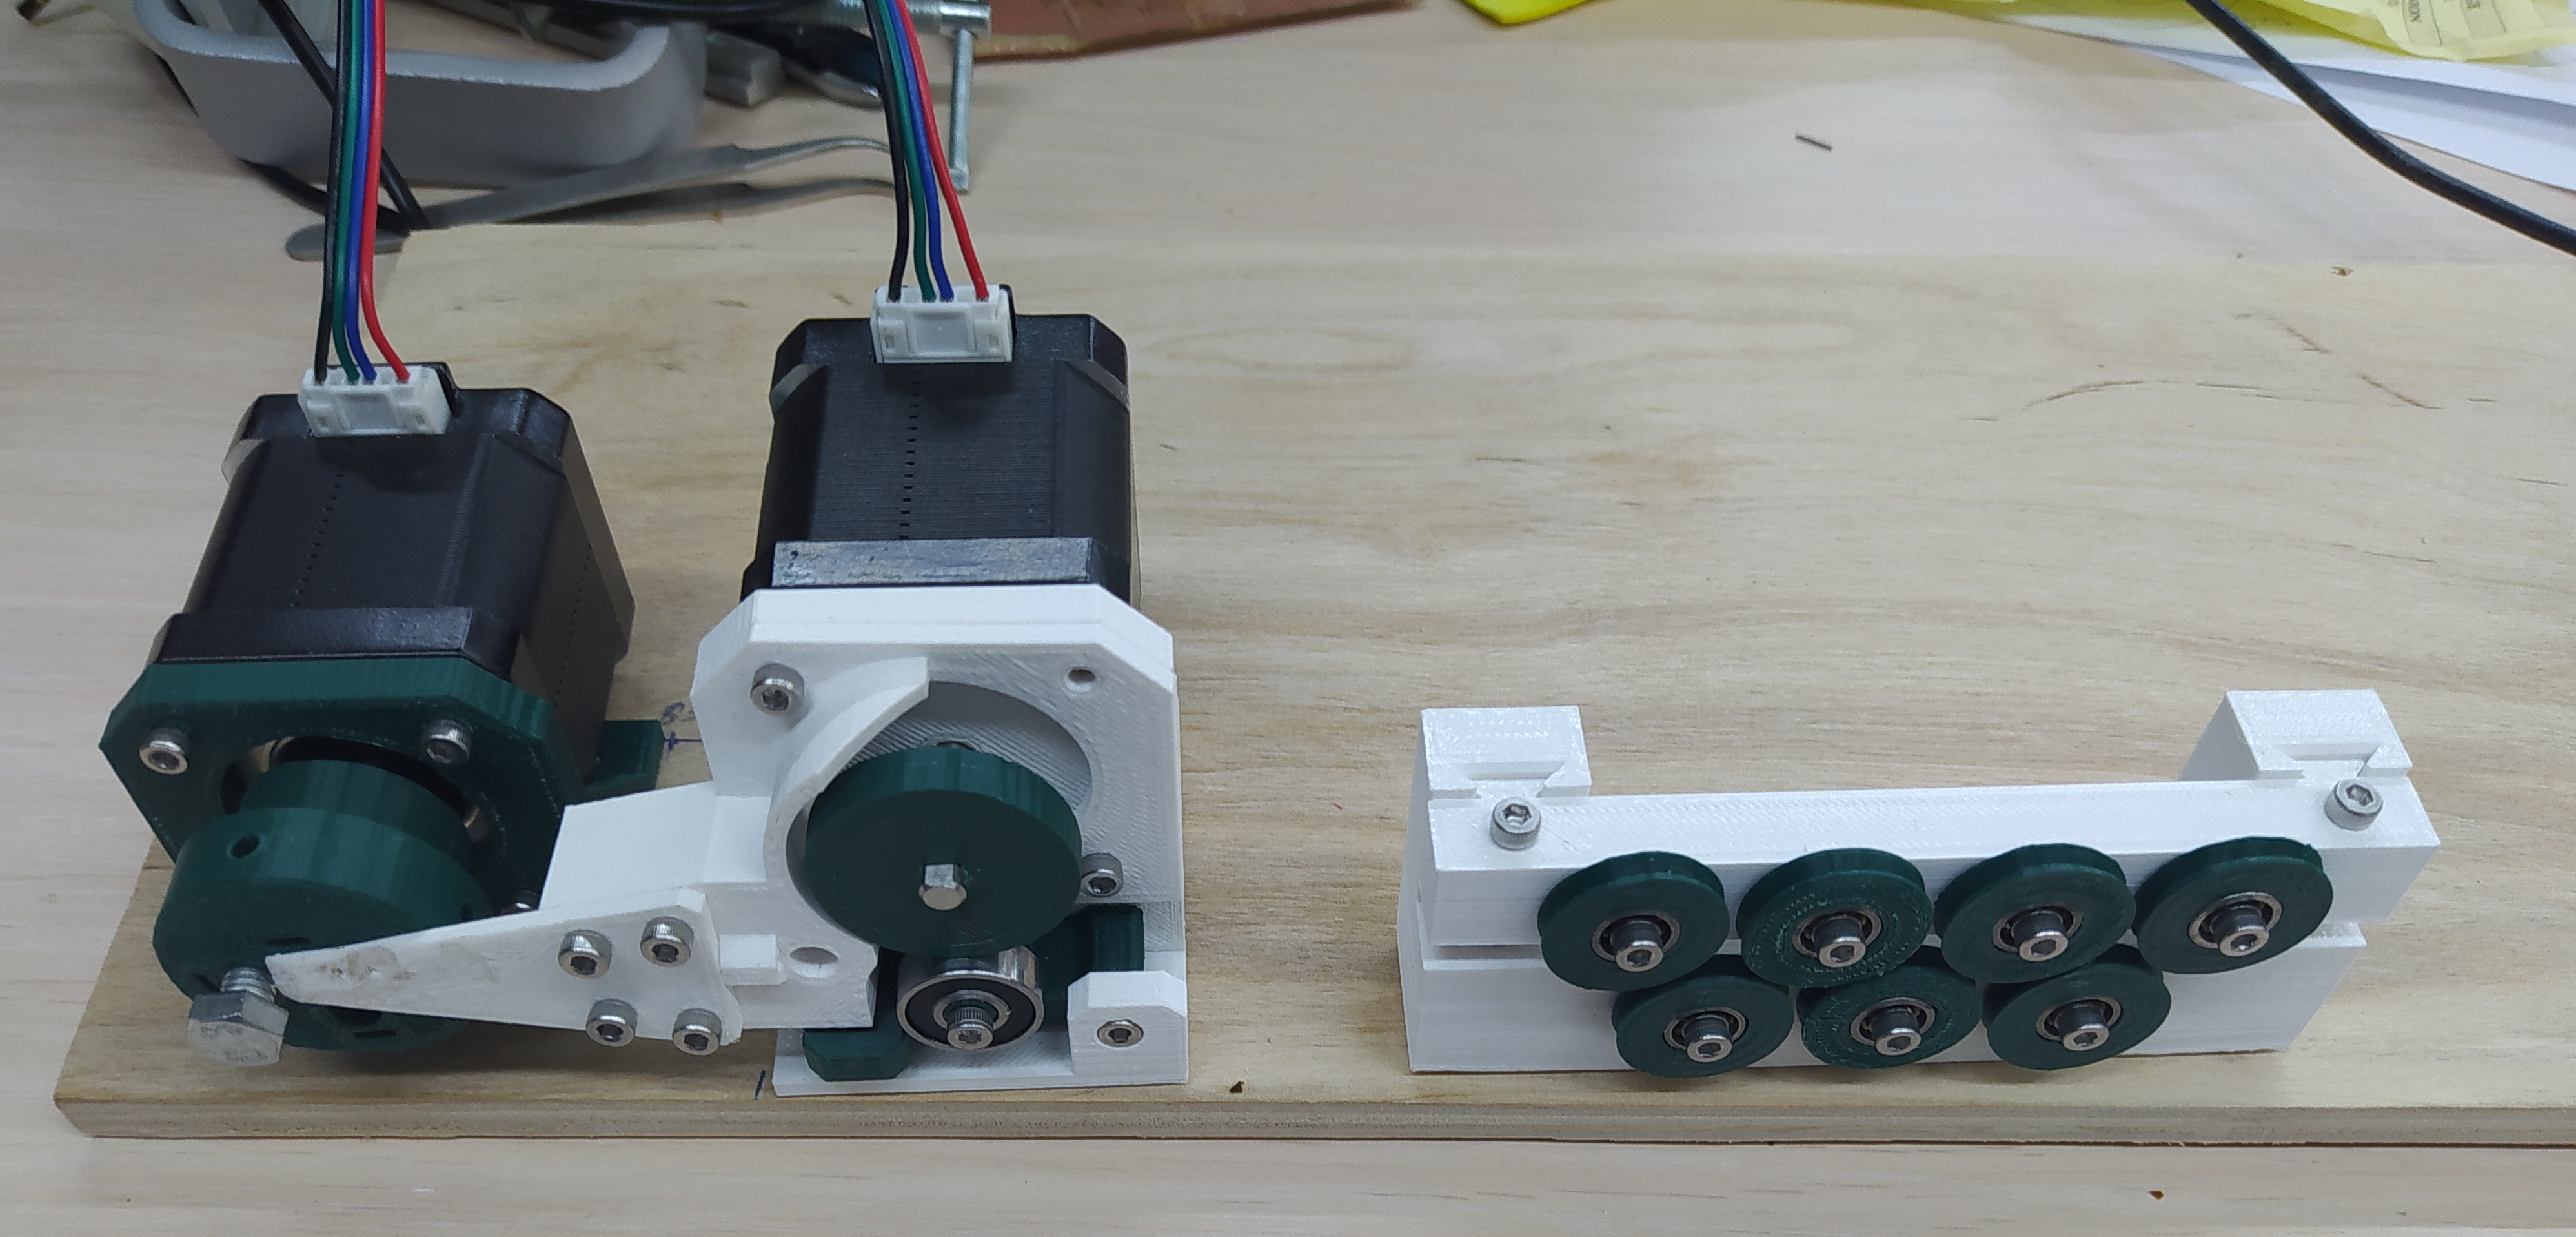
17. Machine design
For machine building our team - me, Maro and Vachik decided to make a wire bender. Here is our group page, where everything is documented.
Maro did the design modification and 3D printing, Vachik did the assembling and I did the software part.
Controlling the bender with Arduino
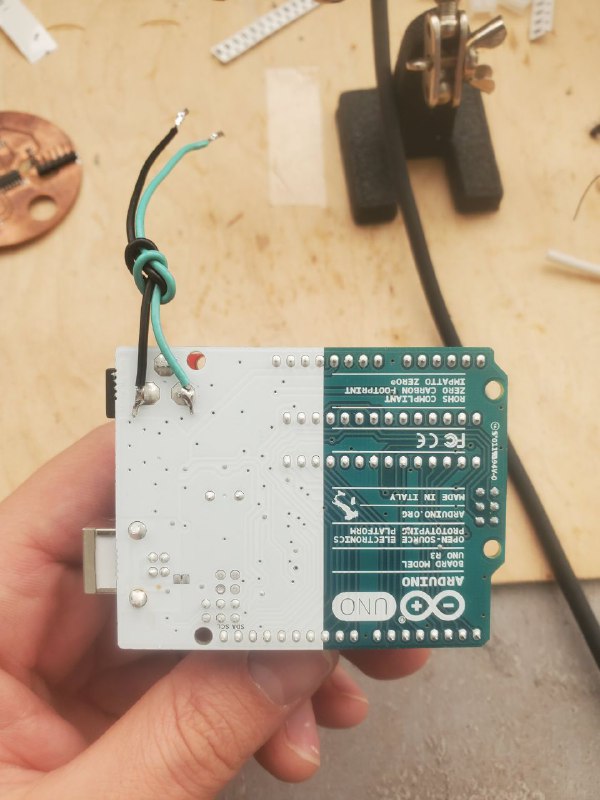
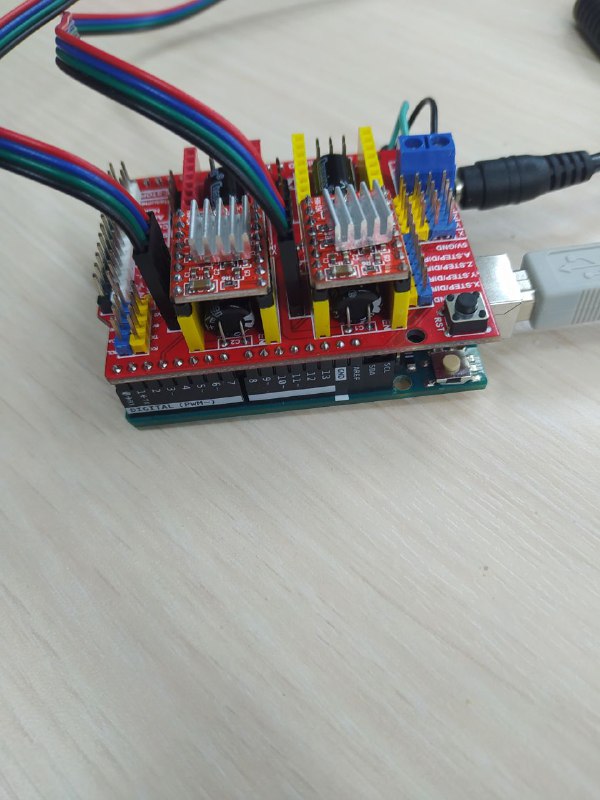
To control the stepper motors we used Arduino Uno. Arduino Uno board need CNC shield and stepper motor drivers to communicate with stepper motors. As we have 2 motors, we needed 2 drivers. At first we solder 2 wires to the Arduino Uno board, and connect them to the CNC shield (+ and - accordingly), which sits on top of the Arduino.

While putting the driver on the CNC shield, we had to make sure that EN (enable pin) on the diver and on the shield were connected to each other. So we placed one of the drivers on the X axis on the shield, and other to the Y axis.
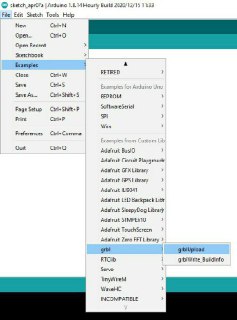
All the following steps are done with help of this tutorial. GRBL is a special library for arduino that “translates” G-code into electric signals, which then are sent to motors. To upload the GRBL library to the Arduino, at first we downloaded GRBL, then added it to the arduino software as shown below.
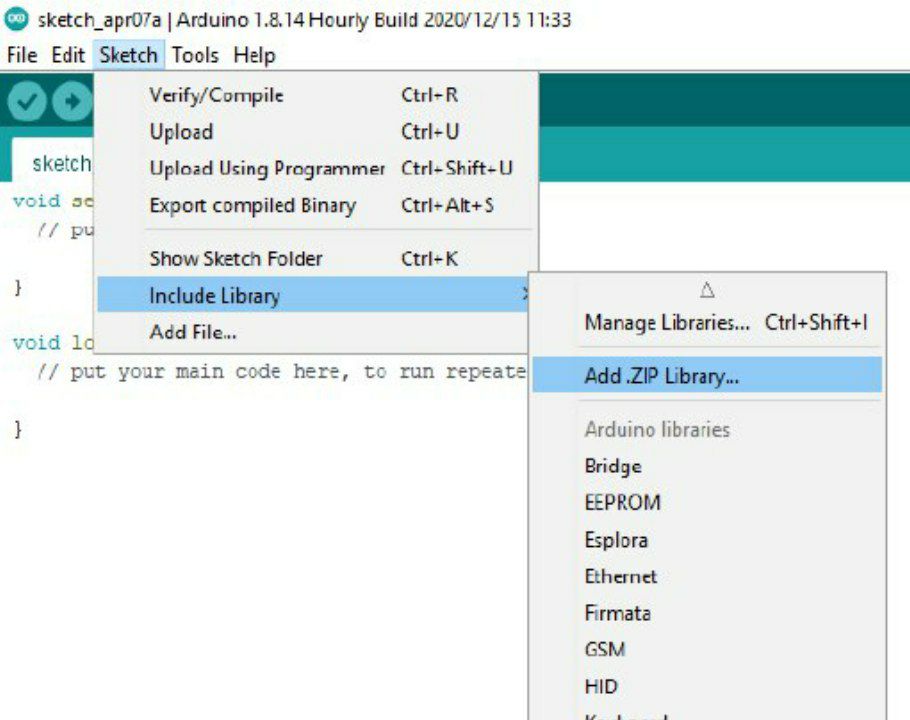
Then we just chose the upload grbl from examples and uploaded it on the arduino.
The software
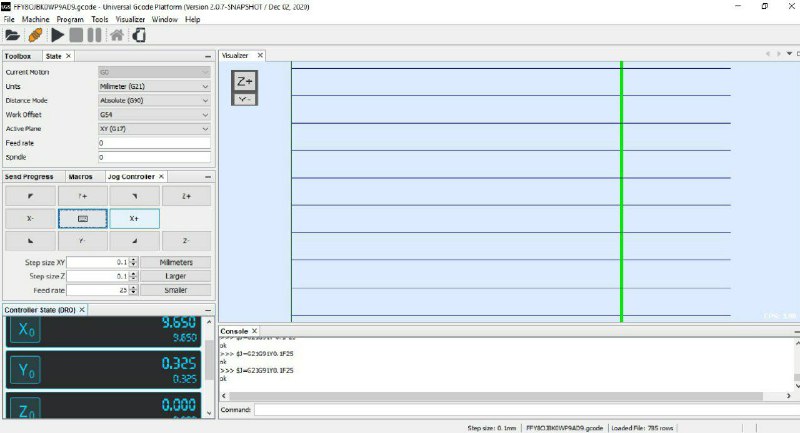
Then we downloaded software for communicating to arduino via G-code from here. This software allows us to send signals manually, or with G-code.
By clicking on X+ and X- buttons we can control one of the motors (depending which one is connected to X port on the CNC shield), and Y+ and Y- controls the other motor.
Wire bender in action
The finished machine: