9. Embedded programming
INTRODUCTION
This week we had to program the board that we made 2 weeks ago, or make a new one and program it to do something. For programming we had to use more than one method. I used 2 methods. The first one was with C language using Fab tiny ISP that I made a few weeks ago, the other was using arduino.
ABOUT THE BOARD
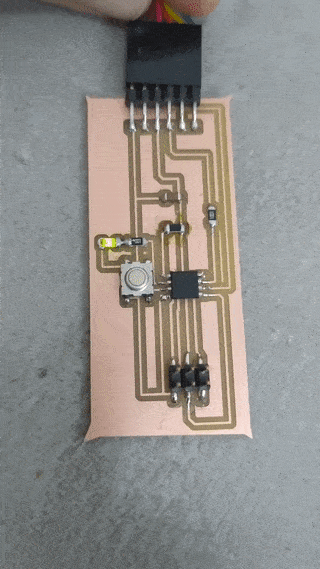
I made a board using AtTiny45. More about the board you can find in Week7.
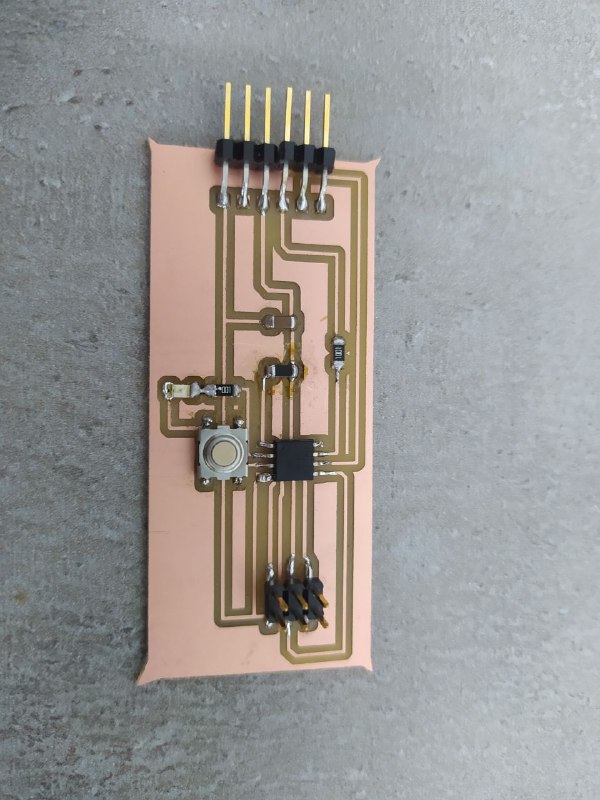
But that week I did all of that, without knowing anything about the AtTiny45 itself. This week I had to read the datasheet and learn how to program it.
FEW IMPORTANT THINGS ABOUT PROGRAMMING
C LANGUAGE
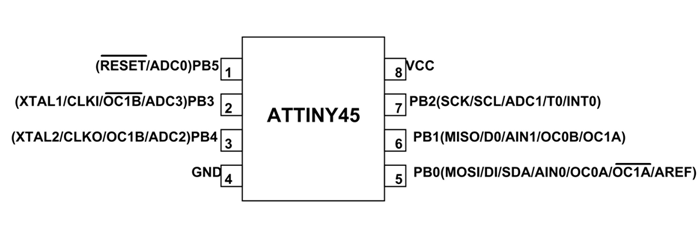
First of all, AtTiny45 is a 8 bit microcontroller. That means that PB3 corresponds to the 4th bit from the end of the 8 digit number in binary, which is PORTB (00001000). So if you want to give power to PB3, you have to assign PORTB value 00001000 in binary (8 in decimal). And PB3 has value 3, so 1 << PB3 is 8 (bitwise shift, more about bitwise operations). If you want to check whether PB4 is connected manually or not (for example if you have a switch connected to it), you have to check if the 5th digit in PINB is 1 or 0. The simplest way to do that is check whether PINB & 00010000 is true or false ( & is the BITWISE AND, which for every bit gives 1 if both of PINB and 00010000 have 1s in that bit, otherwise - 0) (more about bitwise operations). So if there’s a connection in PB4, PINB will have 1 in 5th bit, otherwise - 0. So the bitwise and for PINB and 00010000 will give 10000 in first case, and 0 in second case. After that you check it using IF function. IF(8) returns true, and IF(0) returns false.
AtTiny45 has a built-in clock, which can be used to put some time between some operations. To do that we use function delay. For example, if we want to power the LED in PB3 for 0.5 second, then turn off, we can write
PORTB = 1 << PB3;
_delay_ms(500);
PORTB = 0;
ARDUINO
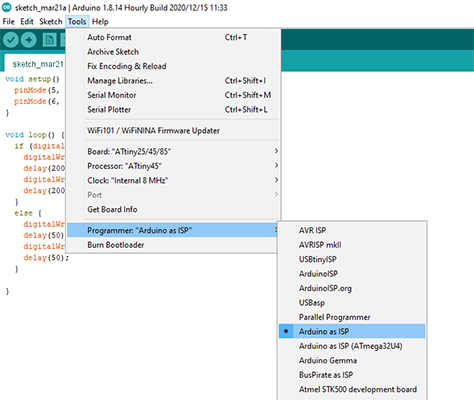
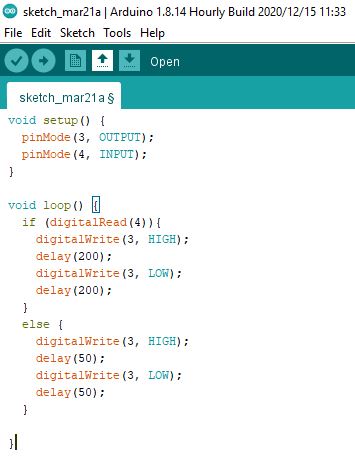
In Arduino you first set up pinMode (if it is input pin or output pin), and write the number of the pin. If you want to check whether pin number 4 is manually turned on or not (input pin), you write if(digitalRead(4)). It returns True, if the 4th pin is on, and False otherwise. If you want to turn on 3rd pin from software (output pin), you can write digitalWrite(3, HIGH), and if you want to turn it off, you write digitalWrite(3, LOW) . To have a half a second break in between program commands, you write delay(500).
if (digitalRead(4)){
    digitalWrite(3, HIGH);
    delay(200);
    digitalWrite(3, LOW);
}
PROGRAMMING WITH C
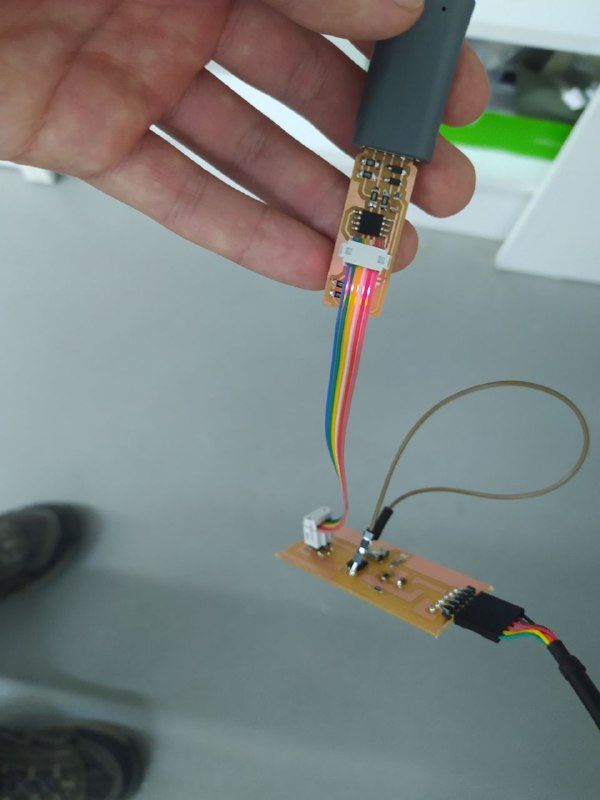
To program the board using C language, you can use the Fab Tiny ISP. You have to connect the board to the computer via FTDI USB cable. The setup looks like this.
Then you write the code and make a .c file, or just download. You have to have a MAKE file as well (.make).
Then you just open the terminal in ubuntu, and ran
sudo make -f blinkmake.make program-usbtiny
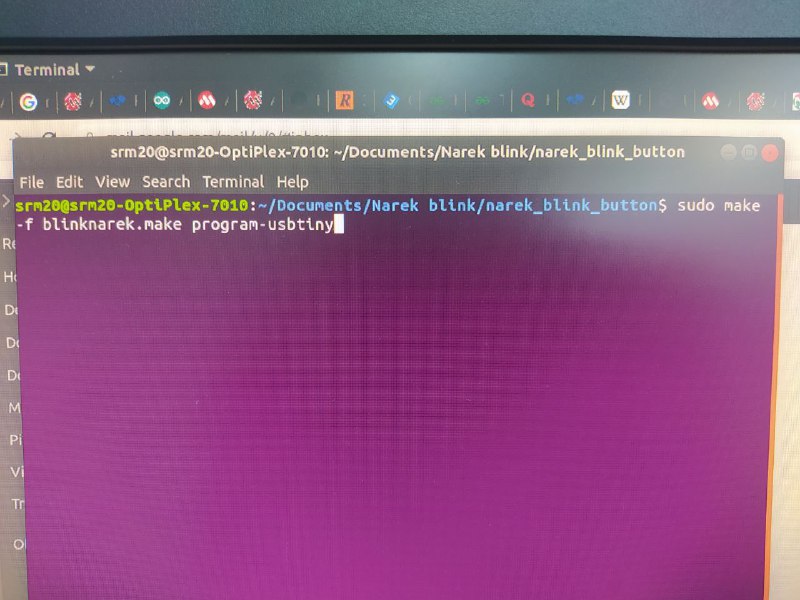
After this the LED on your board will start blinking.
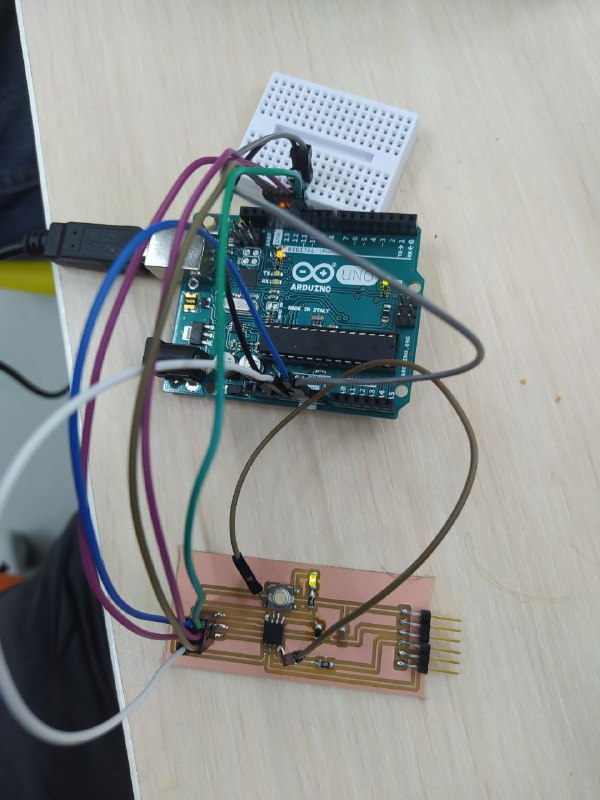
PROGRAMMING WITH ARDUINO
There is a very good and useful link about programming with Arduino, I just followed the steps shown here and it worked as needed.
After that I wanted to program the board the way, that when I click and hold the button on it, the blinking frequency changes. So I wrote a program for that in both C and Arduino
C files
I uploaded the program on the board, but it didn’t work, after trying for few hours, one of my instructors - Azniv figured out that I forgot to add a pullup resistor fro the button. Since I had lost a lot of time already, I had no time to make a new board. So I decided to add a pullup resistor between the button and VCC port using a wire, just to see whether it works or not.
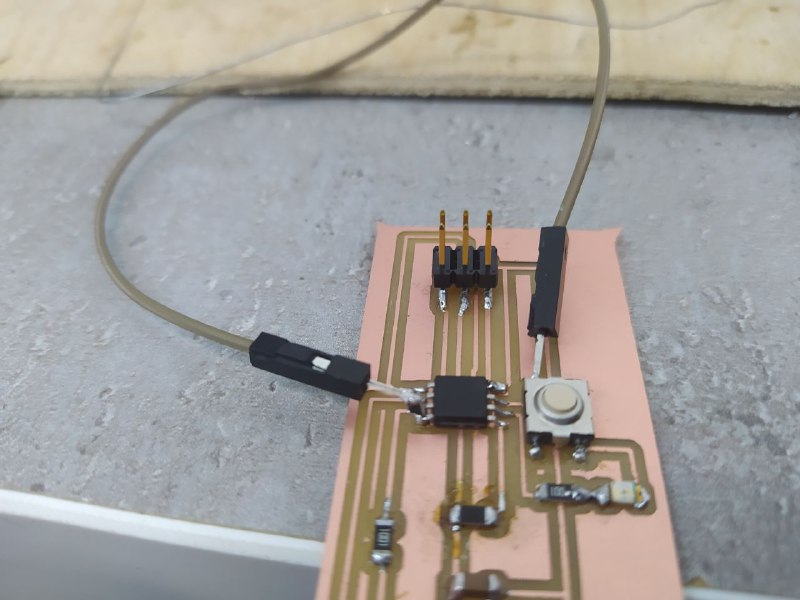
And It worked.