-
01. Principles and practices
-
02. Project management
-
03. Computer-Aided design
-
04. Computer controlled cutting
-
05. Electronics production
-
06. 3D Scanning and printing
-
07. Electronics design
-
08. Computer controlled machining
-
09. Embedded programming
-
10. Input devices
-
11. Applications and implications
-
12. Output devices
-
13. Interface and application programming
-
14. Invention, intellectual property and income
-
15. Networking and communications
-
16. Molding and casting
-
17. Wildcard week
-
18. Machine design
-
19. Project development
-
Glossary
Week 6. 3D Scanning and Printing
March 4, 2020
Assignment
Group assignment
- Test the design rules for your 3D printer(s)
Individual assignment
- design and 3D print an object (small, few cm3, limited by printer time) that could not be made subtractively
- 3D scan an object (and optionally print it)
Rafts, Skirts and Brims
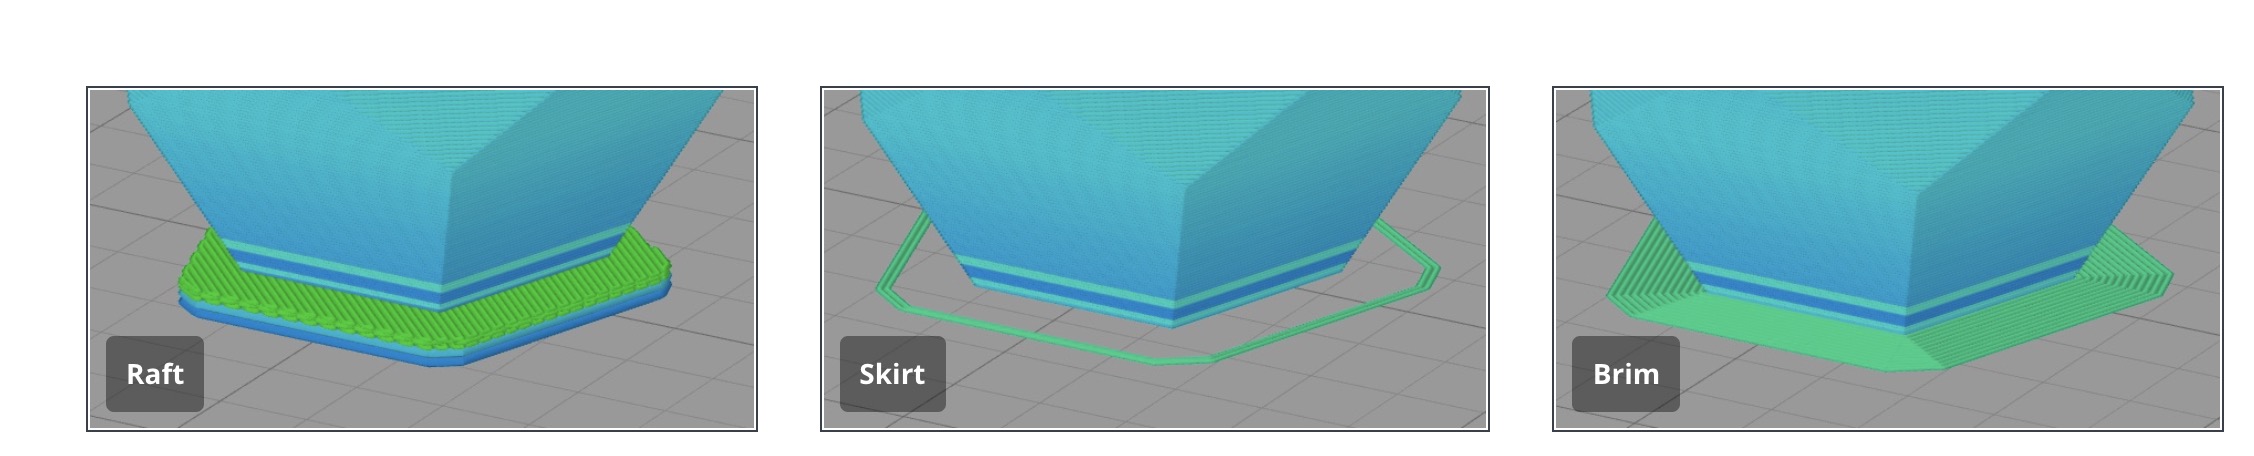
Rafts
A Raft is a horizontal latticework of filament that is located underneath your part. Your 3D printed part will be printed on top of this raft, instead of directly on the build platform surface. Rafts are primarily used with ABS to help with warping and bed adhesion, but they can also be used to help stabilize models with small footprints, or to create a strong foundation on which to build the upper layers of your part.
Skirts
A skirt is an outline that surrounds your part but does not touch the part. The skirt is extruded on the print bed before starting to print your model. Skirts serve a useful purpose because they help prime your extruder and establish a smooth flow of filament. Observing the skirt also allows you to detect and adjust any leveling or adhesion issues before the actual model begins printing.
Brims
A Brim is a special type of skirt that is actually attached to the edges of your model. Typically, the brim is printed with a increased number of outlines to create a large ring around your part, similar to the brim of a hat. Brims are often used to hold down the edges of your part, which can prevent warping and help with bed adhesion.
Supports
You may need to use 3D printing support structures to be able to 3D print it. Here are some examples of overhangs and bridges illustrated with the help of the letters Y, H, and T.
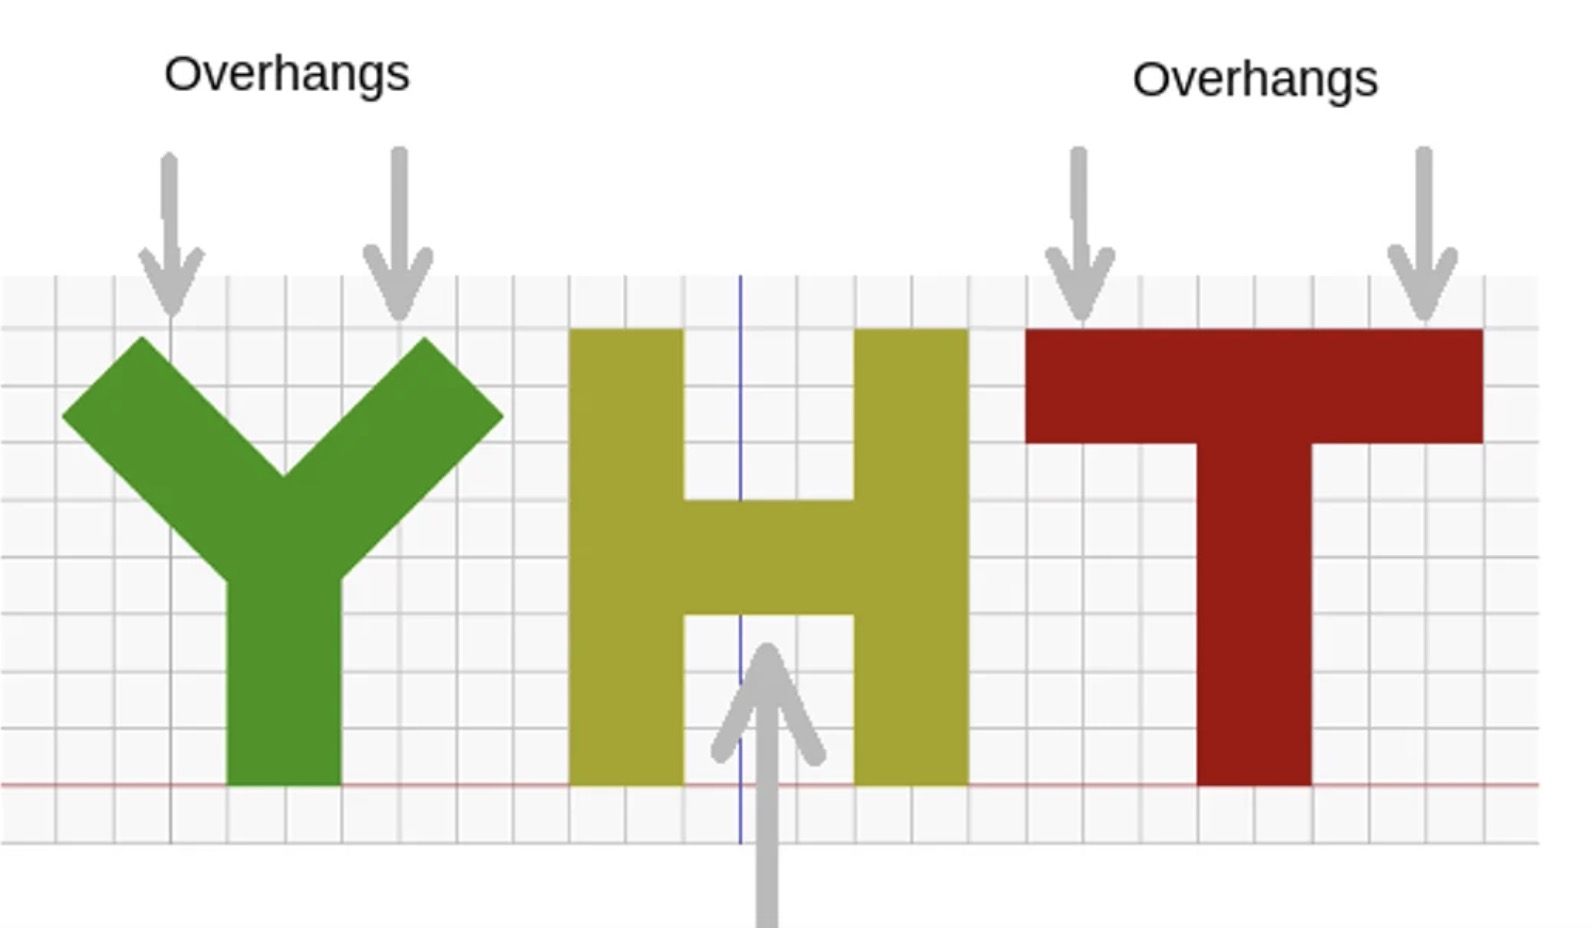
Supports are absolutely necessary for models with nasty overhangs or bridges. On the other hand, they increase material costs, add more post-processing work and can damage the model’s surface. Just like overhangs, not all bridges require support. Here, the rule of thumb is: If a bridge is less than 5mm in length, the printer may be able to print it without requiring 3D printing support structures.
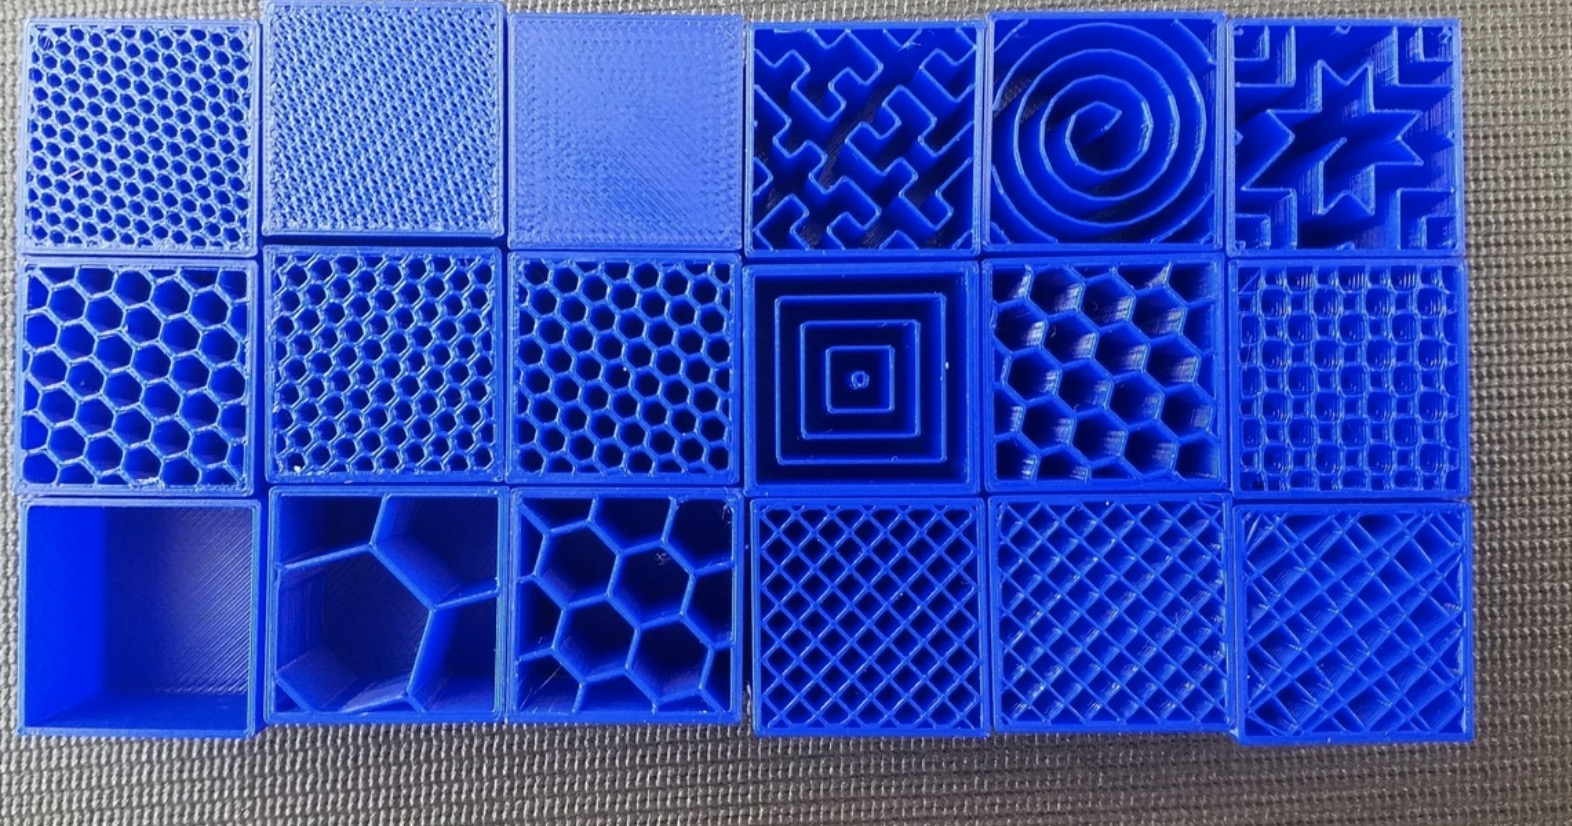
Infill
Infill is simply a repetitive structure used to take up space inside an otherwise empty 3D print. For the majority of prints, infill is hidden from view, but occasionally, special infill patterns are more than worthy of showing off. In addition to filling the empty space in a print, infill can also change it’s weight, depending on the material used.
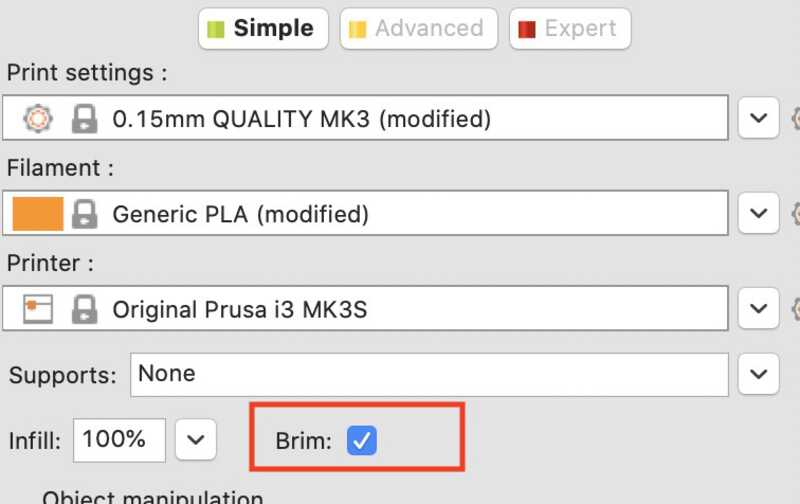
How to use PrusaSlicer
A 3D printer slicer is a way to get a digital file from your computer to the 3D printer in a format that the 3D printing hardware understands. For slicing your 3D design, you can use softwares like PrusaSlicer or Ultimaker Cura. Rutger gave us instructions about how to use Prusa slicer briefly.
Import a 3D file you want to slice
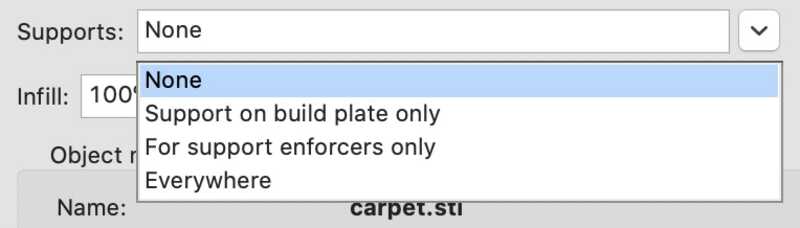
Add support if your design needs a support structure.
Tick the brim checkbox if you want to add a brim to your print result.
Set the infill value. Rutger said he usually set it to between 5% to 10%.
In the Print settings, you can see more detailed settings.
If the file is ready to print, click the Slice now button and click Export G-code. It will show information like estimated printing time and cost.

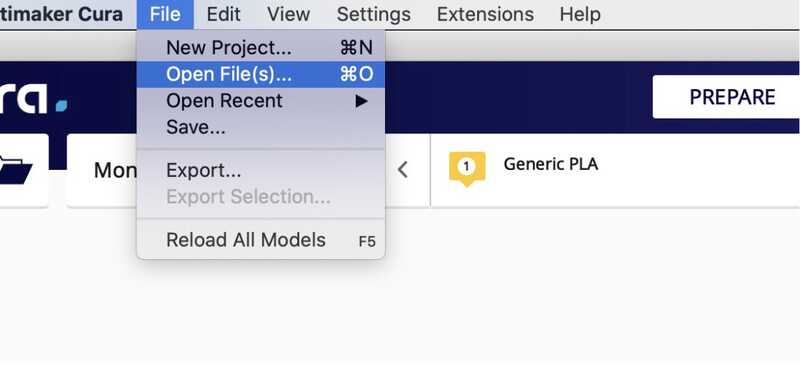
How to use Ultimaker Cura
For an Ultimaker 3D printer, you can use Ultimaker Cura. The settings are simpler than the PrusaSlicer ones. I also think the UI looks more clear.
Import a 3D model file you want to slice through File > Open file
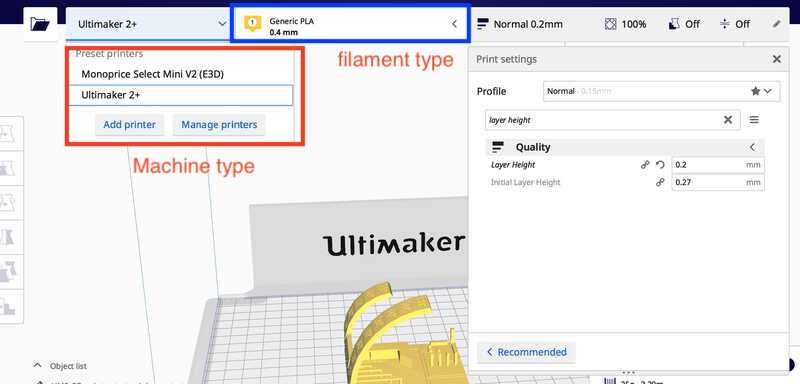
Select the machine and the filament type
Change the settings if needed
Click Custom if you need more customized settings
Click the Slice button on the bottom right, and save the G-code file into an SD card.
How to use Prusa MK2S
This machine belongs to Rutger. It's a slightly older version of Prusa, so you have to use some tricks to make it work.
Nozzle: 0.8mm
Clean the print bed with glass cleaner
Turn the machine on
Enable the preheat option and select the filament you will use
Plug an SD card into the machine
Press the reset button(You don't have to do this for the new Prusa machine, but this is a quickfix for this machine) and you will see the list of files from the SD card
Click the load filament button
Cut the end of the filament to make it more sharp
Load the filament you will be using
The nozzle will pull the filament down. Wait until the color you chose comes out
If the right color comes out, click yes on the screen

How to use Prusa MK3
The interface is similar to the Prusa MK2S, so it won't be that hard to use it if you know how to use the MK2S.
Settings
Nozzle: 0.4mm
Clean the print bed with glass cleaner
Turn the machine on
Cut the end of the filament to make it more sharp
Load the filament you will be using
Click Load filament
The nozzle will pull the filament down. Wait until the color you chose comes out
If the right color comes out, click yes on the screen
Then, it will start the calibration process. Click Adjust Z if you need to adjust the distance between the nozzle and the printing bed
How to use Ultimaker 2+
Settings
Nozzle: 0.4mm
Filament: only 2.85mm
Clean the print bed with glass cleaner
Turn the machine on
Tap the material option on the printer screen
Select the type of filament you will use
Load the filament
Select the ready button on the printer screen. Then the machine will pull the filamen downt automatically
Select the print print on the printer screen and select the file you want to print
How to use PrinterBot
Settings
Nozzle: 0.4mm
Connect the machine with your computer or use Octoprint to connect it remotely
Open Cura and change the machine settings to PB simple
Click Print via USB
Put some craft glue on the printing bed so that the filament will stick to it well
Load the filament while it's calibrating(this sounds a bit weird, but you should use this trick to make it work)
Click the restart button if the job starts without the filament being loaded well
How to use the 3D scanner
Connect the 3D scanner with a USB cable to a computer
Open the Sense program
Choose what type of object you are going to scan. The different options are object, head and body
Scan your object
When it's done, click the finish button
Erase some parts if needed
Click the Solidify button to fill the object
Click the export button and it will export the file as an OBJ or STL file
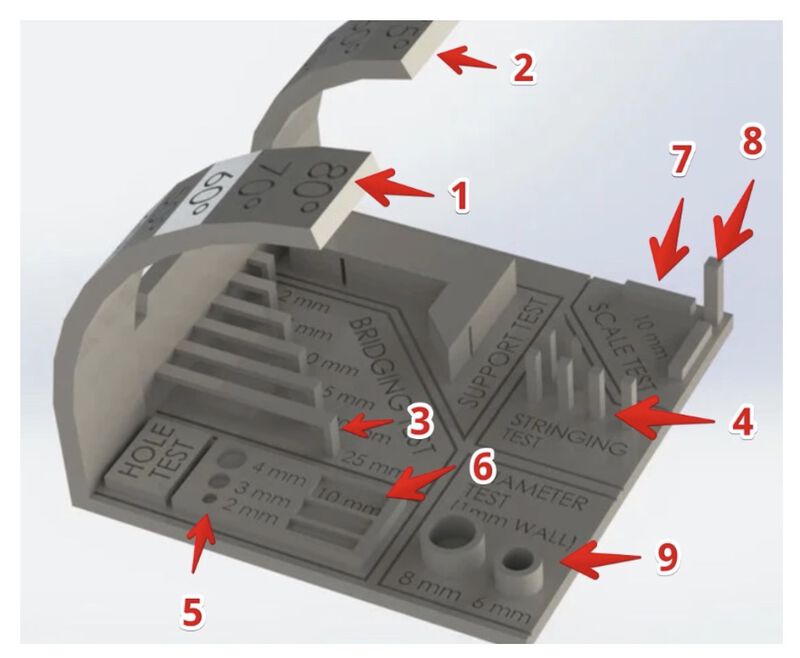
Group assignment
This week's group assignment(group assignment documentation) was to test the design rules for our 3D printers. We have four 3D printers, 2 Prusa machines, an Ultimaker machine and a PrinterBot machine. Octoprint is also set up for the PrinterBot machine.
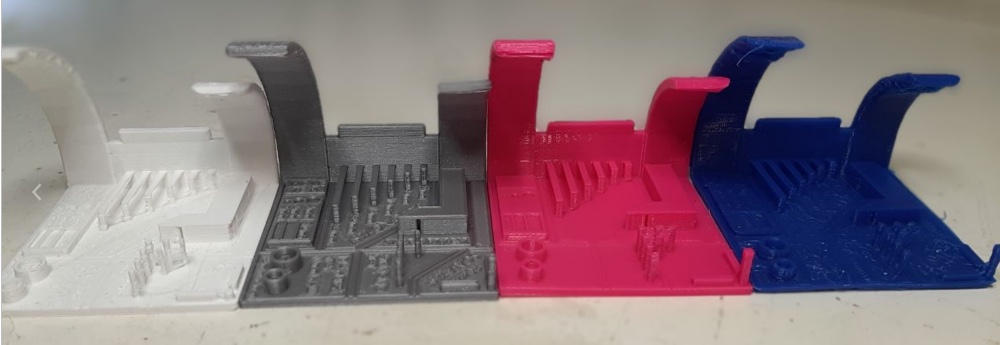
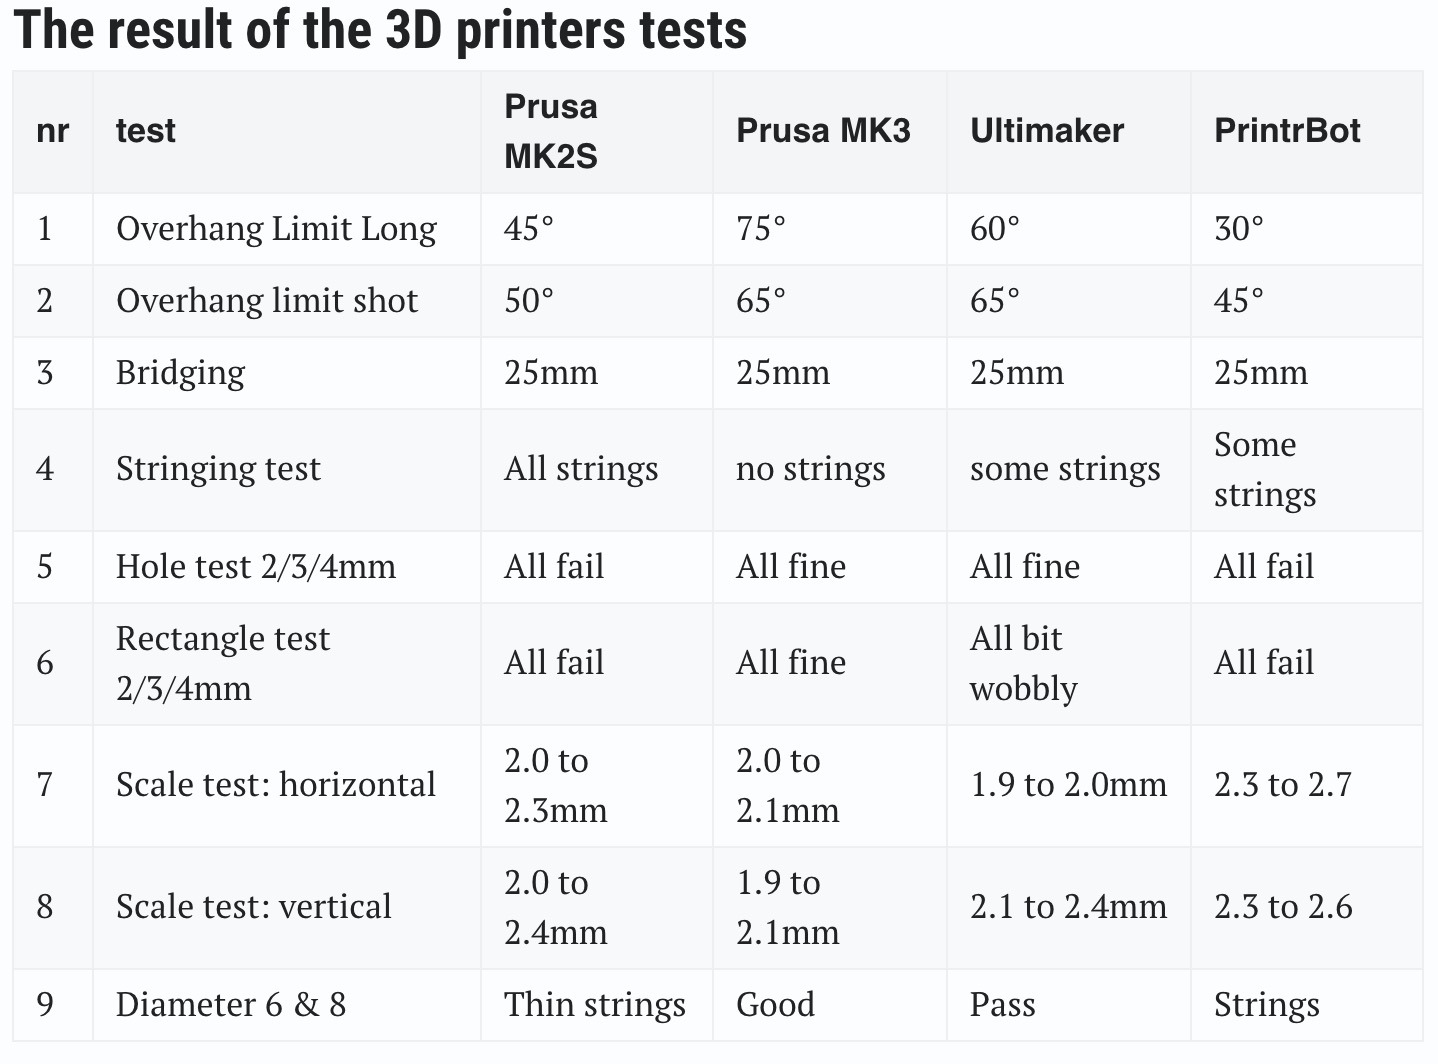
My favorites were the MK3 and Ultimaker. Unfortunately, the Ultimaker will be taken somewhere after this week, so we won't be using it. For the individual assignment, I used the MK3 for the small components and the MK2 for the large components. The MK3 was able to print components without losing small details. MK2 wasn't that good for details but it could print out very fast.
Individual assignment
3D printing
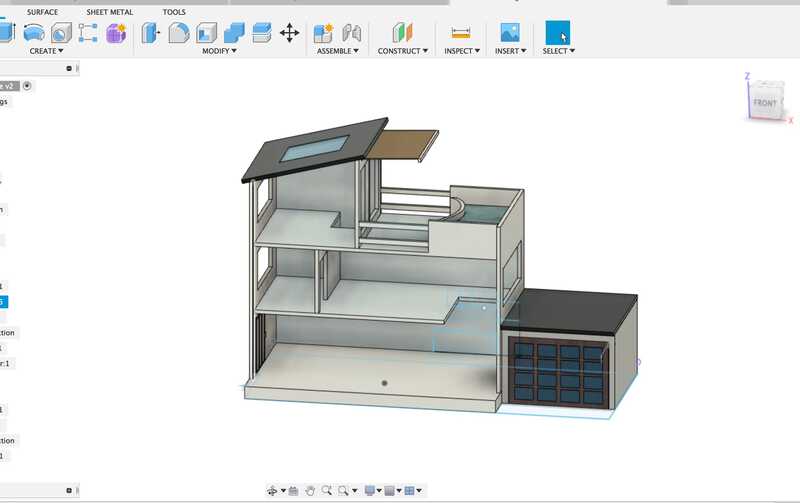
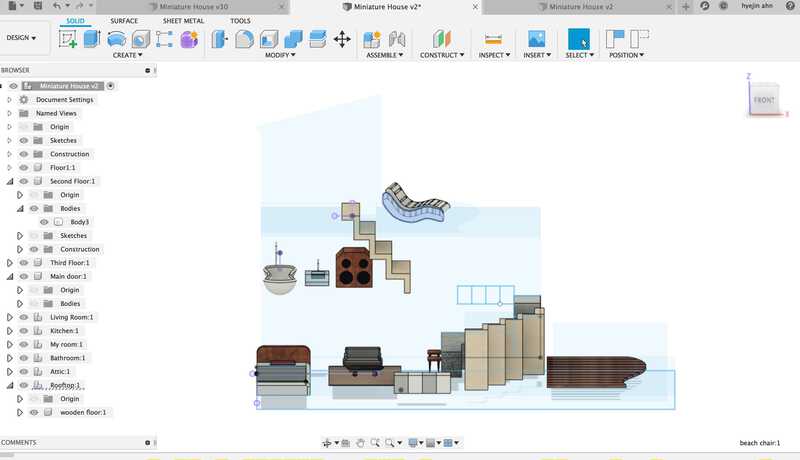
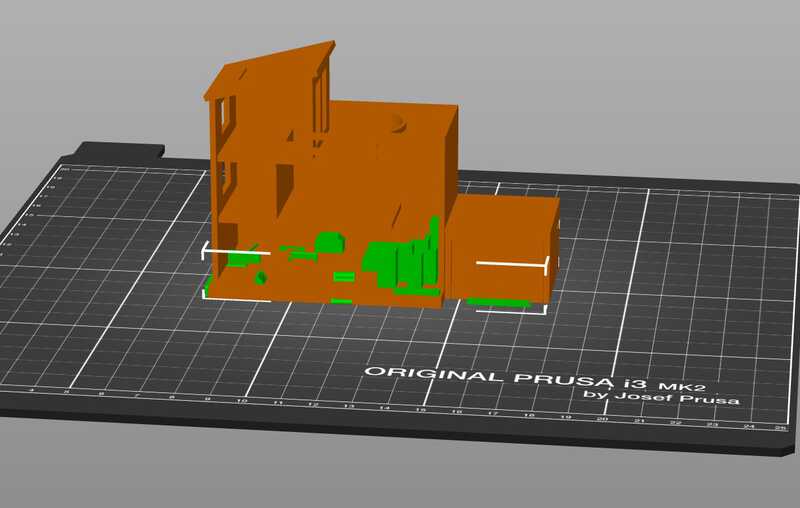
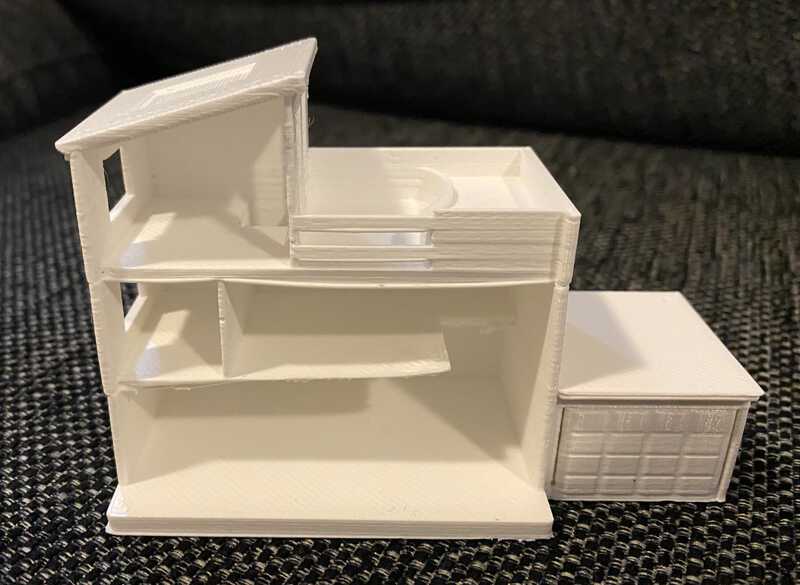
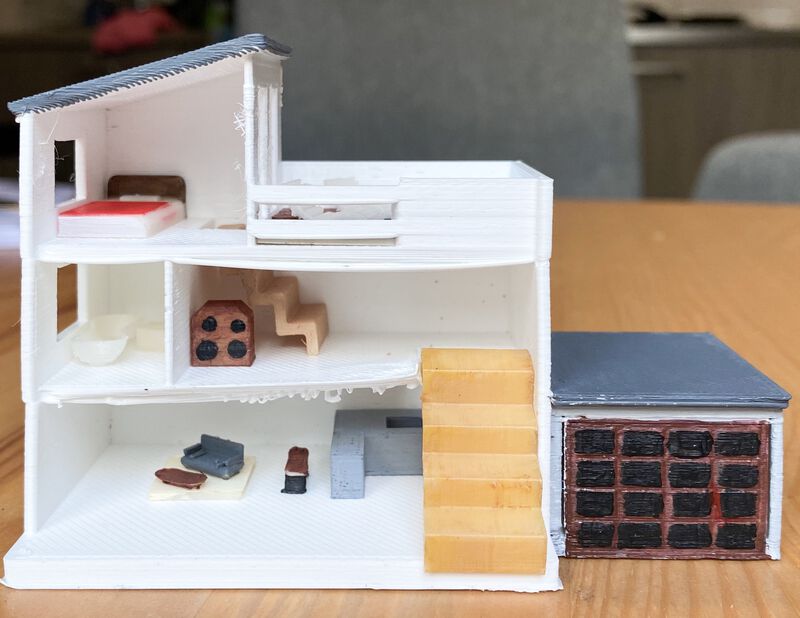
I decided to print out the house I built on week3. I used Fusion 360 to design it. As you can see from the image below, this would be hard to be made subtractively mainly because of the design's complexity.

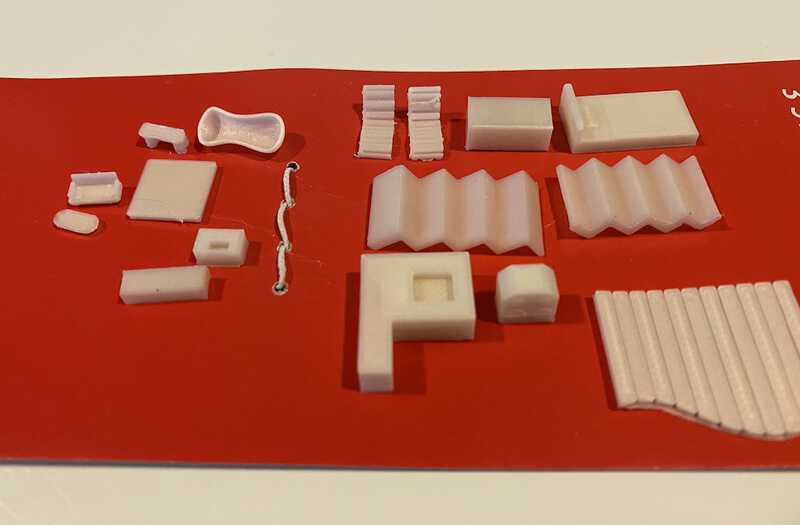
At first, I was going to print out the entire house at once. But I decided to print out the house body and the furniture separately. I divided the house into 2 groups, the house body component and the furniture components.
Before exporting the furniture components, I needed to put them on the same Z layer since each furniture was laid out different layers.
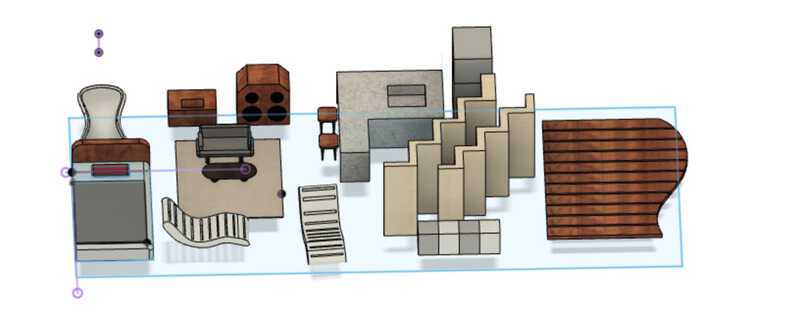
Then I exported them as an STL file and imported them into PrusaSlicer. I scaled them down to 7% of the original size. I decided to print the house body with the MK2 machine, and the furniture with the MK3 machine, since the MK3 machine seems to be better with details.
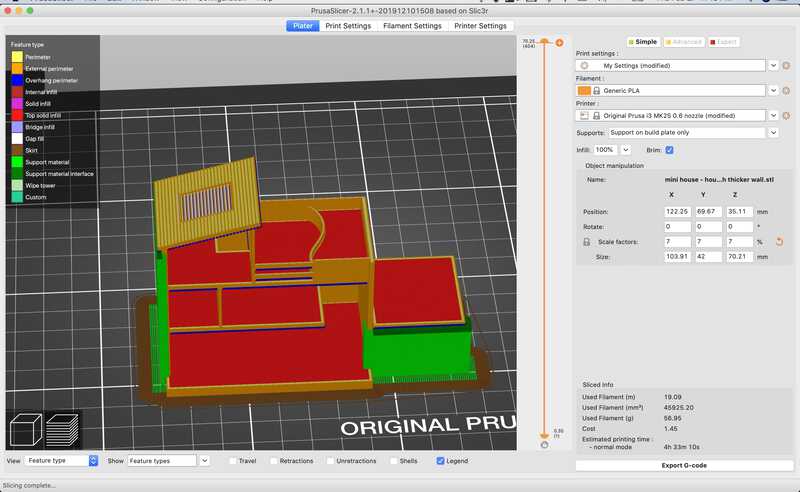
Settings for slicing the house
Print settings: My settings
Filament: Generic PLA
Printer: Original Prusa i3 MK2S 0.6 nozzle
Supports: Support on build plate only
Infill: 100%
Brim: checked
Scale: 7%
Time: 4h 23m
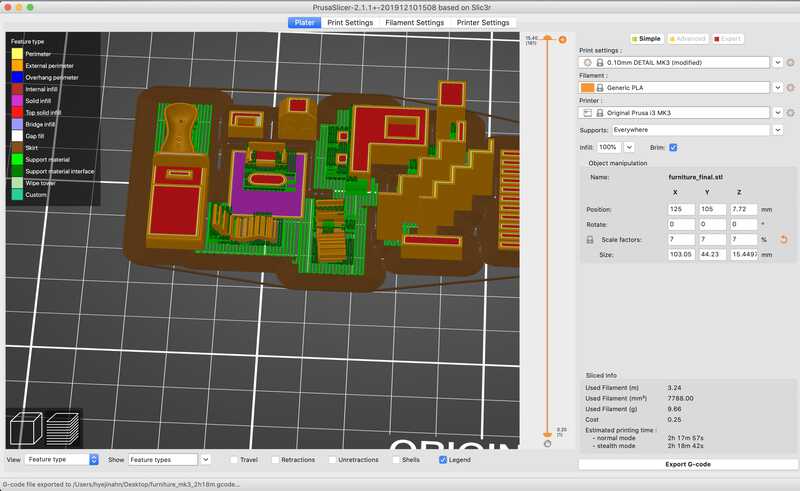
Settings for slicing the furniture
Print settings: 0.1mm DETAIL MK3
Filament: Generic PLA
Printer: Original Prusa i3 MK3S
Supports: Everywhere
Infill: 100%
Brim: checked
Scale: 7%
Time: 2h 17m
I moved the files into SD cards and plugged them into the machines.
When I tried to start the job on the MK3 machine, it showed me a message saying the printer type I specified in the file is different from the machine. I set it as an MK3 machine, but I was wrong. I had to select an MK3S machine instead. I exported the file again and it worked without any error message.
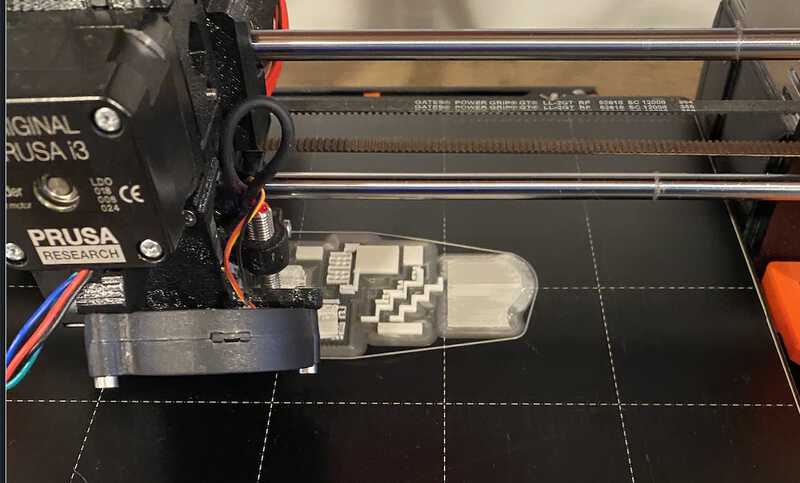
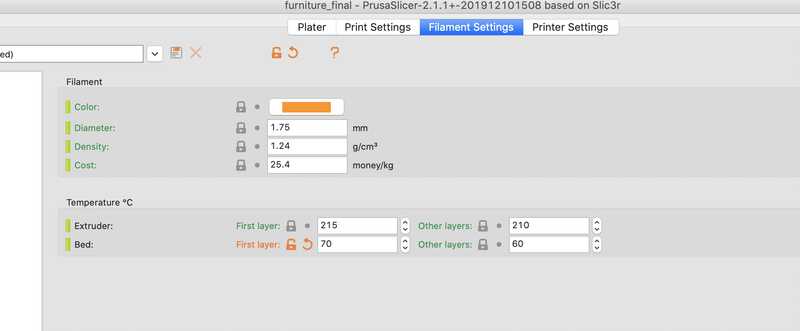
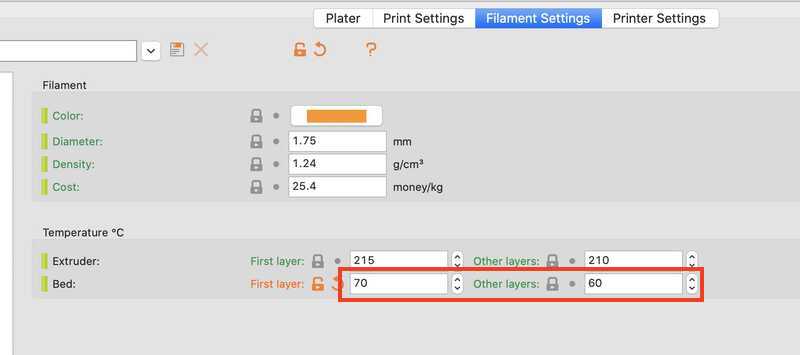
The house body job started without any problems but the filament didn’t stick well on the plate. The first layer of filament stuck well, but the layers afterwards didn't stick well and created crumpled layers. This happened about 4 times but I couldn't figure out the reason. Rutger told me that it might be because the table temperature was not high enough so that the filament couldn't get stuck well. So I went back to the prusa slicer and changed the first layer temperature to 70 and left the rest as it is.
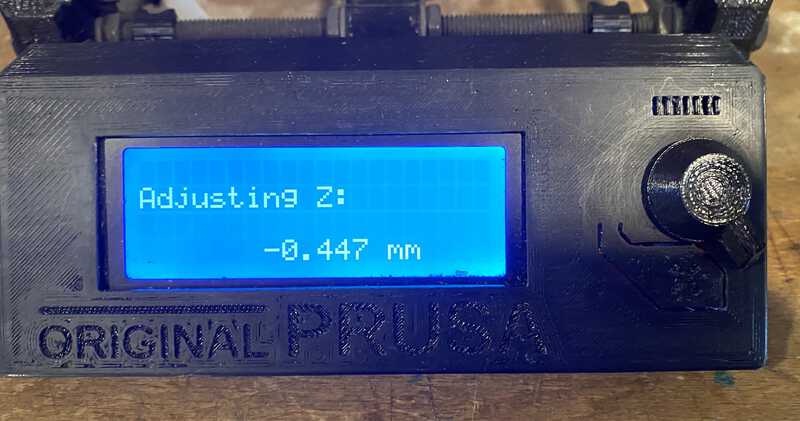
I also thought that the Z value of the machine wasn't right. I adjusted it to find the perfect spot while the printing job was running. I set it as -0.447mm and it seemed good.
It worked well this time. But there was another problem. I accidentally left the furniture file on the slicer program when I imported the house file, so they were exported together in the same file.
I didn't know this until the middle of the process. Then, I noticed the printed profile didn't look as I expected. So I stopped the process again and went back to the slicer program. I deleted the furniture part from the preview and exported it again.

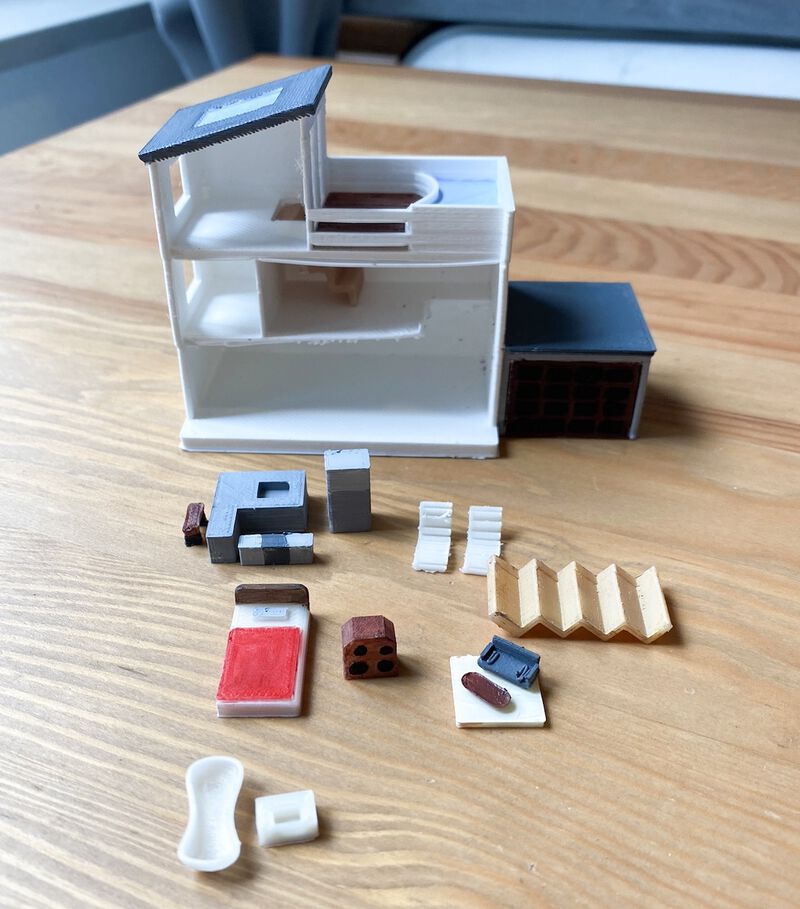
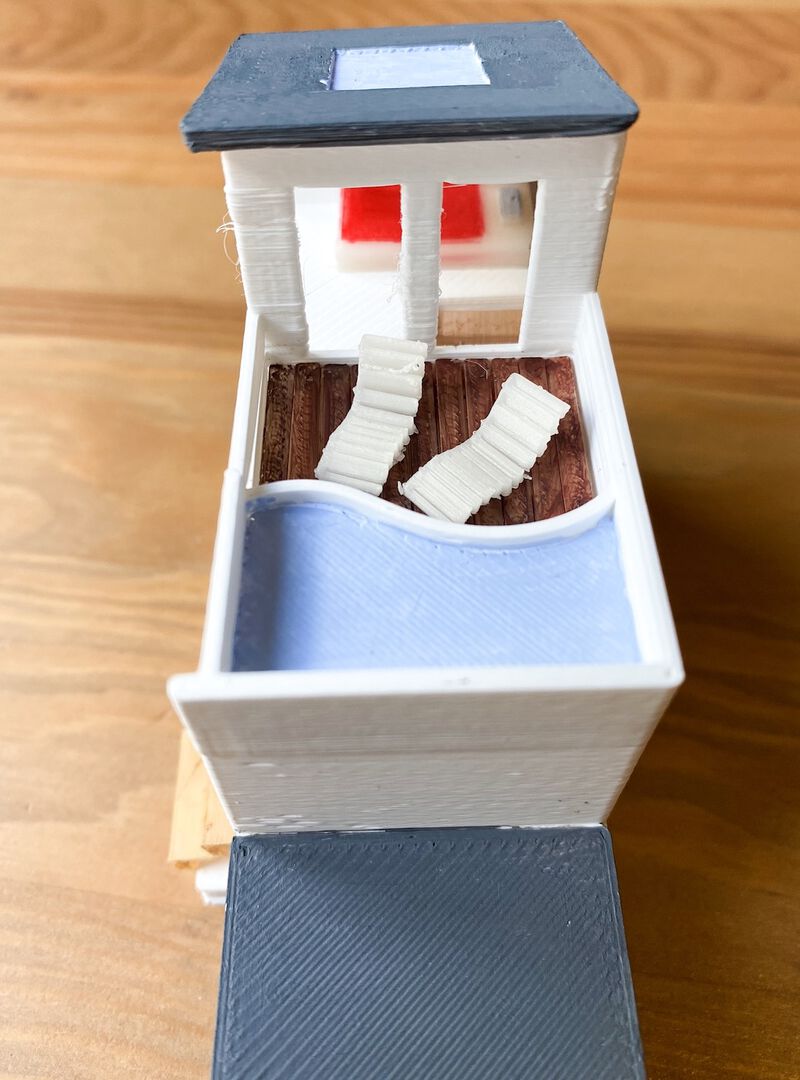
The printing job for the house went well until this happened. Some parts of the floors didn’t get printed well because of the lack of support. But I didn't want to restart the job, so I just kept my eyes on it to make sure it didn't get any worse. Fortunately, that was the only part that looked weird. The furniture also was printed out nicely.
I could have finished the assignment here, but I felt something was missing. It didn't look that pretty since every component was white. So I painted them with acrylic paint. It took a while, but the result looked much better.
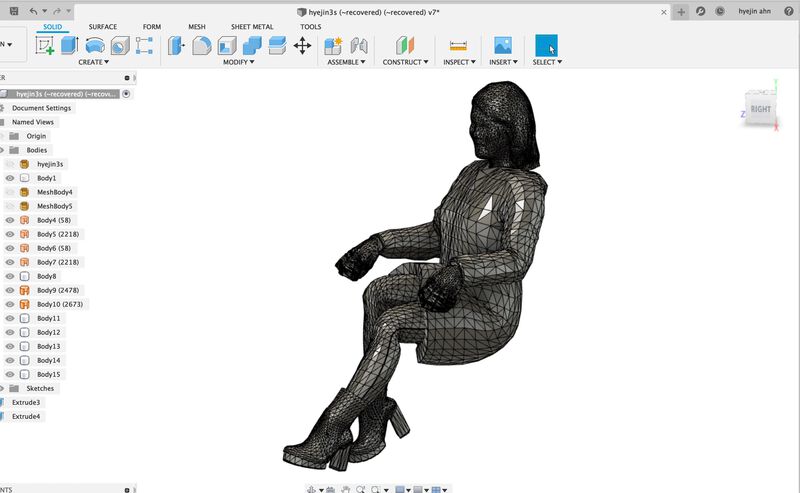
3D scanning
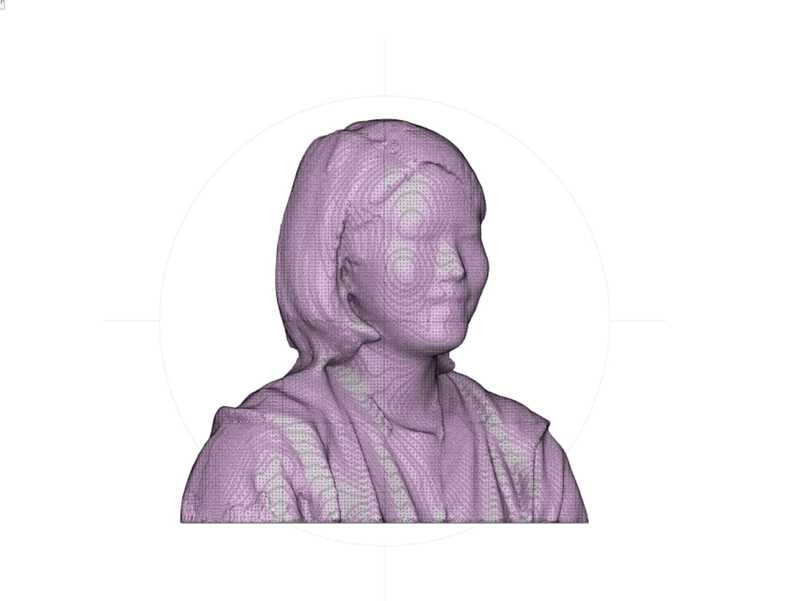
The 3D scanner we have at Waag is a 3D Systems Sense. You just have to plug in the USB cable into the computer and run the 3D Systems Sense software. You can scan objects and people, but scanning transparent objects might not work well. One of my classmates, Rinke, scanned me with the machine. The result looked good.
I wanted to add a body to this, so I downloaded a 3D woman body from thingiverse.
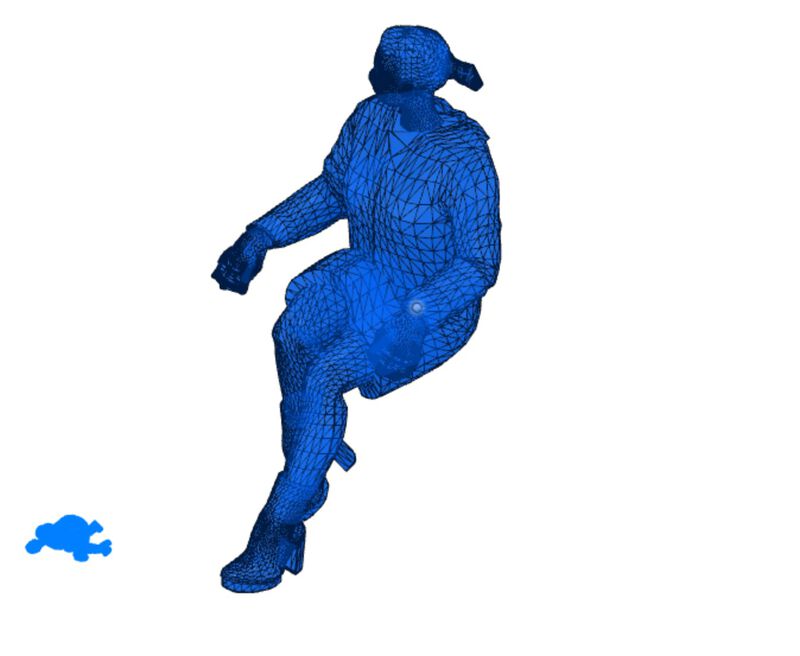
I removed the part under the neck from my 3D scanned figure, and also removed the head from the woman figure I downloaded.
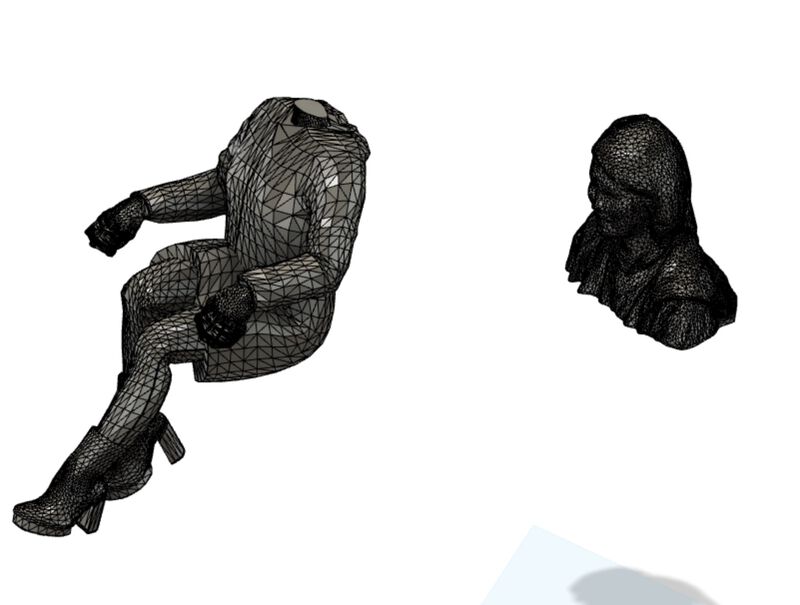
Then I put them together. The connecting part wasn't that smooth but it didn't matter because I was going to print out in a tiny size. It felt like I was assembling a robot using different body parts.
I exported the file and imported it into PrusaSlicer. I opened the furniture file again to see how much I had to scale down the figure.
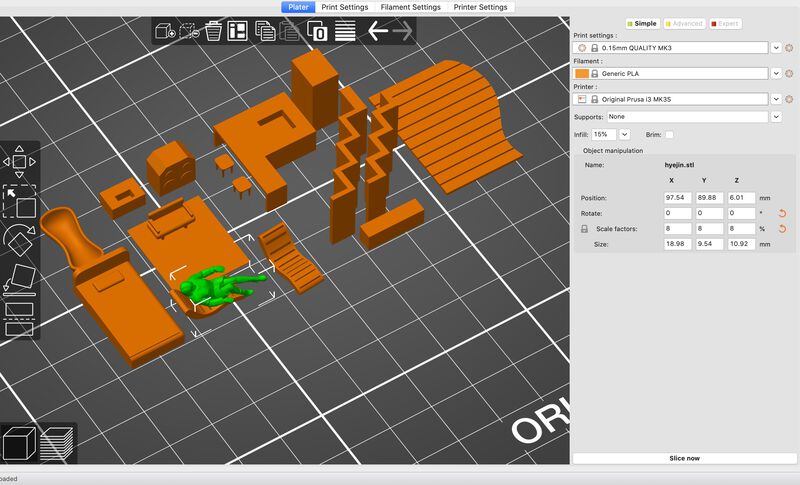
I scaled it down to 8% and selected the MK3S printer.
Attachments
Useful links
- GrabCAD