
Week Five: 3D Printing and Scanning
Goal
There are two goals this week:
- design and 3D print an object (small, few cm) that could not be made subtractively.
- 3D scan an object
Extra credit
- print an object you scanned
- make the scanner
Week Five: 3D Printing and Scanning Objectives
- 3D Scanner
- Chose an object to scan
- Scan Object
- Create a stl file from a point cloud
- View image in multiple mesh programs
- 3D Printing
- Extra Credit Print
- Chose a 3D modeler
- OpenCAD
- Create a 3D model
- Create a on Object
3D Scan an Object
I am newbie when it comes 3D scanning, so I was excited to scan an object. At first, I was going to scan any object. However, speaking with Francisco, he suggested to get an imprint of my sons hands to use the scan for the game controller. So I got Crayola Modeling Magic and took an imprint of his fingers and thumbs. The game controller will be customizable to his hand. The imprint of his fingers will be the modeled and the thumb imprint will be where the buttons will go. For future, I have decided to create a silicon casing consisting of imprints, so as he grows so does te rubber casing. I am still trying to figure out how the controller can grow with him as well.
Chose an object to scan
Before I got the impression of my son's hand I used modeling clay for my own hand. I took a scan with our Next Engine Laser Scanner. I exported the file as an XYZ file, basically a point cloud file.
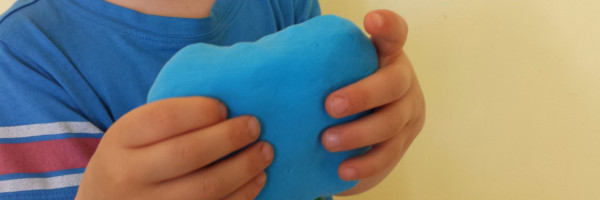
Modeling clay imprinted with sons hands
Son holding the modeling clay to get an imprint.
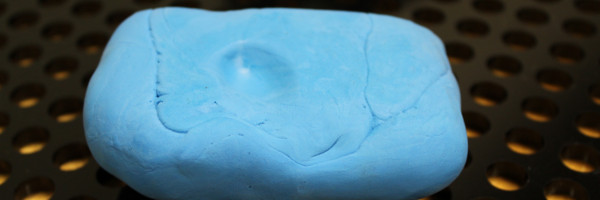
Since the clay was larger than I would like for the scanner I cut the mold in half and scanned the better half. On the final product I plan to use the scan and mirror it to make the other side.
Clearly see the impression of the thumb.
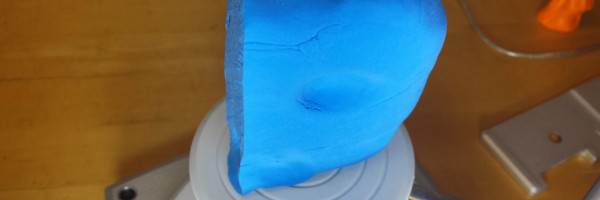
Modeling clay on the scanner.
Scan the object
The equipment used was the Next Engine laser scanner. The hardware was easy to use, except it has no power button, the power is controlled by the software. This is odd to me, I would think you would want a hard stop button to kill the power.
The scan picked up the cracks of the clay. For better results I could smooth out the cracks before scan or delete the points in the software. I believe smoothing the clay before scanning would create better results, however, I do not know for sure.
Learning from the experience of other people the wall was the scanner's backdrop mainly so know one runs into the scan and the color was turned off.
Below are the steps for the Next Engine software.
- Start program.
- Scan Family - Auto.
- Use 8 divisions becuase the manual said so, at least for the first try.
- 360 poosition.
- Points/in^2 (4.4k).
- Target Neutral.
- Range 5.5 - 9 in.
- Physically move object into range.
- In the software turn the part to make sure the part does not go out of range.
- Pick area to scan and drag to select area.
- Start click start.
- Scan Ended and clean up file.
- Trim feature.
- Save as a XYZ file.
Create a stl file from a point cloud
See tutorial on creating an STL file from a point cloud in MeshLab. This time I avoided combining the mesh file and the game controller design files. I forsee this as a tedious task that needs to be done.
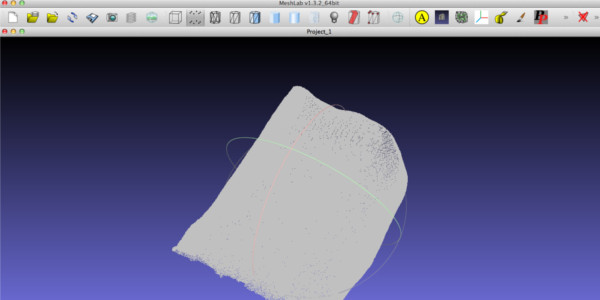
Below is the XYZ file in Meshlab.
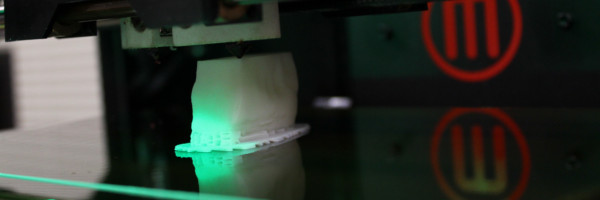
3D Printing
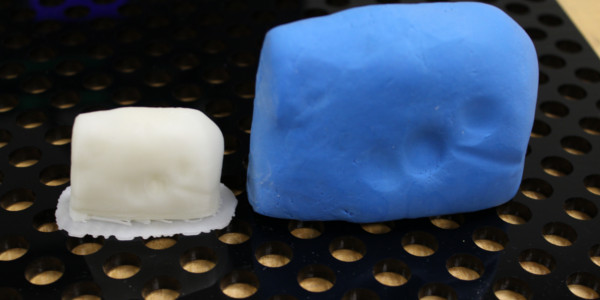
Since, I am familiar with 3D printing I did not run into any complications with the procedure. I printed two, objects one of my son's impressions and the other a Voronoi's 2D diagram linearly extruded. Voronoi diagrams are seen in nature like a giraffe's body an insect's wings and architects are using them in their designes. It is beautiful mathematical physical expression. The Voronoi's diagram I tried to different solid modeling packages, OpenSCAD and Rhino/Grasshopper.
Furthermore, I was excited to use the lab's new MakerBot Recplicator 2x. ABS was used for all prints.
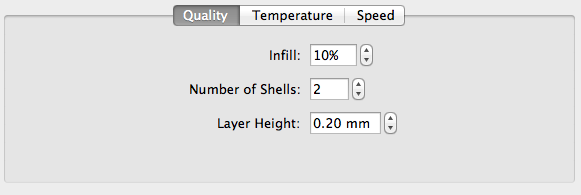
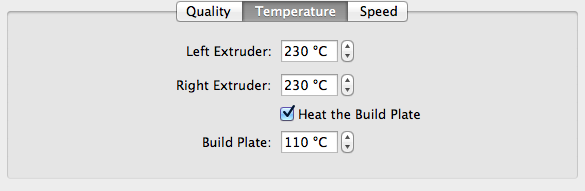
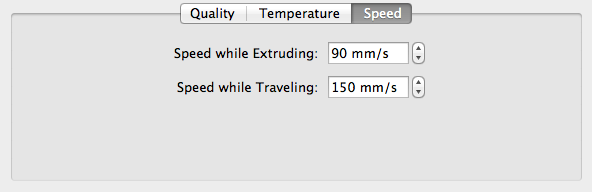
The three images below show quality, temperature, and speed specs for the all prints:
---------------------------------------------------------------------------------------------------------------------------
---------------------------------------------------------------------------------------------------------------------------
Extra Credit Print
Impression
I scaled the 3D printed model down about 50% to save on time and material and saving the full scale for the final project. I was pleased with the results, however, it looks like a rock.You can see and feel the indentations of my son's hand. This gave me an idea, I can take the 3D print create a rubber mold to go around the game controller to make a protective case like a customize phone protecter. When he grows we can swap out the used case and make another one.
For this print I used the Makerbot Replicator 2x. The Makerbot's software was easy to use. I moved the object into position. When the STL file was opened the virtual part was floating above the virtual platform. I rotated (turned) the object 90 degrees in order to keep more detailed impression. When I rotated the object it was in the platform so I had to move it on the platform. Hey there was a button for on the platform. I did some minor rotating adjustments and off to the next stage.
As you can see from the picture above I used raft and support material. I used support material because the bottom was not flush with the build platform.
Chose a 3D Modeler
Since I have a strong interest in 3D modelers, I wanted to keep trying new ones. This week I tried to design my 3D printed piece inOpenSCAD and Rhino/Grasshopper. I have heard good things about both.
Create a 3D Model
OpenSCAD
Like kokopelli I enjoyed the experience of OpenSCAD. It seems to have good documentation and a community to be a part of. For this design I wanted to push myself and create a beautiful mathematical item, more of artwork than functional. During my research for inspiration I found items built with a Voronoi style. The more and more I dug into learning about Voronoi the more I wanted to produce an object with this.
Below is the virtual Voronoy object in OpenSCAD I used Felipe Sanches 2D Voronoy algorithm and created a box around it and gave it some height.

Click HERE to download the file.
Rhino/Grasshopper
I see the power of Rhino/Grasshopper, it seems to blend solid modeling and surface modeling well. Rhino seems very limited by itself as a modeler, it does not have a history more than one process. Furthermore, it does not seem to have any hiearchy associated with the processes. I did not try to use Rhino by itself.
I used Rhino and Grasshopper to approach the design. I was encouraged by Grasshopper to create complex designs with minimal input. For this project, I was excited to see there was a Voronoi function in Grasshopper and many tutorials. However, each tutorial I went through, see resources, I was more and more discouraged because the tutorials were out of date and worked with previous versions, but not with the version I had. Furthermore, as of right now, I cannot figure out how to modify the output of the Voronoi function to a 3D piece.
I completed a Voronoi objected out of pipes, but was not satisfied with the results enough to print.
Create an Object
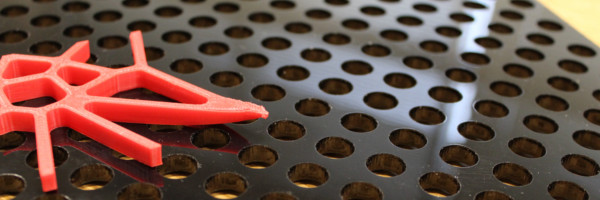
First attempt
I created the Voronoi diagram without walls to see if I liked the way it looked. I choose red, becuase red was one of the two colors we had in the lab and I used white for theimpression. The results were not what I expected. One of the corners peeled off the bed while printing. Usually, this means the bed has not heated enough, the air in the chamber was not hot enough, or the bed was not properly cleaned. I believe the bed was not cleaned, so I used alchohol.
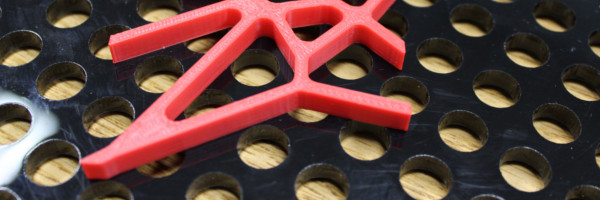
Second Attempt
I created a second Voronoi diagram without walls using the same parameters after the bed was clean. The print had no unforseen consequences and can be seen below. Notice the corner was not bent.
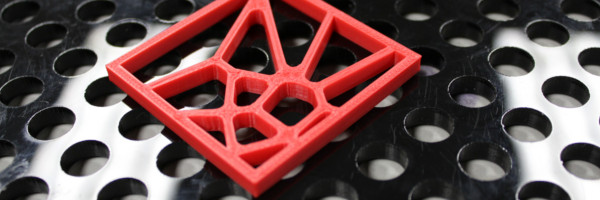
Third Attempt
I decided to put boundaries the same size as the cell borders. I wanted to see what it looked like. This could be a wall for a pencil holder or something else. I scaled the print a smudge smaller than the previous prints. Again the printing went smoothly.
Resources:
- Grasshopper tutorial - http://lab.modecollective.nu/lab/introduction-to-grasshopper/
- Mathematical Functions in OpenSCAD - http://en.wikibooks.org/wiki/OpenSCAD_User_Manual/Mathematical_Functions
- OpenSCAD revolve - http://en.wikibooks.org/wiki/OpenSCAD_User_Manual/2D_to_3D_Extrusion
- Can get organic looking featureshttp://en.wikipedia.org/wiki/Voronoi_diagram
- Waffling http://www.youtube.com/watch?v=gmsrgbPTmjQ
- Thread on soap bubbles in grasshopper - http://www.grasshopper3d.com/forum/topics/soapbubbles-foam?commentId=2985220%3AComment%3A150968
- http://www.grasshopper3d.com/photo/gh3d63?context=user
- http://www.hero-design.com/portfolio/generative-voronoi-bookshelf/