Squid Communicators
Talking squid. Also reading and blinking squid. I2C
Design and build boards that talk to each other
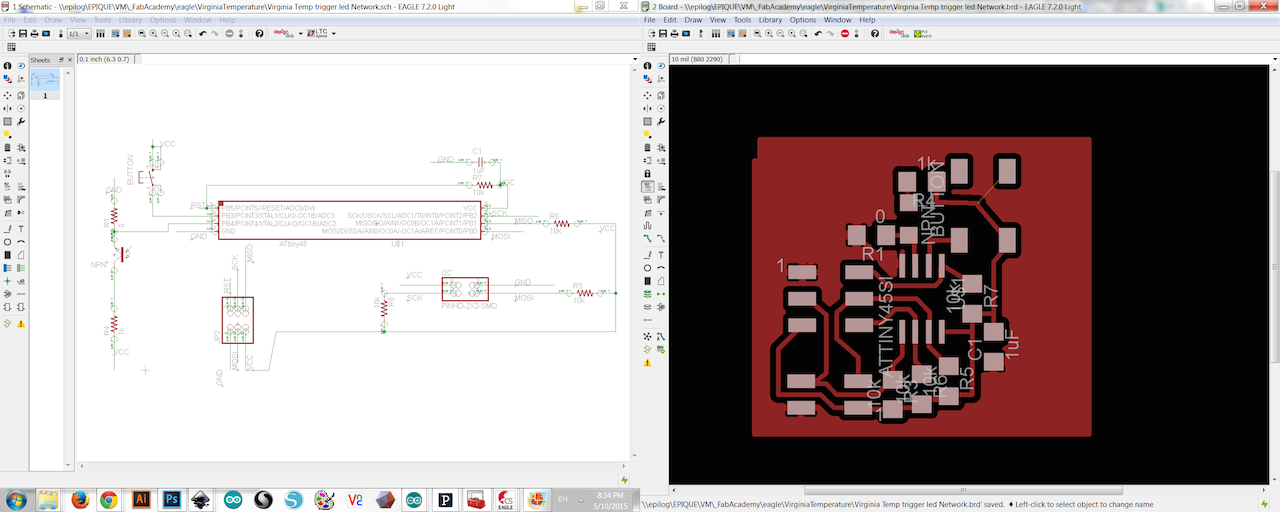
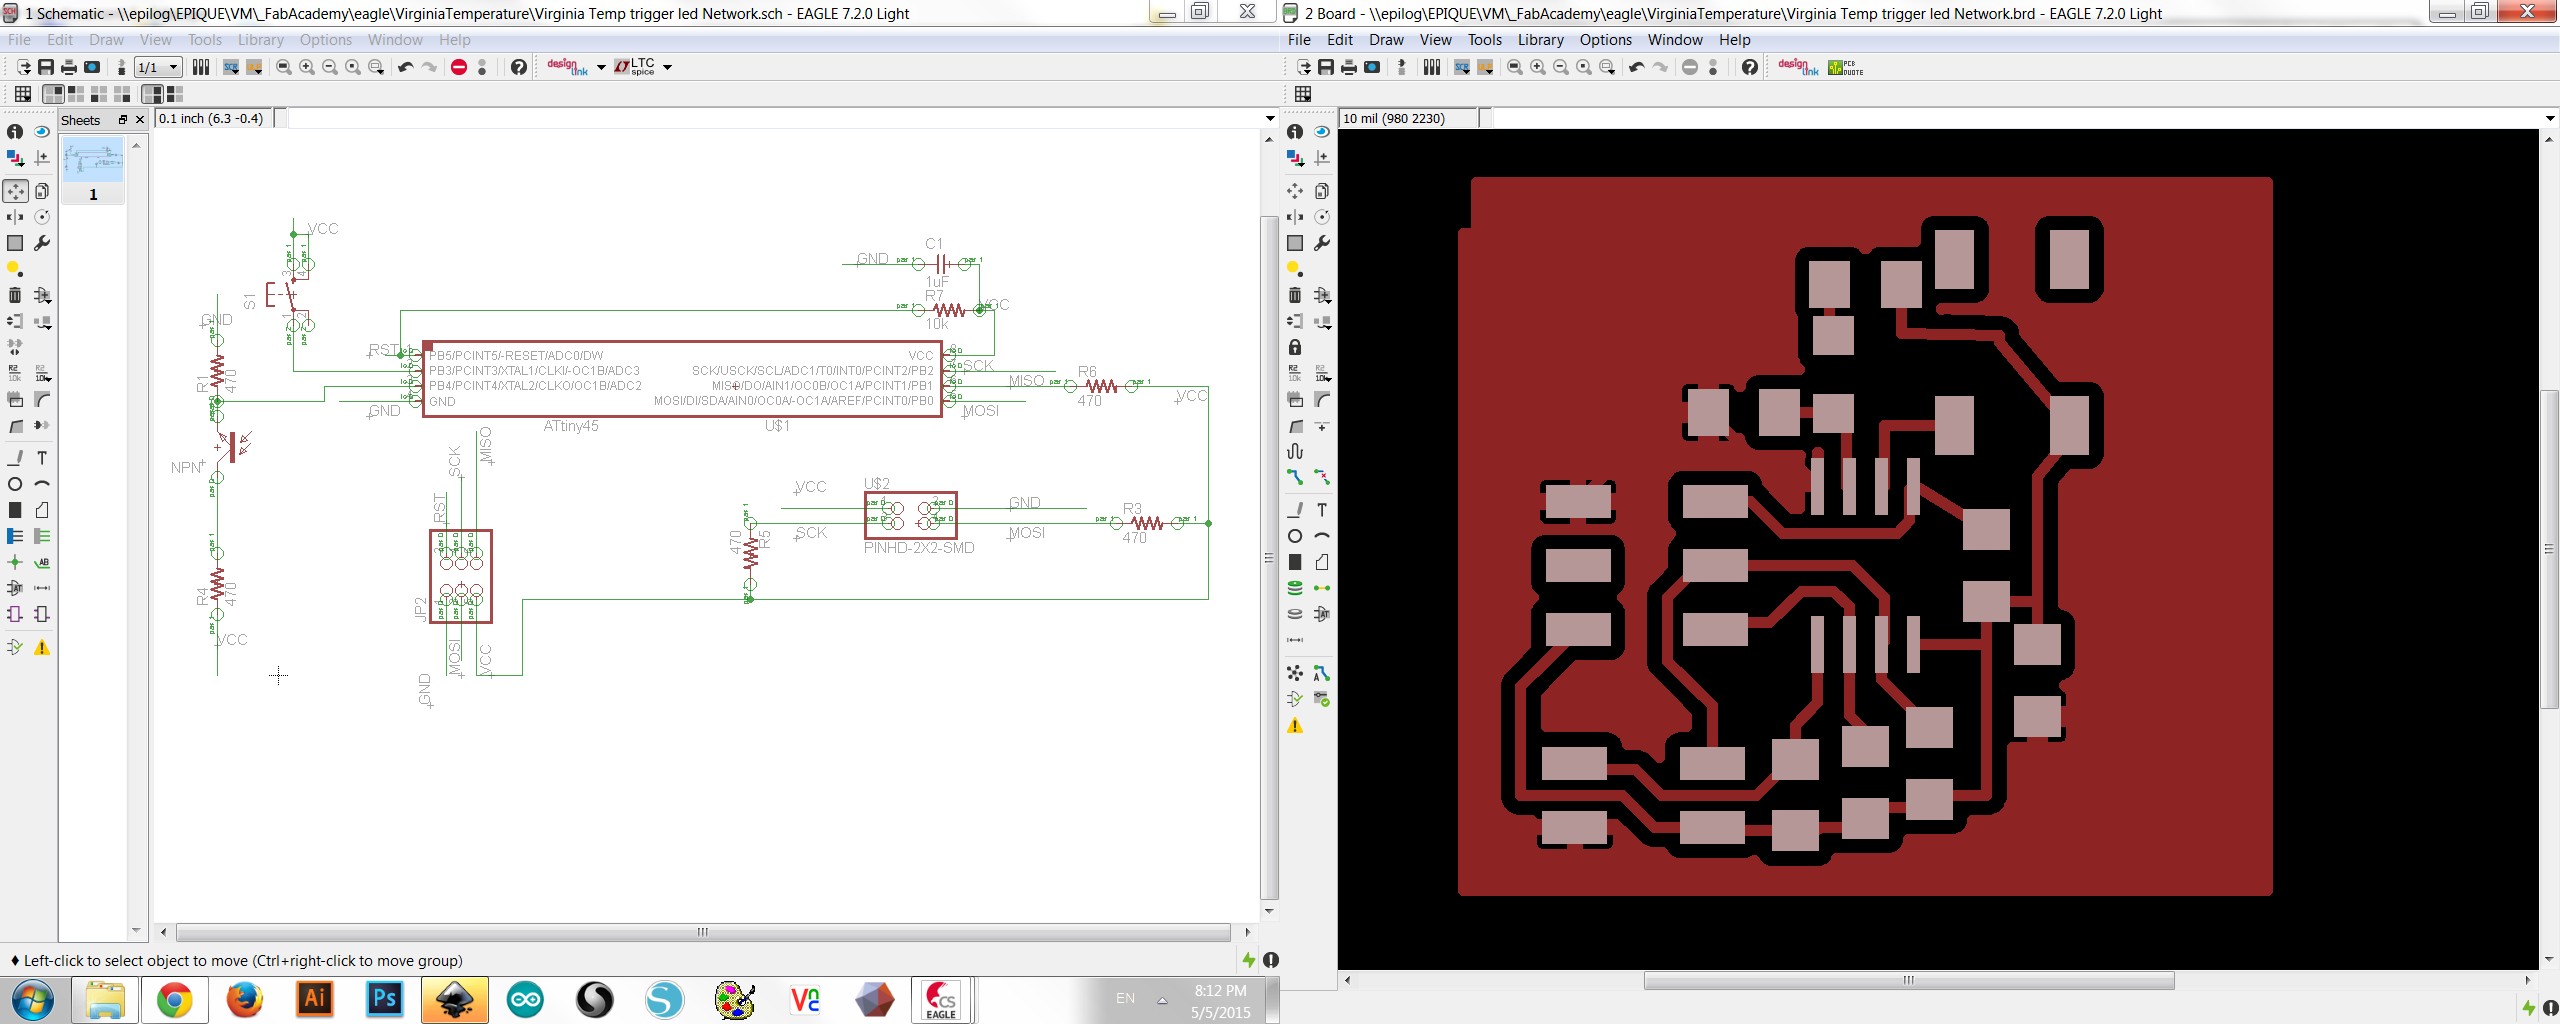
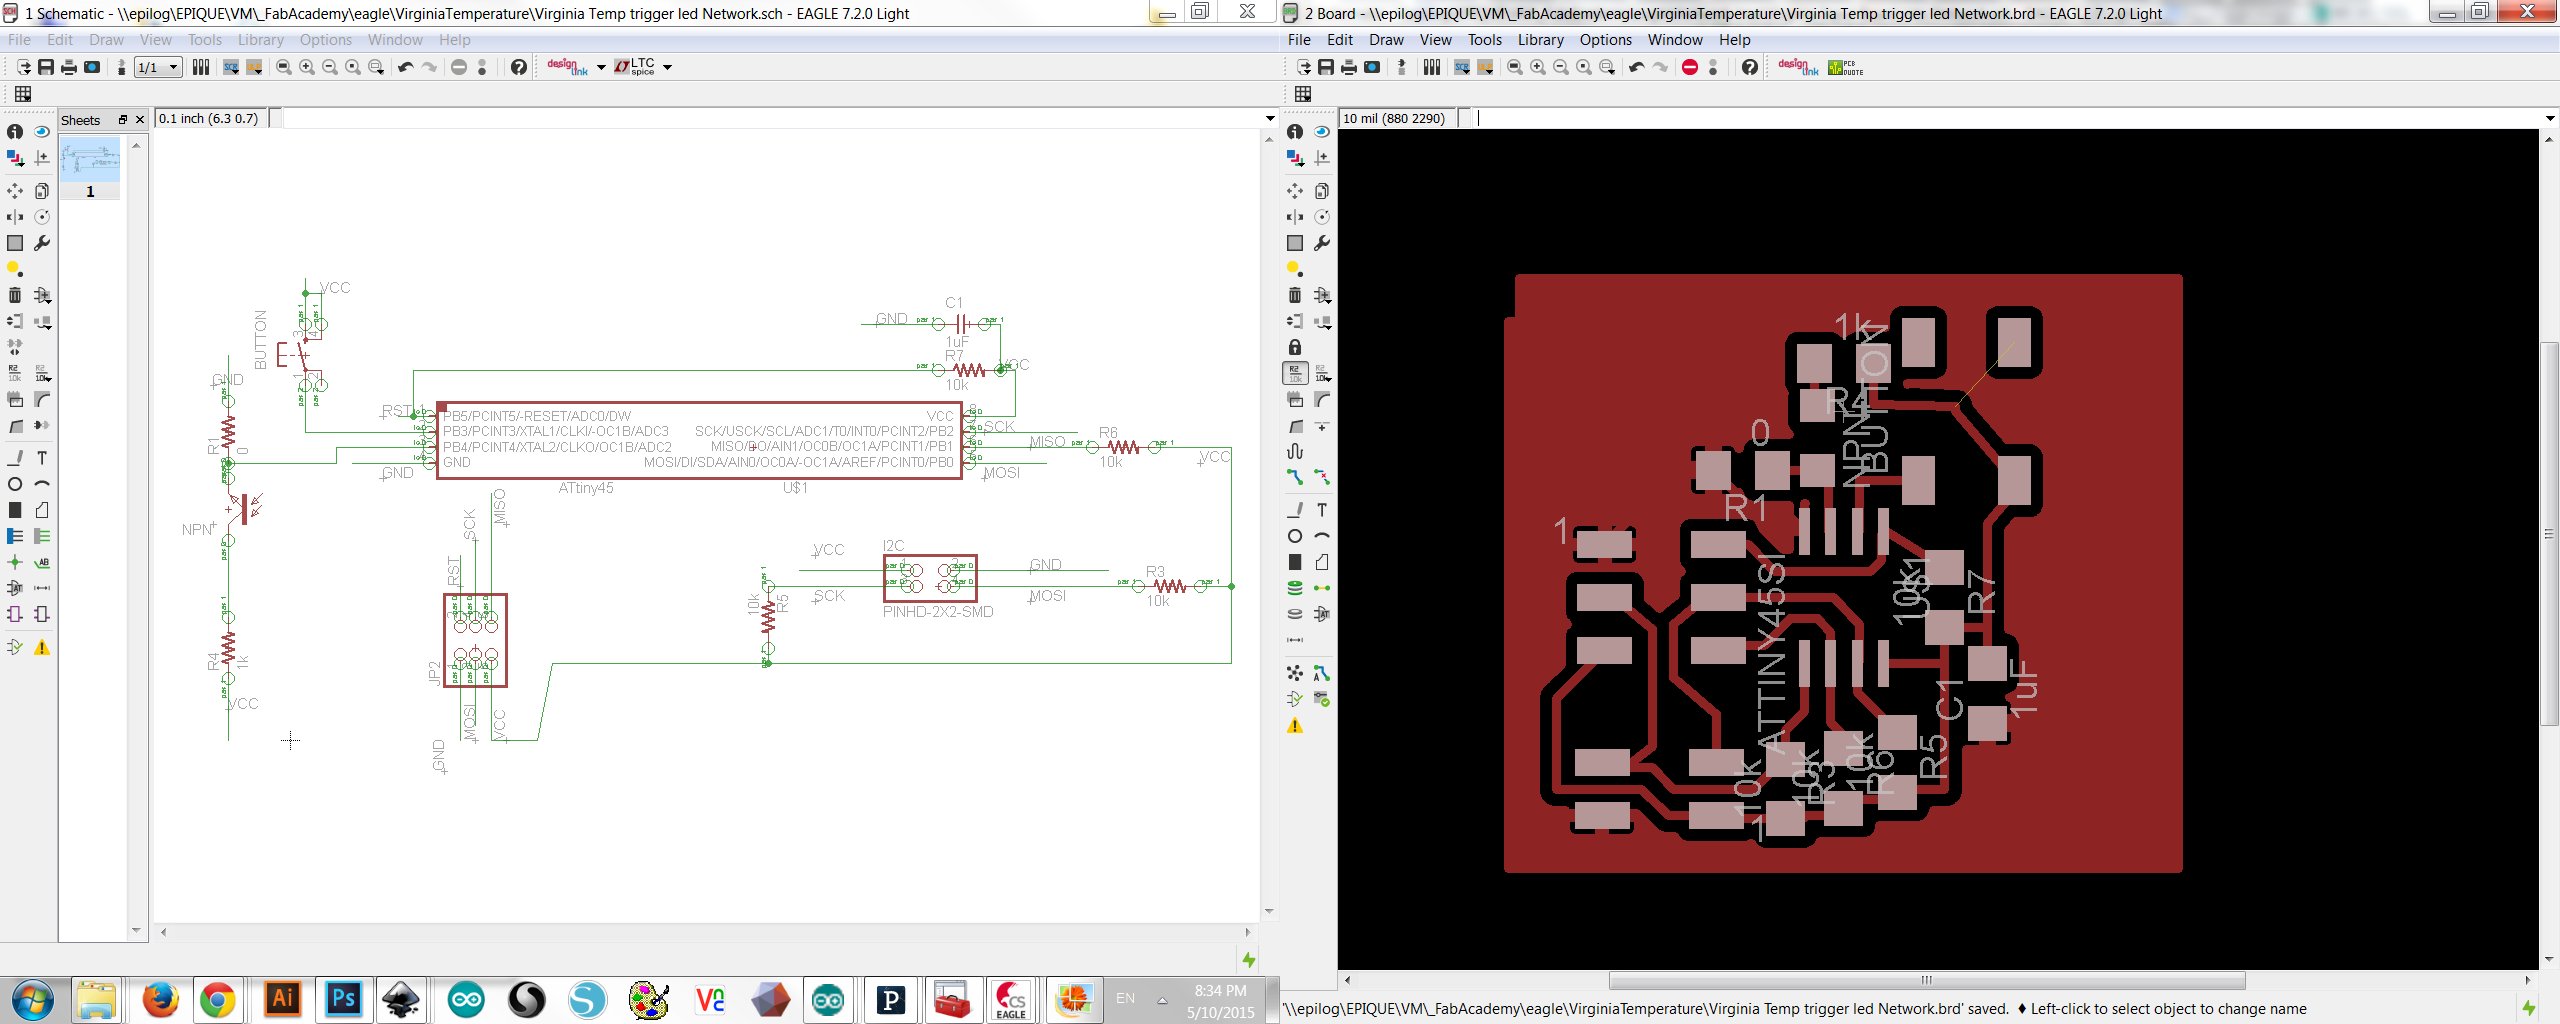
Design the board
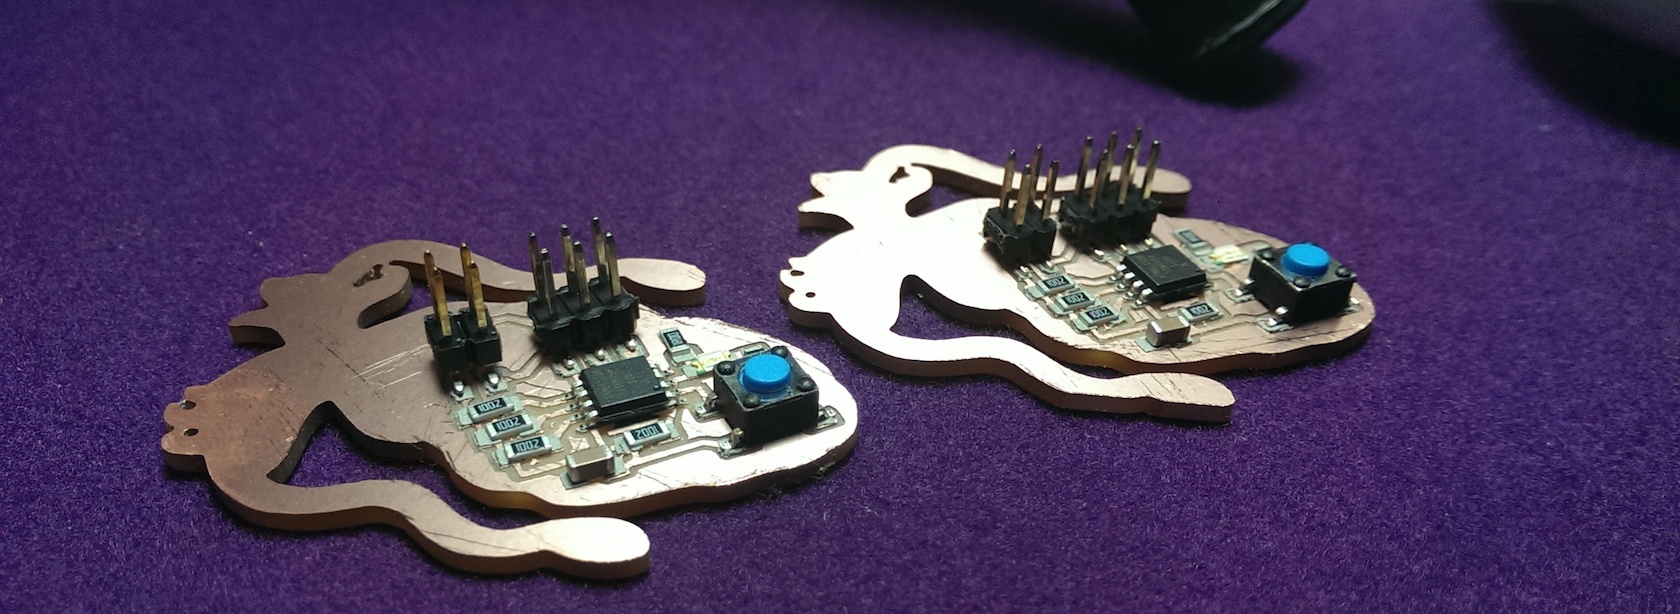
I made some additions to a standard LED output board, then moved things around, and cut it out in the shape of a squid. It works as either master or slave board (when differently programed of course). You may laugh, as well I hope you do, at the shapes, but it is SO EASY to tell at a glance what a board is for if they all have unique shapes instead of having to squint at their layout and components, or reading the copper on light orange letters milled onto a board.
I added a button, and a place for either an LED or a light sensor, and a resistor on either side depending which you want to populate it with (and the other side gets a 0 Ohm resistor or left open). Oh, and most importantly, I added pullup resistors on everything used for I2C pins, because that's what the internet suggested to keep the signal stable, and someone from our lab had trouble when they left them out. So each has a 10kOhm resistor on it to VCC.
I wanted to use I2C because I'd never used them before. Well, next time I'll use an atmel mega chip and avoid the headache of the tinyM/S software workarounds with the 45. I2C is nice; there is always a pair of power/ground pins, and one clock and one signal pin. Very compact! It seems to be a good, common standard these days.
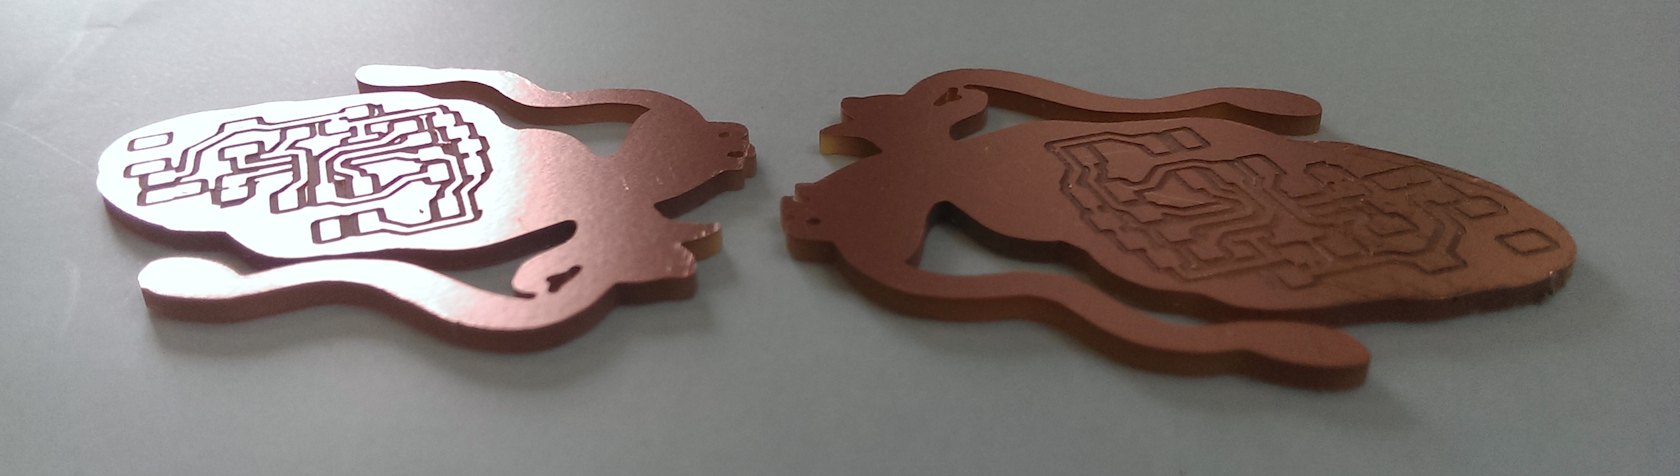
Cut and populate the squid boards
I appologize for only having my camera phone today instead of a dedicated camera...
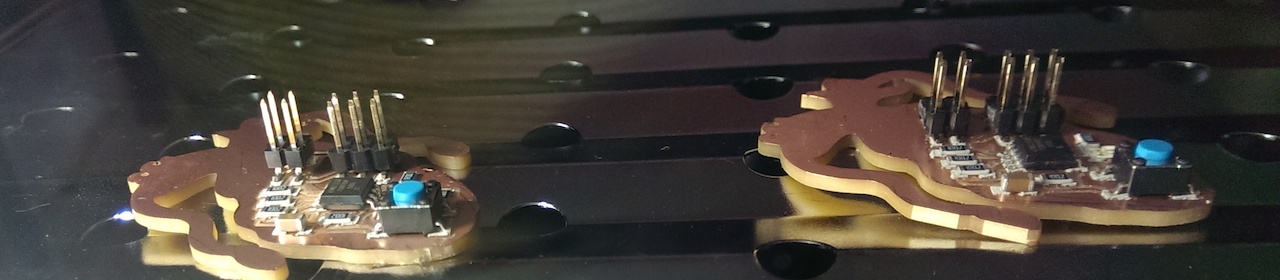
Warm and toasty, and almost 500: just before the solder reflows it turns a nice dry looking lovely white.
Program the master & slave
The ATtiny i2c libraries only worked sporatically in the end. They talked fine when I had one ATtiny and one ATmega (or arduino) together in both directions, but I couldn't get consistant results on the squids with the ATtinies even after trying different or no pullup resistors and making 4+ different revisions to the boards to troubleshoot. This was definitely my most intensive and discarded itterations strewn week. In the end, I'm not convinced of its success as made, because it seems so unreliable and I'd plan to have some megas on hand to make some ATmega chip based communicator squid instead if I were redesigning it now that I know more.
An early revision lacked... certain connections :)
Which I ammended in a later version
Ok, so here’s some more notes on the first troubleshooting steps I went through when my two squid wouldn’t talk to each other. Only one bootloaded at all, and I wasn’t sure what was wrong with the other. It didn’t help that I forgot to remove the resistor I had put in for option 2, sensor edition, and instead put a 0 Ohm resistor connecting the light to ground and letting it light up all the time. This was definitely the weekly assignment I’ve had the most frustration with in the class. Boards not programming, having trouble with the roland modela not holding onto bits and breaking my only bits of the semester, argh.
There are really good instructions for using i2c, and also for programming an ATTiny with a FabISP board, too. http://highlowtech.org/?p=1695 and http://playground.arduino.cc/Code/USIi2c
When they didn't communicate right off the bat, we did some trouble shooting. I had the communicator squid each talk to an arduino both as a slave and as a master. That worked great! Programming with the arduino side starts with example sketches from file > examples > wire > slave receiver > slave
The address just needs to be the same on the slave and master. It’s a 7 bit i2c address. So change it from 0x48 to 0x04 (or whatever number you want, in hex). Select the board ATTiny (you need to install it to get this option, there are really good instructions on high low tech). Processor: ATtiny45, Clock: 1MHz (8Mhz might also work) internal, Port n/a (doesn’t matter for the ATtiny), Programmer: we are using our fabISP’s so we selected USBtinyISP. Select whichever you are using.
A4, A5 are hardcoded to be serial on the arduino uno -- plug those from your test arduino board to your pins on the I2C on the board you made program the arduino with wire > slave_receiver or master
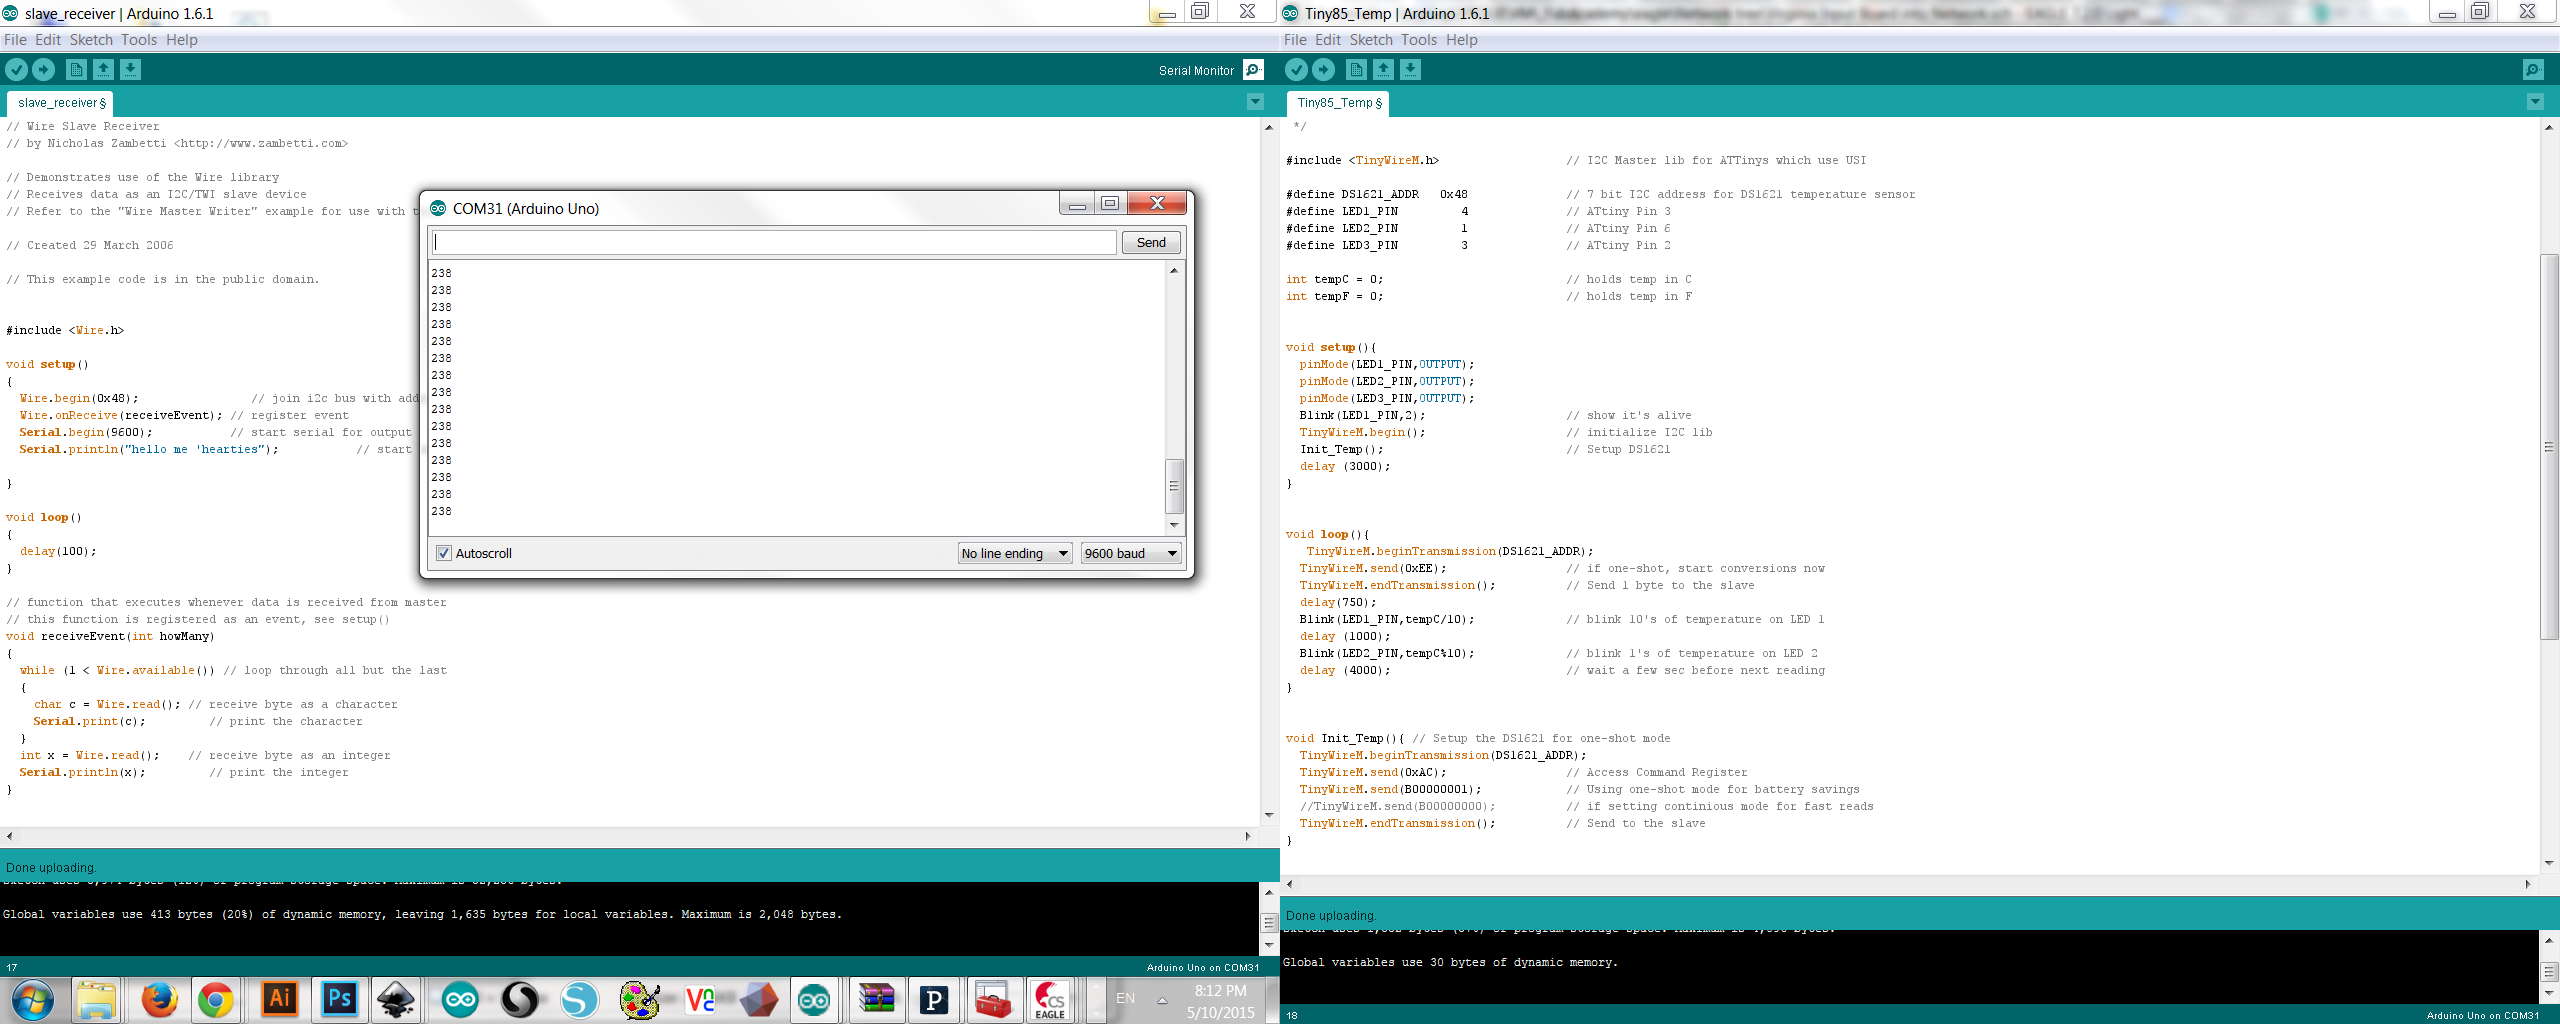
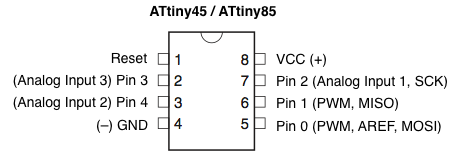
Program your networking board with: TinyWireMaster, tiny85_Temp and comment out the send and receive lines. Change all the LED pins to the pins I’m on. Comment out the send lines (or your program will stall!). Check with the high low tutorial for the conversion (my LED is on pin3, which, probably with unnecessary confusion, converts to pin4 when programming with the full sized arduino interface). It was blinking really fast on 1MHz, so I switched it to program in 8MHz.
Final thoughts
Looks good enough. Definitely make it more reliable with a mega next time. Now on to making everthing and its toaster part of the internet of things...! The built in arduino example code for wire>master_writer and wire>slave_receiver which runs on atmegas will talk with the squid programed as a master/slave with the tinyWireMS code completely, reliably, and predictably! They were programmed to send a signal from the master when the master's button was pressed, and the slave would blink different patterns depending on what was received. But even after four or five iterations with the tiny 45's I couldn't get them to talk to reliably each other, only to ATmegas runing the normal (not tiny) wire sketches.
Downloadables:
If you want to recreate this madness, I would recommend replacing my ATtiny with an ATmega or at least an ATtiny85. Or at least replacing one side (master or slave, it doesn't makter) with one of those. tut so, here's the Fab library, the eagle schematic and board, revision A images for the traces (needed a soldered jumper from the ISP to the I2C), the cut outline for the boards (2 per sheet). My spotty code master and slave, never guaranteed for the ATtiny45's to begin with, comes from the tiny master and tiny slave originals and needs those original code cpp and header files to run. Dump the new code in the old code's example folders.