W_16: Applications and implications (May 13) <
AND NOW WHAT?
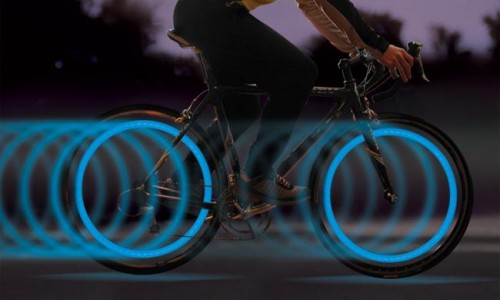
Its time to start thinking about the process of our final projects the weeks fly by and there is so much to do still. The idea i have in mind to develop is more and more of a reality as the time passes. My basic idea for the final project is to create a bike light with rgb led's that attaches to your wheel and emits different patterns while your cycling at night.This will create a general awarness for the cars and people arround you so they can sense your passiing by, it creates a sense of security for the rider and the other automobiles in your surroundings.
WHAT WILL IT DO?
My basic idea for the final project is to create a bike light with rgb led's that attaches to your wheel and emits different patterns while your cycling at night. This will create a general awarness for the cars and people arround you so they can sense your passiing by, it creates a sense of security for the rider and the other automobiles in your surroundings. Also its very fun and beautiful. The idea is to attach it to the sopke of your bike and make so it will be weather resistant and durable to use.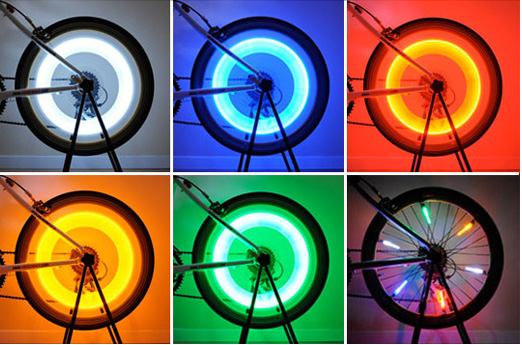
WHO HAS DONE WHAT BEFOREHAND?
There are many projects that have been done in this area and in different formats also. There are the single rgb led lights that produce different colors, the led array that produces different colors, there are the led arrays that are programed to produce images or rgb bitmaps on your wheels syncronizing with a speedometer incorporated in the board and finally also the single colored led strips.

LED SPOKELIT is a single rgb led on your bicycle wheel, that hooks on to your spokes and produces one circular stream of colurfull light.
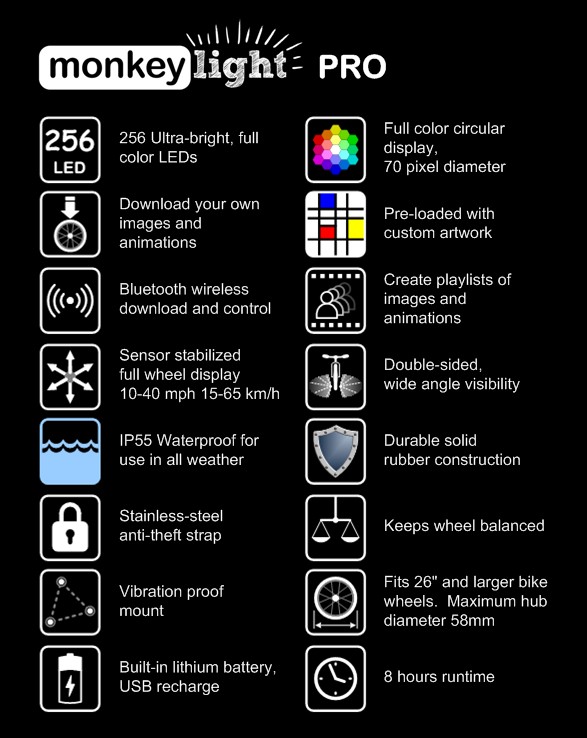
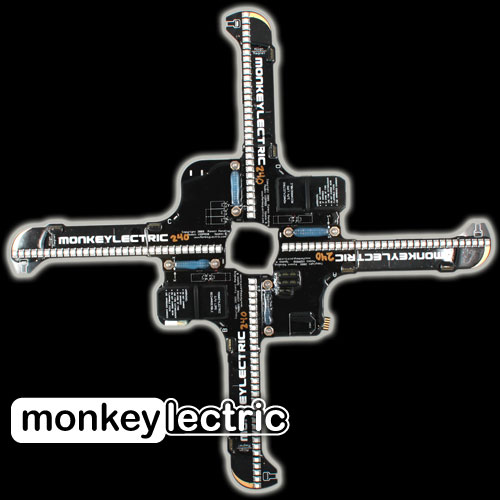
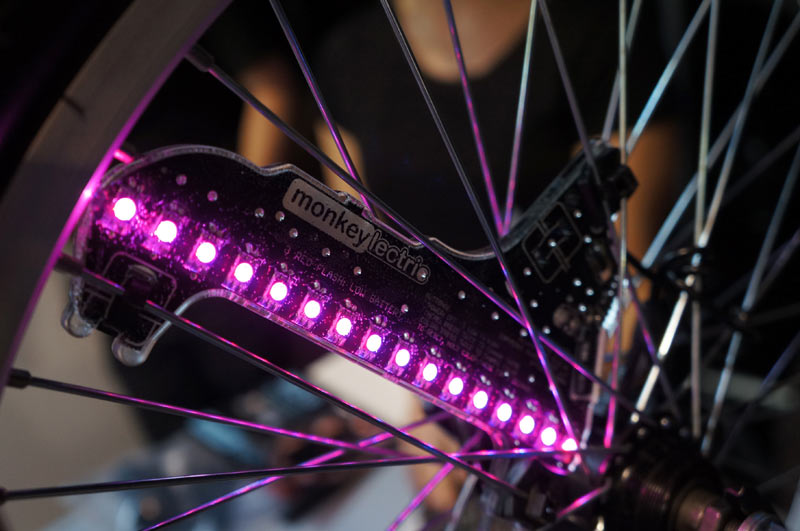
MONKEY LIGHT PRO Is a four led strip bike light that is double sided and projects rgb images that you can load yourself or use the predetermined artwork already loaded.
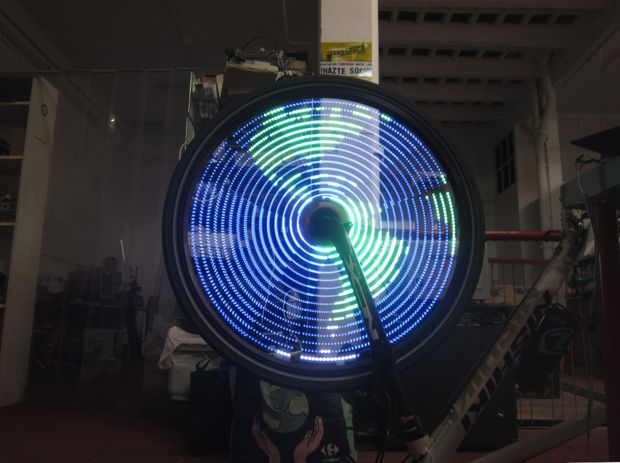
BIKE WHEEL WS2811 LED ARDUINO Is a project on instructables that uses arduino to program a ws2812b led strip, this project helped me alot in the making of my final project
WHAT MATERIALS AND COMPONENTS WILL BE REQUIRED AND HOW MUCH WILL IT COST ?
All the materials will come from the fab inventory that we have at the fablab barcelona except the adressable ws2812 led strip that i will try to find in local stores.
Usb mini port 0.79$
FTDI CHIP 4.5$
Atmega 328 1.9$
Switch tactile 0.7$
Big switch 1.5$
Magnetic reed switch 0.72$
CAPACITORS:
Ceramic cap 10uf (X3) 0.48$
ceramic cap .1uf (x4) 0.44$
cap smt 18pf (x2) 0.36$
RESISTORS:
res 0ohm (x10) 0.04$
res 1k (x5) 0.036$
White smd led (x2) 0.4$
Red smd led (x2) 0.26$
Shotky diode 1A 100v (x2) 0.19$
Regulator 5v 1A 0.33$
16 mhz crystal smd 0.4$
PLA 50g (unknown)
ADRESSABLE WS2812B 30 LED'S STRIP 16.95$
9v Battery 5.3$
TOTAL= APPROX 35$
WHAT PROCESSES WILL BE USED ?
· BOARD DESIGN(JOIN THE FTDI CHIP WITH THE BARDUINO, THE LED STRIP, THE SWITCH AND THE MAGNETIC REED SWITCH ON ONE SINGLE BOARD)
· PROGRAMMING(THE BARDUINO TO ACCEPT THE REED SWITCH AND TRANSMIT TO THE LED STRIP)
· SOLDERING(THE COMPONENTS ON TO THE BOARD)
· 3D PRINTING
WHAT TASKS NEED TO BE COMPLETED ?
DESIGN THE PCB ON EAGLE JOINING ALL THE PARTS ON TO ONE BOARD
PROGRAM AND TEST THE BOARD AND LED STRIP WITH DIFFERENT LED LIBRARIES
DESIGN THE BATTERY CASE ON THE BACK OF THE BOARD AND PRINT IN 3D
MAKE IT WATER PROOF SO THE WEATHER DOESNT DESTROY THE CIRCUITS
WHAT QUESTIONS NEED TO BE ANSWERED ?
The way to water proof the whole system is a dificult process because of the different components on the board there are some that need to be exposed for future programming changeslike the usb port, the 2x3 isp header, the reed switch needs to be outside to make contact with the magnet and the switch that runs from the batteries to the sircuit needs to be on the exterior.
Also the led strip needs to be sealed but also seen at the same time.
The casing cant interupt the way that the board clips on to the spokes because it can't hang out more than the actual wheel or it will hit the bike frame.
WHAT IS THE SCHEDULE?
First design a normal barduino, program it and test the led strip
Then design the final board and stuff it with all the different components.
After this Burn the bootloader and program to work with the reed switch and the led strip
Test different led strip libraries and figgure out how to make the components speak to eachother.
Finally find a suitable method to join the board components to the wheel and make the case for it.