W_07: Embedded programming (Mar 11)
For this assignments we had to program our hello board(button + led) to do some simple functions. I used the arduino 1.6.0 to programm it.
Arduino 1.6.0 to program the hello board
This consisted in programming our new board with the fabISP we made in week 4 using the arduino program. I followed some of the tutorial on the HIGH LOW TECH website wich shows you the steps to follow. The first is downloading the arduino program compattible with your computer after that you are supposed to introduce a an attiny folder in the arduino program by creating a folder inside arduino and saving it inside:

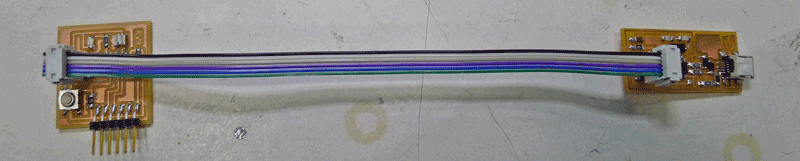
Once you have done this its time to select the correct options for your boards. Connect your fabISP to your computer and the fabISP to your hello board. Whean all this is connected you will be able to program your hello board. This is a photo of what the connections should look like:
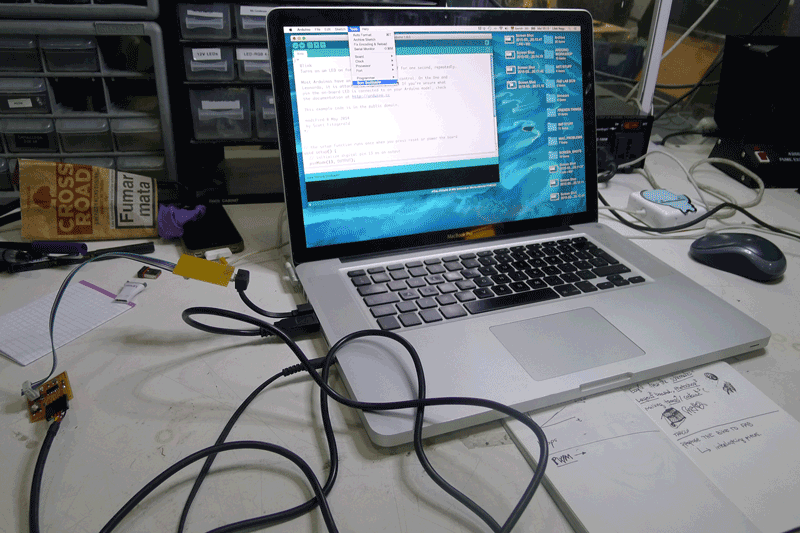
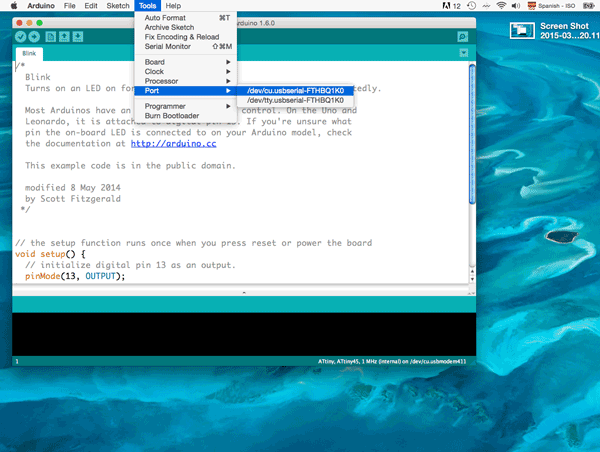
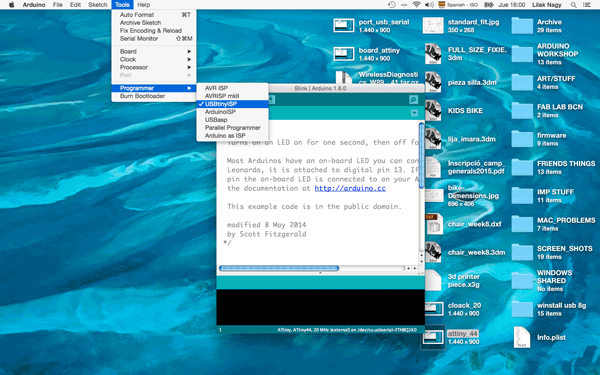
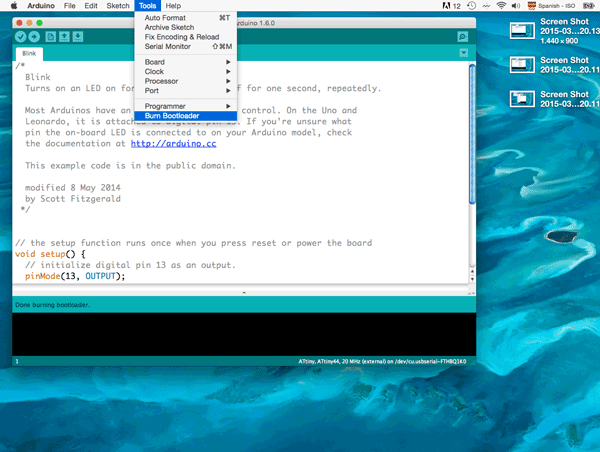
When this is connected you have to choose the correct tools to be able to program your hello board. Itook a couple of screen shots while I was doing the process:
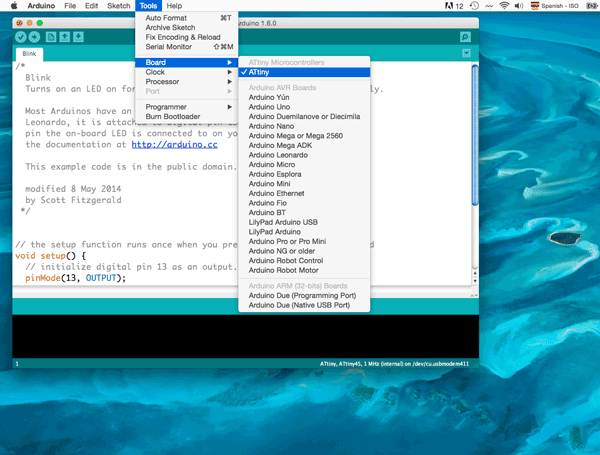
1· Select the kind of board you have (ATtiny):
2· Then the kind of clock that your board has
(in this case its 20MHz):

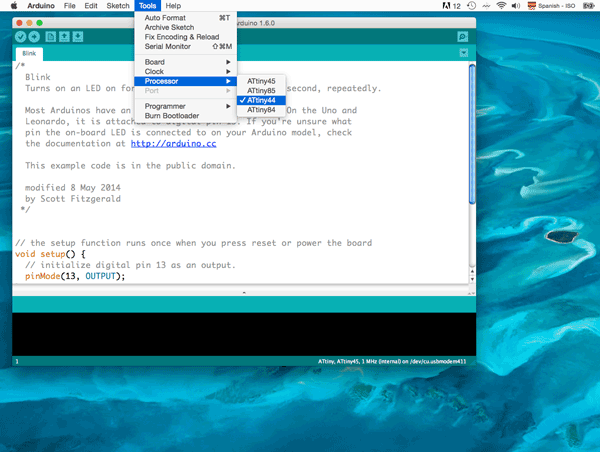
3· After that you select the processor wich will be ATtiny44
4· Once you have selected all these options, it's time to connect your FabIsp to your computer and that to your Button/LED board and this back to your computer, The option called port in the arduino program wasn't available before u connected the boards to your computer, now you will be able to select the "Port" option that wasn't available earlier:
5· After this you now select the kind of programmer you are using (in this case its USBtinyISP):
6· Finally you burn the bootloader so your able to load the different functions/programs using Arduino IDE:
The programs i loaded to test out the hello_board_44 from the arduino library. With my own settings regarding the pins and time delays: