About Week 4
My Electronics Production Exercise...
This week assignment was about Electronics Production and in particular to make the FabISP in-circuit programmer: milling the board, stuffing it with components and finaly program it. As reported in tutorial "the FabISP is an in-system programmer for AVR microcontrollers, designed for production within a FabLab. It allows you to program the microcontrollers on other boards you make".
The first step was to download the board traces  and board outline
I imported them in Inkscape, I vectorized the png, I signed it and I putted a red border for cutting

Ready for engraving and cutting...
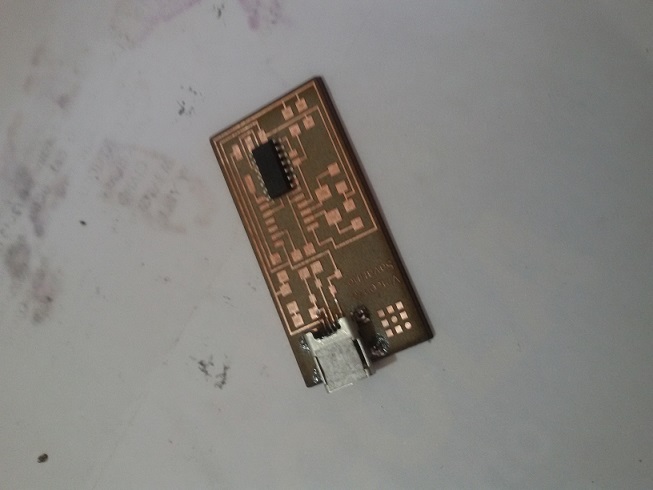
Thanks to the experimentations made by Enrico Bassi, in OpenDot it is possible to use a Trotec laser cutter machine to engrave and cut FR-1 sheets. This laser cutter has two different kind of laser beams, CO2 and fiber. We used fiber laser to engrave and completely remove copper from the FR-1 surface, and C02 laser to cut the board. With the support of my collegue Daniele Ingrassia I've produced my FabISP: as I'm new with electronic production two copies are better!
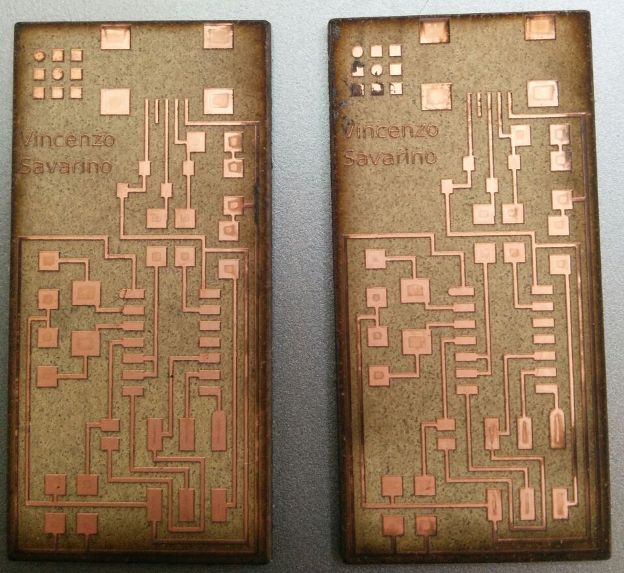
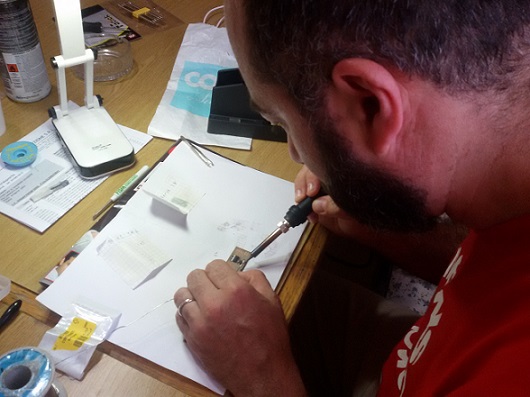
it is time to stuff it with components....Before starting I collected several soldering tutorials and tips, and discussed with my collegue Daniele. For the step by step soldering process I followed Fab Academy tutorial.
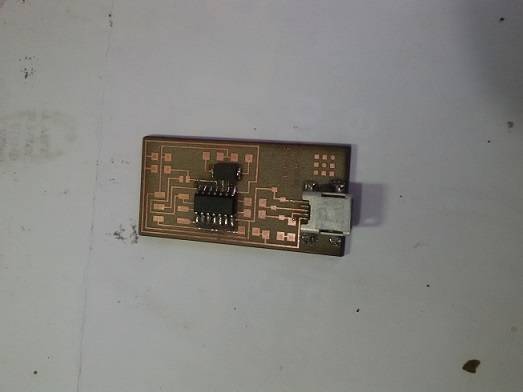
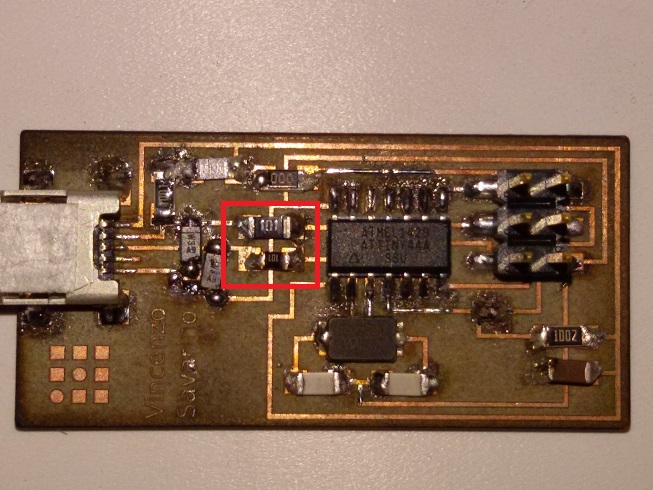
After long several steps I realized that two 100 ohm resistor were missing and I was at home! My mistake was not to check and prepare all components from my component box. I remembered of some board of a broken fax and I searched for two resistors with code 1000. I found them with code (after checking SMD resistor code) 101, one very smaller. I desoldered and used them.
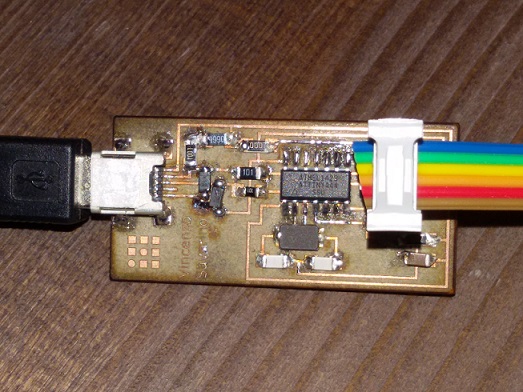
Once soldered all components and verified with a multimeter possible short circuits and I made my Smoke Test: OK!
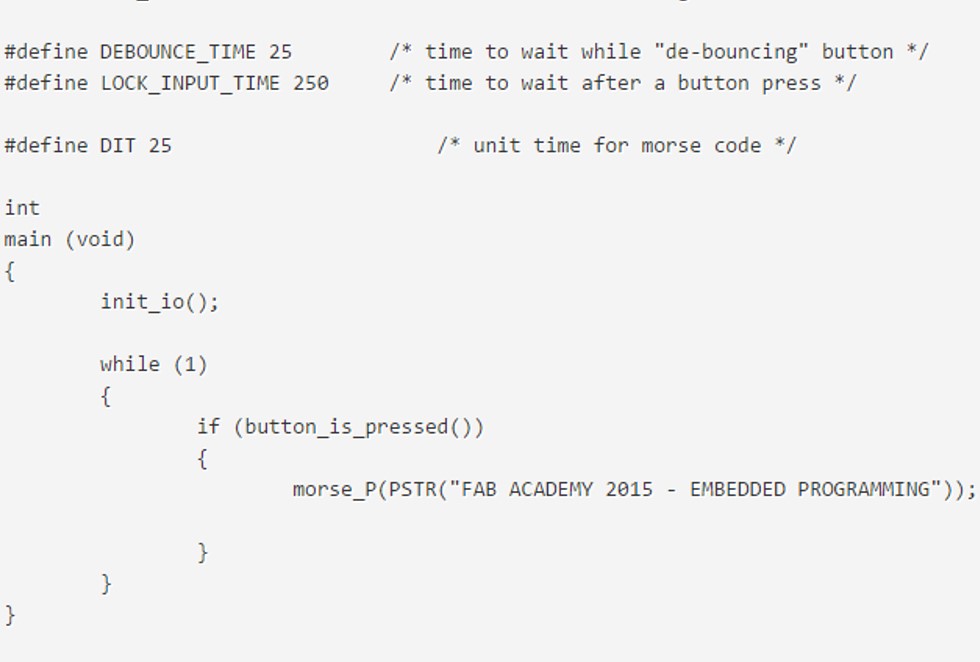
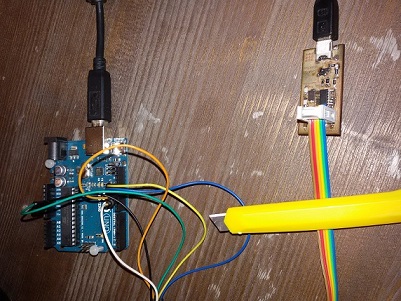
It was time to program FabISP. To do this I used an Arduino UNO as programmer. I downloaded the firmware and installed WinAVR. I've done a backup of my System PATH variables as suggested in tutorial but after installation I realized in my Windows 7 OS that the installation maintained my PATH variable configuration.
Inside the Makefile for the configuration of FabISP firmware, after checking the port of my Arduino , I modified the following line:
AVRDUDE = avrdude -c stk500v1 -b19200 -P COM4 -p $(DEVICE)
I connected Arduino and my FabISP as reported on the top of comment section of ArduinoISP sketch:
// slave reset: 10
// MOSI: 11
// MISO: 12
// SCK: 13
My first try failed because I forgot to upload the Arduino sketch! Once uploaded I restarted the programming steps
- > make clean
- > make hex
- > make fuse
- > make program
D:\FabAcademy_Files\ElectronicProduction\firmware\fabISP_mac.0.8.2_firmware>
D:\FabAcademy_Files\ElectronicProduction\firmware\fabISP_mac.0.8.2_firmware>make clean
rm -f main.hex main.lst main.obj main.cof main.list main.map main.eep.hex main.elf *.o usbdrv/*.o main.s usbdrv/oddebug.s usbdrv/usbdrv.s
D:\FabAcademy_Files\ElectronicProduction\firmware\fabISP_mac.0.8.2_firmware>make hex
avr-gcc -Wall -Os -DF_CPU=20000000 -Iusbdrv -I. -DDEBUG_LEVEL=0 -mmcu=attiny44 -c usbdrv/usbdrv.c -o usbdrv/usbdrv.o
avr-gcc -Wall -Os -DF_CPU=20000000 -Iusbdrv -I. -DDEBUG_LEVEL=0 -mmcu=attiny44 -x assembler-with-cpp -c usbdrv/usbdrvasm.s -o usbdrv/usbdrvasm.o
avr-gcc -Wall -Os -DF_CPU=20000000 -Iusbdrv -I. -DDEBUG_LEVEL=0 -mmcu=attiny44 -c usbdrv/oddebug.c -o usbdrv/oddebug.o
avr-gcc -Wall -Os -DF_CPU=20000000 -Iusbdrv -I. -DDEBUG_LEVEL=0 -mmcu=attiny44 -c main.c -o main.o
avr-gcc -Wall -Os -DF_CPU=20000000 -Iusbdrv -I. -DDEBUG_LEVEL=0 -mmcu=attiny44 -o main.elf usbdrv/usbdrv.o usbdrv/usbdrvasm.o usbdrv/oddebug.o main.o
rm -f main.hex main.eep.hex
avr-objcopy -j .text -j .data -O ihex main.elf main.hex
avr-size main.hex
text data bss dec hex filename
0 2050 0 2050 802 main.hex
D:\FabAcademy_Files\ElectronicProduction\firmware\fabISP_mac.0.8.2_firmware>make fuse
avrdude -c stk500v1 -b19200 -P COM4 -p attiny44 -U hfuse:w:0xDF:m -U lfuse:w:0xFF:m
avrdude: please define PAGEL and BS2 signals in the configuration file for part ATtiny44
avrdude: AVR device initialized and ready to accept instructions
Reading | ################################################## | 100% 0.07s
avrdude: Device signature = 0x1e9207
avrdude: reading input file "0xDF"
avrdude: writing hfuse (1 bytes):
Writing | ################################################## | 100% 0.01s
avrdude: 1 bytes of hfuse written
avrdude: verifying hfuse memory against 0xDF:
avrdude: load data hfuse data from input file 0xDF:
avrdude: input file 0xDF contains 1 bytes
avrdude: reading on-chip hfuse data:
Reading | ################################################## | 100% 0.02s
avrdude: verifying ...
avrdude: 1 bytes of hfuse verified
avrdude: reading input file "0xFF"
avrdude: writing lfuse (1 bytes):
Writing | ################################################## | 100% 0.06s
avrdude: 1 bytes of lfuse written
avrdude: verifying lfuse memory against 0xFF:
avrdude: load data lfuse data from input file 0xFF:
avrdude: input file 0xFF contains 1 bytes
avrdude: reading on-chip lfuse data:
Reading | ################################################## | 100% 0.02s
avrdude: verifying ...
avrdude: 1 bytes of lfuse verified
avrdude: safemode: Fuses OK
avrdude done. Thank you.
D:\FabAcademy_Files\ElectronicProduction\firmware\fabISP_mac.0.8.2_firmware>make program
avrdude -c stk500v1 -b19200 -P COM4 -p attiny44 -U flash:w:main.hex:i
avrdude: please define PAGEL and BS2 signals in the configuration file for part ATtiny44
avrdude: AVR device initialized and ready to accept instructions
Reading | ################################################## | 100% 0.07s
avrdude: Device signature = 0x1e9207
avrdude: NOTE: FLASH memory has been specified, an erase cycle will be performed
To disable this feature, specify the -D option.
avrdude: erasing chip
avrdude: please define PAGEL and BS2 signals in the configuration file for part ATtiny44
avrdude: reading input file "main.hex"
avrdude: writing flash (2050 bytes):
Writing | ################################################## | 100% 3.49s
avrdude: 2050 bytes of flash written
avrdude: verifying flash memory against main.hex:
avrdude: load data flash data from input file main.hex:
avrdude: input file main.hex contains 2050 bytes
avrdude: reading on-chip flash data:
Reading | ################################################## | 100% 2.52s
avrdude: verifying ...
avrdude: 2050 bytes of flash verified
avrdude: safemode: Fuses OK
avrdude done. Thank you.
avrdude -c stk500v1 -b19200 -P COM4 -p attiny44 -U hfuse:w:0xDF:m -U lfuse:w:0xFF:m
avrdude: please define PAGEL and BS2 signals in the configuration file for part ATtiny44
avrdude: AVR device initialized and ready to accept instructions
Reading | ################################################## | 100% 0.07s
avrdude: Device signature = 0x1e9207
avrdude: reading input file "0xDF"
avrdude: writing hfuse (1 bytes):
Writing | ################################################## | 100% 0.02s
avrdude: 1 bytes of hfuse written
avrdude: verifying hfuse memory against 0xDF:
avrdude: load data hfuse data from input file 0xDF:
avrdude: input file 0xDF contains 1 bytes
avrdude: reading on-chip hfuse data:
Reading | ################################################## | 100% 0.02s
avrdude: verifying ...
avrdude: 1 bytes of hfuse verified
avrdude: reading input file "0xFF"
avrdude: writing lfuse (1 bytes):
Writing | ################################################## | 100% 0.03s
avrdude: 1 bytes of lfuse written
avrdude: verifying lfuse memory against 0xFF:
avrdude: load data lfuse data from input file 0xFF:
avrdude: input file 0xFF contains 1 bytes
avrdude: reading on-chip lfuse data:
Reading | ################################################## | 100% 0.02s
avrdude: verifying ...
avrdude: 1 bytes of lfuse verified
avrdude: safemode: Fuses OK
avrdude done. Thank you.
D:\FabAcademy_Files\ElectronicProduction\firmware\fabISP_mac.0.8.2_firmware>
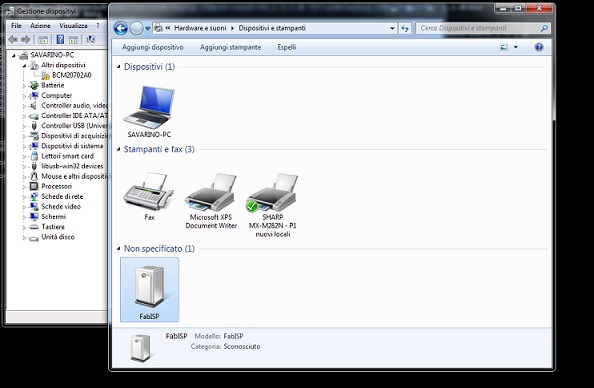
I tested if FabISP has been recognized by Windows 7 but I realized that no drivers were available despite I've installed it following the step by step Fab Academy tutorial. So I retried to provide drivers by selecting the drivers path and finally it recognized without drivers errors:
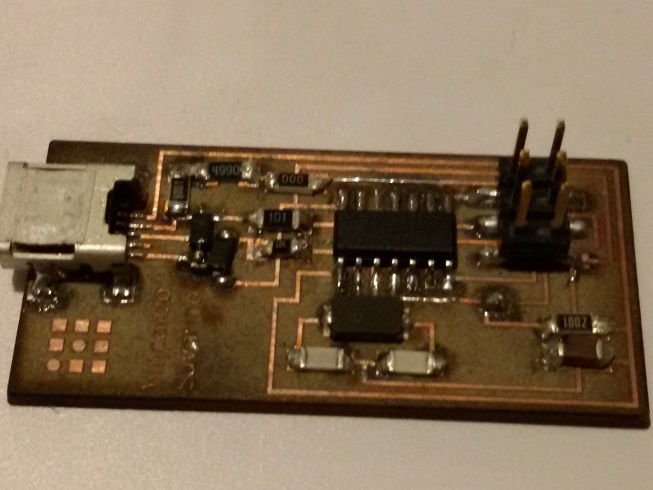
The final step was to remove the SJ1 zero ohm resistor and SJ2 solder jumpers in order to make the FabISP to be a programmer