About Week 10
Input Devices Exercise...
For this week the assignment is about input devices in order to measure something by adding a sensor to a microcontroller board.
For this assignment Massimo introduced us the Fabkit, an Arduino-compatible board designed by David Mells and based on an ATMEGA382P microcontroller.
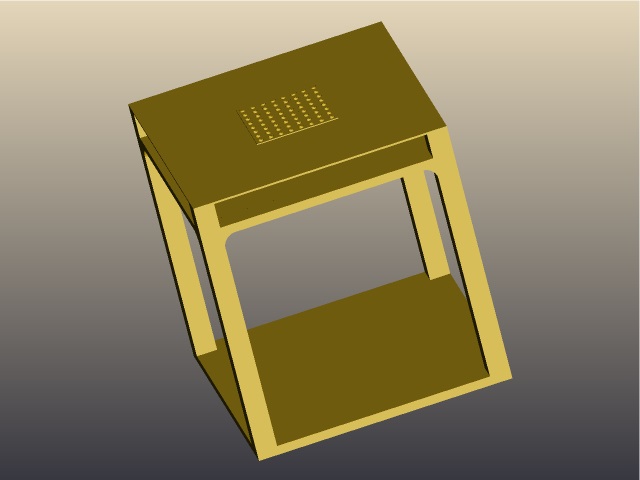
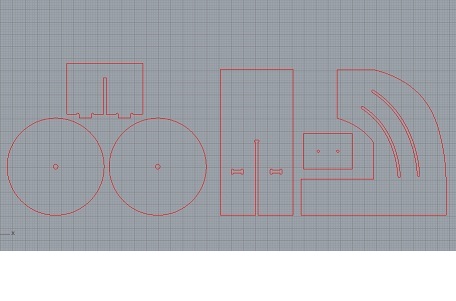
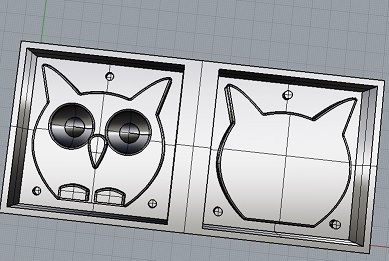
Starting from this my colleague Daniele Ingrassia designed a new Arduino-compatible board during Fab Academy 2015, the satshakit. Me and Daniele have discussed about the usage of this new board and I accepted the proposal of test it, for milling, solder and programming, mainly thinking about my final project in order to In order to replace Arduino with this board.
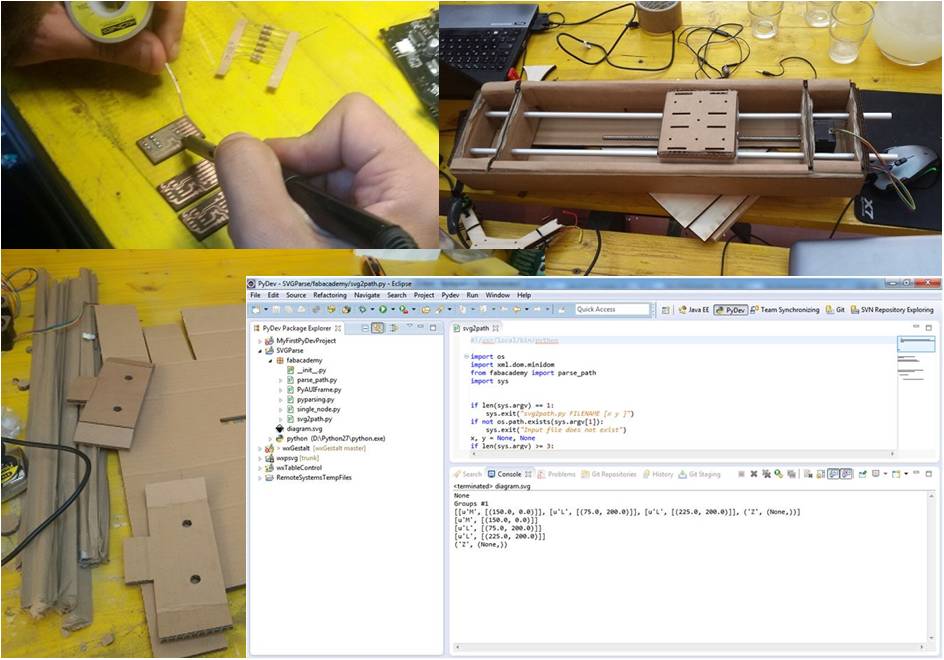
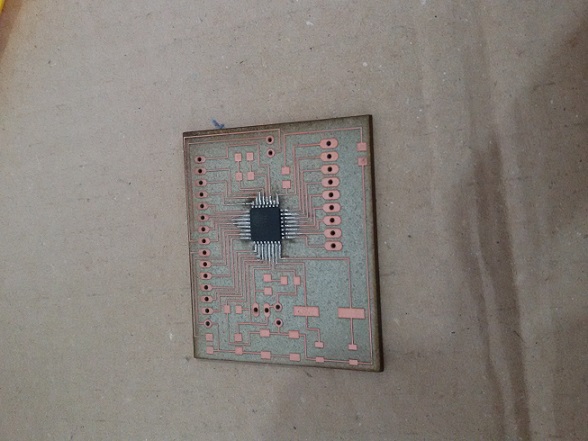
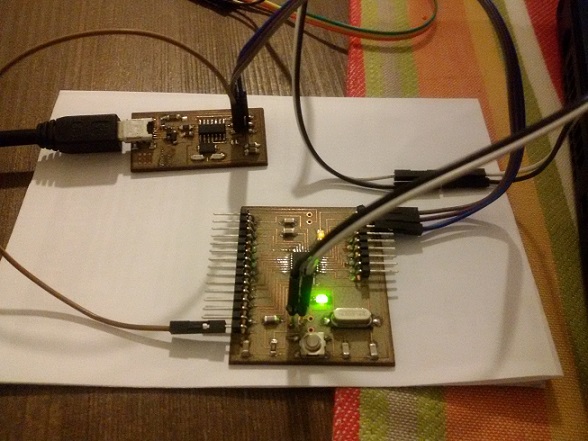
I discussed and exchanged experiences with other colleagues about how to solder the microcontroller and for this exercise I decided to use a technique I read: the pins are not soldered one by one but serially in a row! I was thinking "difficult" but I wanted to try in order to provide a different experience. The final result was successful:
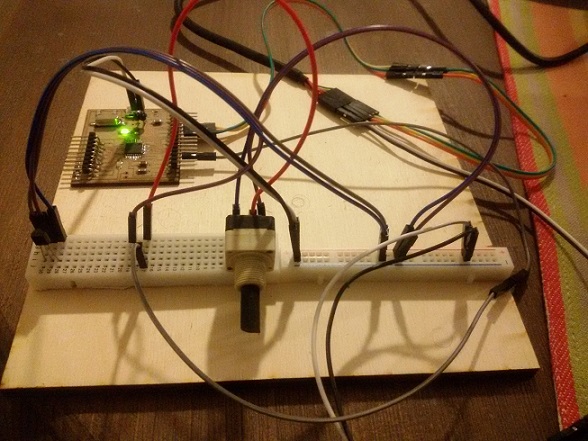
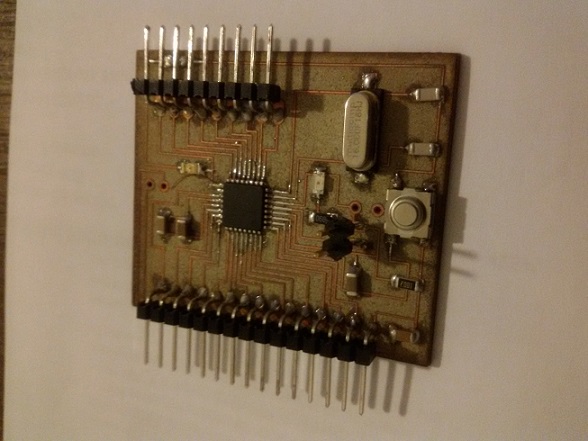
I continued to solder the other components until the final results:
It was the time to program in order to use satshakit as an Arduino, that is the next step was to upload Arduino bootloader.
As described in
To upload the bootloader I need a programmer, an Arduino:

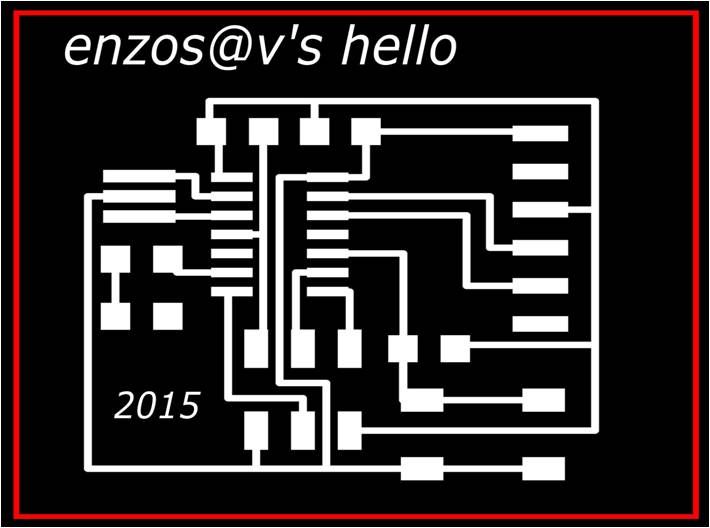
or myFabISP produced during week 4 assignement:

So I followed the steps:
- a)from Arduino IDE
- b)select USBtinyISP)
- c)select Arduino UNO as board
- d)click on tools->Burn Bootloader
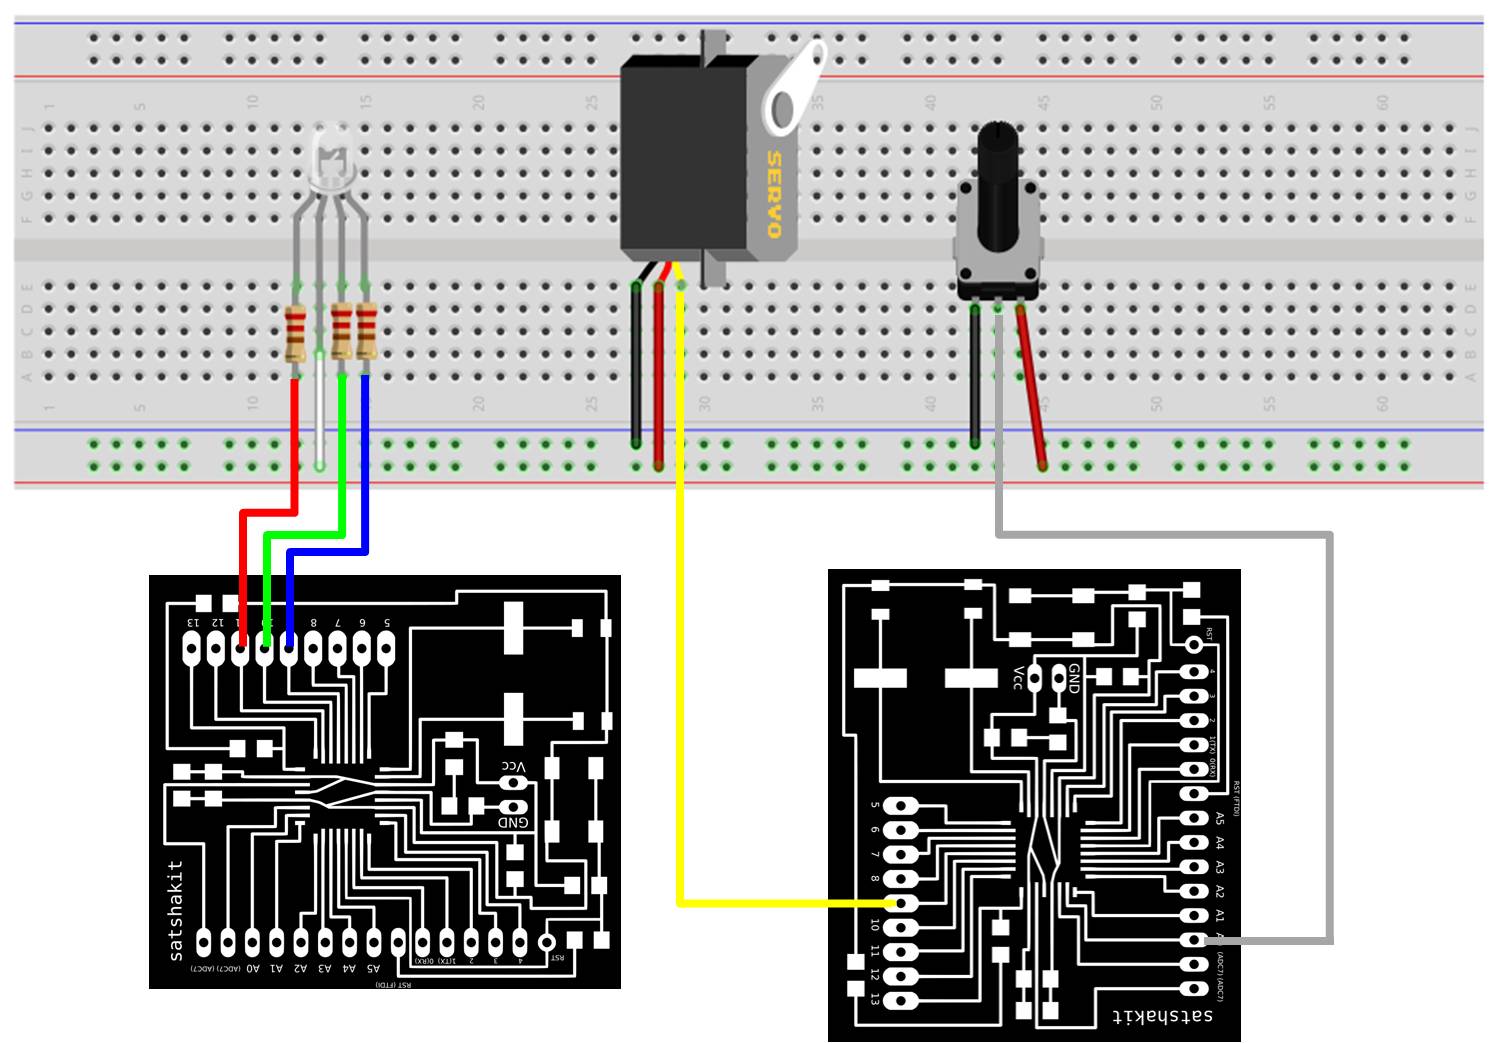
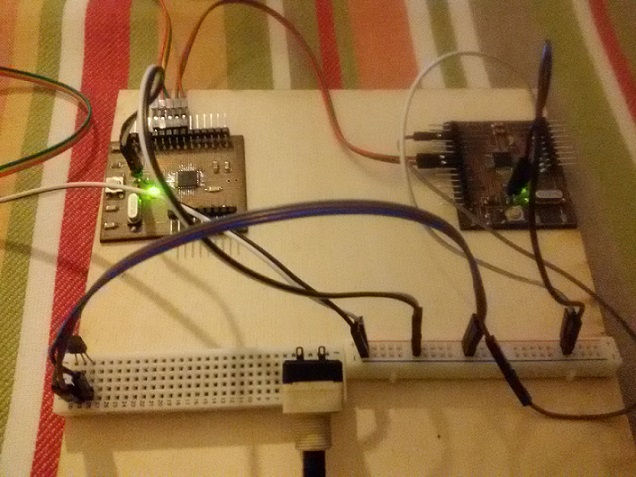
The upload went successfully and the board was recognized. It was time to test a first sketch for input exercise. For my exercises I used a potenziometer and an analog temperature sensor: tmp36
First of all I had to connect FTDI cable:

As for input sensors these can be distinguished in two categories: analog and digital . Typically, the analog sensor returns a value continuous in time , the digital provides a discrete numeric value. For the first try, read value from potentiometer, I considered as pin reading the AnalogIn 0 , consequently the voltage drop across the potentiometer is read from this pin and , digitized by a value which varies between 0 and 1023 .


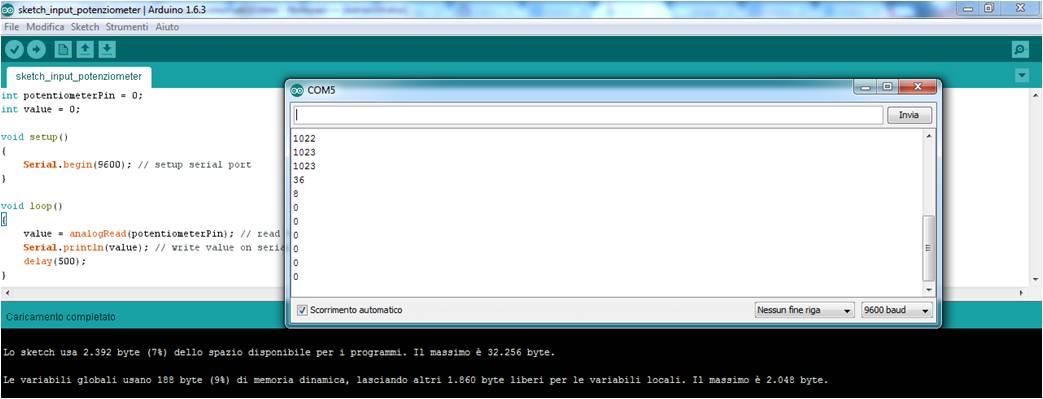
After this I uploaded the following sketch
Sketch_Input_Potenziometer
int potentiometerPin = 0;
int value = 0;

void setup()
{
    Serial.begin(9600); // setup serial port
}

void loop()
{
    value = analogRead(potentiometerPin); // read value from potenziometer
    Serial.println(value); // write value on serial output as debugging
    delay(500);
}
The sketch was uploaded successfully, and I tried to vary the potentiometer and read the data from Arduino IDE serial monitor
The next exercise was to read the temperature value from a analog sensor. To this end I used a TMP36 produced by Analog Device
the circuit is similar to the previous one for potentiometer, by connecting the board with TMP36 by A0 pin
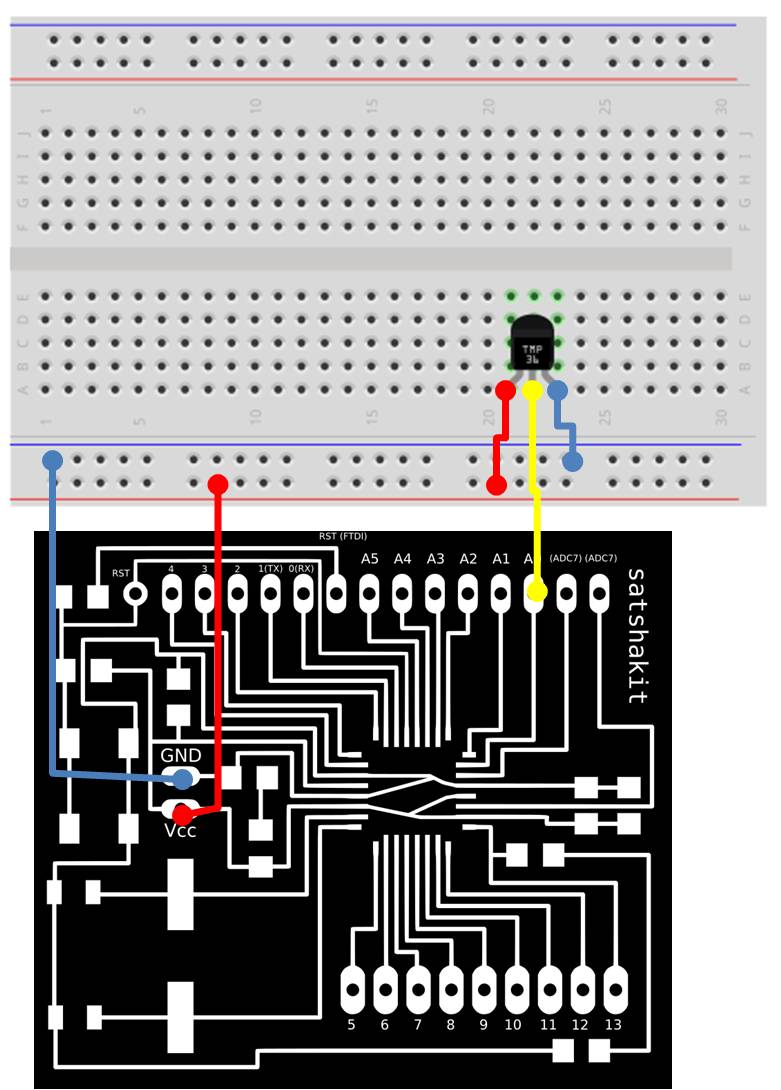
The TMP36 allows to acquire temperatures in the range between -40 ° C and + 125 ° C by returning output values of linear voltage between about 0.1Vdc and 1.7Vdc . A variation of degree produces a change in output voltage equal to 10mV ; at a temperature of 0 ° C the sensor provides a voltage of 500mV .
In order to read the temperature and provide a correct value( for example in C°) the measured value should be interpreted so as to obtain the value directly in ° C . To do this we need the datasheet of the component , namely the graphic conversion ° C / Vdc , represented in the following figure :

For an output voltage of 0.5Vdc the sensor detects the temperature of 0 ° C . So lower voltages 0.5Vdc indicate temperatures below zero . Furthermore a change of grade is reflected with a variation of voltage of 10mV . Thus if at pin A0 are present 510mV means that the sensor is detecting a temperature of 1 ° C ( 510mV - 500mV = 10 mV variation of 1 ° C ). Starting from this information the following sketch returns the value in ° C :
Sketch_Input_TMP36
int val_Adc = 0;
float temp = 0;

void setup()
{
  //init seriale
  Serial.begin(9600);
}

void loop()
{

  val_Adc = analogRead(0);
  temp = ((val_Adc * 0.00488) - 0.5) / 0.01;
  Serial.println(temp);
  delay(500);
}
The formula that converts the acquired value in Celsius degrees Celsius is the following
°C = ((valueADC * PrecisionADC) – vZero) / stepGradeV
where
° C = the temperature in Celsius degrees
valueADC = value of the conversion from analog to digital returned by analogRead
PrecisionADC = This value is obtained by dividing the reference voltage of the ADC ( default 5Vdc ) and the maximum return from the conversion (1024 ) . ( 5Vdc / 1,024 = 0.00488 )
vZero= indicates the output voltage from the sensor when it detects a temperature of 0 ° C
stepGradeV = indicates the voltage variation for each variation of a degree ( 12:01 = 10 mV )
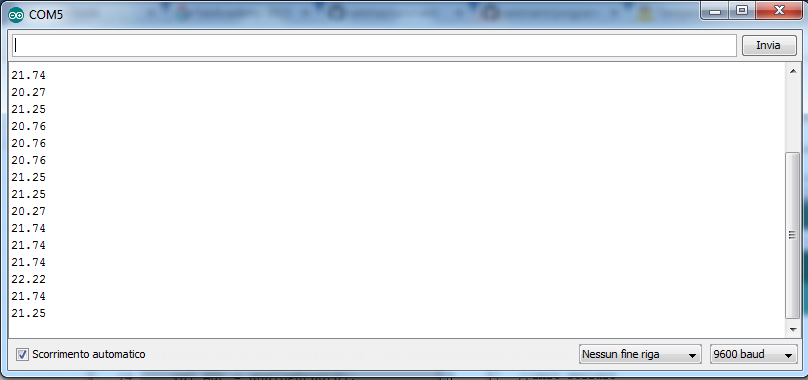
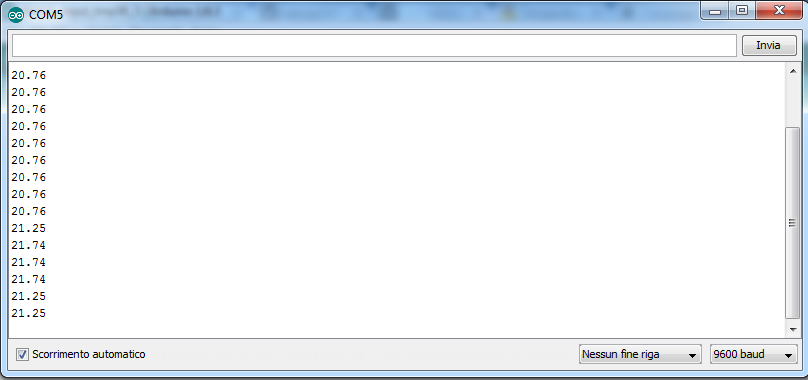
Checking the values from serial monitor for the previous sketch the temperature values are variable. Considering the accuracy of the sensor TMP36 +/- 2 ° C throughout the scale , however, the values differ from the real value . This ' error ' is dependent on several factors including lack of precision ADC , signal noise and approximate values in calculations .
A simple solution is to consider a value calculation taking into account the mean of a set of measures:
Sketch_Input_TMP36_v2
int val_Adc = 0;
float temp = 0;

void setup()
{

  Serial.begin(9600);
}

void loop()
{

  val_Adc = analogRead(0);


for(byte Ciclo = 0; Ciclo<100; Ciclo++)
{
val_Adc += analogRead(0);
delay(10);
}

val_Adc /= 100;

temp = ((val_Adc * 0.00488) - 0.5) / 0.01;

Serial.println(temp);

}