Input Devices קלט ממוחשב
on this week's assignment, i used Arduino, light sensor and firefly (grasshopper plugin)
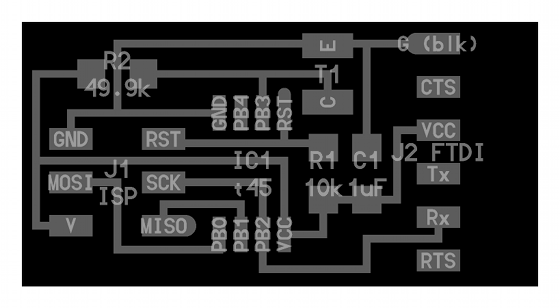
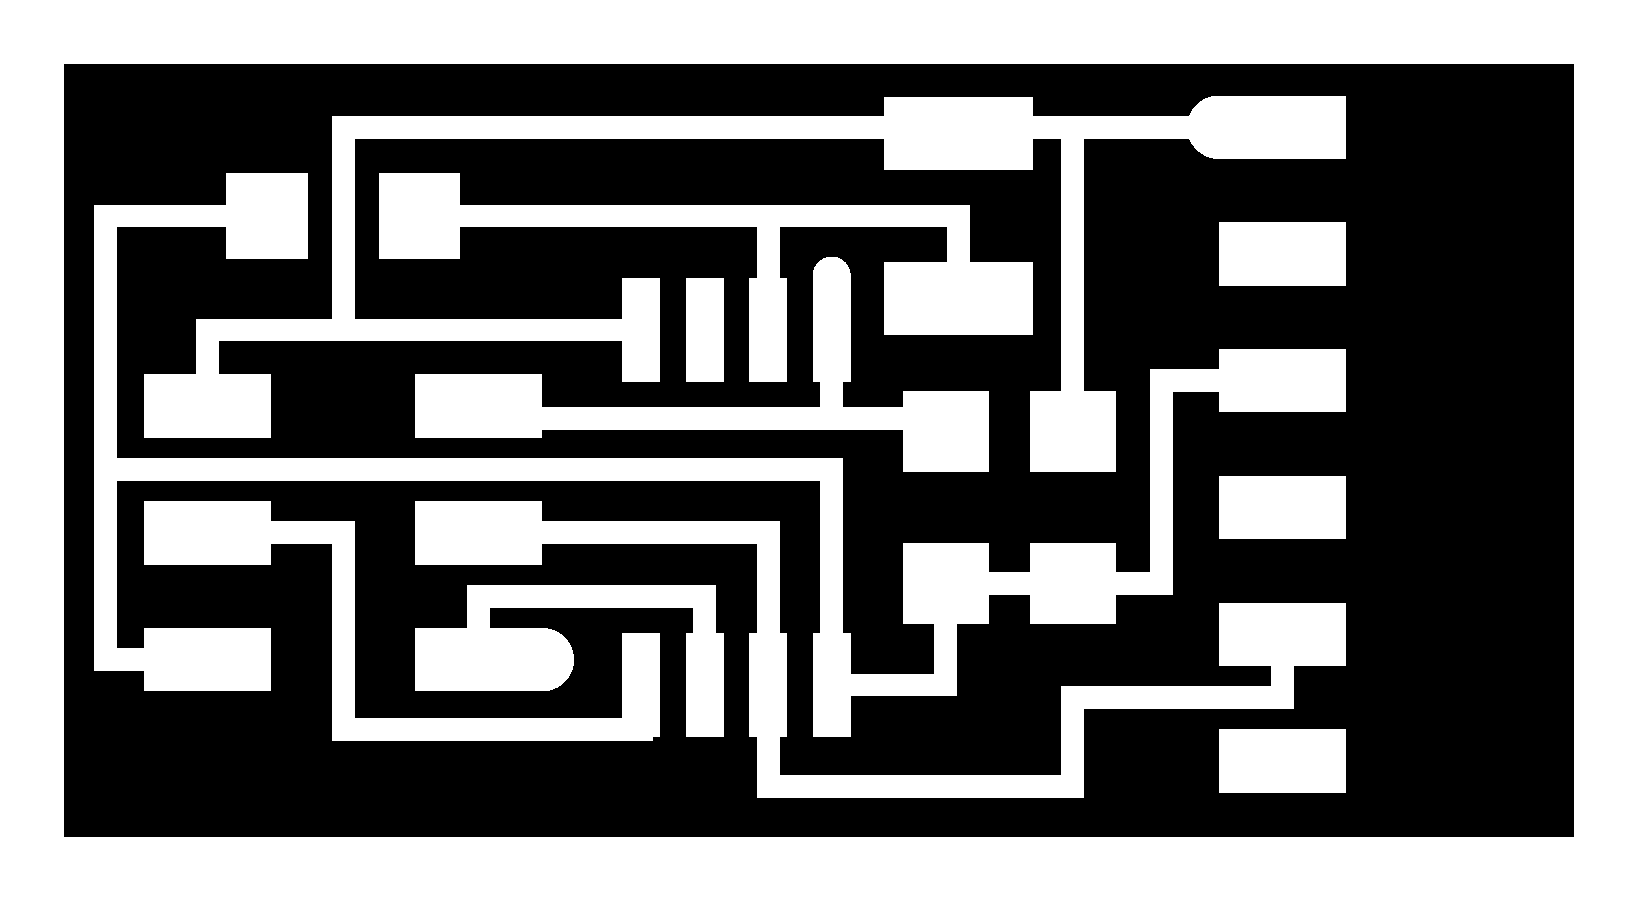
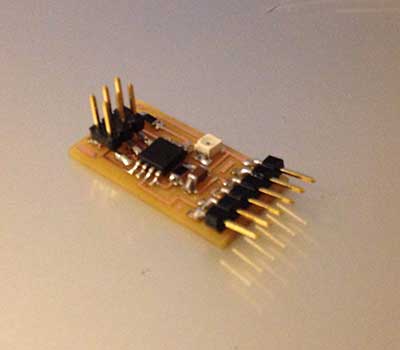
first, i milled the phototransistor sensor board (traces,interior) and solder the components.
I used this tutorial to solder and connect the components.
במשימה של השבוע, השתמשתי בארדואינו, מעגל עם חיישן תאורה ופיירפליי של גרסהופר.
תחילה כרסמתי מעגל בעל חיישן אור והשתמשתי ב טוטוריאל הזה כדי להלחים את הרכיביםץ
i connected the sensor to the arduino using bread board. and the arduino to the computer חיברתי את הארדואינו לסנסור בעזרת מטריצה ואת הארדואינו למחשב
now i need to program the arduino to connect with the sensor. i downloaded a knock sensor code from the arduino website. and uploaded it to the program. the next thing is to configure the board toArduino Uno כעת צריך לתכנת את הארדואינו שיתקשר עם הסנסור. הורדתי מהאתר של ארדואינו קוד לסנסור . כעת יש לתכנת את הארדואינו לארדואינו-אונו
Tools > Board > ArduinoUno
now set the serial port. to the COM arduino is connected to. כעת יש לתכנת את החיבור של הארדואינו למחשב, עפ"י המספר שהוא נותן.
Tools > Board > ArduinoUno
after that, you can change the data in the code. i changed the Delay time, to see how the sensor works כעת ניתן לשנות ערכים בקוד. אני שיניתי את זמן ההשהייה כדי לראות איך עובד הסנסור.
to burn the code on the arduino. you need to compile the code and then to upload it. כדי צרוב את הקוד על הארדואינו. צריך לקמפל את הקוד ואז להעלות אותו


now to connect with the firefly, you need to upload another code, this code comes with the plugin "firefly firmata". then again complie and upload. open it threw sketchbook. כעת כדי לתקשר עם הפייר פליי, יש להעלות קוד שמגיע כשמורישים את פלאג-אין ולאחר מכן שוב לקמפל ולהעלות
i started with the first example of firefly, just to check the connection is working. the example is very elaborate, and easy to understand. first you need to change the "COM" number, to the one you burned on the arduino התחלתי עם דוגמא שמגיעה עם הפיירפליית הדוגמא מאוד ברורה ומפורטת וקלה לשימוש. תחילה יש לשנות את החיבור למספר אותו צרבנו על הארדואינו
now press on the toggle component so it change to "true", and then press the 1ms component to start the timer in order to get data from the sensor. עכשיו יש ללחוץ על הכפתור כדי להתחיל לקבל את המידע מהחיישן
the data from the sensor changes the circles radius in the example, as you can see in the movie i uploaded. המידע מהחיישן משנה את הרדיוס של העיגולים בדוגמא. כמו שניתן לראות בסרט
i tried playing a little bit with the grasshopper and the sensor, i changes the extrusion hight by the domain from the sensors data. ניסיתי לשחק מעט עם הגרסהופר. שיניתי את הגובה של האקסטרוזיה ביחס למידע שמתקבל מהחיישן.