Caution! José Figueroa at FabAcademy 2013
Weekly report of my work at FabLab Barcelona
We have arrived to the 3D printing week. It is a fascinating technology, that gets a lot of media attention nowadays. Neil discussed the different technologies available to 3D print, what materials are used, and the software involved in 3D printing. We also worked on 3D scanning, which seems easy when you talk about it, but not easy to do. There are many options of ways to do a 3D scan, and they all need their interesting tweaking in order to work well. Throughout the rest of the post I'll talk about my experiences with 3D scanning and printing.
First task I worked on was 3D scanning. John Rees, a fellow classmate, found an interesting scanning technique, in which a laser line is projected into an object in a dark environment. Many pictures have to be taken and then analyzed. The program is supposed to analyze pixel by pixel the intensity of the laser, and according to that intensity, asign depth values for those pixels. Looks quite nice in the webpage, so John and I created a really quick prototype, which consists of an Arduino-controlled stepper motor and a rotating acrylic platform on the motor shaft. A camera takes a picture every time the motor rotates, responding to a signal sent by an infrared LED controlled by the Arduino. John found the Arduino sketch to get the right frequency for the infrared light to control his Nikon camera. I found out how to control the stepper motor using a Easy Driver given to us at the FabLab. We were also given a laser-levelling tool to project a laser line on the objects. The laser, according to documentation, needs to be at 15 degrees from the camera line of sight, we measured that using a printed protractor.
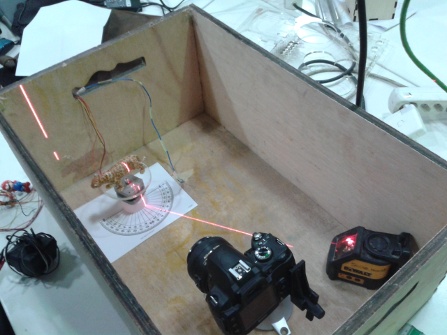
But that did not work. The images were either too dark or the laser not strong enough, so scripts we used only gave an output of pitch-dark images. That was a whole day worth of trial and error.
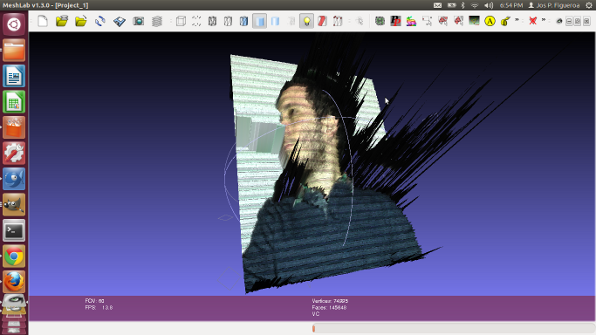
The next thing I tried was structured lighting. Another fellow classmate, Francisco Sánchez wanted to try it out, so we set out to download the files available at the website. We used a projector to project three different patterns of lines of light. We took a picture of each one of us with each of the different patterns.
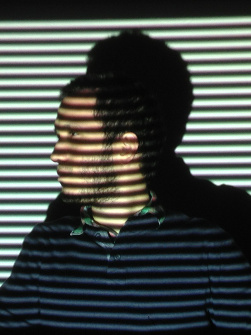
Afterwards we executed the Processing program available at the website, and got some really interesting results.
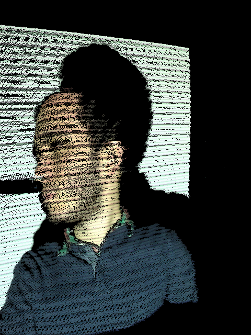
I can export the generated file into Meshlab. I will work on it some other time.
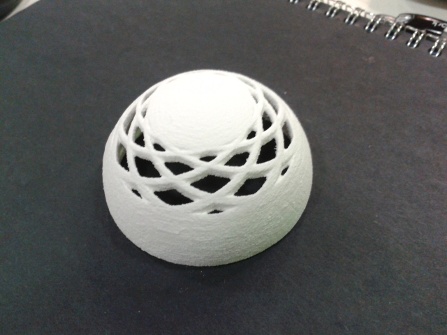
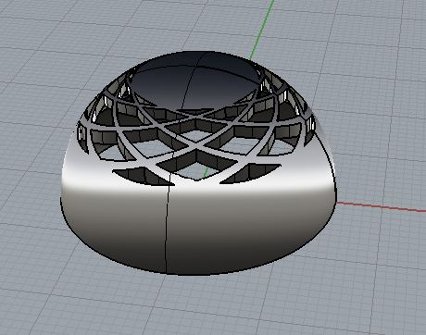
I did not have time to edit the mesh file, so I went on to work on 3D printing. I quickly edited a design made
in the second week, scaled it a little bit and sent it to print to the Z Corp. 3D printer available here. This
printer works by "printing" a glue into a powder, layer by layer. In our case, we have 1124 different layers
of powder being printed.
There were many students wanting to print something, so we had to send many different designs to print at the same time, so I will have to wait until tomorrow to see my design done.
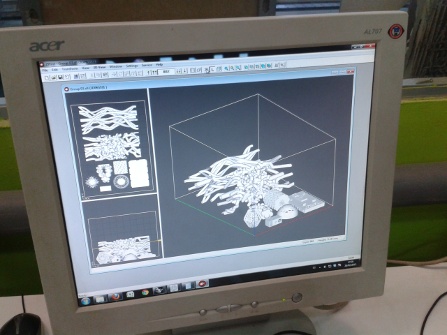
UPDATE! Next day I could see my creation come to life. Had to clean the excess powder and apply glue. Looks great!