Vacuum form machine
Simple and effective
- Notes on mercurial
Notes on webdesign
Notes on digital drawing
Notes on 2D cutting
Notes on electronics production
Notes on 3D scanning and printing
Notes on electronics design
Notes on molding and casting
Notes on embedded programming
Notes on computer controlled cutting
Notes on input devices
Notes on composites
Notes on interface programming
Notes on output devices
Notes on networking and communications
Notes on machine design
Notes on the final project
Final Presentation Notes on Invention, Intellectual property and Business model
Notes on Computer Controlled Machining
Due to stolen laptop no screenshots! :(
Make something big! Finally. I had been looking forward to this assignement. And man does it suck all kinds of balls that I did not have a computer at the time. Thankfully our lab manager had the perfect solution. I could use one of their computers and instead of working on a project all by myself we put our heads together and tackled the project as a team. But making sure every member worked on every aspect of the process.
- Design
- Prototype
- Redesign
- Master
- Construction
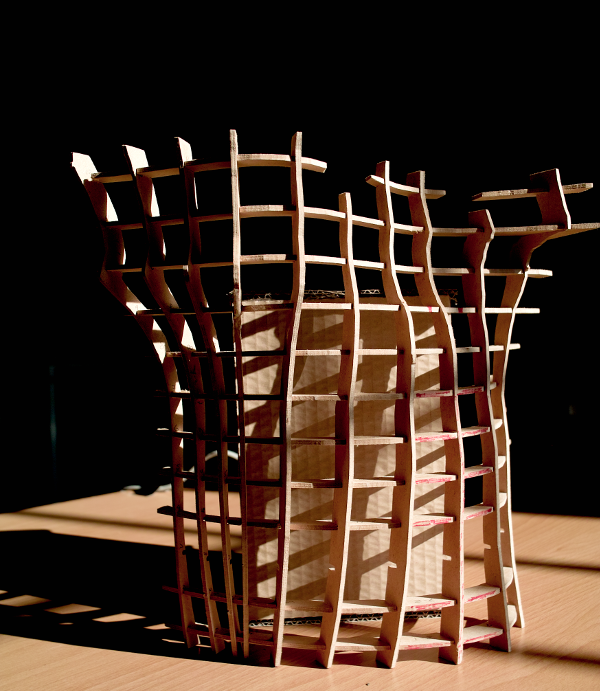
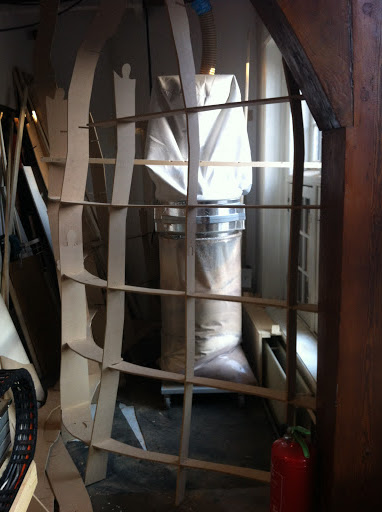
Alex, our lab manager/owner, wanted a enclosure around the shopbots vaccuum unit and filter. Instead of just a regular box enclosure I dubbed a 'Dixi' (a brand of portable toiet) he wanted to have a real artsy enclosure. So I decided on an organic natural flowing structure. Immediatly I took measurements of the machine and of the available space. Our lab being in one of the oldest buildings of the city (over 500 years old) didn't help. Nothing is straight and most of the structral properties you can't touch (or drill). That meant our structure needed to be able to support it's own weight. After a hundred or so sketches from everyone we ended up with a floor/ceiling plan.
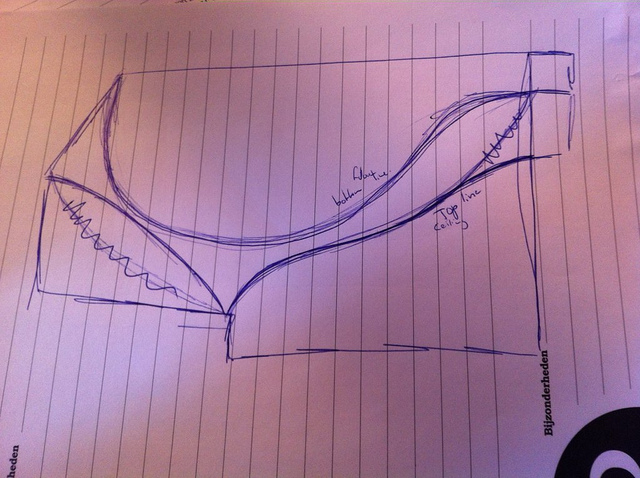
You are looking at the outline of the space, the upperline is the line the structure will start from the floor. The lower line will be the ceiling
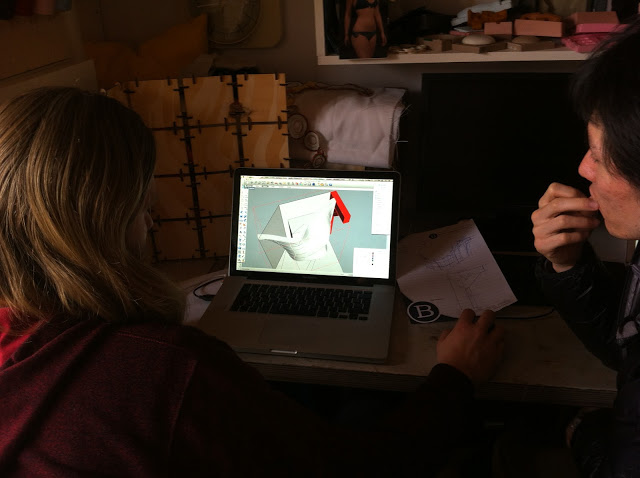
After I modeled the space in Sketchup I used the photo to draw our lines in Rhino. With those lines in it was time to freeform the organic flow.
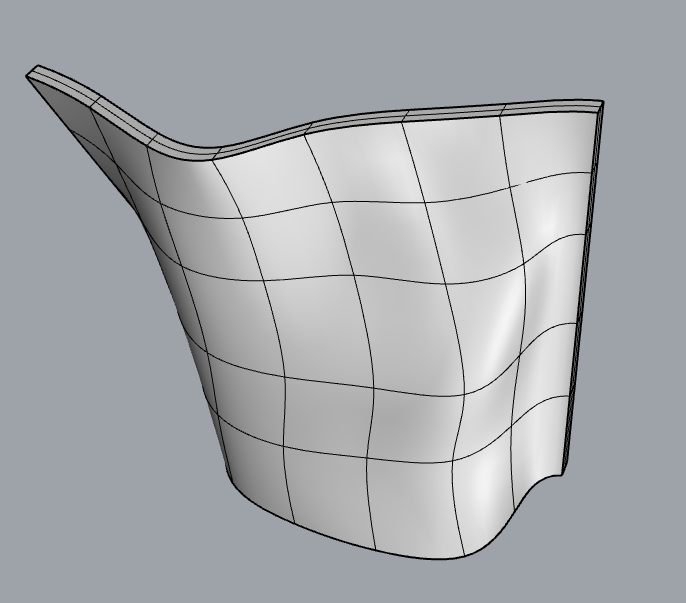
Our first wall
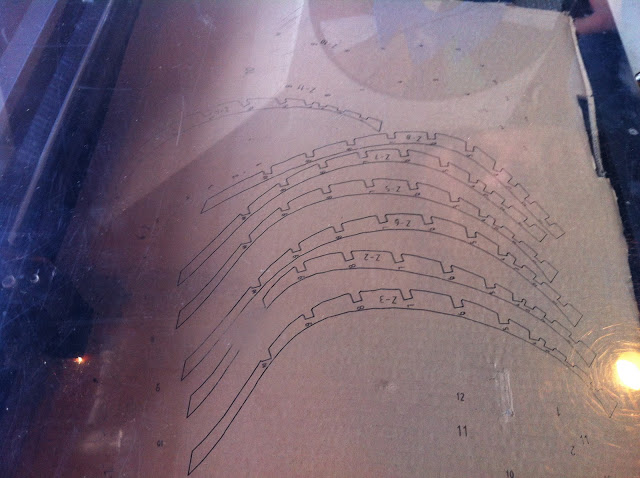
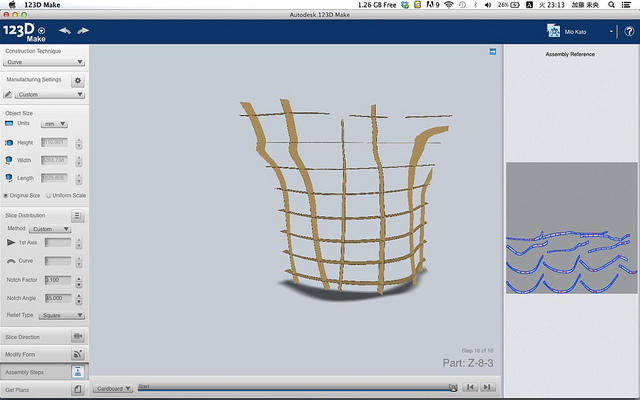
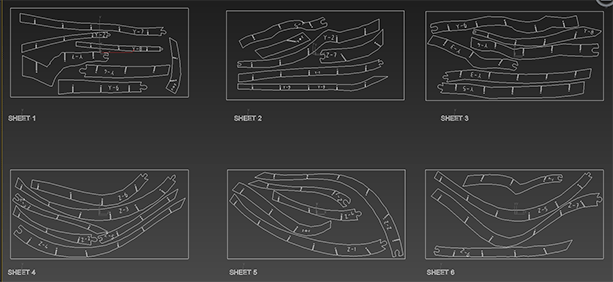
We uploaded the file from Rhino to 123D Make. 123D Make is an easy to use application that can automatically generate a sliced up version of a 3D model, complete with slits to fit the entire structure together. I scaled down the entire thing so I could quickly create the prototype and moved on over to the laser cutter to cut our first prototype out of cardboard.

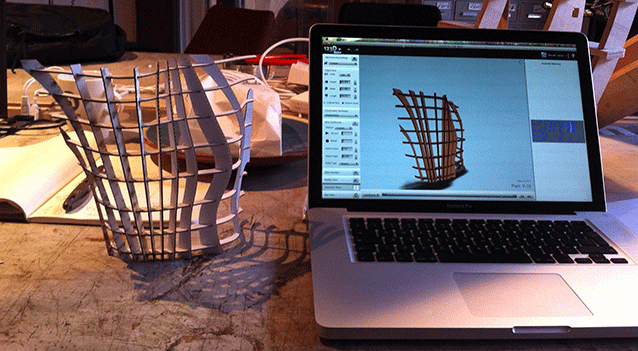
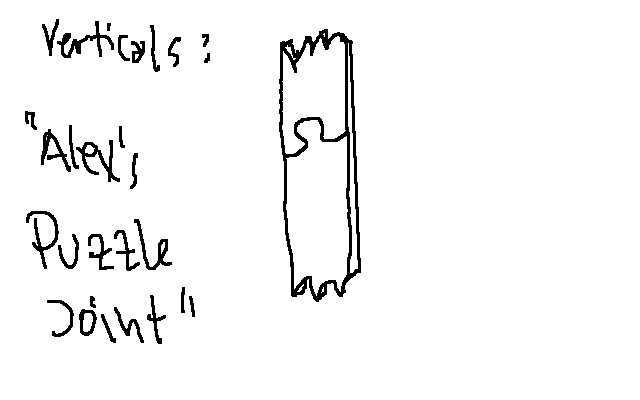
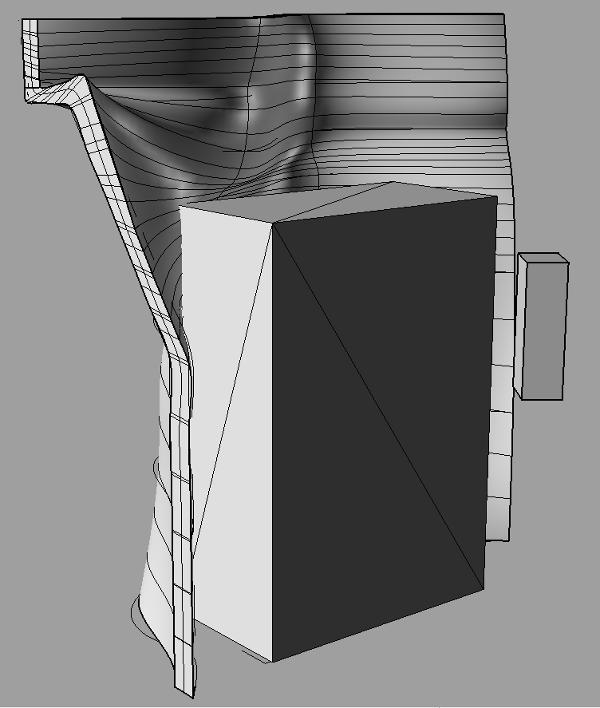
Everything fit together pretty well and I set out to redesign a couple of things. I modeled a box to represent the shopvac and I added the beams. I also tackled the problem of our pieces being too large for the shopbot by using Alex's "patented puzzle joint". After a redesign we again refitted our model in 123dmake and sliced it up. This time we used the showbot to cut the pieces out of a sheet of mdf.

While milling the sheet of mdf I soon learned that 5 screws could not hold the sheet down. I had to hold the sheet and the pieces while everything was milled. Otherwise pieces went flying. Though it looked a little dangerous I really didn't feel like it. No guts no glory right?
One last redesign and we were ready to go. We had calculated 20 sheets of mdf... That number needed to come down. Less ribs in the model and a better layout worked real magic. I ended up milling 6 sheets of 9mm mdf. Michael get's credit as the layout master while we all took turns loading the files into the shopbot. Zeroing the axis and start milling. During milling I removed the finished pieces and had to sand the sides because they were a little rough.

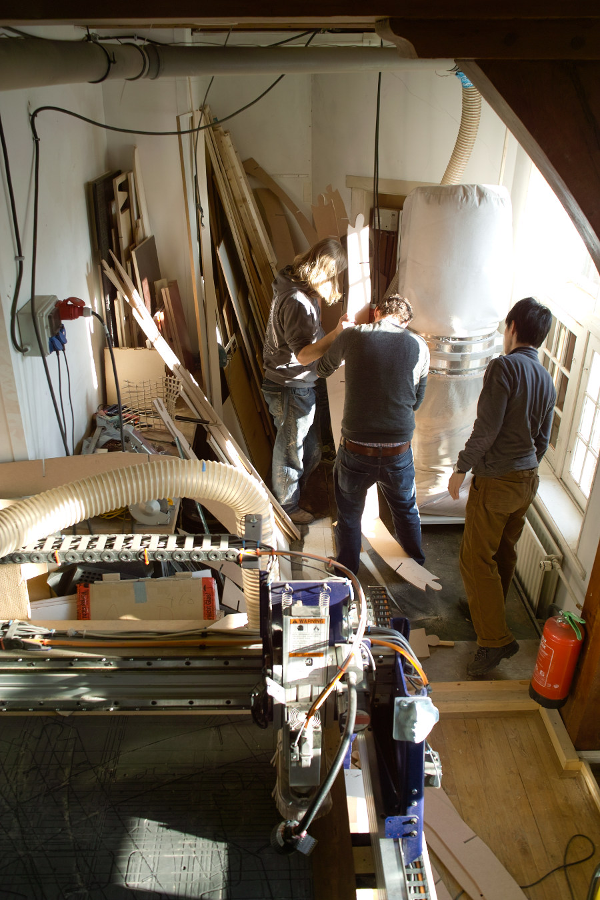
We soon began pieces everything together. The puzzle joints wouldn't fit so we had to sand and file all the holes. The same for all the slits. This helped a lot in construction. During construction some of the pieces wouldn't slide together. This is due to the software recognizing the end location of the rib but not construction. So some angles looked impossible to slide together. Using too much force the 9mm mdf would just break. This happend to us a couple of times...
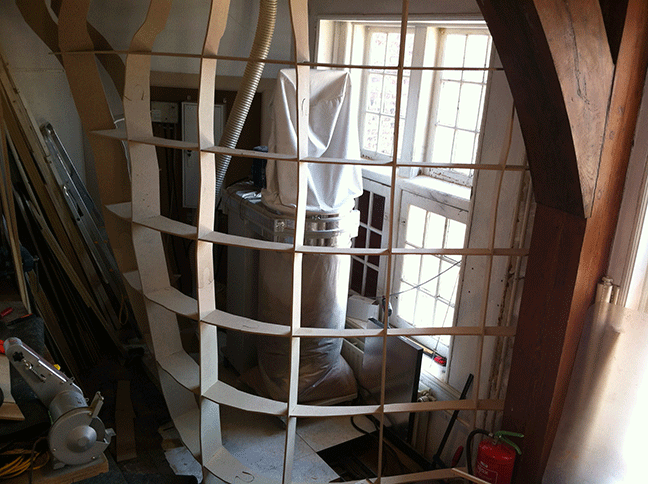
We ended up with an awesome looking wall. We will be finishing this in the next couple of weeks. Fixing it a door, and sealing it in plastics.
top