Laser cutting
We have two laser-cutter at the lab, a big one and a smaller one. The big one is named Jade, it can cut through lots of different material onto a 600x900mm large area. The other one is named Agathe and can cut part on a 500x300mm large area.
Both can cut through wood, plastics, papers. And also engrave different material such as paint, wood, leather…
A laser cutter work by focusing light on a tiny area to make it melt or burn locally. It can achieve this using a CO2 laser. Just as the vinyl cutter, you can cut the outline of a logo. But laser can also be used to engrave pattern. In other words, you can cut the outline and use engraving for the infill. This can be used to add depth or just color variation to a project. You can also use engraving to add text on your productions.
Characterization
Fireman
First, I had to deal with fire !
Well, Whatever parameters I was using the laser cutter always wanted to burn things to hell. I tryed for hours to figure out what’s mistake I was doing… I remember that We moved the laser cutter from a building to another a few weeks ago. So I checked the whole installation…
- Particle filter was OK
- Water cooling was OK
- Lens was OK
- Mirrors was OK
- Air compressor was’nt !
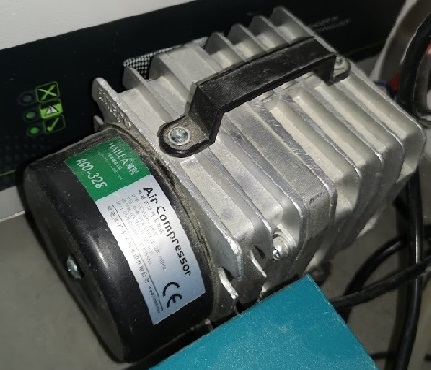
There is a small air compressor behind the laser cutter which wasn’t neither powered nor pluged into the Air duct. This problem cause flame because no air was comming frome the laser head. Immediatly after fixing that, The laser cutter works way better !
Some of the following pictures may have suffered the flame problem, but it is fixed now.
Focus lenght
To characterize the laser cutter, I first decided to check the focus. The focus is the ideal distance between the final converging lens and the material. Too high or too low and the laser isn’t focused enough and the less energy you have on the material. The more energy you concentrate on the material, the more easily it will burn.
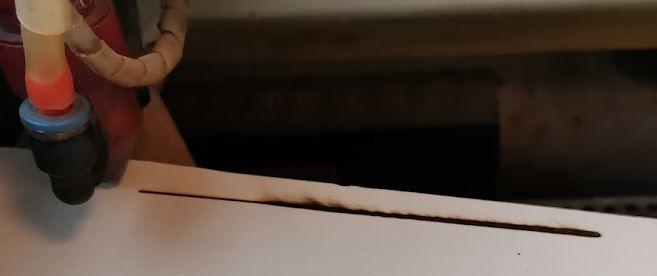
To set the focus, I place a piece of wood diagonaly into the laser cutter. Then I placed the laser head on the most left, just a few millimeters above the material. This way :
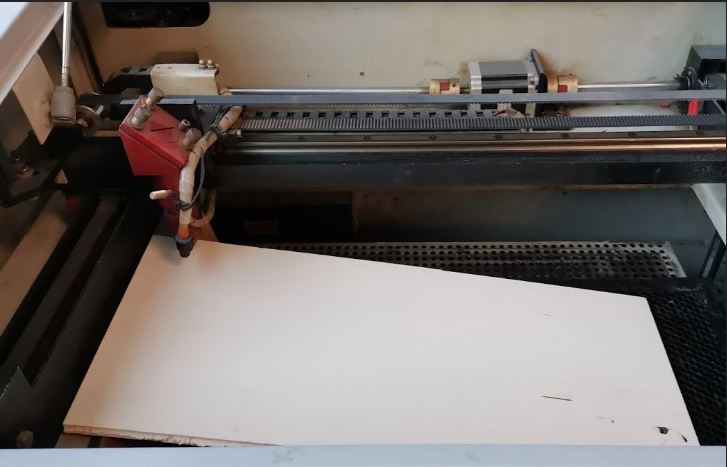
Then I draw a straight line on my laser control software (Lasercut) and started the machine. Ass you can see, the line is cleaner on the left, and very large on the left.
I mesured the distance between the material and the laser head using a caliper. The ideal focus distance is 8mm (+-1mm without big changes)
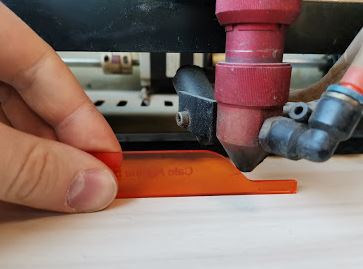
I drew a little mark on our focus calibration piece to remember the ideal focus :
Kerf calculation
To calculate the kerf, I look for inspiration on the net. I found this tutorial which was very useful. To caculate the kerf, the guy cut a series of tangent rectangle. Then he push all the rectangle to the left and mesure the remaining gap.
Here is what I did.
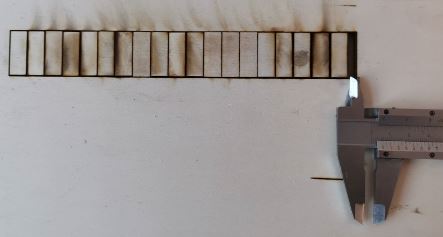
Finally the gap was about 5mm wide.
Power/Speed characterization
The laser cutter has to be tune according to the material. Settings are different for wood and plastics for instance. Or even, it also depends on the operation you’re using. Engraving needs low power and high speed when cutting require low speed and lots of power. In the fablab we mostly use two materials, plywood and plexiglas (PMMA). The Agathe laser can only handle part that are 5mm thick or less. It cannot go through thicker material due to its 40 Watt of power. Still using this machine is pretty awesome.
To get the right parameters, we usally cut a test file. I designed one especially for that purpose. It is basically a grid of squares. On the horizontal axis I raise the power from a square to another. On the vertical axis, I raise the speed. You can easily find what settings combination works the best after all.
I tried to cut one of my parametric piece just after calculating the kerf. As expected it didn’t go through the material.
To characterize power and speed of the laser, I created a bunch of squares on Inkscape. Using the laser control software I set a different parameter for each square. The top left square was set to power 40% and speed 5 mm/sec. Then I decreased the power used on adjacent square. Finally, on the plate, power decrease on the horizontal axis and speed increase with the vertical axis :
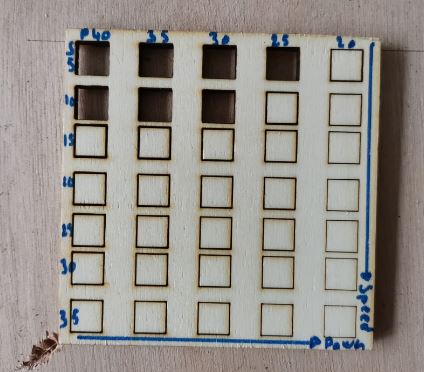
It seems that for plywood, the value are : - Speed : 5 - 10% - Power : 30 - 40% - Air : Always needed
Parametric kit
Fusion 360
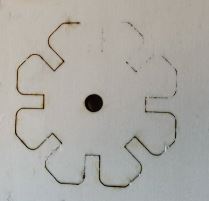
For my parametric design, I started by creating a parametric polygon using fusion. I drew this sketch on Fusion 360 :
This sketch is very simple, I used the circular pattern function of fusion 360 to copy un side of my polygon. In the parameters I created a new input named edgeCount. The problem I had was to find a formula to calculate the length of the edge. Which is of course dependent of the edgeCount. I used this formula to do so :
Where
- n : Edge count
- c : edge length
I was using a radius instead of the edge length to draw my polygon, so I had to adapt the formula. By reversing the formula I got :
Where
- n : Edge count
- c : edge length
- r : polygon radius
Here is my final sketch
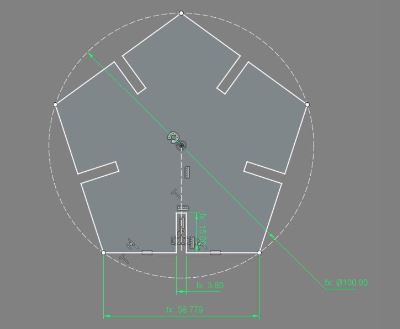
The formula I used for the apothem :

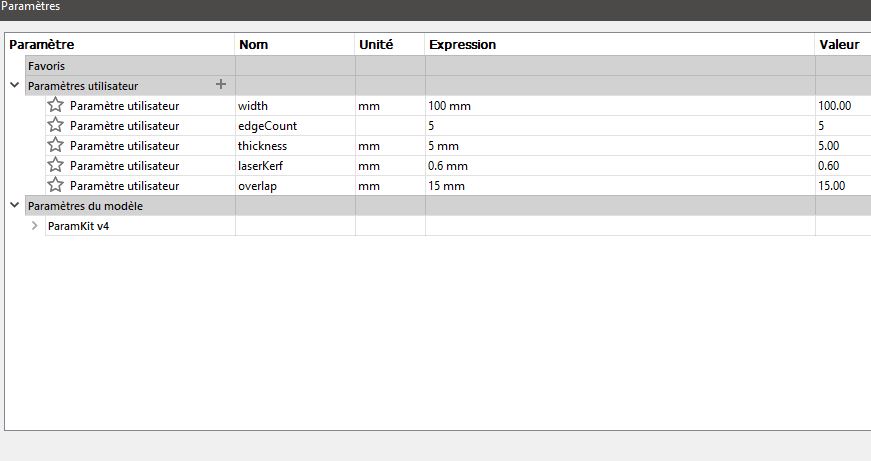
The set of parameters I used:
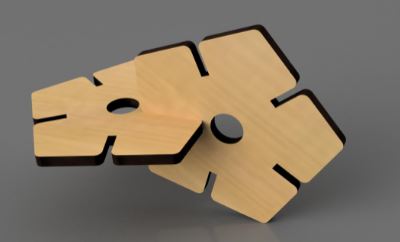
The part is mostly finished. I just extrude it and add some filet to the edge. Here is the final render :
I measure the wood planks thickness and the kerf and updated my parameters. I used this formula to calculate the gap where part attaches together :
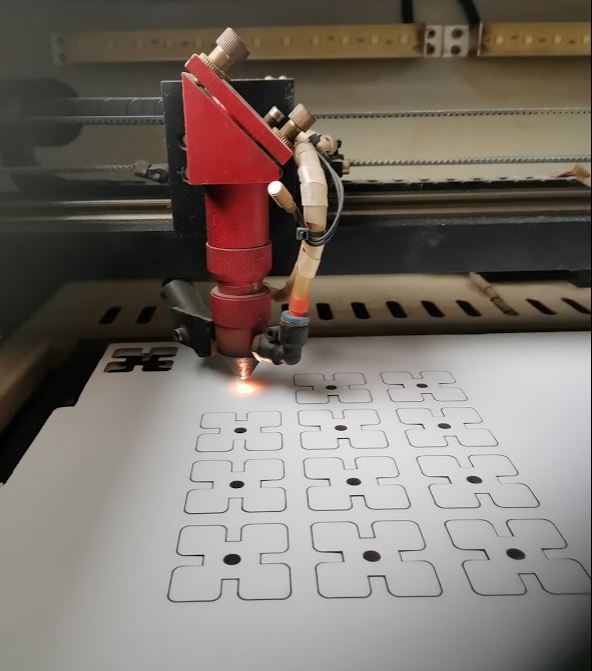
Laser cut
I then exported the sketch as a DXF. I convert it using Inkscape to DXF AutoCAD R14 format to be able ton open the file with our laser control software. Then I cut a bunch of them :
I decided to try another material which I never experienced, foamboard. Foamboard is a type of cardboard composed of to sheets of paper separated by plastic foam.
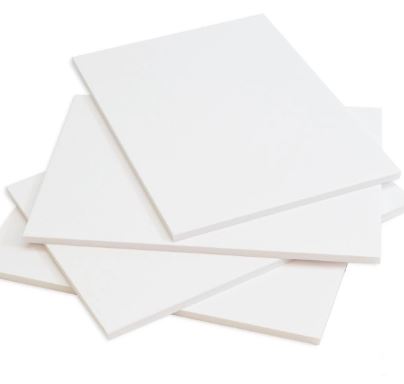
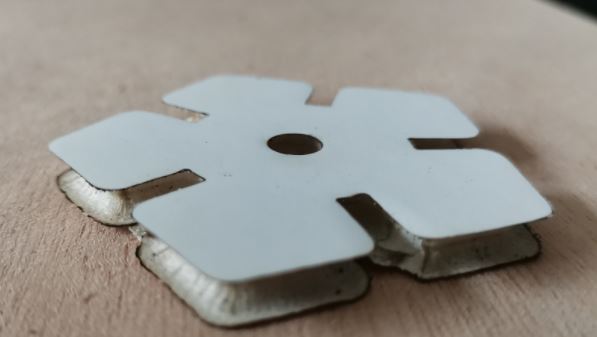
This material is very light but strong enough th fly a little plane for example. I had to find the correct power and speed parameters to cut it. Unfortunately my past methods didn’t work. This material is very easy to cut. But there are two problems. Firstly, it burns easily. (Keep water near you) But the foam is also melting away. Giving this strange cut :

After lots a test using simple square, I have a better idea whether it will burn into fire. I can more sophisticated parts. I tested some of my design files using different settings to see what works the best.
I used Lasercut to prepare the files. Unfortunately I didn’t take any screenshot but Lasercut is very similar to Lightburn. So here is an illustration with lightBurn…
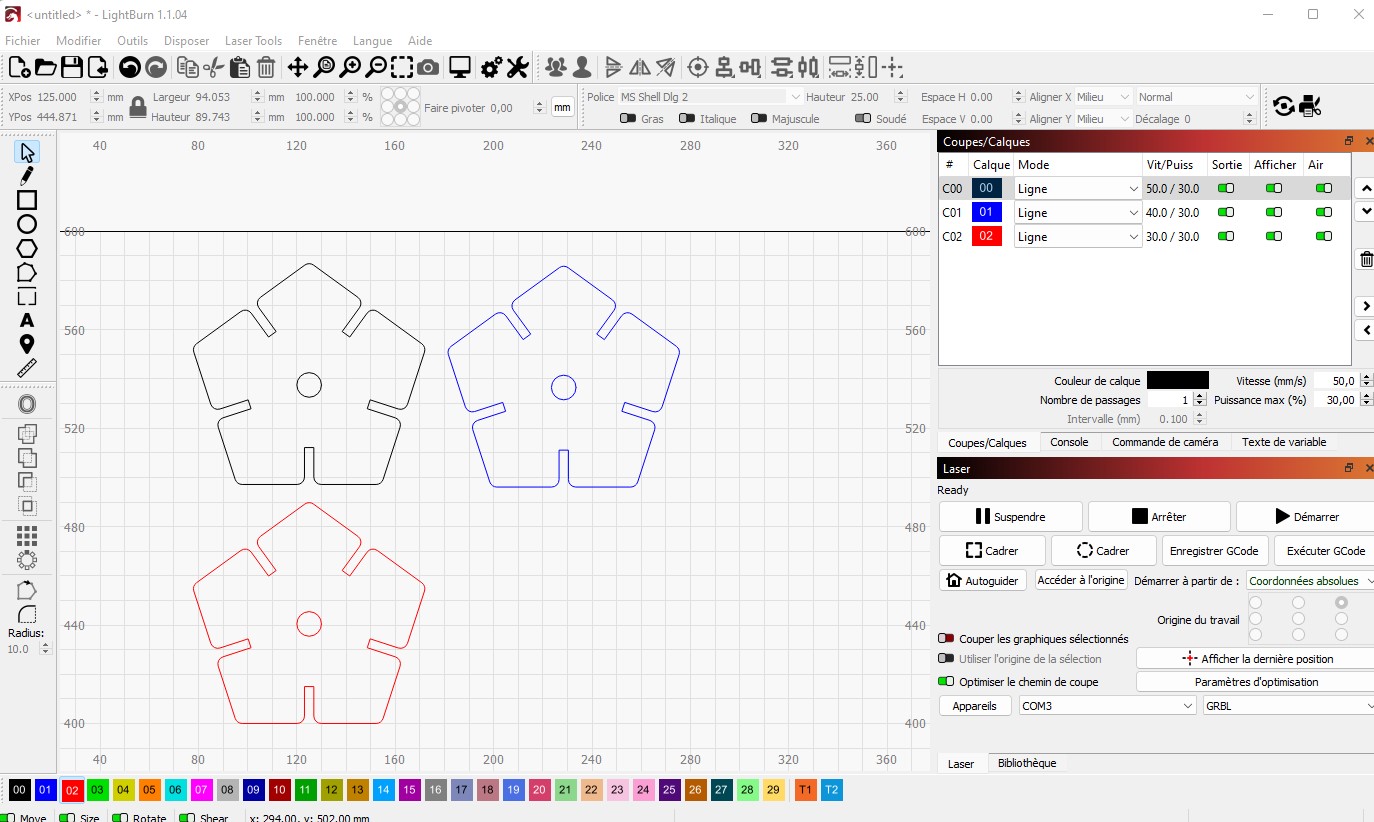
In lasercut, you can import multiple DXF file and give them a color. Each color is associated with a setting. Part with the same color share the same settings. I assigned a different color to each part to test one setting per part. On the top right menu, I tune the settings for each color. And upload into the laser cutter.
After a few tries I successfully cut the material without melting too much foam. I used these parameters :
- Speed 65 mm/s,
- Power 50%,
- Corner power 25%
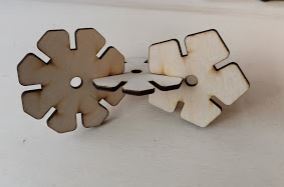
Here is what I got :
The parameters were very good, the board wasn’t burning at all, The foam doesn’t smell very good, but our filter does a very good job managing the smoke and particles. (It smells like burn paper)
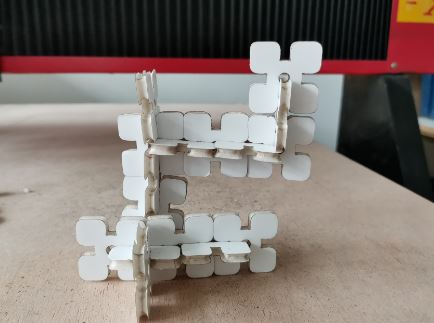
I decided to cut a bunch of them :
Here is how it looks when assembled :
Downloads
Here is my files : - Fusion project : Link
- Triangle DXF : Link
- Square DXF : Link
- Pentagone DXF : Link
- Hexagone DXF : Link
- Heptagone DXF : Link
- Octogone DXF : Link