
This work is licensed under a Creative Commons Attribution-NonCommercial-ShareAlike 4.0 International License
Weeks 9-10: Mechanical Design, Machine Design
Apr 5, 2021Summary
Assignment 1 - Mechanical Design
- Group assignment:
- Design a machine that includes mechanism + actuation + automation ✔
- Build the mechanical parts and operate it manually ✔
- Document the group project ✔
- Individual assignment:
- Document your individual contribution ✔
Assignment 2 - Machine Design
- Group assignment:
- Actuate and automate your machine ✔
- Document the group project ✔
- Individual assignment:
- Document your individual contribution ✔
Resources Used
- Software: SOLIDWORKS
- Hardware: FDM 3D Printer (Sindoh 3DWOX1)
Skills Gained
- Extension spring and compression spring design
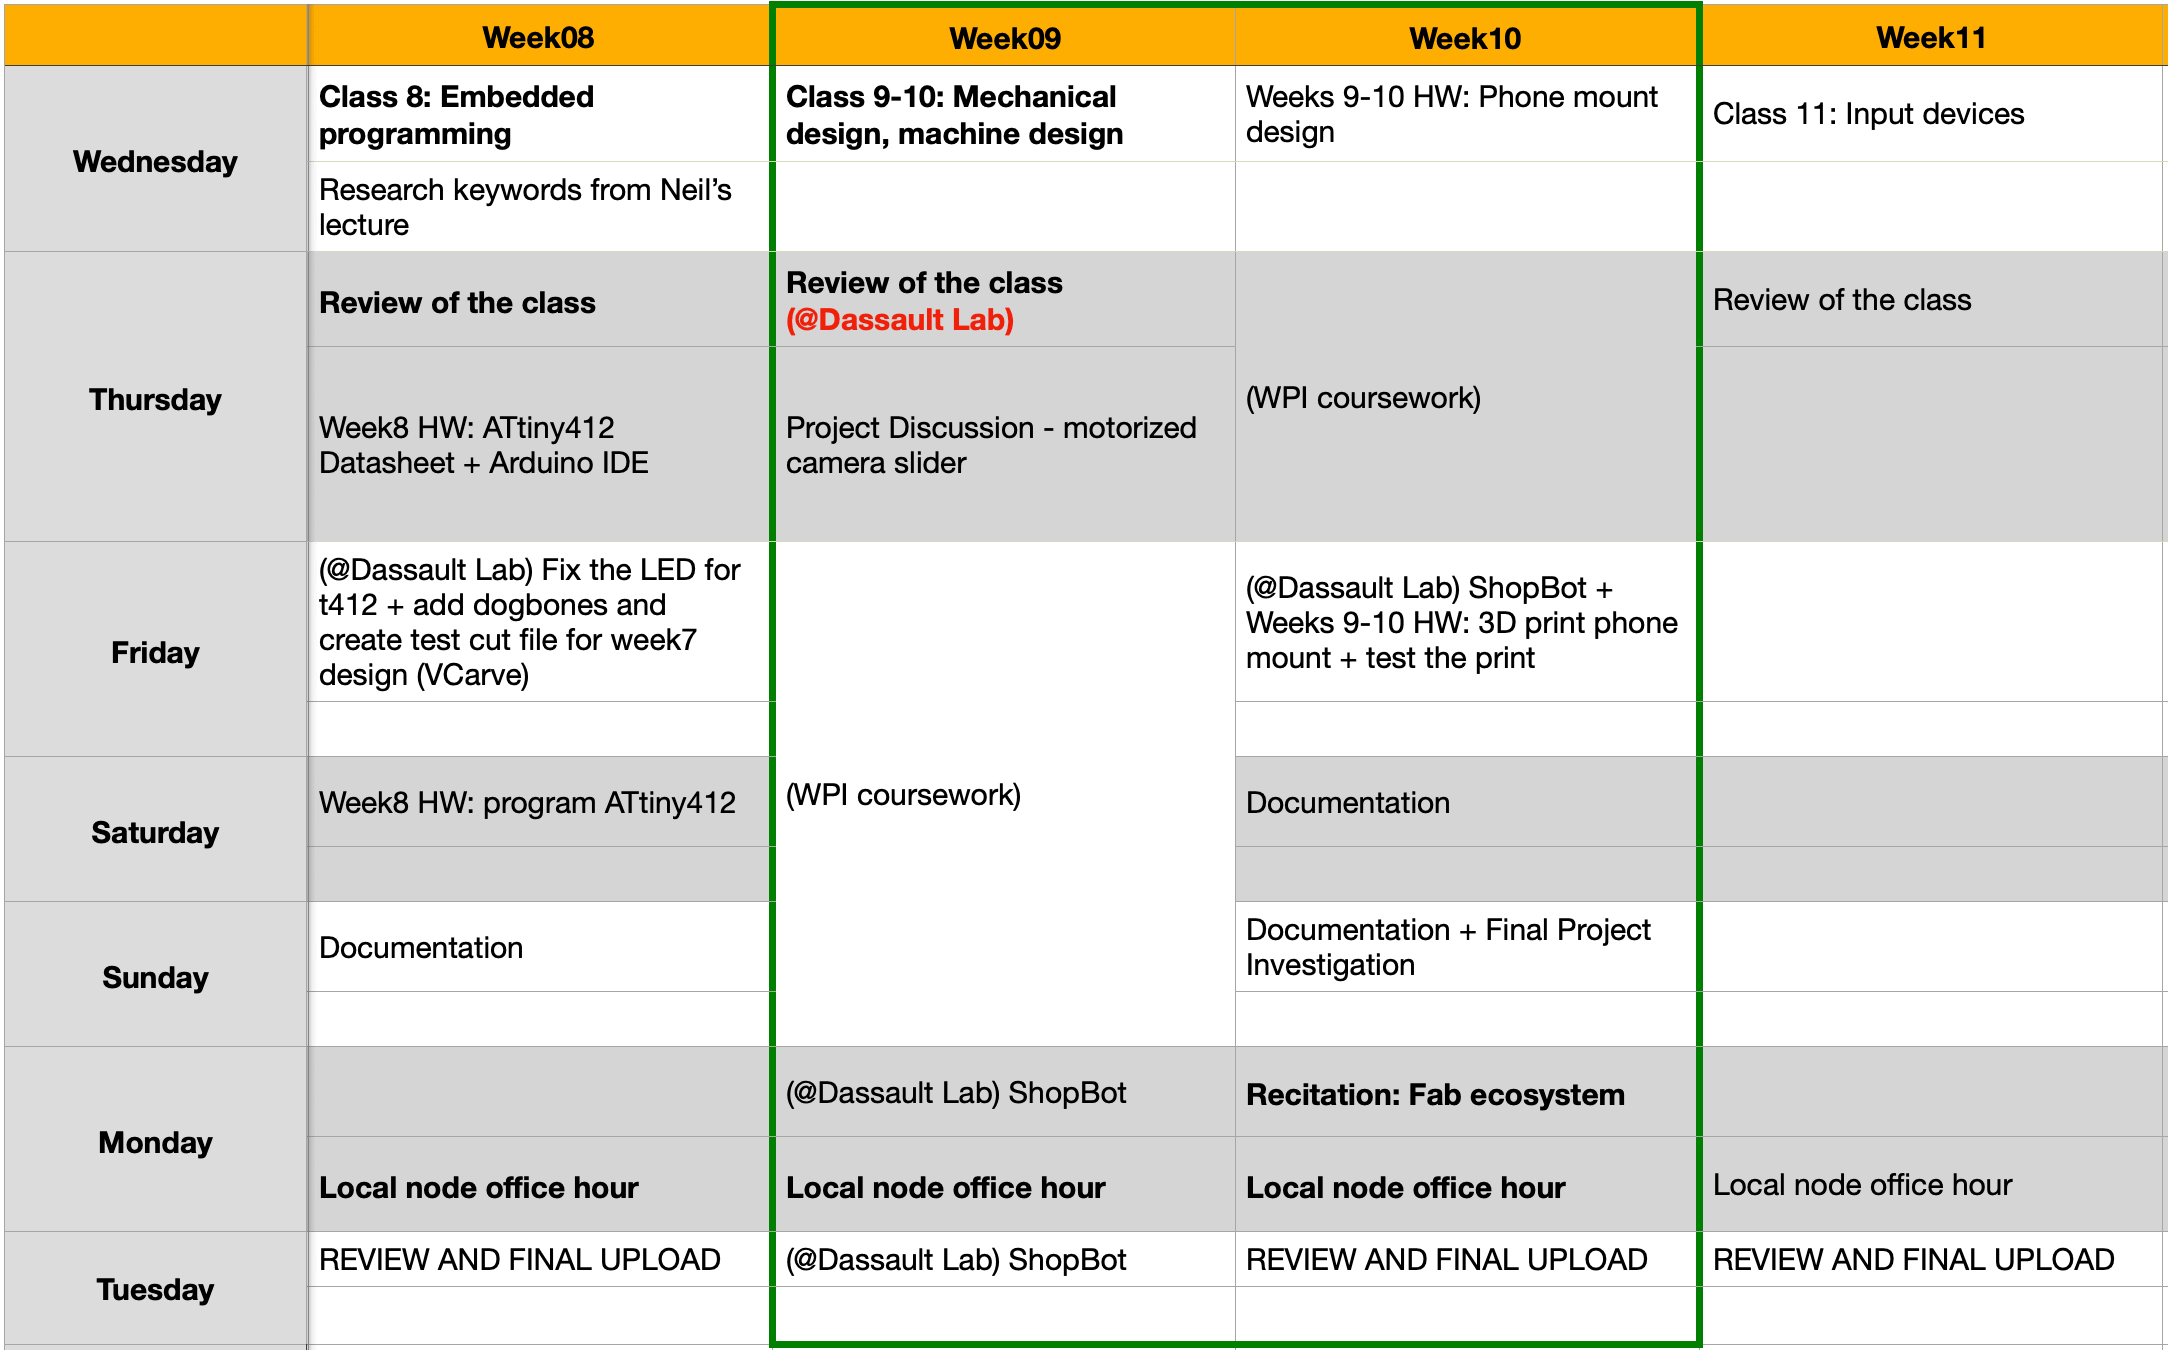
My Weekly Schedule
Project Motivation and Planning
In the past two weeks, as a group, we worked on designing a machine that includes mechanism, actuation, and automation features. After some brainstorming and ideas evaluation, we decided that we liked to work on a motorized camera slider because it could be helpful to filming our final projects.
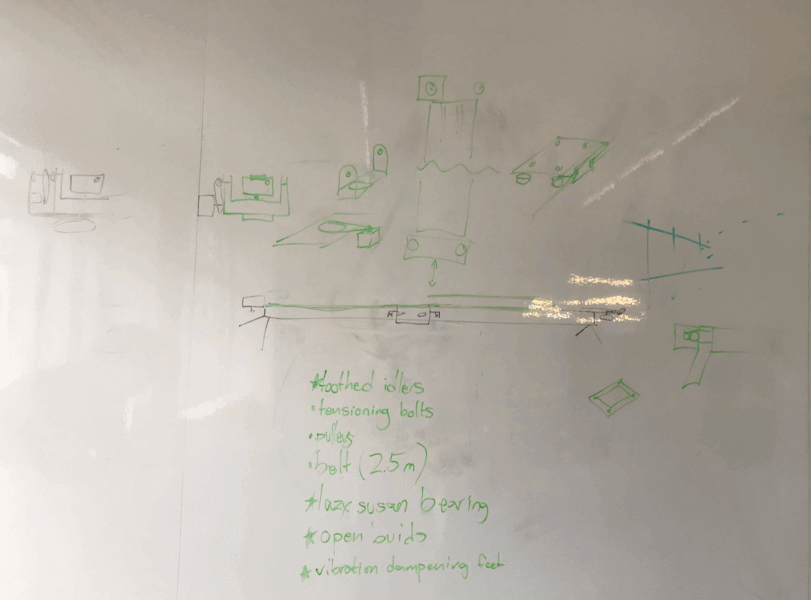
There were some past motorized camera slider projects that people made for this week, we also looked up online and liked the concept of a camera slider with a pan and tilt head. The machine we would make would be able to stop or move to a specific spot as we would like. We sketched out what the machine would look like, focusing on the gantry machine parts:
Each of us was able to work on a subsystem: Griffin on the linear motion platform, Nick on the pan/tilt head, Jonathan on the programming of the slider, and me on the camera/phone mount. The full group documentation can be retrieved from this machine design group assignment page, what follows is my specific contribution to the group project.
Research
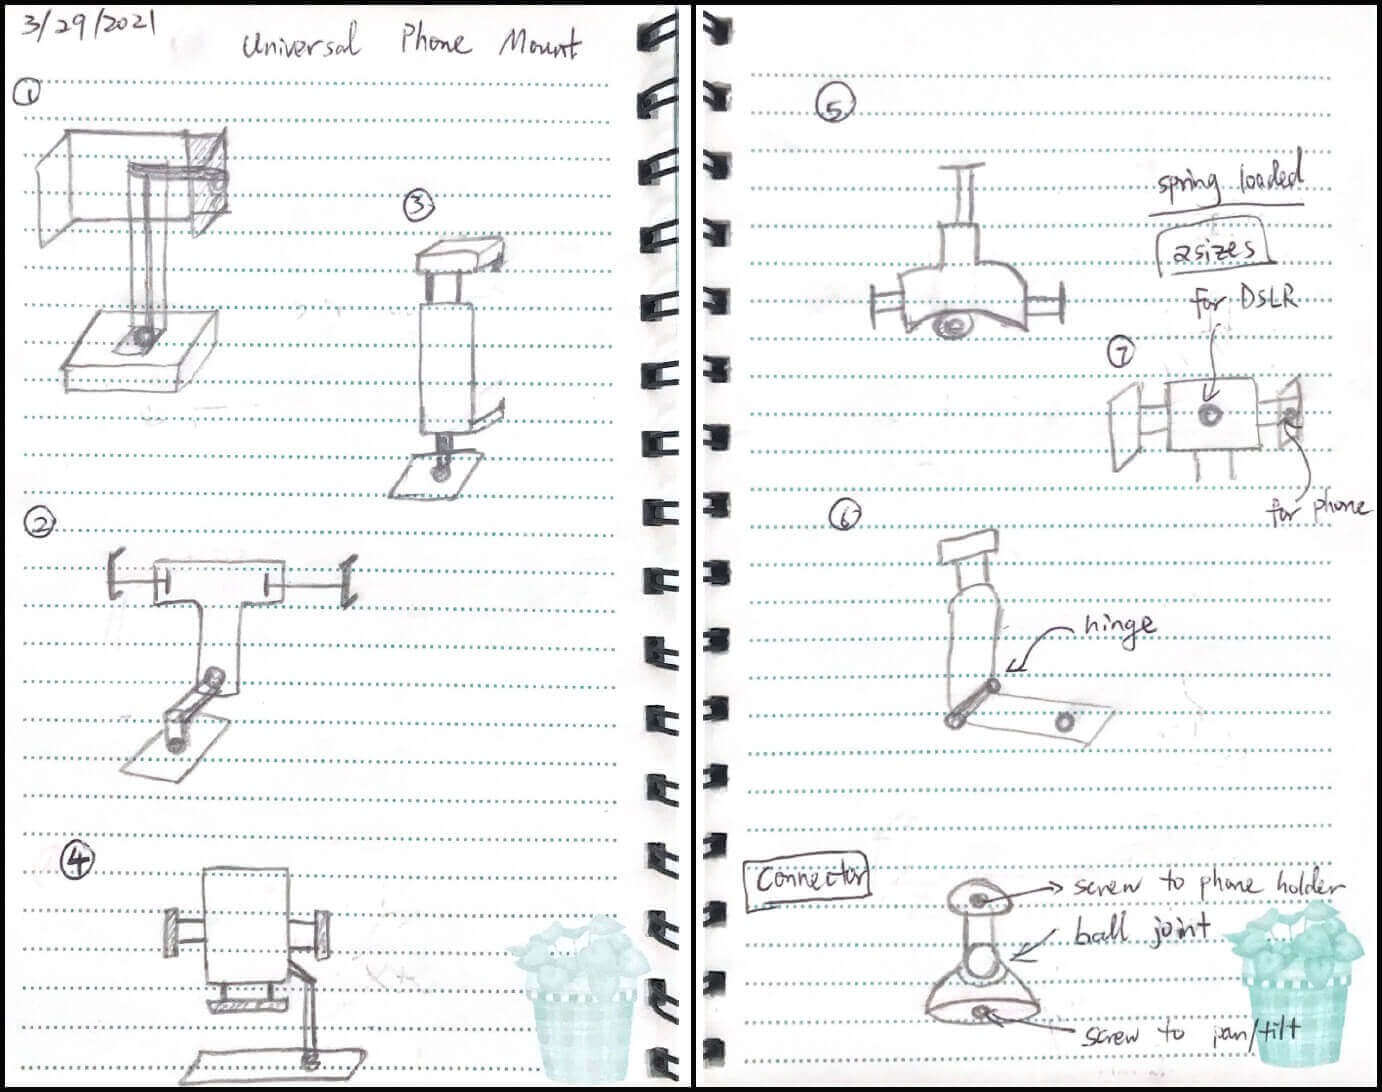
I took on the challenge of designing the phone mount. I began by looking at ideas in places such as Thingiverse, Etsy, and amazon.com. I could laser cut or 3D print the phone mount. Although laser cutting allowed for faster turn around time, I knew that it would be more flexible to go for the 3D printing route as I was looking to design a universal phone mount. After I knew what process I would go for, it was time to design. Initally, I wanted to include a ball and socket to the design but I quickly recalled that I didn't need to since our machine would have the pan/tilt head.
I saw that Nick has included a 1/4"-20 screw on one of the tilt parts, so I decided to use it as the connector to the phone mount.
I then moved on to the design phase. First, I measured the width of my phone with a six-inch dial caliper.

Interation 1: Extension Spring Phone Mount
I found that I could approach the universal phone mount design in several ways: screw down, gear driven, and spring loaded. I liked the idea of having a spring loaded phone mount because it allowed for a simpler setup. Although I knew that the lab may have some spare springs, I decided to order a spring assortment from amazon.com just in case, and also to see what options I have.
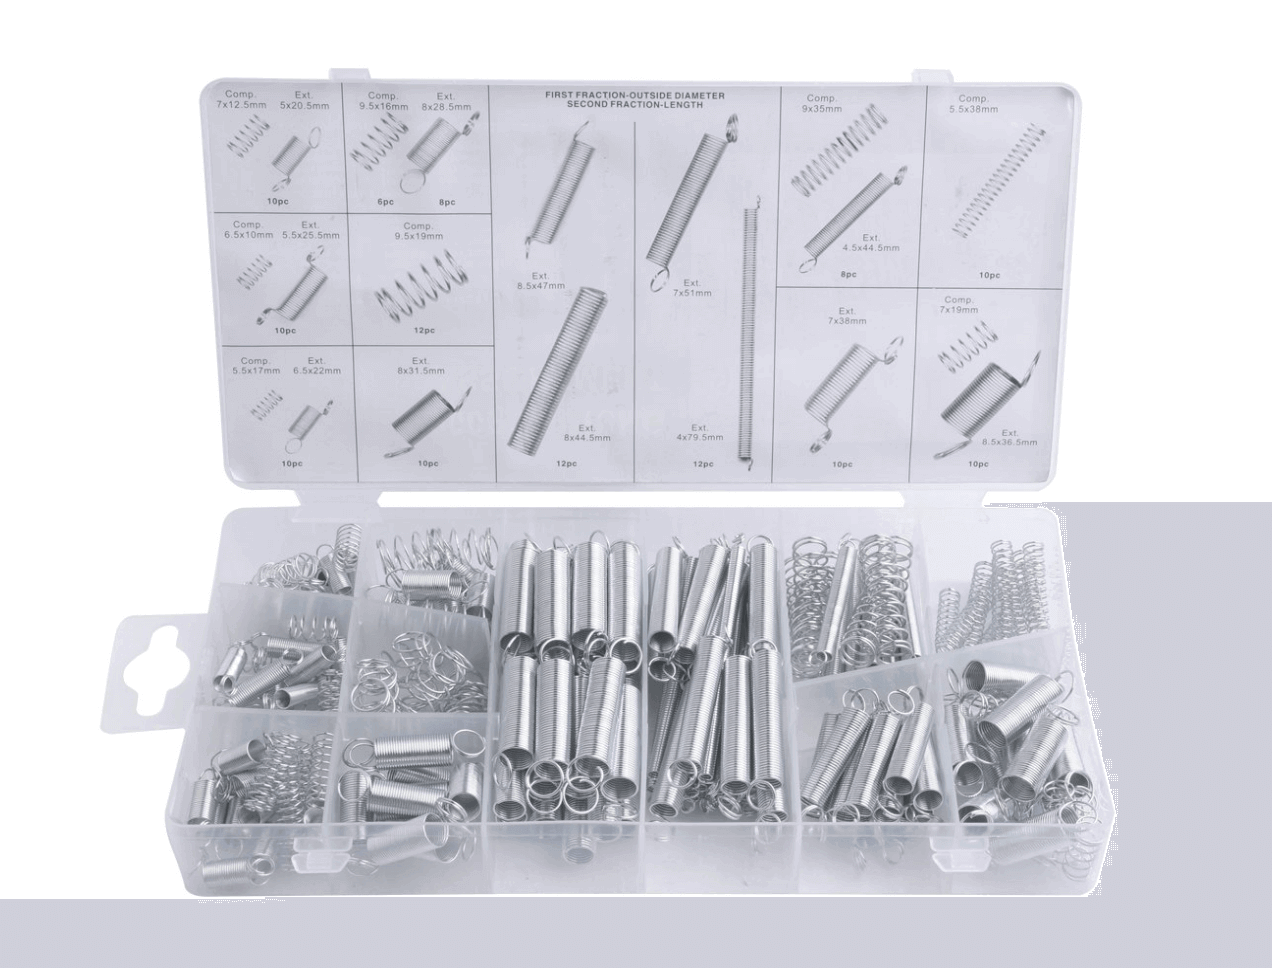
Once I received my order, I tested each type of the spring by pulling or pressing them to have a feeling of how much force needed to be generated to ensure the spring extend/compress properly. As I wanted to design a mount that would hold a phone with 75 mm - 90 mm in width, I found that the 7.93x31.7 extension spring work the best in my case.
First fraction is the outside diameter (mm), second fraction is the length.
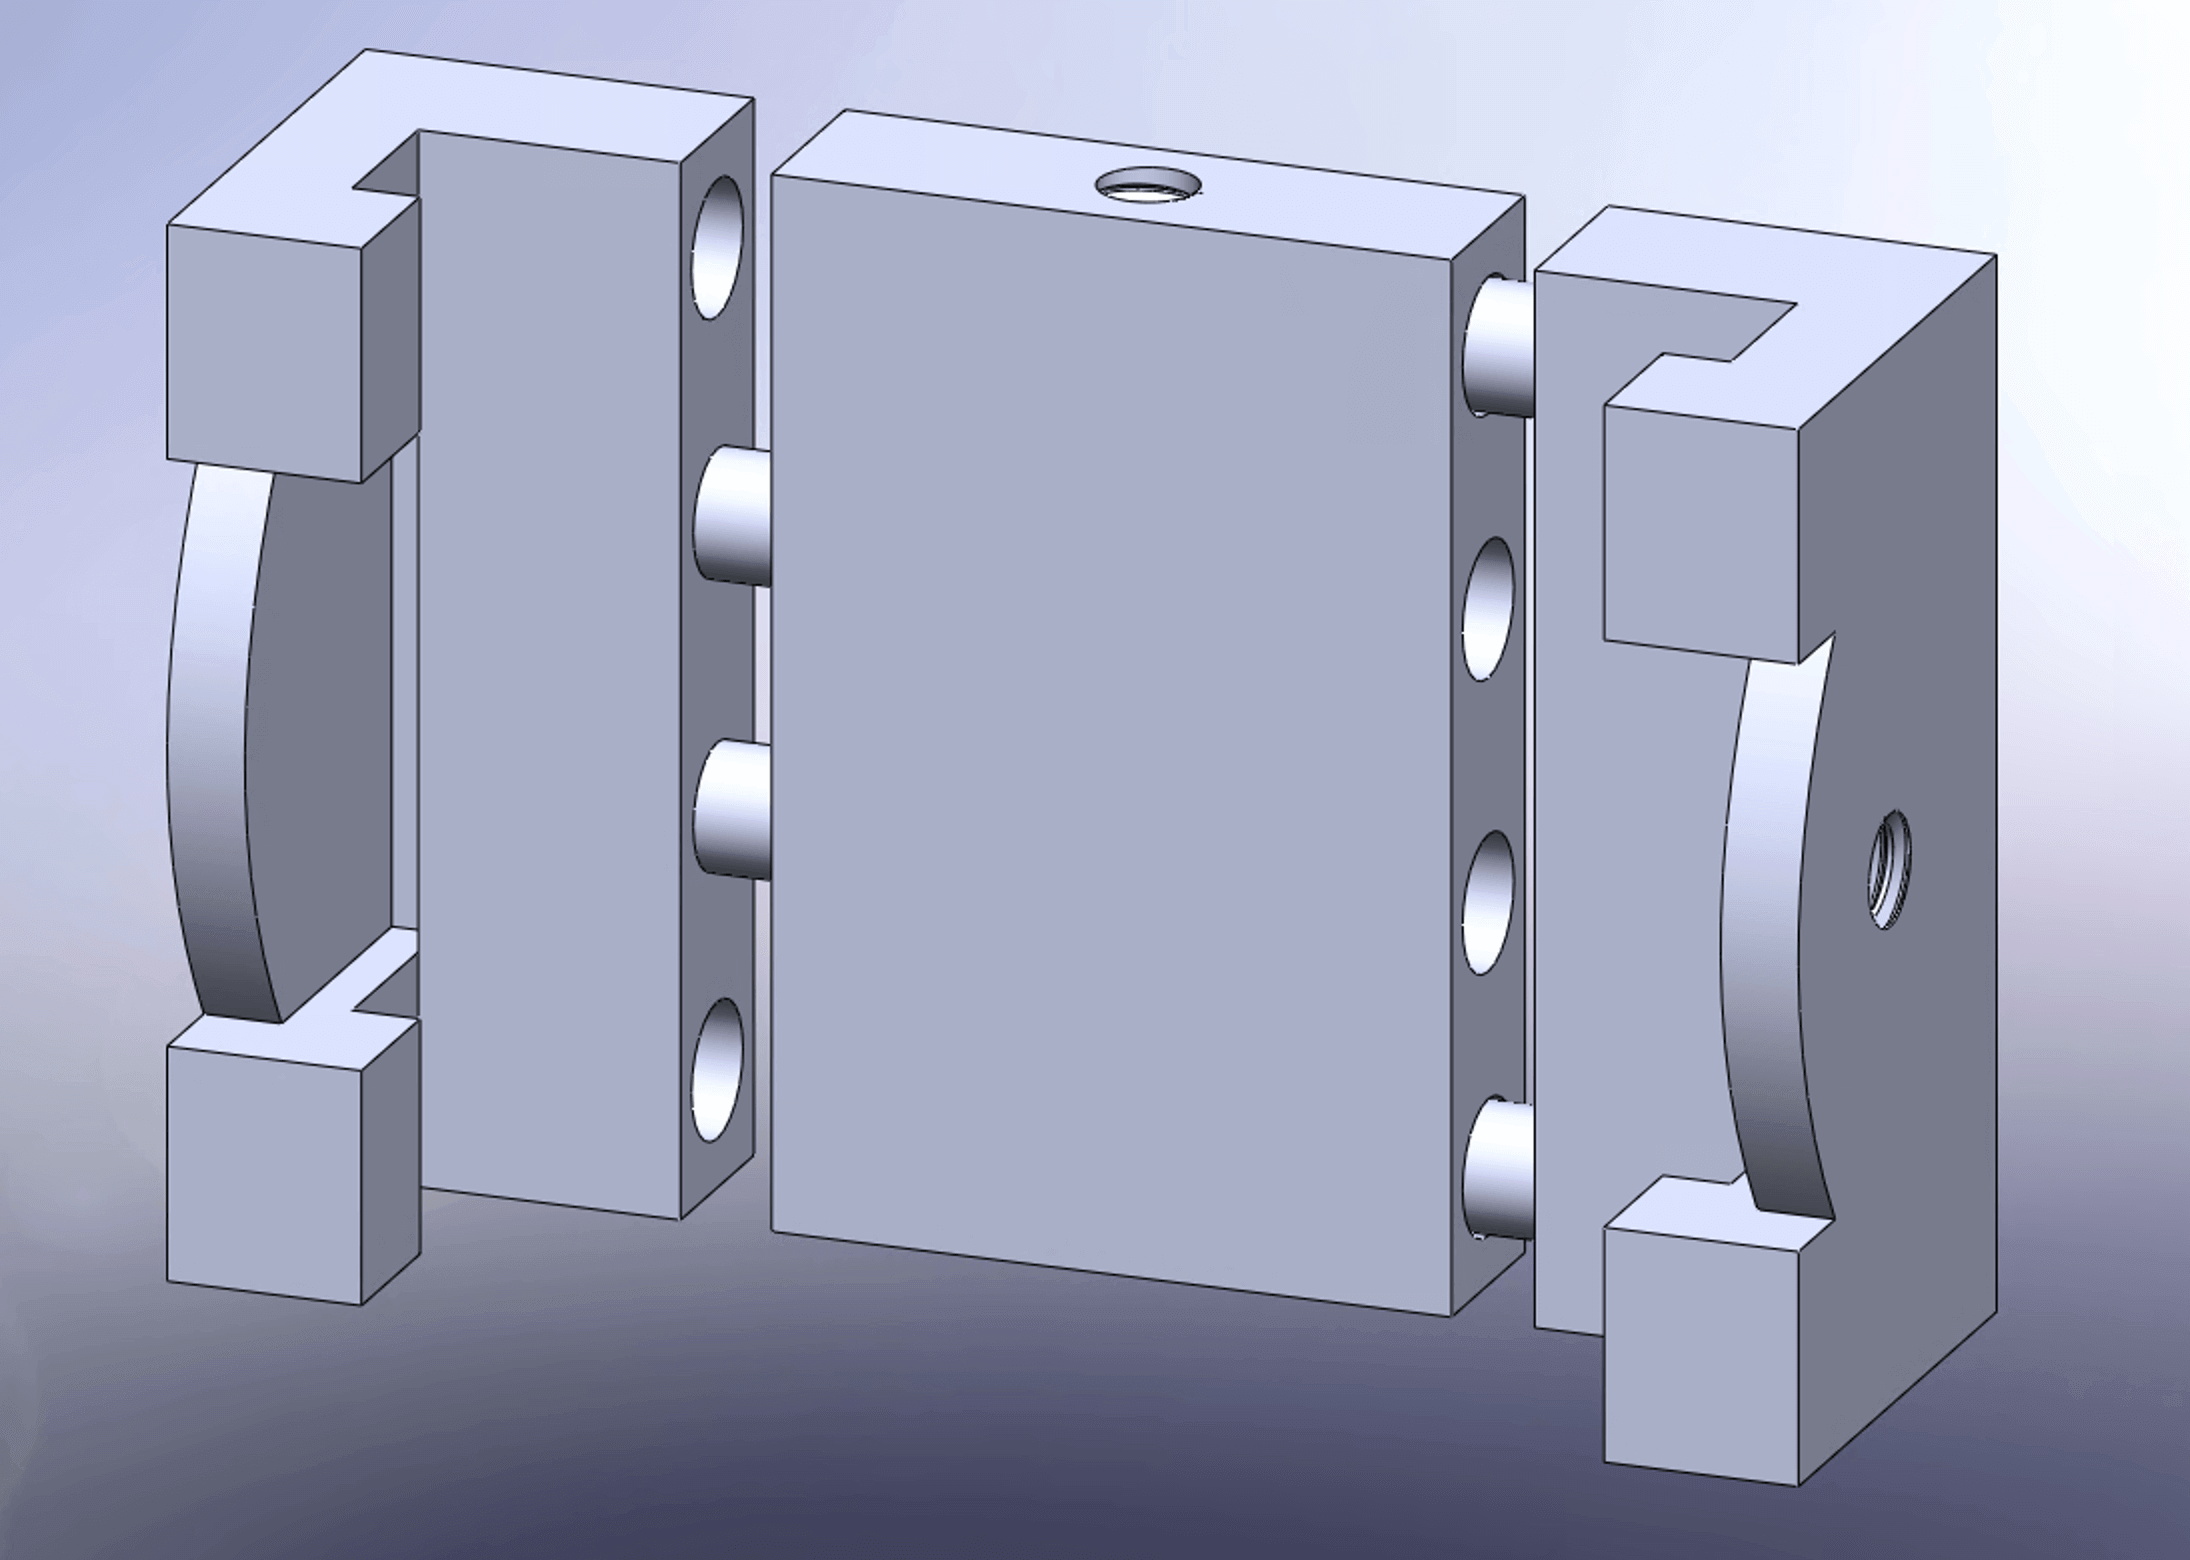
After I knew which spring I wanted to use, I then created a 2-component extension spring loaded phone mount in SOLIDWORKS based on that. Using a parametric table, I defined the length, width, and thickness of the mount, I also set the tolerance as 0.025 mm for a smooth sliding operation. The spring was designed to be load on the exerior of the phone mount because I thought that it would allow for easier spring replacement in the long run.
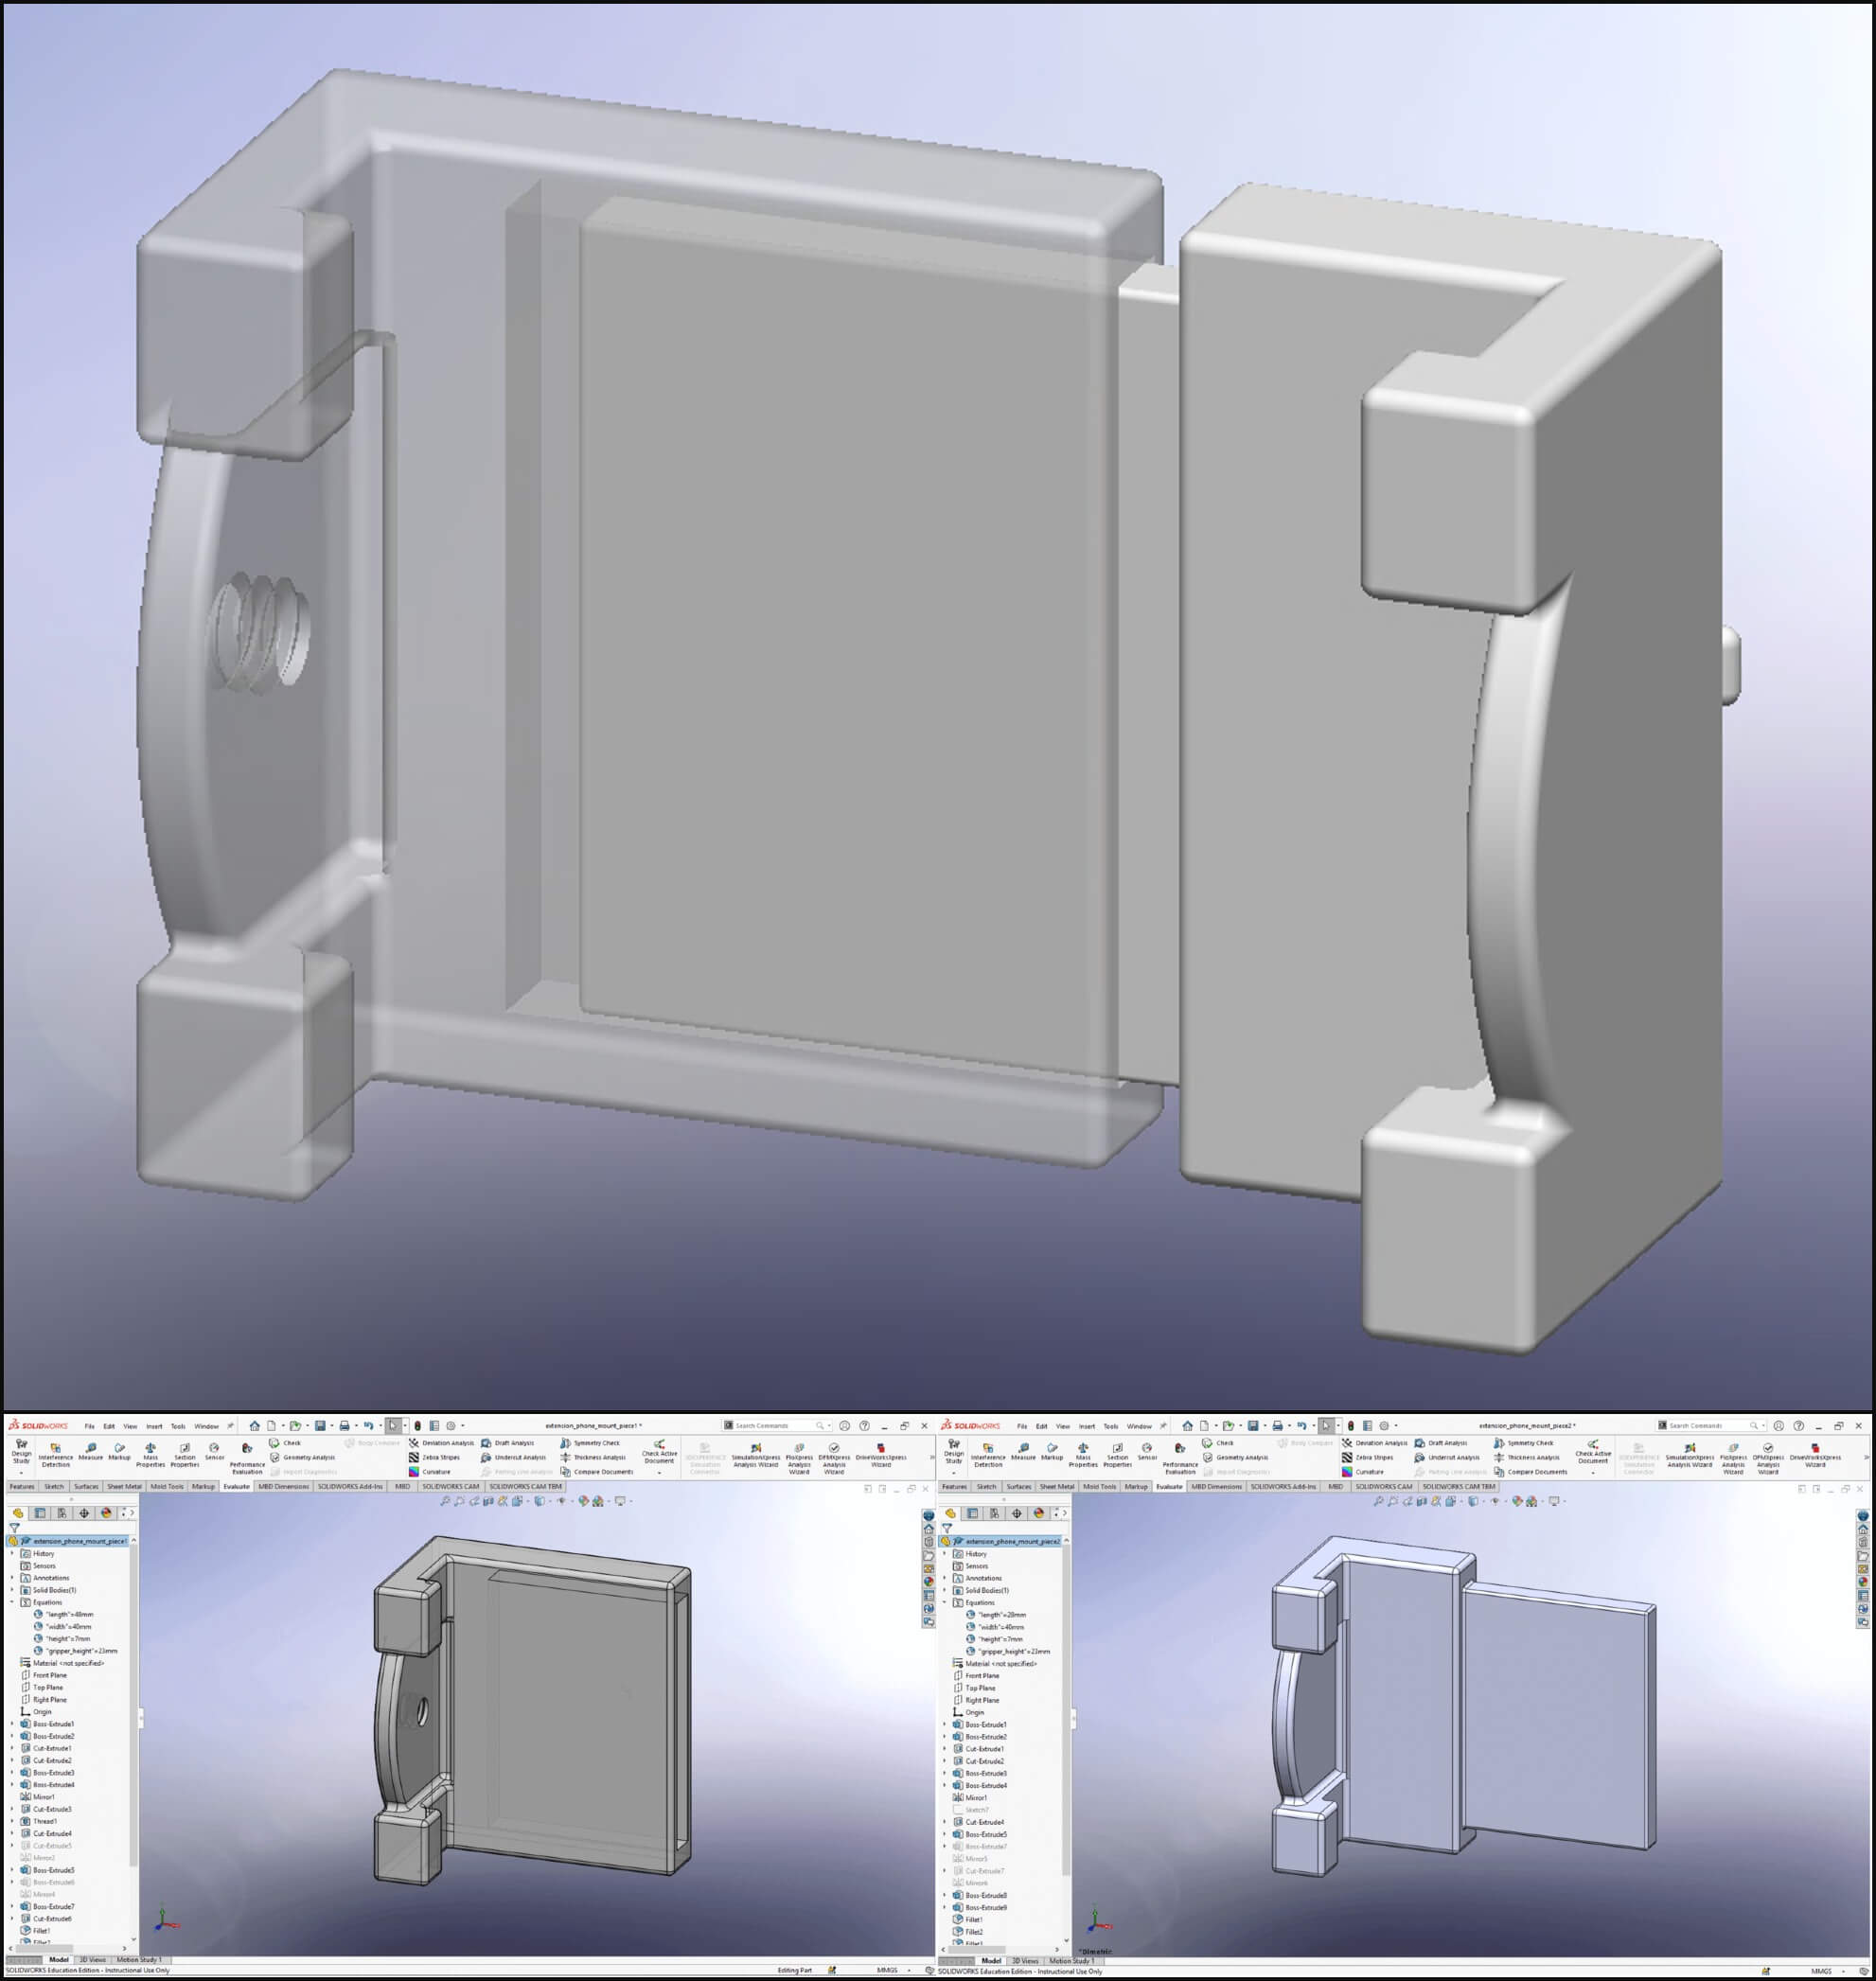
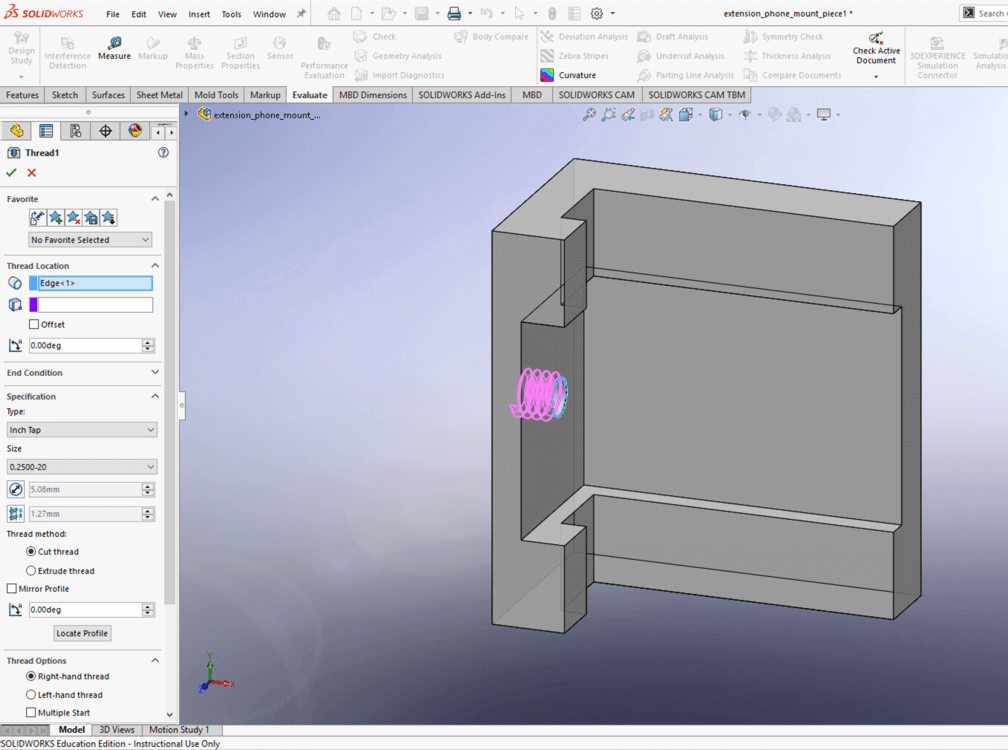
I also added the thread for the 1/4"-20 screw on the "bottom plate" (female part) of the phone mount.
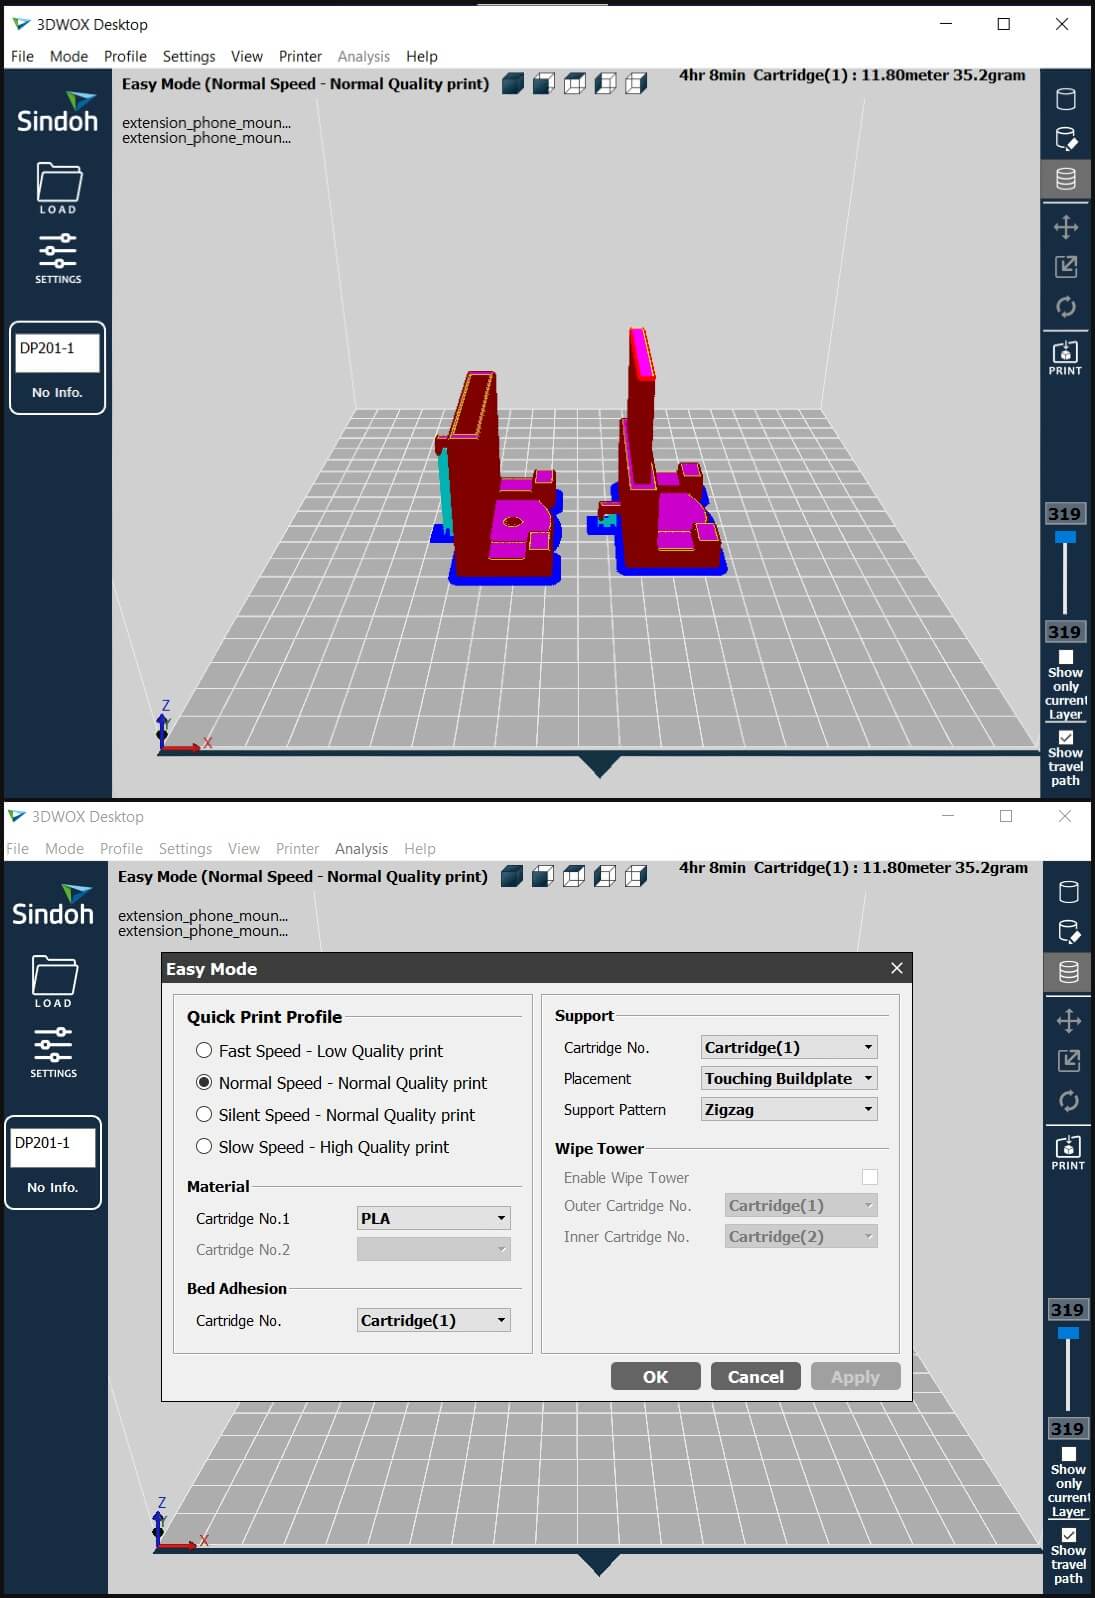
Once I was happy with the design, I saved each part file in .STL format and was ready to print. Since I was using the ShopBot at the lab the past few days, I decided to also 3D print the phone mount at the lab and tested the fit. The 3D Printer that I chose to use was a Sindoh 3DWOX1, I also added a zigzag support to hold the "spring hanger" in place. The total print time was 4 hour 8 minutes, which was 2 hours shorter than the estimated time by Cura on my Ender3 3D Printer.
When the print was complete, I removed the support carefully but I noticed that the "spring hanger" didn't print well when I had to add a much longer support compared to the overhang.
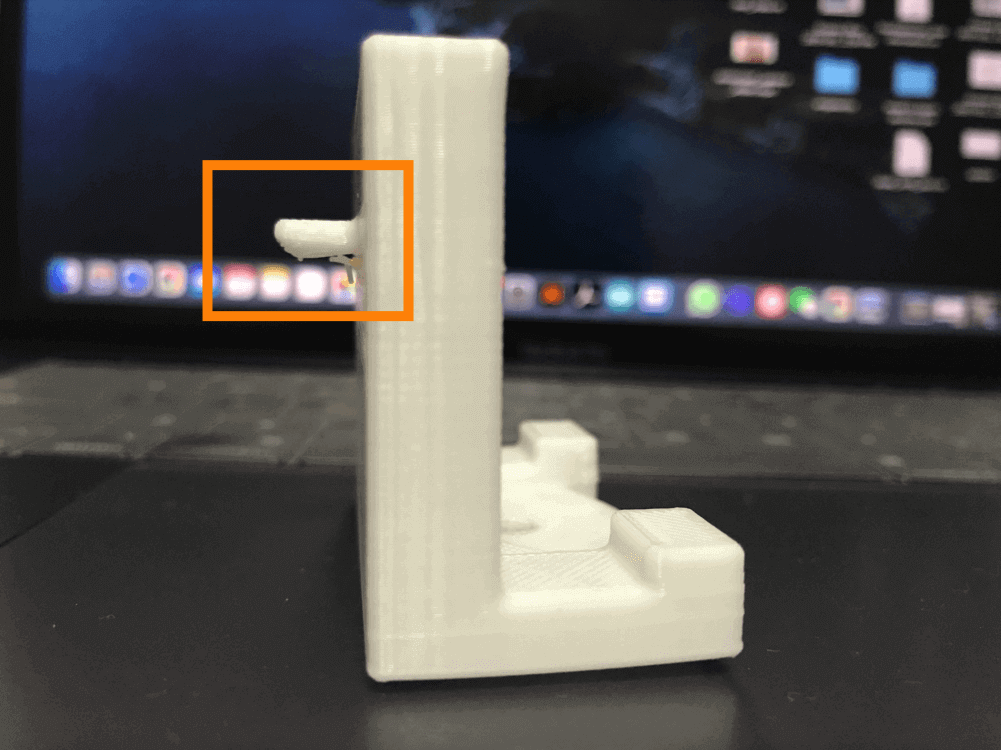
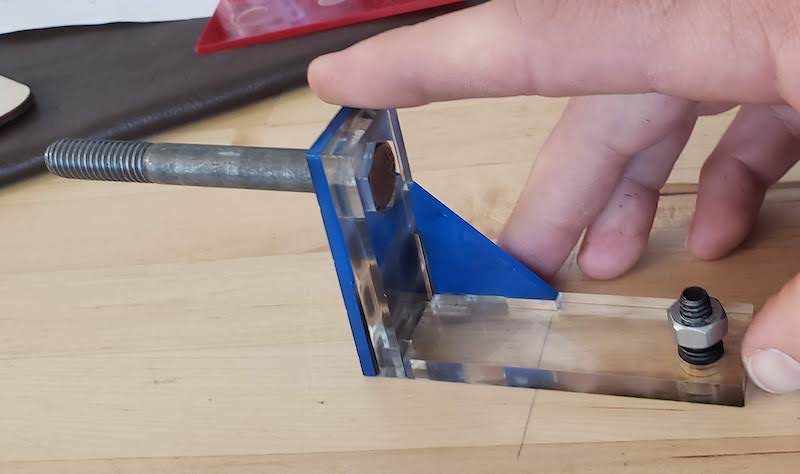
Though the overhang was not printed successfuly, we wanted to test it to to see how it fit the system. Here is what that looked like:
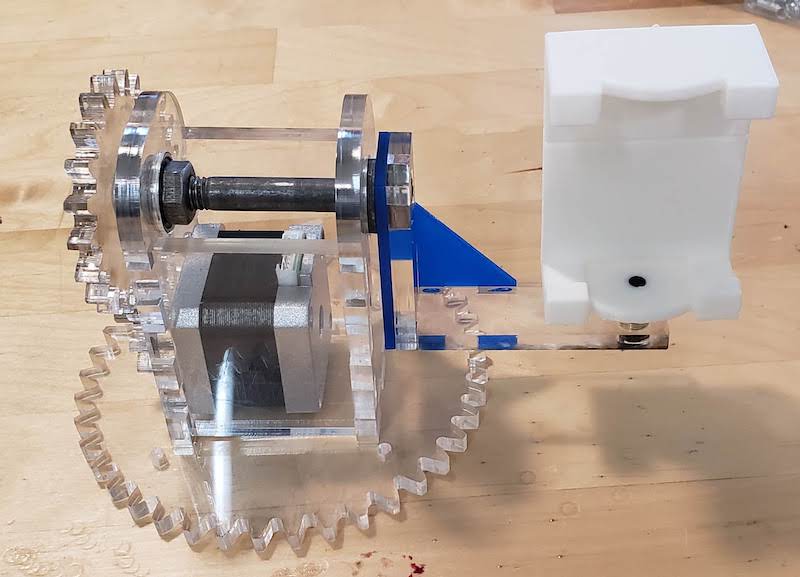
Next, we also wanted to see how strongly did the spring hold through manual operation:
The phone mount was able to hold the phone well during our actuation testing of the system:
I would say I was quite fortunate in this case since the phone mount still functioned even though it was defective. This print may fulfill the basic requirement for this week's assignment, but our goal was to be able to use the machine to film our final projects, and hopefully final projects of the future students. With that in mind, I knew that i would want a better design, what's more, I learned that I would want to cover the spring for aesthetic and potential safety reasons, so I was motivated to do a compression spring loaded phone mount.
Interation 2: Compression Spring Phone Mount
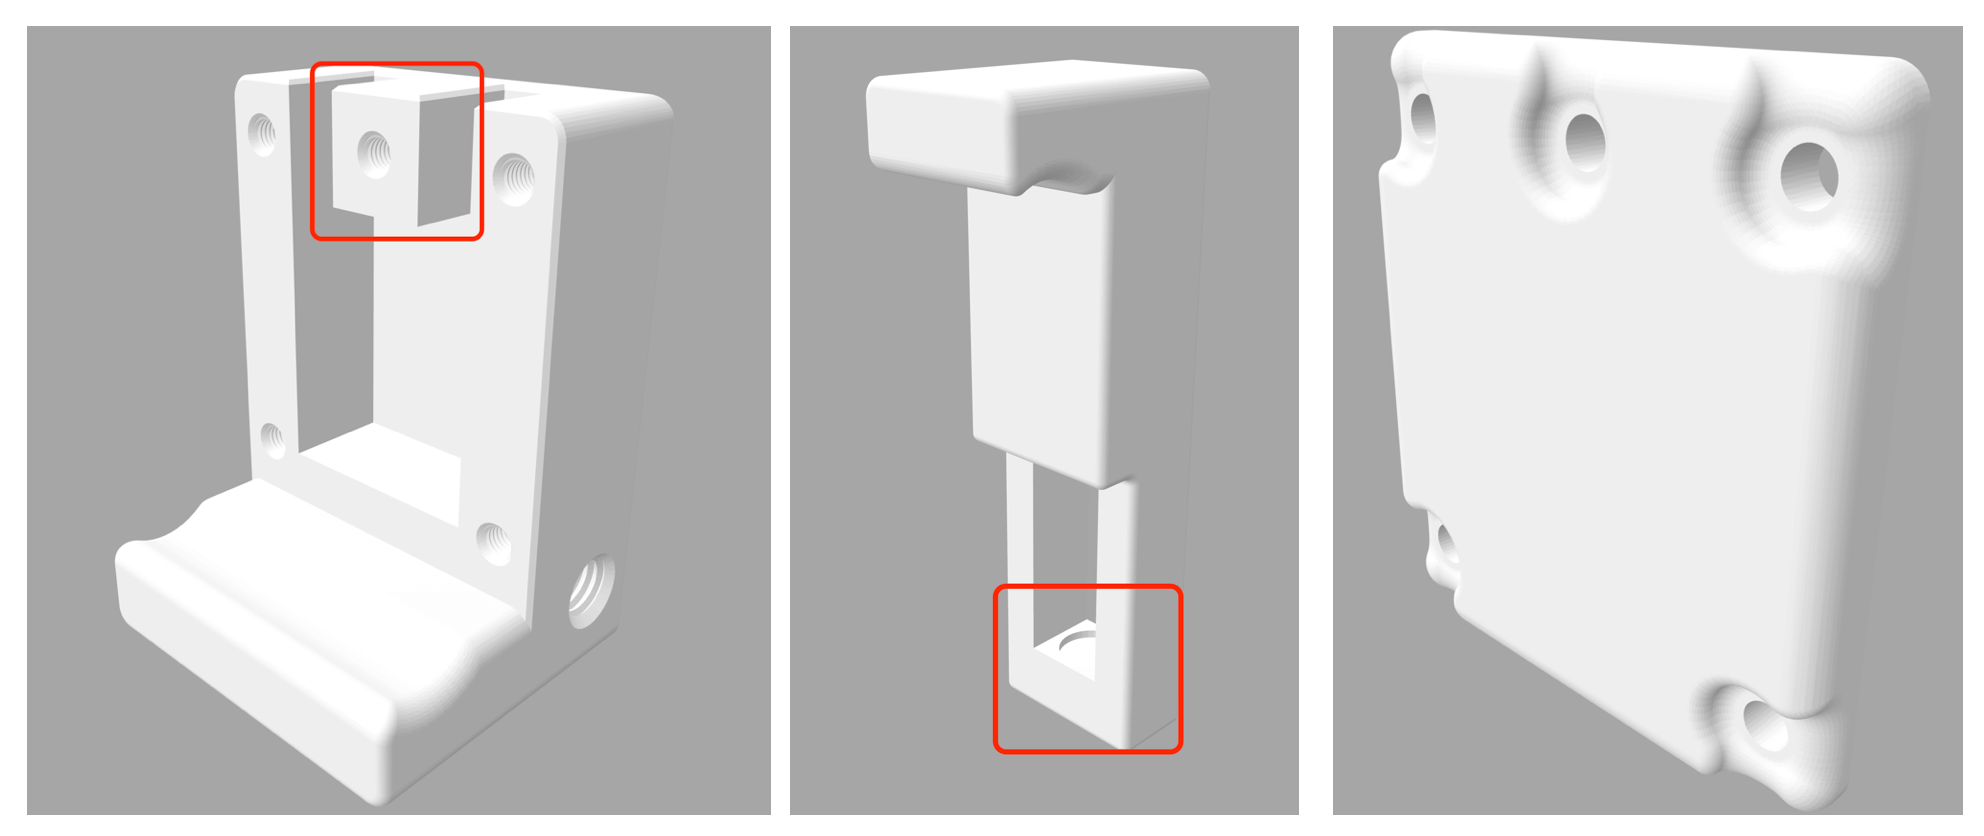
The compression spring loaded phone mount required more design considerations. I needed to look up more resources online on how to design for compression spring, and I found that this spring design lecture helpful. In our Home Fab Lab kit, I found a Ubeesize phone tripod that contained a compression spring loaded phone mount, so I started my design with the same parameters. Here is how my initial design looked:
The most difficult issue I have encountered in the design process may be leaving the room for the spring that would be placed inside. I then searched online to find tutorials on how to do this, and I found this helpful Youtube Video and decided to learn the design process (Thingiverse site for OM3 phone holder).
Files
Please find below the files that I made for this assignment.
- Extension spring loaded phone mount:
- Compression spring loaded phone mount: