16. Interface and application programming
For interface and application week, I wanted to try out programming interface for very basic interaction involving the Arduino IDE, my onboard 3216 interfaced microphone and a choice of program for experimenting with the interface.
My choice was depending on previous experience and something that was used within the Fab Academy/instructors initial setup. This narrows down to Touch Designer and Python version 3.
Setup
I had much trouble during the Input Devices week with making a “standalone” microphone. The signals given off by the microphone were too small to be able to be useful for applications or networking.
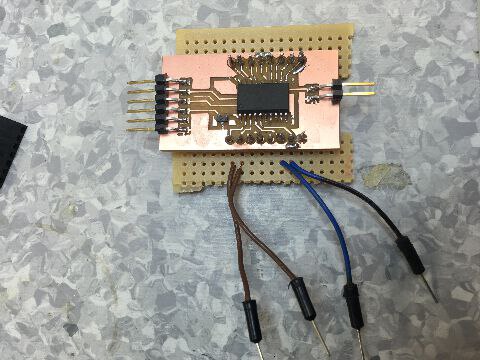
There were two approaches to this. Make a breakout board with just the 3216 and pins - that would help me to test different input devices and output devices, rather than have them all on the board. (The resistor/capacitor values tend to change according to each microphone requirements).
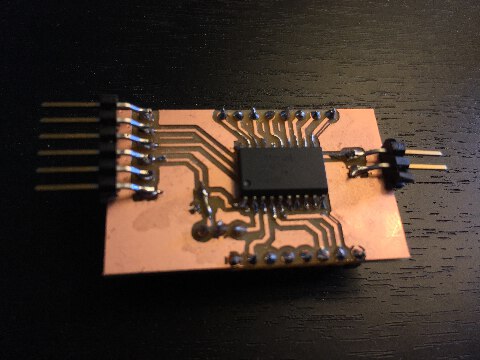
So this standalone breakout board was designed on Ki-Cad with pin spacing designed to fit breadboard, first (though I ended up using a THT board instead with the pins).
Secondly, with the help of Krisjanis, the Adafruit microphone was studied closely from the datasheet. We thought the electret mic we had in house, was close in characteristic to the Adafruit one - and so we started to design our own with his help.
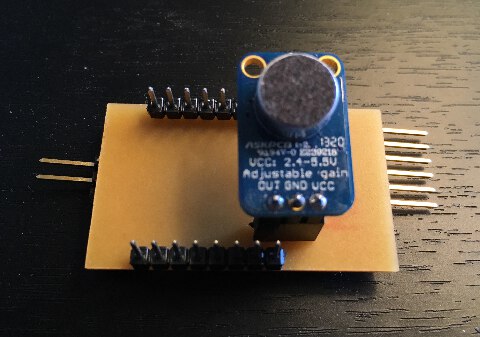
In meantime I experimented with the 3216 breakout board and the Adafruit MAX4466 mic with adjustable gain on a regular breadboard.
While Krisjanis mic did work - the sound in itself was distorted (possible grounding issues or so) - and most of Fab Academy example mics were just used as inputs to drive some outputs based on signal levels, and were not focused on sound quality as such.
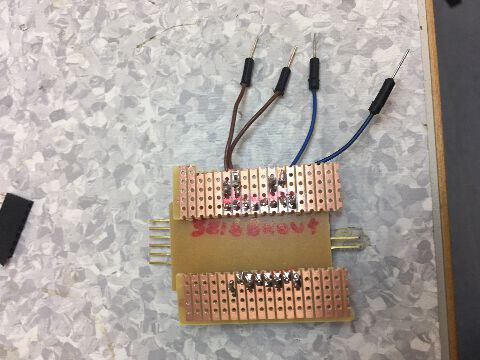
At the end - it was decided to make a single board with a latch-on slot for the Adafruit MAX4466 mic with adjustable gain .
However, the board design had an error that needs to be fixed - the regulator footprint got mixed up and instead of 3.3 V I was forced to send a direct 5V 0.5 mA current by jumping the regulator to the microphone.
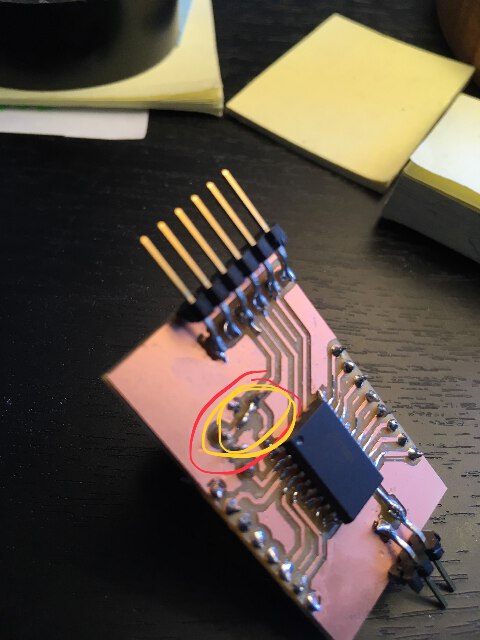
The chip also had trouble with programming. So this board needs to be re-designed for more than one reason.
Since this assignement was mainly about Application design, I decided to stick to the Adafruit - Arduino setup and just get the mic signal in first without any further ado.
Working with Python
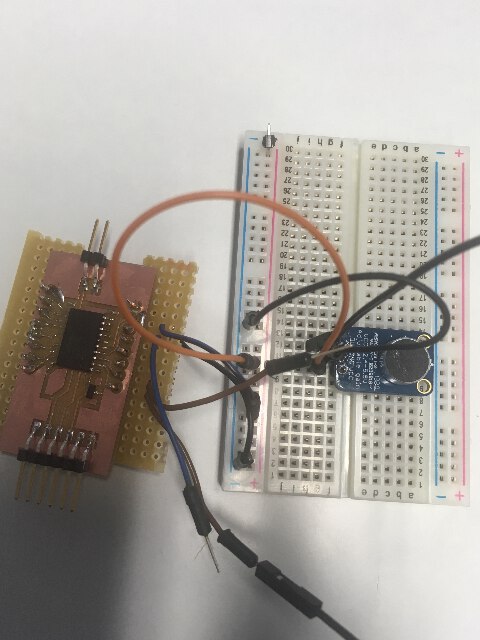
I was able to successfully run a python script to detect the mic signal from my 3216 breakout board.
Now I wanted to create an application interface to playback, stop and record sounds from the mic.
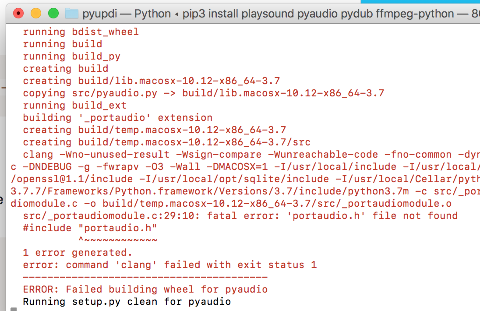
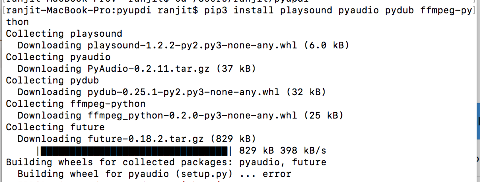
Initially I wanted to install Python libraries to play and record audio in Python move on torecord the screen options.
However I kept getting exit code 1 error after upgrading to latest python, so started troubleshooting
Python Errors:
Turns out it is an issue with Package Management
now I understand why its called Python - it entangles you and once it has devoured you it gets hard to digest.
I tried to run the command : pkg install portaudio portaudio-dev however I am neck deep in error protocols and python troubleshooting is quite difficult for me for the time constrains.
I then switch to Touch Designer - at least there is a visual programming environment there and I have used it for one VJing gig with a downloaded template.
GOODBYE for now Python, well hellooo Touch Designer!
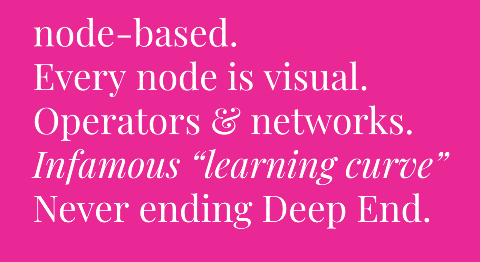
Touch Designer has recently gained tremendous appreciation from artists, programmers, creative coders, multimedia performers, live theatre etc. for a highly versatile tool for performances, installations, and fixed media works.
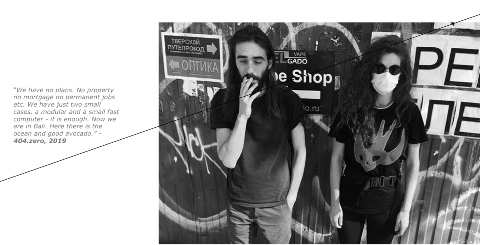
I think the image below captures well the general disposition of a Touch Designer artist:
Touch Designer is a node based visual programming language for real time interactive multimedia content.
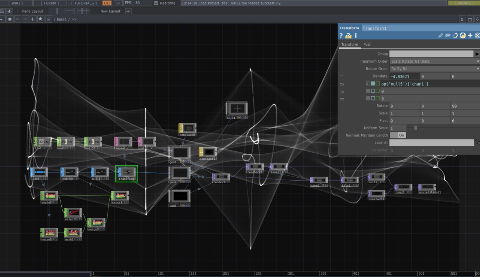
A great design choice of Touch Designer is that the various operators are visualized according to a seperate colour code - in a complex network it becomes easy to identify these different parts.
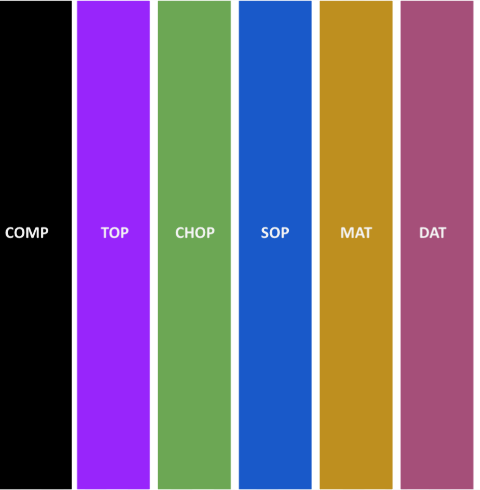
From the TD WikiPage:
COMP - Components represent 3D objects, panel components, and other various operators
TOP - Texture Operators handle all 2D image operations
CHOP - Channel Operators are used for motion, audio, animation, and control signals. CHOPS are good at smoothing mathematical variables.
SOP - Surface Operators are the native 3D objects of TouchDesigner responsible for 3D points, polygons, and other 3D “primitives”
MAT - Materials are used for applying materials and shaders to the 3D rendering pipeline
DAT - Data Operators are for ASCII text as plain text, scripts, XML, and tables
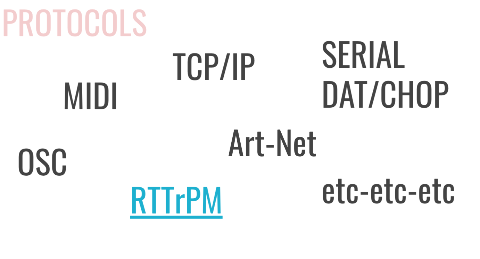
TD is versatile as it can handle various protocols including MIDI, OSC, TCP/IP and in my case read the serial data from the pyupdi pre-programmed 3216 as well as Arduino hardware board
Setup Arduino board and Touch Designer
First I try to fix Arduino with TD using this tutorial
There is TD support for arduino which helps me to get through the hello world checklist.
Setting up Arduino and connect it to Touch Designer was fairly straightforward.
====
AdaMic Arduino Uno code
    const int sampleWindow = 50; // Sample window width in mS (50 mS = 20Hz)
          unsigned int sample;

            void setup()
              {
                Serial.begin(9600);
                }


                  void loop()
                  {
                    unsigned long startMillis= millis();  // Start of sample window
                    unsigned int peakToPeak = 0;   // peak-to-peak level

                    unsigned int signalMax = 0;
                    unsigned int signalMin = 1024;

                    // collect data for 50 mS
                    while (millis() - startMillis < sampleWindow)
                    {
                      sample = analogRead(0);
                      if (sample < 1024)  // toss out spurious readings
                      {
                        if (sample > signalMax)
                        {
                          signalMax = sample;  // save just the max levels
                        }
                        else if (sample < signalMin)
                        {
                          signalMin = sample;  // save just the min levels
                        }
                      }
                    }
                    peakToPeak = signalMax - signalMin;  // max - min = peak-peak amplitude
                    double volts = (peakToPeak * 5.0) / 1024;  // convert to volts

                    Serial.println(volts);
                  }
=========
Touch Designer, mic input and image mixing video
touch designer and mic from Ranjit Menon on Vimeo.
links
Reactive Spaces and Media Architecture
Gallery