12: interface & application programming
Individual Assignment
The individual assignment for this week was to write an application that interfaces a user with an input and/or output device that you made.
I decided to use Processing for this week. I had never used Processing before, so I watched some tutorials and the opening videos to get started. I planned to use my input device from week 9, a sonar sensor, to write the application. The goal was to show the distance the sonar sensor would read, displaying a rectangle and the serial values.
Here is the code I used for my input device:
/*
 * created by Rui Santos, https://randomnerdtutorials.com
 *
 * Complete Guide for Ultrasonic Sensor HC-SR04
 *
    Ultrasonic sensor Pins:
        VCC: +5VDC
        Trig : Trigger (INPUT) - Pin 2
        Echo: Echo (OUTPUT) - Pin 1
        GND: GND
 */

int trigPin = 2;    // Trigger
int echoPin = 1;    // Echo
long duration, cm, inches;

void setup() {
  //Serial Port begin
  Serial.begin (115200);
  //Define inputs and outputs
  pinMode(trigPin, OUTPUT);
  pinMode(echoPin, INPUT);
}

void loop() {
  // The sensor is triggered by a HIGH pulse of 10 or more microseconds.
  // Give a short LOW pulse beforehand to ensure a clean HIGH pulse:
  digitalWrite(trigPin, LOW);
  delayMicroseconds(5);
  digitalWrite(trigPin, HIGH);
  delayMicroseconds(10);
  digitalWrite(trigPin, LOW);

  // Read the signal from the sensor: a HIGH pulse whose
  // duration is the time (in microseconds) from the sending
  // of the ping to the reception of its echo off of an object.
  pinMode(echoPin, INPUT);
  duration = pulseIn(echoPin, HIGH);

  // Convert the time into a distance
  cm = (duration/2) / 29.1;     // Divide by 29.1 or multiply by 0.0343
  inches = (duration/2) / 74;   // Divide by 74 or multiply by 0.0135

  Serial.print(inches);
  Serial.print("in, ");
  Serial.print(cm);
  Serial.print("cm");
  Serial.println();

  delay(250);
}
I used Processing’s reference libraries as an initial guide to start. I used the Serial read() to get the Serial library and basic format of importing and printing Serial data. I also knew I wanted to include a shape in my interface, so I used the PShape format as well. Lastly, I used this source as a guide to add text to the interface. My first “draft” of code produced the correct text, but no shape and incorrect text. The only value that was being displayed was ‘10’.
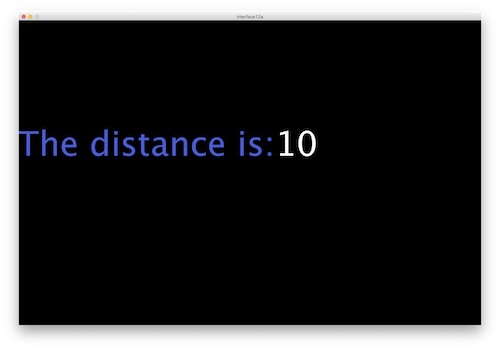
I saw that there were values being read in the serial monitor, but they weren’t being displayed.
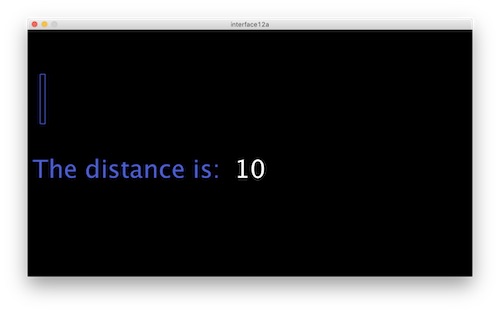
I changed the stroke of the rectangle from false to true, and saw the outline above the text.
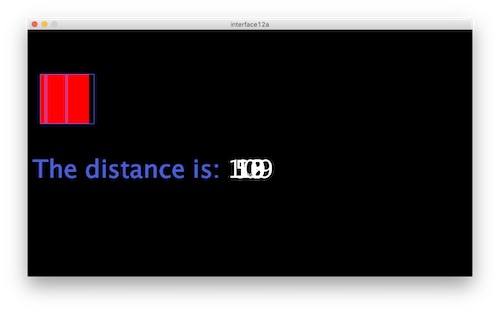
I moved the background(0) to the void setup, and this produced some sort of change. Values were being read, but they were stacking up on top of each other and the rectangle was doing the same thing.
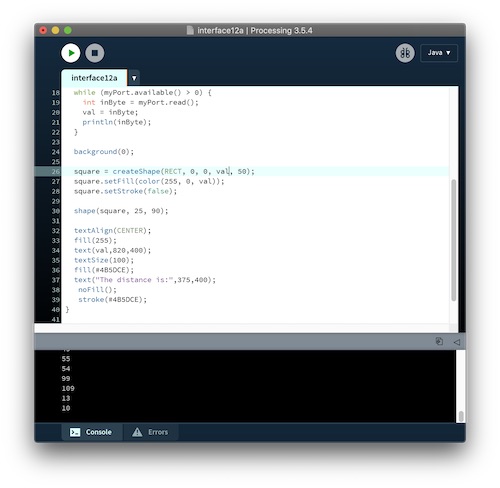
After asking a past FabAcademy graduate, Kai Vincent, to look over my code, he told me that I needed to move the background, text, and shape to void draw. I commented out some statements and copied and pasted others. Here is what this iteration of my code looked like:
import processing.serial.*; //includes serial library

Serial myPort;  //the serial port
PShape square; //the PShape object
PFont myFont; //the PFont for text

int dist = 0;

void setup() {
  size(900,500);
  background(0);//size of processing window
   //noFill();
   //stroke(#4B5DCE);
  //list all the available serial ports
  printArray(Serial.list());
  //open the port you are using at the rate you want:
  myPort = new Serial(this, Serial.list()[2], 9600);

}

void draw() {
  background(0,0,0);
  textSize(50);
  fill(#4B5DCE);
  text("The distance is:",200,300);
  while (myPort.available() > 0) {
    int inByte = myPort.read();
    dist = inByte;
    println(inByte);

  }

  square = createShape(RECT, 0, 0, dist, 100);
  square.setFill(color(255, 0, 0));
  square.setStroke(true);

  shape(square, 25, 90);

  textAlign(CENTER);
  fill(255);
  text(dist,500,300);

}
Kai also pointed out that Processing was probably confused because the serial monitor was receiving two sets of vales (inches and centimeters) and the units as well. I chose to display the distance in inches and commented out the unnecessary variable and units in the Arduino code:
 // Convert the time into a distance
  //cm = (duration/2) / 29.1;     // Divide by 29.1 or multiply by 0.0343
  inches = (duration/2) / 74;   // Divide by 74 or multiply by 0.0135

  Serial.print(inches);
  //Serial.print("in, ");
  //Serial.print(cm);
  //Serial.print("cm");
  Serial.println();

  delay(250);
}
I saw in the serial monitor that even though there were values being read, the value ‘10’ remained at the bottom and thus was the only one being displayed on the interface. Because my code was very similar to Kai’s code, I attempted to copy and paste his code and edit it to fit my variable and port. It still did not work.
I searched the web for other people who had created an interface using Processing for a sonar sensor. Instead of the ‘while’ loop that I had being using and introducing a variable for distance, I found here that someone had imported the serial data using a String. They also added
void serialEvent(Serial myPort) {
  data=myPort.readStringUntil(‘\n’)
I tried this version and the interface worked! The sonar sensor values were being displayed in the interface. They were stripped from the serial monitor and sent directly to the display.
import processing.serial.*;
Serial myPort; //the serial port
String data="" ; //data from serial port
PShape square; //the PShape object
PFont  myFont; //the PFont for text

void setup() {
  size(1366,700); // size of processing window
  myPort = new Serial(this, Serial.list()[2], 9600);
  myPort.bufferUntil('\n');
}

void draw() {
  background(50,0,50);
  textSize(100);
  textAlign(CENTER);
  fill(255,0,0);
  text(data,820,400);
  fill(255,255,255);
  text("    The distance is:     in",450,400);
   noFill();
   stroke(#4B5DCE);
}

void serialEvent(Serial myPort) {
  data=myPort.readStringUntil('\n');
}
Here is a video of this code working:
Once I had the serial and text portion working, I began attempting to add the shape. I first attempted to paste in:
square = createShape(RECT, 0, 0, data, 50);
square.setFill(color(255,0, data));
square.setStroke(true);

shape(square, 2, 90);
into the new code. I got the errors The method createShape(int, float…) in the type PApplet is not applicable for the arguments (int, int, int, String, int) and The function “createShape()” expects parameters like: “createShape(int, )”. This told me that I could have a String as a parameter of a shape—it had to be an integer. I attempted to Google how to convert a String into an integer, but accidentally placed the statements into void setup instead of void serialEvent, so I continued to get errors. Once the statement dist=int(data) was eventually placed into the correct section, I still received errors. Kai, ever an engineering guru, found a way to get around this. The String needed to be converted into an int, but an intermediate step was required. We first tried converting a String to a float, because Strings are difficult to work with. This conversion worked, so we then converted the float to an int. This also worked! Once that formatting was correct, we created a shape by using: rect(20, 500, dist*10, 100) instead of the more complicated PShape. The distance was multiplied by 10 so that the maximum value of the rectangle reached closer towards the right side of the processsing window. This also showed a greater difference between the values. Kai had the great idea to add a statement to the display when there was not an object in front of the sensor. The sensor displayed random large values whenever there was not an object, so I added an if/else statement that stated that if the distance was less than 80 inches, the rectangle and text would display the correct values from the serial monitor. Else, the statement “No object detected” would appear.
Here is my final code and a video of it working!
import processing.serial.*;
Serial myPort; //the serial port
String data="" ; //data from serial port
float distfloat;
int dist;
PFont  myFont; //the PFont for text

void setup() {
  size(1366,700); // size of processing window
  myPort = new Serial(this, Serial.list()[2], 9600);
  myPort.bufferUntil('\n');
}

void draw() {
  background(50,0,50);
  textSize(100);
  textAlign(CENTER);
  if(dist<80) {


  fill(255,0,0);
  text(dist,820,400);

  fill(255,255,255);
  text("    The distance is:     in",450,400);

  stroke(#4B5DCE);
  fill(0,0,150);
  rect(20,500,dist*10,100);
}
  else {
  fill(255,255,255);
  text("    No object detected   ",450,400); //sonar sensor range = ~1-80in, so any values greater are extraneous
  }
}

void serialEvent(Serial myPort) {
  data=myPort.readStringUntil('\n'); //reads Serial input
  distfloat=float(data); //parses string data into float value
  dist=int(distfloat); //parses float data into int value
  println(dist);
}
what did you gain from this week? What was the biggest take away from using Processing and combining with your input work?
In summation, this week I learned how to create an interface for my input board, an ultrasonic sensor. This allowed me to take the values I was receiving in the serial monitor and create a neat looking interface in Processing to display them. I also learned how to “connect” the two software programs via serial. Processing was cool to learn because there is a lot you can do with it and you can be really creative with your display.
Group Assignment
The group assignment for this week was to compare as many tool options as possible. You can view the whole process on our group page here.