16. Molding and Casting
idea 1 - Toyota MR2 casting
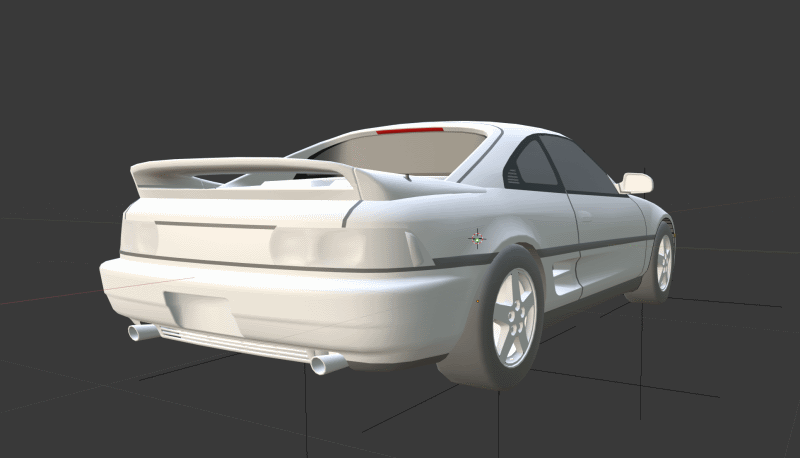
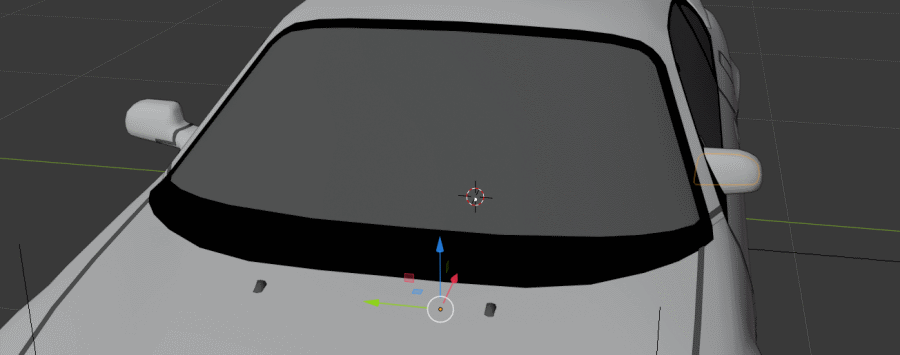
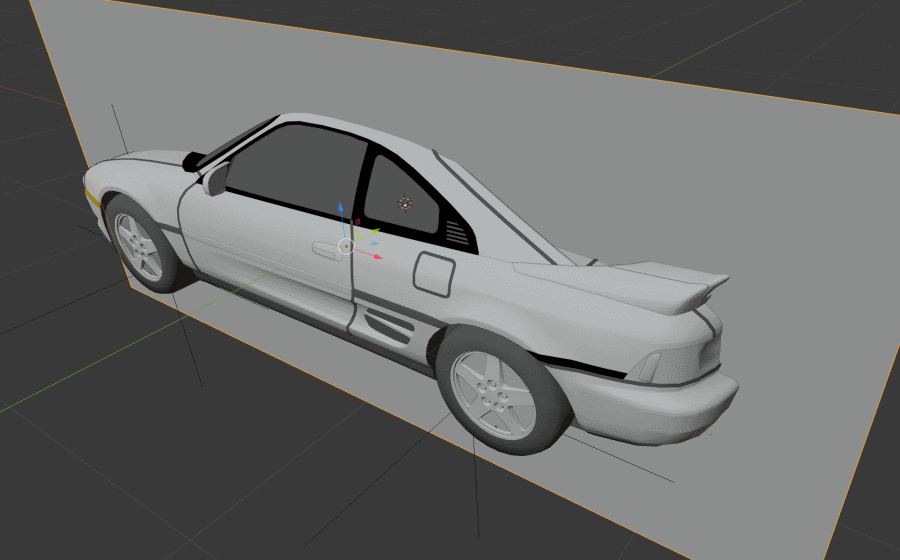
This week I first wanted to make a epoxy cast of one of my cars, a Toyota MR2.
For this, I start by reusing an old design I have on an old computer.
I’ve made remesh and stl extract a few years ago and I will reuse them.
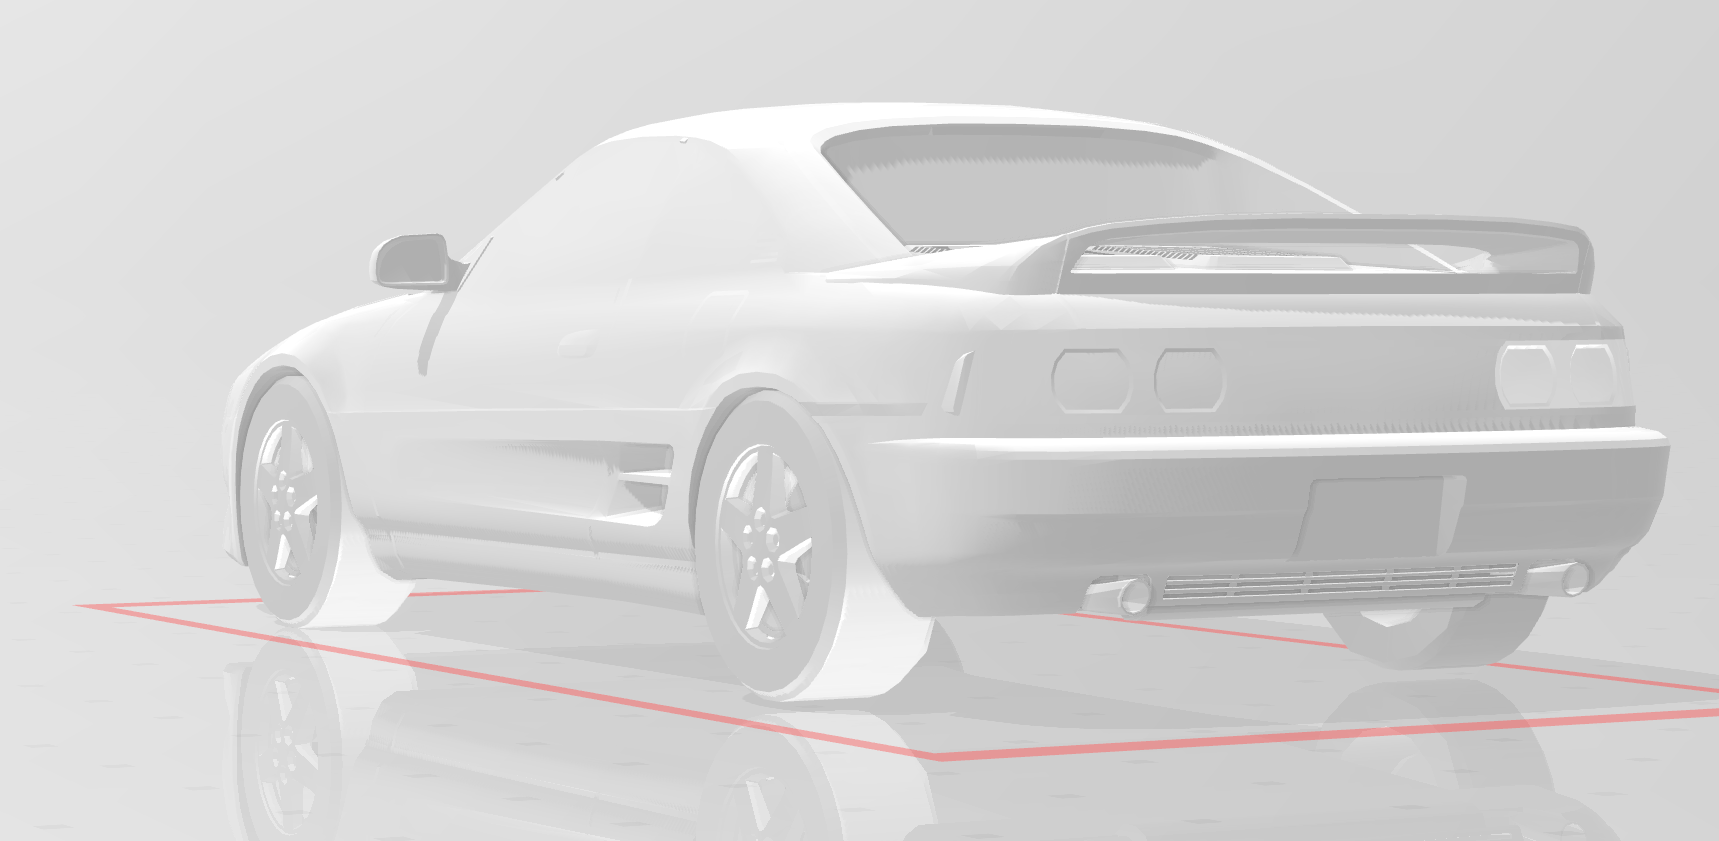
But there is a big problem : it’s extremely difficult to mill this design with only a 3 axis CNC mainly because of side mirrors and rear spoiler. Cut in 2 is a idea but there no plane I can use to only cut in 2. I know I can slice it in more parts on Z axis or cut on many axis but it’s time consuming and start by doing it too big for the first try increases risks to fail.
So I will made a mold of the side for chocolate casting.
I import my stl to fusion 360
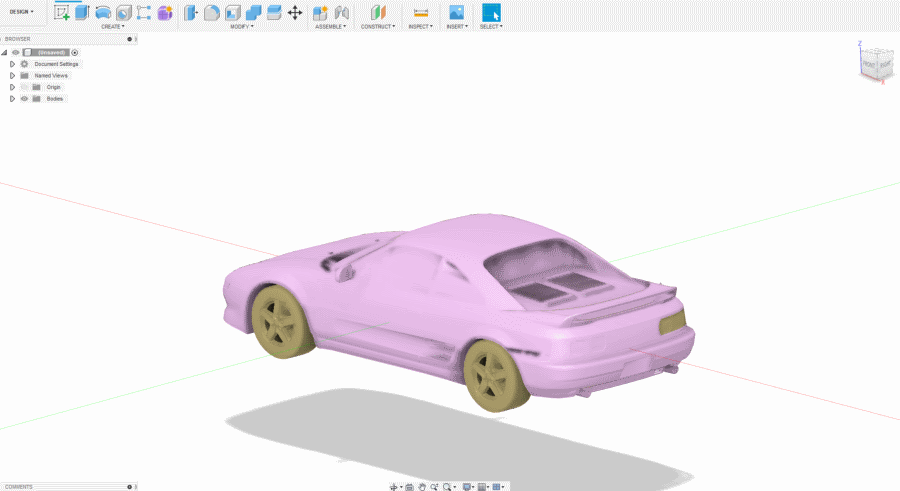
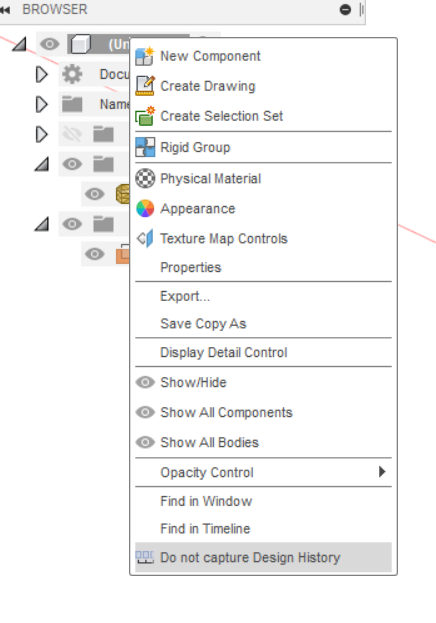
To work with mesh in fusion 360, you first have to deactivate design history
Verify you have enabled mesh workspace in preferences

Now you have Mesh visible on UI

I go in mesh mode and I made a plane cut.
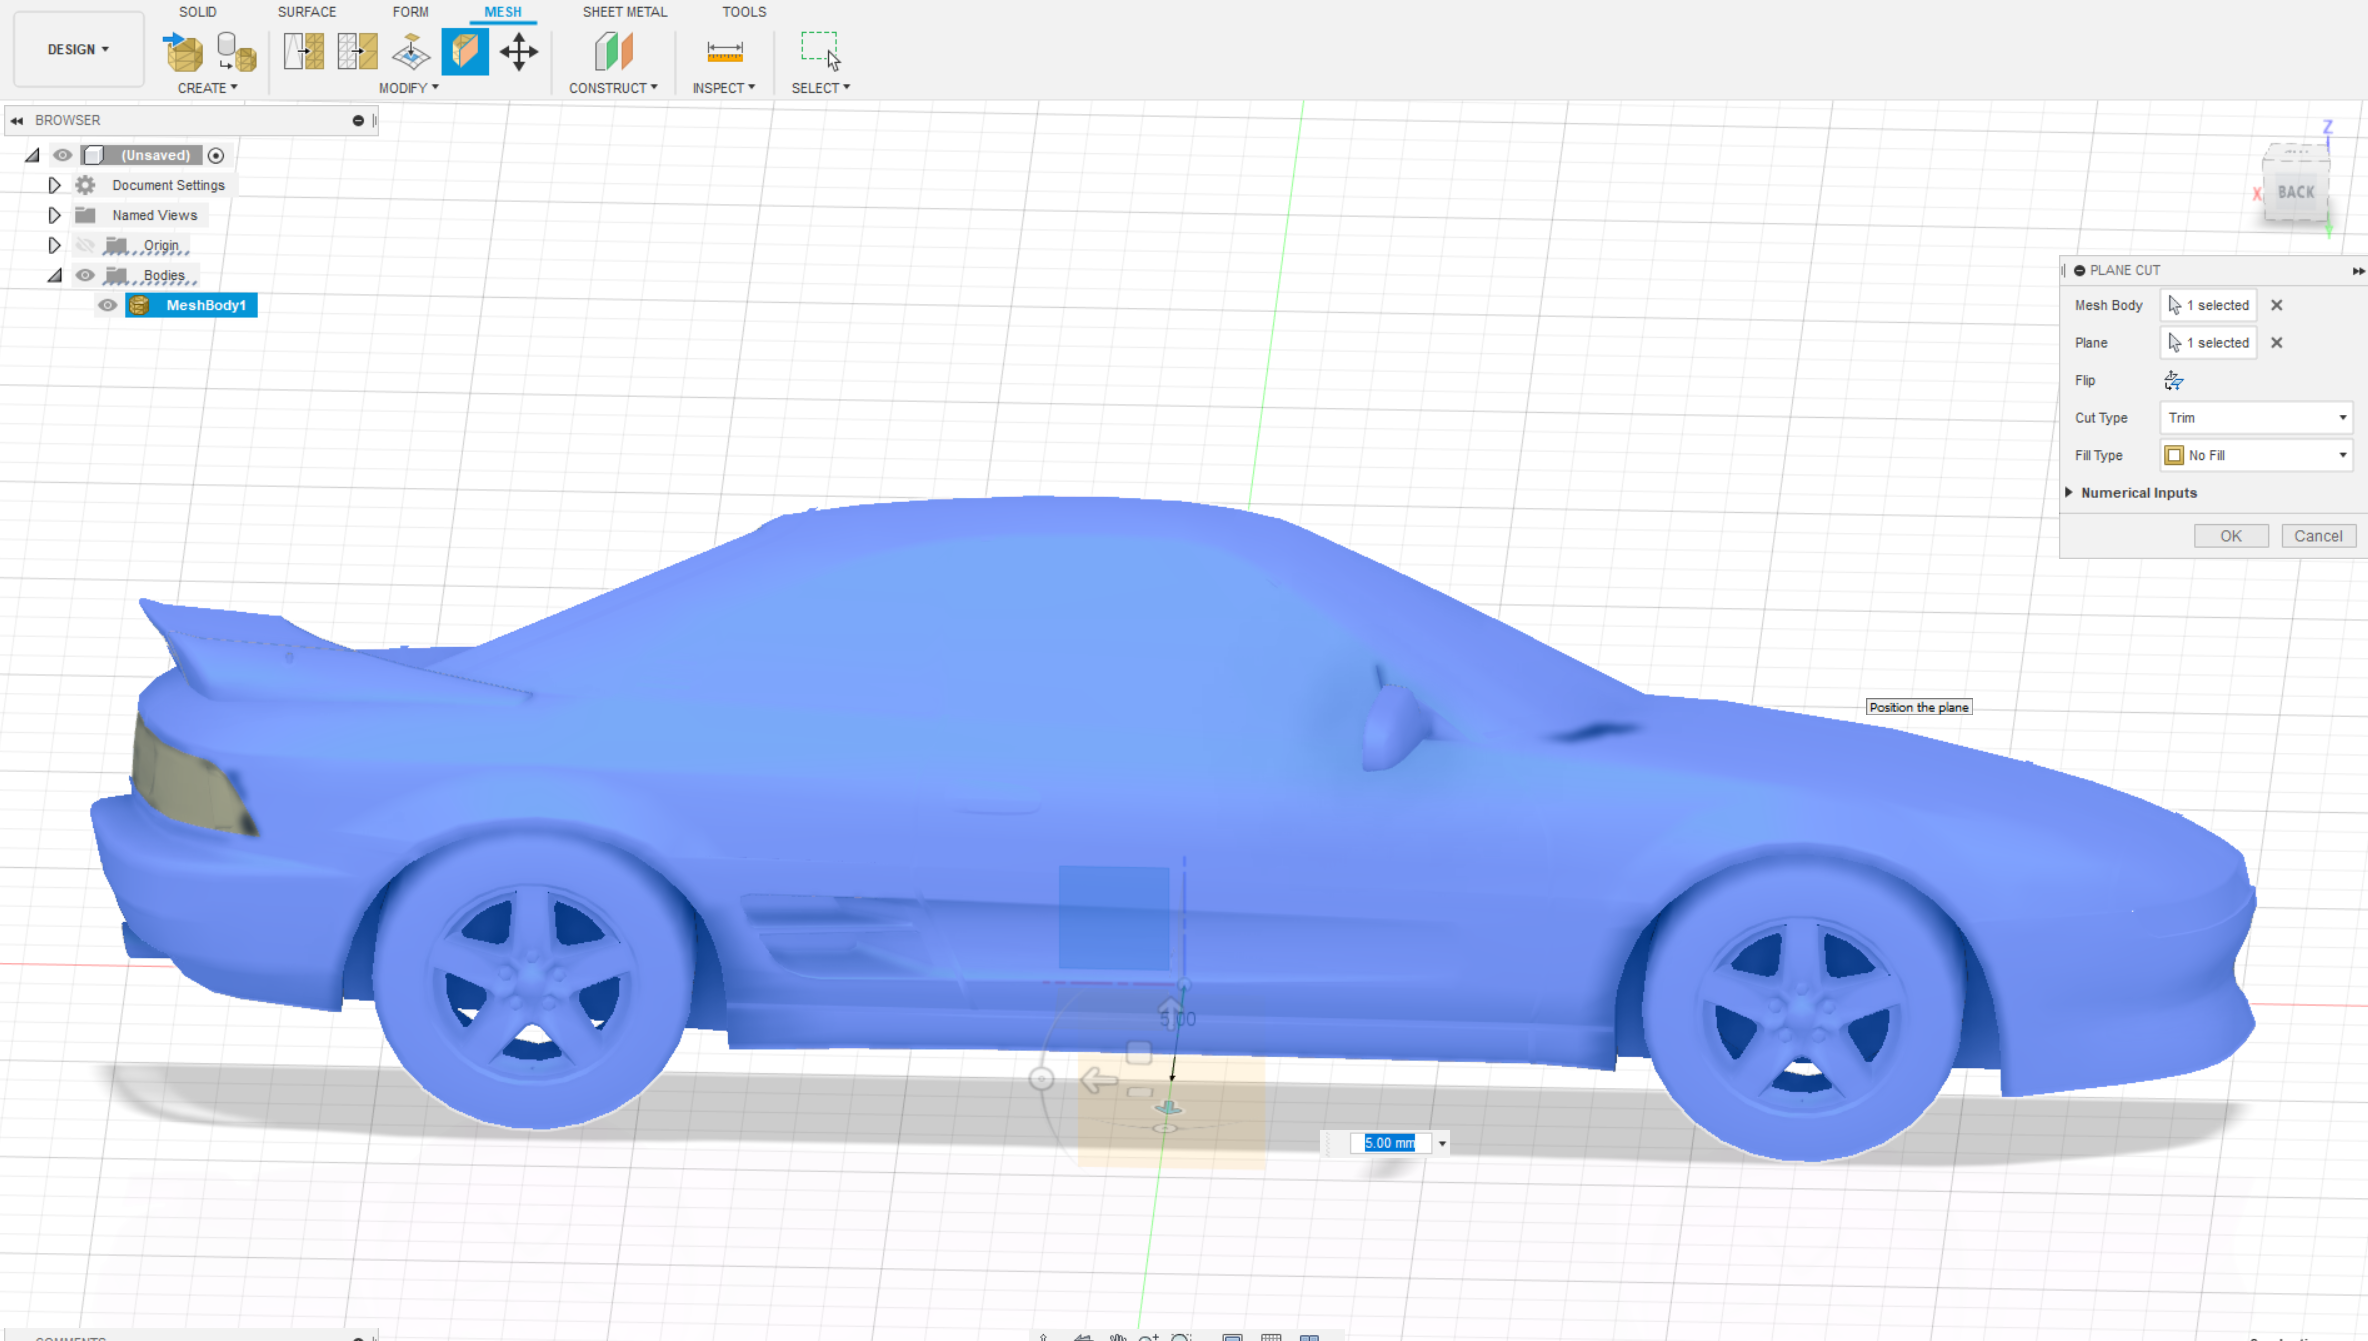
The fill function don’t work with this model, maybe a error on the body but I have my side.
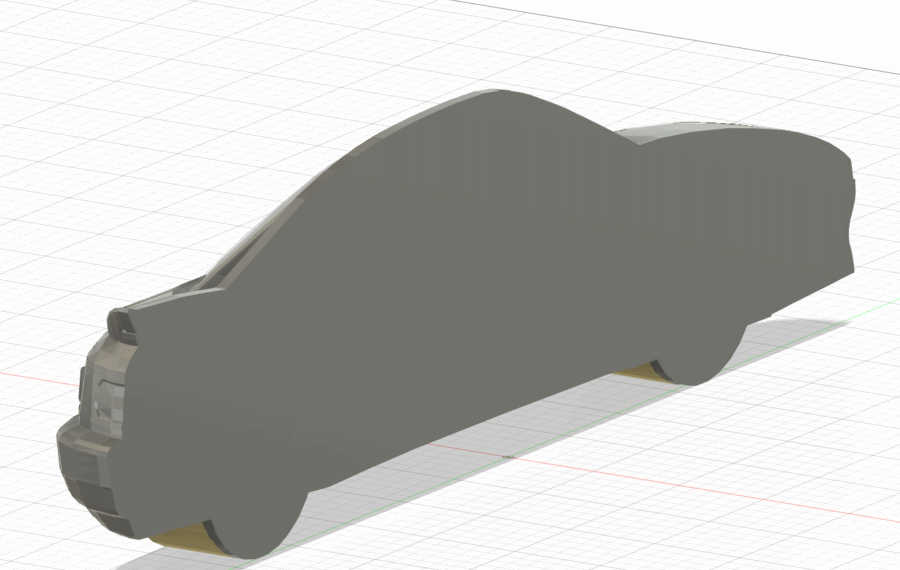
I decide to restart from the stl, i try some repairing on meshlab and meshmixer but result wasn’t good so I go back to blender and simplify directly my model. Also I want to be sure that my model is close.
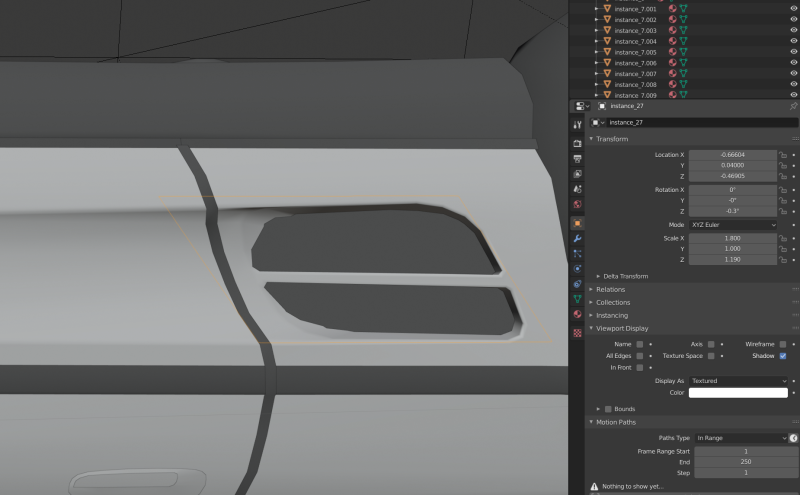
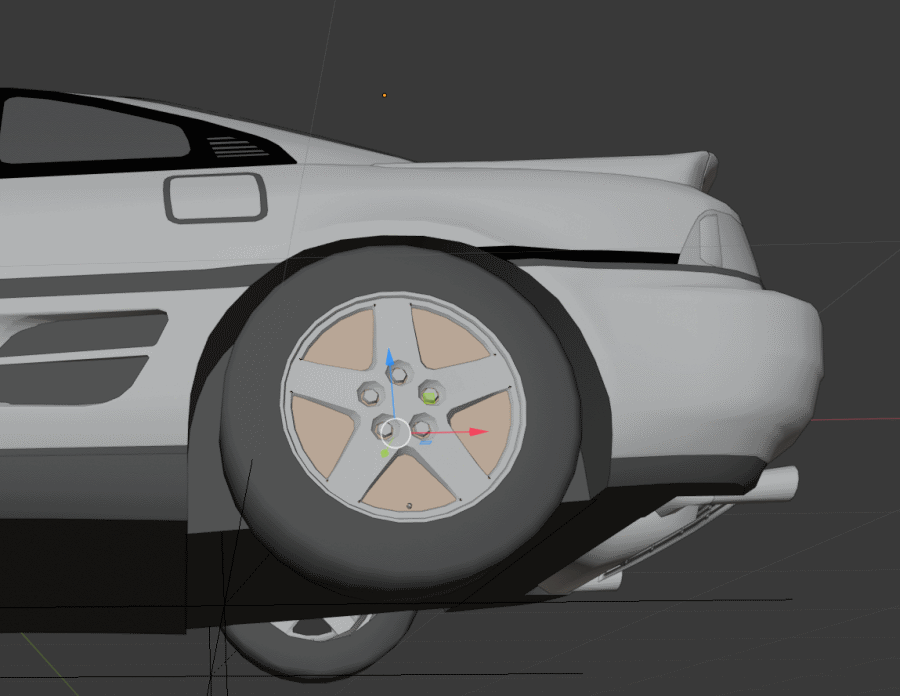
I remove brakes & caliper and fill wheel arches. I also rework on side mirror to make it millable on 3 axis.
Filling side vent
filling other side

filling wheels
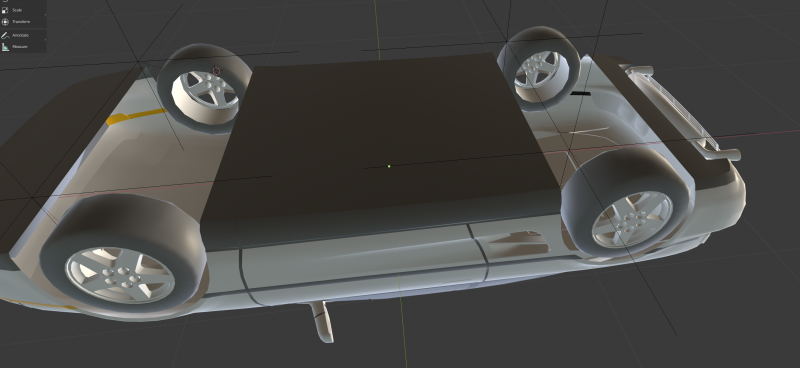
working under the car to fill holes and reduces gap

modifying side mirrors, here difference between normal (left) and modified for CNC (right)
cut testing
I first go to meshlab to clean stl but it crashes many times so I move to meshmixer. In the meantime, I change size.

After many mix of using blender/fusion/meshmixer/meshlab, I finally import the side of the model in fusion360 and convert mesh to brep. Then I create a sketch and
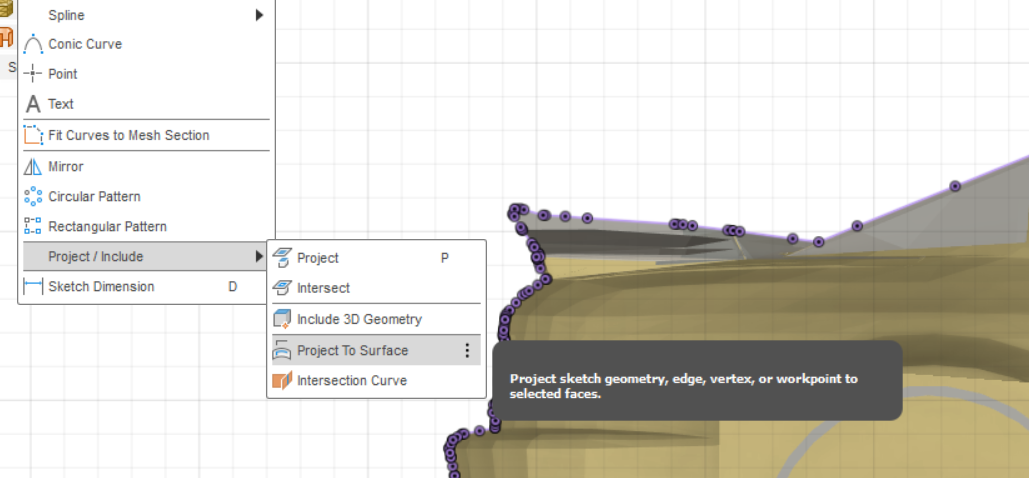
to project the silhouette of car on the sketch.
but shape is not fully closed in projection, so after repairing edges, finally I put some lines to find where shape is open
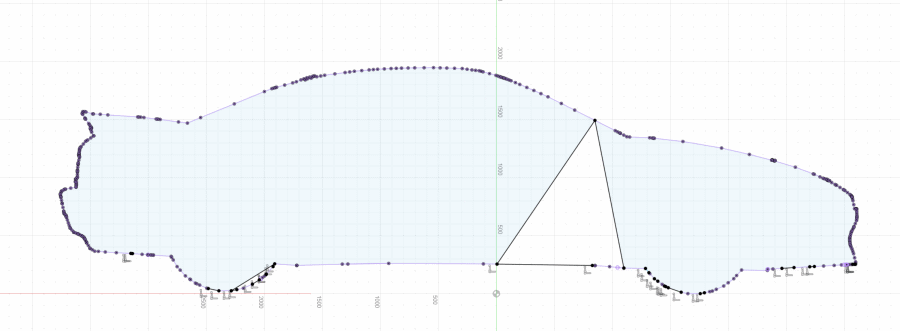
when zooming to the max, I found 2 points not coincident, I let you see the distance…
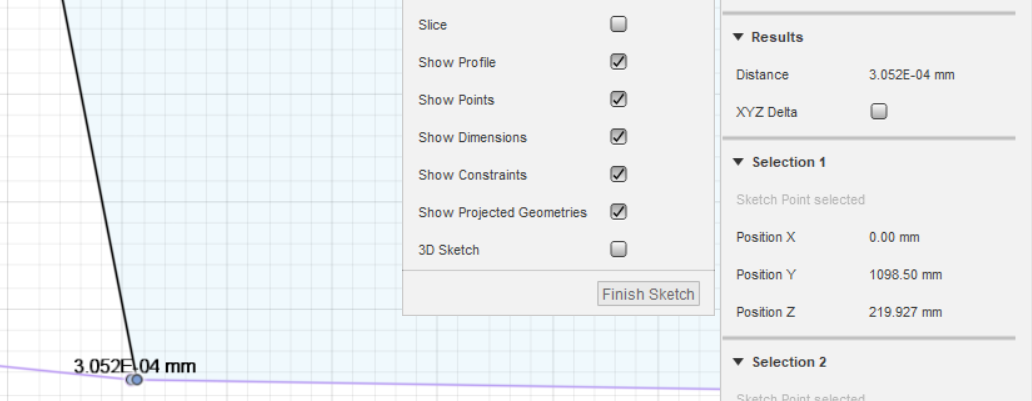
finally, I clean the sketch, I export an stl and go back to meshlab to clean model again.
and the challenger is freecad but tools in it doesn’t deal better with my model than others software.
Not finished yet. Still a lot of work!
idea 2 - Subaru Impreza WRX casting
In the same time, I work on another project. I’ve made this first for 3D printing. Finally, due to lack of time to finish the MR2 project, I fallback to this.
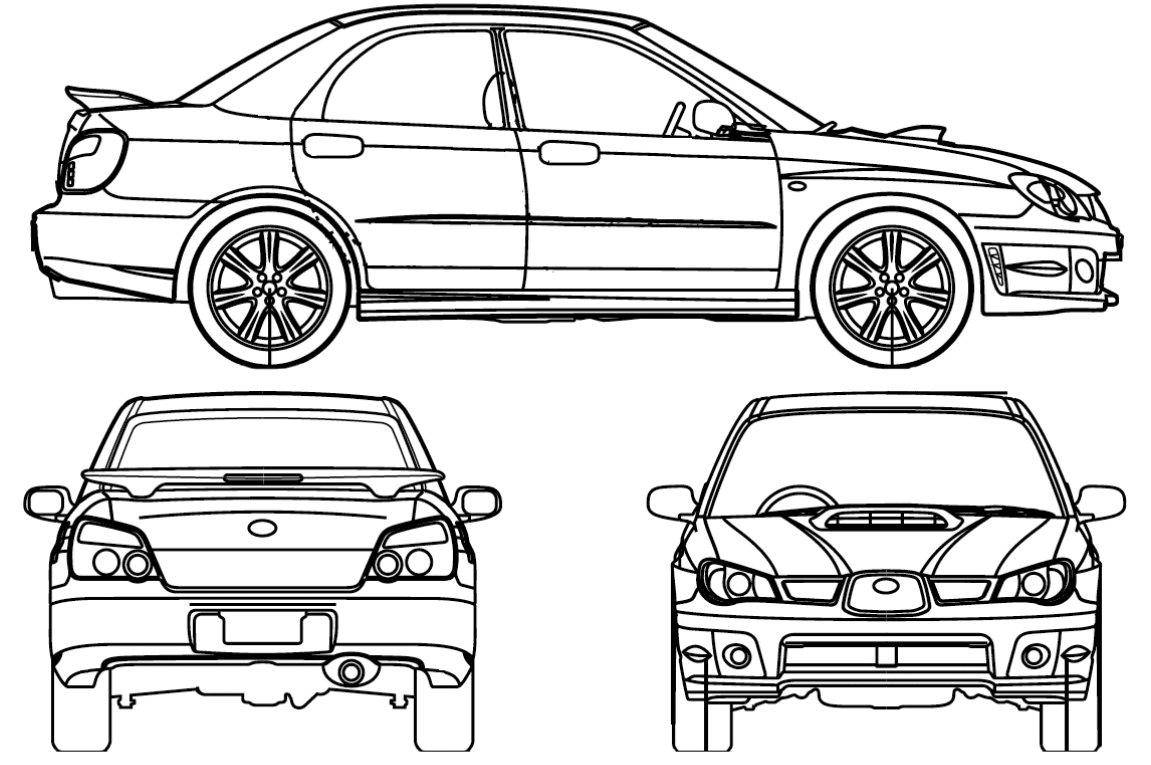
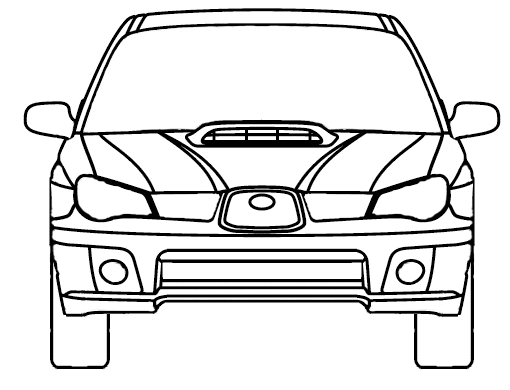
I start first from a blueprint of a Subaru Impreza WRX 06-07 found with google images on internet.
There are some errors & artifact, so I start to clean image and remove details with paint.net
Then I switch to Inkscape, I made a vector from my raster image
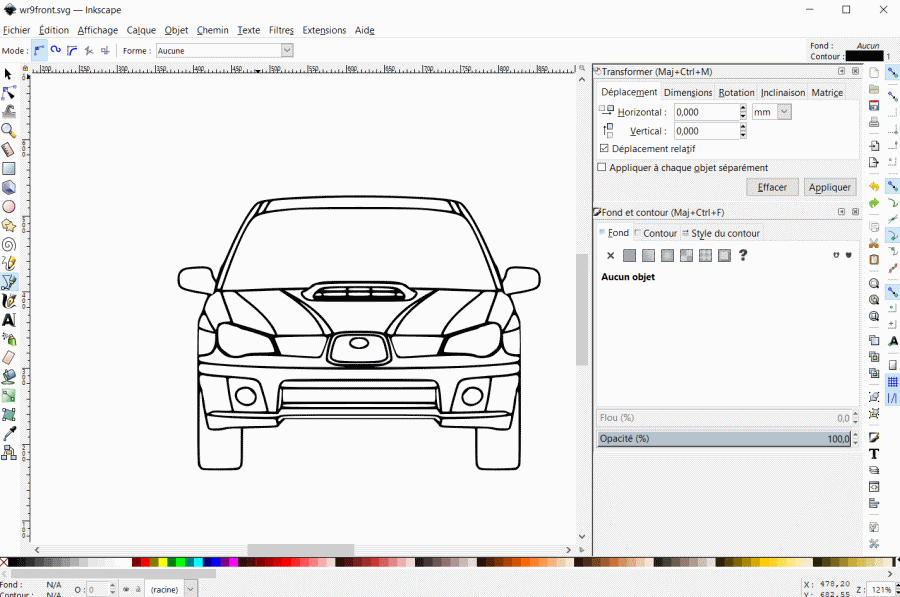
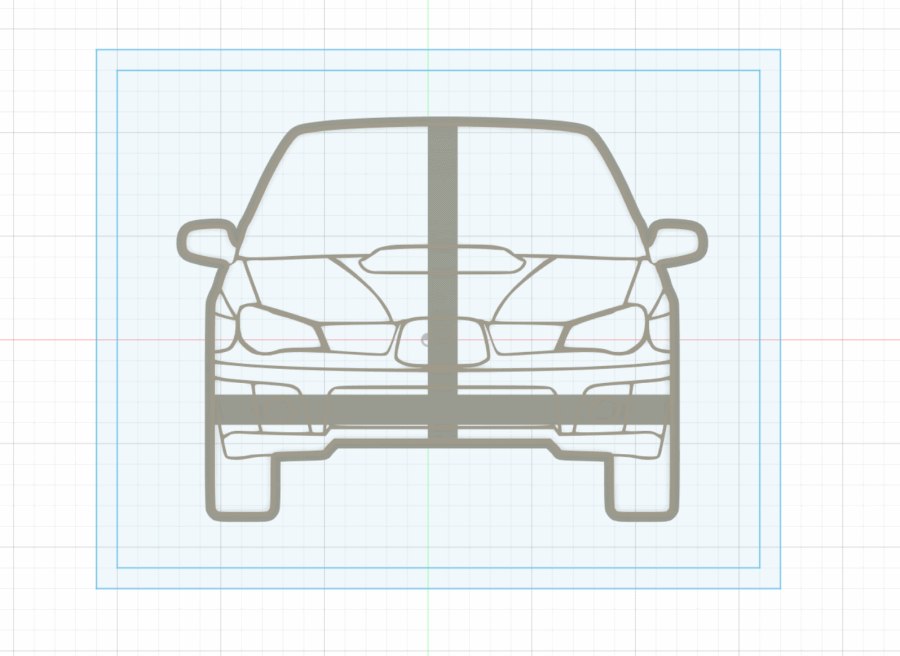
Then I save my vector a svg file and I go to fusion 360. I made a sketch and import my SVG file. Here I add some line to separate outline to inner lines because I will extrude at 2 different heights. Outline will cut the shape of cookie, so it will be higher than inner lines that just make trace on cookie. I also double outlines to make my cutter more stiffer.
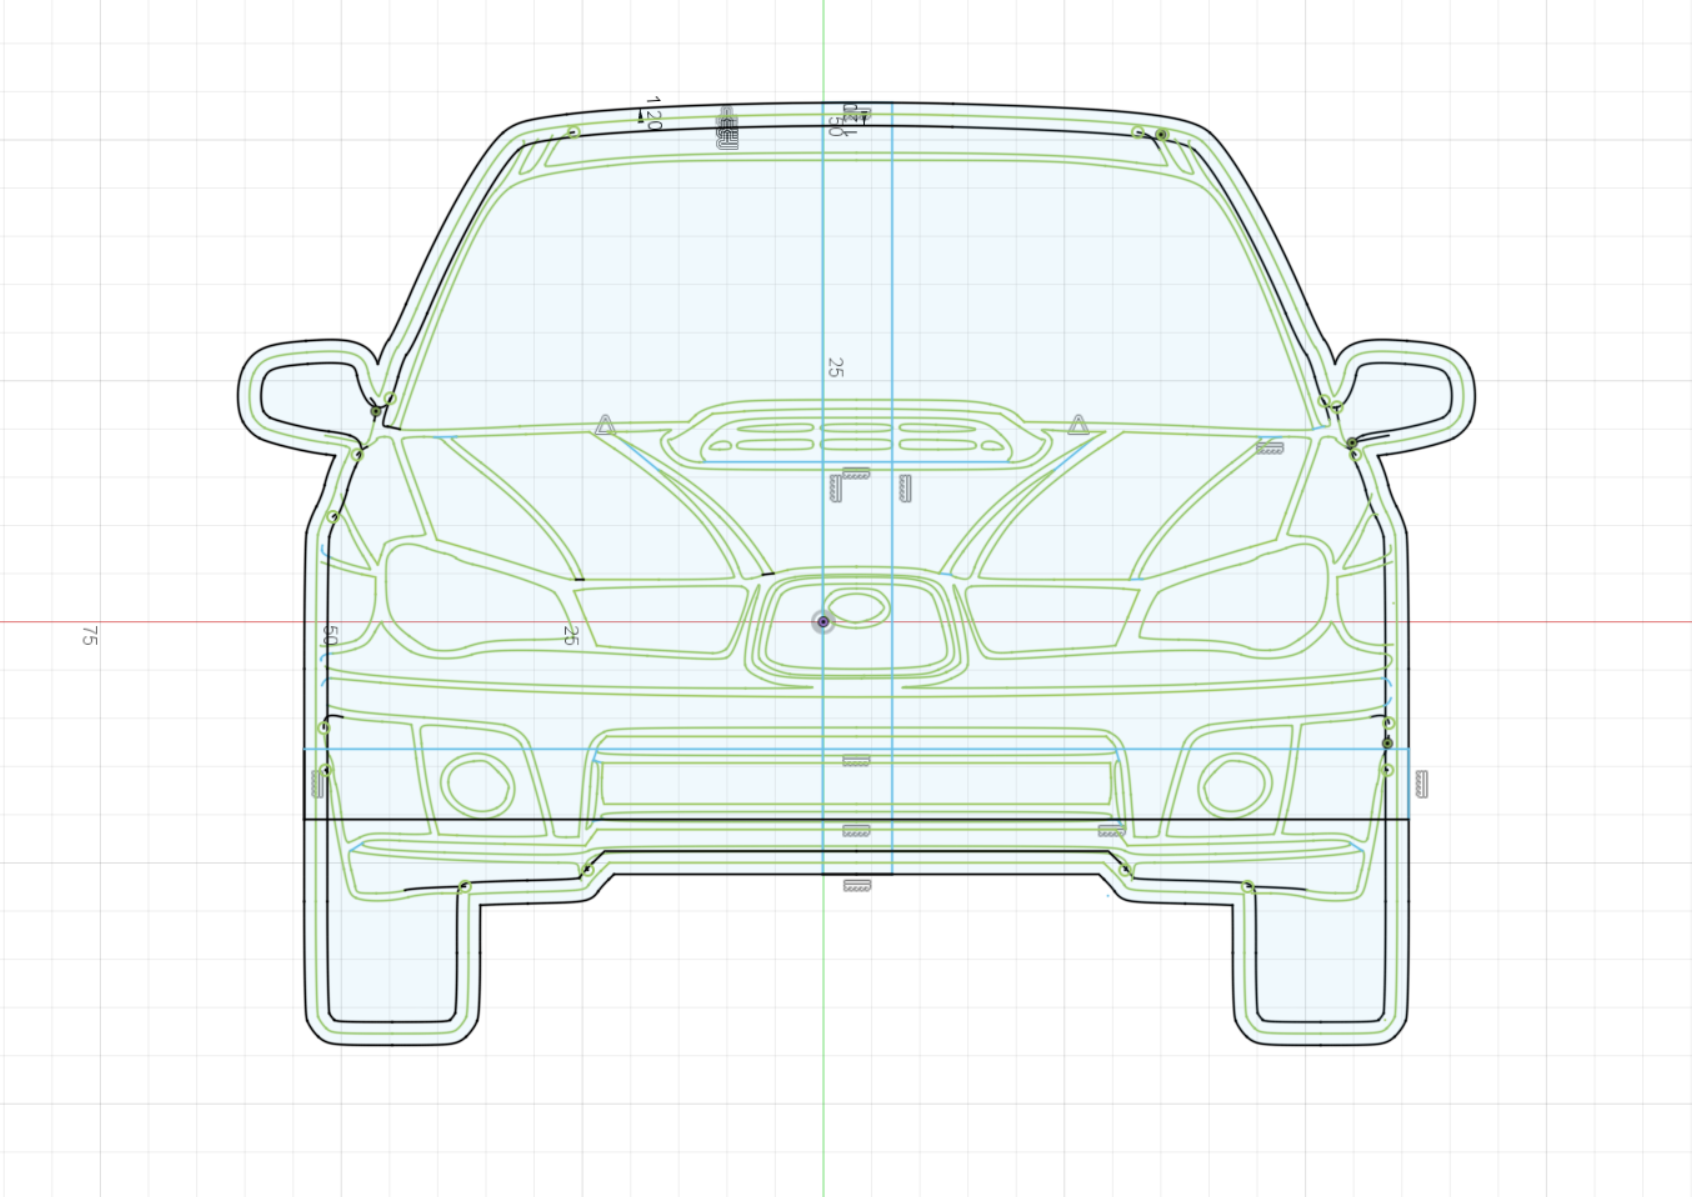
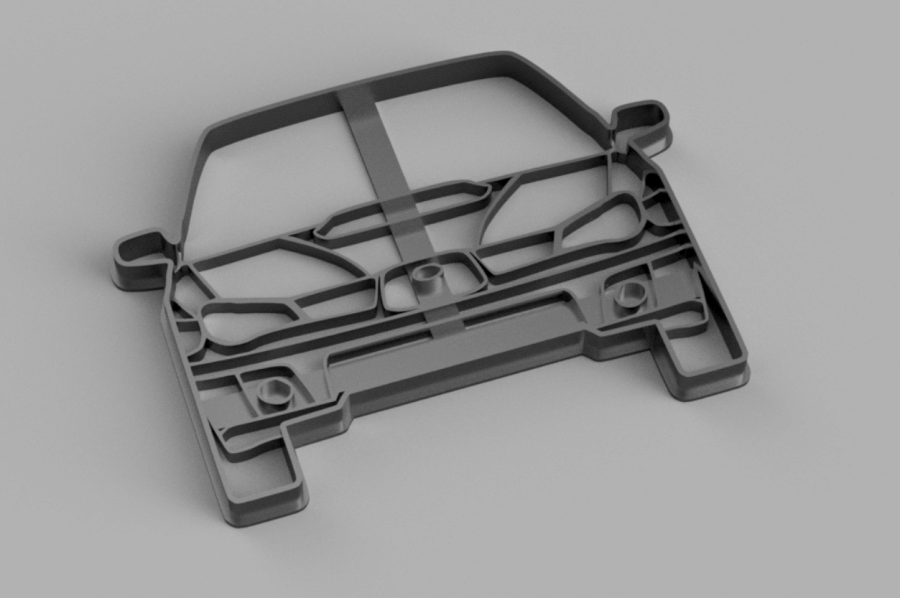
A lot of work to finally go to this result. I have continue to remove details but I keep them in the sketch if I want to add them later. Here a render of the 3D object.
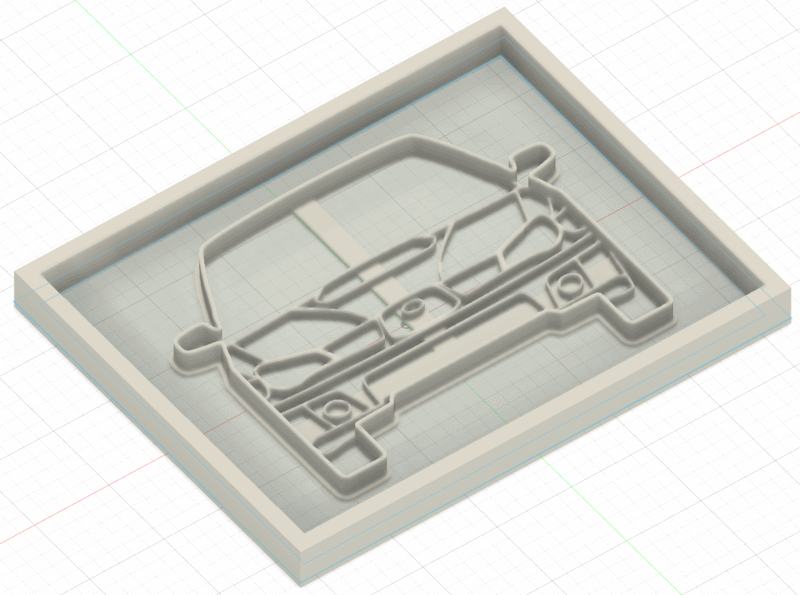
Finally because I use this to make a mold for a mold. I make a derive to another project. In this new project, I add a sketch with 2 rectangles surrounding the car
And then I extrude to make a box
I will make paths and mill when I go back to fablab because I have to measure endmill before.
idea 3 - Cat casting
Back to fablab, I want to go fast and catch up my late so I make a simpler design to mill it. Later when I have more time I will try cars but I know I have to work on 3D models.
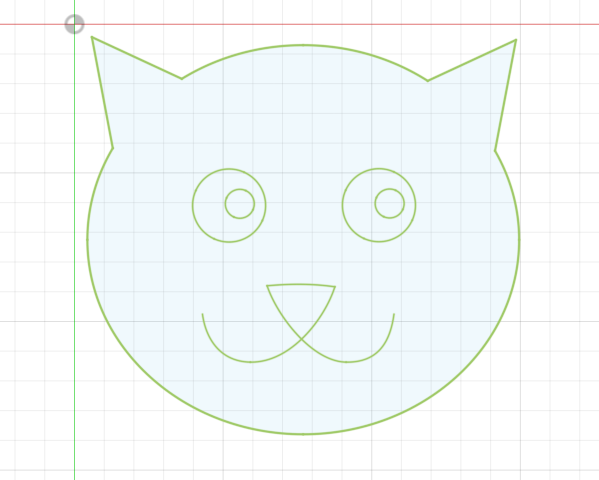
I take a picture of a cat from internet

The svg is available here. I import i directly on fusion 360 and change the scale.
Now I rework some details and make 2 different extrusions.
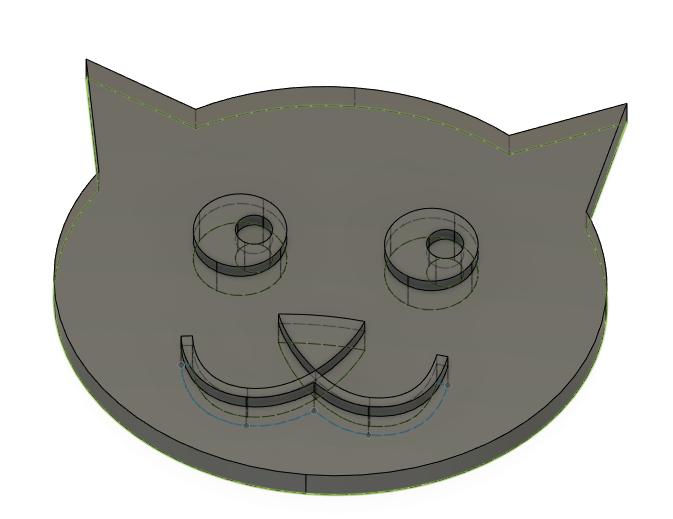
Now I smooth edges with fillet, having a error message, i have to rework on the mustache before make fillet.
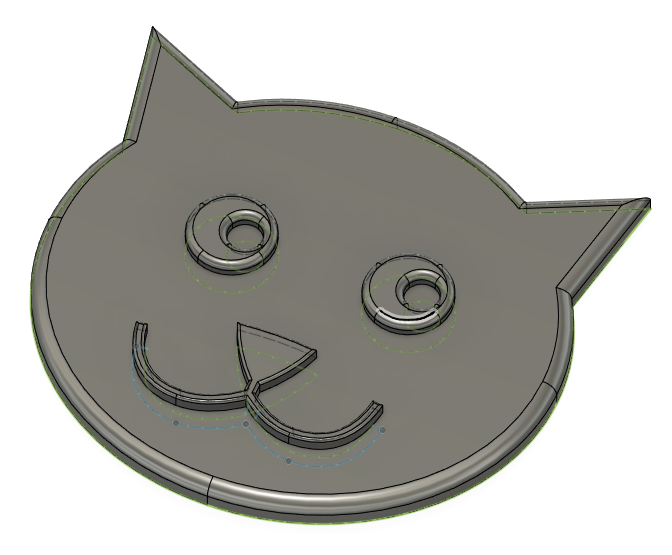
Now I sketch a surrounding box and extrude it.
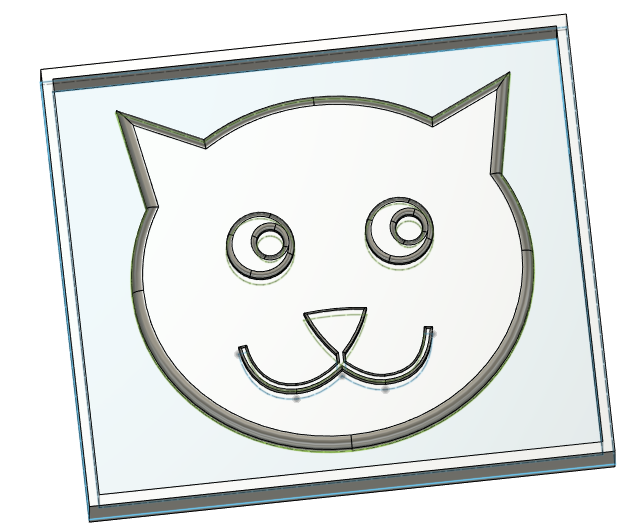
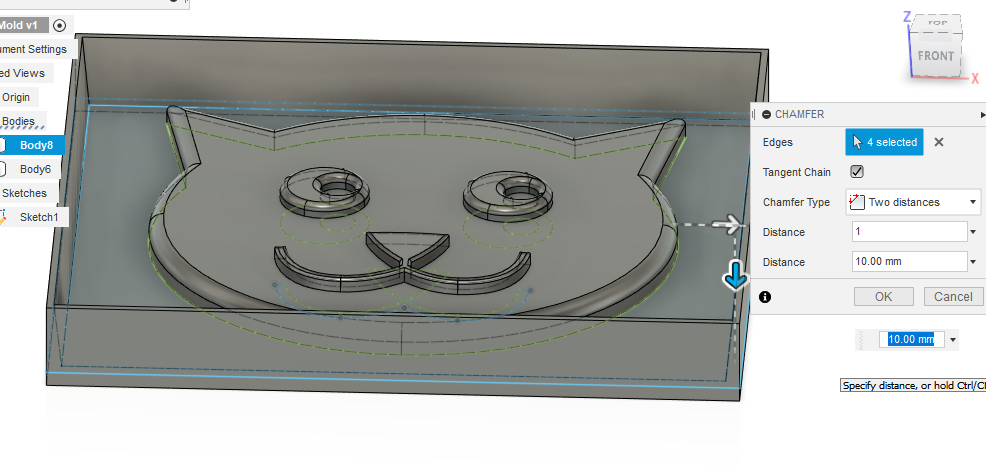
Luc says to add chamber on outside to unmold more easily
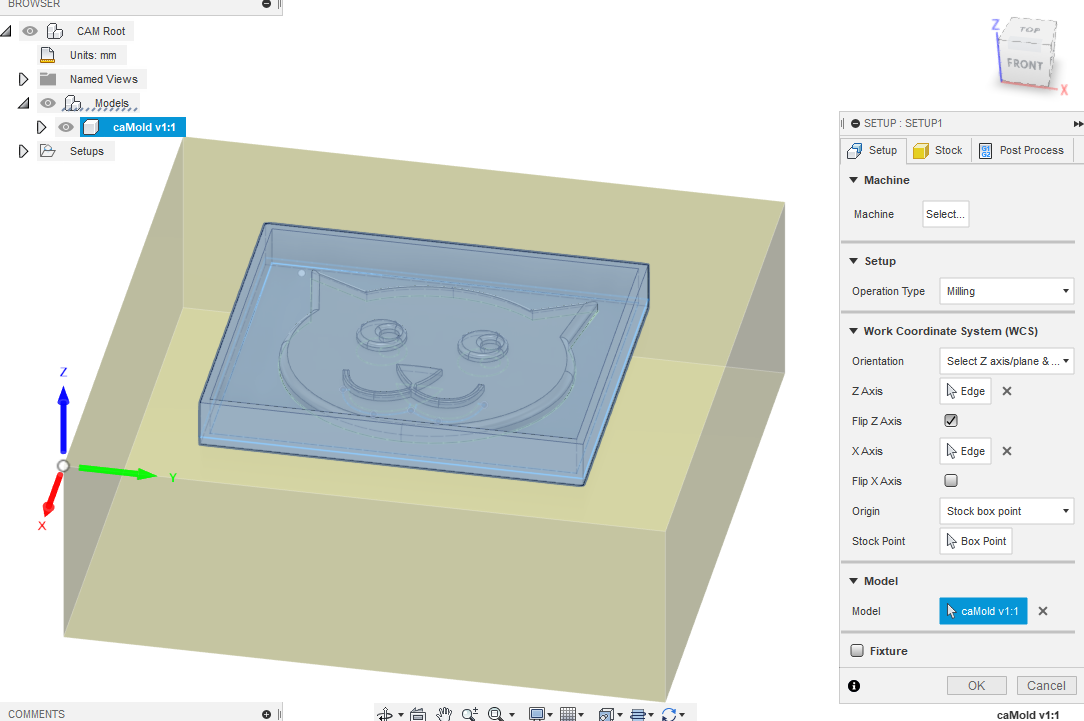
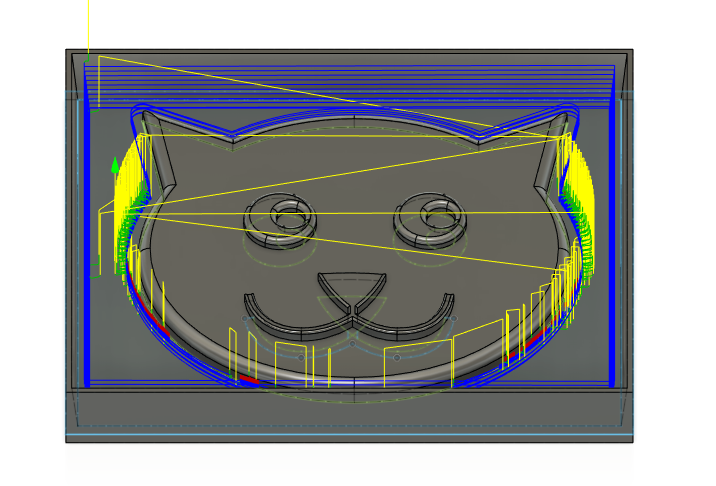
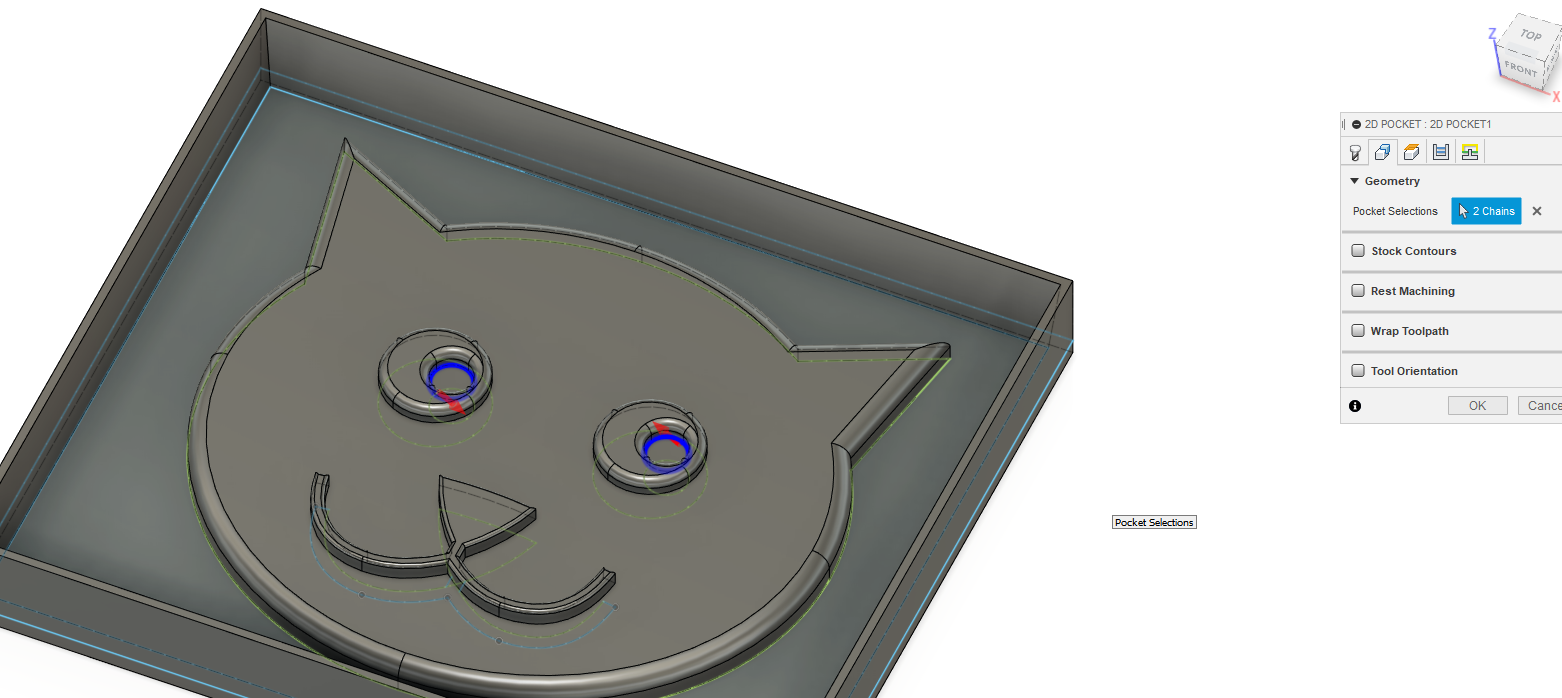
Then I go to manufacturing, I create my setup
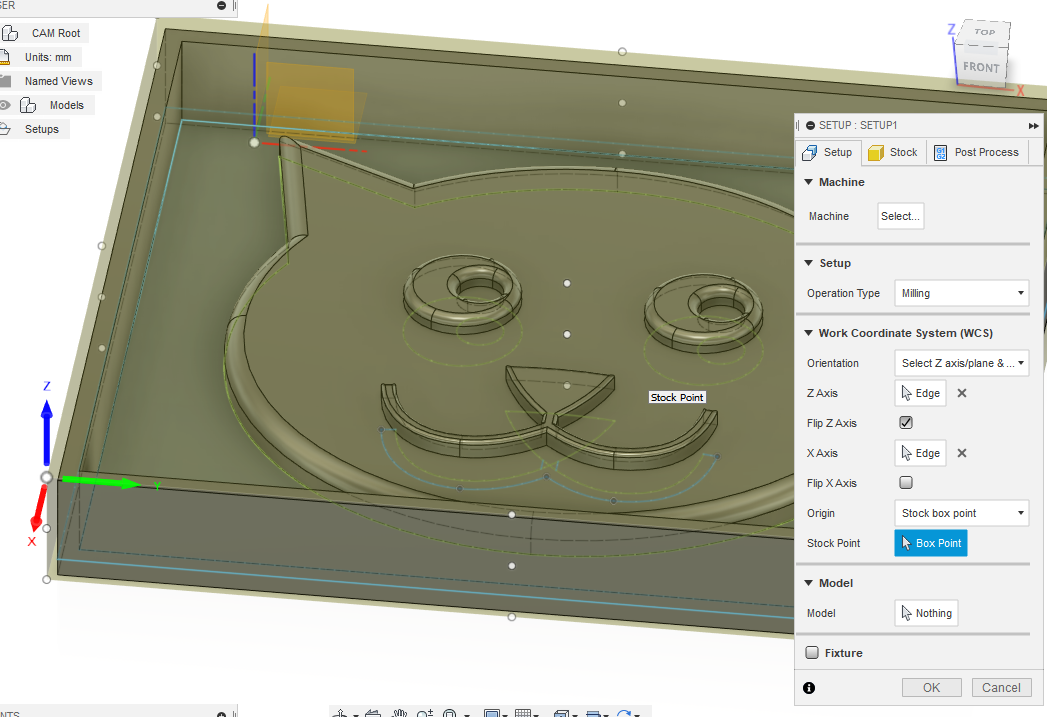
I define size of the material and position of my object to mill.
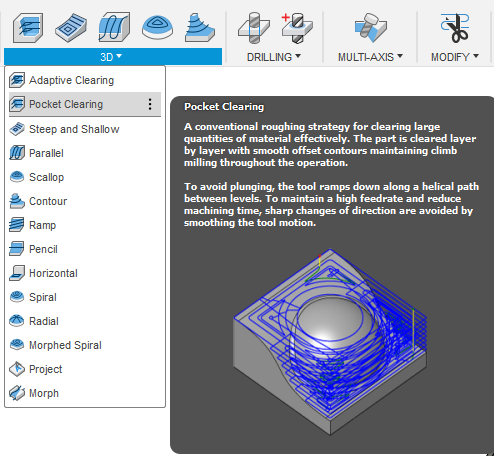
I start with a 3D pocket clearing
I create an endmill, here i use a 4mm 2 flutes endmill.
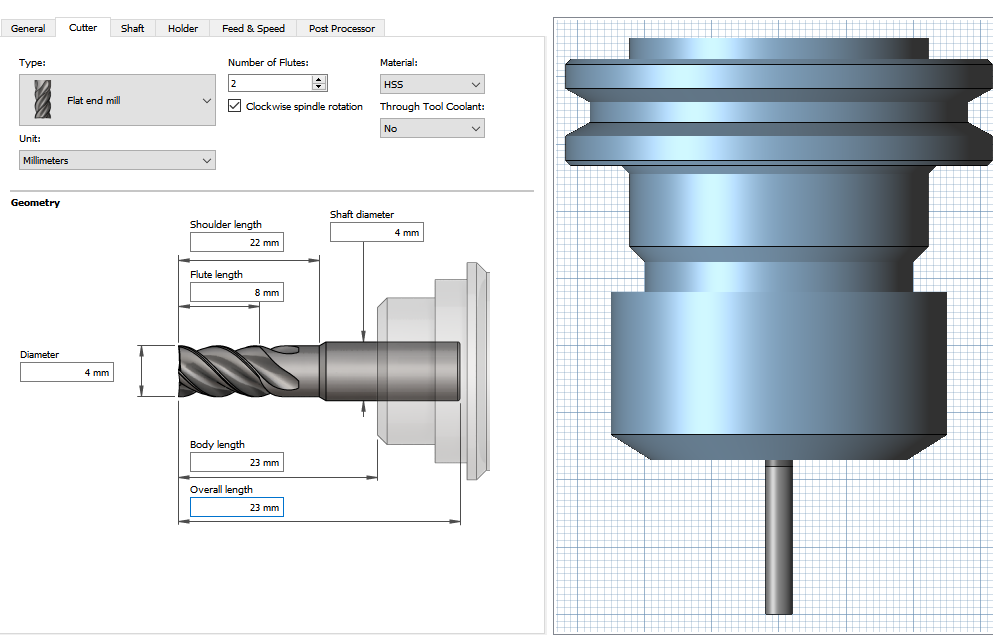
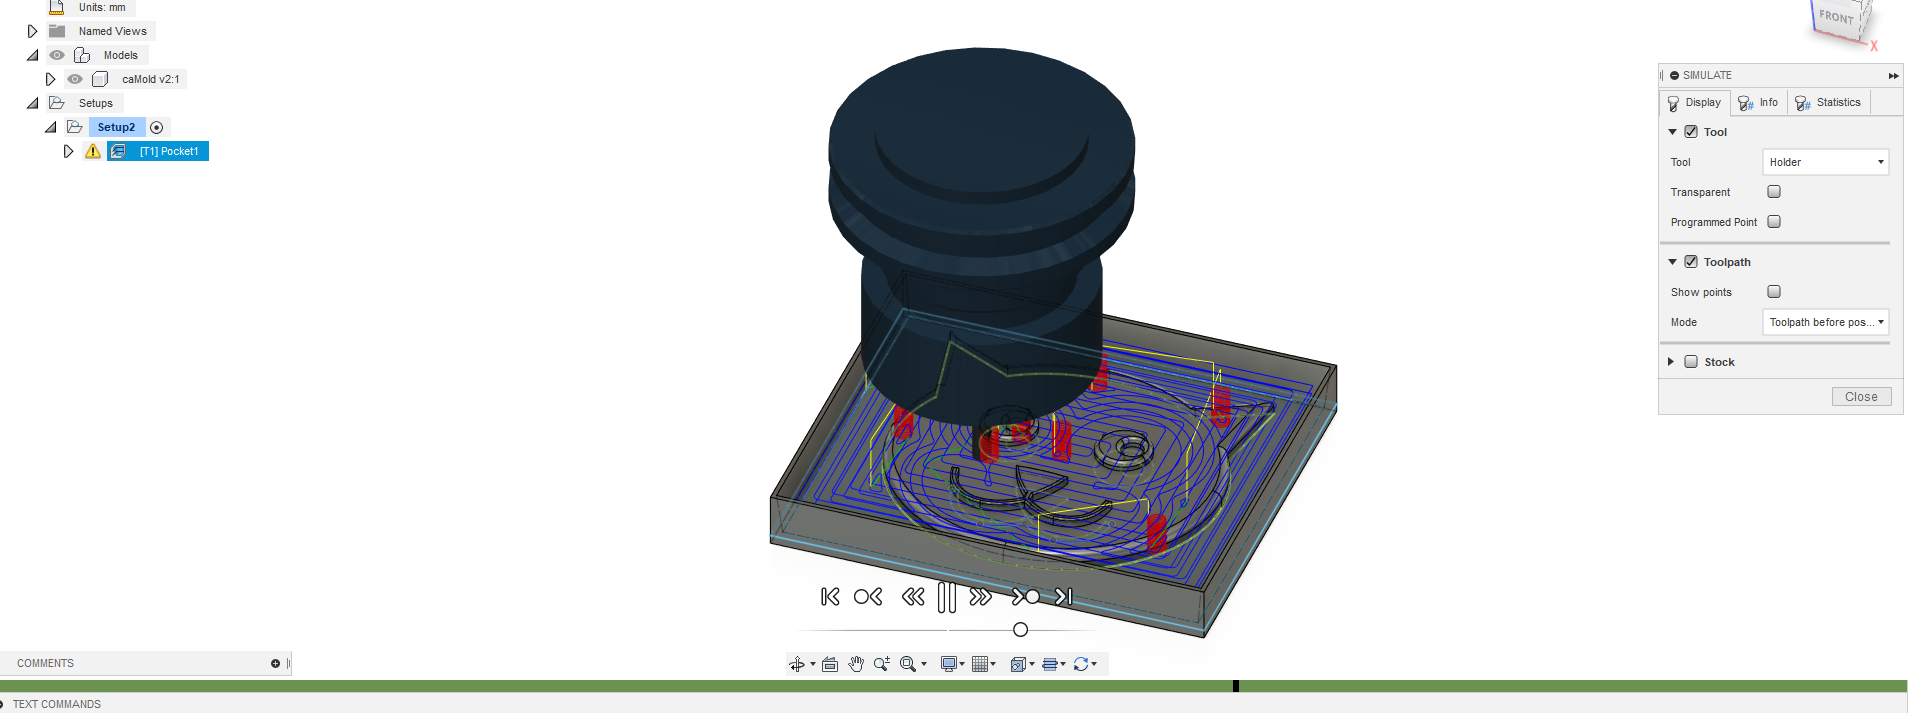
I set max depth to 6mm, wax is soft and easy to mill. I verify toolpath with simulation. All is green! I let 0.5mm stock to finish with an smaller endmill.
With the same endmill, I add a ramp and leave no stock. I don’t take care of yellow lines but it was a bad idea, many many moves en Z axis, many small moves on X & Y. It very stressfull for the structure of the machine. Don’t try this with a cheap CNC.
Then I add a face, bad idea…
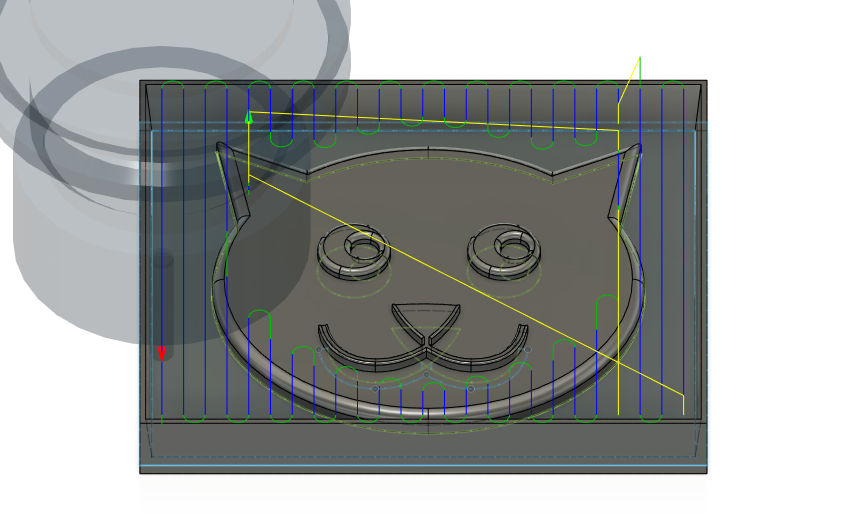
Even selecting the bottom, I don’t look on good point of view when simulating but face just mill to the top to surface material. And I my case, with this shape and because I force my 0 en Z axis to be lower, it draw lines on the top (I’ve let boundaries to center of endmill).
I add a new step, that normally replace face, it’s a parralel strategy :
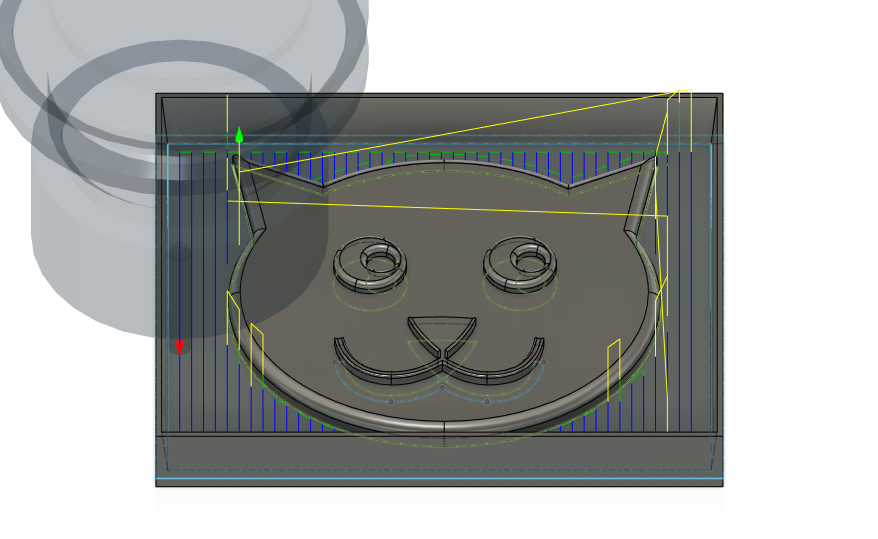
The same in another point of view, to be sure this time !
Now i add a finishing path with a 1mm endmill.
Here my final strategies used on the wax.
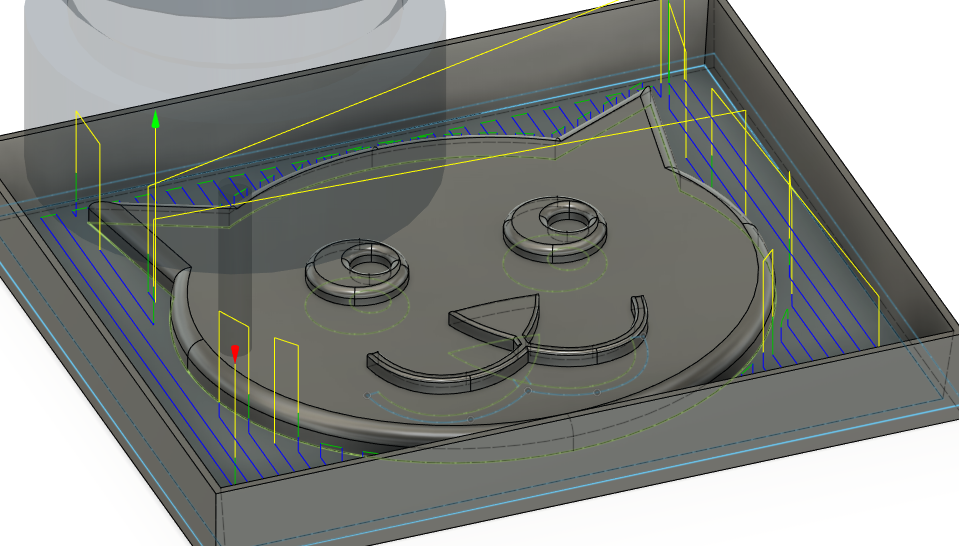
The face part is useless, it works only on top. And because I manually force Z axis a little bit lower, result is worse with this.
Finally I use a parallel to have smooth finish on the flat bottom (T2 parallel 2)
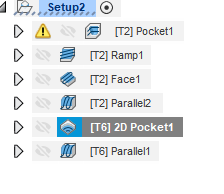
Milling the mold of the mold
Then I use the big CNC of AgriLab.
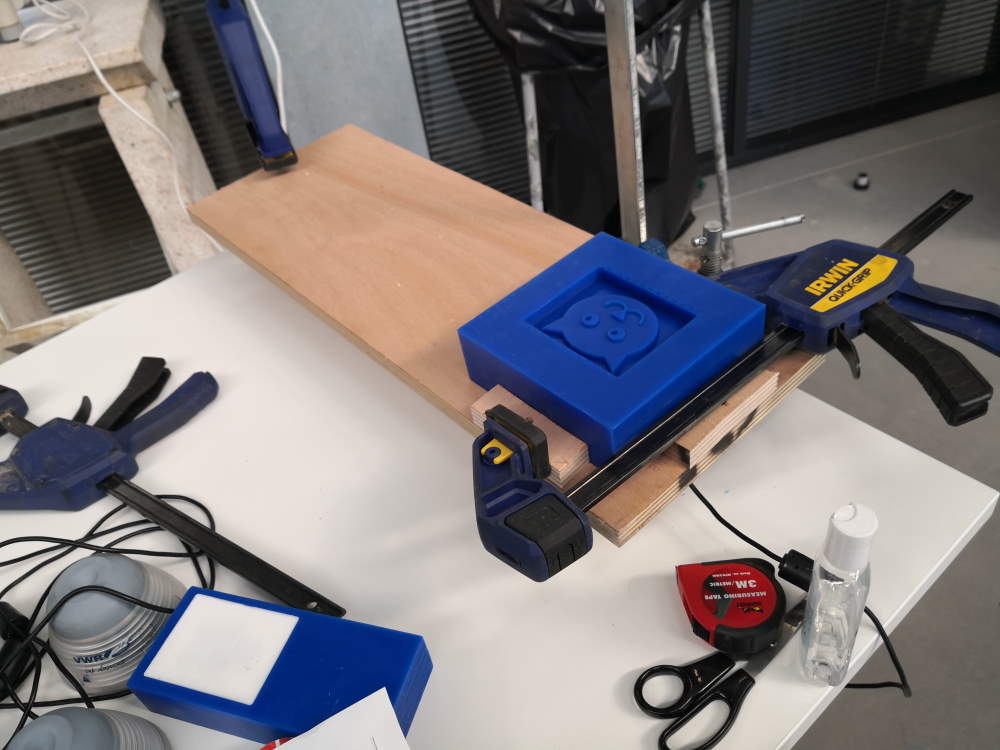
Because I don’t want to glue or screw the wax, I create a low profile quick release wax holder :

Due to his low profile, this holder permit a few error when using CNC, nothing is higher than the top of material in the travel tools holder <> material. I have also at least 7cm on each directions lower than the top of material. With this trick, if I make error on my axis, I have time to stop the machine if I see it goes in wrong way.
Other interesting part, not used here, if I want to mill several wax, it takes only a few second to change material!
Here the end result, nothing move when milling :
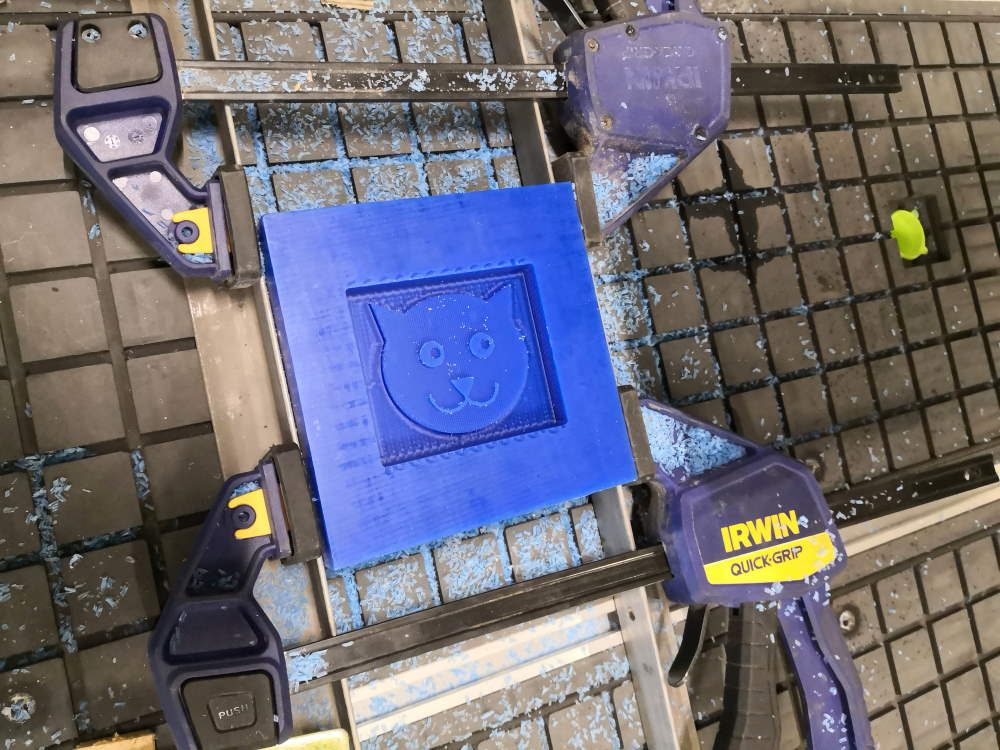
Casting the mold
I will made my mold with RTV 3428 A and B from : https://espritcomposite.com/rtv-alimentaire/40-silicone-contact-alimentaire-3428.html
Specifications : It’s a silicone for food. White color. Proportion 100g of A for 10g of B Timing for the full curing : 16h at 20°C or 40 minutes at 60°C Maximum timing too pour into the mold : 90 minutes at 23°C
specification document in french : rtv3428_a_b_ft.pdf
I’ve found security notice on last year Luc page because supplier doesn’t give us one: RTV3428-MSDS.pdf
Because there’s still no vacuum pump at AgriLab, I create another machine to have a better result on silicone casting. I know 2 way to remove bubbles on casting: vacuum or vibrate (I use this technique when I make concrete for building things like terrace or house). Better than complain of unavailable vacuum pump, I build my own machine to vibrate silicone in the mold.
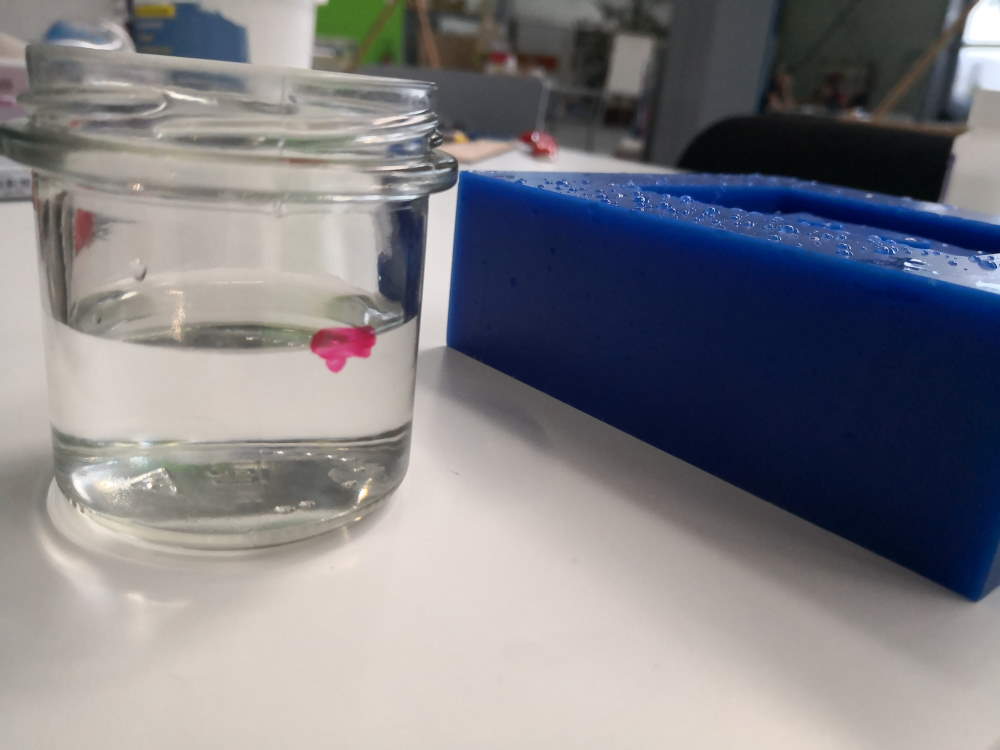
To find correct volume of silicone, I fill mold with water.
Then I pour water in translucent glass jar and I mark the level.
I empty the jar and put it on a scale and tare. Now scale is at 0.

Now I fill the jar up with silicone (A part) to the level mark. Weight is 91.6g.
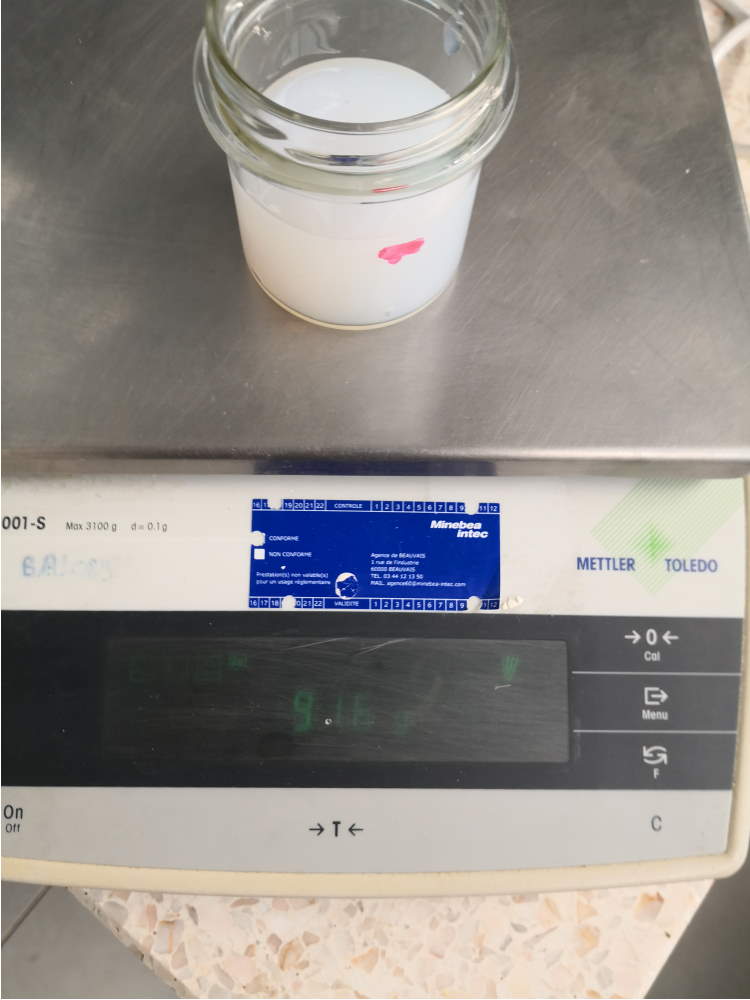
Now, I have to add the B part @ 10%, so I add 9g. I’m now at 100g. I have an extra 10% security volume because silicone stick everywhere so I lost a few with each object touching it (the jar, the wood stick I use to mix A+B, etc.). I fill the mold with the mix and put all on the machine I have created to add vibration.
And a little video of the system :
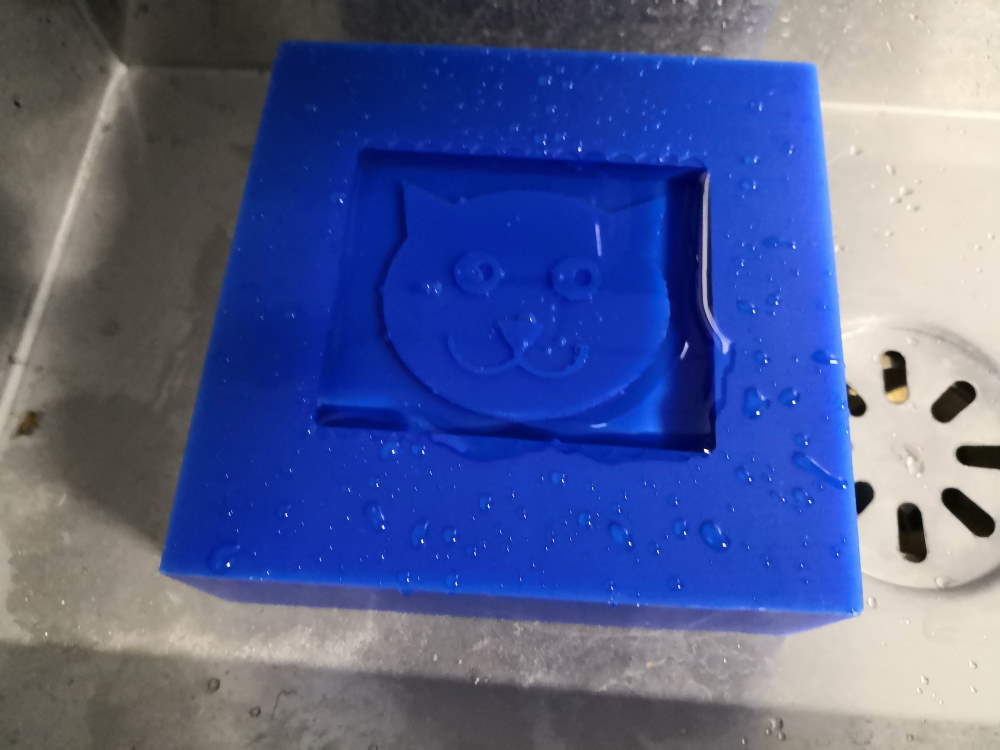
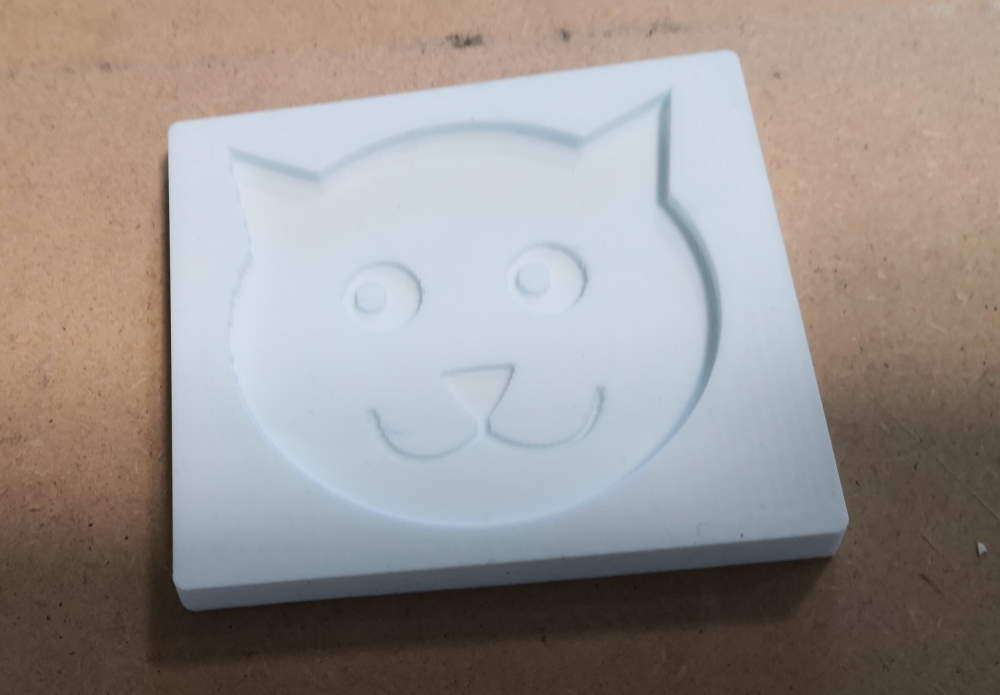
16h later, time to unmold, here the result, all is perfect molded, bubble free, no default :
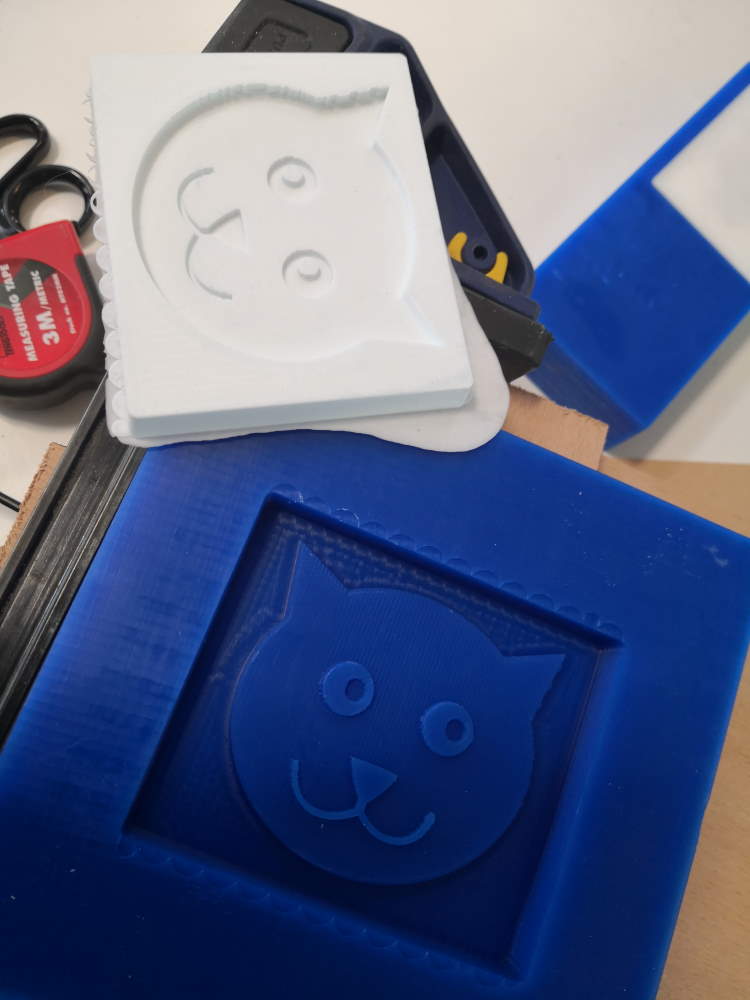
I just cut a little the side with a cutter to clean object :
Casting final object in chocolate
Disclaimer: following technique may be not the perfect one but remember context: 2020, COVID-19, big shutdown, I can’t go everywhere to find all the stuff.
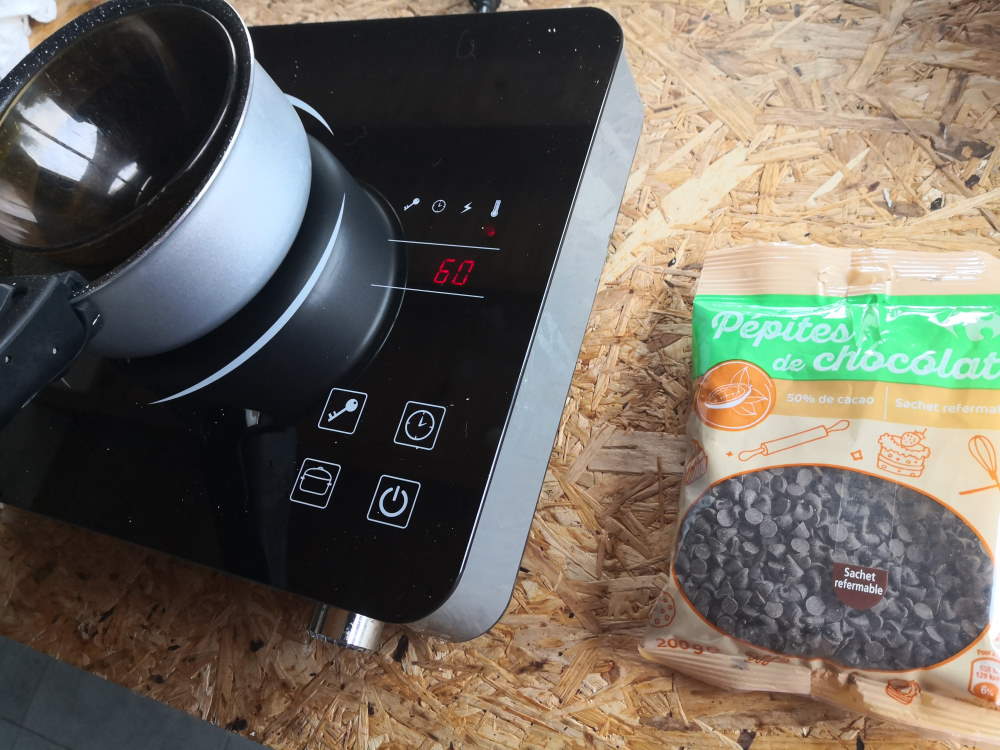
At home, I try to cast my final object. I try first with dessert chocolate but it doesn’t work.
Here is the second attempt with another chocolate, I usually use this in cookies. I melt it in a bowl in a water-bath @ 60°C. I have no specification on this chocolate to melt it and I can’t set lower than 60°C on this hot plate.
Chocolate is melt, time to pour with a spatula :
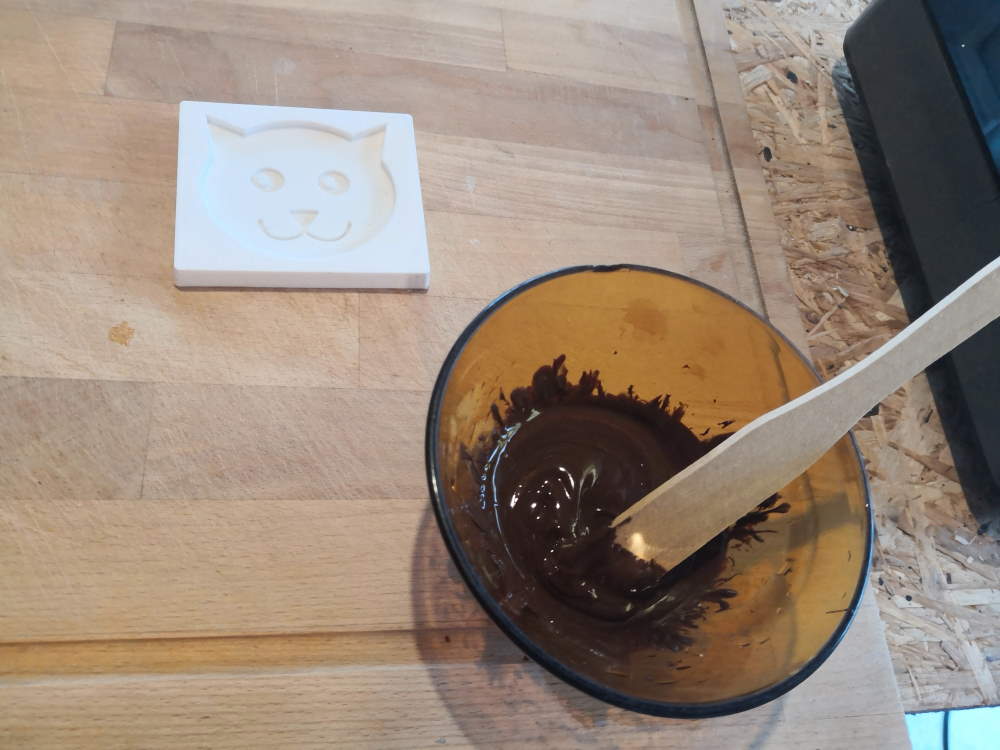
I fill mold with chocolate using the spatula. I press to fill everywhere and avoid bubble, at the end I slam the mold with chocolate to remove bubbles (vibration).
Someone gave me a old vacuum & seal machine, so I put mold + chocolate on a bag, vacuum (also for removing bubbles) and seal it. Now I can put it in the freezer.
2 hours later, I unmold my chocolate.
Attachments
caMold.f3d I’m sorry but manufacture part isn’t included in file due to a crash of my computer and it wasn’t saved. Never trust online software!