Week 03
Computer-Aided Design
Assignment:
Model (raster, vector, 2D, 3D, render, animate, simulate, ...) a possible final project, and post it on your class page.Learning outcomes: Evaluate and select 2D and 3D software, Demonstrate and describe processes used in modelling with 2D and 3D software.Have you? Modeled experimental objects/part of a possible project in 2D and 3D software, Shown how you did it with words/images/screenshots, Included your original design files.Parametric design.
2d, 2.5 design.
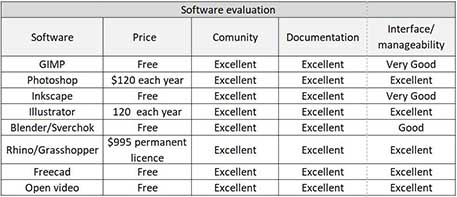
Raster, Vector
- GIMP:
- Photoshop:
- Inkscape:
- Illustrator:
Is an image manipulation software and a free alternative to Photoshop, I did this tutorial where is clearly explained the basic concepts and how to use the software. I find it very easy to use and very similar to Photoshop just with differences in the user interface. A great advantage is that you do not have to pay for a license.
This is a PNG image that I created with GIMP:

You can download the file:
It's imaging and graphic design software allows you create and enhance photographs, illustrations, and 3D artwork, I have recently discovered that allows you design websites and mobile apps, also to edit videos, simulate real-life paintings, and more.
I have used it a lot since the college to edit pictures, photographs and 3D views of my projects, to digitize some of my drawings, and then to be printed in sticker paper or be sublimated in a T-shirt.

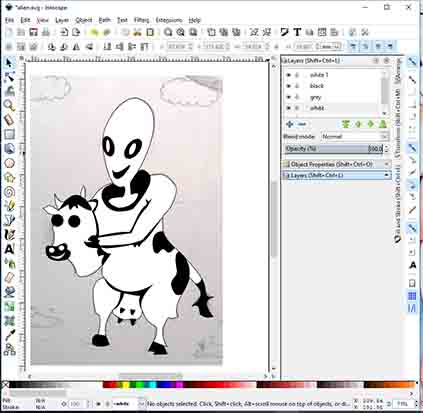
Is a free and open-source vector graphics editor; it can be used to create or edit vector graphics such as illustrator. I did this tutorial where I learned how to create a simple vector tracing of one of my alien sketchs.
For me was a little difficult to navigate through the layers and change one object to a different layer I think in illustrator the user interface is easier to handle.
The best thing of this software is that is free and open source.
You can download the file:
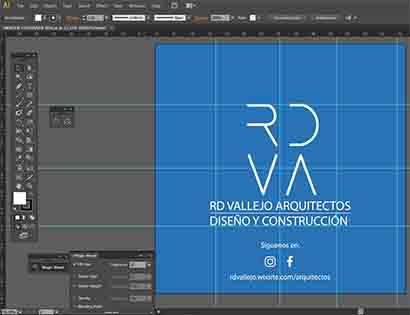
It's a vector graphics software lets you create logos, icons, drawings, typography, and illustrations for print, web, video, and mobile.
I started using it in the university for the design of my presentation sheets, then to create vector drawings like advertising for my architecture office and recently to cut and engrave with laser.
I find this software very complete and and it runs very well when creating files composed of many images or with a lot of information, the bad thing is you had to pay for a license and they have different prices focused for the different users which can be paid in a plan.
3d design types
- Constructive solid geometry (CSG)
- Constrained
- Hierarchical
- Parametric
- Procedural
- Algorithmic
- boundary (b-rep)
- function (f-rep) representations:
- graphical user interface(GUI)
- Scripting
- hardware description languages
- imperative,declarative,generative:
- optimization:
- Multidisciplinary Design Optimization
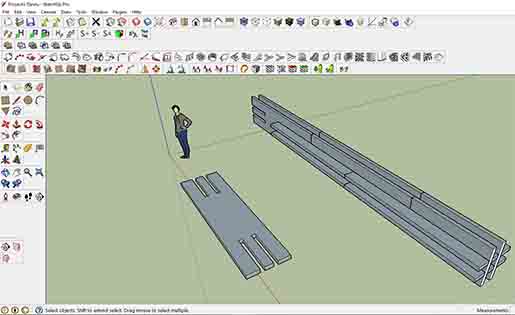
Sketch up
My friend Ale help me with another idea for my final project structure, it was to divide the base module to the half so it can be assembled on both sides.
I did't model this archive, but I've already worked on Sketch Up and I can say it's very useful to model, and a very easy to use it has a lot plugins that make it more complete the bad thing is you need to buy a license.
I think the limitations of this program are the parametric design and rendering engine.
You can download the file:
Blender Sverchok
Blender is a open-source 3D creation suite. Sverchok is a parametric tool for Blender built to help generate complex 3d shapes to control the flow of math and geometry. Those familiar with Rhinoceros 3D (Grasshoper), Houdini, Dynamo, etc.
I think Grasshoper is little bit easier to use because of it user interface but I found the two of them great.
I downloaded and installed Blender then I did the same with Sverchok after that I read the introduction and did the lesson 01 where I learned to create vertex, vectors and to change the size of the plane using mathematical nodes.

You can download the file:
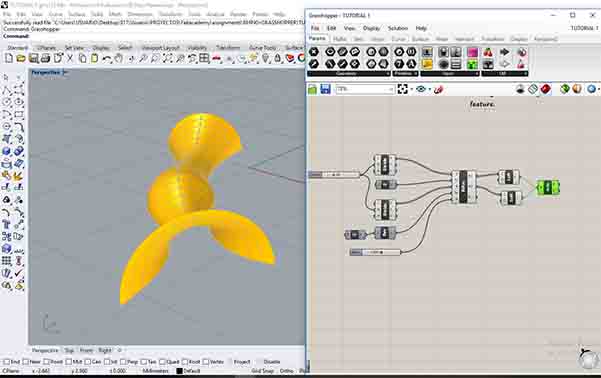
Rhino Grasshoper
I feel interested in parametric design because I did some googling in the FabAcademy browser about folding and I found some interesting projects where the students use Rhinoceros and Grasshoper to do some origami shapes.
So I downloaded and installed Rhino 6 which has integrated Grasshopper that is a full 90 day version which means that after 90 days, Rhino will not allow me to save or load plug-ins until I purchase a license. I'm OK with that because I just want to do some tutorials to understand how it works.
I did some video tutorials of Introduction to Grasshopper foundational that help me understanding a little about Grasshopper.
You can download my files:
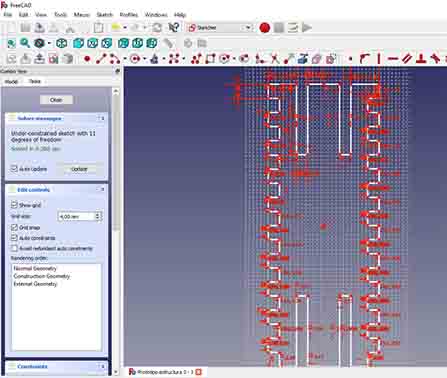
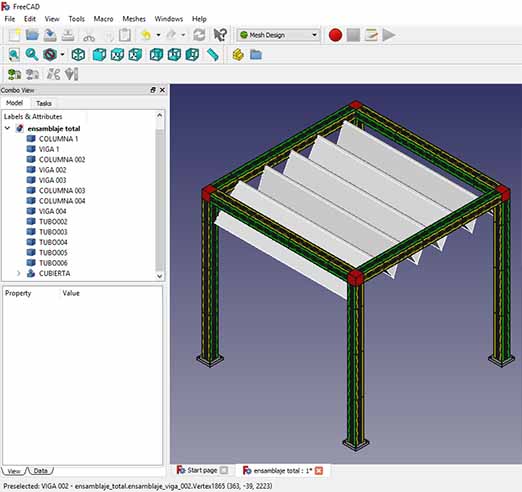
FreeCad
FreeCAD is an open-source parametric 3D modeler made primarily to design real-life objects of any size. Also allows you to sketch geometry constrained 2D shapes and use them as a base to build other objects.
- I started downloading and installing FreeCad as a recommendation of my instructor Roberto and Neil.
- The next step was to follow this tutorial where explain in a very simple way how you can make a 2D parametric sketch.
- Then I became familiar with the documentation page of FreeCad called wiki where there is a lot information about the program.
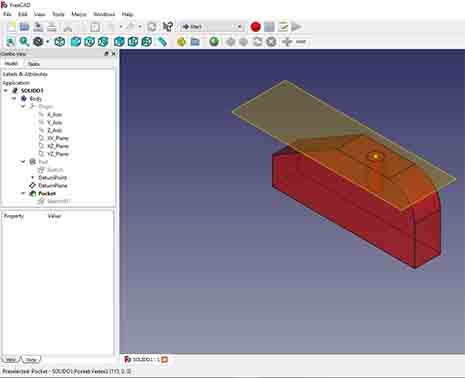
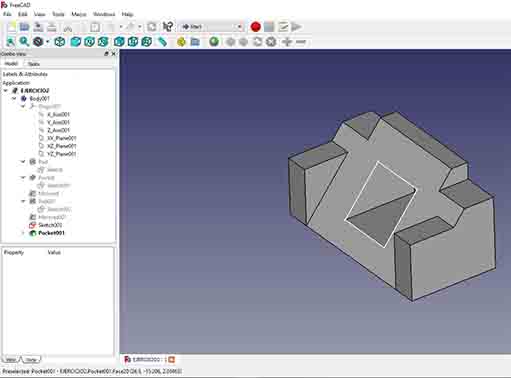
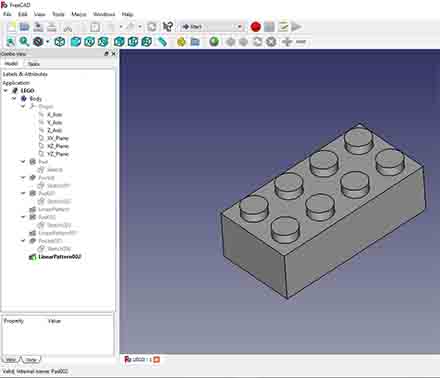
- After that I went to the Modeling 3D Parts tutorials and made three of them: Simple Part, Basic Part and LEGO!.
Slideshow 2: Click on the arrow to see the images!
You can download my files:
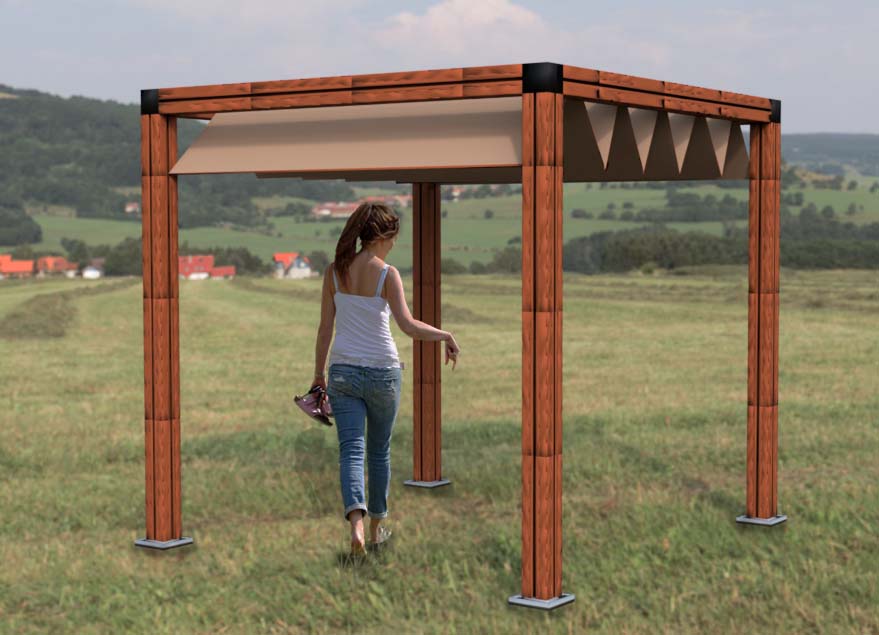
Using Freecad for my Final Project:
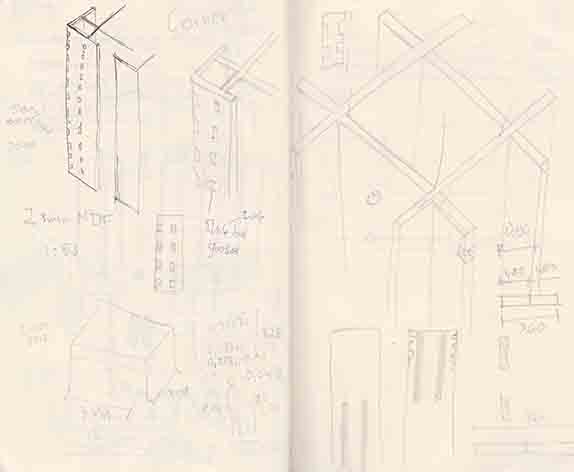
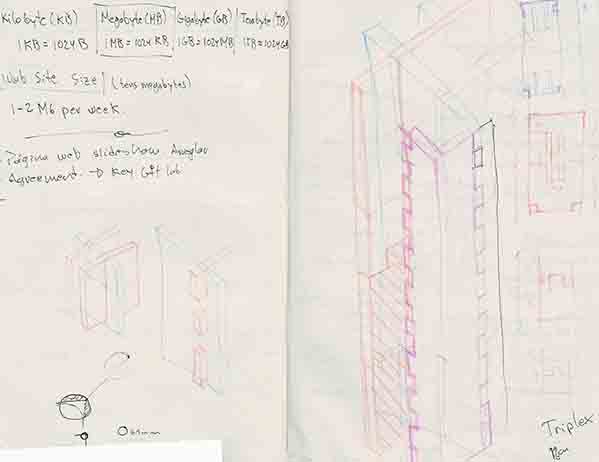
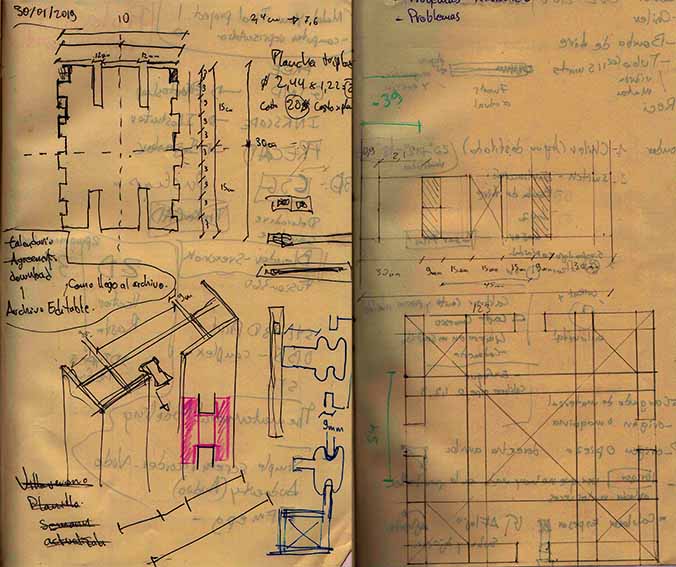
I started thinking and drawing how the main structure will be assemble like a press fit system, I'm trying to make a structure with the same form of the profile used in my inspiration project ModuLounge due to the rails that form.
I want to make one base module that should be repeated and assemble one with another to form the columns and beams, also I should create a bottom module and top module to close the shape. In addition to this I should design the corners to close the form.
Using FreeCad to make the parts of my Final Project:
- First structure prototype:
- Second structure prototype:
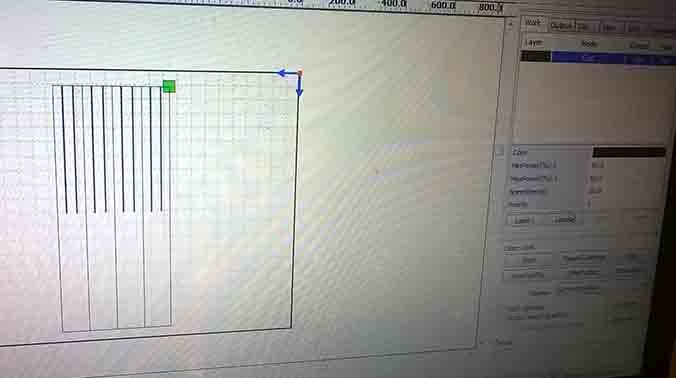
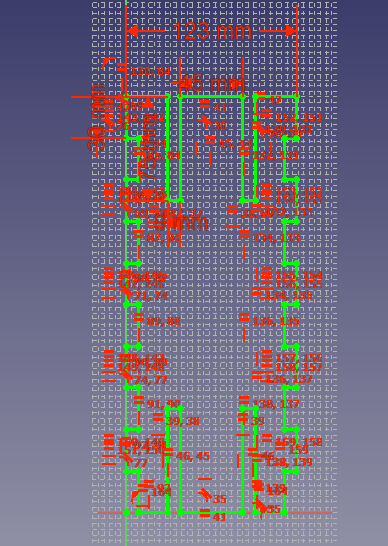
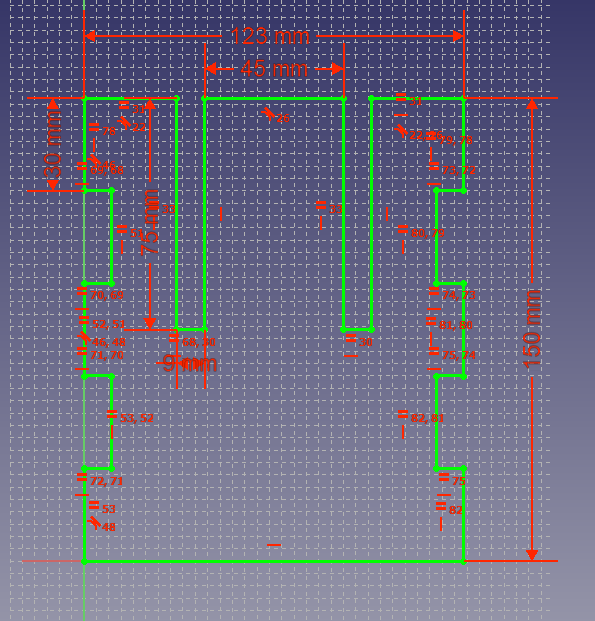
The idea was to make one module to be repeated to conform the profile shape. I started making a test of how to perform the shape of the profile using parametric design.
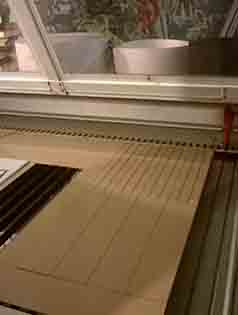
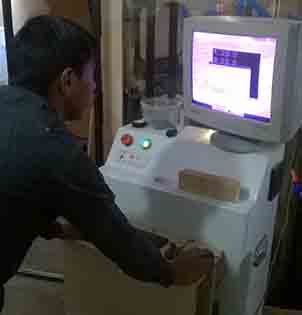
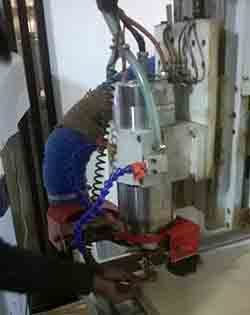
With the file ready I asked Alex (actually works at FabLabZoi) to help me cut my archives with Laser, then he recommend me to use MDF of 3mm and explain me the basic steps to run the machine.
Slideshow 3: Click on the arrow to see the images!
You can download the file:
Comment: I don't have the first Freecad archive of my first prototype because I overwrite the second prototype in the first, so I just put the DXF file that I use to cut in laser.
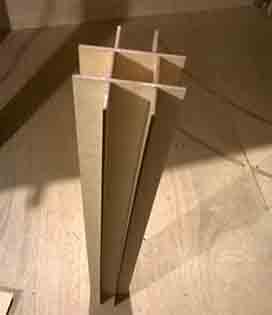
1st prototype Conclusion:
The material used, MDF 3mm thickness is too weak and flexible to be used as structure.
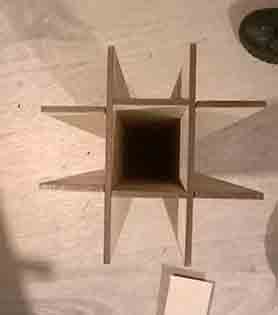
The design of the base module is to long to form a rigid shape, it should be shorter and conformed by smaller modules to form a one larger shape.
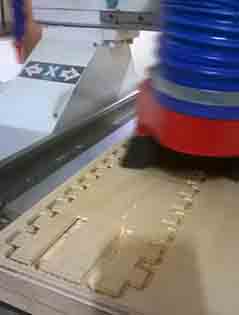
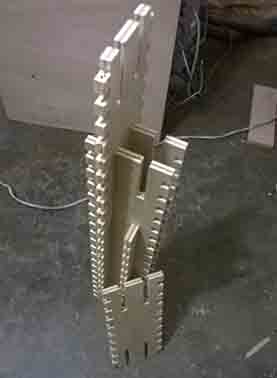
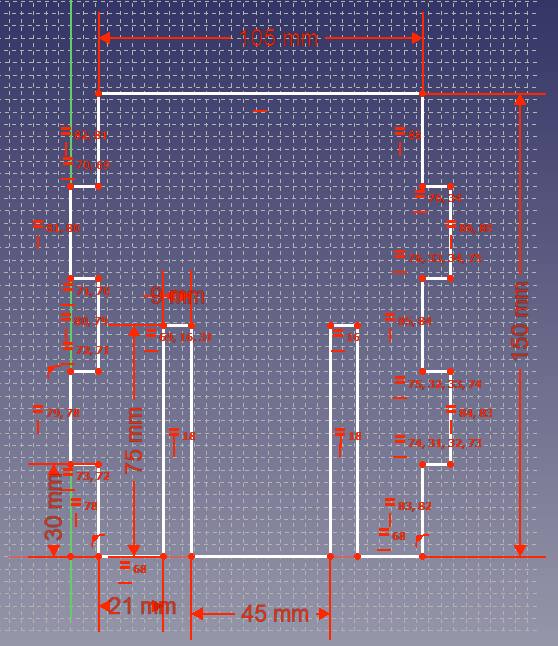
For this second prototype I change the material to triplex plywood 12mm thickness as a advice of my instructor and the idea for this was to create a 30cm module that could be assembly with another identical modules forming a column or a beam. Also the lateral sides should have 1,5 cm cuts to put the corners as a press fit system.
Again ask Alex for help to cut my files in the CNC machine.
Slideshow 4: Click on the arrow to see the images!

