Week 06
3D Scanning and Printing
Assignment:
- Group assignment
Test the design rules for your printer(s)
- Individual assignments
Design and 3D print an object (small, few cm) that could not be made subtractively. 3D scan an object (and optionally print it).
- Learning outcomes:
Identify the advantages and limitations of 3D printing and scanning technology. Apply design methods and production processes to show your understanding. - Have you:
Described what you learned by testing the 3D printers. Shown how you designed and made your object and explained why it could not be made subtractively. Scanned an object. Outlined problems and how you fixed them. Included your design files and "hero shot" photos of the scan and the final object.
Group assignment
Specifications of the machine:
- Product name: Maker select 3D Printer V2
- Model No: 13860
- Power: 110-220 VAC, -2 amps, 50-60Hz, 250W
- Material: PLA pro melted to 200 degrees.
Design Rules for 3D print machine:
- Resolution: we have to take all 3 dimensions into consideration: resolution along the X and Y axis, and resolution along the Z axis.
- Time: We should consider that 3D printing in X and Y axis are quick compared with Z axis and a faster 3D printing speed means lower quality.
- Cost:There are many different types of printers and materials in the market we must consider which characteristics are the best for what we want to do.
- Overhangs: is any part of a print that extends outward, beyond the previous layer, without any direct support.
- Supports: This could affect the final shape of our printed object and takes more time to print, so it's better when we design our 3D object to be printed without supports.
- Angle: anything past 45 degrees approaches the horizontal and becomes difficult to print. Such overhangs are prone to curling, sagging, delamination, or collapsing. Exceeding 45 degrees means every new layer has less of the previous layer to bond with. This translates to a poor quality print with droopy filament strands.
- Post-processing: we can add a Protective coating for smoothing and finishing 3D printed parts, we have to consider that does not melt plastic.
- Wall and edge thickness: refers to the distance between one surface of your model and the opposite sheer surface. In general, if the thickness of a model's wall is insufficient, there is a high risk of production failure such as a loss of detail or features, rounded edges, or even parts breaking off.
- Dimensions: we have to consider the boundaries of the work area so that our element should fit in there.
- Clearances: Its the distance you specifically design between modeling stage and the set number.
- Orientations: To prevent prints from breaking when force is applied; the model must be oriented to minimize the stress in the piece, orienting the model so that the printing lines are perpendicular to the point of pressure applied.
- Fills: FDM prints are typically printed with a low density infill. Most FDM slicer programs will by default print parts with a 18% - 20% infill which is perfectly adequate for the majority of 3D printing applications.
- Tolerance: In 3D printing, like any other manufacturing process, machines have specific tolerances. This means that prints may slightly deviate from the actual dimensions. A tighter tolerance indicates consistently higher dimensional accuracy. Its a range of number This is a relevant point to be consider consider when we want to print objects that fit together.
3D print test
We downloaded the Mini All In One 3D printer test and the 3D printer Tolerance Test, and to prepare them to 3d print and to generate the G-code file we downloaded Ultimaker Cura Software, the conclusions of the test are:
Mini all in one 3d printer test:
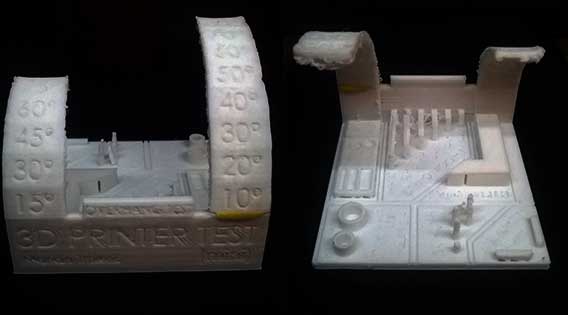
- Overhang test:increasing consecutive angles above 15 degrees, the back side of the shape is affected.
- Bridging test: distance above 5 mm without supports the final shape gets affected.
- Scale test:the horizontal rectangular prisms have the same distances as the vertical 10 mm.
- Diameter test: the two cylinders have the same dimensions in digital and in the real object, the bigger one of 8 mm and the second one of 6 mm.
- Hole test: The dimension of the holes was the same in digital and in the real model even the little ones of 2 mm.
- Support test: the horizontal shape is well supported by supports of 6mm height and look they don't affect the upper shape.
- Stringing test: the 3d printed shapes of 8 mm don't look like a perfect prism as the digital but it's acceptable.
3D printer Tolerance Test:
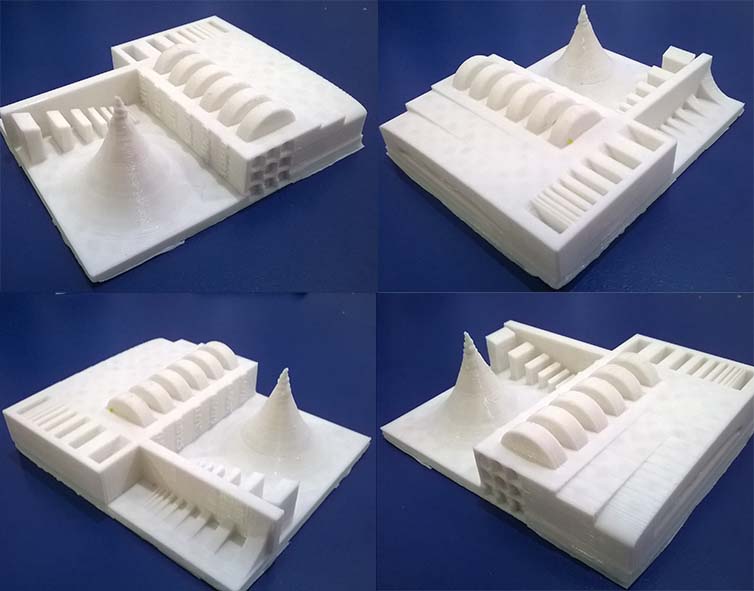
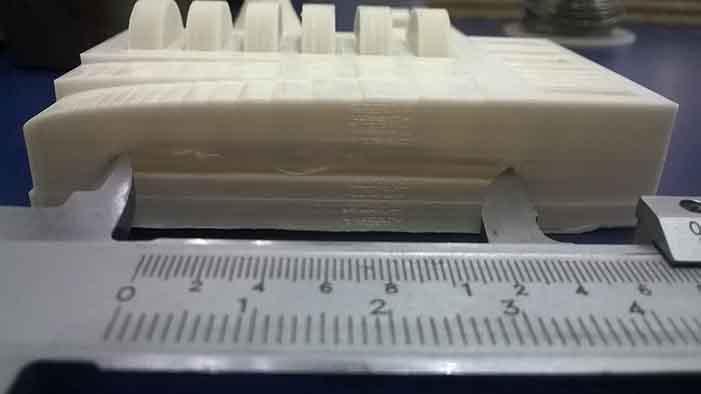
- Cone: The surface is pretty smooth, even the spike at the top is well constructed.
- Pins: the thickness continuously increase from 5 mm, 4 mm ,3mm , 2mm , 1mm, 0.5mm, 0.4mm,0.3mm and 0.2mm and all of them are well printed.
- Holes: Like the pins the thickness continuously decrease 5 mm, 4 mm ,3mm , 2mm , 1mm, 0.5mm, 0.4mm,0.3mm and 0.2mm and all of them are well printed.
- Cylinders: with the thickness of 5 mm are inserted in rectangular pockets which thickness continuously increase from 5 mm in a factor of .0025 to reach 0.015 bigger.
- Round pins: the surface feel smooth and looks very well printed.
- Round corner: Constantly the layers of the print are spaced until generate a round corner.
- Horizontal overhang: with a cantilever of 5.8 mm and a separation of 3 mm the overhang is affected at the middle but the inside looks well constructed.
Settings for the two tests:
- Layer height: 0.15mm
- Wall thickness: 1mm
- Top/bottom thickness: 1mm
- Infill density: 15% (grid)
- Printing temperature: 200 degrees C
- Build plate temperature: 60 degrees C
- Print speed: 60mm/s
- Supports: NO
- Build plate Adhesion: skirt
3D printer Tolerance Test
Design an object that could not be made subtractively:
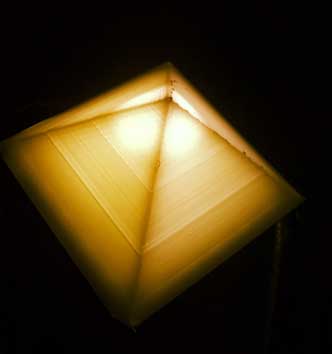
Why it could not be made substractively?
Because the mulling cutter tool can't reach the four interior corners of the sides to create this pyramid shape empty at the inside like a shell and the only connection between the interior and the exterior of the shape is a small hole which is a big limitation to be made substractively.
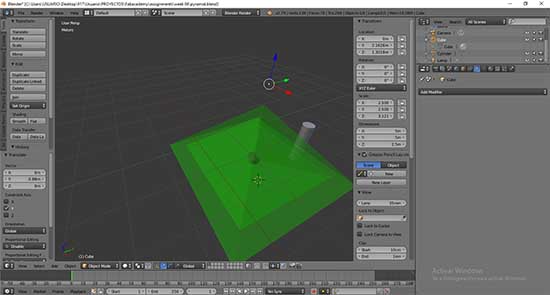
I did a hollow pyramid inside with a hole in its base. I choose the pyramid shape because I wanna use 45 degrees angles to print without supports. The interior void allow me to put a light inside and create a beautiful effect like a lamp, at the same time allow me to use less material. The hole in the base was a suggestion of my instructor and allows the program to read the object as a continuous print, obtaining the desired result in the 3d print.
Design process:
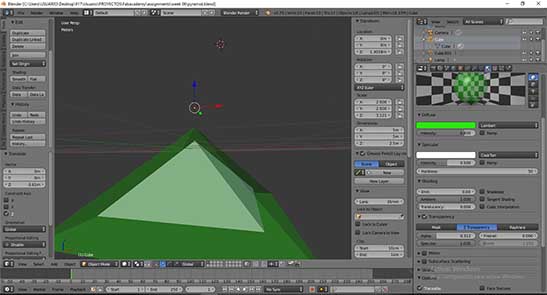
- I had to choose one of the 3D CAD softwares, first I think in 3ds Max but my license has expired, then I think about using Freecad but when I started researching about how to do a Pyramid I found it more complicated than what should be, finally I choose Blender because its similar to 3ds Max and don't need a license.
- The next step was to follow some tutorials that I found in youtube the first of them was about "how create a pyramid in blender".
- Then I had to set up the units of my digital object, for that I found a tutorial about "how set to metric units".
- After that I create a copy of my pyramid and make it smaller so that it can be placed at the interior of the original and finally substract the interior mass with the desired shape. For that I did a tutorial about Boolean.
- Before that, I want to differentiate one from the other pyramids so I did a tutorial about "how to change color".
- I want to visualize the interior shape inside to be placed correctly. For that I did this tutorial about "changing the object transparency".
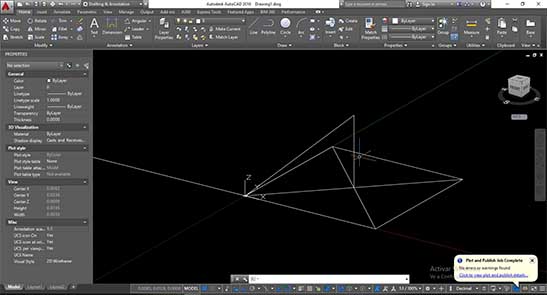
- For me the easier way to visualize and get the 45 degrees angles and dimensions before use blender was to draw the pyramid shape in Autocad.
You can download the files:
3D print the pyramid.
To save time we decided to put all of our files together and print them at the same time.
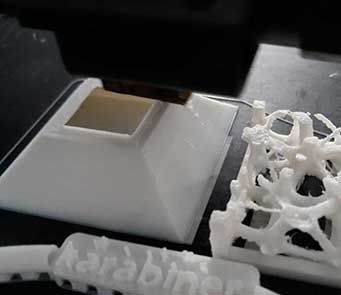
- In our first chance we had an error because the machine stop printing and we do not know for sure what happened. Maybe something related with the G-Code so we generate a new one.
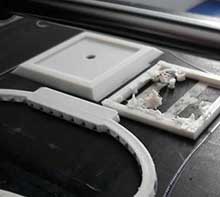
- In the second chance all was good but because of the complex shape of Ale's object the 3d printer got decalibrated and this affected the wall finish of my pyramid.
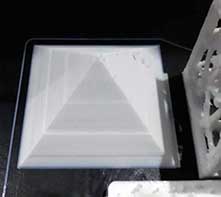
- The 45 degree angles of the pyramid allowed to print the pyramid shape without supports and fill.
- The base hole which connects the outside of the shape with the inside allow the software and the machine interpreted well the void in the inside and print well without supports.
- I'm really happy because the final result was the expected.
You can download the files:
3D Scan an object.
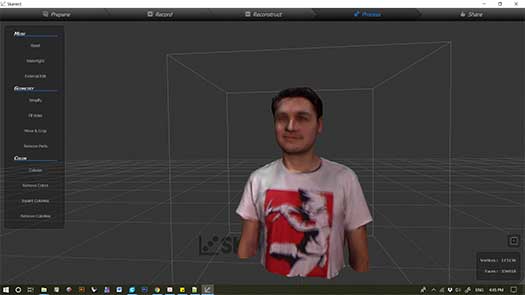
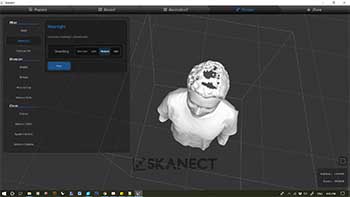
For this assignment we scan ourselves using a Kinect device and the Skanect software. The process was really easy:
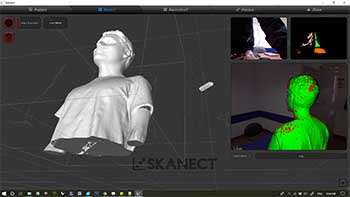
- The subject to be scanned has to rotate on its own axis 360 degrees.
- At the same time another person had to scan with the Kinect moving it from the bottom up.
- A third person had to check the screen and verify that the scan is done correctly.
- A bigger issue was about the holes created at the top of our heads, to solve that we use watertight option to close the shape.
- Another issue was about deforming faces when we scan the face two times and when we do it quickly. To solve this we start scanning slowly the back side and front side at the end.
You can download the file:
Conclusions:
3d printing is an additive form of production as opposed to subtractively process, one of the advantages is 3d print can create complex shapes that milling machine or laser cut can't. The limitations of 3d print are the time it takes because the object is created layer by layer.
Scanning technology is really useful to take objects from the real world and digitize it to be analyzed if we want a better resolution scanner the price increase but there are many options in the market and most of them are accessible.