- Wildcard week
Through the week
This week was based on Design and produce something with a digital fabrication process (incorporating computer-aided design and manufacturing) not covered in another assignment, documenting the requirements that your assignment meets, and including everything necessary to reproduce it. Possibilities include (but are not limited to) composites, textiles,biotechnology, robotics, folding, and cooking.
So I managed to make a Composite based on combining a fiber and epoxy resin. For that I selected Coir rope which is abundantly available in kerala ,as the fiber which can be effectively structured to make a resin based composite. Since I want to experiment the Strength and compressive property I selected a honeycomb structure.
Group Assignment
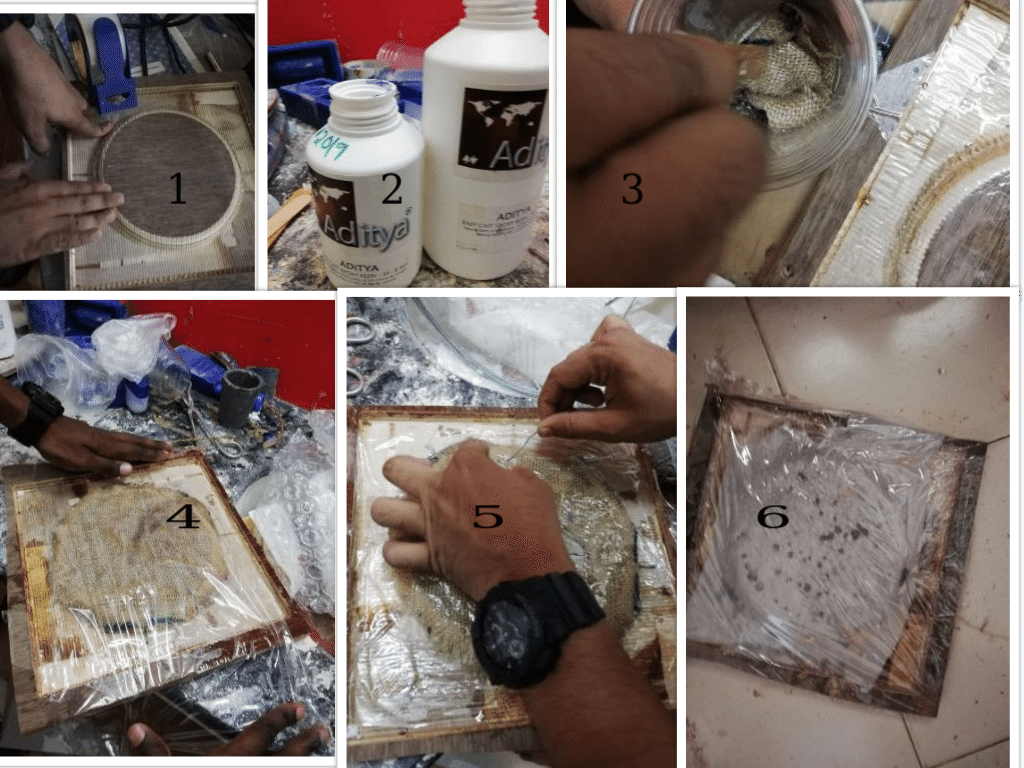
The group project was about producing test coupons for the composite fabrication process.
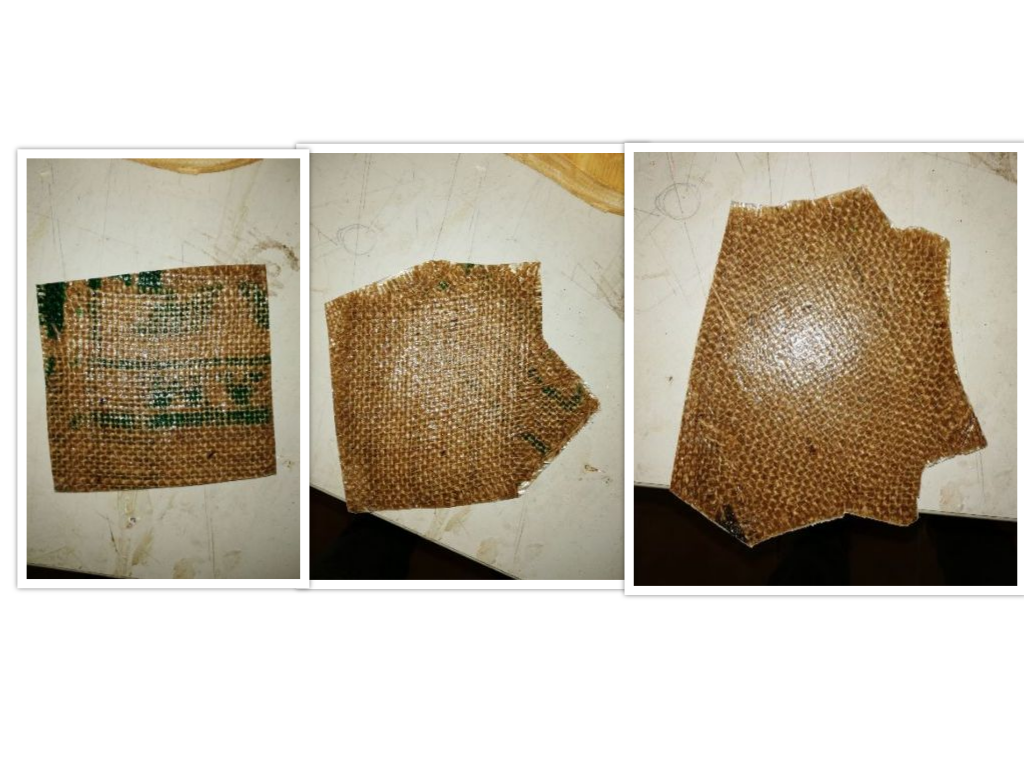
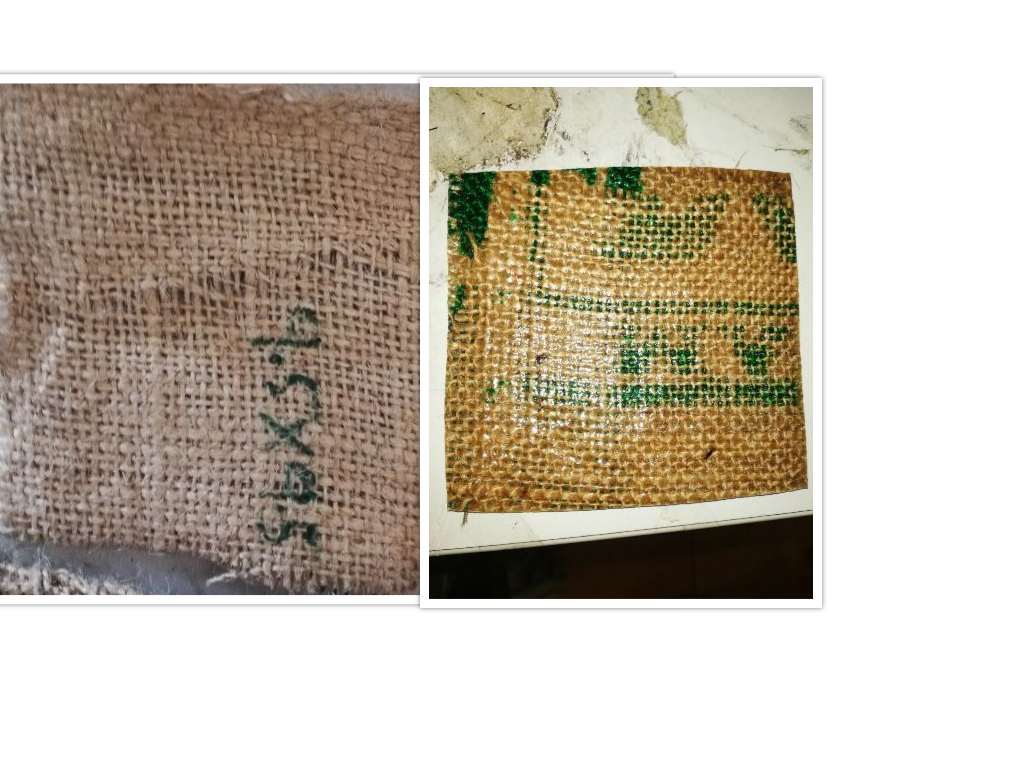
For making test coupons,we cut the jute sack into square pieces of 10*10 cm and arranged in three different patterns in order to test the orientation difference and adhesion property on different orientations.
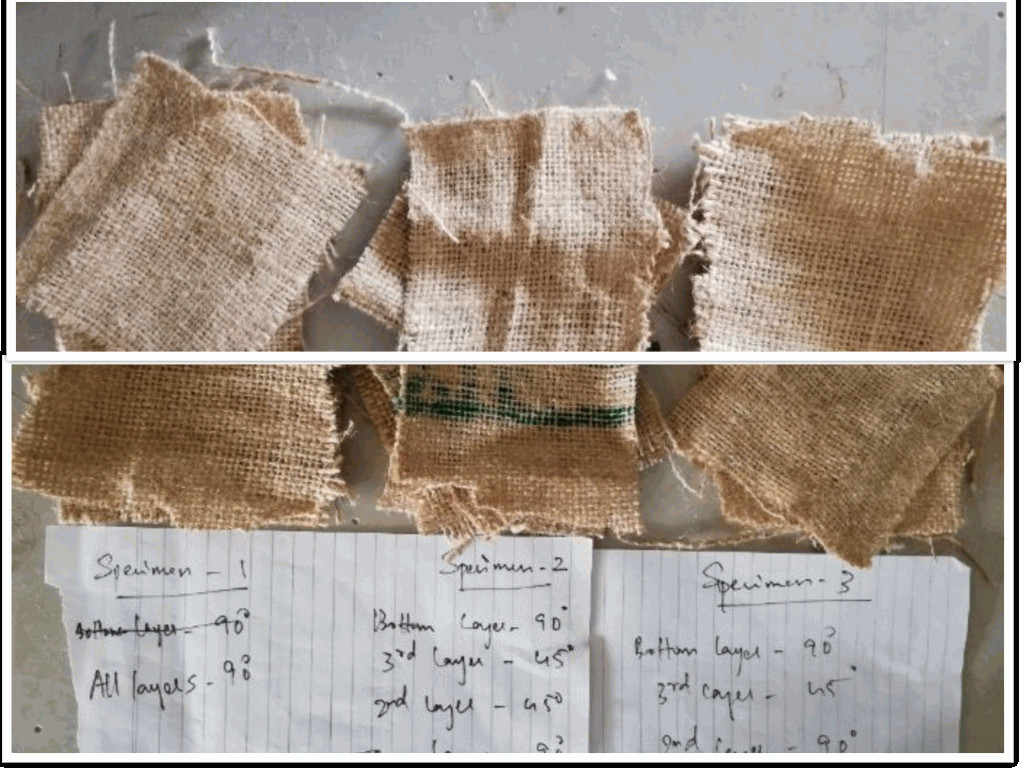
The first pattern was about arranging the sack in such a was that 90 degree perpendicular, over the other as layers.
The second pattern was fixed as 60 degree perpendicular,one over the other layer and similarly the third piece was arranged 45 degree perpendicular to the one over the other
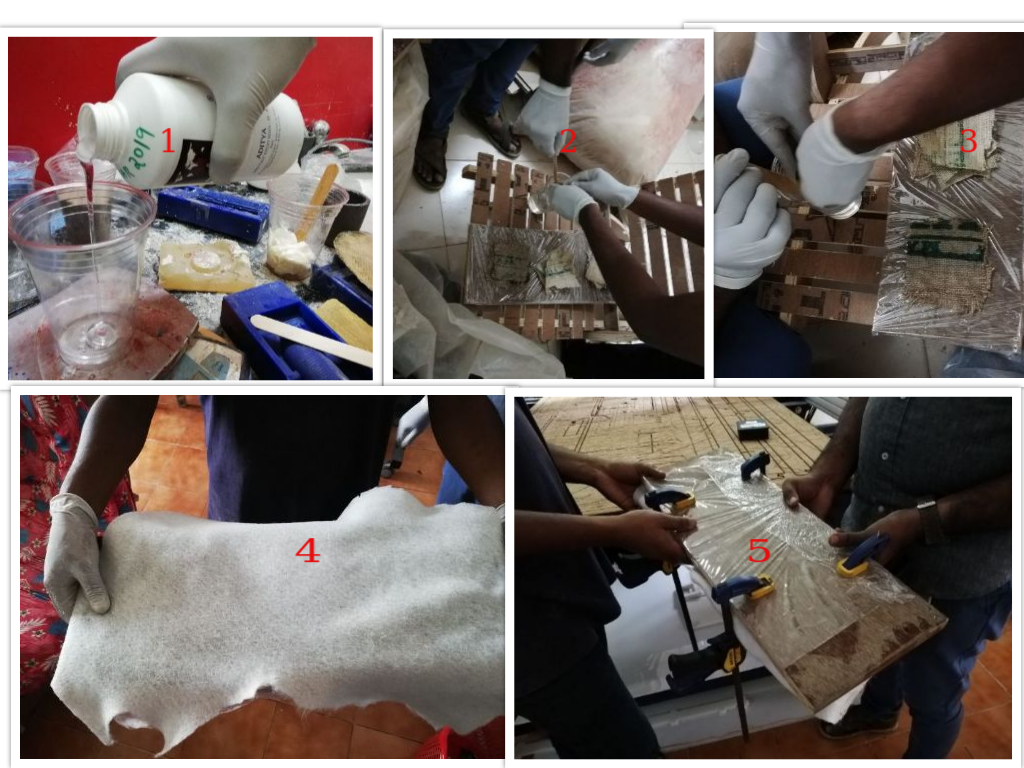
Then poured the Adithya Resin A part and the B part in the ratio 2:1
After wrapping two pieces of wood with plastic,we placed the token pieces into that and wrapped once again with the plastic and then made some holes in the plastic.Then wrapped the whole test token with breather cloth for sucking the excess resin.
Then we applied some external pressure for compression and settling of the test piece.
After allowing 24 hours of settling time we removed the test tokens and concluded that the first test coupon with 90 degree orientation is best with consideration of surface finish,strength and hardening capability.
With this I completed my Wild card week.
Traditional way of Coir rope making in kerala
Click the link below to watch the traditional method of Coir rope making. (https://www.youtube.com/watch?v=SrUsiMxbDew)]
In the primary stage the fibers are extracted from the coconut husk and then it is allowed to decompose by dipping it in salt water (normally back waters and lakes) and after that the fine fibers is p[ulled out from that. Then it is spineed in a machinery by letting each of the strands to get connected in such a way that each stand is overlapped to thet other.
Things I Did
Design
I selected a “HONEYCOMB” design to make the composite structures because of the following reasons:- Honeycomb sandwich panels are widely used in automobile, aerospace and space structures due to unique characteristics like high strength to weight ratio and High stiffness. Honeycomb sandwich panels consist of honeycomb core made of either metal or thin paper like materials. Core is sandwiched with metallic or composite face sheets. Core gives high compressive strength in T direction whereas face sheet gives shear strength in T and W direction.Compressive strength of sandwich panel depends on foil thickness of honeycomb core, cell size, thickness of core in T direction and face sheet thickness. For nearly same weight honeycomb sandwich panels can give up to 30 times higher stiffness than metallic sheets.Face sheets of the sandwich structure facilitate mounting of the instruments as core has very high volume fraction of cavity and hence cannot hold fasteners alone.Modelling of Honeycomb sandwich structures with actual cell configuration is difficult and time consuming. Hence sandwich structure is generally modeled as equivalent homogeneous structure. This paper gives an insight about design, simulation and manufacturing aspects of honeycomb sandwich structures. (Source:http://www.ijsdr.org/papers/IJSDR1704101.pdf)
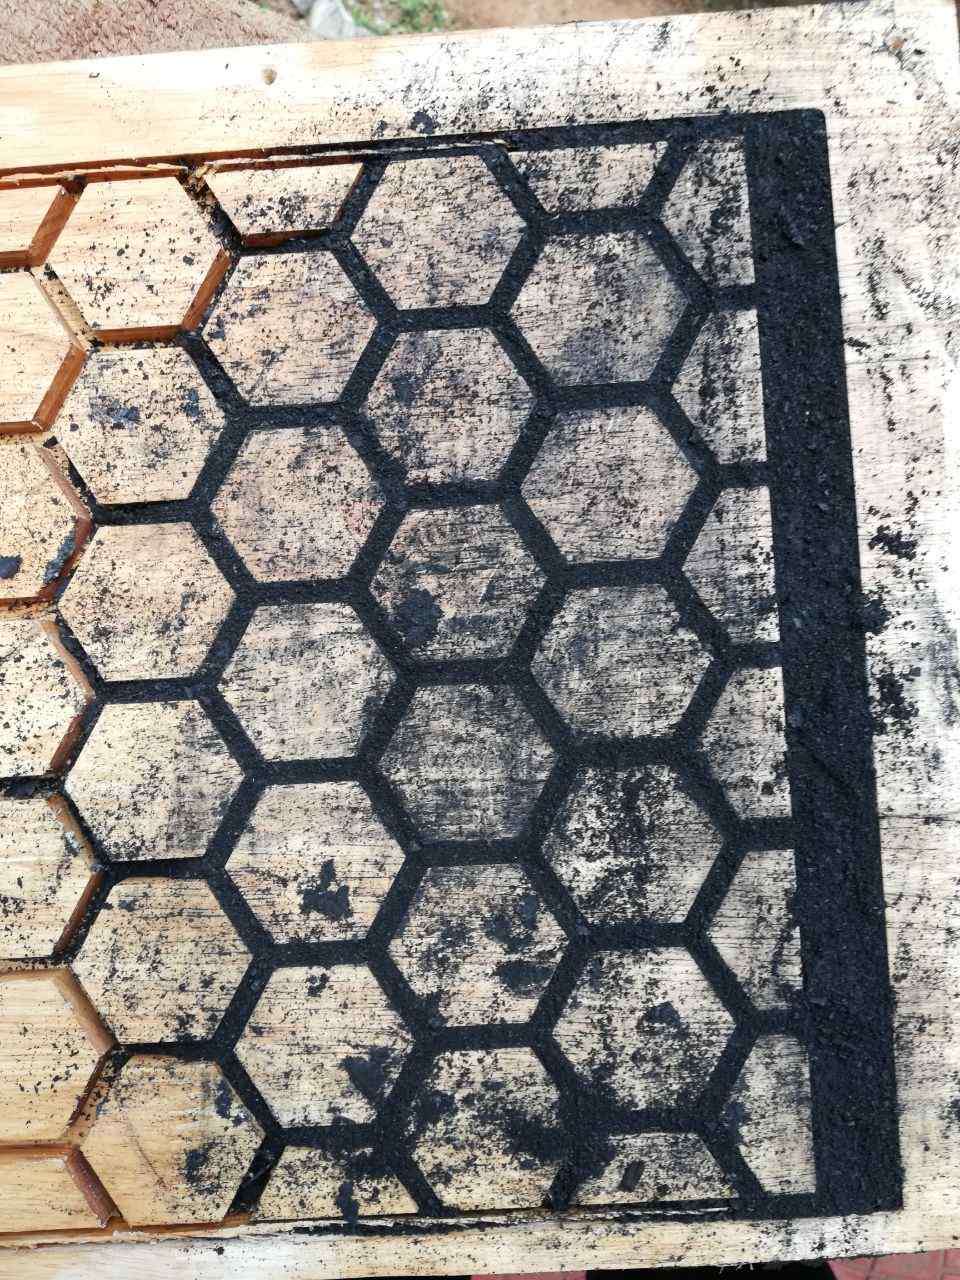
For that I have designed the Honeycomb structure in FUSION 360 of size 30*30
Then I Saved it in DXF format and planned to mill on 18 mm plywood
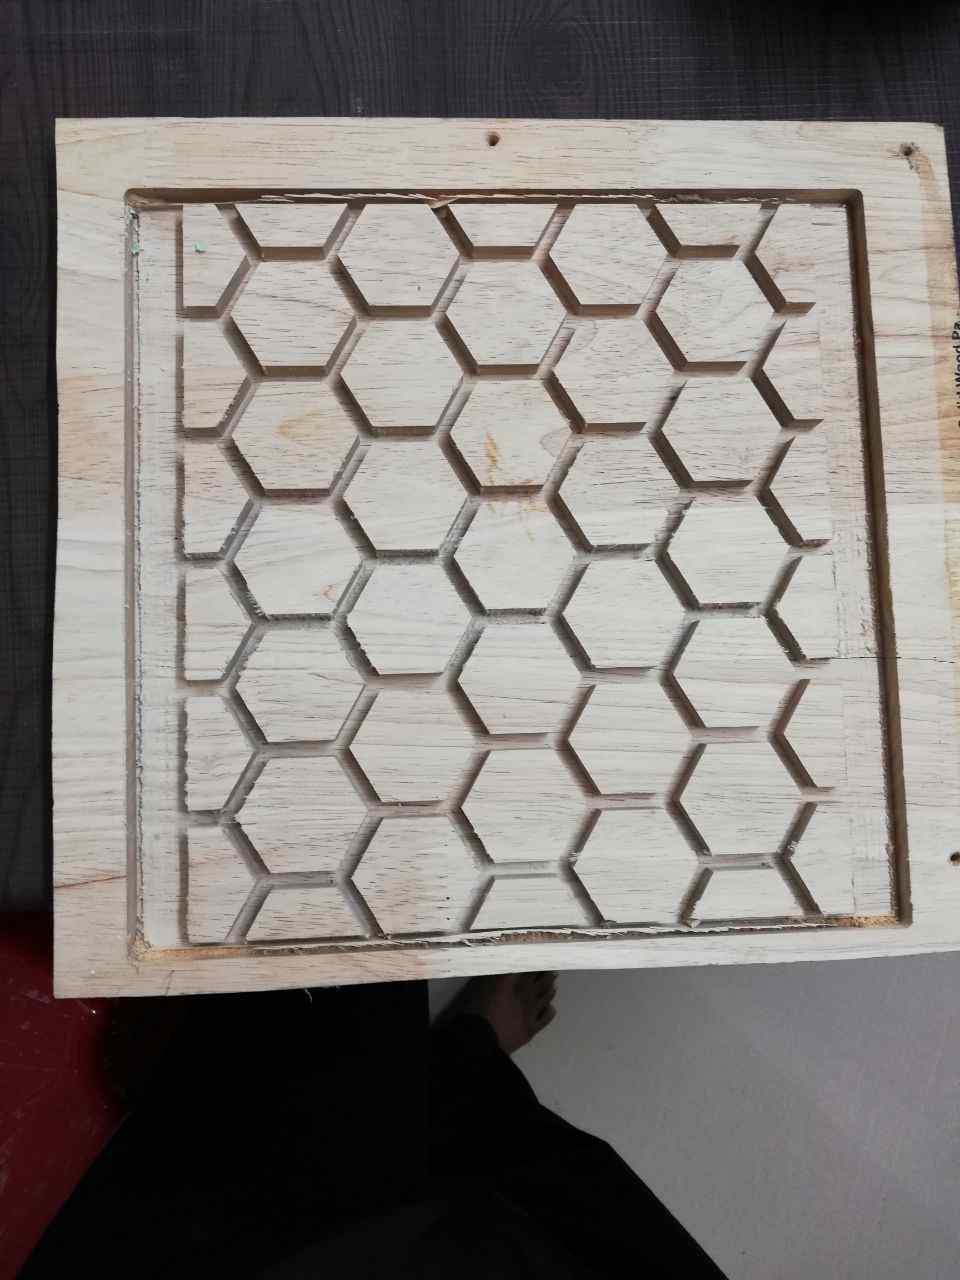
Then I milled the design by using “SHOPBOT”
Then by using sandblaster I tried to make finish .
After that I tried to execute the design with various mixtures to understand the moulability
For understanding the moldability I made various mixtures and also as part of the group project
My Primary aim was to make something from fab lab wastes like Wood powder left out from shopbot ,The plastic wax waste that is left out after making the mould, HDPE waste etc.
For that I proposed a method to melt the HDPE plastic and then to add wood powder to it at different ration and for doing that I made two mixing ratios for the composite based on HDPE and Wood
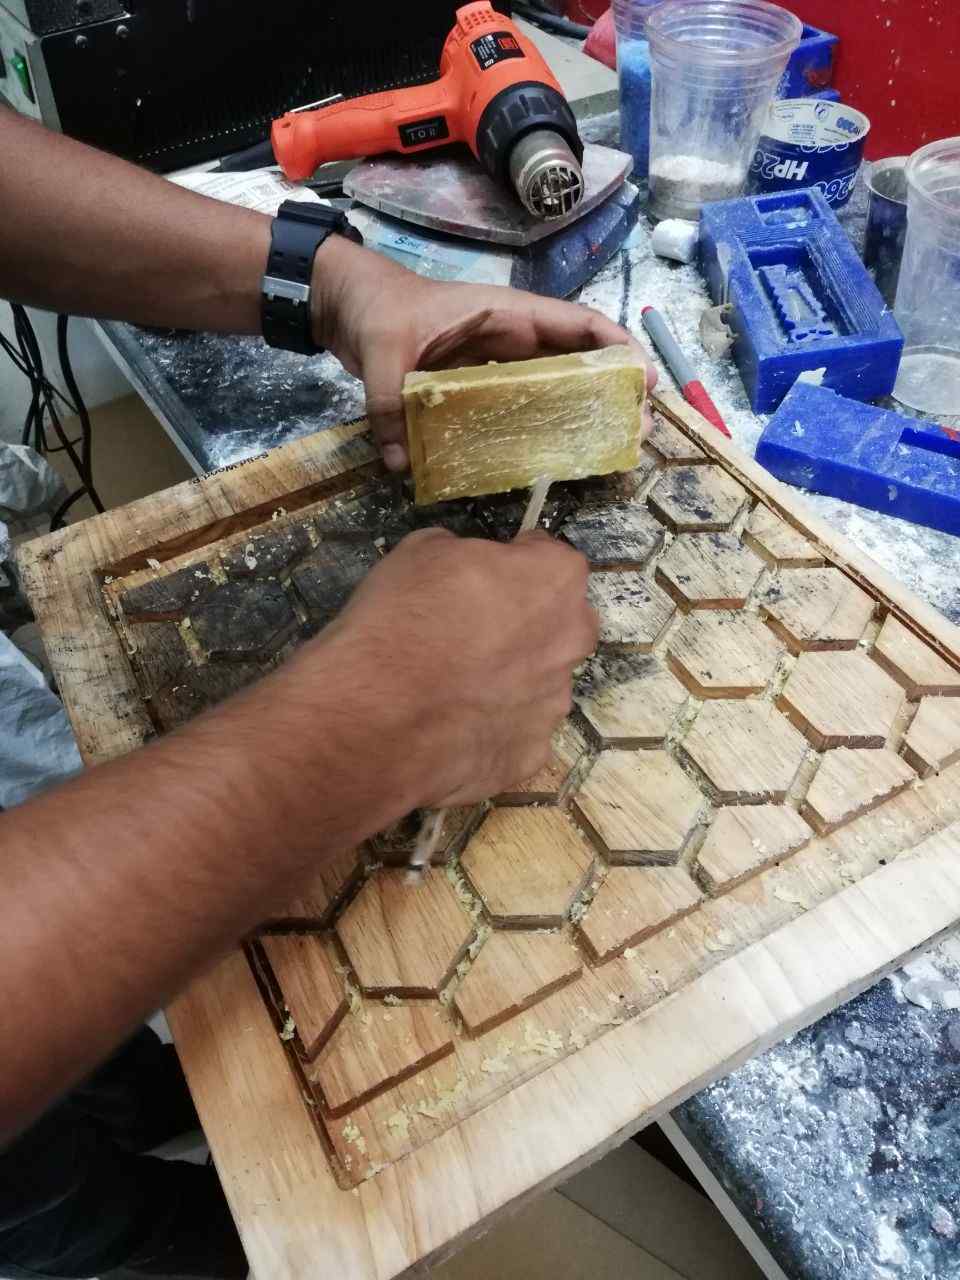
After Coating B wax to the mould I began the process.

The primary stage of the process was mixing the wood and HDPE and melting the HDPE at high temperature.
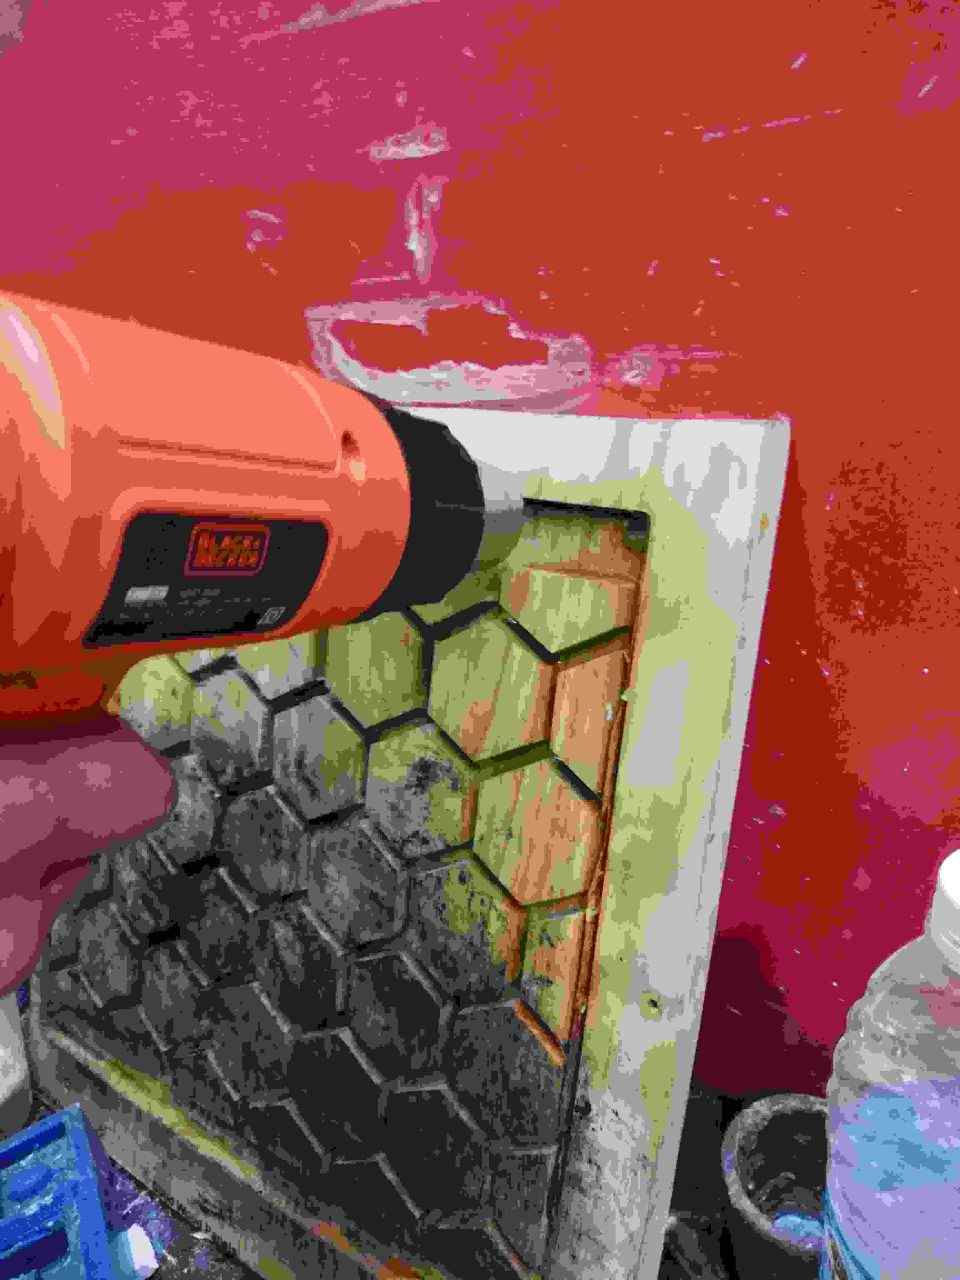
I selected almost 300 degrees in the Furnace but it remained uncombined
So I planned to melt the mixture in open gas
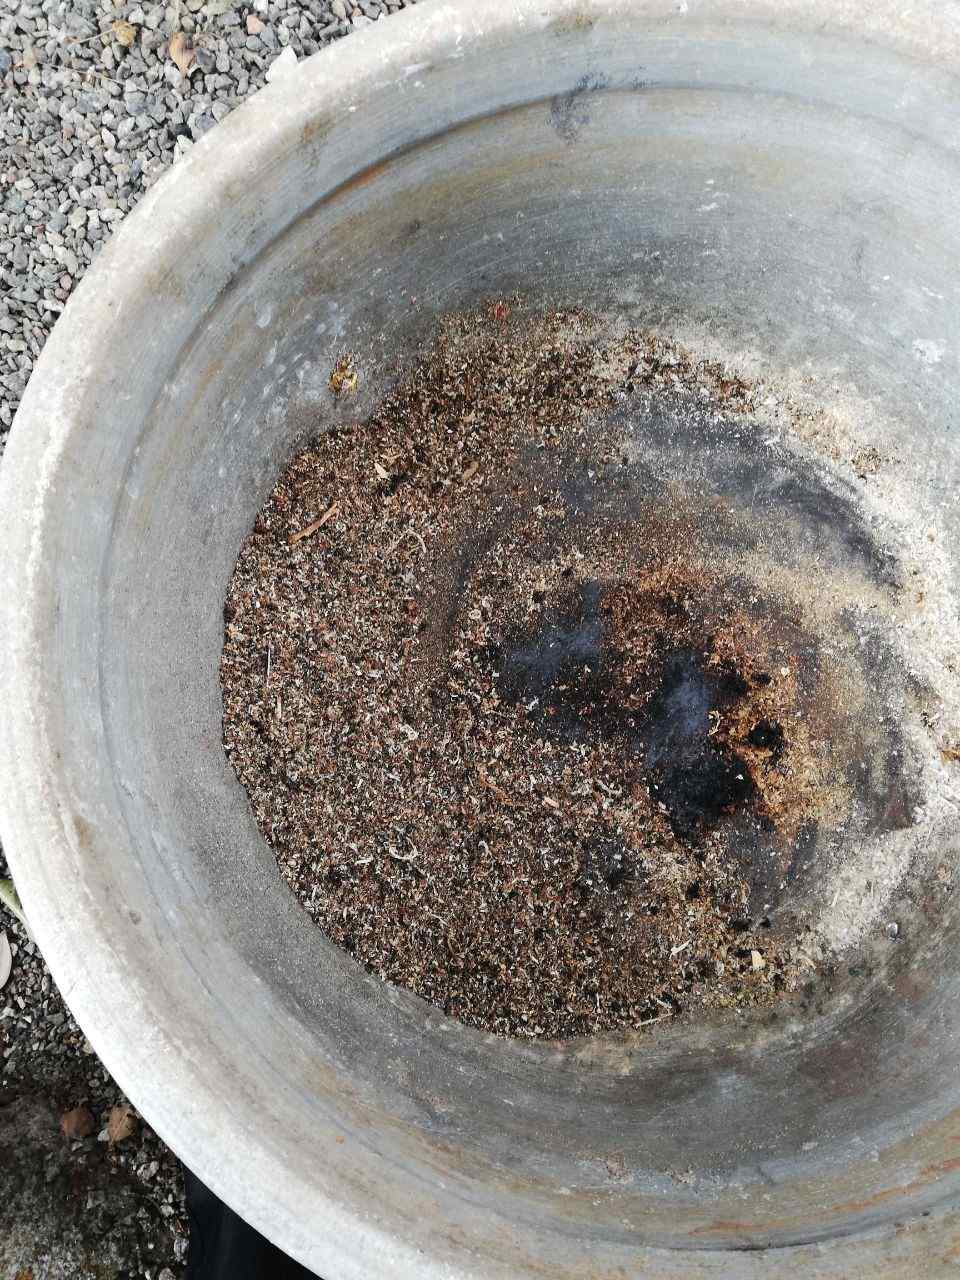
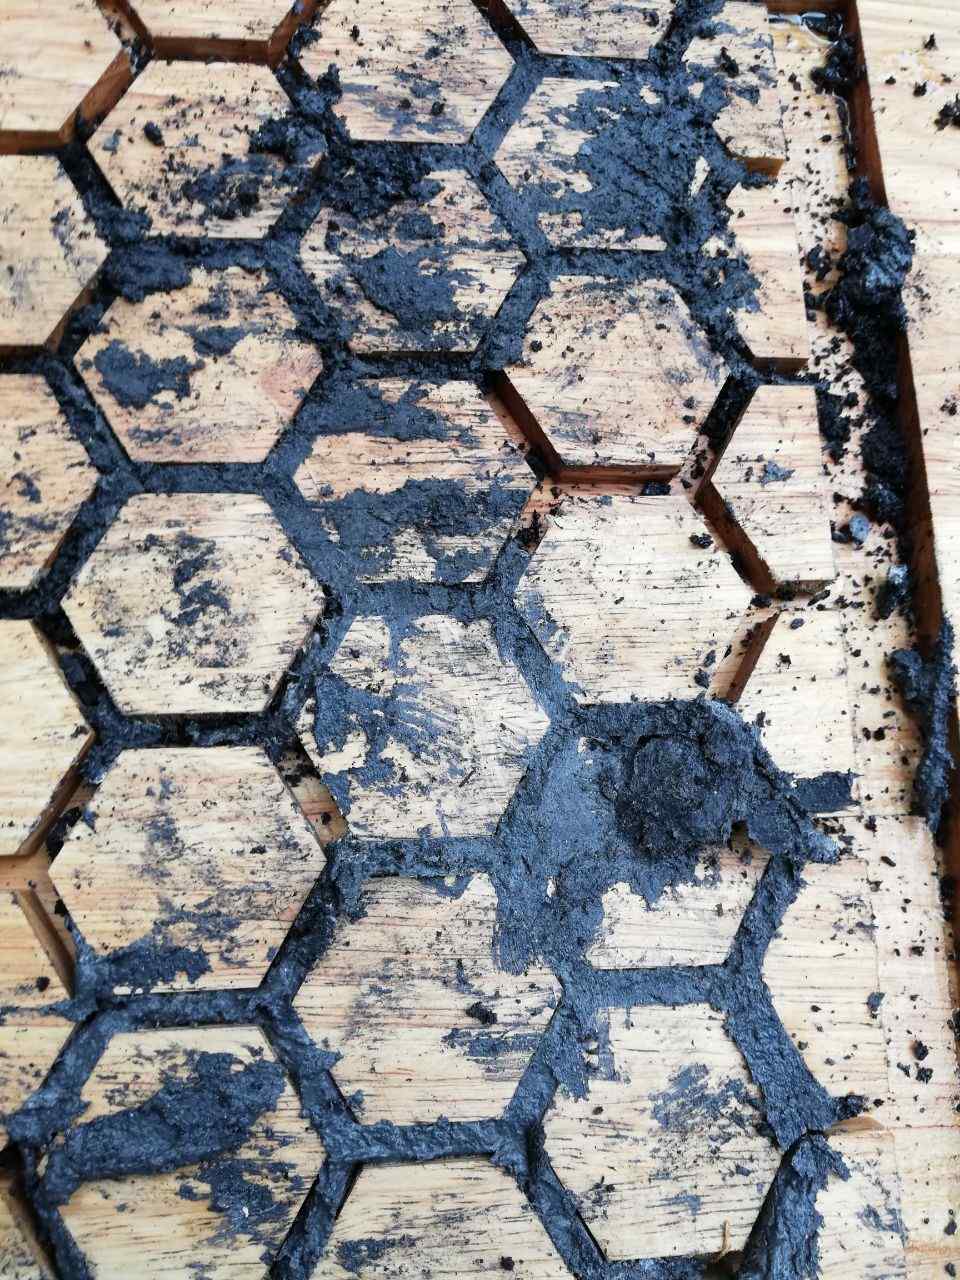
I found that the wood is also burning along with the HDPE and getting carbon content in black colour.
Even though I poured the semi-liquid composite to the mould
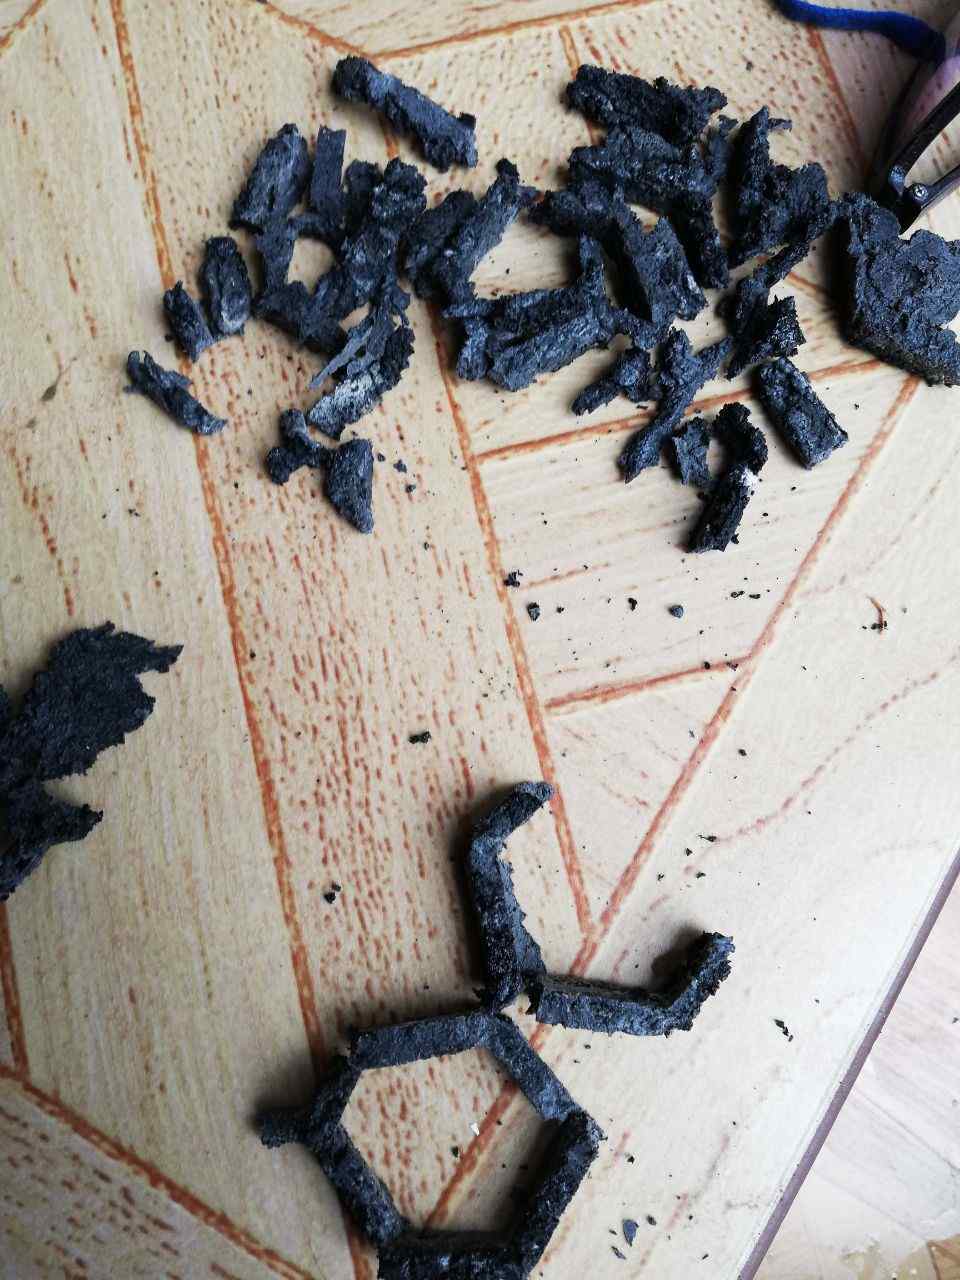
But It was too difficult to remove the composite from the mould and from that I understood that the composite doesn’t have the strength to withstand even small forces and I planned to try it with another mixing ratio
The next mixing ration which I proposed to do was 50%of HDPE and 50% of wood
 .
But it also resulted in the same like before as carbon deposits were founded black in colour
.
But it also resulted in the same like before as carbon deposits were founded black in colour
Even though the formed composite showed a bit strength it cannot resist the force applied to pull the composite from the molud and it breaks into pieces.
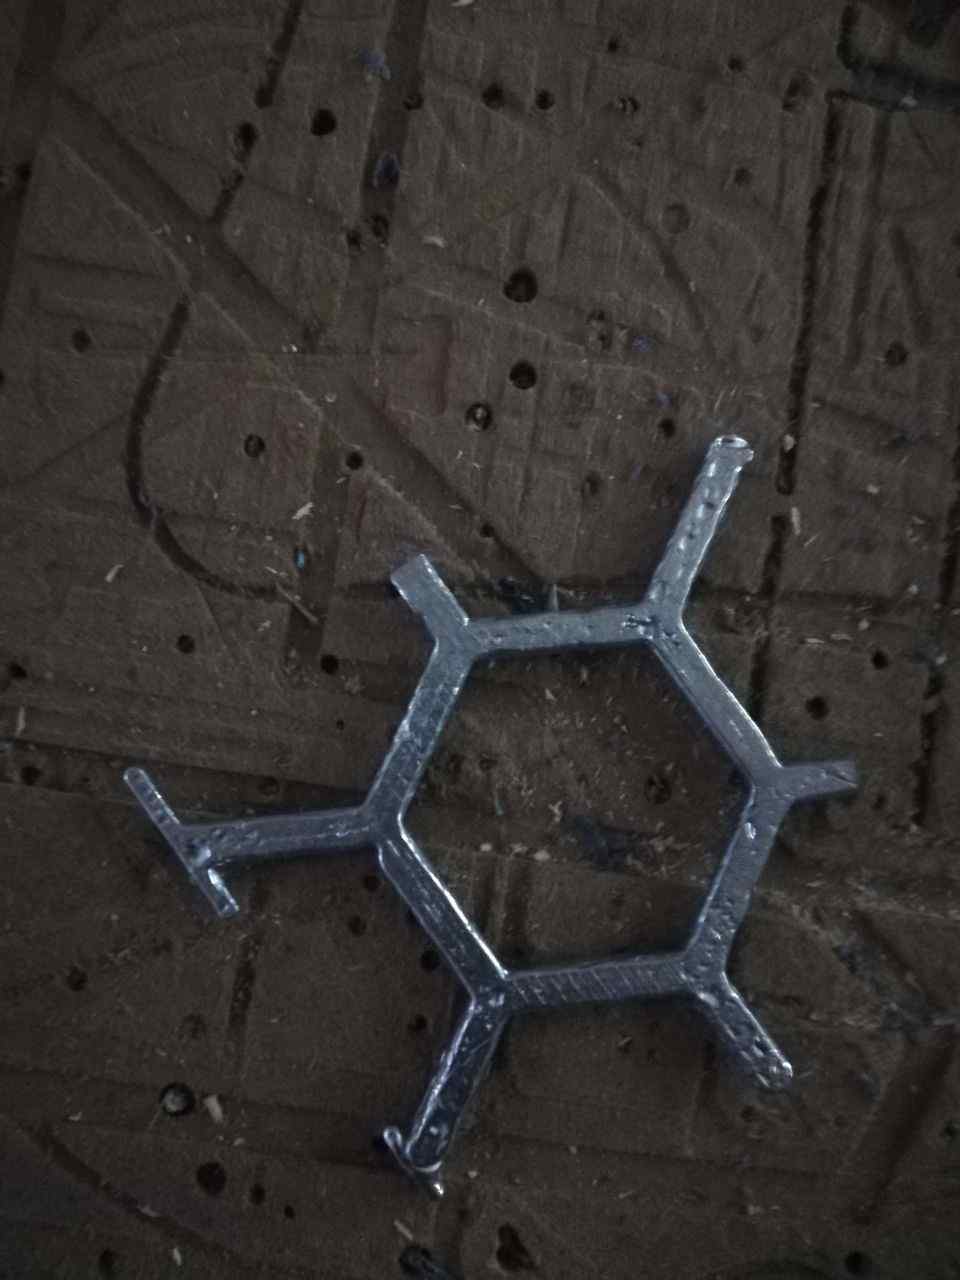
Then for understanding the moldability I planned to mould it with some metals and for that I choose the BABBITT metal which was available in the lab for the purpose and after coating the mould once again with the B wax.I was curious about the temperature.it requires about 300 plus temperature to melt the babbitt metal and quite surprisingly the wooden mould withstanded that temperature. and then it was easy to remove from the mould.
After that I tried it with Coir rope and resin .
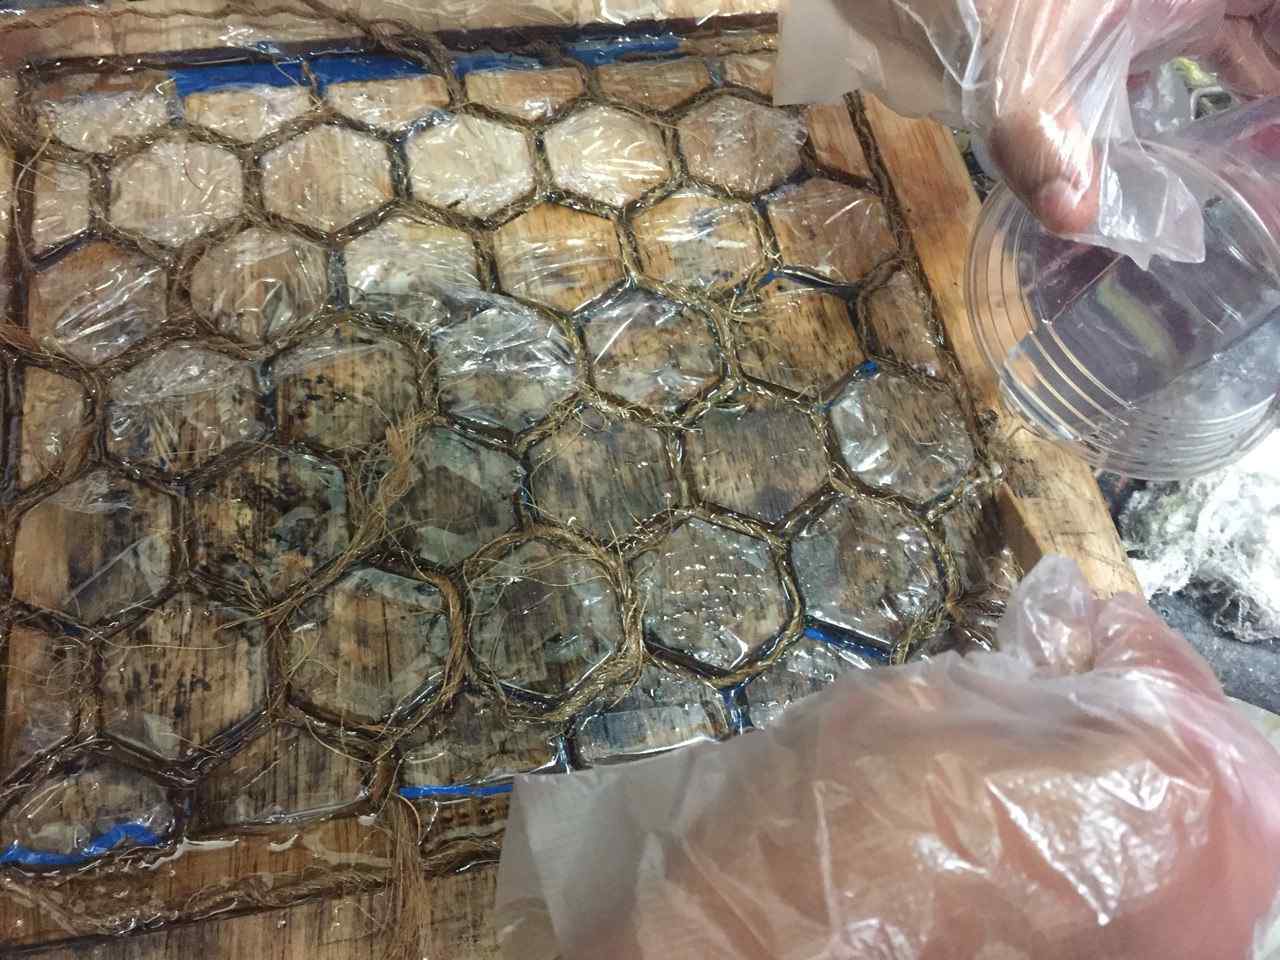
Primarily I wounded the rope against the honeycomb structure and then after mixing the Epoxy Resin on 6:1 ratio of A and B part I poured it into the honeycomb mould after packing it with plastic so that the epoxy may not stick into the mould.
But the result was very disappointing that ,I even cannot remove the composite from the mould and it got ruptured.
Since the expected result was a failure I planned to try different things.
So my new idea was to make something hard that can replace anything that is commonly used in our day to day life.
At that time I found a steel plate in front of me and I thought about replacing the material and bring it into a composite material.
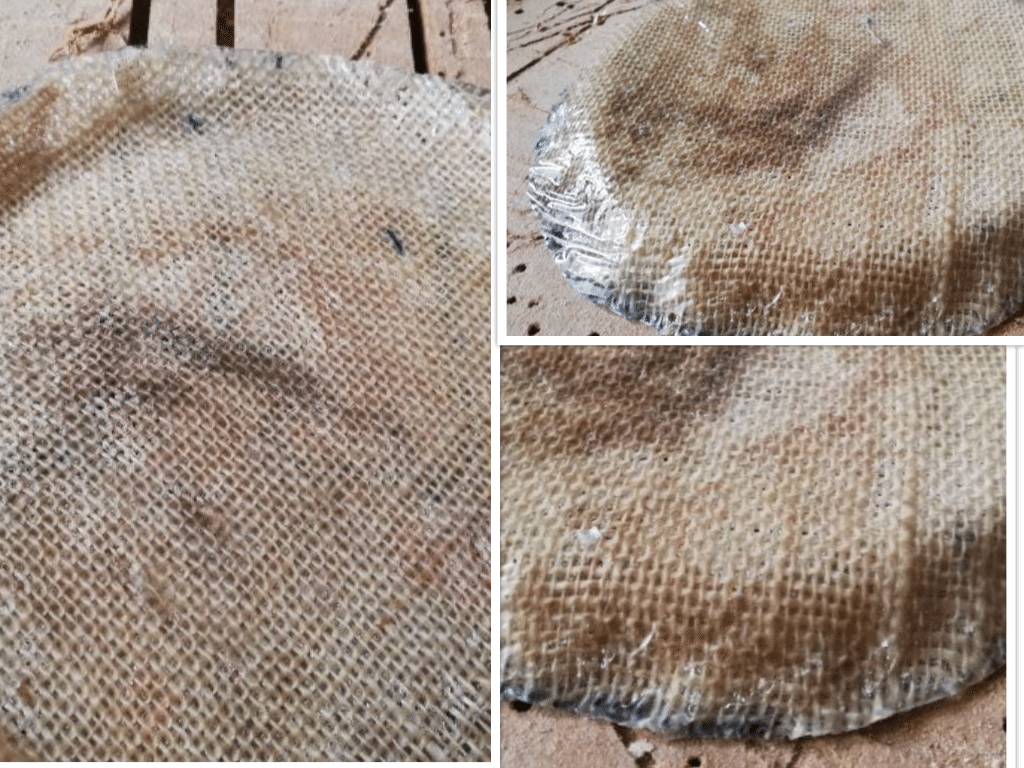
After Consulting with the instructor I planned to make the composite with jute sac and epoxy resin because jute is a non toxic material but it lacks strength. So by mixing it with the resin ,it can have good binding capacity and rigidity.
Then I designed a plate mould and milled it by using the shopbot.
After Sanding the mould I coated the mould with sellotape in order to cover it with plastic
Then I soaked the Jutes in epoxy resin by mixing the resin in 6:1 ratio.
Then I placed the composite in the mould
After that I sealed the composite by using a plastic sheet and then made holes to escape the excessive resin from the composites
After that I wrapped the mould by using a cotton material that will absorb excessive resin from the mould.
After completing that I put the composite and the mould under weight for compression
Then I allowed the composite to get settled and left about 240hours to settle it down.
After 24 hours I took the composite and removed it from the mould.
The composite results mild strength and Even though it can be used for the purpose