8. Computer controlled machining
What I learned on this week
On this week, I learned
- How to use a CNC machine,”ShopBot”, to mill big wood boards
- Features of the ShopBot
- Designing something big
Group assignment
For the summary of our grouop assginment on this wwek, please see this link.
Through the group assignment, we got important information of the ShopBot we used for our individual assignment.
Individual assignment
Designing something big
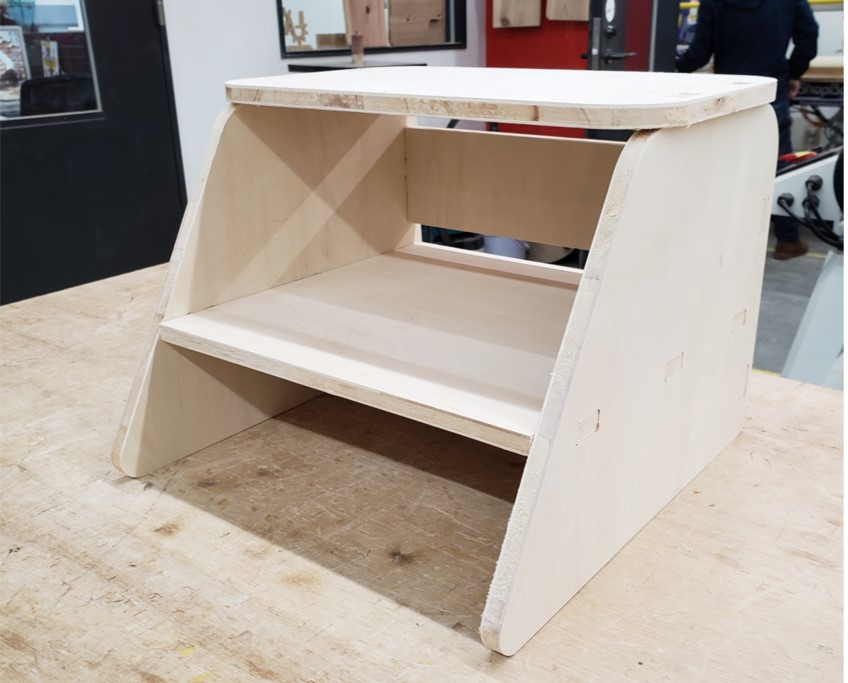
I decided to make a shelf for books and my laptop as “Something Big” to make the table clean. I usually work for my private tasks in the living room, but the table where I work is always messy due to a great number of books. Moreover, although I use an external monitor connected to my laptop, the monitor mounted on piled books. This work style had not been good, so I thought this week was a good opportunity to change my work style in the home.
First of all, I sketched a rough design of my production. I needed some spaces to put books and my laptop. So, I designed two spaces to put books and the laptop separately. Moreover, I usually tilt a display of my laptop because tilting the display makes me work comfortably because of good posture. Then I added slope lines on both sides of the production.
“rough skecth”
From this rough sketch, I designed 2D sketches in Fusion 360. Parameters were set as parametric values.
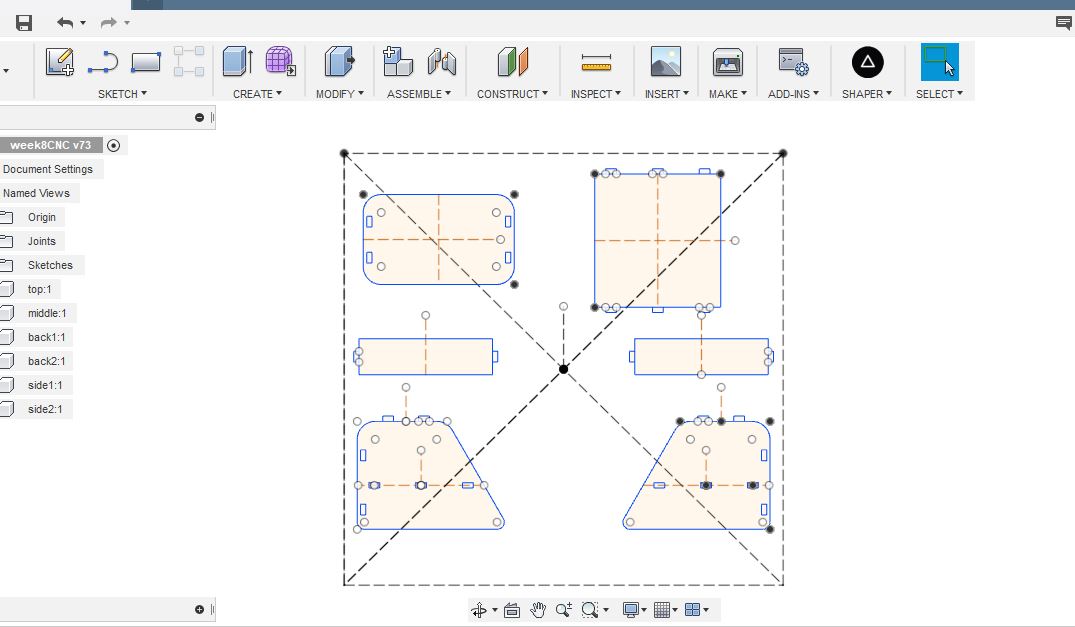
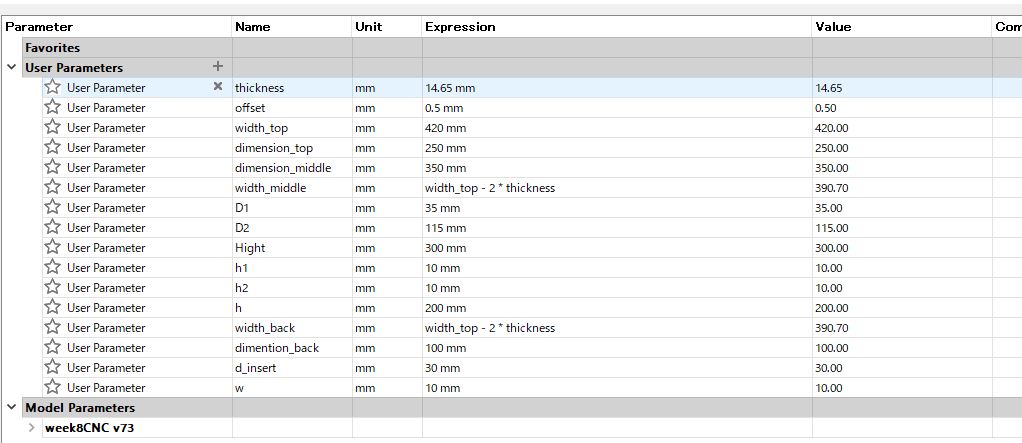
Note: Although the offset value was set as 0.5mm, the offset was not included in the CAD design, because I recognized offset value could be set by ShopBot CNC machine later.
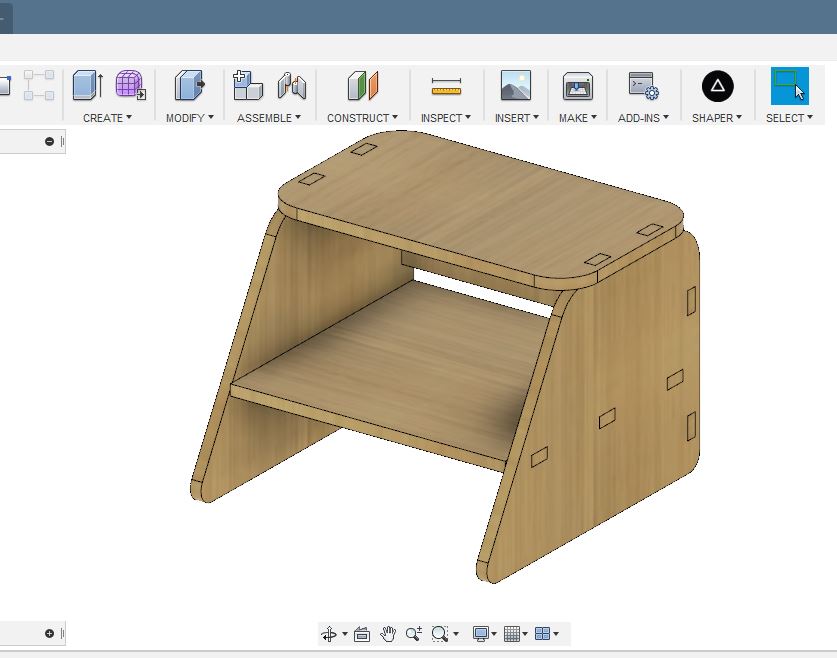
Simuation to assemble
These 2D sketches were extruded by “thickness” to create 3D objects. To check my design had no issue, I used “joint” in assembling function in Fusion 360. Assembled model looked like there was no issue on my designing.
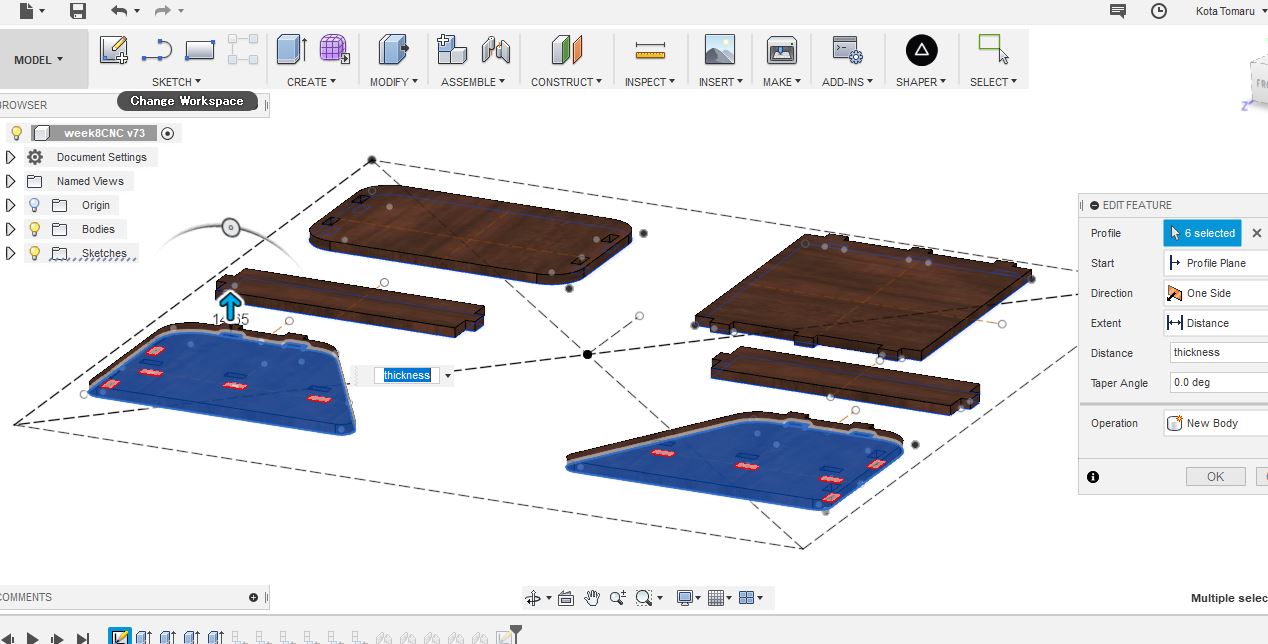
Finally, I rendered my 3D production to make the model beautiful.
You can donwload my this CAD file * here
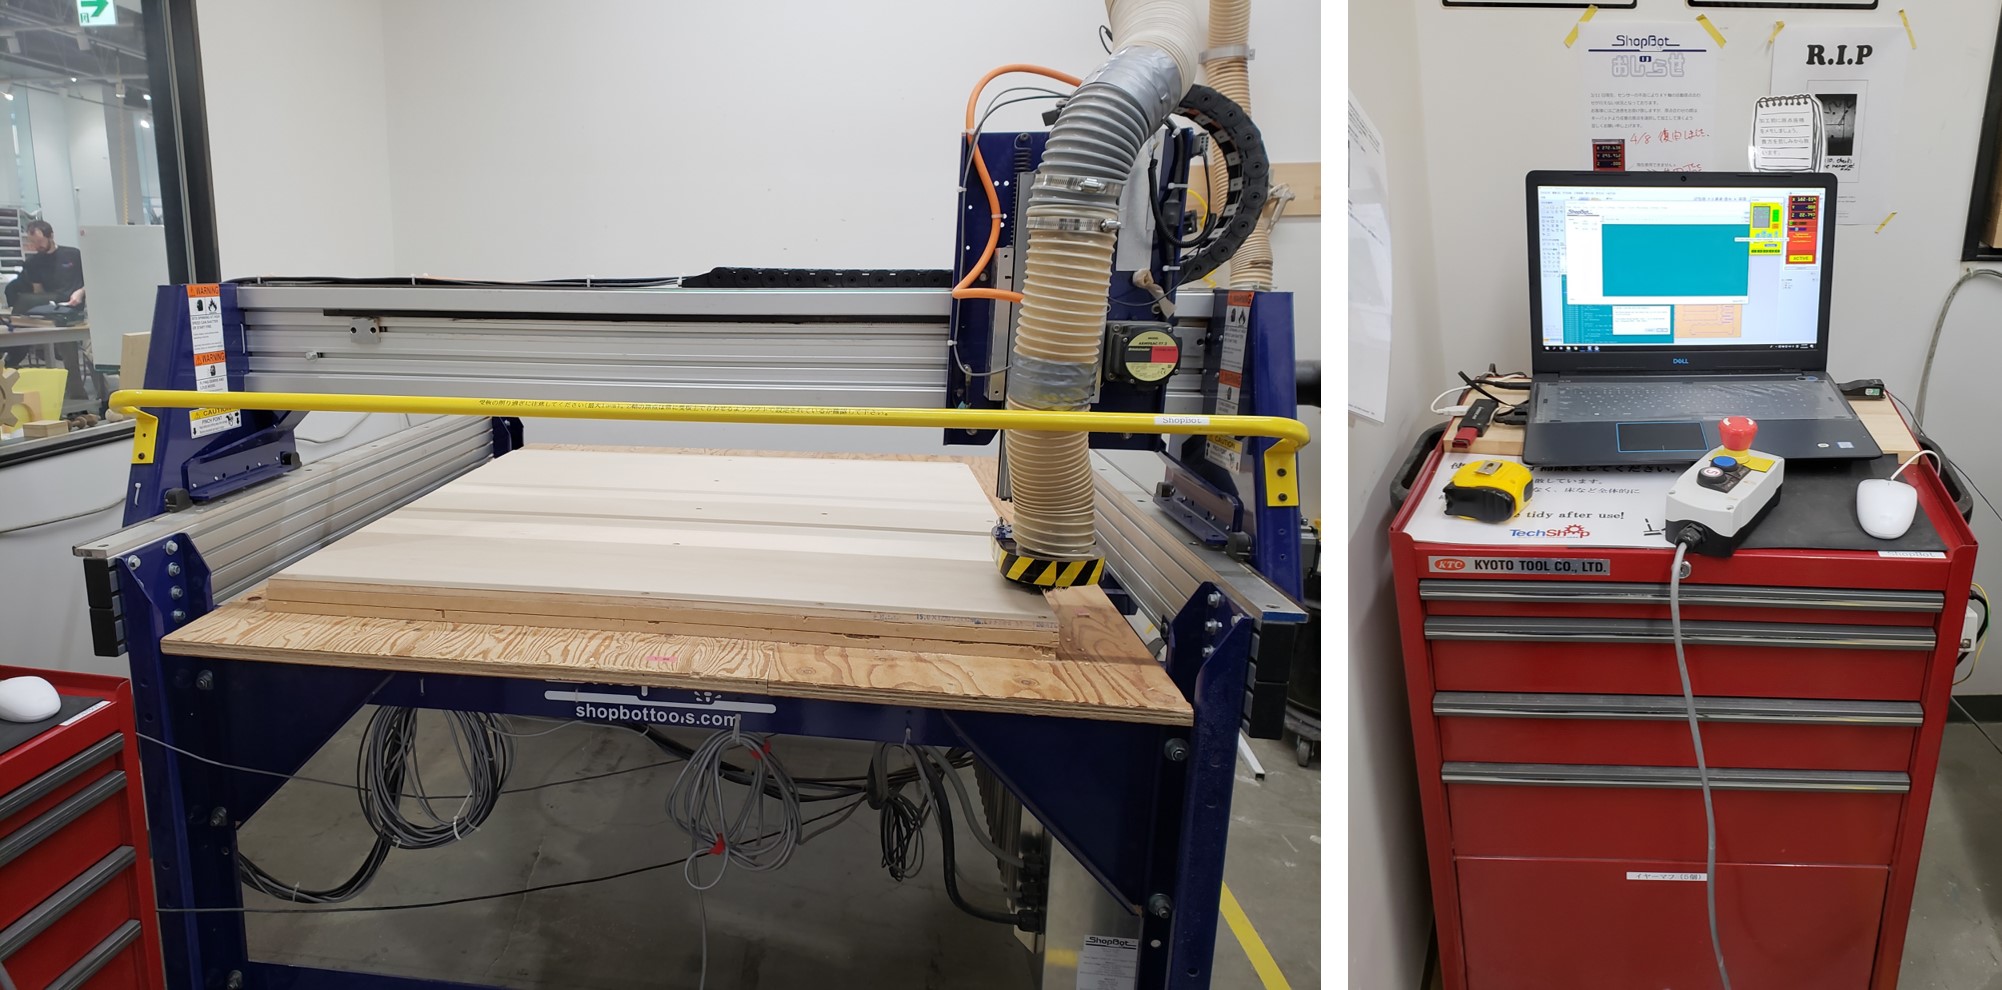
Milling a big wood board by ShopBot
To create actual production, I used ShopBot CNC tool in TechShop Tokyo.
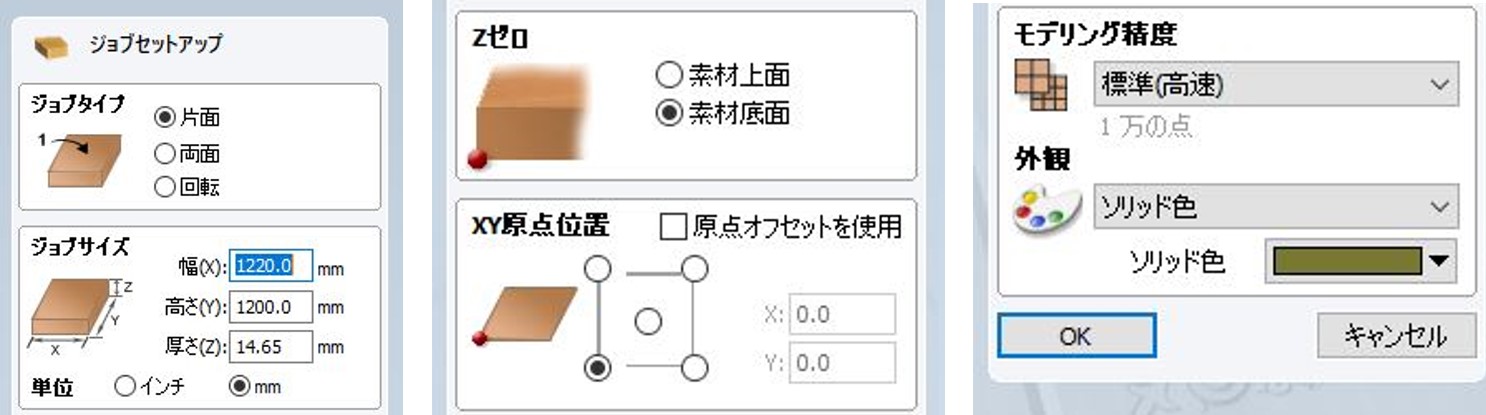
Step1 Setting milling path on V-Carve
Before activating the CNC machine, a path to perform milling was defined.
- Job setting up
From the result of measuring actual thickness of the board, I set up the Job setting for the ShopBot machine.
- Importing files
DXF file exported from Fusion 360 was imported to V-Carve that is a software for ShopBot CNC machine.
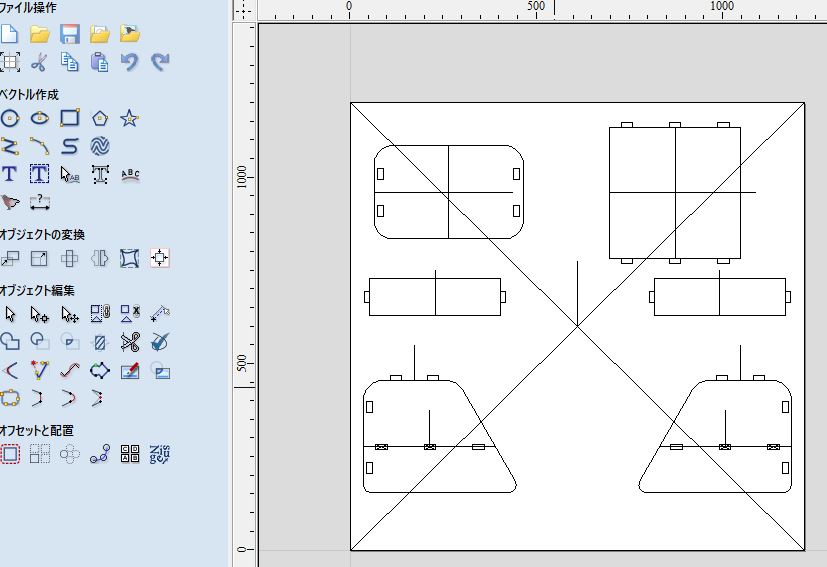
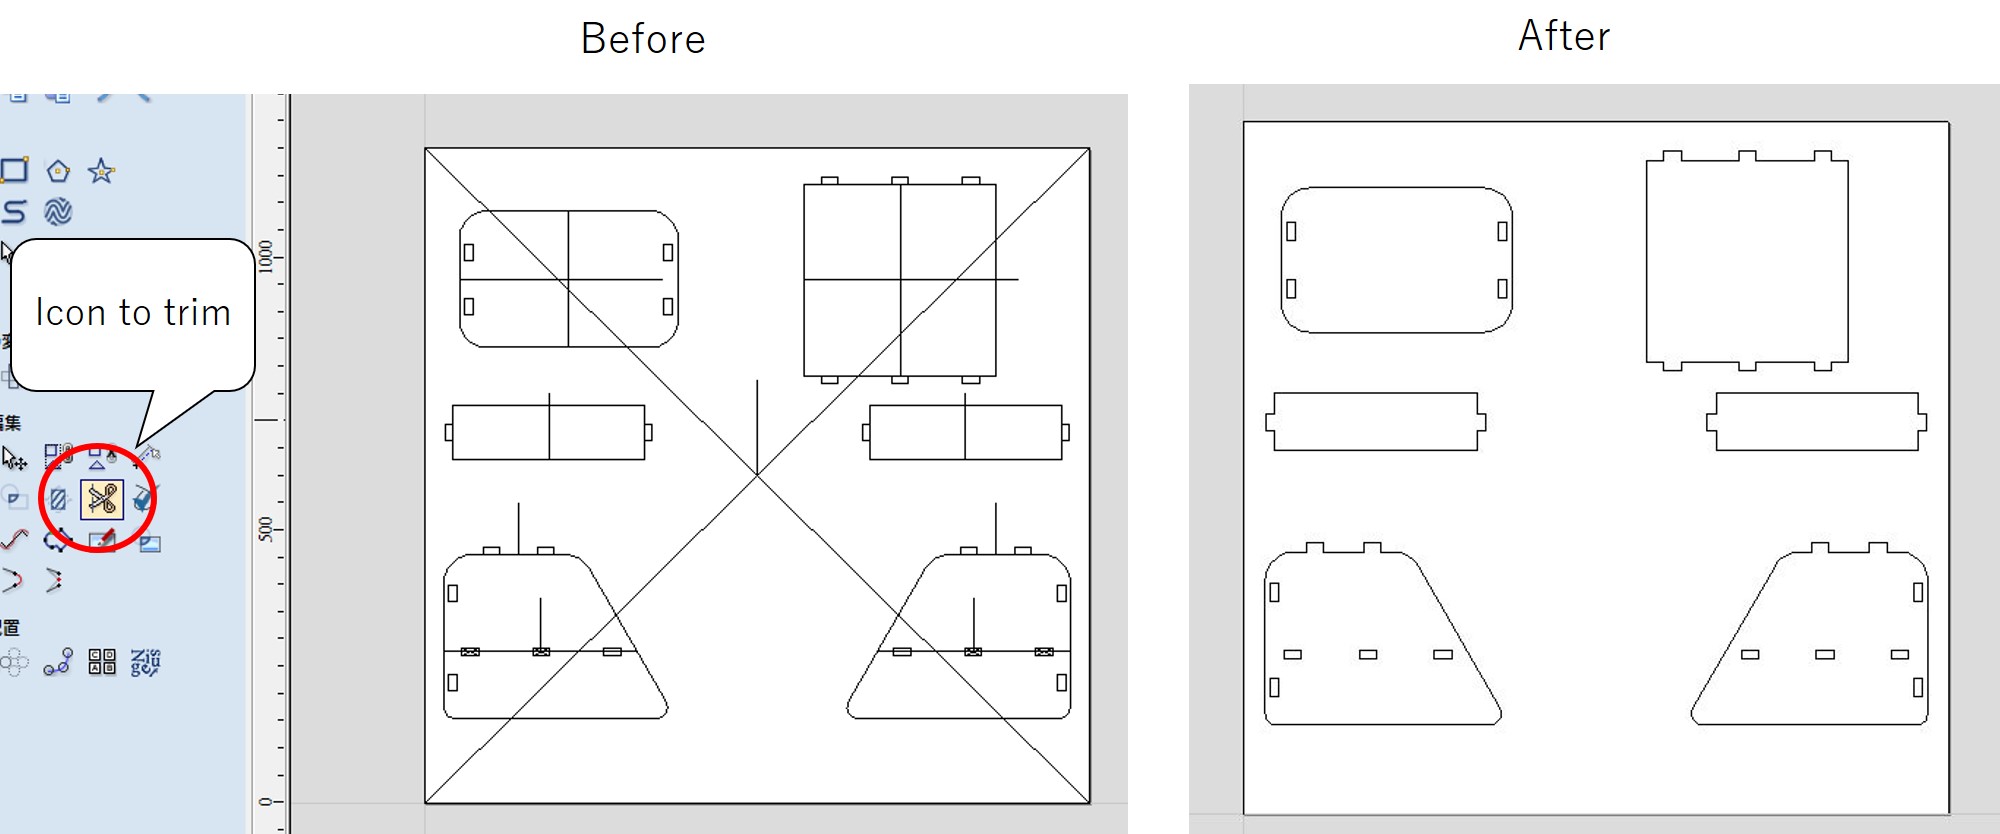
- Trimming extra lines
In my case, extra additional lines also appeared as a vector. So, I cut off these extra lines by “Trim”.
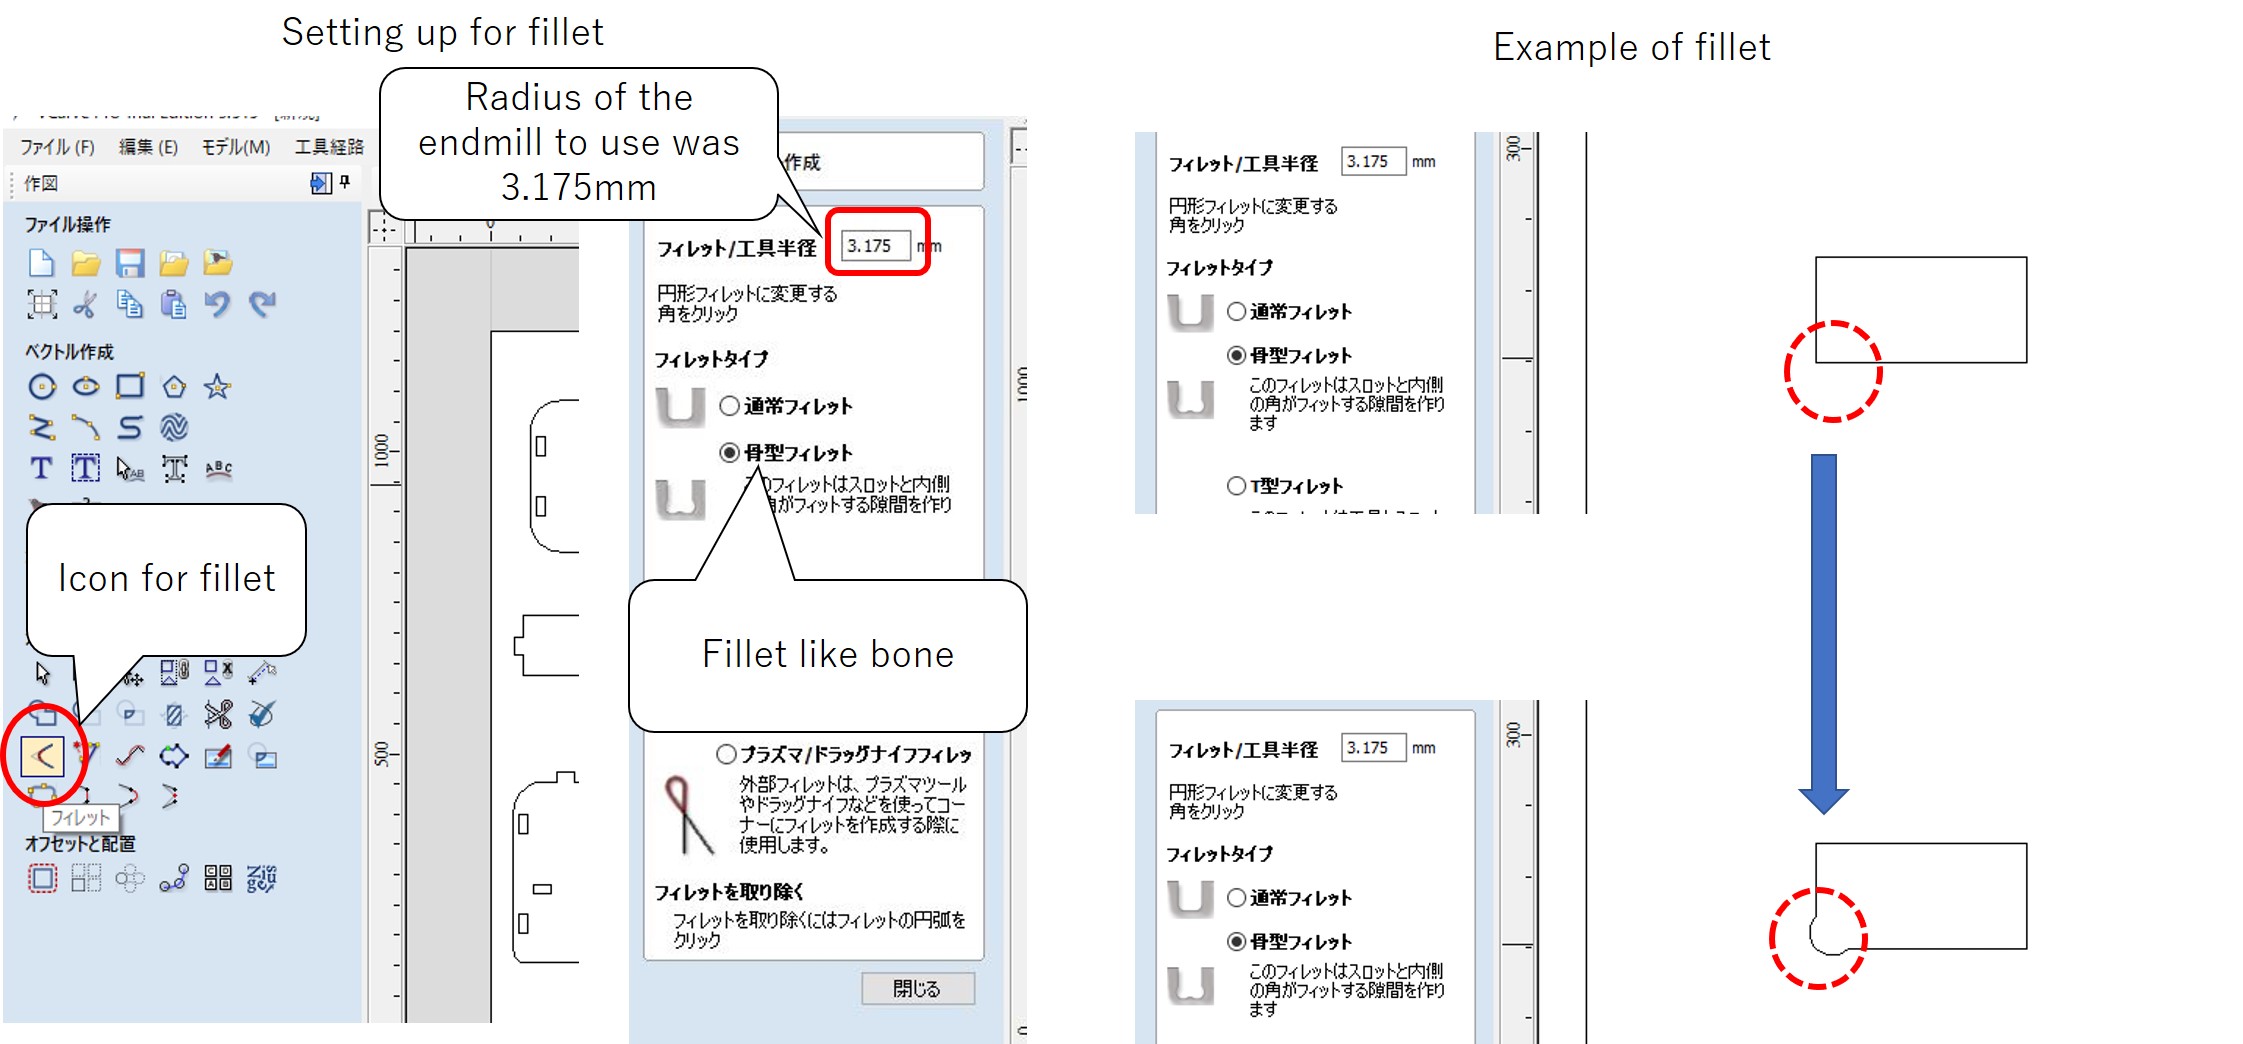
- Creating fillets
To connect joints smoothly, fillets had to be created at the corners of joints.
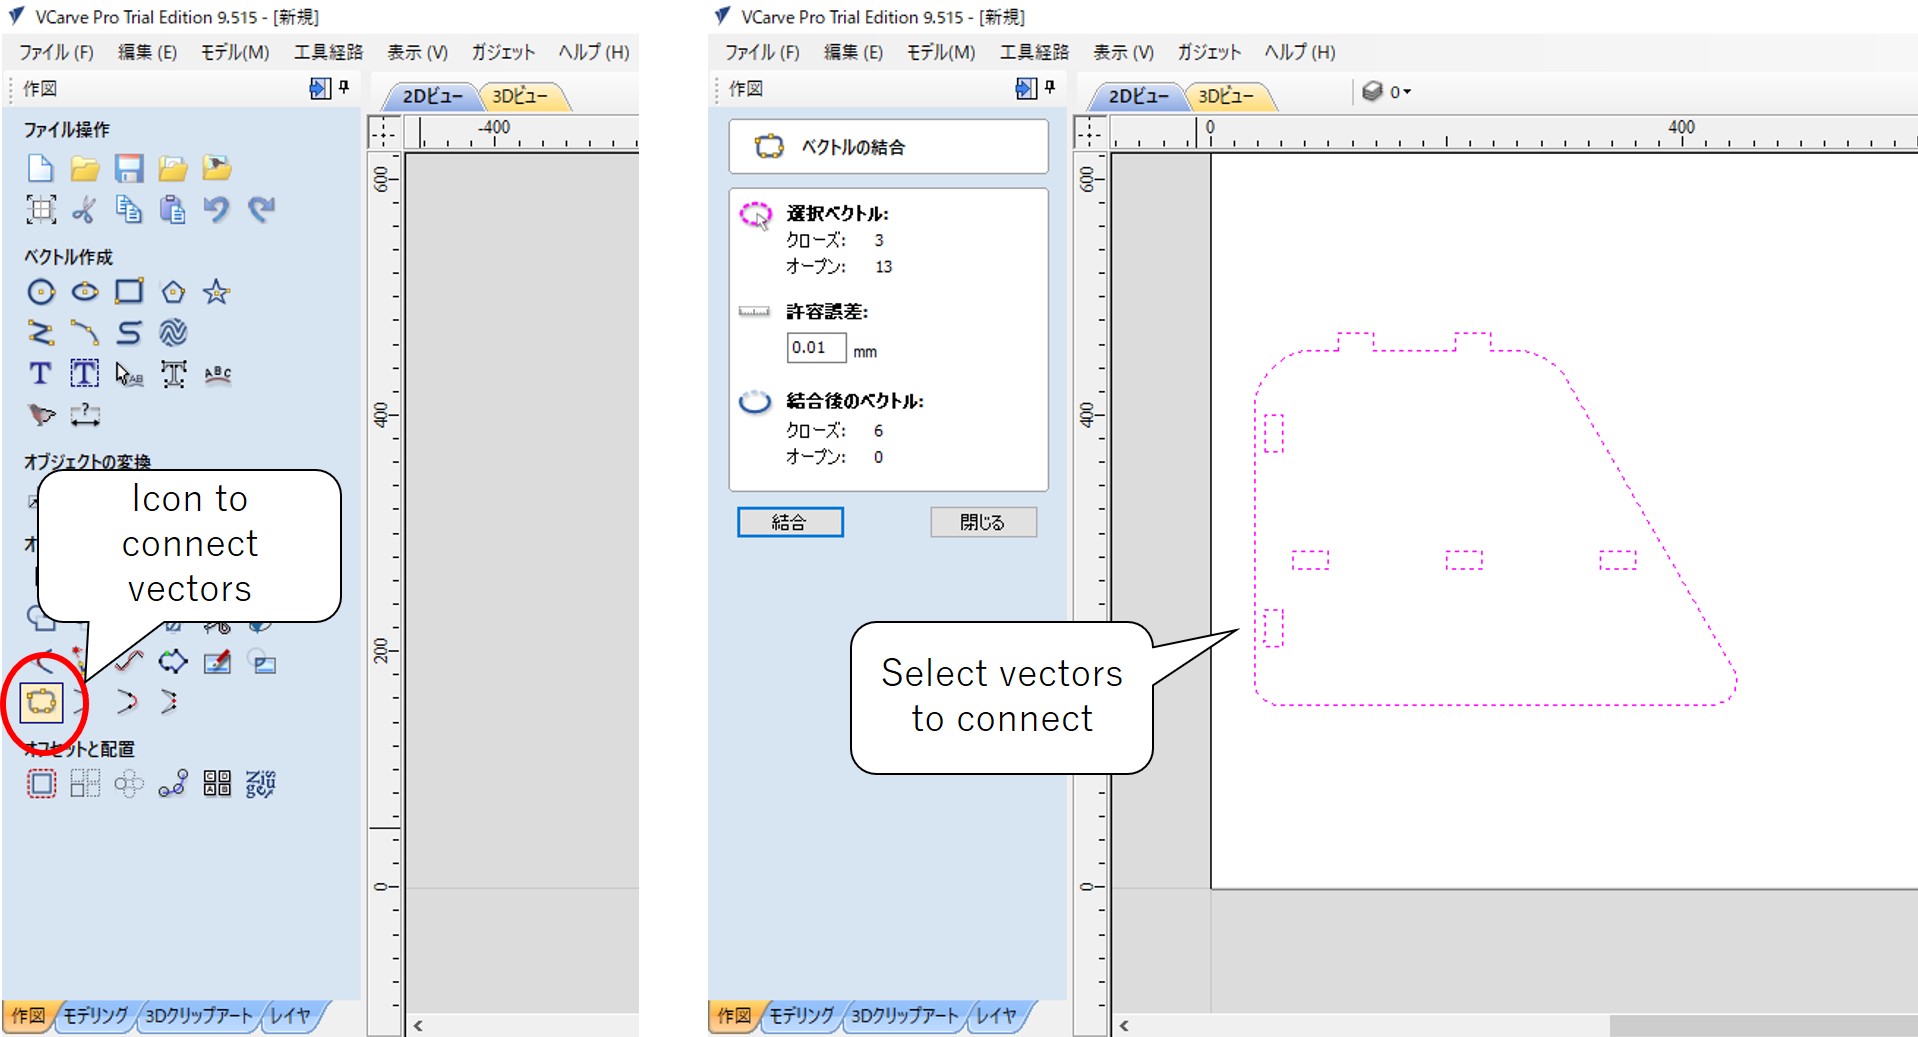
- Connecting vectors
During creating fillets, some corners could not be available. I found those lines were not actually connected to create corners, although they looked like being connected. So, I used “connecting vectors” to connect these lines.
- Setting up Endmill
I set up the operating conditions of the endmill for my task.

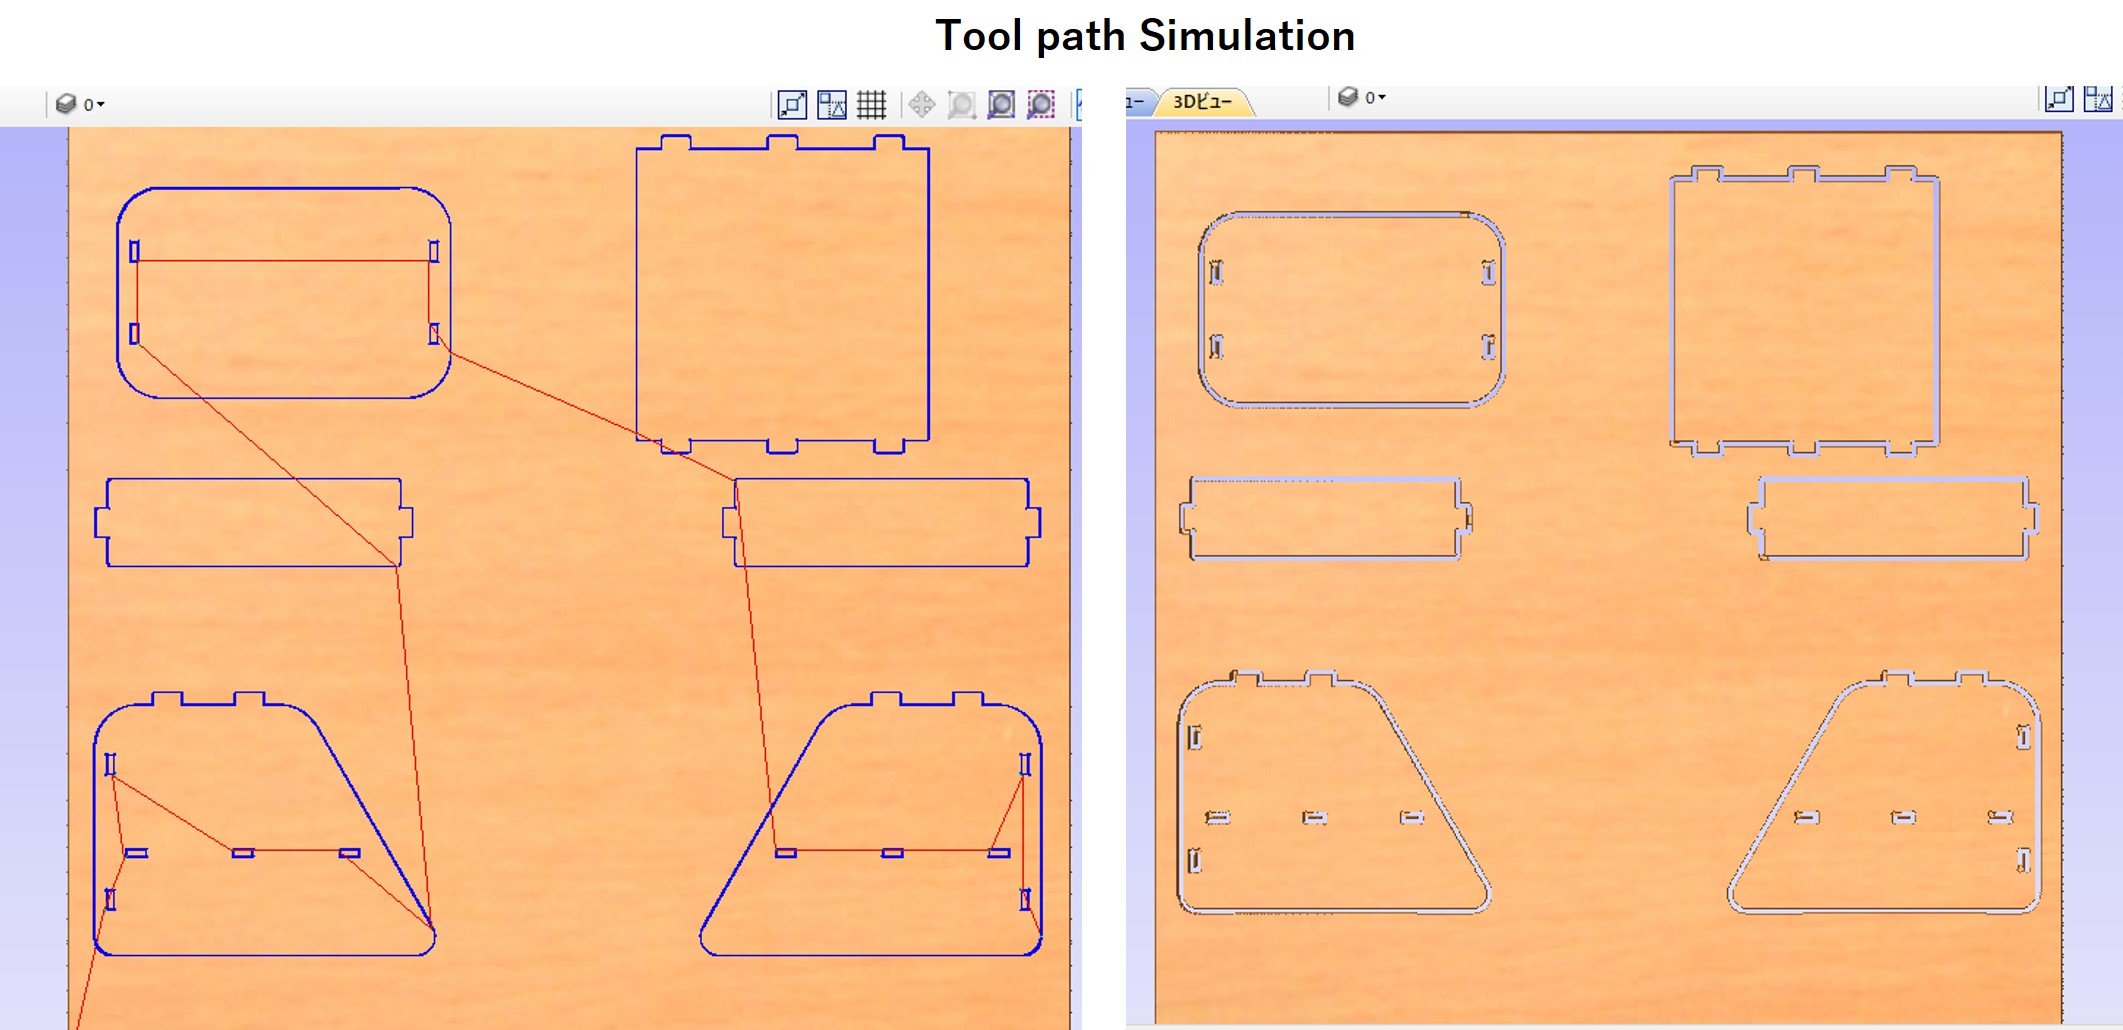
- Tool path simualtion
Finally, I simulated desired endmill path to check whether the endmill would move correctly.
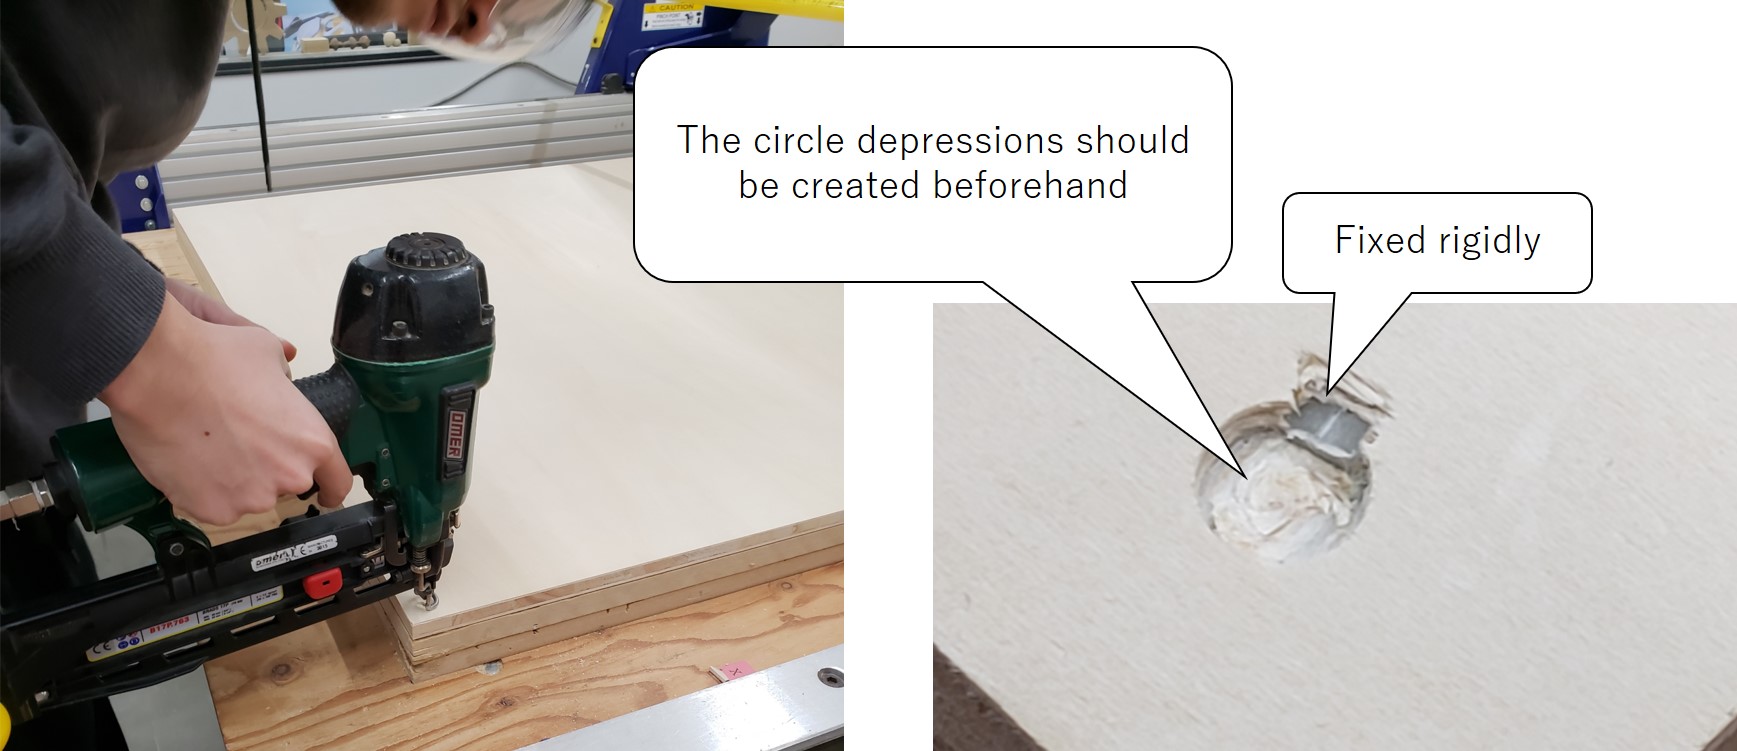
Step2 Preparing CNC machine setting
Before milling the board, I had to fix the board to the base of the CNC machine for safety. To fix it, I used the tool to shot plastic fittings to the board. The points to shot should be created before shooting as depressions.
Step3 Performing the milling job
It was ready to mill. During milling, I had to keep being ready to stop the machine just in case. After finishing milling, I put off the components from the board by using a hammer.
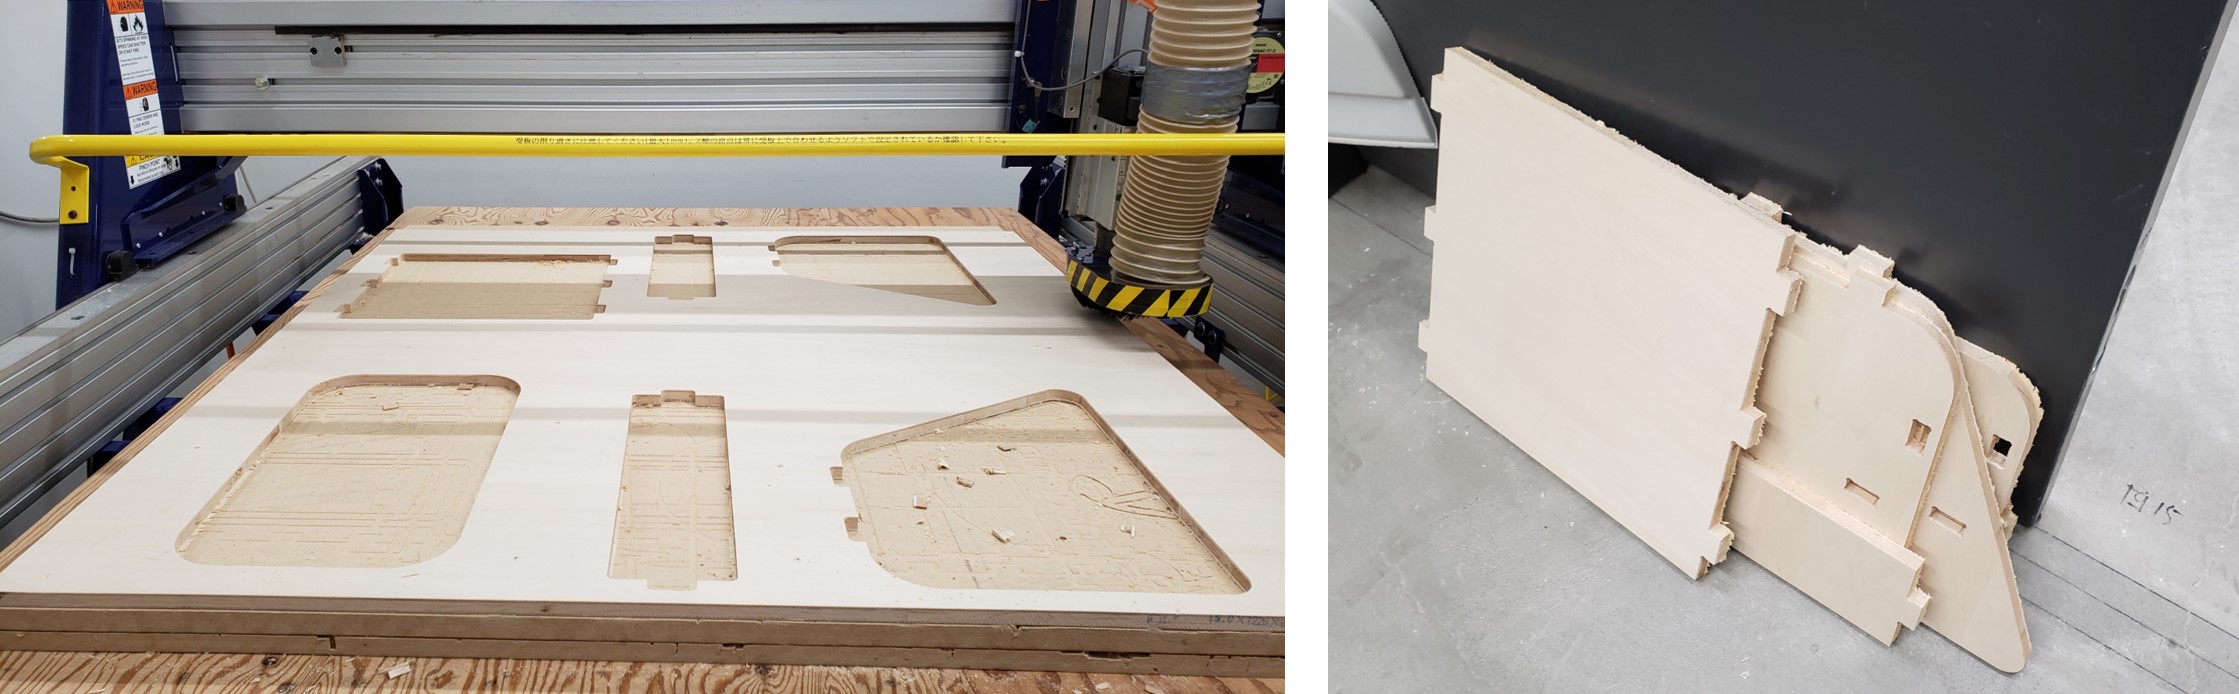
Step4 Assembling the shelf
After filing joints of each component, I completed to assemble them. Now, an example of actual utilization is seen below picture.