10. Molding and casting
On this week, I learned how to create 3D objects by a method except using 3D printers. The method is “Molding and Casting”. In my opinion, the method is suitable for multiplying the same products faster than using 3D printers. So, learning “Molding and Casting” is also beneficial for me.
Group assignment
The detailed works of our group assignment are shown here.
Individual assignment
The goal of this individual assignment was
1. Design a mold around the stock and tooling that you will be using
2. Mill it (rough cut +(at least) three-axis finish cut)
3. Use it to cast parts
1. Designed in Fusion 360
First of all, I designed 3D models in Fusion 360. For this assignment, I should design 3 kinds of models because of the process of casting.
- Desired object : It is what I want to create
- Silicon mold : To cast a desired object
- Wax mold : To cast a silicon mold
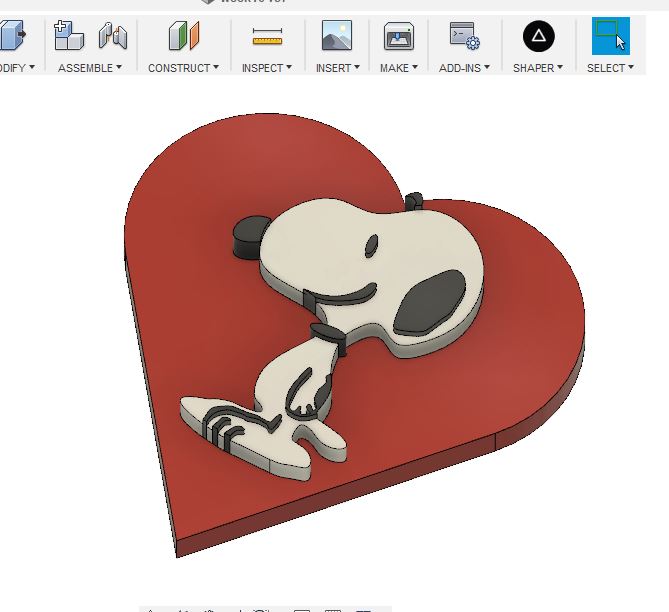
For this assignment, I planned to create a SNOOPY printed on a heart-shaped coin(desired object).
Next, I designed a silicon mold by using the desired object. The silicon mold includes 2 parts to be held with each other for casting. So, to avoid leaking liquid silicon during casting, the parts of the mold were designed to be concavo-convex.

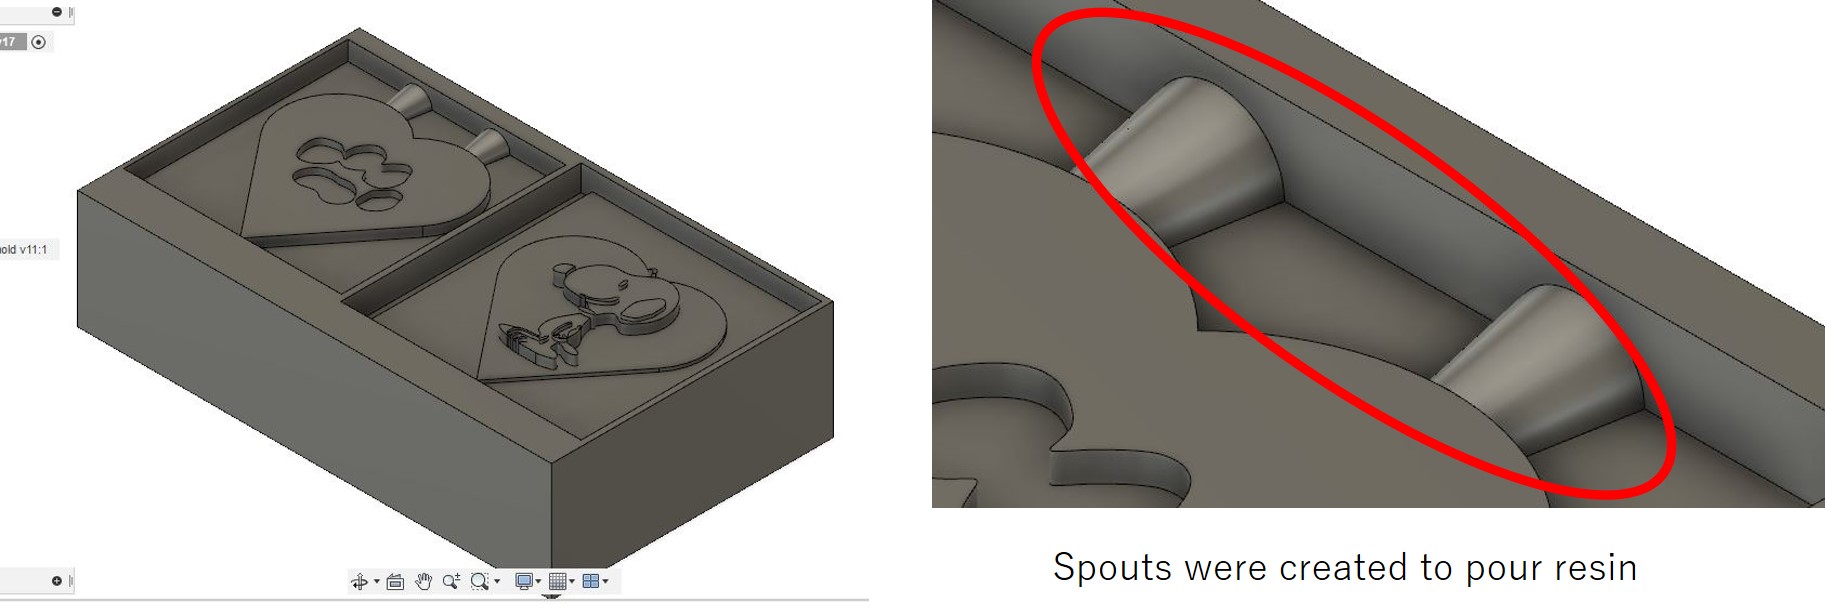
Finally, I designed a wax mold.
For casting, the positions of spouts were also important to extrude air during casting.To do that, I designed to have the bottoms of the spouts touch the top plane of the coin.
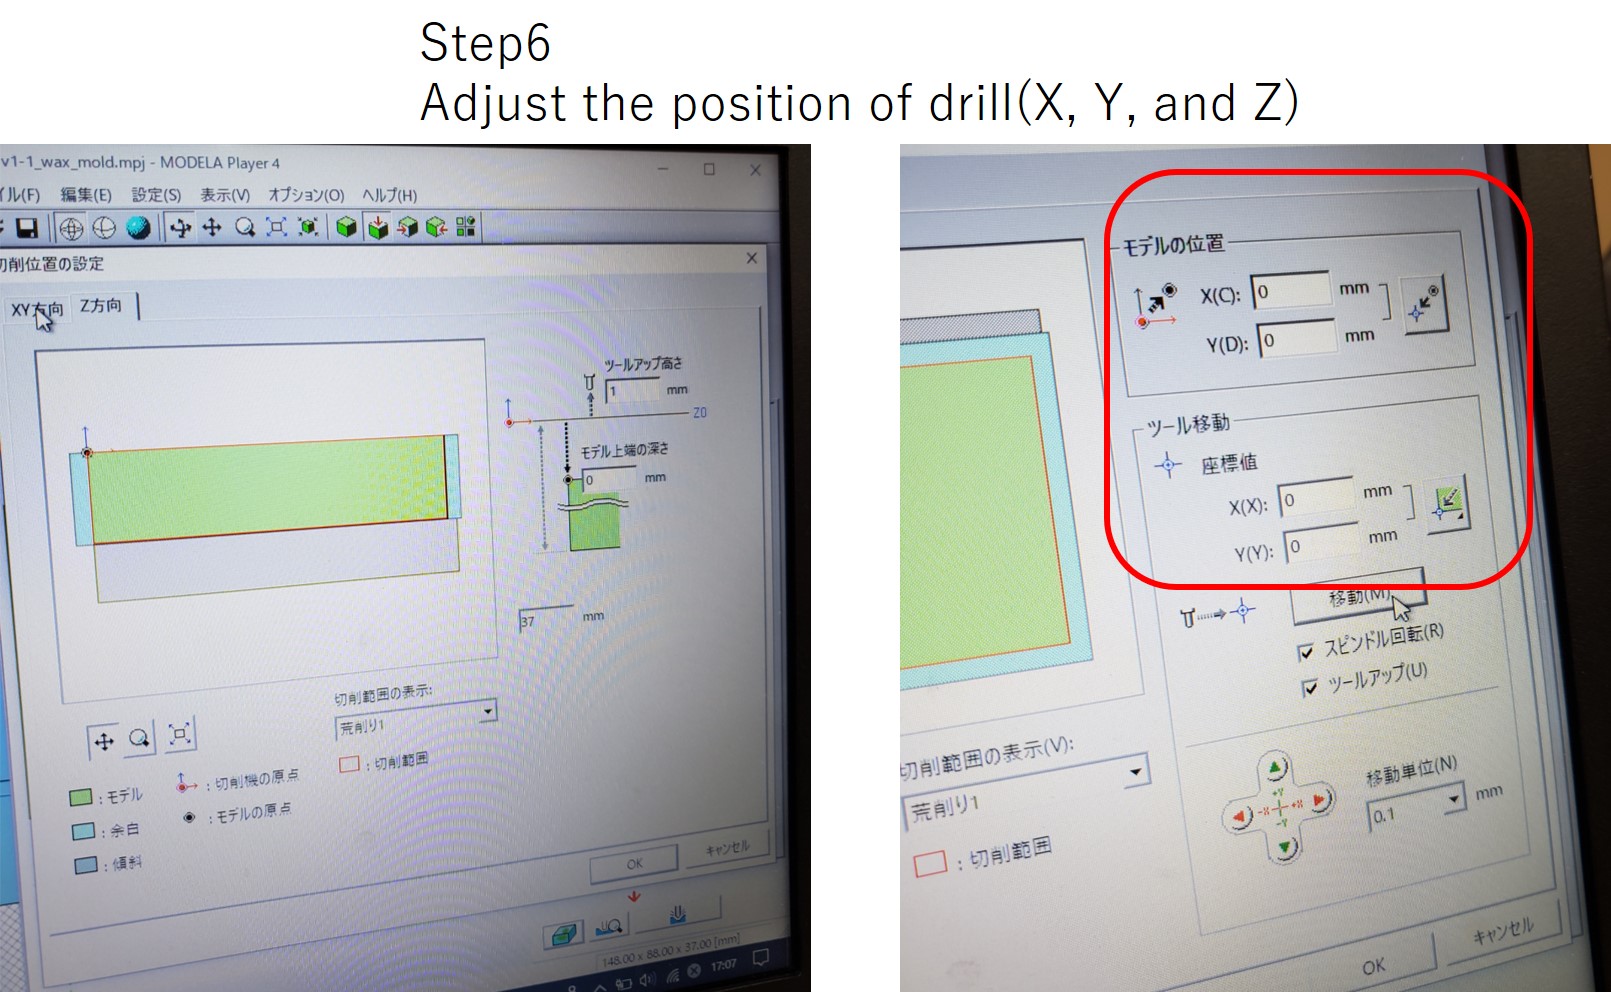
2. Milled a wax mold to form a silicon mold.
To mill wax mold, I used the same machine as week 5 and 7. However, the way to set up was different. To set up, I used “MODELA player 4” installed on the computer in Fablab Kannai.
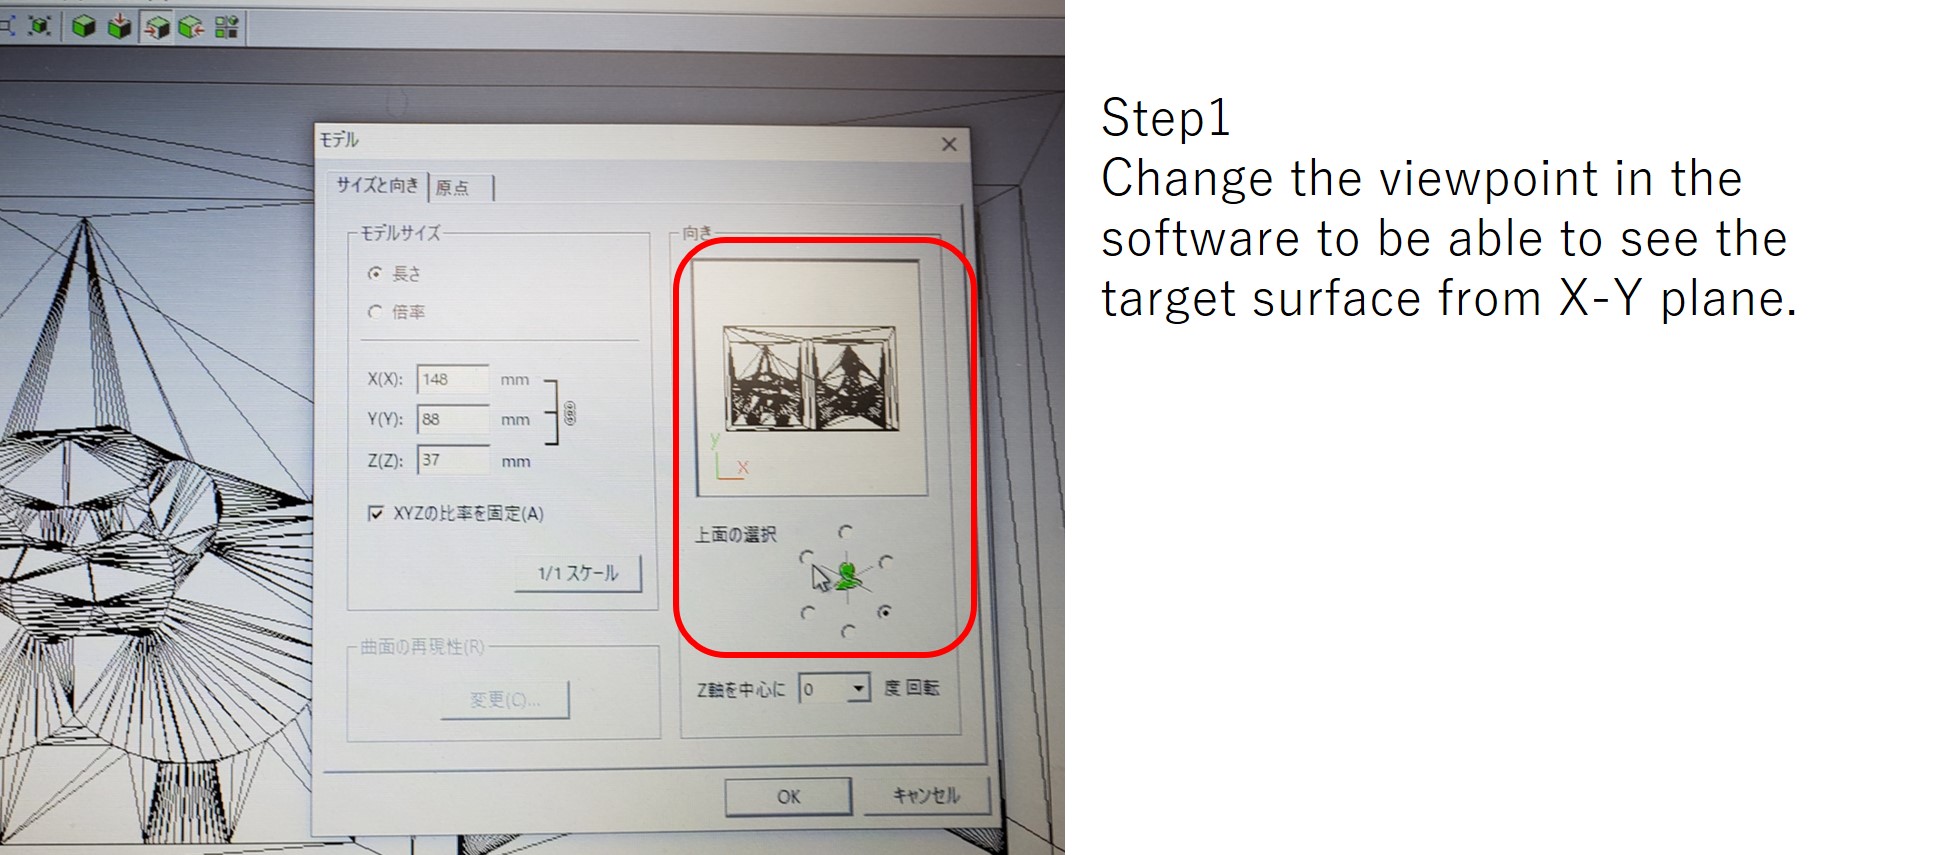
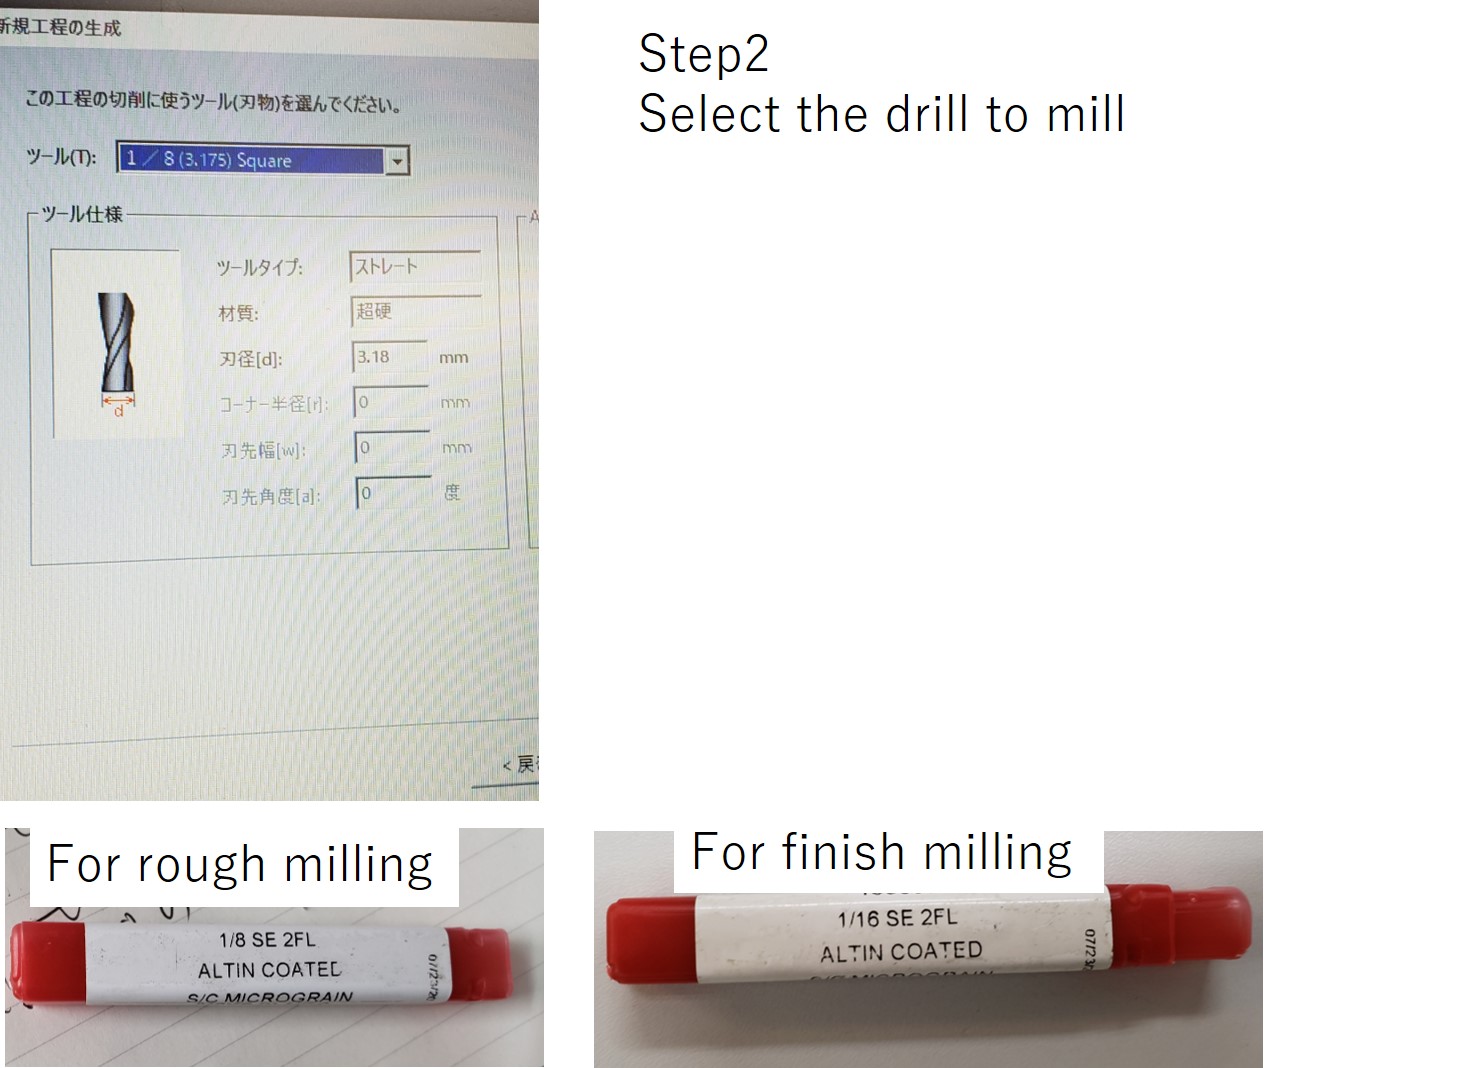
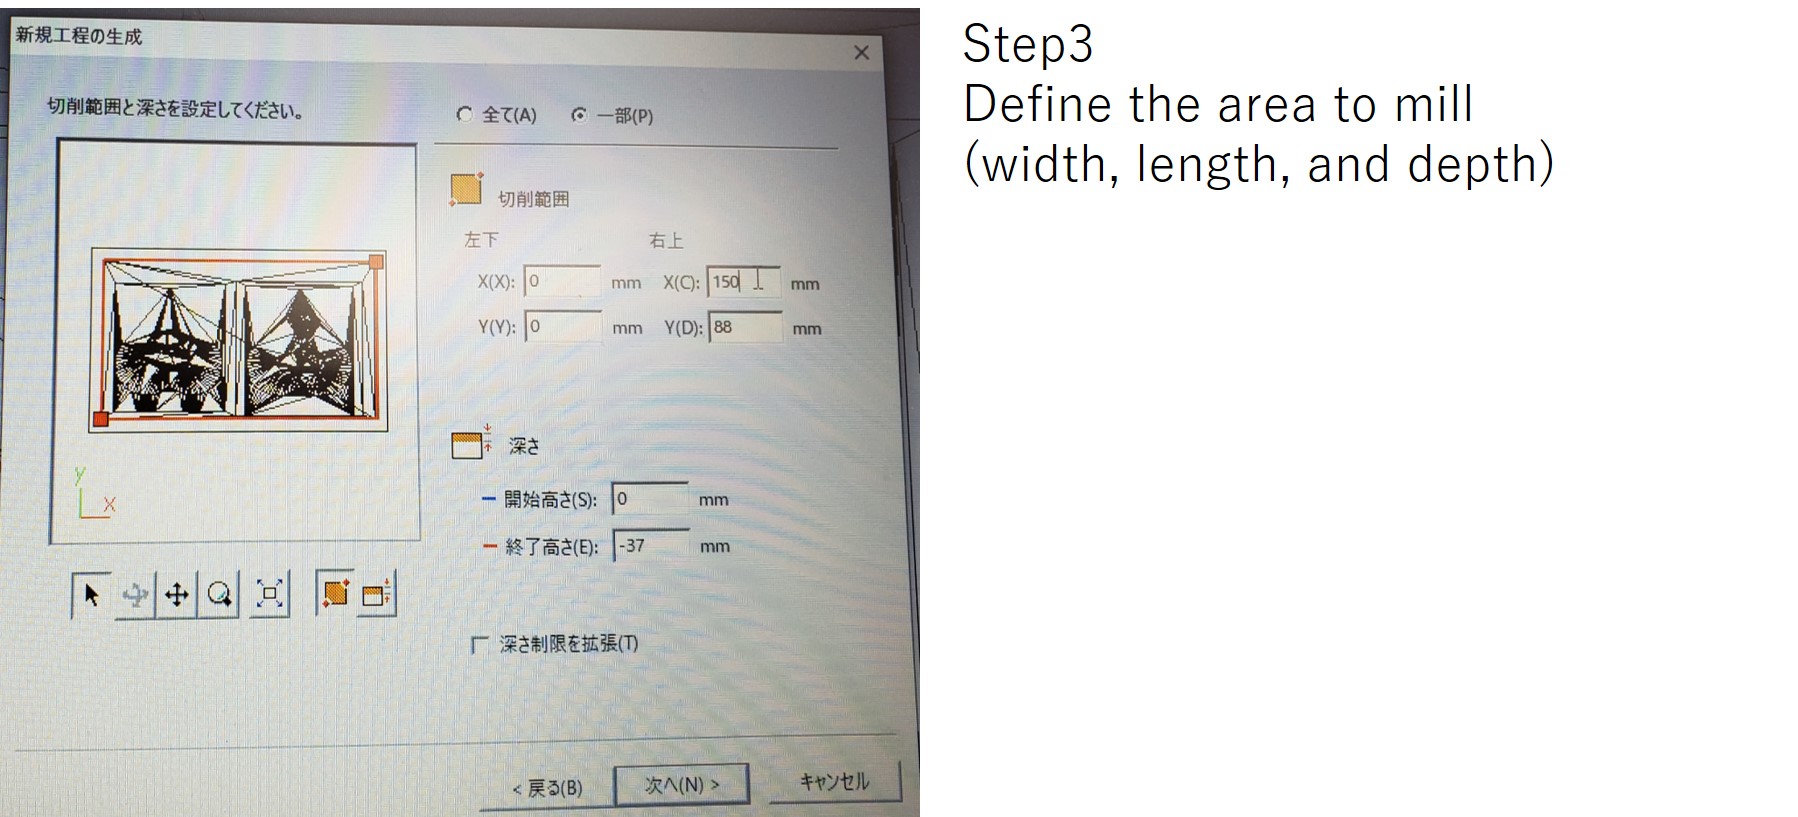
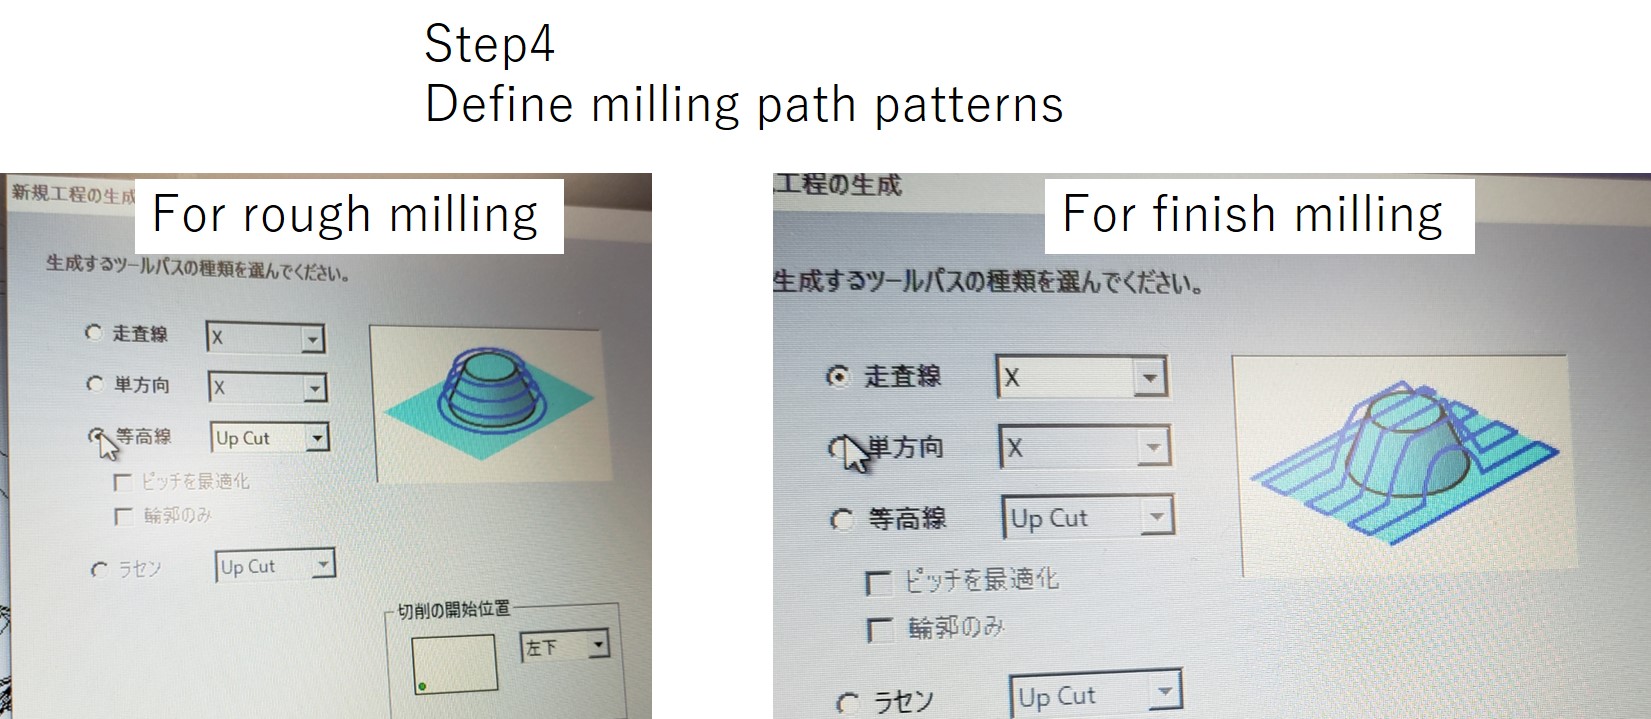
In my case, there were 2 kinds of steps to mill. One is rough milling to form the outline of wax mold and the other one was finish milling for detailed parts. Then, the above process was done two times for each kind of millings.
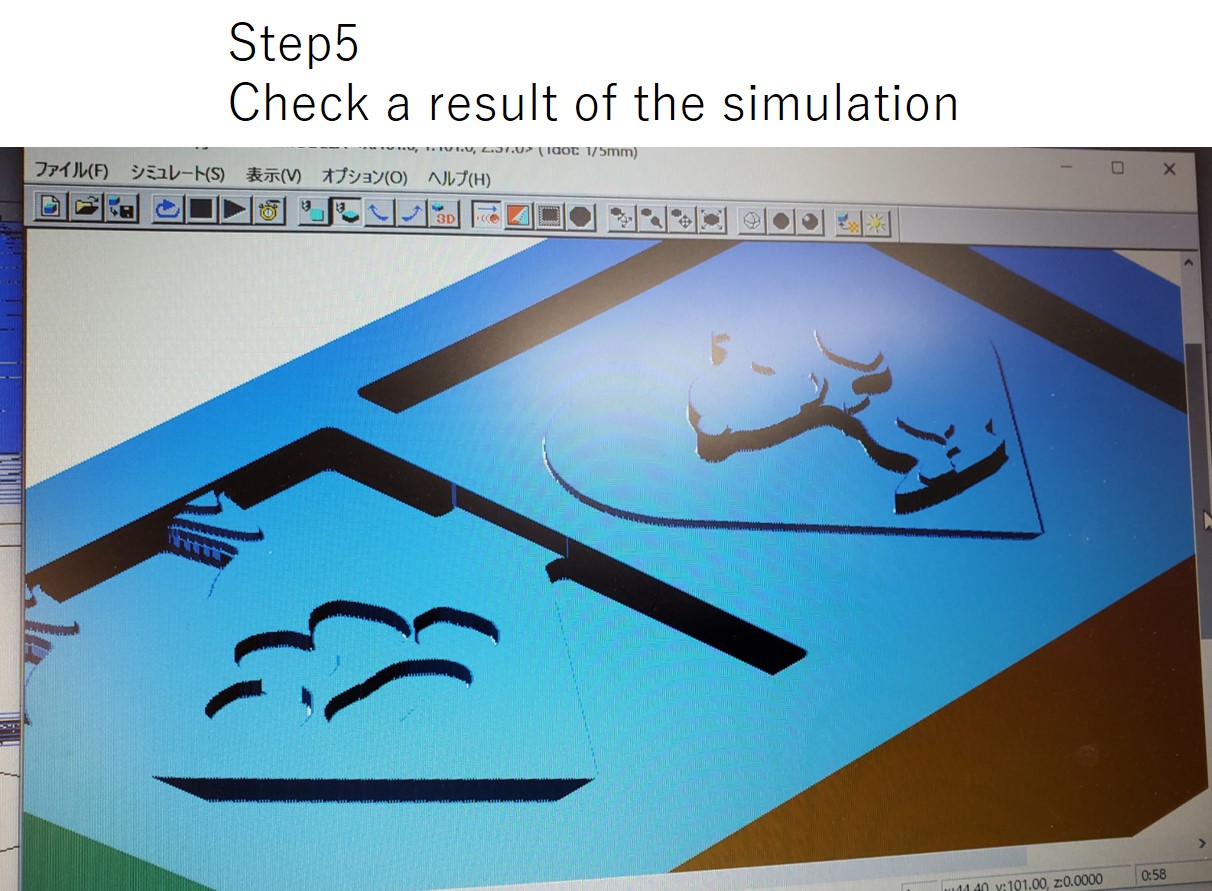
Actual scene of milling was shown below picture.
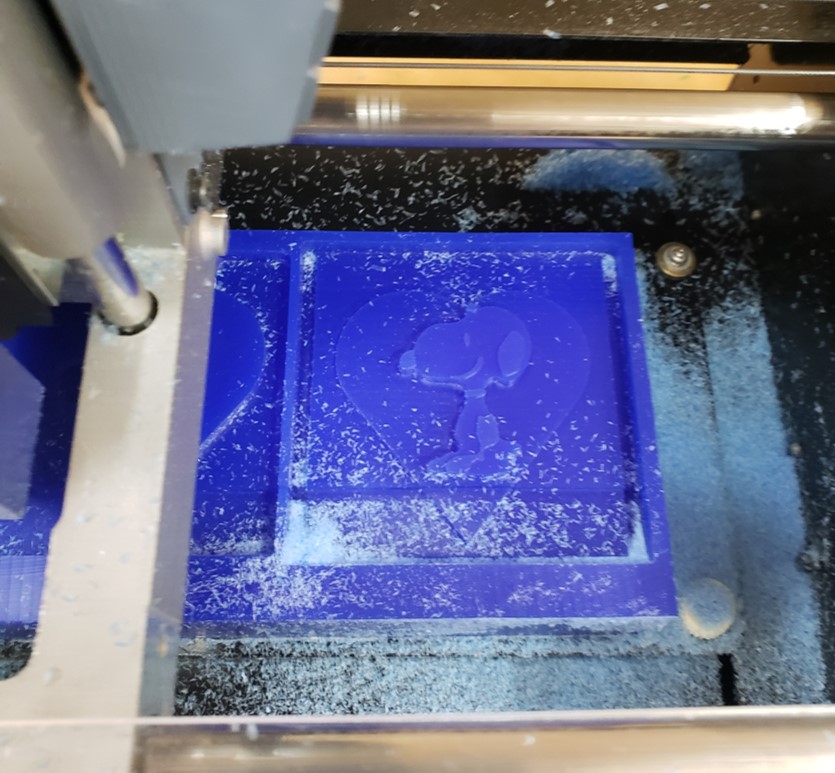
Finished product is shown like here. It looked like that the shape of SNOOPY was milled clearly.
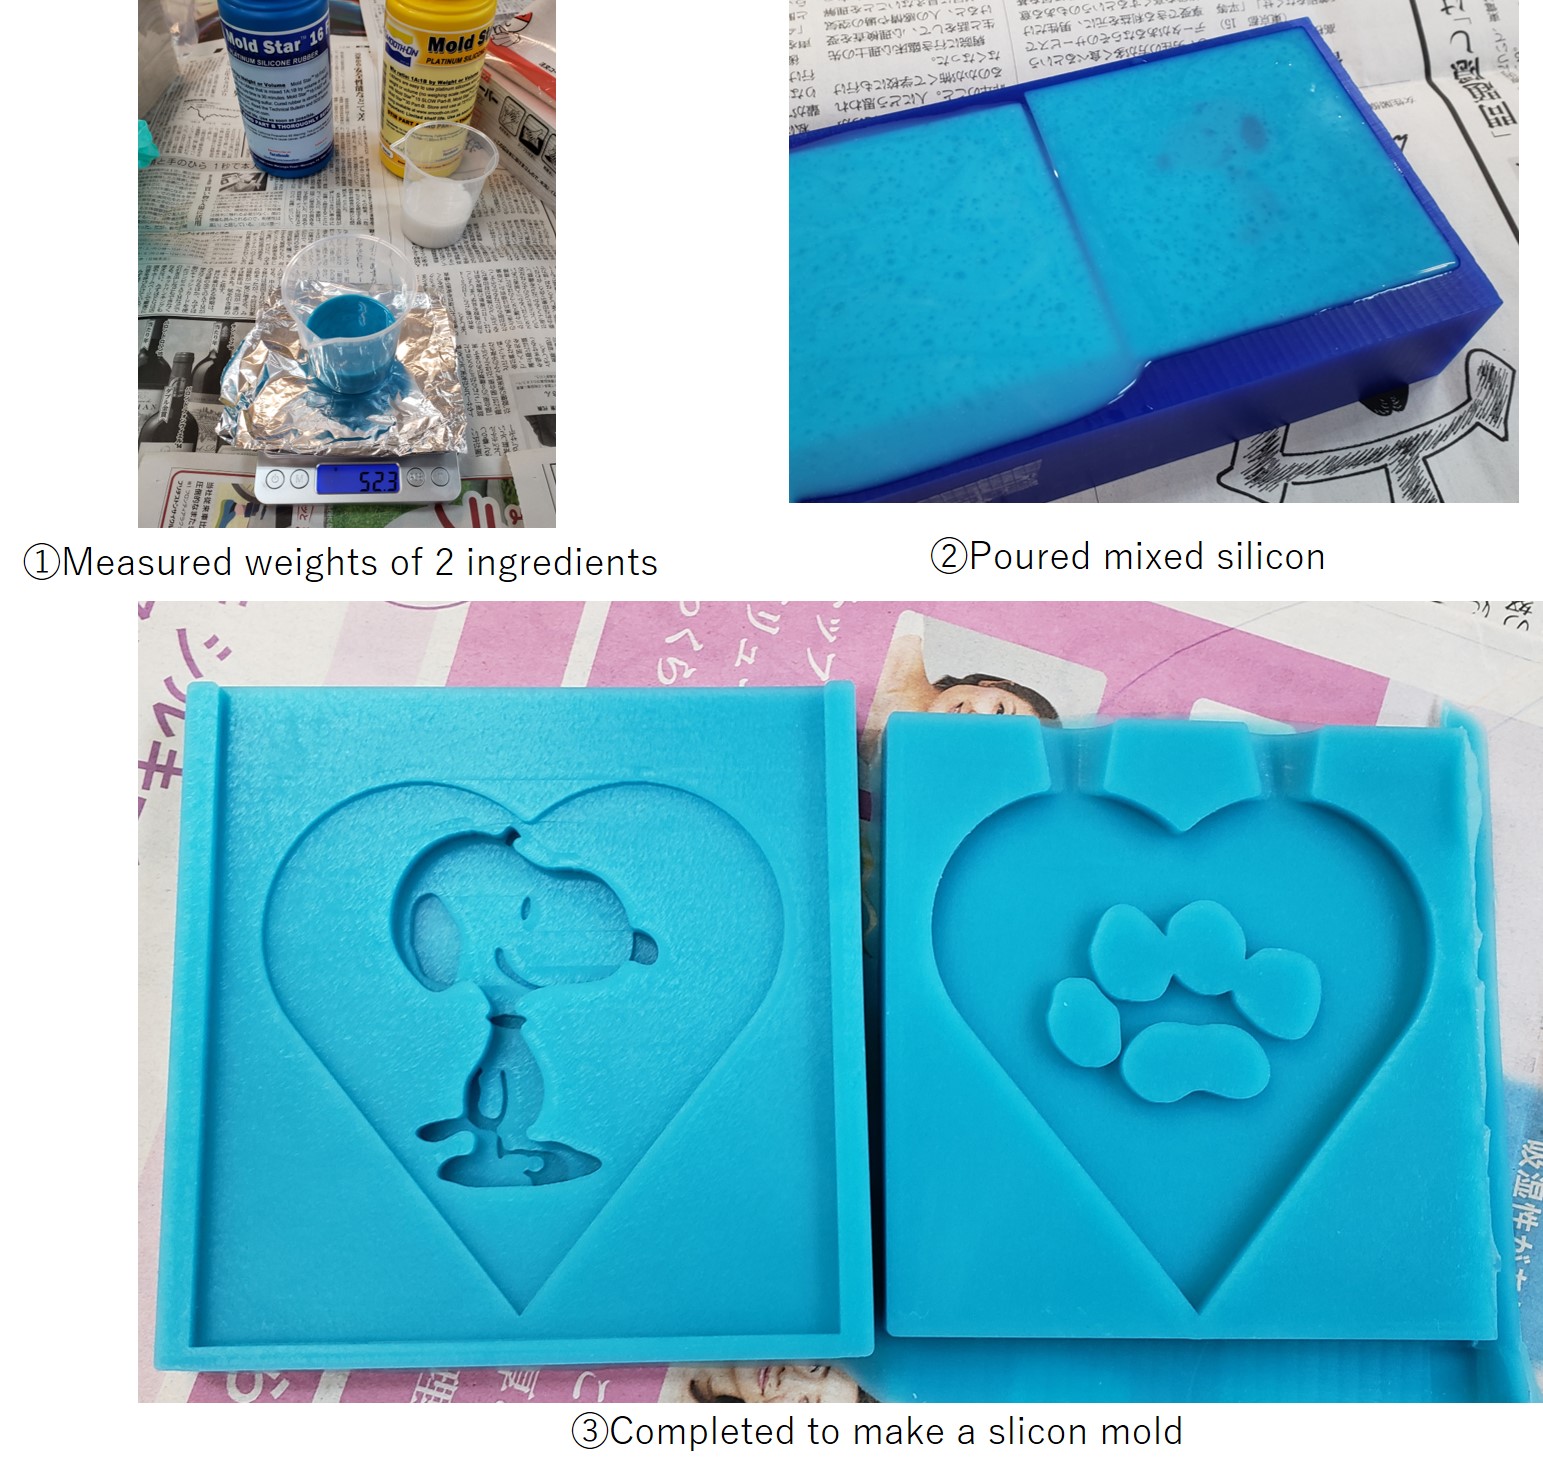
3. Casting silicon mold from wax mold
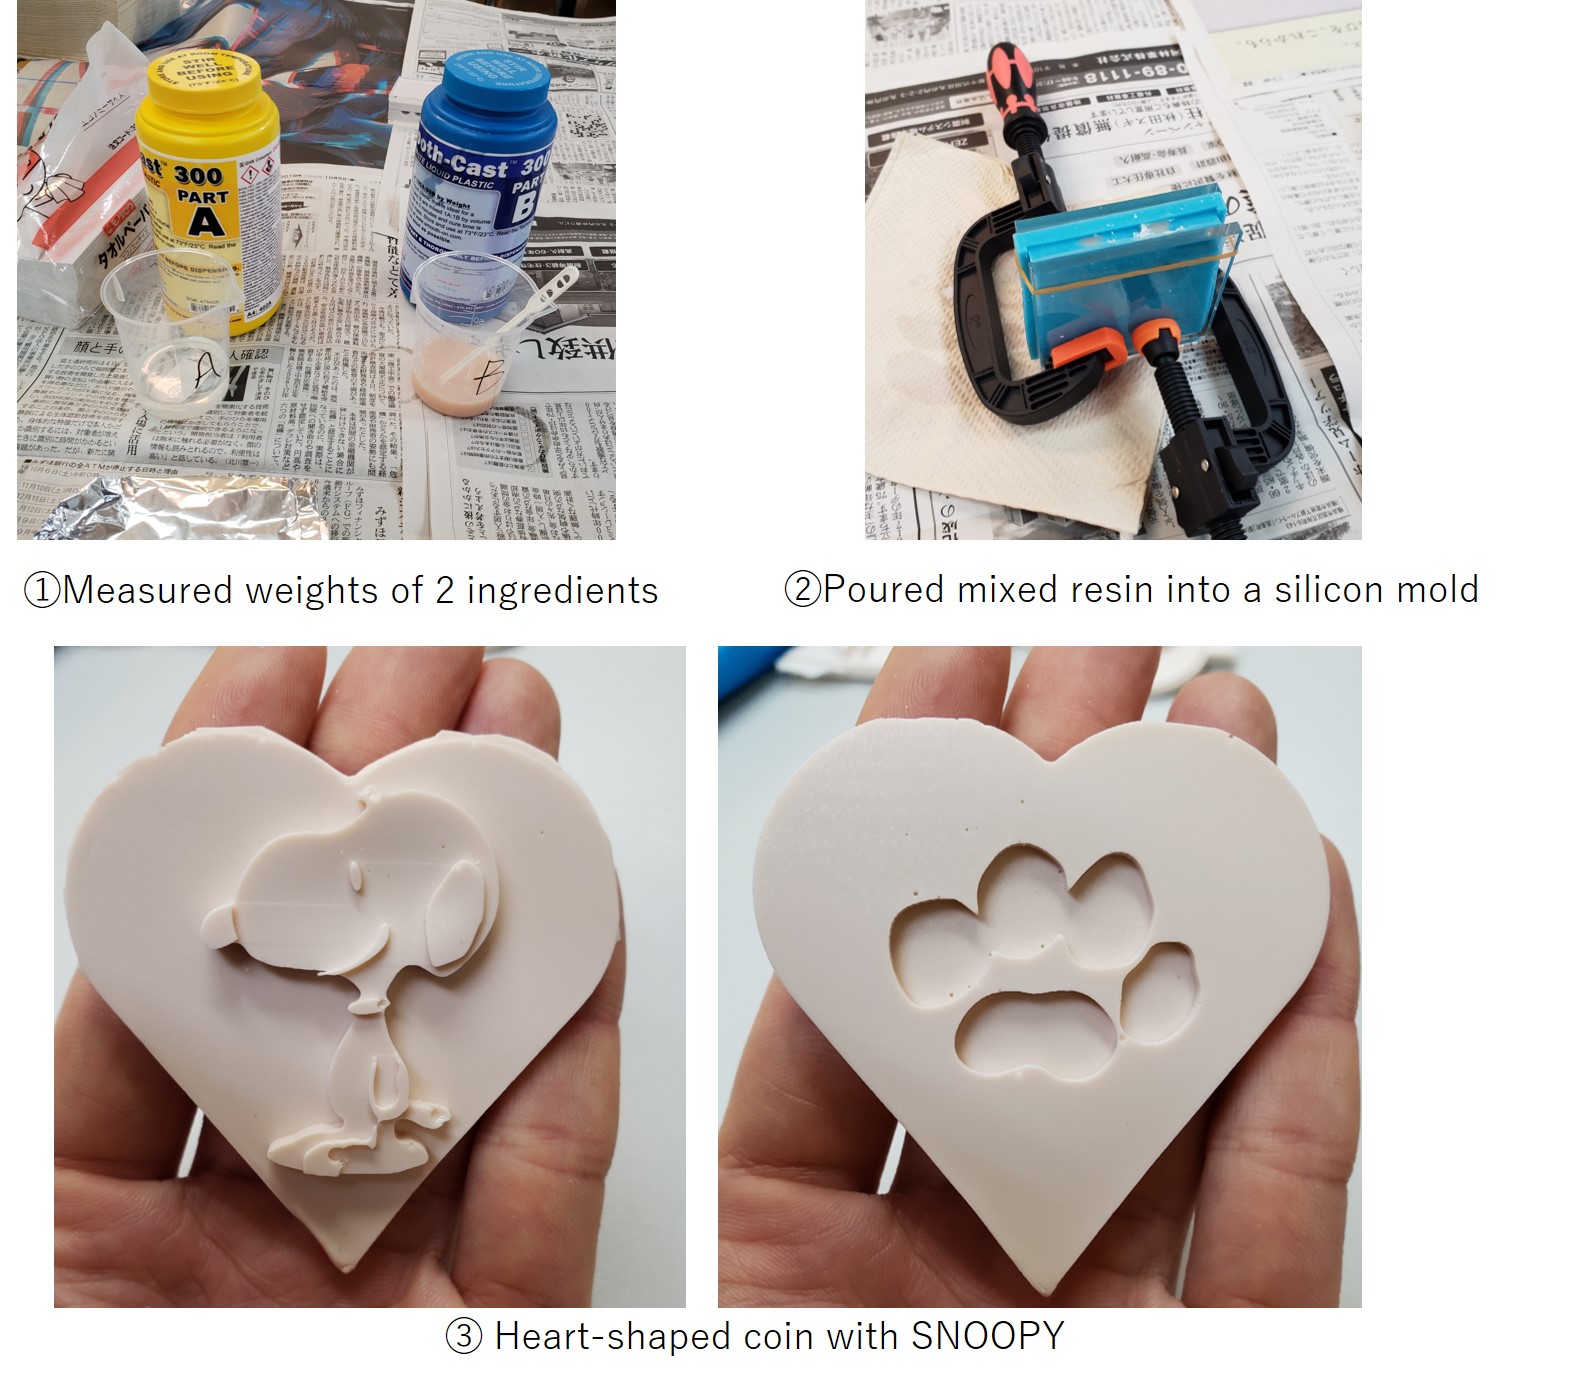
To make a mold from a wax mold,Slicon was poured into the wax mold. Two ingredients were mixed to prepare silicon to pour into the wax mold. The ingredients were mixed at a constant rate. After mixing and pouring, I had to wait for more than 30 minutes by when the silicon became rigidly.
4. Casting a SNOOPY coin from the silicon mold
Finally, I used resin to cast SNOOPY coin from silicon mold. Also, in this case, other kinds of two ingredients were mixed to prepare resin. The rate to mix was 10:9 (A:B).
When I poured the resin, I used vices to fix the silicon molds rigidly to prevent the resin from leaking. After pouring the mixed resin into the silicon mold, I waited about 10 minutes.