14. Networking and communications
All this information is refered to Networking and communications class.
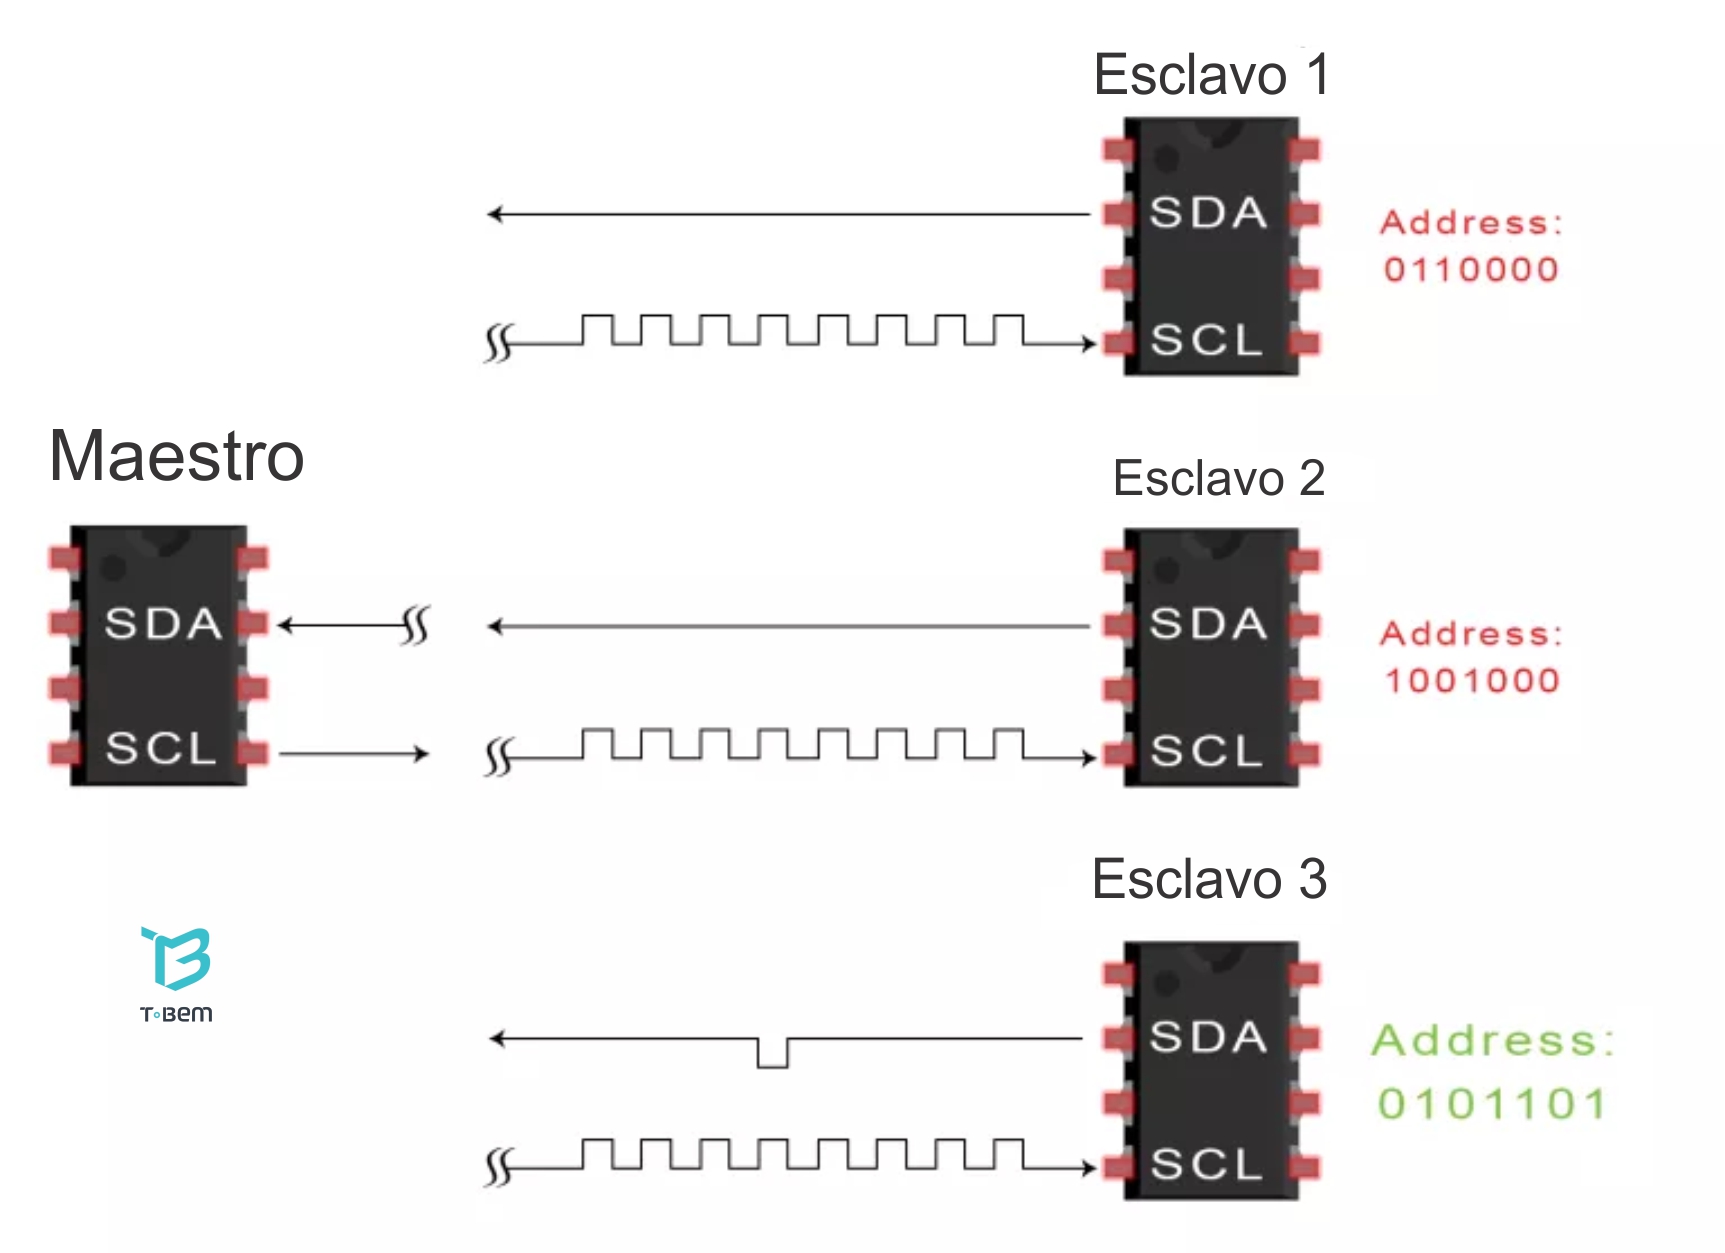
I2C Comunication Protocol
I2C is a two-wire interface to connect low-speed devices like microcontrollers, EEPROMs, A/D and D/A converters, I/O interfaces and other similar peripherals in embedded systems. It was invented by Philips and now it is used by almost all major IC manufacturers. Each I2C slave device needs an address – they must still be obtained from NXP (formerly Philips semiconductors).
I choose this protocol to learn, because it is a standard protocol that can feet boards that you developed with boards developed by other people or companies. This because it doesn’t need a rate sinctronization.
It is polpular for the following reasons:
-
Simple to use
-
Multimaster
-
Multislave
-
Only upper bus speed is defined
-
Uses only 2 wires
More information can be found in the following link
The Boards
I built 2 boards, a master and a slave, both of them using the Attiny 44.
Master
The master board has FTDI comunication, so I can print through Serial what I receive from the slave board.
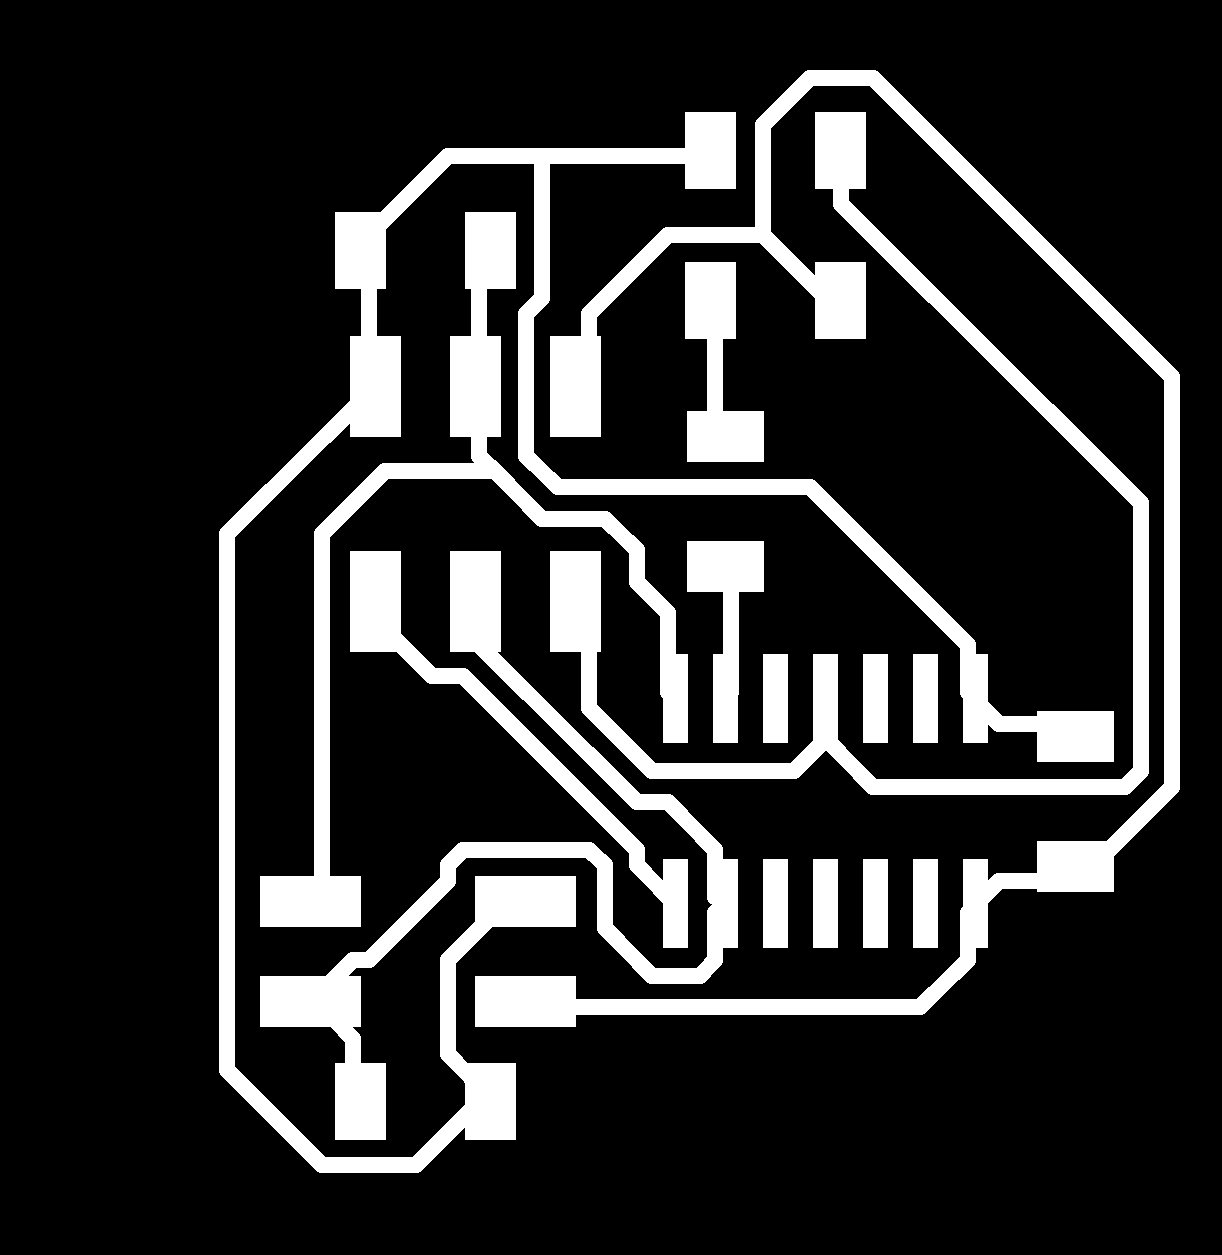
The Board:
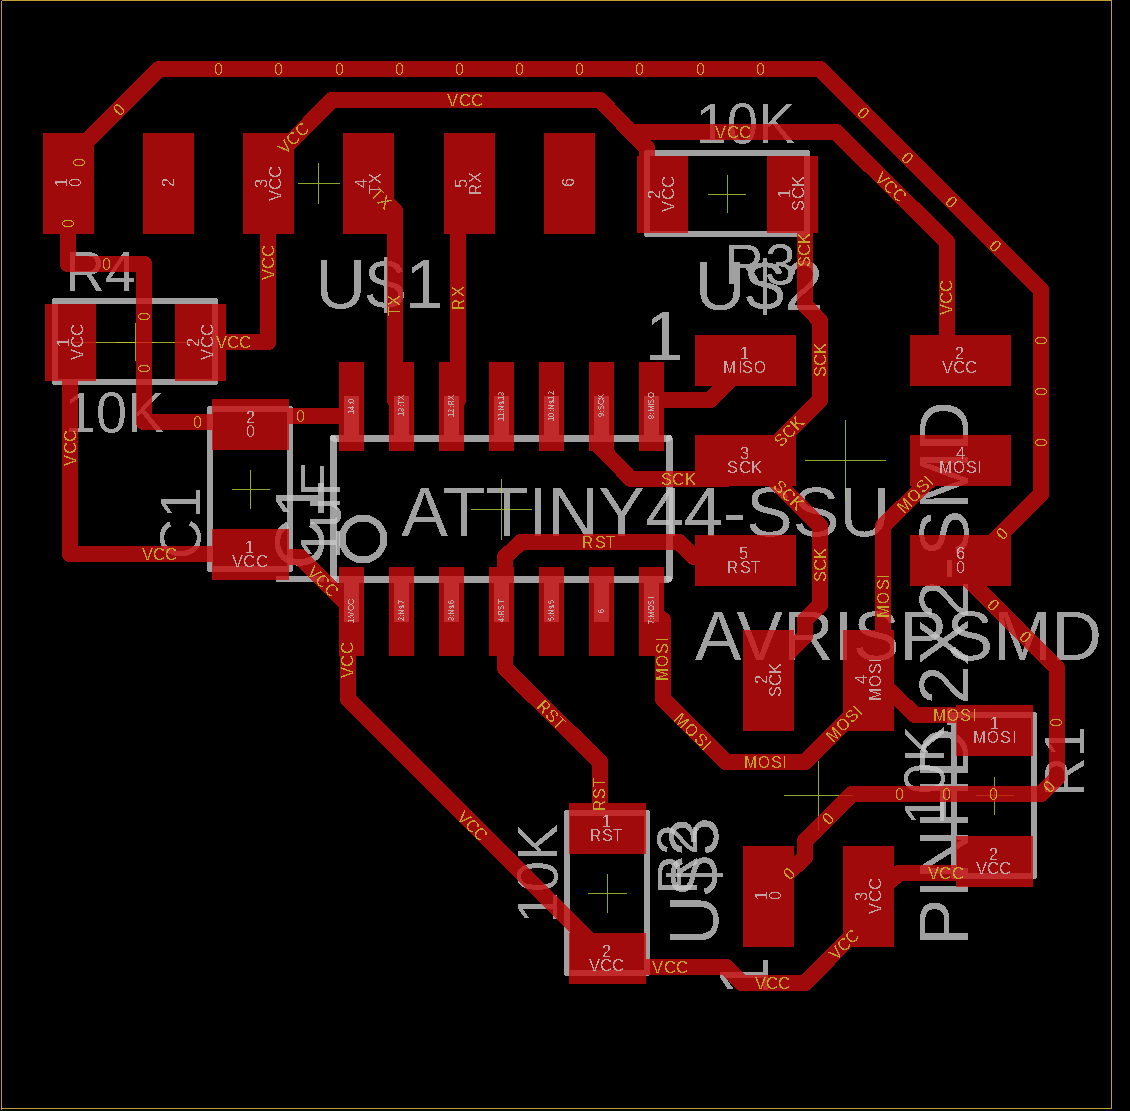
Traces
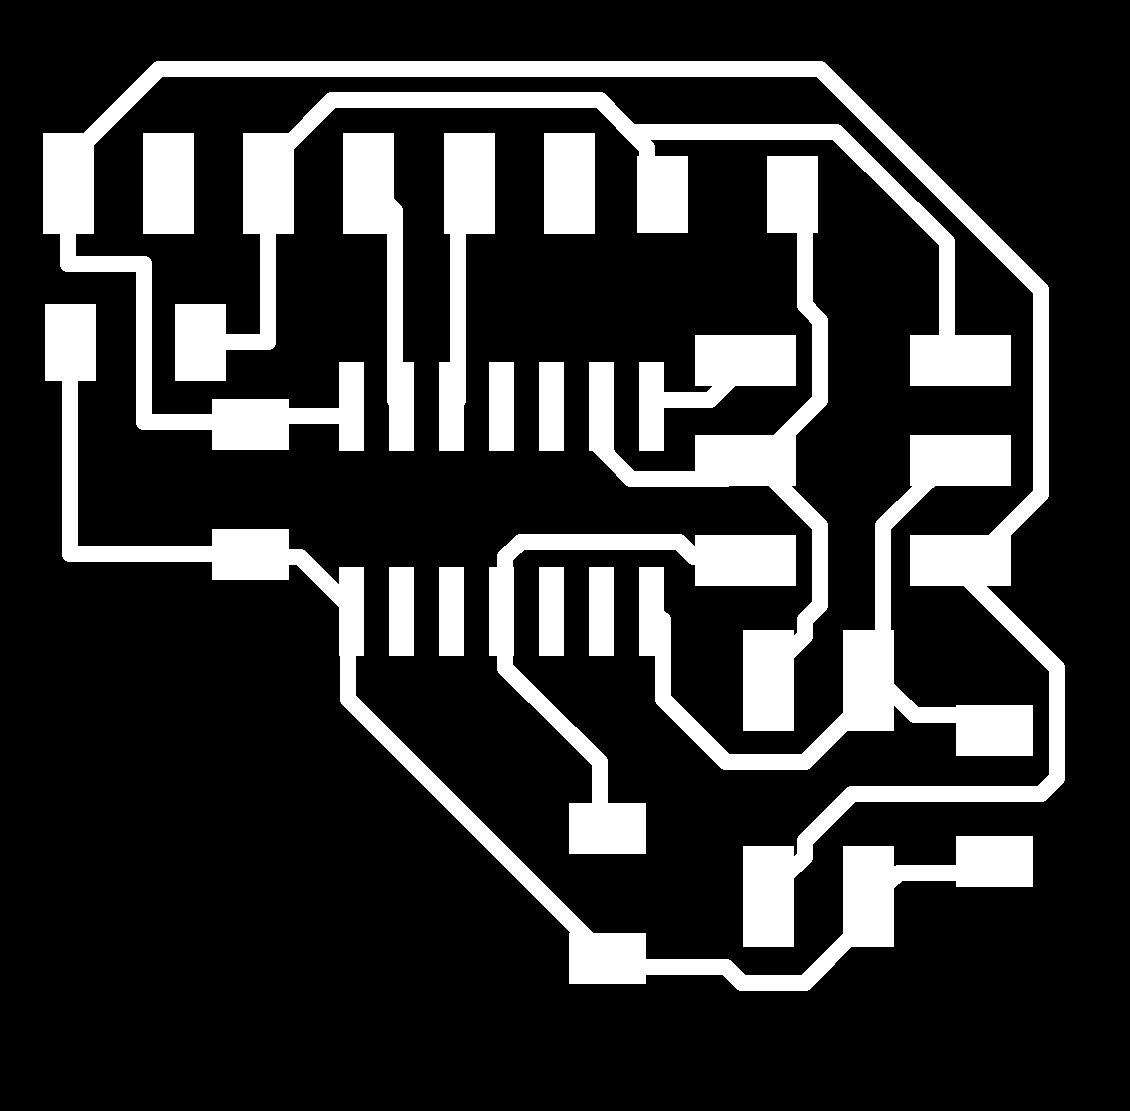
Contour

The Code
For the code I used the wire library that comes with the Arduino, it important that your boards come form Attiny Core board manager, that you can download from here.
#include <Wire.h>
#include <SoftwareSerial.h>

#define rxPin 0
#define txPin 1


SoftwareSerial mySerial( rxPin,txPin);
void setup() {
  Wire.begin();
  mySerial.begin(9600);
}

void loop() {
  Wire.requestFrom(8,6);    // request 6 bytes from slave device #8

  while (Wire.available()) {
    char c = Wire.read();
    mySerial.print(c);

  delay(500);
}
The code uses 2 Arduino Libraries, Wire and Software_Serial.
Slave
The slave board has an included LED included in Pin 7, so it makes has an output for every massage it send to the master board.
The Board:
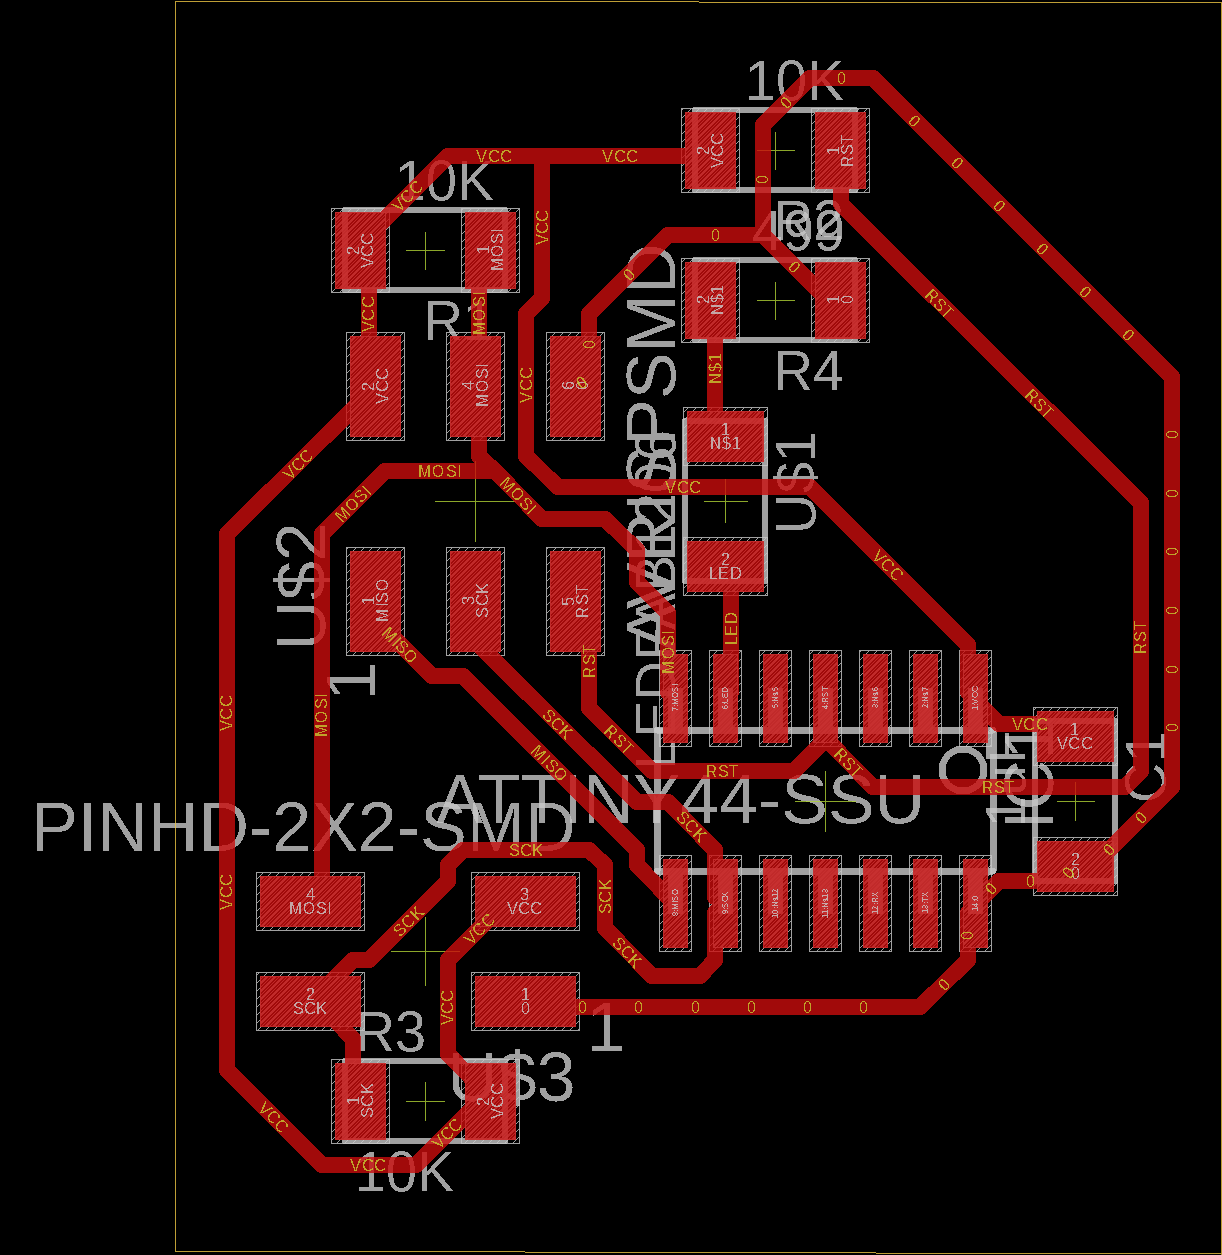
Traces
Contour

The Code
#include <Wire.h>

void setup() {
  Wire.begin(8);                // join i2c bus with address #8
  Wire.onRequest(requestEvent); // register event
  pinMode(7,OUTPUT);
}

void loop() {
  delay(100);
}


void requestEvent() {
  Wire.write("HelloooOOOooOOOooo ");
  digitalWrite(7,HIGH);
  delay(100);
  digitalWrite(7,LOW);
  delay(100);
}
Results:
The Boards
Video
José Tomás Domínguez (Joseto) on Vimeo.
Troubleshooting
My biggest problem was the Wire library, as I specified when explaining the code, you have to use a Attiny Core board, instead of a normal board in the Arduino IDE profile, if not it wouldn’t work.
I also tried to build a ESP 8266 board without sucess, all the documentation for that process is in Aleza Epstein website.