6. 3D Scanning and Printing
This week I worked alongside my group to test the design rules for our 3D printer(s). In addition I designed and 3D printed an object that could not be made subtractively and 3D scanned an object. I have worked with PLA 3D printers before but never SLA printers. Our lab has varies 3D printers in both types, however ironically the only printers working at the moment are the SLA printers.
3D Scanning
Machines
3D Systems Sense 2
Key Parameters:
- Geometry Resolution
- Scan Volume
The Sense 2 is a handheld, short range 3D Scanner with full HD color that captures and processes data in real time. It works by generating a complete mesh of polygons. It comes with its own program to install on your computer that that allows the user preview the scan in real time and play wit a few different settings. Before beginning the scan he application provides the following choices in order to optimize your scan: object, head, body. I choose to do my classmate, JT’s head.
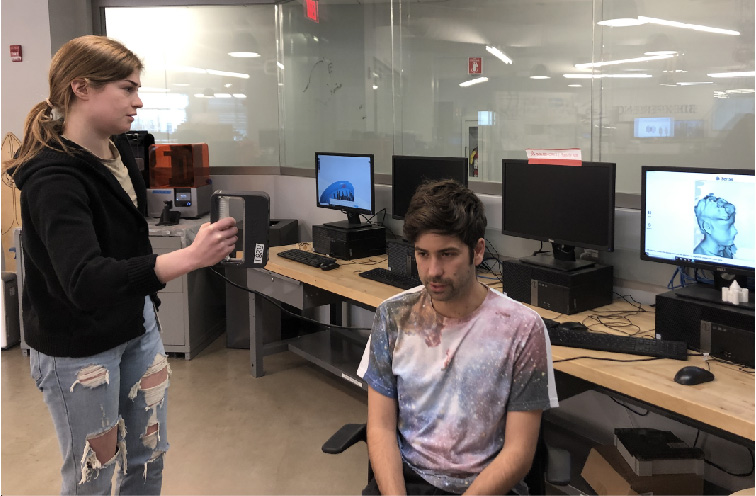
He sat in a 360 “spiny” chair so that I had 360° clearance around him. I used the preview mode to make sure that the whole area of him that I wanted to scan showed inside the green box on the screen. This reinsured that I would capture the entire “object” while scanning. The recommended distance for scanning is aprox. 0.45m - 2m (18” - 6.5 ft.), however I found no problems with being about 1 foot away, and if you get too close the 3D view turns white, signaling you to move back. It is also important to note that there should be minimal shadow on the object being scanned, so lighting matters. While scanning collected data appeared as “green” snow over top of the object or person, “yellow” if I was moving too fast, and “red” if tracking was lost. These built in tracking indicators came in pretty handy. Once I was satisfied with the scan I selected “finish” on the computers scanning controls. I noticed some extra forms that the Sense must have recognized but where not a part of JT so I used the “erase” tool to take away unwanted forms. I also used the “repair ” tool to fill a hole. Next I saved and exported the model as an STL to get it ready to 3D print.
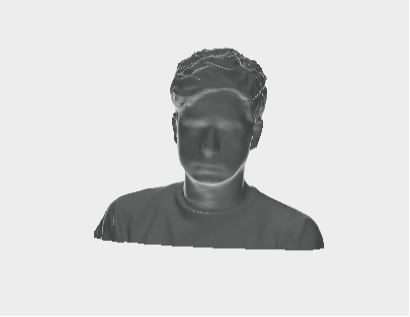
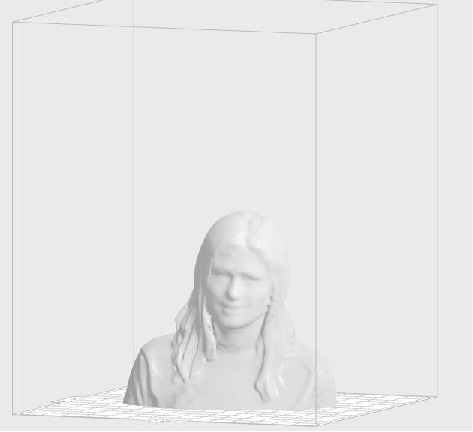
3D Rendering
Some aspects I think are worth noting is the machine is relatively inexpensive, portable, and it offers full-color 3D scanning. Some of the not so good features are DRM restrictions, success of scan relies heavily on the users skill with machine, it is not something you can just pick up, requires skill so someone wanting to 3D scan an object quickly and precisely that has never used a Sense should not expect it to be a piece of cake.
It took me three 2 tries to get a complete scan and was pretty happy with how the STL render came out looking like him. It was very important that he didn’t make any sudden movements while I was scanning him or the mesh would break and the scan lost
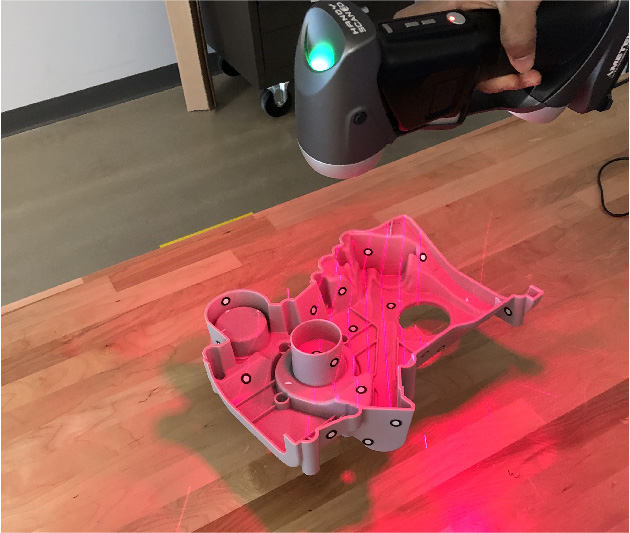
Creaform HandyScan
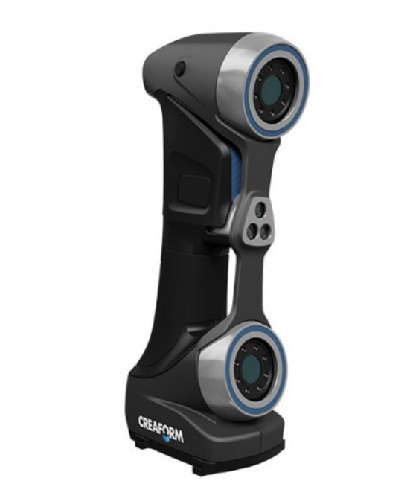
The Creaform HandyScan is a member of the metrology-grade 3D scanners that suits various uses such as reverse engineering, all steps of design and manufacturing processes, cultural heritage preservation, restoration, digital archiving and entertainment. This portable 3D scanner is one of the most effective products on the market for producing high quality 3D meshes (and is very expensive).
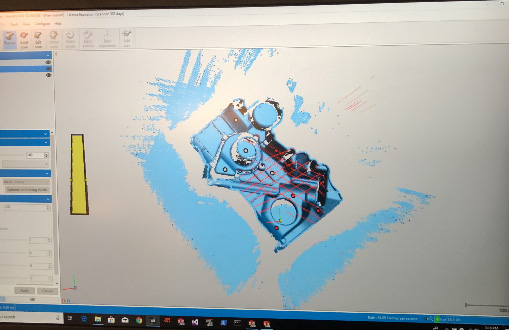
Results: experimenting with an engine shell
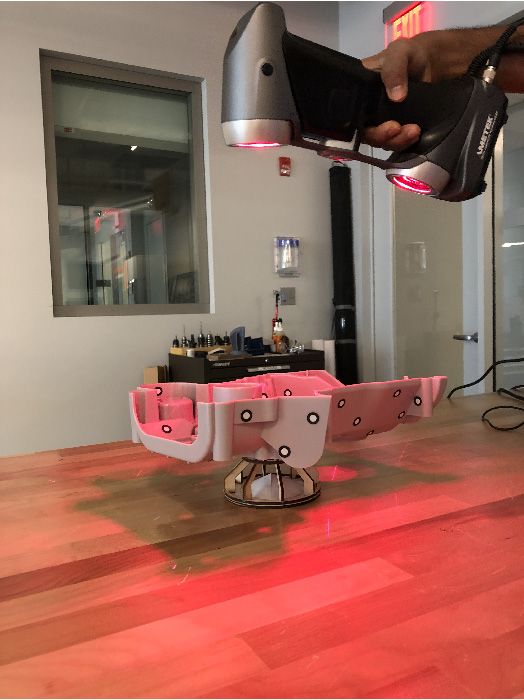
The Creaform scanner requires the use of “positioning targets” - small adhesive dots placed on the object (or in the background in fixed relationship to the object. An intern in the lab helped me with this scan. The more targets positioned on the object the more accurate the 3D rendering will be.
Unfortunately, I was not able to play around with this device too much but it definitely has the power to do crazy accurate renderings.
3D Printing
I have experience with FDM 3D printers so I wanted to try out SLA printing
Machines
FormLabs Form 2 Printer SLA 3D Printer
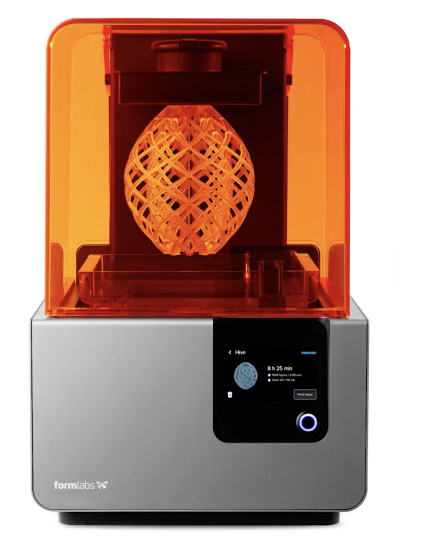
SLA stands for stereolithography. they work with resin instead of thermoplastics. What makes this SLA 3D printer interesting is the consistent quality. While FFF printers need a constant balancing of parameters, temperatures, filaments, and extruders, the Formlabs Form 2 just delivers without you having to worry about quality. Drawbacks: working with resin means you will have to do some post-processing.
The FormLabs 2 points a high precision laser on a tray of liquid resin, which causes a thin layer to solidify. This chemical reaction allows for the creation of water-tight printed parts. The 3D printing speed is comparable to FFF machines when comparing layer thickness and density. SLA printers are also known for printing high-detailed objects.
Design Rule Test
We downloaded the design rule test from thingiverse and loaded the STL to the Form Lab Preform 3d slicing/printing software. After using the “generate supports” tool, the file was sent to the printer. It is important to make sure matches the resin setting in Preform (the resin loaded in the printehotopolymer resin”). The resin used in this print is “Black FLGPBK03 “
The test includes: support test, scale test, overhang test, hole test, diameter test and bridging test. It was printed with 100% infill without supports.
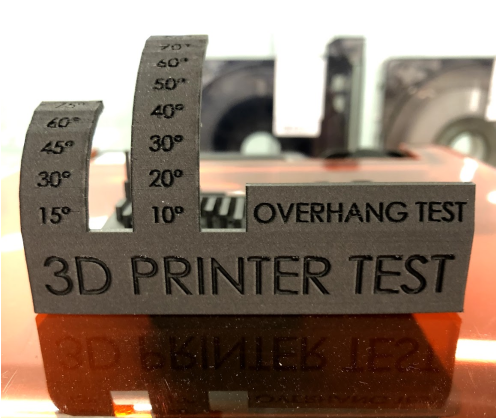
The “overhang” test looks pretty clean in this angle, however in the photo below you can see little fragments hanging off.
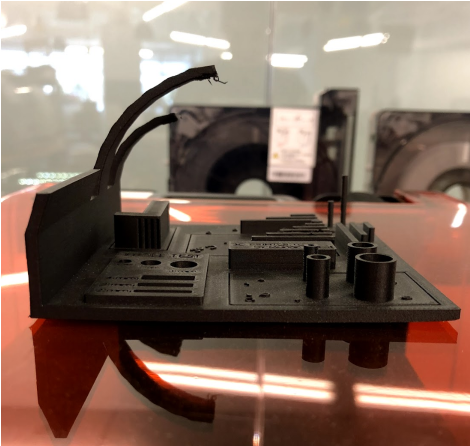
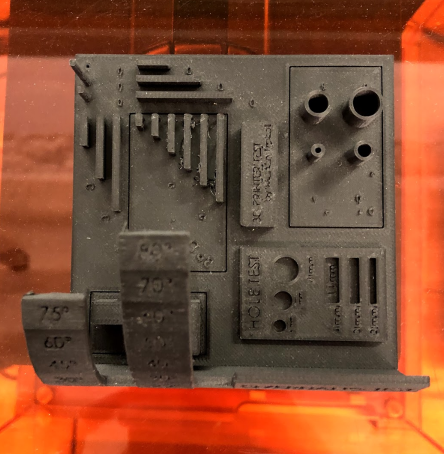
Overall the test did not come out as clean as I hoped it would. The text that is supposed to be denoting the test variables is illegible in most cases and there is excess material on the bridge test and a broken bar in the scale test. The lack of print quality is probably due to the fact that we shortened the suggested print time.
To test out a second print design I 3D printed myself from a Sense scan. Before loading the 360 degree object scan (mini me) into the printing environment I entered the post processing phase, to prepare my object. Solidify: It fills the holes you couldn’t scan properly in the scanning process. Trim: Allows the user to cut points that the scanner could get as part of the piece, but aren’t really from it.
Once I finished post processing I loaded the .stl file into the Preform Software. I used the “generate supports tool” and then sent the file to the printer. Before sending the job I made sure the resin setting in the Preform matches the resin loaded into printer. After double checking the settings I sent my job, loaded it on the printer job list and started it.
Once the print job is done I removed the tray holding my print and attached it to the head of the isopropyl wash station.
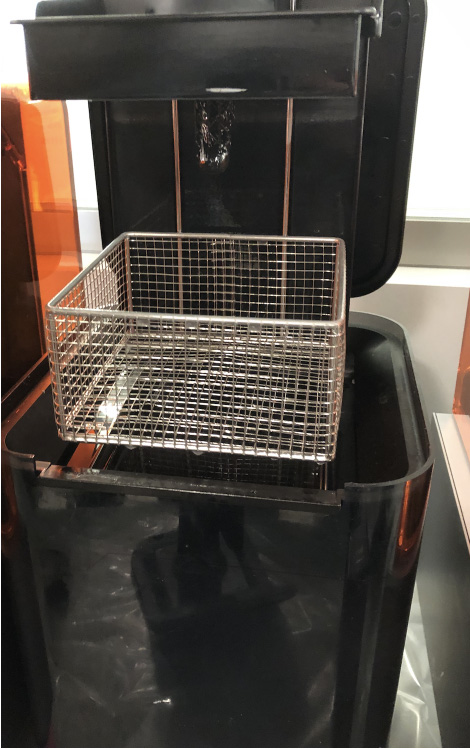
After the cleaning process finished the print is now ready to cure.
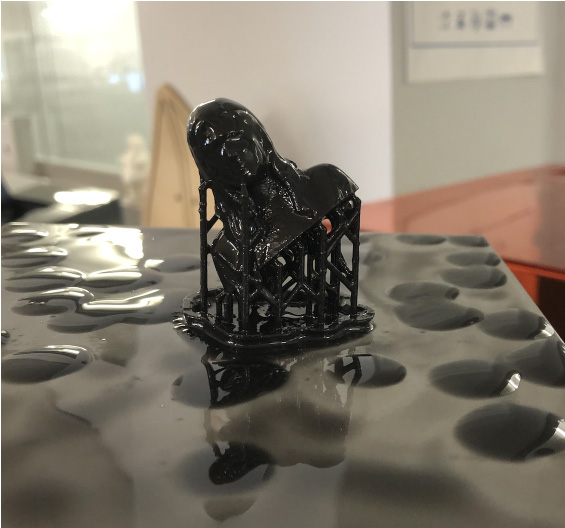
Once the print was finished curing I removed the supports using pliers.

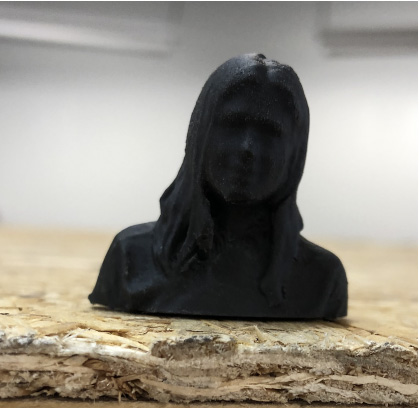
TA DA!
This print used the same resin but came out a lot cleaner than the print test. I believe this is due to the fact that I used the suggested print time, instead of rushing the print.
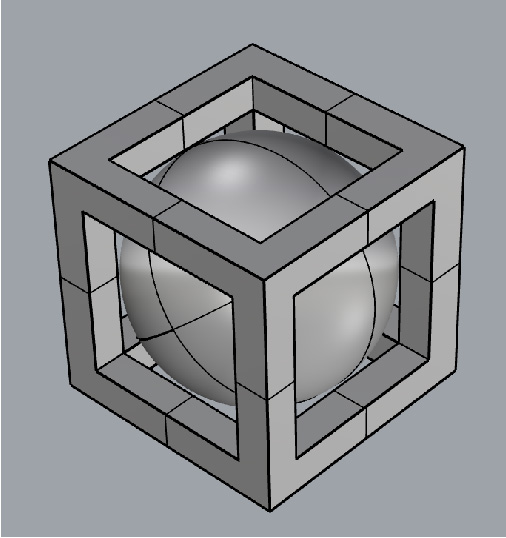
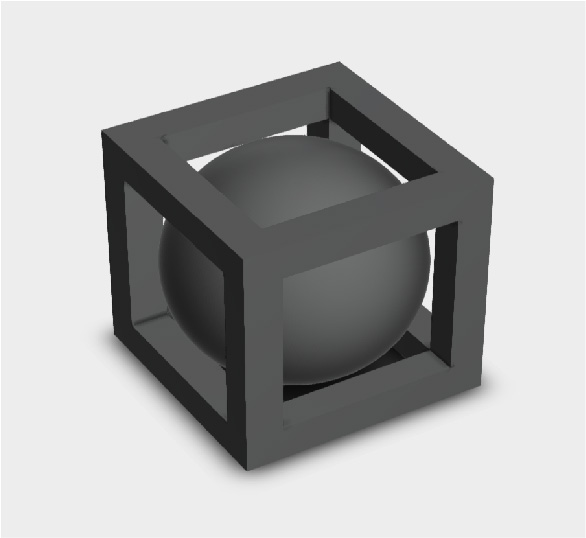
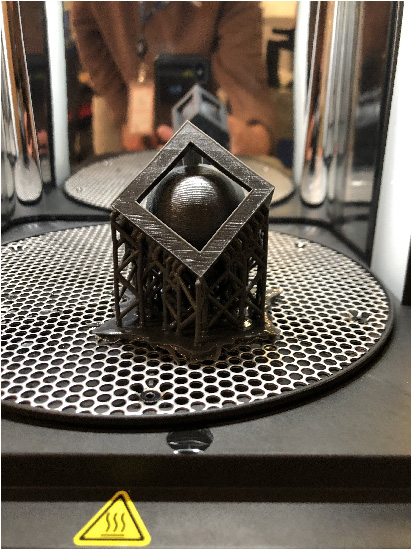
3D printed object that can not be made subtractivley:
Floating sphere within a cube
To print something that can not be easily made by subtractive manufacturing, I floated sphere inside a hollow cube. Before I decided on this design, to understand the assignment I began by brainstorming and hand sketching simple geometries that would be near impossible to make using CNC machining, and that only a 3D printer could accomplish in a single print. At the same time I was fidgeting with a game controller joy stick and realized that this geometry could be achieved by 3D printing and in a single job. I used the Formlabs Form 2 printer again but this time I wanted to test out a different type of resin. For this this print used the “Flexible Photopolymer Resin.”
In conclusion I enjoyed my experience with the Formlabs Form 2 SLA and found it to be easy to set up with a very user friendly interface. Overall I think the print quality is pretty reliable and my favorite part is the variety of resins compatible. A few aspects I wasn’t a huge fan of is that every print requires post-processing (not an option), time intensive, the standard support structures are pretty dense, and the resin is messy and toxic. That being said its strengths defiantly over power its weaknesses and I am excited to work with this printer again. I think it would be cool to create a print that uses more than one kind of resin.
Other 3D Printers
I have been fortunate enough to work in a lab such as Dassault Systems that has resources allowing them to have a collection of 3D printers. Here I will review other printers I used throughout this program.
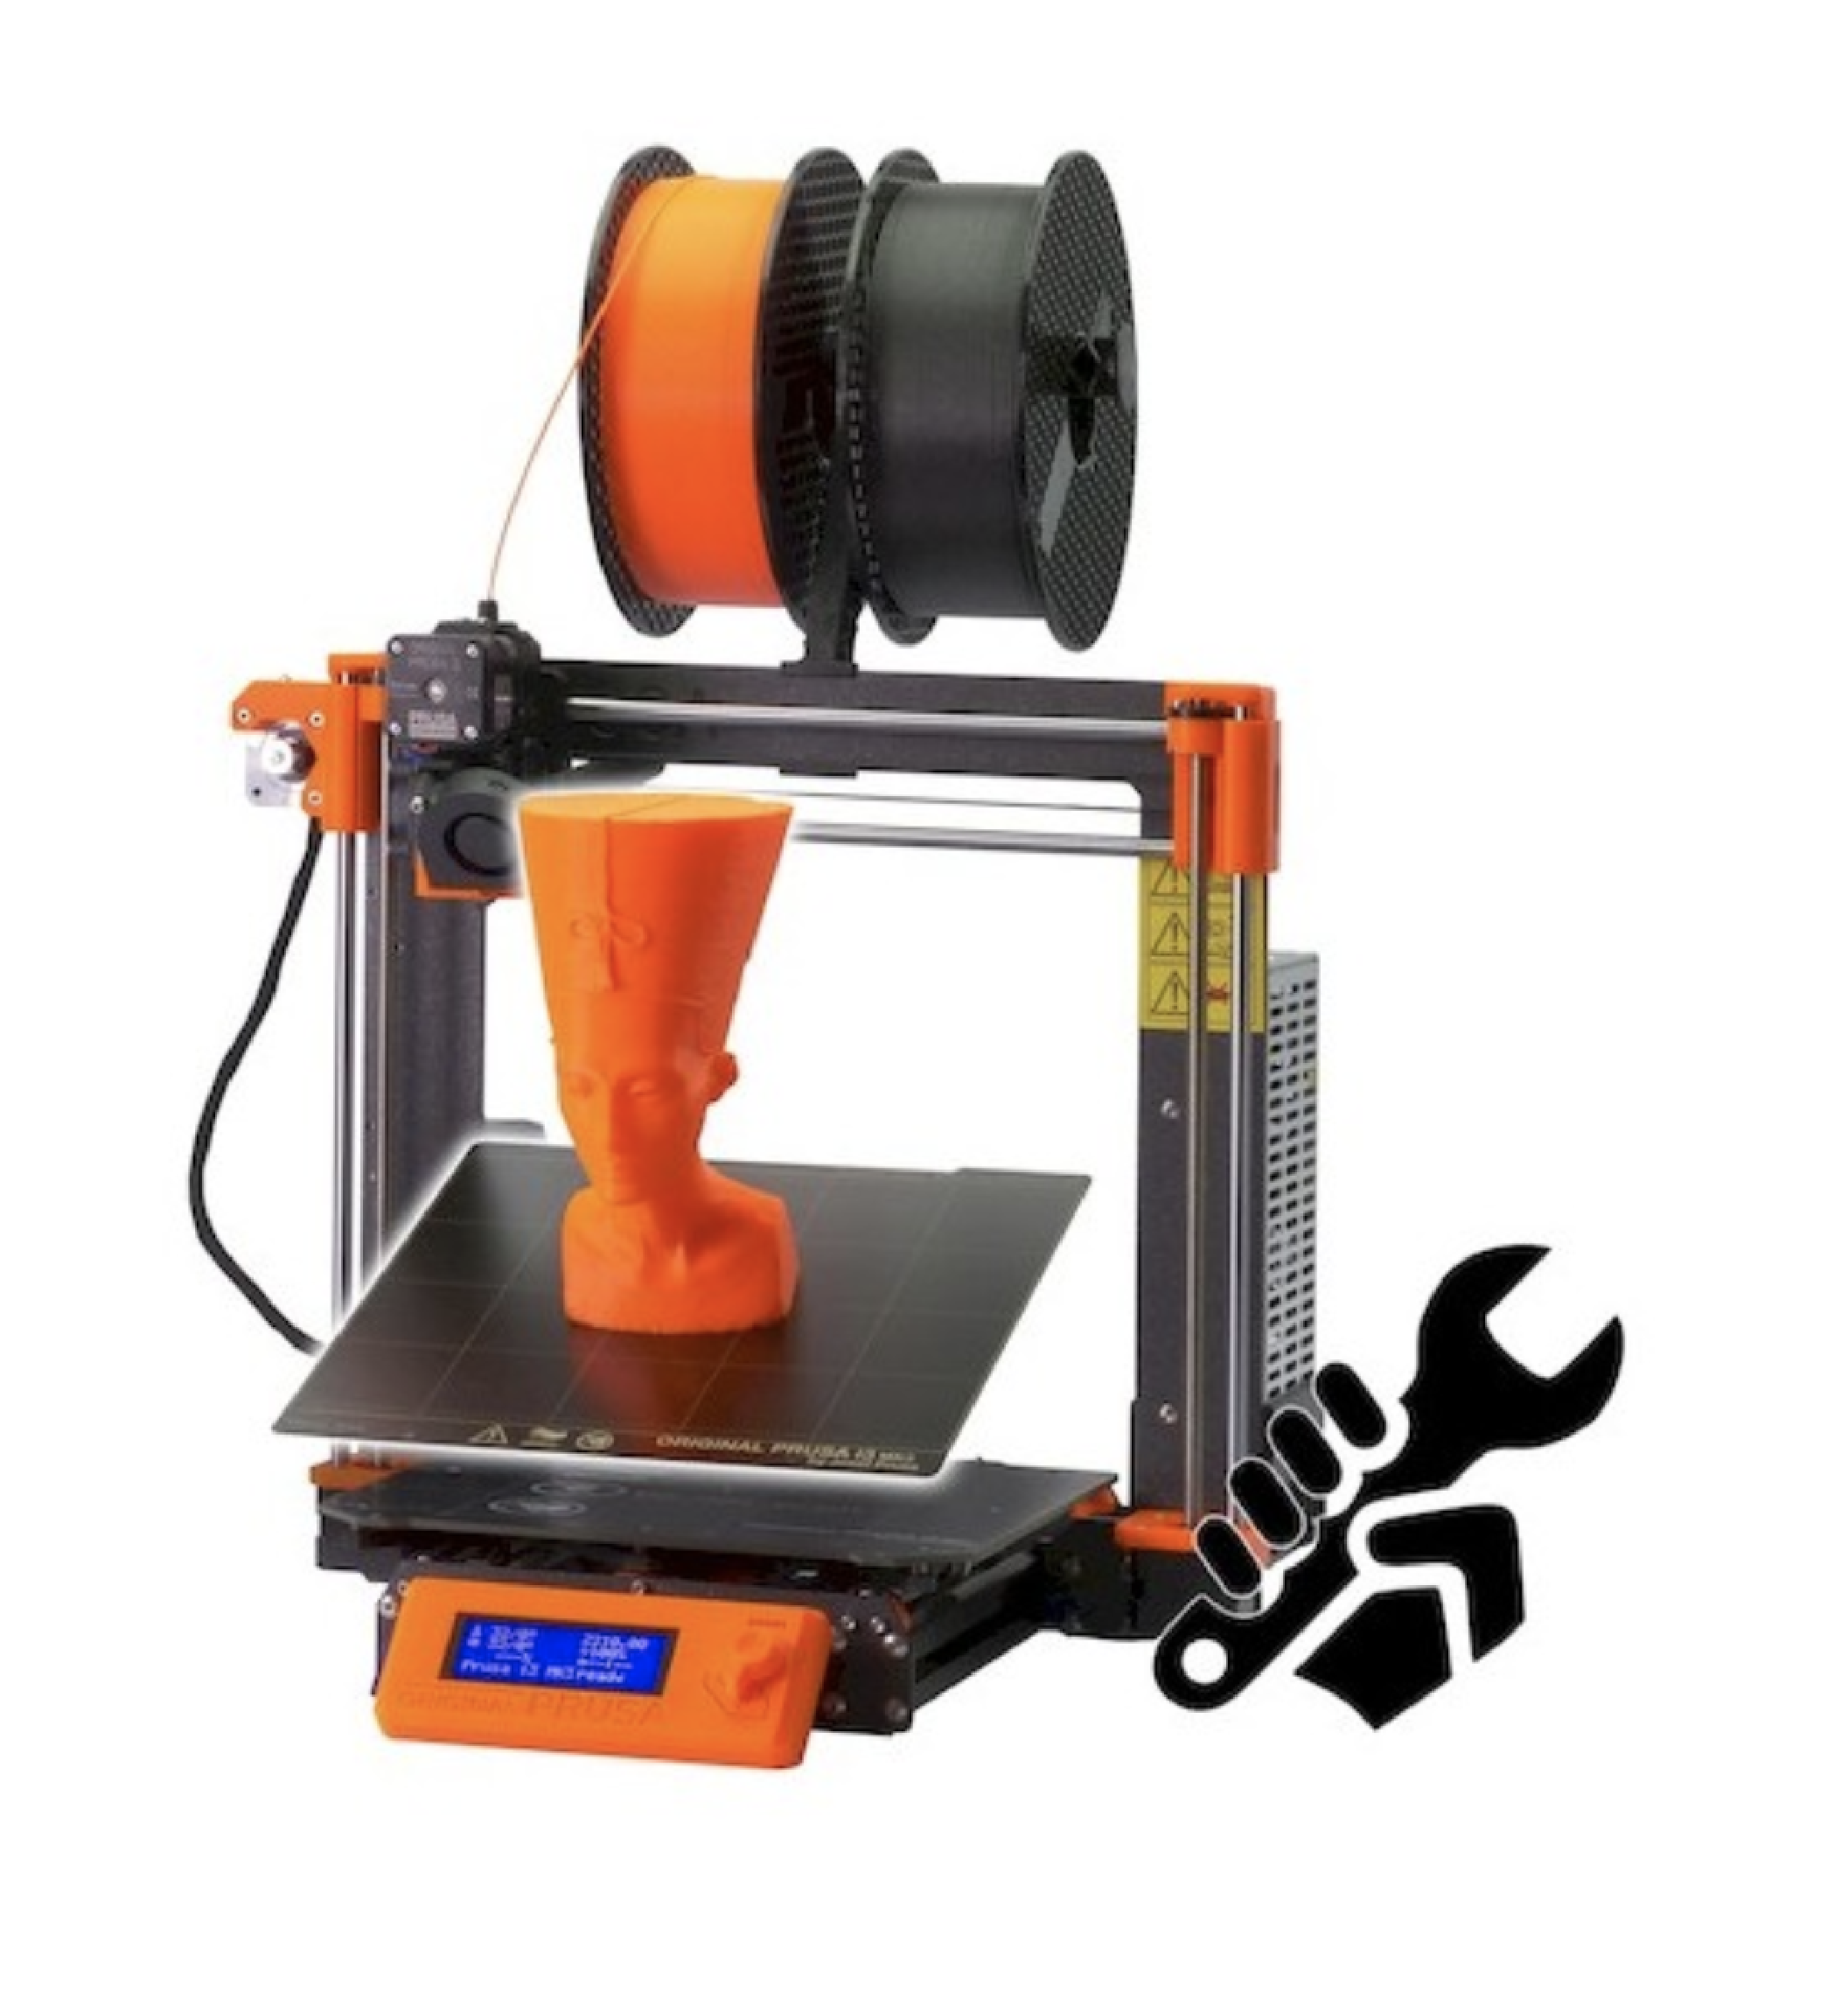
You can purchase the Prusa Pre-Assembled or you can purchase the Kit at a discounted price and assemble it. Our lab purchased the Kit and one of the lab interns built it in one day. Funny story, the kit came missing a part so the intern simply 3D printed the correct piece. Slic3er
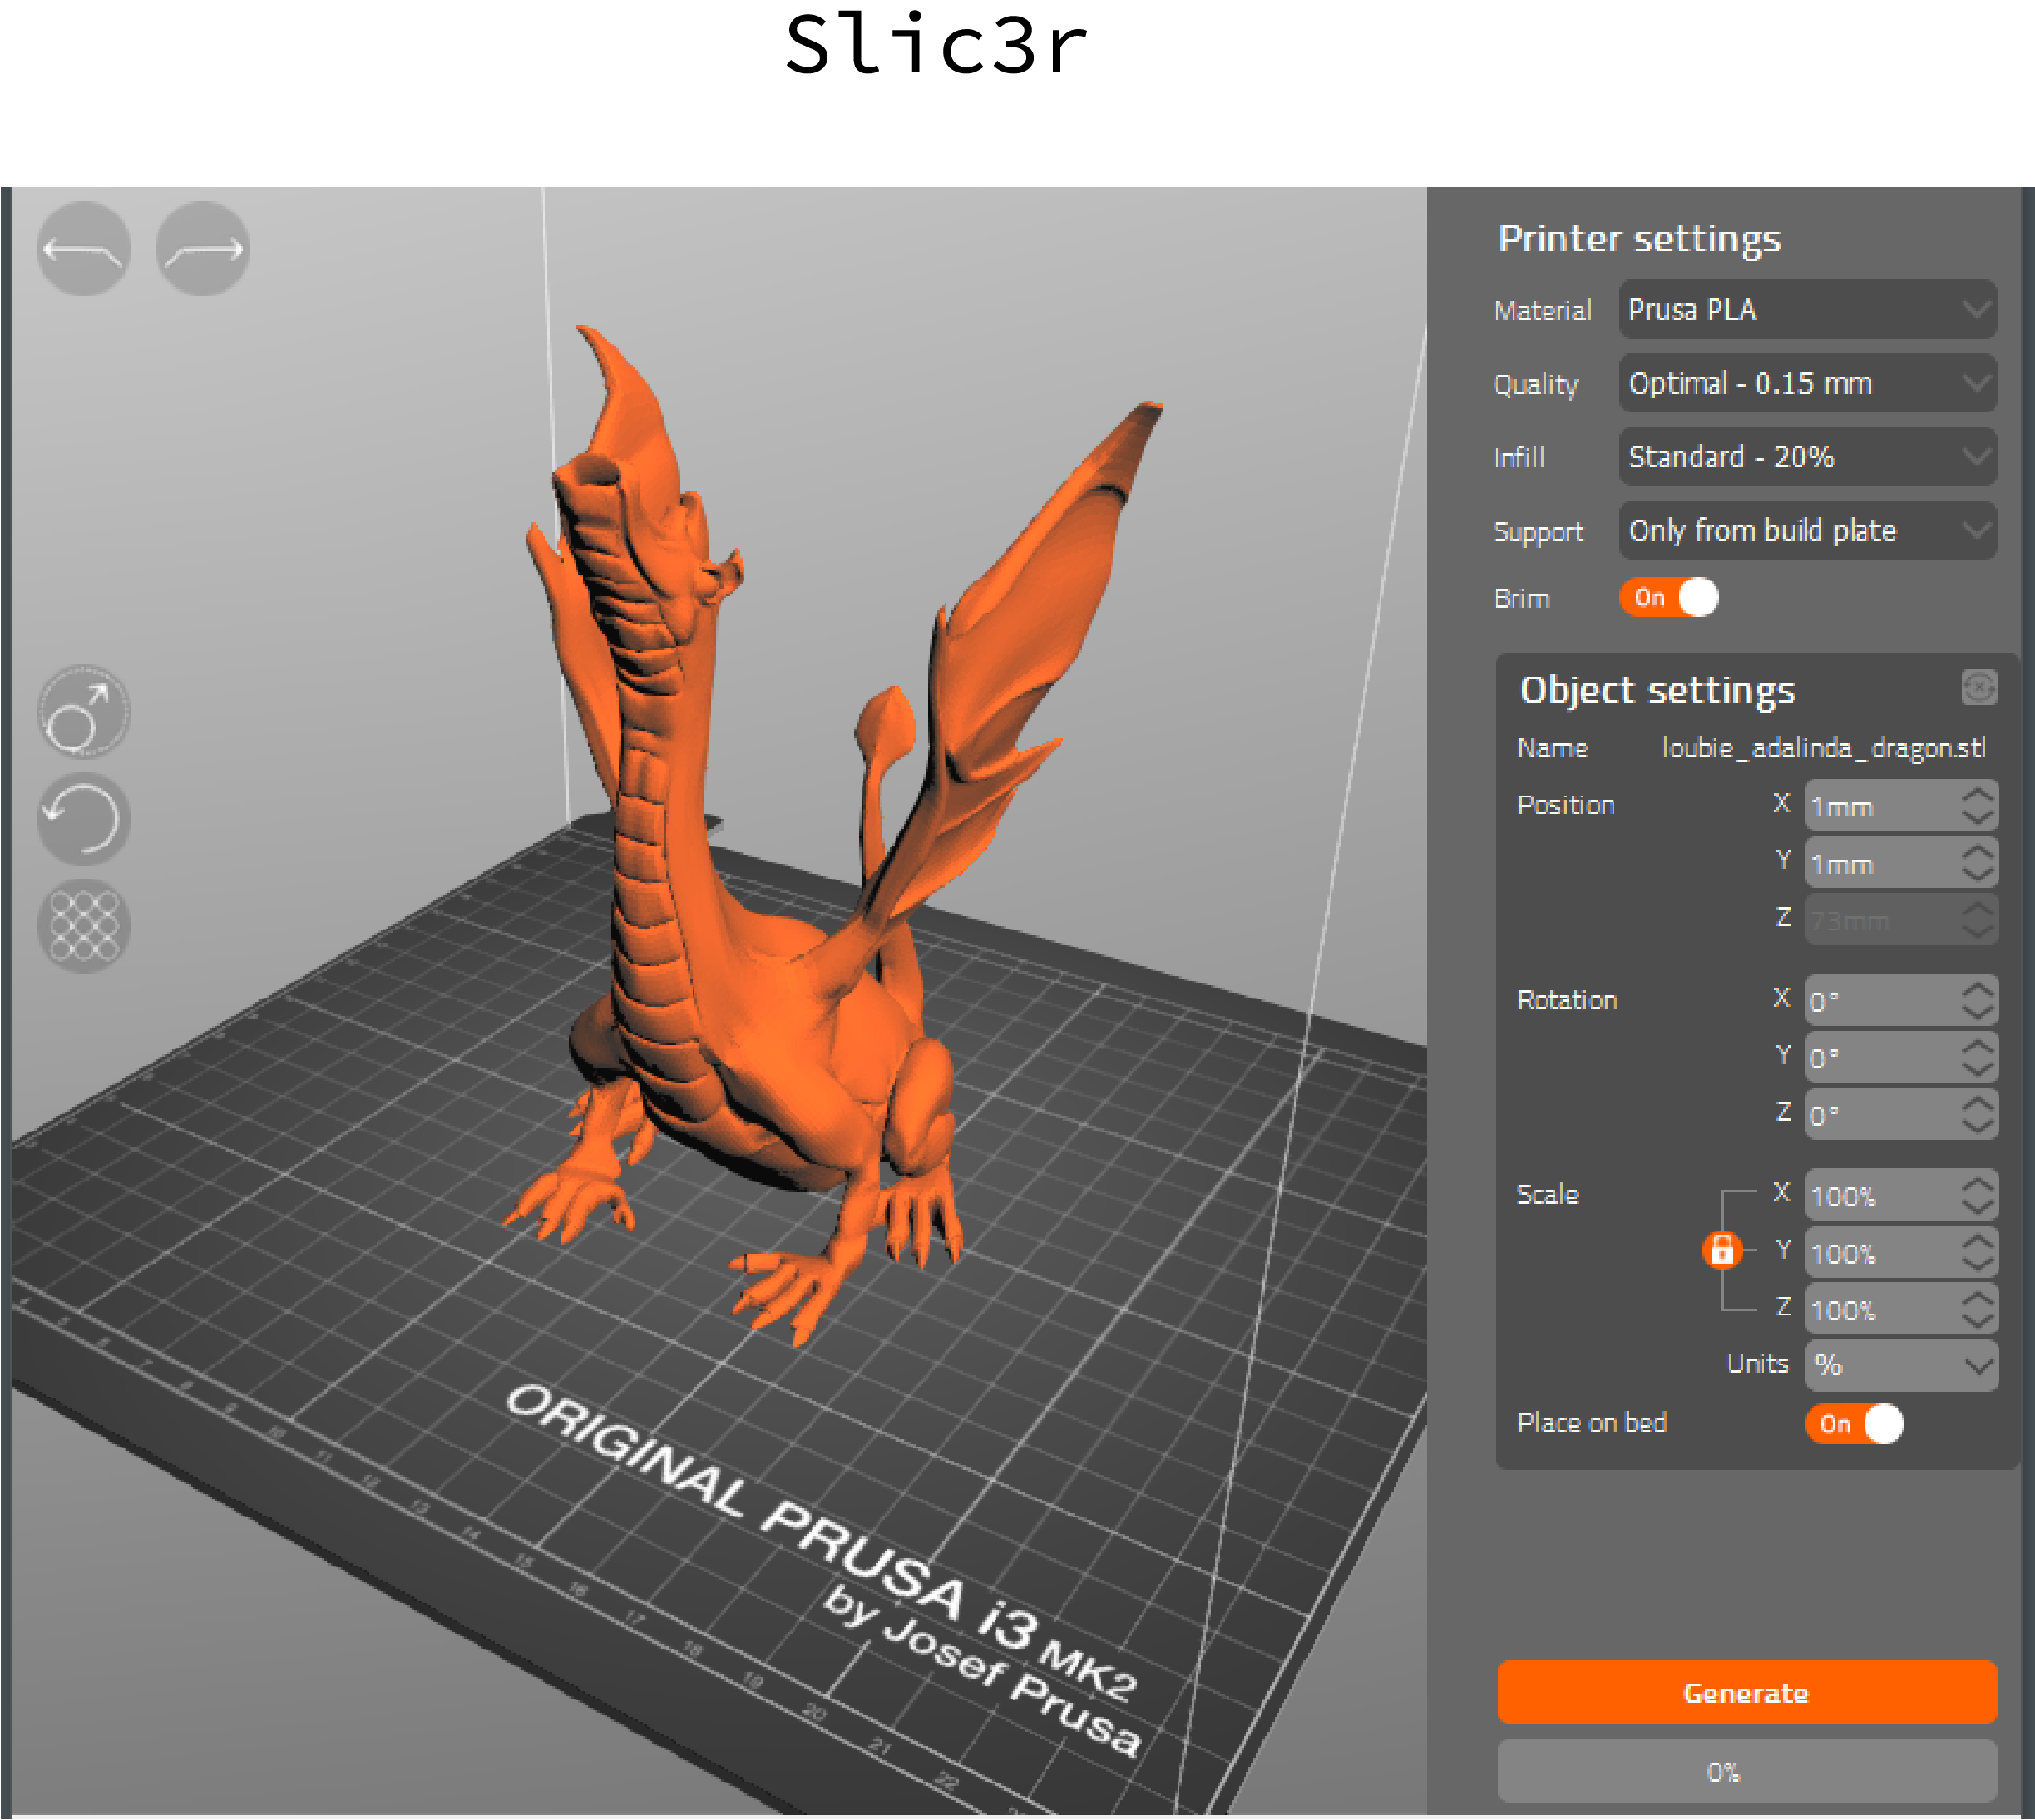
In my opinion, the Prusa is the most user friendly printer I have encountered. It’s Slic3r software is very straight forward and easy on the eye. Prusa has grown a huge following due to it’s open-source ecosystem, from hardware to software. It is very cool to watch this printer in action because of its non-enclosed structure, there is no door or container surrounding it so it almost looks like it is printing in thin air. It has exceptional print quality, the machine is sturdy, it comes with auto-calibration, crash detection, print pause and restart, beautiful bridging and overhang and again, the slicing software is easy to use, in addition it is relatively inexpensive for the quality it achives. The only con I had was the default settings prepare dense support structures, which first time users would not know how to manipulate.
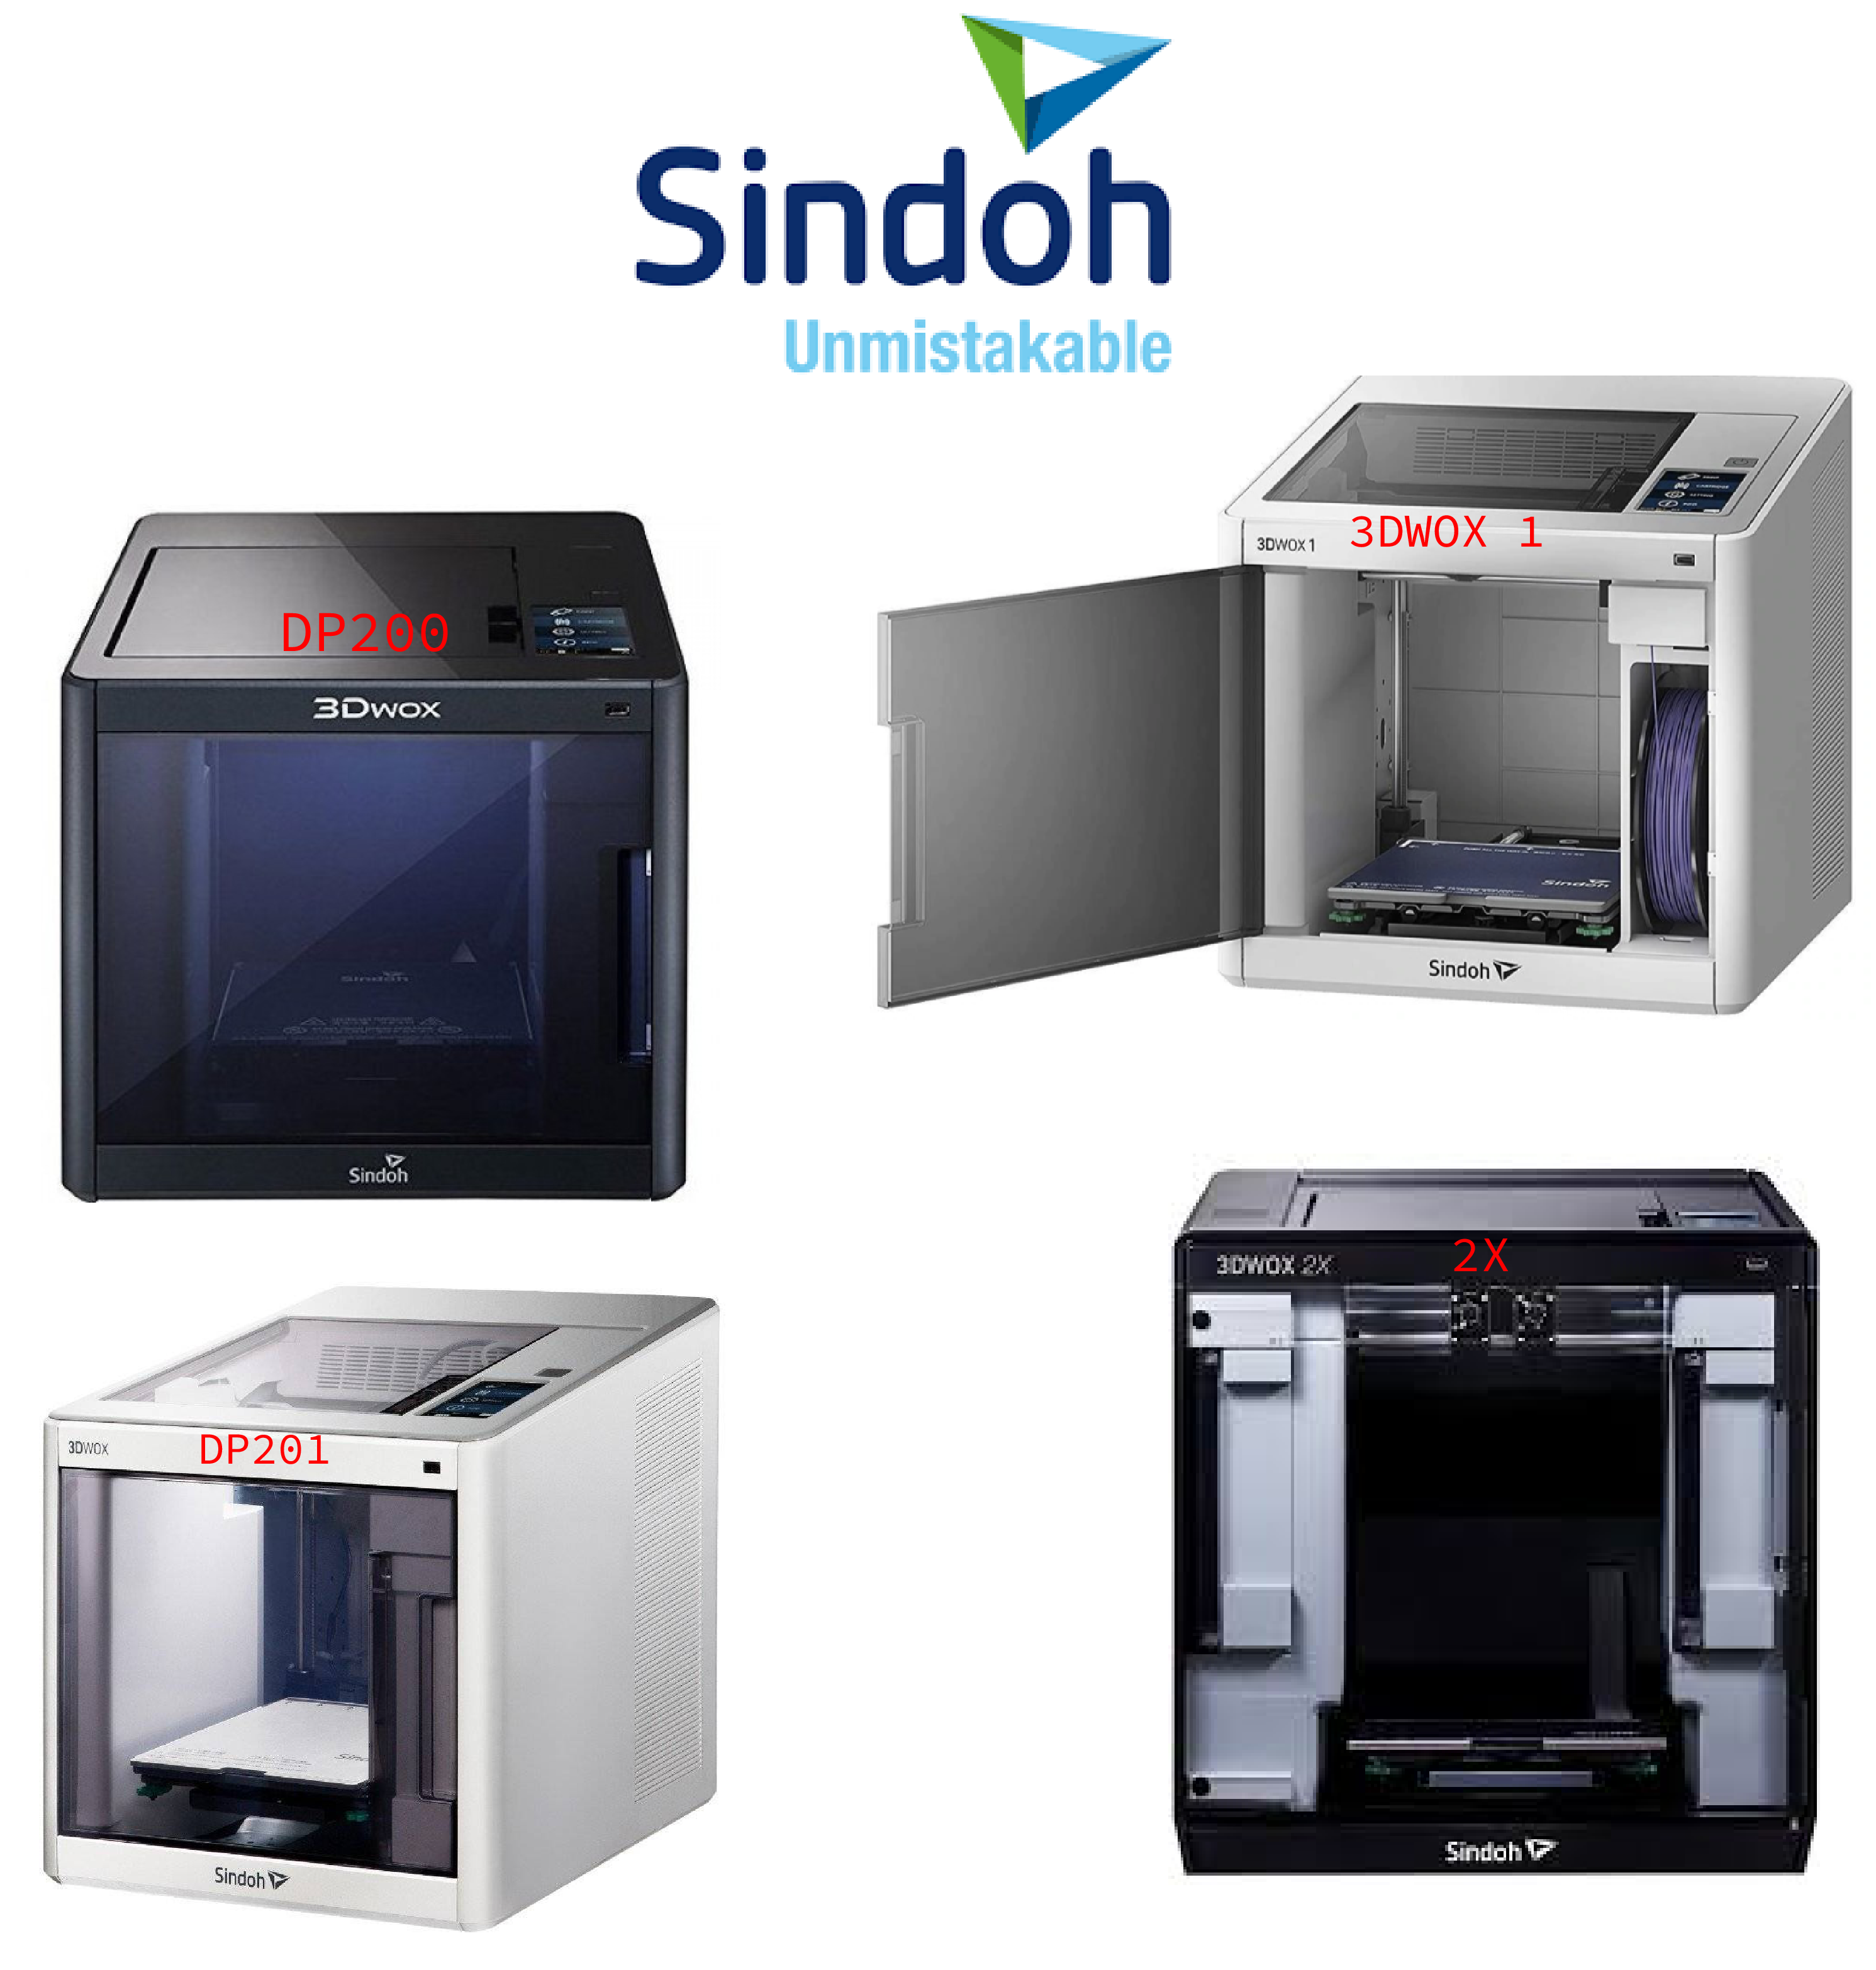
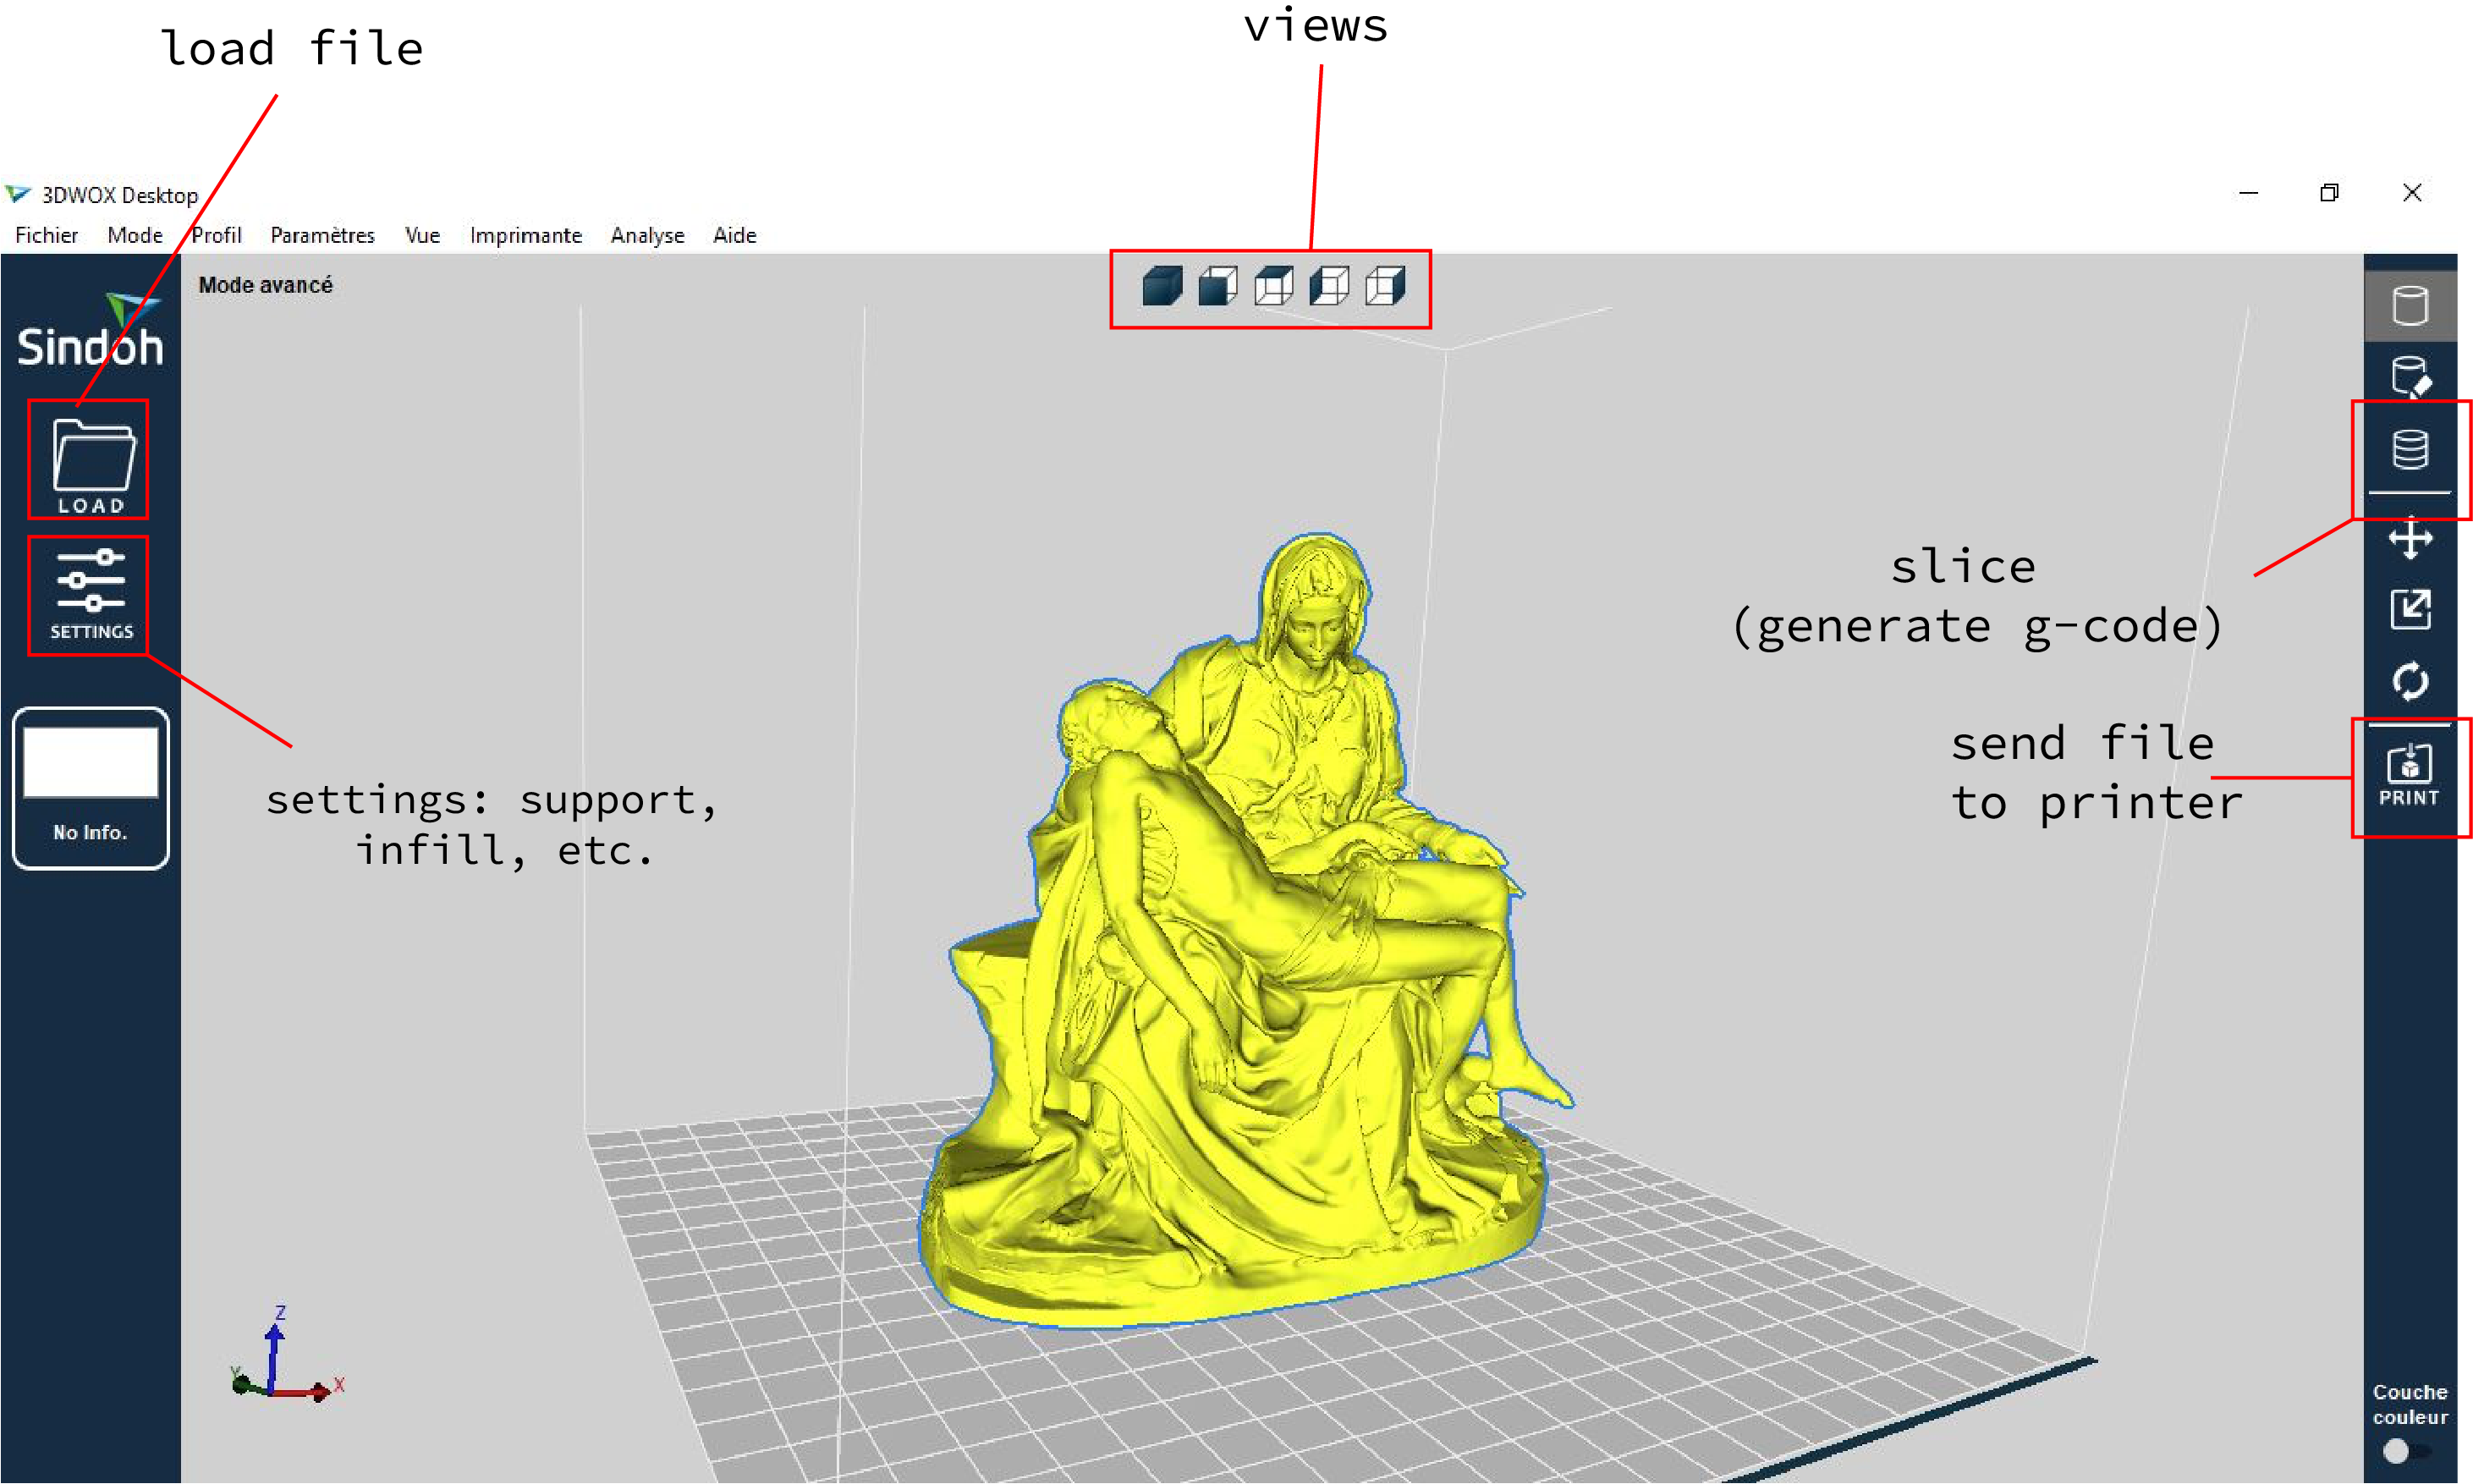
Our lab has a collection of all Sindohs on the market, and I have tried them all. The DP200, DP201, 3DWOX1, 3DWOX 2X. I honestly don’t have a preference when it comes to choosing which one I prefer regarding performance.
DP200: Prints in both ABS & PLA. Features a heated aluminum bed for a more flexible bed design for easy print removal. It’s enclosed design ensures less noise and more consistent print temperatures. Other built-in conveniences include auto-loading filament cartridges, assisted bed leveling, various connectivity options, touch screen control and remote print monitoring.
DP201: Lower-budget option. “The Most Reliable Flexible Bed Ever.” Instead of the heated aluminum print bed, the DP201 comes with a flexible silicon surface that attaches via magnets. However the silicone build platform is only compatible with PLA filament. Sindohs has made it a point to market this printer to schools becasue of it’s kid friendly nature (ABS can be dangerous).
3DWOX 1: This printer came after the DP200. New features include detachable build plate, and support for third party filaments, promises “library noise level” operation, remote monitoring, and update automatic and semi-automatic settings. In my experience both the semi-automatic bed leveling and full automated filament loading on the work well. The only thing the user has to do manually is make sure the filament is aligned as direct and put the cartridge in and the machine does the rest.
3DWOX 2X: Includes two cartridges for filament, each on one side of the build chamber. The cartridges work in a manner similar to the DP200: loading is as simple as inserting them, and the machine automatically heats the hot end to the correct temperature and inserts the filament without human intervention. The 2X stands for the 2 identical nozzles that work independently. I have not personally tested this out but the 2 nozzles technically should allow for a multi-color and multi material print. The build volume is larger than its siblings and the dual cartridge system has twice the material capacity (obviously). The build plate has also changed in this model. It uses a metal plate like the DP200, but it is also flexible like the DP201. The magnetically attached plate can be easily removed and then flexed to pop off completed prints with great ease.
As you can see each printer in the Sindoh family has it’s own unique qualities From my experience they all worked smoothly and performed exactly as I hoped.
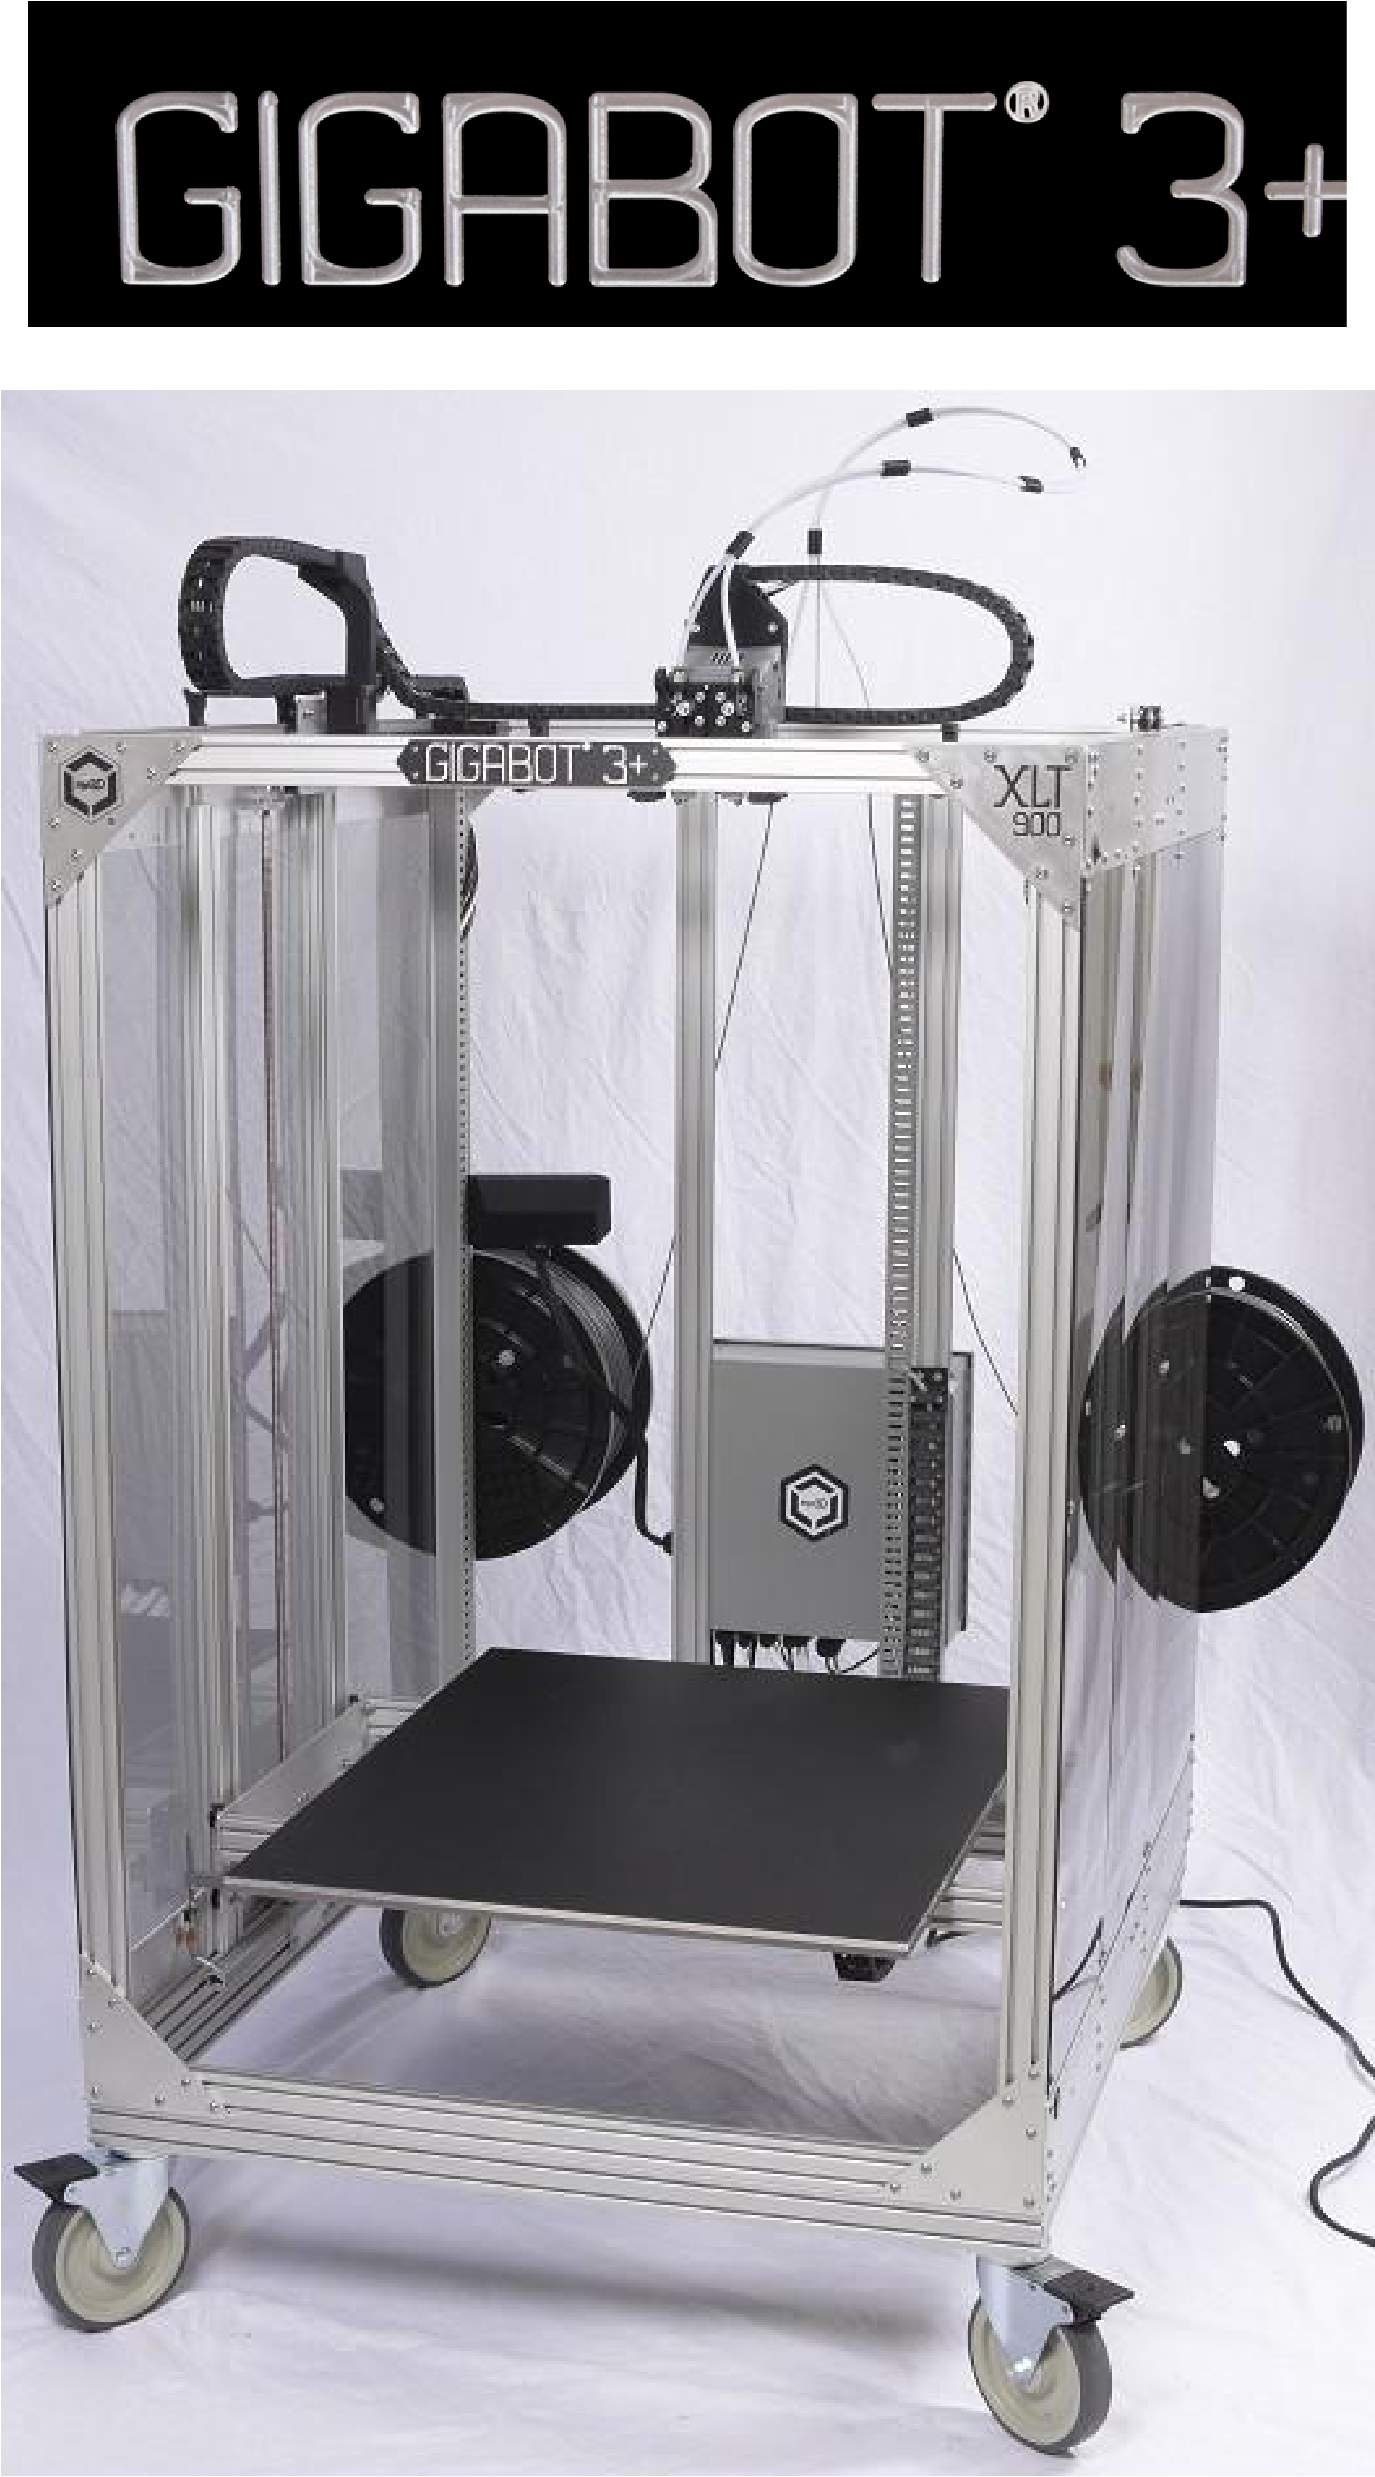
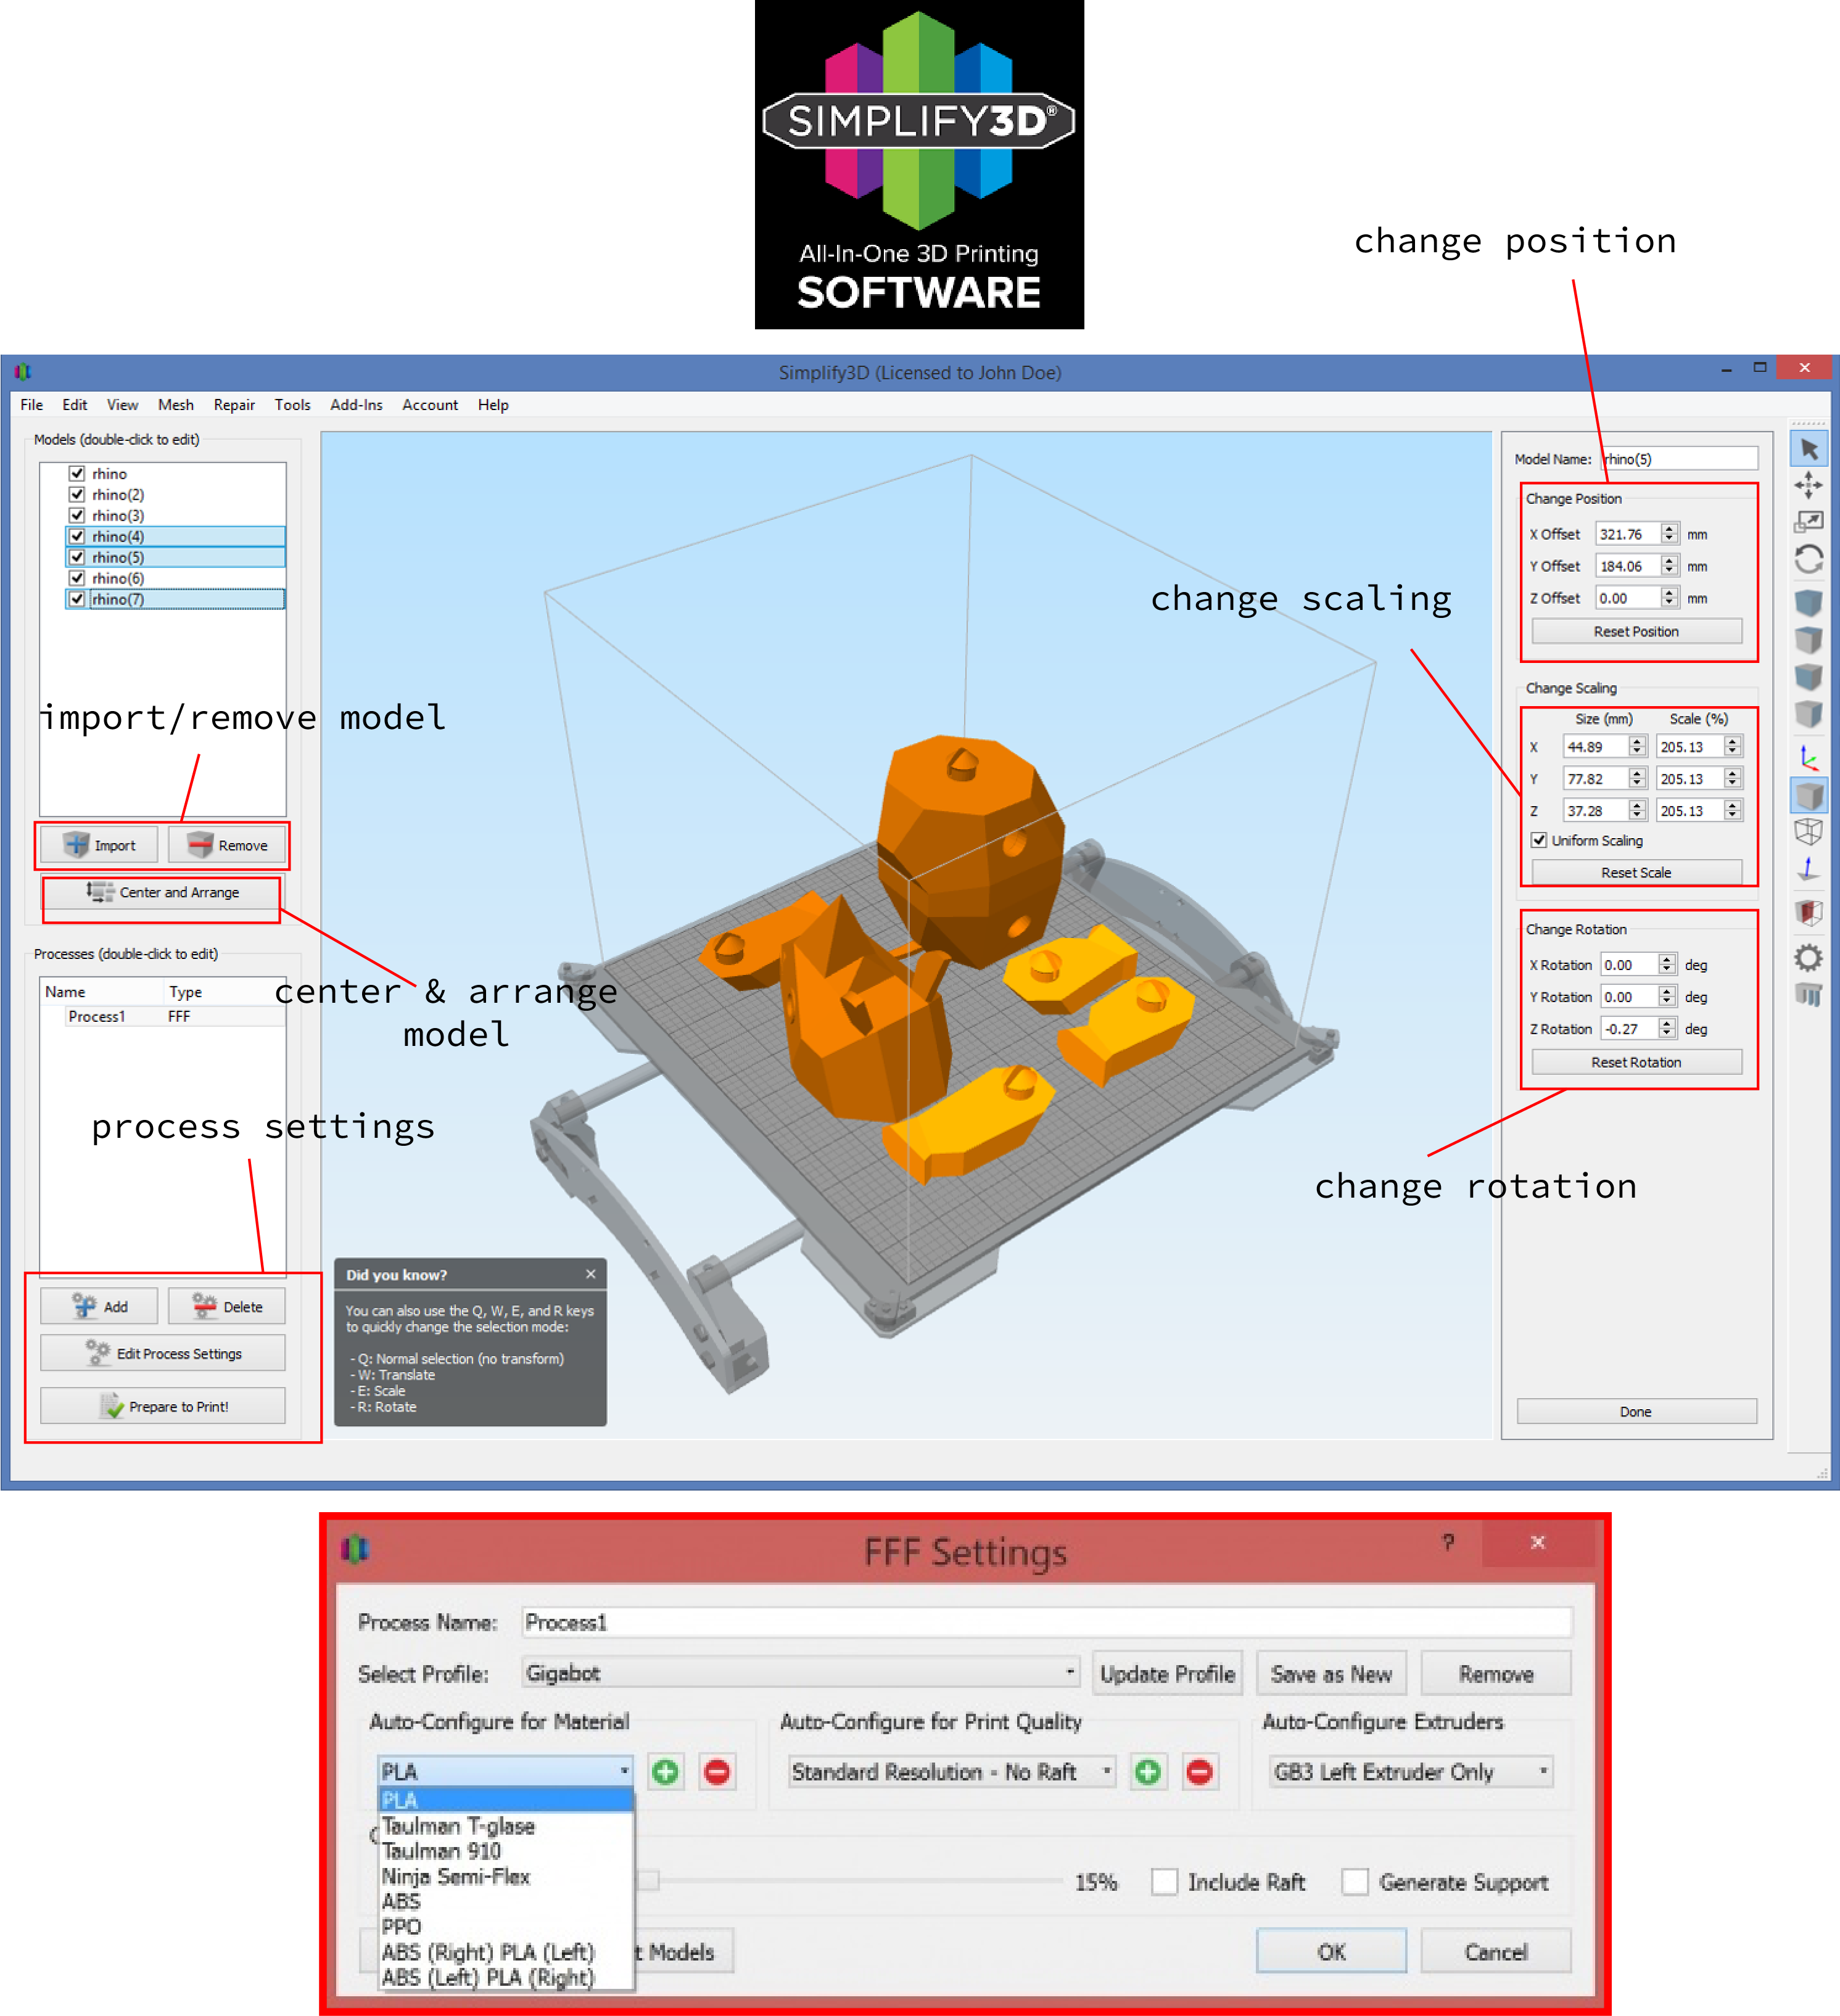
The Gigabot is a personal favorite of mine because of its large scale build capacity. I really want to use it to print an entire shoe (stay tuned). In addition to the awesome build size there are dual extruders. I have not test using both extruders in a print but I defiantly am interested. I used this printer a lot in my final project and had very little issues. My only critique is the Simplify 3D software is hard on the eyes and not very user friendly although it was not hard to find tutorials online. During one of my prints I ran out of PLA filament, but it was very easy to change the filament. The machine has an LCD control box on the side with a circular toggle controller, that is easy to navigate with. The system reminds me a bit of the one on the PRUSA. To refill the filament I simply had to navigate through the settings on the control box. Before inserting new filament I had to “disable the steppers” and “home all” he machine, the “prepare” for filament replacement. The machine does all the work and let me know when it was ready for insertion. I really liked this printer.
Last but not least....

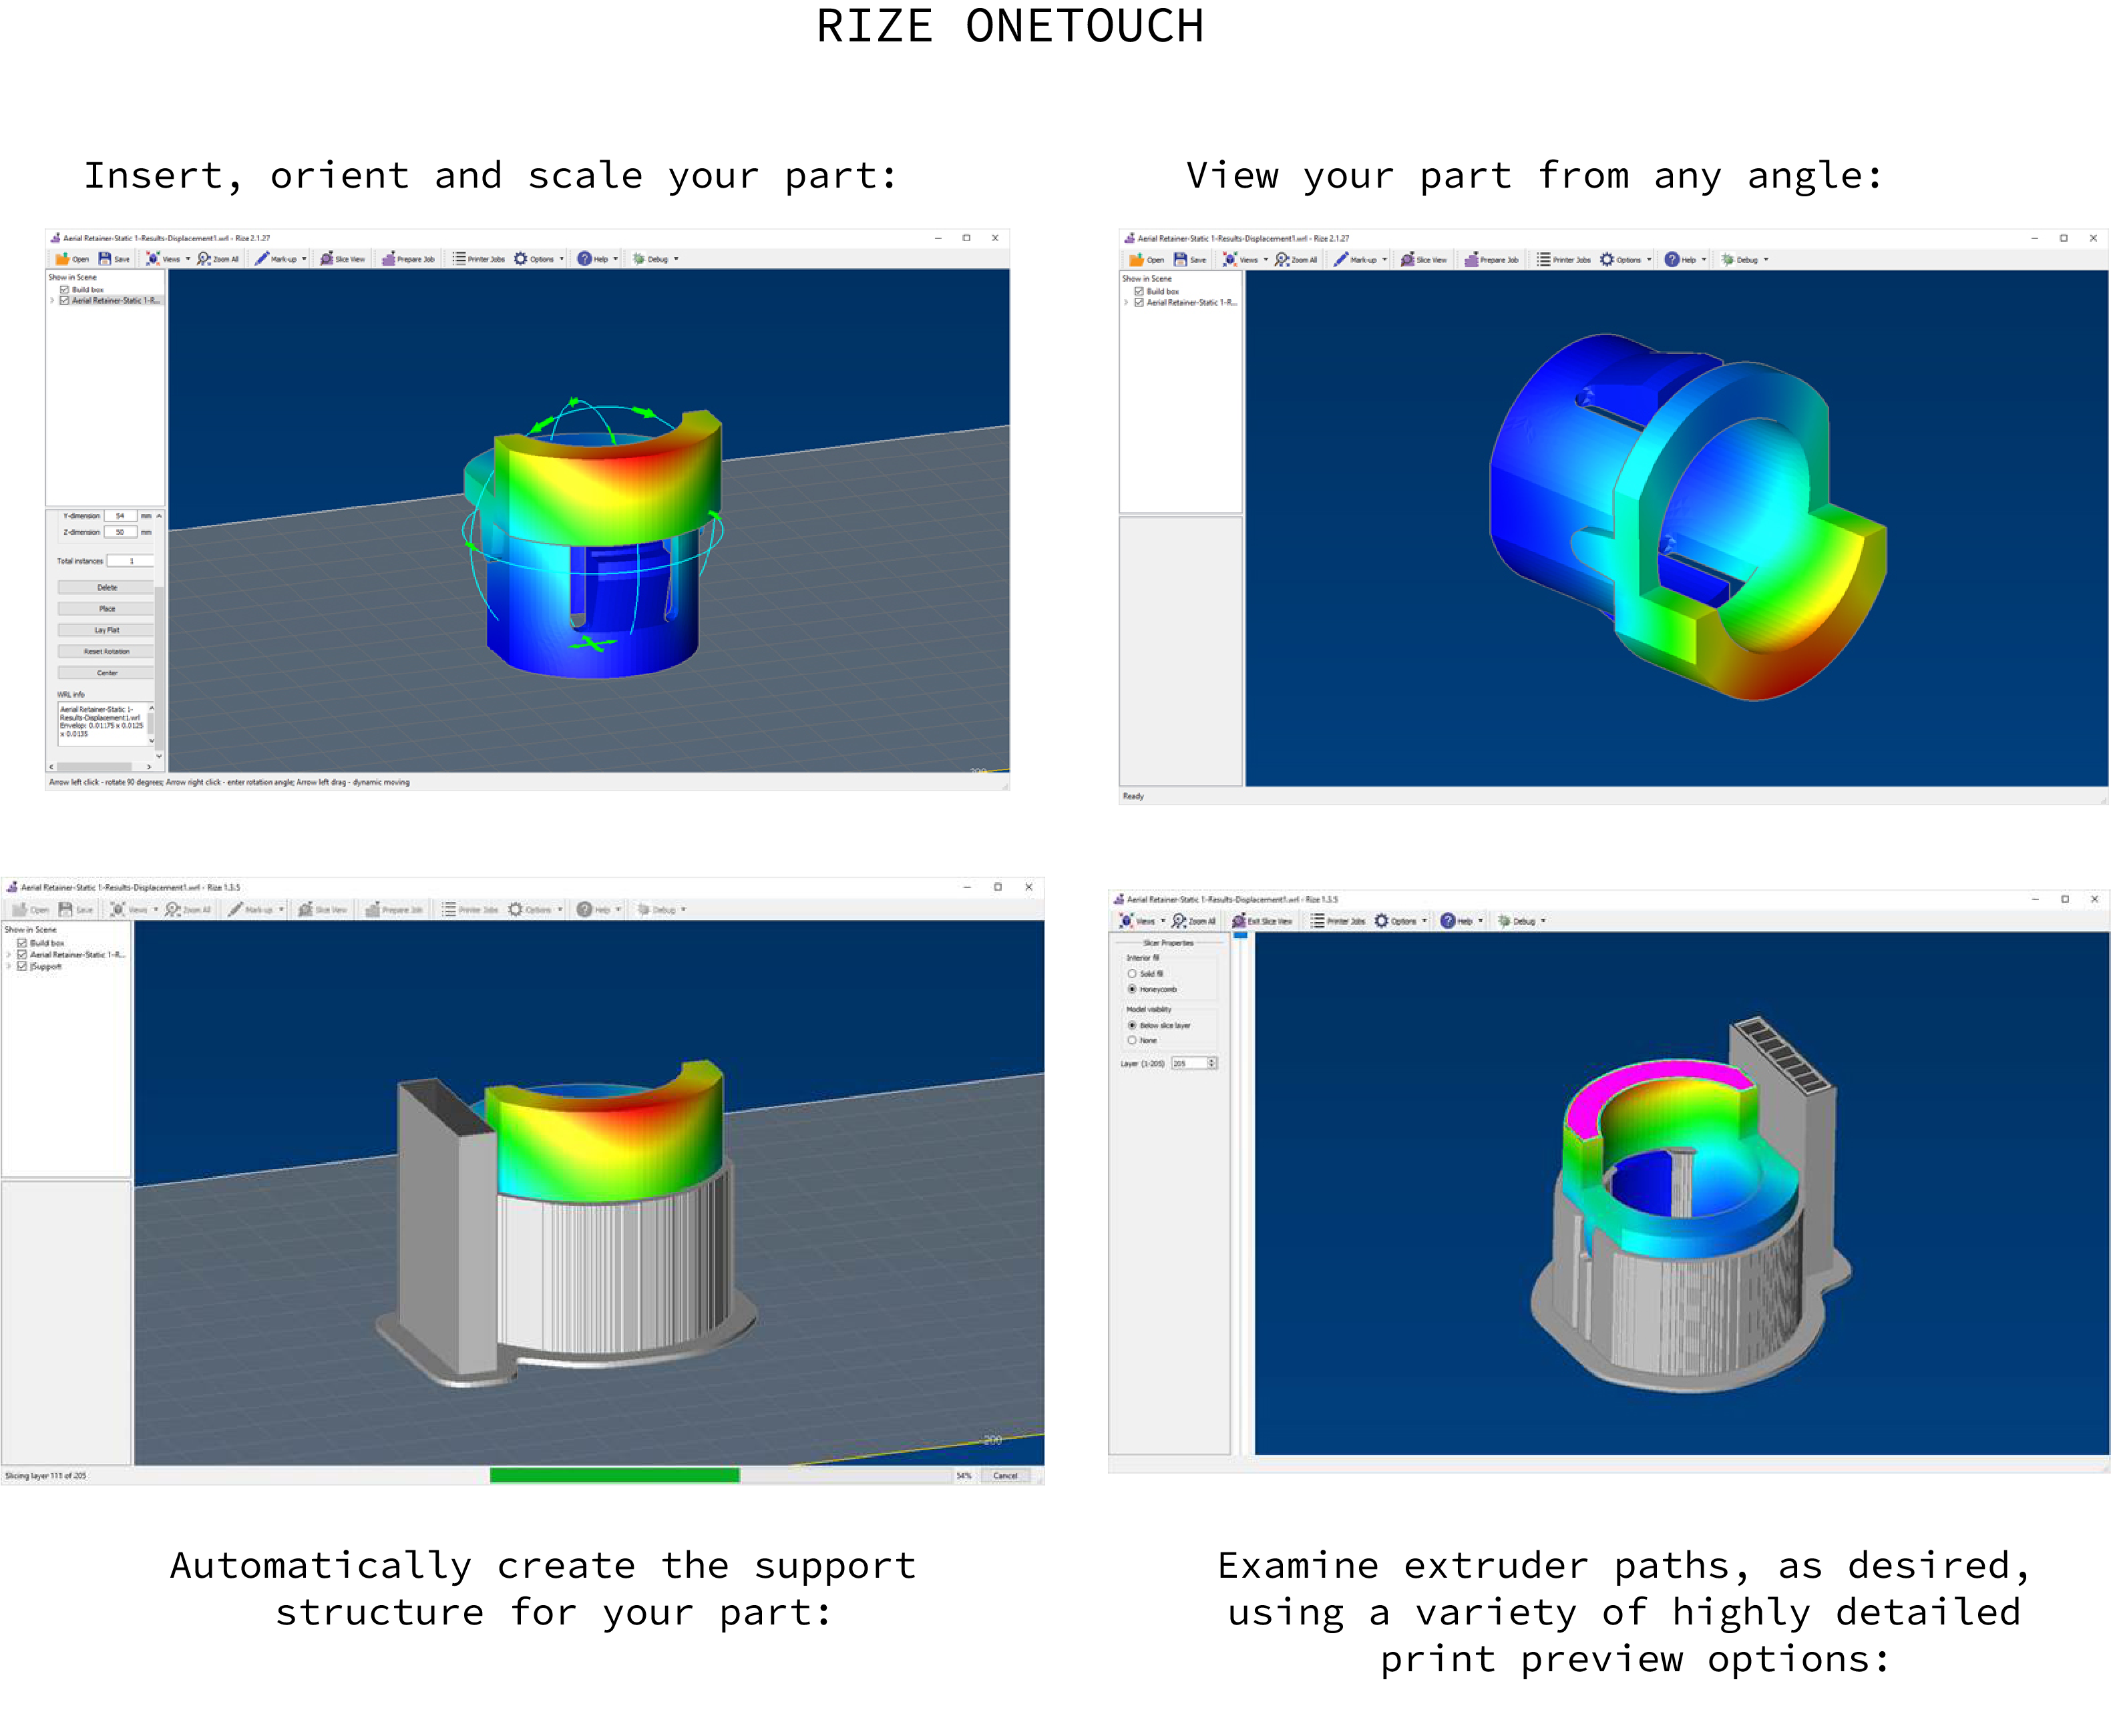
Rize manufacturing is Boston based:) This printer is unique in that special it has the ability to print in full-color. Combining principles of FDM and print jetting to mark 3D prints wit text and graphics. I was not aware of this until further research but this printer is priced a $55,000, even though it is labeled as a desktop sized machine (most others are way cheaper). I found the OneTouch software to be user friendly and easy on the eyes. When researching I also discovered the Augmented Deposition, fusing extrusion-based 3D printing with jetting technology akin to that used by regular 2D printers. While the engineering-grade thermoplastic part is being created layer-by-layer, the 3D printer simultaneously releases CMYK (cyan, magenta, yellow, black) inks through printheads to add color…pretty cool. I have not used this printer enough to pass too much judgment but when I used it, it did the job (and that is wihtiut using it’s awesome jetting function).