Assignment 3
Computer-Controlled Cutting

How to:
This week is all about computer-controlled cutting, i.e. we were asked to collect experience using CNC machines like a laser cutter. In this weeks group assignment we got to know the laser cutter. As described in the group assignment, our local tutor Marcel gave us an introduction in using the laser cutter correctly and safely. You can find our group project in the following link: 'Group project'
In our local FabLab we have an Epilog Zing 24 Laser, with a work area of maximum 610 mm by 305mm('Lasercutter')
Lasercutter PressFit
In general, a laser cutter is not the most common machine to be used for 3D models, but actually using techniques like press-fit kit it is very easy to realise a 3D object with laser cutting. As explained in the assignment 2.2 the method of laser cutting is faster than 3D printing when producing an object. Therefore, in this assignment the exercise was designing a press-fit kit model and build it using the laser cutter.
There exist different shapes on how to joint parts of a press-fit kit. Therefore, for my designs I did design two different objects with different sizes and types of joints
Candle Light
1. My first object was designed with the tools OpenSCAD and the tool Inkscape. With OpenSCAD it is easy to design basic shapes as parametric designs. Therefore, for the bottom and top part of my candle light I used this option to have a flexible design. This way I am able to just change the amount of joints or rather side parts I wanna have for a second candle light. I used this cheat sheet to learn how to program models with OpenSCAD.
- For both candle parts I defined variables (seen underneath) to use for my design.
- For the candle bottom part I made use of the 'difference' function: I used a full circle from which I subtracted the small squares which are the joints for my candle sides. The squares are also modified by using the 'rotate' and 'translate' functions to define the correct position of the squares.
-
The code for the top part of the candle looks the same with one additional command: a command to substract a smaller circle from the big one to be able to put a candle light inside the candle light holder.
b = 0;
c = 0;
degree = 22.5;
width = 13;
length = 1.95;
outerCircle = 80;
innerCircle = 55;
 difference(){
    circle(outerCircle);
     circle(innerCircle);
     for (number = [1 : 1 : 16]){
     rotate([0,0,number * degree]) translate([outerCircle,b,c]) square([width, length], true);
         }
 }
2. For my sides or rather the connecting parts of my candle light I used Inkscape to design them. I drew lines, curved and connected them to design the basic side object. This way I could also gather more experience with this 2D design tool

Parametric code for top and bottom part. 
2D model in Inkscape for side parts. 3. During design it helped a lot that we did the group assignment before were we tested the kerf of the laser cutter. This way I could estimate how to design the joints best to let them fit. Surprisingly, my first estimation was fine and my model fit form the beginning.
4. After designing I opened the svg file in the software visicut (as mentioned in the group assignment we use this software to prepare the models for cutting on the laser cutter. This tool simplifies the user experience as the user can set easily options like material and thickness of material. The power and speed of the laser cutter will be adjusted automatically.

Top part opened in visicut. 5. By pressing the button
 I send the in visicut defined job to the laser cutter.

6. Start cut job. 
7. Cutting of side parts. 
8. Take out material. 9. After cutting all parts assembling started. It was exciting to test if the joints would fit. As mentioned the first cut object was suitable and I was able to assemble all parts smoothly.

9.1 First side parts assembled seen from the top. 
9.2 First side parts assembled seen from the side. 
9.3 Adding more side parts. 
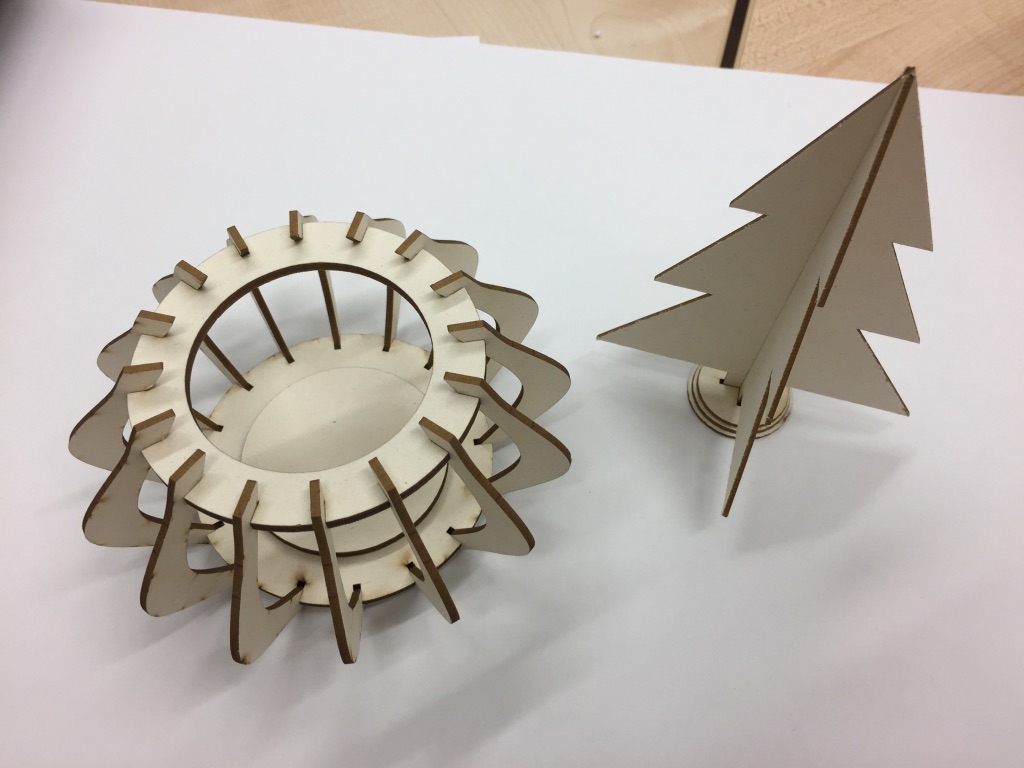
9.4 Close-up of assembling one side part. 10. Finally, I was just happy to see my finished candle light. I think this will be a perfect present for the upcoming birthday of my grandma.

Finished candle light =).
Christmas Tree
1. My second object was only designed with the tool OpenSCAD. This way I am able to change the height and width of my tree very flexible and I can laser cut a whole forest =). The tree itself consists of a lower and an upper part. Each has got a long joint in the middle (upper: lower joint; lower: upper joint). Additionally, the model includes a stand in which the tree can be fitted to make it steady.
-
For the tree itself I wrote my own method 'module tree()'. In this I defined triangles that are modified with the 'translate' function to form the desired tree. Using the 'difference' function again I
modelled the joints to be able to link the two christmas tree flat parts that form a 3D tree.
length = 10; width = 10; a = 0; b = 30; c = 0; d = 10; inside = 5; widthSquare = 10; lengthSquare = 20; module tree(){ translate ([a,0*b,c]) {polygon(points=[[0,0],[-4*length,0],[0,5*width]], paths=[[0,1,2]]);} translate ([a,1*b,c]) {polygon(points=[[0,0],[-3*length,0],[0,5*width]], paths=[[0,1,2]]);} translate ([a,2*b,c]) {polygon(points=[[0,0],[-2*length,0],[0,4*width]], paths=[[0,1,2]]);} translate ([a,0*b,c]) {polygon(points=[[0,0],[4*length,0],[0,5*width]], paths=[[0,1,2]]);} translate ([a,1*b,c]) {polygon(points=[[0,0],[3*length,0],[0,5*width]], paths=[[0,1,2]]);} translate ([a,2*b,c]) {polygon(points=[[0,0],[2*length,0],[0,4*width]], paths=[[0,1,2]]);} translate ([a,-0.5*c,c]) square([widthSquare, lengthSquare], true); } difference(){ tree(); translate ([0, 70,0]) square([1, 70], true); }- The code for the stand of the tree basically was just designed with the 'difference' function by substracting two sqaures form a circle.
2. This time estimating the size of the joints did not work in the first place. For the stand part of the tree I had to do two iterations until my tree was able to fit into the stand.

Parametric design for tree in OpenSCAD. 
2D model of stand in OpenSCAD. 3. After designing I opened the svg file in the software visicut (as mentioned in the group assignment we use this software to prepare the models for cutting on the laser cutter). This tool simplifies the user experience as the user can set easily options like material and thickness of material. The power and speed of the laser cutter will be adjusted automatically.

Stand opened in visicut. 4. By pressing the button
 I send the in visicut defined job to the laser cutter. I misaligned the tree once as I miscalculated where the tree was cut. Therefore,
I had to cut the stand a second time.

5. Cut stand. 
6. Cut the two tree parts. 7. After cutting all parts assembling started. Again an exciting step to see if the joints would fit. As mentioned I had to cut the stand a second time to make it fit properly.

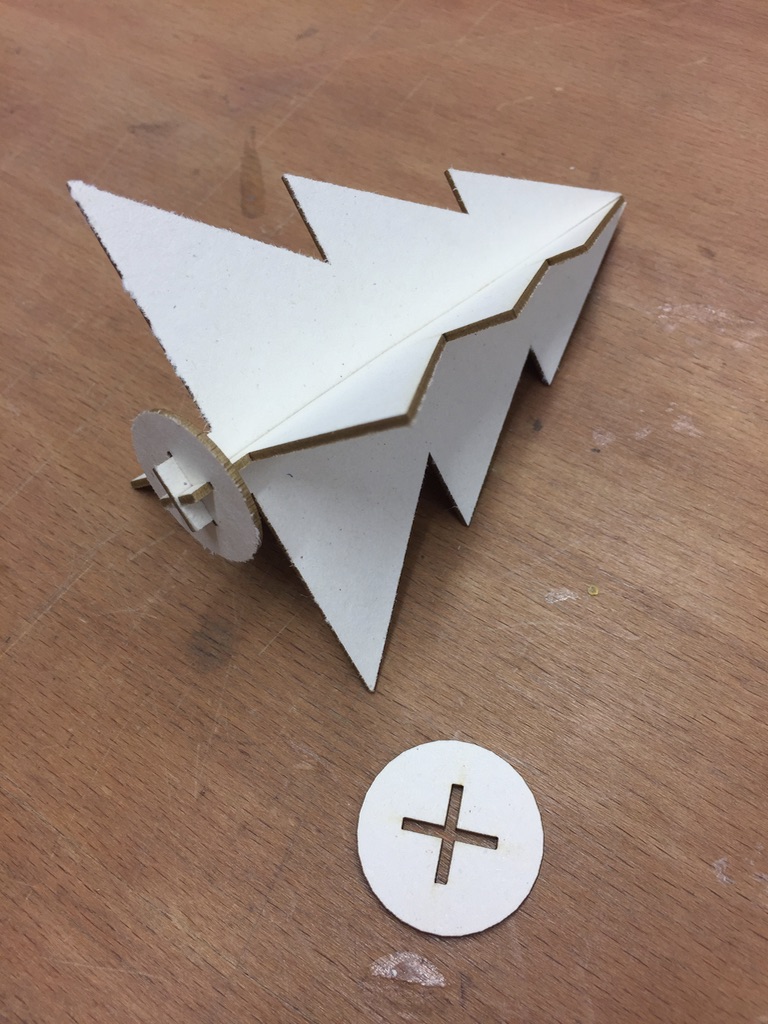
7.1 Assembling the upper and lower part of the tree. 
7.2 Finished tree. 
7.3 Adding the stand underneath. 
7.4 Adding more stands in different sizes to make the tree more stable. 8. Finally, I had my Christmas tree which I can also use for my final project, the interactive crib, in which some trees would fit into the scenario.

Finished tree in stand =). Vinylcutter
General information
The vinylcutter is a computer-controlled plotting device with a blade instead of a pen and cuts the outline of a shape or letters into a sheet or piece of vinyl (self-adhesive plastic). At our FabLab we use a Silhouette Cameo 3 and also use the software Silhouette Studio. We have three different blades for this vinylcutter but the 'Auto-blade' works well enough for producing e.g. laptop stickers. The Silhouette Cameo can either be connected via bluetooth or USB with the machine that runs the studio software.
I decided to design a cool and personal laptop sticker that can be cut be the vinylcutter. So now one could ever steal my laptop secretly =P.
1. First of all, I downloaded the software and installed it on my laptop.
2. Now the design of my laptop sticker started. I wanted to have a sticker connected to my hobby volleyball. To design a volleyball as a sticker I had a look at the website 'Pinterest' and soon I found a good idea for underlining how I value volleyball. I did not like the font of the sticker. Therefore, I designed the three letters in another font as seen on the right underneath. The volleyball of the Pinterest website I liked a lot. So I decided to use it for my sticker.

Volleyball in Inkscape. 
Design letters in Inkscape. 3. After designing I opened the file in the silhouette software. In the 'Design' step of the tool you define what you want to be cut.

Define what should be cut. 4. In the 'Send' tab of the tool ypu set parameters like material (e.g. glossy vinyl) and force and speed of the blade. The software provides suitable default values for each material.

Prepare the parameters for the cut. 4. Next, I prepared the vinyl. Therefore, I cut a part with suitable dimensions for my sticker on put it on the sticky underlay for the vinylcutter. This underlay assures that the vinyl does not move around during cutting. Afterwards, the underlay with the vinyl is put into the cutter. Underneath in the left picture you see the prepared vinyl and in the right you see me pressing the 'Load' button (located on the interface on the right of the cutter) which tapers the material. Now the material is prepared completely.

Prepared material on the underlay in the cutter. 
Push the button 'Load'. 5. Now I did connect my laptop with the cutter via USB to be able to run a cut process. Sadly, the bluetooth option did not work. By pressing the button
 in the software I started the job.
6. Cut the two tree parts. 6. After the cutter finished the job I had to press the button 'Unload' on the cutter interface to retrieve the material. Afterwards I started adhering the sticker on the laptop.

Finished sticker on the underlay after the job. 
Adhere the vinyl sticker to the laptop. 7. After rechecking that my sticker was aligned properly on my laptop, I finally have my very own 'Love Volleyball' laptop.

Finished sticker on my laptop =).
-
For the tree itself I wrote my own method 'module tree()'. In this I defined triangles that are modified with the 'translate' function to form the desired tree. Using the 'difference' function again I
modelled the joints to be able to link the two christmas tree flat parts that form a 3D tree.