Assignment 15
Wildcard Week

This years new assignment is called 'wildcard week', which means: Design and produce something with a digital fabrication process not covered in another assignment.
As we got an embroidery machine in our FabLab I decided to use this one for a textile digital fabrication process.
Embroidery Machine
In our Lab we have a Bernina B 880. This machine can be used for usual sewing and also for very artistic stitching. On Youtube you can find a bunch of tutorials that help you to work with the machine and to understand the machine's features.One member of our team has worked with the Bernina a lot and gave us a short introduction into the machine, which included:
- Turning On/Off
- Lace the upper and lower thread into the machine, which looks complicated in the first place. After 3-4 times it is easy.
- How to change sewing head and plate. The Bernina machine has many different ones to choose from depending on the use case. In our lab we mostly use only two plates and two heads. One set each for sewing and stitching (you can see these in the pictures underneath).
- Sewing: Basic lines the machine can sew
- Stitching: Basic shapes like letters


Buttons right side: Press the upper button to start stitching (it turns green when it can be pressed).

Textile Fabrication
My goal was to fabricate a textile that has electronic parts. I want to control LED's with a button. The overall plan was doing two fabric layers, one using the stitching option
of the machine and one using sewing. The stitching layer should be the artistic one and on top of the sewing layer. The sewing layer is the functional one, that includes conductive thread
to connect LED's, button and battery.
My textile should somehow be usable for my final project.
Stitching
To stay in my crib theme I looked through the shapes the Bernina already offers for stitching. I found a snowflake that I liked very much and that I can use to decorate the crib. Therefore, I decided to stitch this one. I chose a colour for the upper thread, laced the thread, prepared the fabric (as shown in the picture underneath) and started stitching.


Sewing
For sewing I used conductive thread for the upper thread. I drew the basic shape of my upper snowflakes onto the fabric and sewed along these lines.


Testing the Conductive Circuit
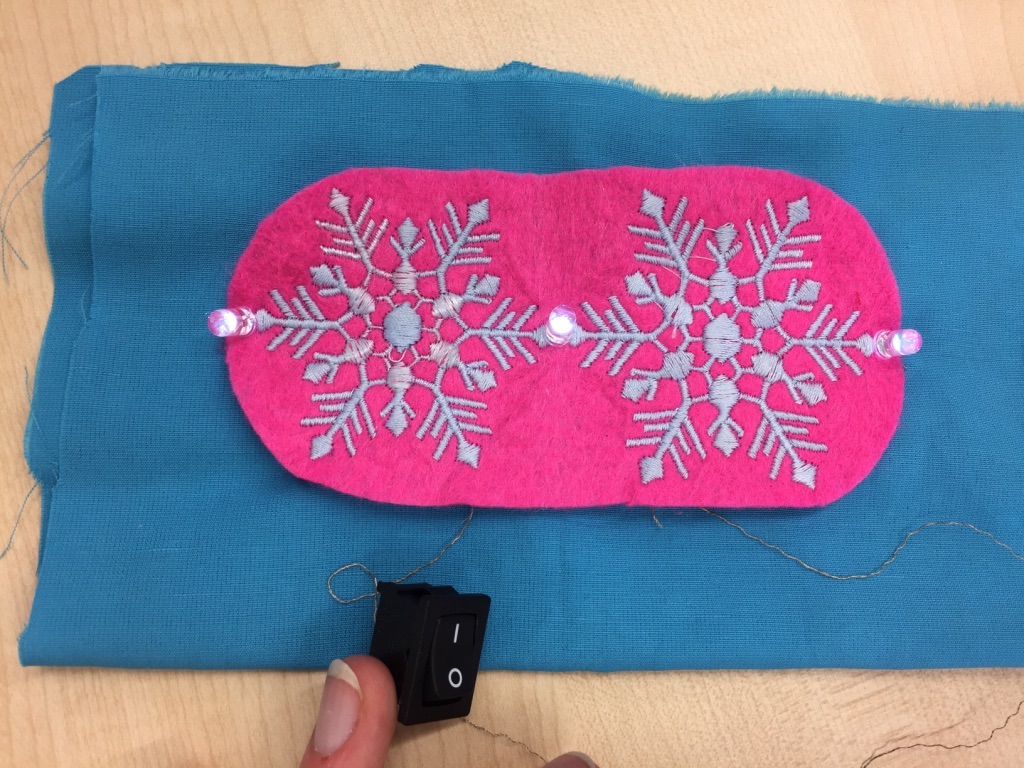
Testing the lower fabric was very important as I had to find out how much resistance the conductive thread has at certain points of the sewed lines. I used a mulitmeter to measure these. In the end I decided to use three LED's with a white light (also to stay in the topic of crib and snow) that light up the snowflakes on the upper fabric.


Final Assembling
Finally, I put all parts together. I sewed the LED's manually to the fabric. Then I connected the switch and battery to them and let the snowflaked shine. Electronic parts I used:
- Three white LED's
- Conductive thread with resistance (ca. 200 Ohms resistance before the first LED to assure it does not break)
- Switch to turn on/off LED's
- 9 Volt battery with 20mA