Development of my Final Project
MAKE A PINBALL
9/06/2013
handmade prototype - CAD - cnc
RAMP
It took me a while to update some pages and wow, it's already passed more than a week!
Today I spent all the afternoon and the night working on one Ramp.
The point is that I tried to study deeper those ramps (this is the website where I found the inspiration), to figure out how to make them..and again my problem was to understand where to start.
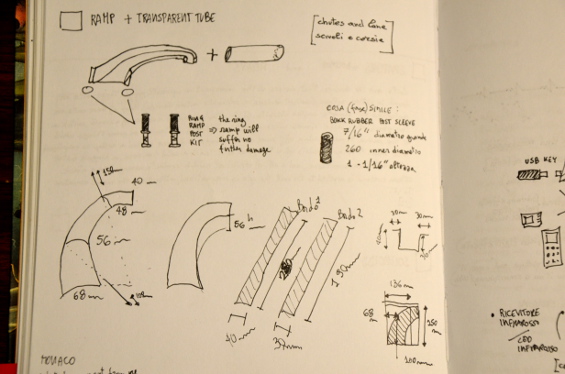
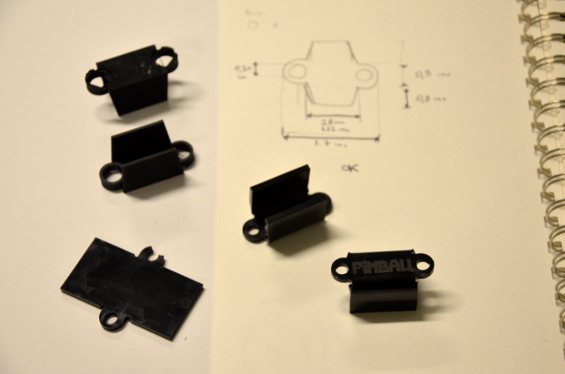
I begun with some sketches on my notebook...
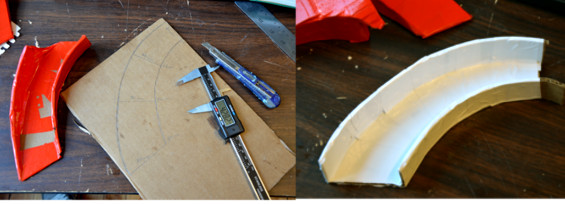
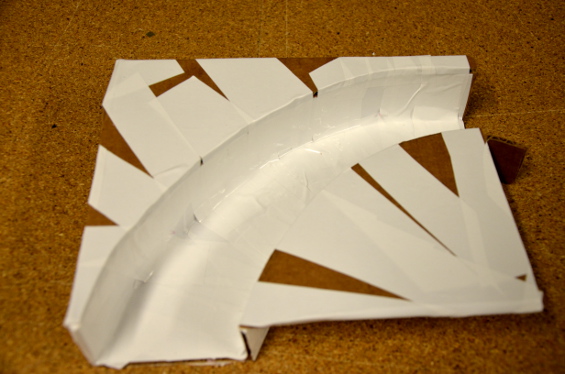
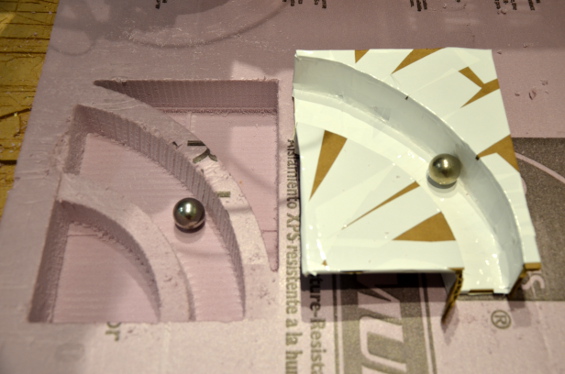
..et voilà this is the second prototype! ((again made by using the scraps of cardboard and vinyl that I found in my lab).
Even if it's not beautiful, it has been really useful for understanding better the proportion with the ball and the playfield. So I did a rough model in Solidworks and I saved it in .stl ready for the ShopBot machine.
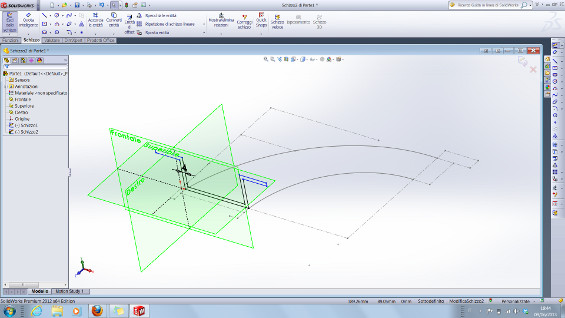
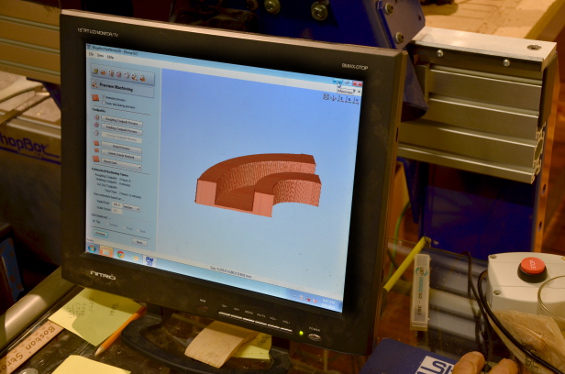
Since I didn't want to waste wood, I decided to use the foam(thickness= 50mm) with a bit of 57.
[the size of my model is weight= 180mm; height= 42mm; depth= 230mm]
Here I got some issues with axes and sizes of the lane, so it took me several attempts to solve it.
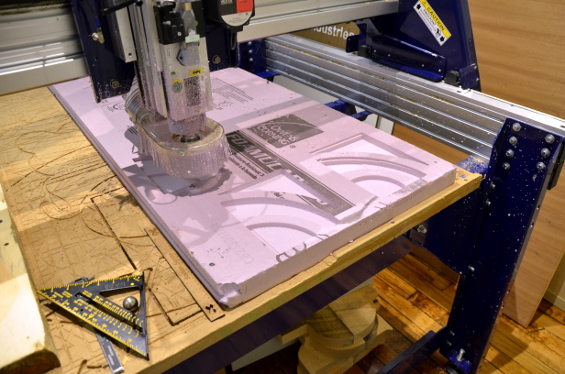
Now I've got two options with the mold in foam:
firstly I decide to use this mold with the old vacuum heater that we have in the lab, to built the shape of my ramp; but probably I need to pay more attention because the foam was going to burning and also the plastic was stuck to the foam.
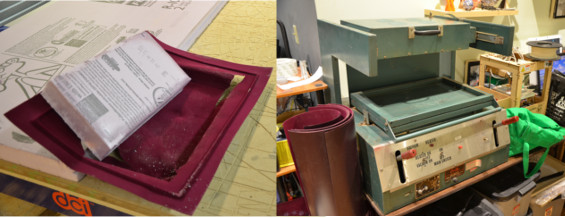
secondly I can try to use black cardboard mix with resin in order to make it strong enough..
28/05/2013
cnc - laser cutter - programming - assembly
PLAYFIELD
I used the shopbot to cut the base of the pinball (24x19 in) where on one side I'll place the acrylic playfield and on the other, all the elctrical part.
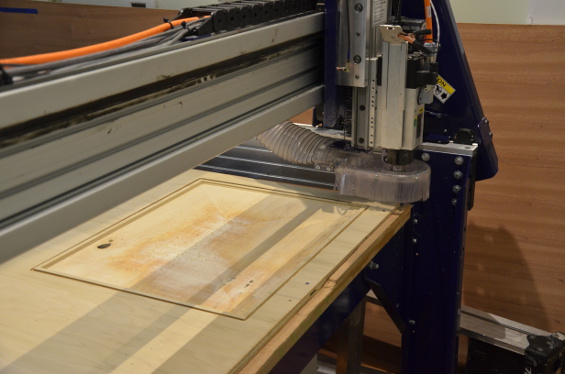
Eventually it will look smaller than what I had thought but still, I managed to place all the same elements I'm working on. Another Redesign.
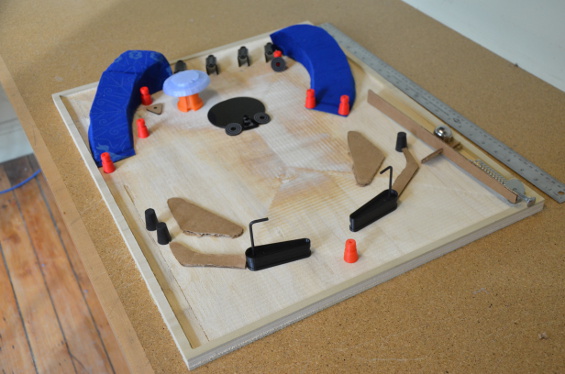
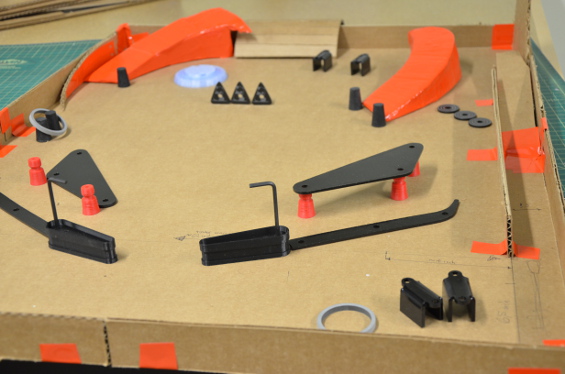
ASSEMBLY
This time too I tried to use as much as possible scraps of acrylic that I found around, apart from the white acrylic.
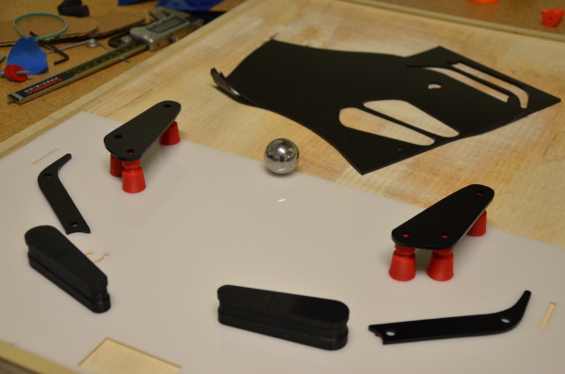
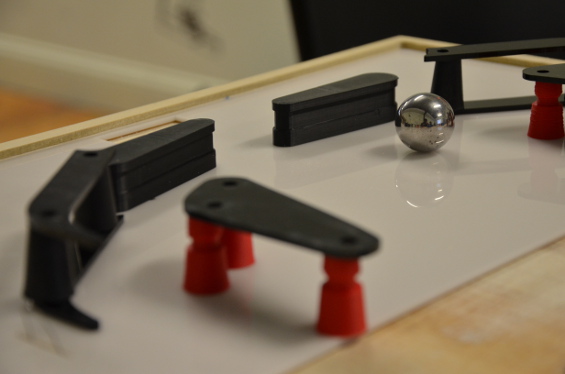
I started from the bottom of the playfield and I mounted the lanes and the flipper bats. Here at last I began to work seriously and know better the solenoids.
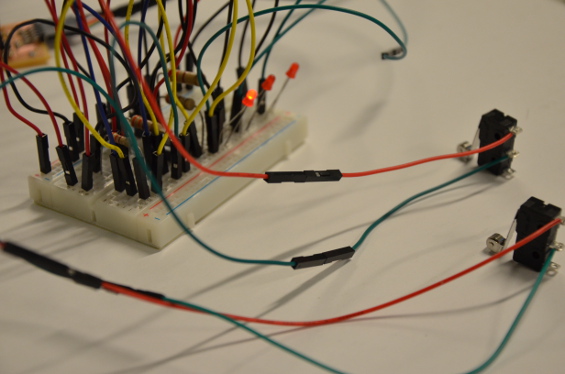
MAKE THE BUTTONS FOR FLIPPER BATS
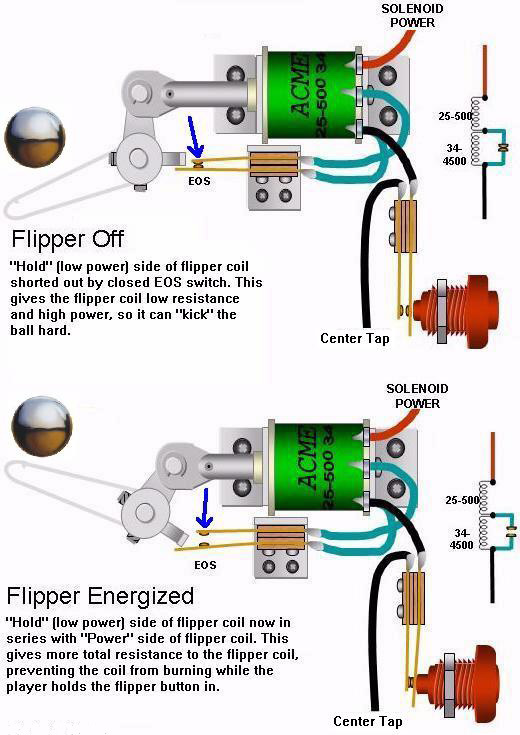
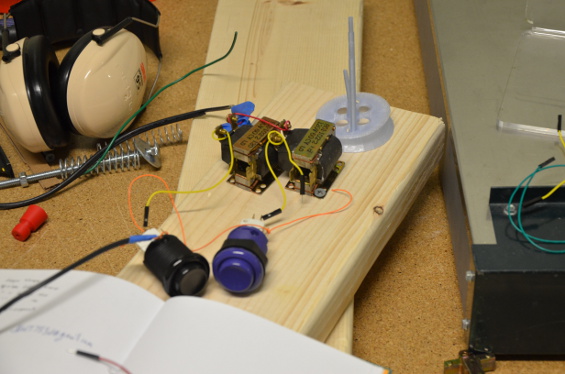
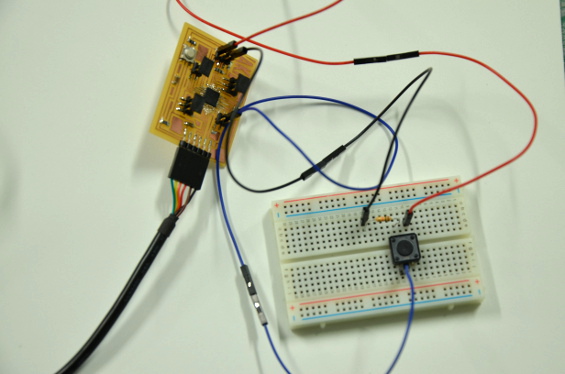
So I was able to build a circuit (easy for most experts, but difficult for me) that allows me to control the solenoids (which will be connected with the flipper bats) with the buttons.
Here there is the video:
Fabacademy - DIY Pinball from Lorenzo Negri on Vimeo.
27/05/2013
programming - heat pressure - 3d print
step1 - 3 buttons and 3 LED:
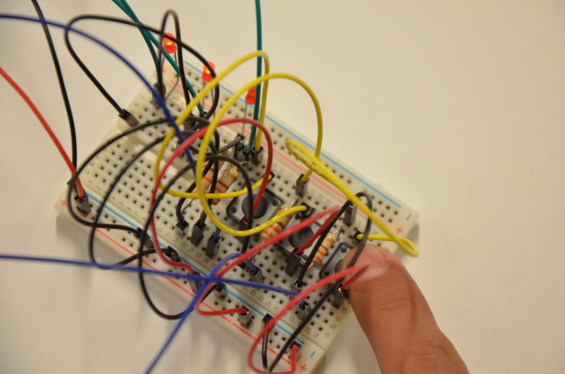
step 2 - 2 switches, 1 button and 3 LED
I've never worked with the switch (I'm currently using these Roller lever Switch) and I am informed here and here.
So: "For regular switch action, connect to the C and NO terminals. The switch will be open when not pressed and closed when pressed". Thus, the C goes with the flow and NO with the resistance and digital pins.
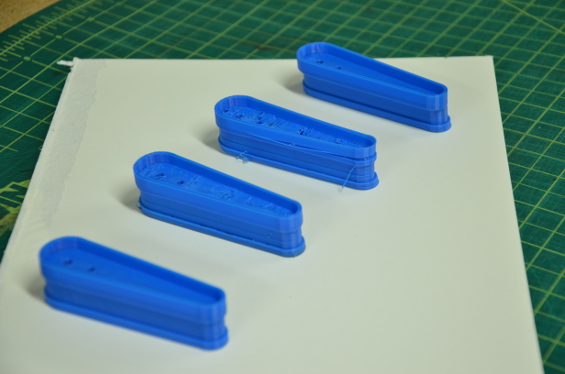
RAMP
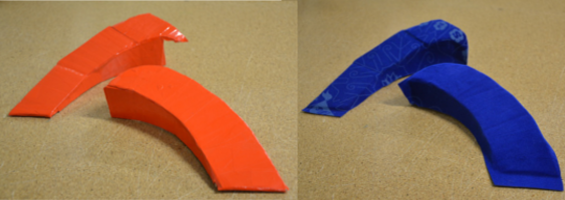
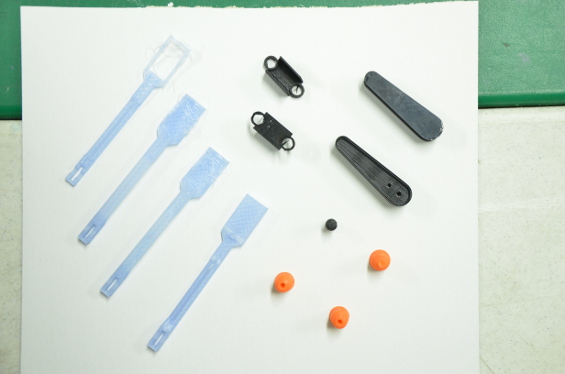
I used scraps of cardboard and vinyl to build ramps (the two red), then I used these ramps as molds for the heat pressure (blue), I used this machine for the first time and the result is incredible! I aready have in mind how to improve them.
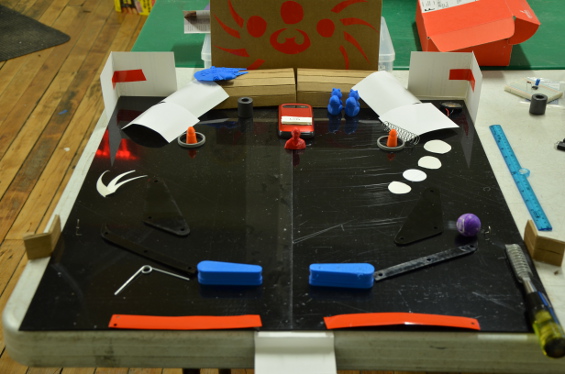
PLAYFIELD
Here is the second prototypeof the playfield, done in cardboard. Little by little I start to have a clear idea about the dimensione and the architecture of the playfield.
26/05/2013
laser cutter - bending - 3d printing - programming

it is amazing but I waited two hours for this component and here is the result.
The Replicator has not been able to use the abs, not because it was over but because the wire was mysteriously tangled. So it worked for nothing.
I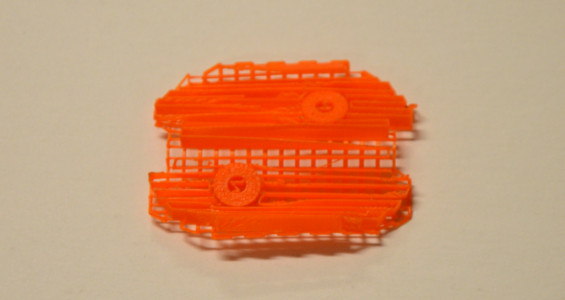
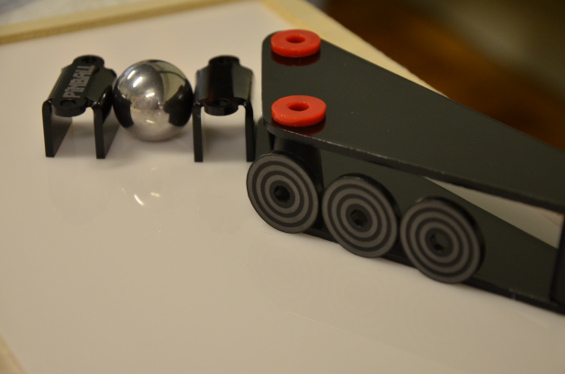
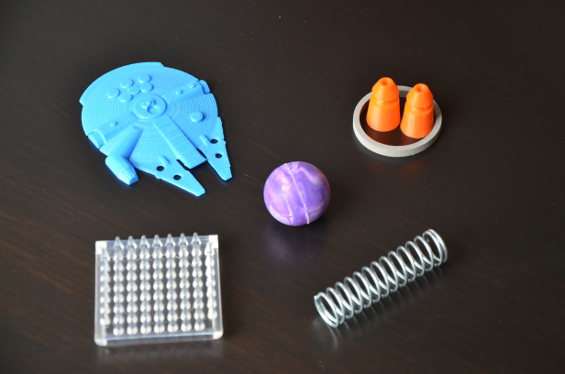
Here there are the components of the bumper made in PLA, the body's target and the body of the bumper in ABS.
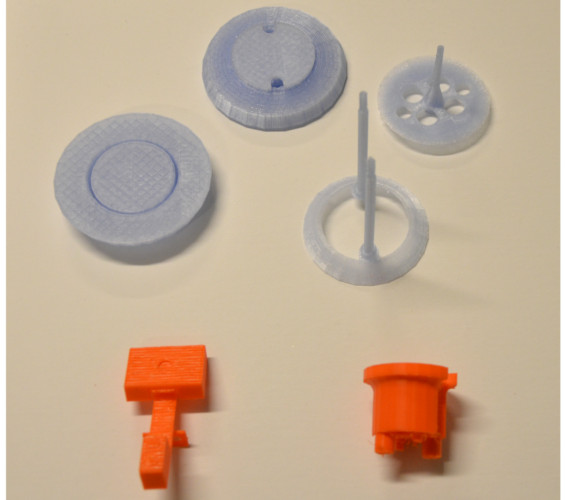
Meanwhile I designed and made with laser cutter some examples of targets.
Furthermore yesterday I printed the guide lane but went out really bad from the 3d printer, so I decided to make a new design thanks to laser cutter and bending machine. Here there are some picture about my workout using the scraps of others.
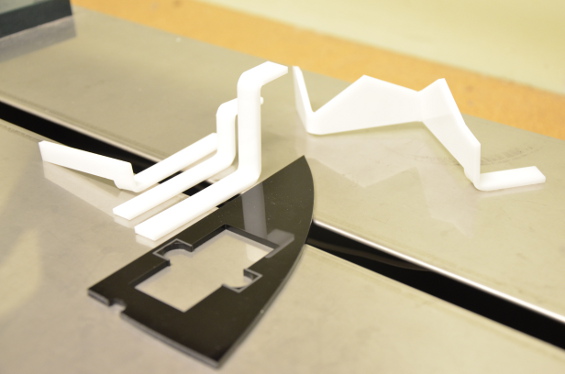
..and here one of the topic moment of my day, my first official bending.
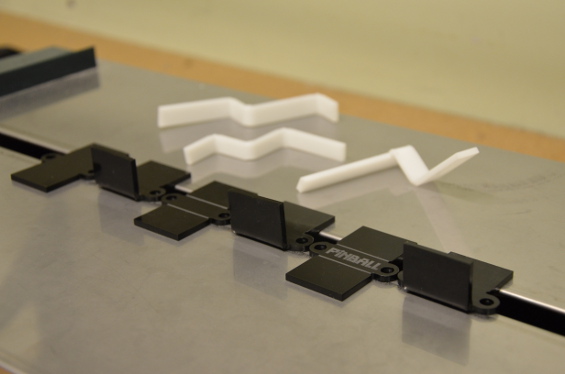
..and this is the Guide Lane story, from paper - 3d print and finally laser cutter + bending machine!
25/05/2013
3d print - programming
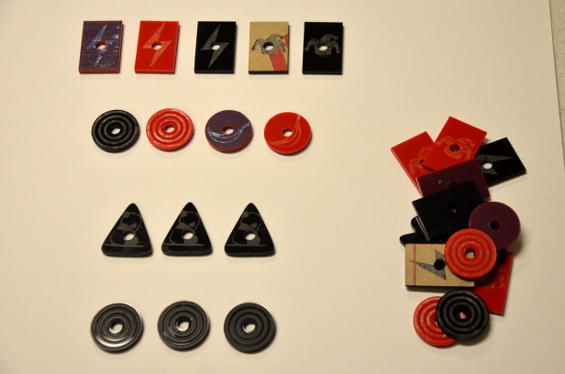
thank also to Anna that she brought her Replicator 2, I was able to print the first targets(on the left) and besides the guide lane, the flipper bats and a couple of post.
Meanwhile I studied some example of code useful for all the switches inside the playfield.
button - buttonstatechange
24/05/2013
programming and prototyping
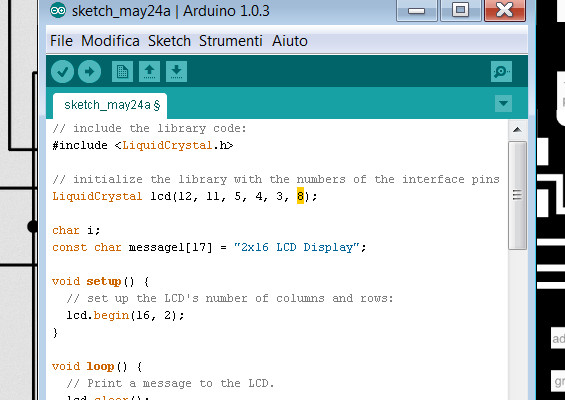
LCD
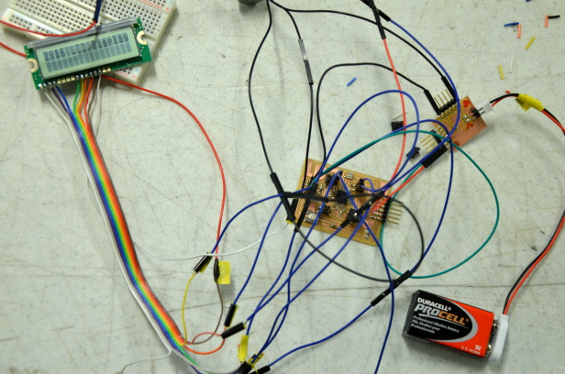
data sheet, tutorial and blog
It was like a treasure hunt to look for the right pin and connect them to the LCD.
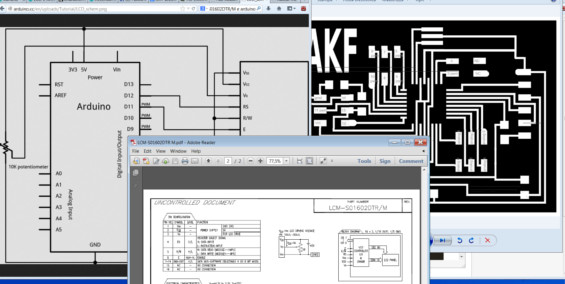
In our Arduino one pin "is missing" (pin 2). So, thanks to my classmate Dana, i was able to figure out how to make it work.
I wrote down a new code, changing digital pin 2 with n.8.
testing code
Fabacademy - LCD for final Project from Lorenzo Negri on Vimeo.
SWITCH
I plan to receive today my microswitches but unfortunatelly they are somewhere in the USA, so I'm not able to test them.
The only thing I can do is to study this tutorial,play and make a code with LCD.
SPEAKERS
I've got two possibilities:
I can make those speakers show in a book that I've found here in the lab AS220 ("fashioning technology"), with these component:
(x1) 220uF capacitor
(x1) 0.05uF capacitor
(x1) 10ohm resistor
(x1) LM386 audio amplifier IC
(x1) 10Kohm trimpot - variable resistor
(x2) 8 ohm speakers
(x1) 1/8" audio plug
(x1) tilt switch - nonmetallic
(x1) 9V battery connector
Otherwise it could be really great to make this and upload all the sounds and voice clips that I have already done.
Unfortunately in both cases I lack the components; Let's see tomorrow.
PROTOTYPING
It's friday night, I'm tired and so let's have some fun with a good brainstorming and see how could be my pinball (I'm still thinking about name and theme).
23/05/2013
CAD and programming
3d print - first attempts
It's clear that we have some issues with our Replicator. The first flipper bat went out perfect (the first starting from the bottom) and then.. boom!
step motor
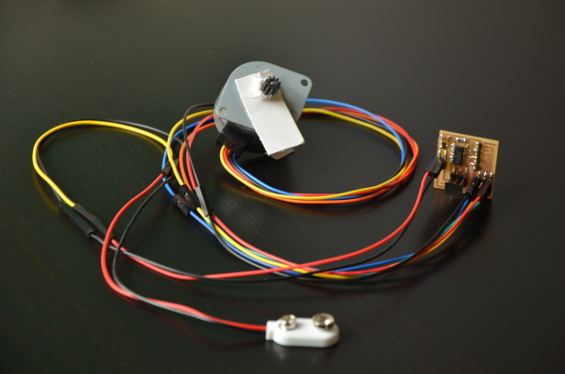
I make some test with step motor in order to see if it can be a viable alternative for an an alternative bumper...
Here is the page where you can find more info.
22/05/2013
make it as simple as possible
After spending several weeks studying in depth the world of pinball (blogs, forums, websites of companies that sell components and makers who have tried to make DIY flipper) I realized that they are "toys" extremely complicated to reproduce; Even more so then the original intent is also to add more interactive elements.
Pinball machine is exceptional because it allows me to work with everything: engines, matrix LED, LCD screen, sensors, motors ... then obviously for the presentation I will try to make a simplified version.
18/05/2013
I know it's a lot, but this would be my wish list of the main components and what I have to do
playfield:
_materials: plywood or acrylic puzzle (to be decided)
_details: it will have several holes in order to fix: screws, side walls (x4), guide lane (x3), spinner,(x2 - 1), bumpers (x2), targets(x4), holes for controlled lamps/LEDs(x4 RGB useful to light the fields intruction\targets), slingshots/kickers(x1), out hole, thin holes for rollover switches (fine metal blades, used for scoreing and for the machine to know where the ball is in play), ramp(x1), ball shooter and ball shooter lane.
walls:
[x4] - main box
_materials: plywood or acrylic (to be decided)
_details: holes\squares for: lights effects, screws of the ramp, ball plunger, start button, flipper buttons and output power.
_options: add graphic design with vinyl.
[x1] - for the launcher lane,
_materials: plywood or acrylic (to be decided)
_details: holes to fix the plunger
[x2] - guide lane to upload a new ball for the launch area.
_material: plywood or acrylic
[x1] - apron for the instructions
_ materials: plywood or acrylic
_details: half part with holes for light\touch sensors (one of the interactive part)
The instructions can be ingraved or written on the vinyl.
sloping base (elements to be joined to the playfield)

[This picture is NOT what I want to do but it shows the angles degrees of a standard pinball: 3,5* - 6,5* - 11,785* useful for my project]
_details: useful to hide all the components, like motors(bumpers, drop targets and maybe kickers), wires for lights and their board especially for controlled lamps (that shows the player where to aim for) “tilt-plumb bob”(optional, not extremely necessary), hide the sensors necessary for understand whatits goin on in the field and translate them into malus-bonus points (sensors for scores)
COMPONENTS
ball (x3)
_materials: abs, pla or iron (in order to understand which gives the best performance in my DIY playfield)
_details: I can use 3d printer or if I have time I can molding and casting the shape.
_note: I ordered also a standard iron ball (1$)
ball shooter (x1)
_materials: I found a great guy who has made it with a calde bolt, rubber tip, 1 spring, 1 hex bolt, and 1 washer.
_note: I ordered also a standard shooter(to assemble), just in case.. (7.35$)
flipper bats (x2)
_materials: abs or PLA (as above) + rubber rings
_details:I can use 3d printer or if I have time I can molding and casting the shape.
_note: I ordered also two standard flipper bats and the rubber rings
scores - display LCD (x1)
_details: It shows only the scores during the game.
In stand by, it shows the three best scores and their names (3 letters\numbers)
visual effects 01- matrix LED (x1)
_materials: red LED
_details:
visual effects 02- field lights group (at least x4)
_materials: white (or RGB LED)
_details: I can cover the white LED with plastic tubes in order to add colours around the playfield.
ramp (x1)
_material: plastic or composites
_details: (to be decided)
bumpers (at least x1)
[I'm still working in order to be able to make something with motors or coils - follow updates]:
targets (x3)
_materials: abs or PLA
_details:I can use 3d printer or if I have time I can molding and casting the shape.
sensors:
switches (at least x2)
_details: used for scoring and for the machine to know where the ball is in the play. They are connected also with field lights group.
16/05/2013
sitography
I chose to go ahead with this project because my parents have an old pinball machine that does not work and one day I'd like to be able to fix it.
So I tried to learn and among the hundreds of websites, blogs, etc. that I've seen, I have selected some really interesting:
I found this website useful if you want to know the history of the pinball and the components on the playfield.
http://www.pinball-fixers.com/PINBALL-HISTORY/tilt-mechanism.html
This is excellent if you want to understand the physics behind the pinball
http://myplace.frontier.com/~woodrails/physics/
Here are links to find out how other people have worked to make their pinball
http://xtcpinball.com/?p=59
for the maintenance\repair of pinball
http://www.pinrepair.com/restore/index3.htm
Finally, these are just a couple of sites to understand how much components cost
http://www.marcospecialties.com/
http://www.pinballlife.com/index.php?p=home (I just made the purchases here, I will let you know)

