07 - molding and casting
Abstract: honestly I tried hard to do my best, but I had a lot of problems and I'm still working..
snowflake
My first idea was to create a mold in order to make the shaped chocolates snowflakes.
Since I have had bad experiences with the milling machine with .png files, I decided to create this simple design in 3d (in retrospect I can say that it was a really bad choice!), especially to have more control over the rounding of corners.
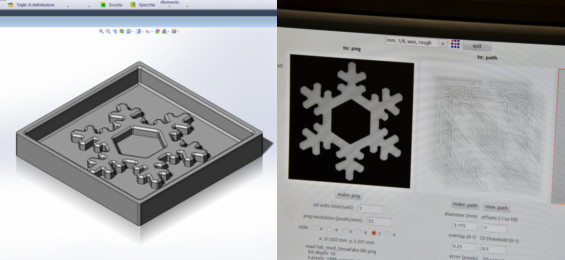
So, I first modeled a snowflake inside a box (which will serve to contain the silicon for the mold) in Solid Works. Once I saved my file in .stl (not in .STL ASCII), I used the milling machine to mill a block of wax and get my mold.
Sounds easy? Yes, but unfortunatelly I've got some issues.
Now with a relaxed mind I can say that I made several silly mistakes because my aim was to finish quickly since I knew that to make a mold and cast it took a long time.
For istance I didn't pay any attention on sizes of my object, because I was convinced that, among the various settings, Roland Modela can scalar files the same way as a normal software. I don't know why but I lost half a day to figure it out.(especially because I always waited the end of the calculations in order to make a path, with Modela...like "waiting for Godot")
After arranging the file I lost more time because Modela wasn't able to make the path, despite the measures were correct. After several attemps thanks to James, one of the labs manager, we have understood that I have to fix the axes of my object in the settings of Modela. I arranged for the umpteenth time the file and everything seemed fine, but once I send the job to MODELA, it inexplicably began to cut the wax randomly. The next day, thanks to my Fab Academy's director Anna, I was able to use the same file in the milling machine.
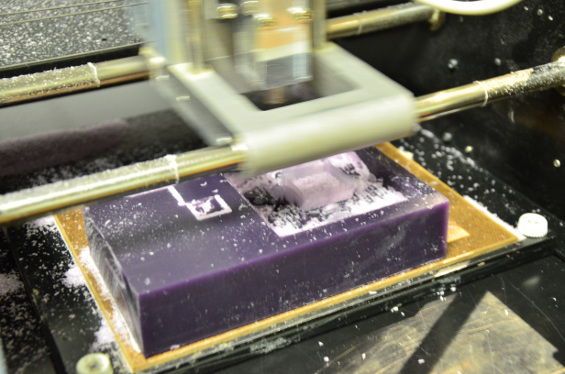
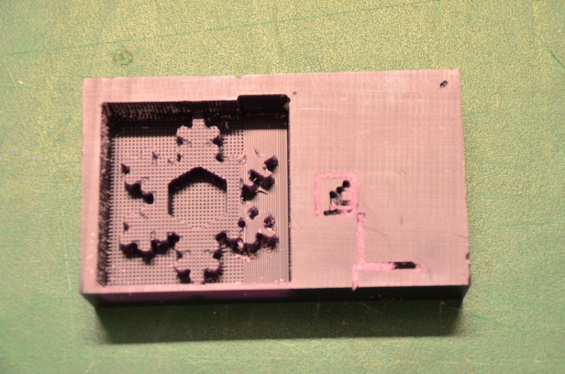
Even this time, however, there have been problems: in fact, after the first milling "rough" with a large tip (I would say perfect), while the second (with a bit thinner to get a smooth surface - diameter 1,5875mm) the Modela went crazy. Inexplicably, after the first centimeter of perfect work, it began to create holes in the snowflake. I decided to restart everything and try again but this time, after the first centimeter, the tip is output from the wax and started milling at random. I made other attempts but it continued to poke holes in the wax or mill randomly.
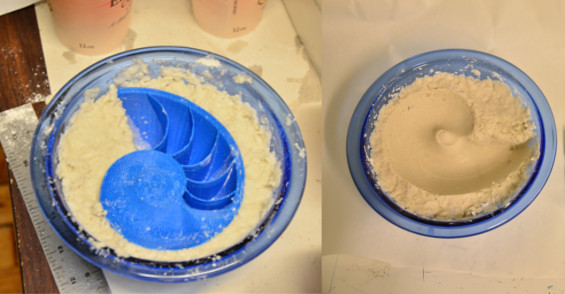
At this point I have decided to use anyway the mold in wax to make the mold in OOMOO, but again the result was poor and I wasn't satisfied.
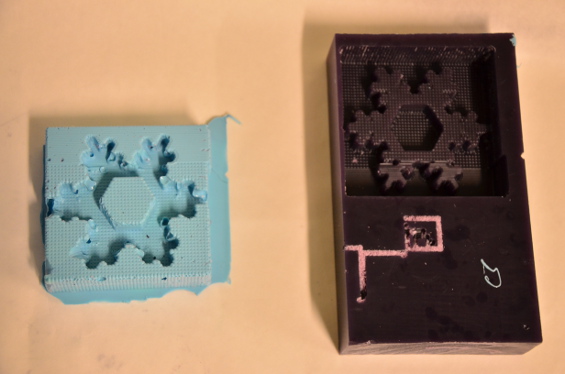
Although a little frustrated I decided to give up the milling machine and use the 3D printer (which, however, had already given me a bit of trouble with my second project, the Nautilus) to create my object.
I'd say it was a great choice because the model came perfectly on the first try, awesome!
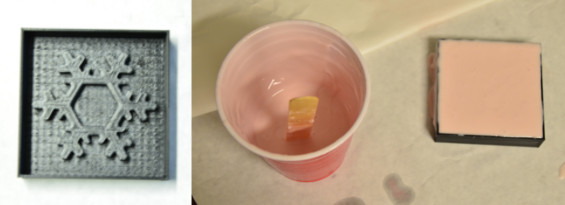
After much work, I was finally able to create a silicone mold suitable for food (using SMOOTH SIL940) and I really can not wait to test it to make snowflakes black and white chocolate!
Once ready the mold I put it in the oven at 210° F for about four hours.
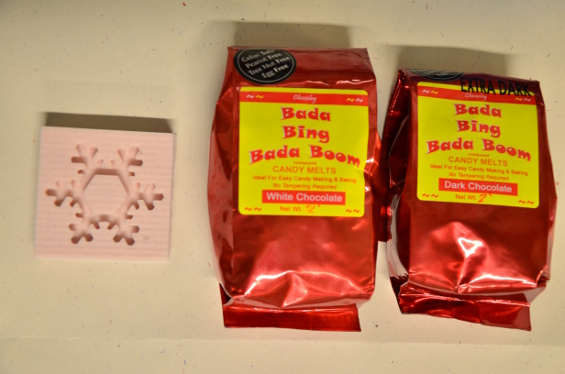
After that I cleaned thorough and then I started to prepare the chocolate: thank to this instruction and also to the the great instruction made by my Fab Academy's director Anna (akaziuna).
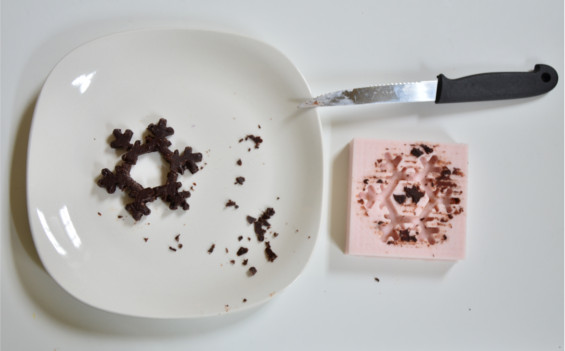
Even though I had a perfect mold, in this picture you can see my first snowflake broken because I have noticed that it is not easy to pull out the chocolate from my mold.
If I can, I will try to go through the whole process with a mold easiest to do and that allows me to remove the chocolate without breaking it.
nautilus
The second idea was to make a Nautilus, because I love the shape as well as all its scientific aspect (from golden spiral to Fibonacci spiral); also with the help of the microcontroller I'd like to use the mold to create the enclosure for a pair of speakers.
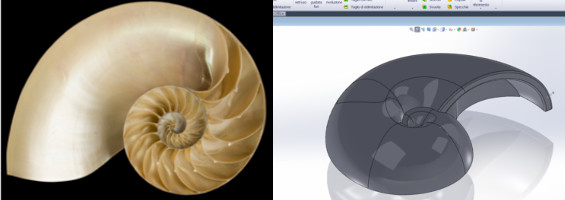
I made a model of a Nautilus with Solid works and then I print it with these settings: 3 shells (in order to get better curved surfaces), 90 feedrate and a Full flat/support (idem, also because my Nautilus is hollow).
After 40min to create all the layers and 5 hours and 13 minutes of printing, my nautilus was ready!
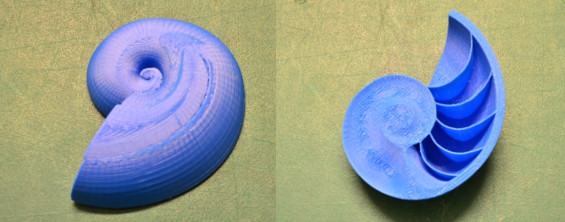
Then I do not know why, when the press was at 97% of the printing (really a great bad luck!),one of the belt that controls the movement of one of the axes of the printer jumped off. So all the last layer of the press have moved a mm and obviously in a surface like that, you notice. But it could have been worse, and only thanks to Anna who promptly has placed the belt axis, the very last layers (apart from a couple of layers corrugated) are as accurate as the rest of the shell.
I fix gently those areas of the surface damaged both with acetone that with the sandpaper.
After that I decided to use the Instant mold with this object. I tried to be as accurate as possible when mixing the ingredient to create the instant mold, but I did not want it dries up immediatelly, and I added more water than expected; so I'm still waiting for it to dry.