08 - embedded programming
arduino IDE
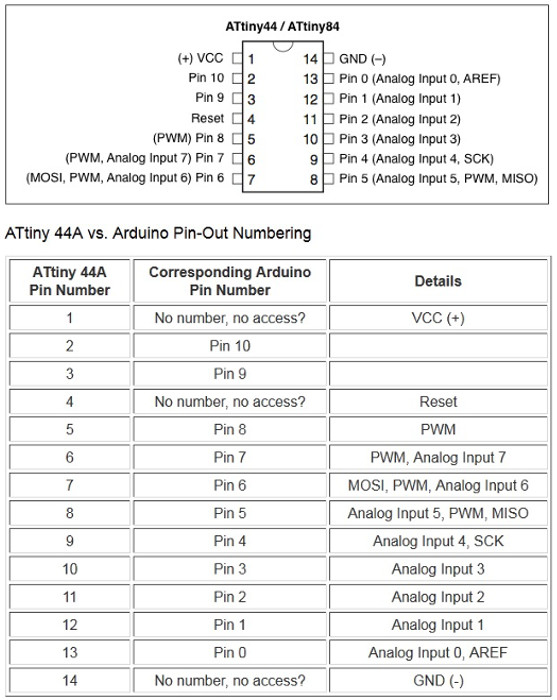
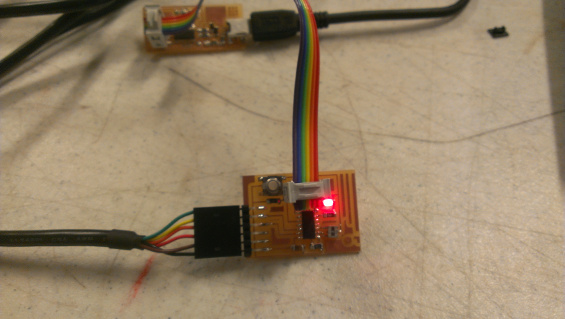
For this assignment I programmed an ATtiny44A microcontroller, Using FabISP that I made in class and the Arduino software (version 1.0.3.).
After downloading the board files (so the Arduino IDE can talk to the ATtiny44A), I placed the ATtiny folder inside the Arduino folder (Arduino software>hardware>ATttiny).
Then I opened Arduino and I chosed ATtiny44A-external 20 MHz clock, 'cause I have an external 20 MHz resonator on the Hello Button + LED board, inside Tools>Board menu. I also selected my programmer, FabISP (Tools>Programmer>USBtinyISP), The last step was to burn the Bootloader (this configures the fuse bits of the microcontroller so it runs at 8 MHz).
Finally I was ready to upload a program in my ATtiny and I chose an example sketch inside the examples menu (File>Examples>Digital>Button)
I admit that I was so happy to see the light on!
ATtiny44A: Hello Button + LED from Lorenzo Negri on Vimeo.
hello arduino
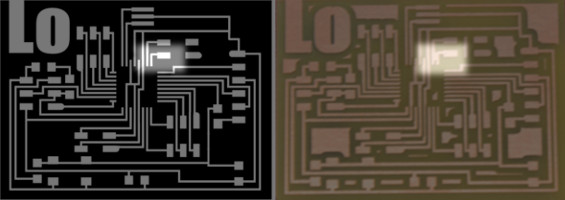
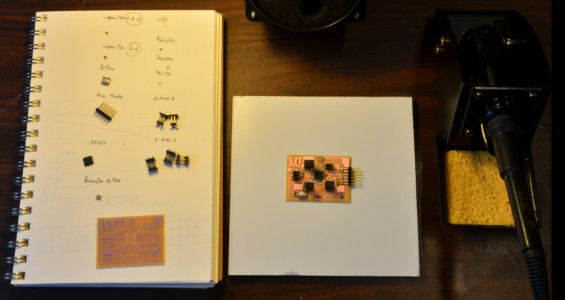
For this assignment I decided to make a Anna's board because it has more pins than Neil's board.
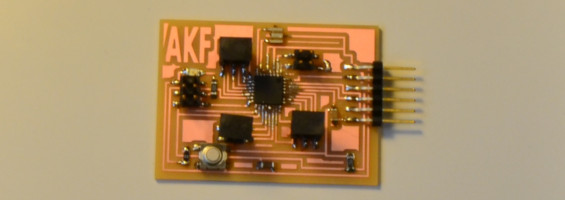
After milled Anna's board, I started to solder the components. Compared to other times, I found it quite difficult to weld various components, particularly the microcontroller. I also had to share two tracks that had been badly cut by milling machine, perhaps due to the original design file.
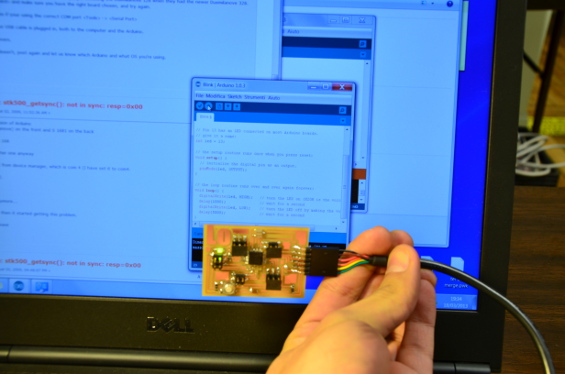
After completing my board, with the help of FabISP I managed to burn the bootloader and load the first code example, Blink.
Since I had some more time I made another board but this time custom.