15 - machine mechanical design
drawbot
First of all a Drawbot is an open source application that allows users to to write simple Python scripts to generate two-dimensional graphics.
I work together with my Master Anna and my classmates in order to built our Drawbot based on Makelangelo 2.
My job within the class has been to make an Arduino following the instruction of Barduino.
So I milled the traces and cut out the board thank to our Roland Modela (milling machine).

Unlike the other board that I milled, the barduino.outside.png file to cut out the board has series of dots representing the holes various pins, VCCs, ground and FTDI.
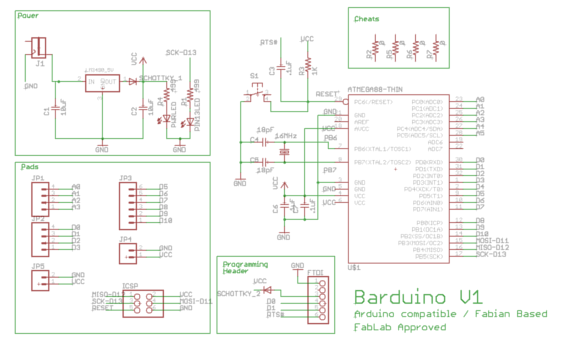

I found very useful the Eagle's file (to solder the components) and also the pinout guide.
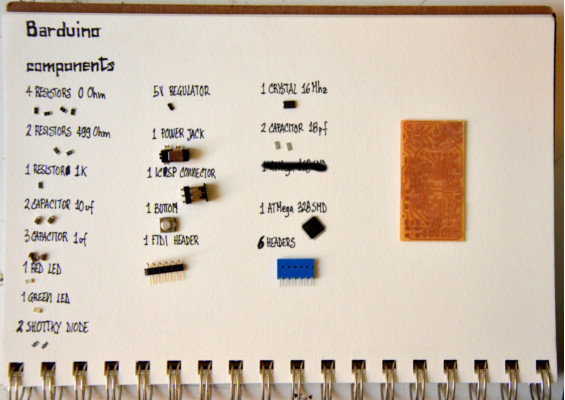
This is the list of components you'll ever need to make the Bardunino.
Note: I found some difference between the eagle's file and the picture of Barduino, but Luciano gives me a great explanation:
"The resistor that shows as 1K on the eagle files is a dependency of the arduino / micro controller circuit. The other two resistors are there to protect the two LED's.
They should be 1K by rule of thumb, but sometimes I will use 499O. The reason for this is, if you are running the arduino off the USB only, sometimes there won't be enough current to power both your application and the LED's at full power.
So if you are trying to run something like a small DC motor, your LEDs will be dim with a 1K resistor.
This is a choice you can make, with 499O you will decrease the life of your LEDs, although not by much.
If you choose 1K, which again is the norm and what I will update the page to reflect tomorrow, you might see a drop in brightness from you LEDs when you try to draw too much current from the circuit."
Thank you again Luciano.
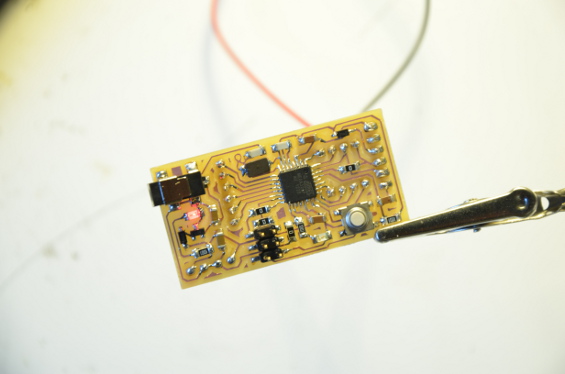
The most difficult component to be soldered was the AtMega 328 SMD.
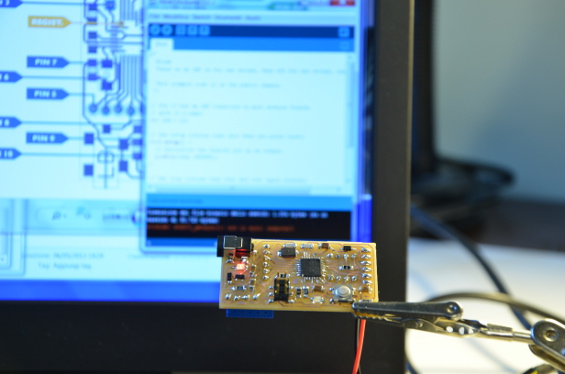
Once ready I did the smoke test and I programmed with the FabISP through Arduino software and soon after I loaded the program Blink.
Well, now you just need to see how the project is finished in our laboratory AS220 in Providence.
Here you can find also the BOM/assemmbly constructions, the product page with the software and all the design files.

