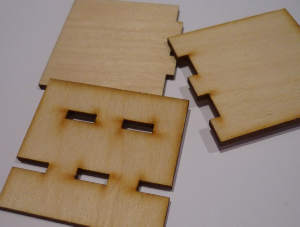
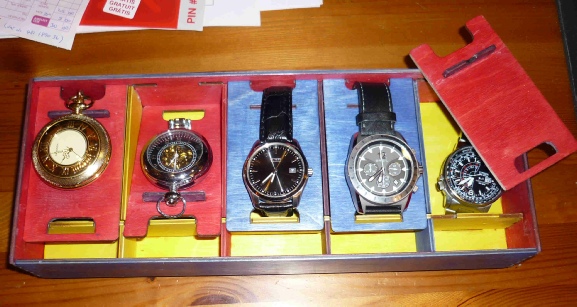
After making the puzzle and using this to learn how the laser cuts and what sort of finish to expect I set about designing and making a jewellery box for men, ie one which would take watches and cuff links.
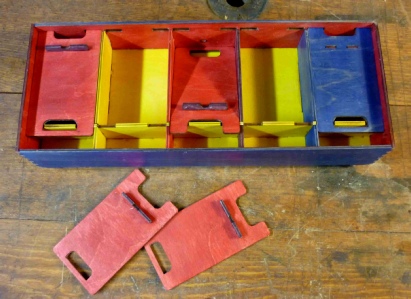
I had discovered that the laser friendly ply is very bland and of a course finish, since the objects I was making were to be handled I wanted a smooth finish, to get away from the blandness of the ply and the occasional smoke mark I decided to stain the wood after sanding and before finishing with a soft furniture wax.
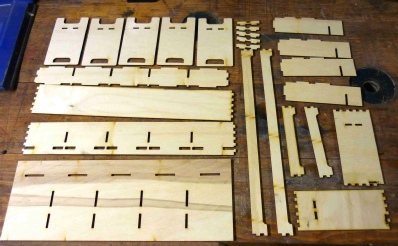
To produce something of this style and scale I also decided to change the method of drawing and created a 3D image using creo where each part was drawn and assembled thus allowing development of fit and connections as well as careful positioning of the tabs etc. From the parametric drawing I generated a nmber of dfx files which were taken into my CAG software where I could remove dimension, and surplus views leaving me with only the flat views to be used for cutting.
This was cut on the laser cutter, during this operation I discovered the necessity to ensure that cut parts fall through cleanly -
For me this has now been a successful project giving me something that has a good appearance, functions well and is adaptable. It not only shows the laser cut fit, but my trays are adaptable. The U shape of each plate s designed to go through a slot in the back which is sized to allow the plate to swing up before removing.