Week 14 – Molding and Casting
Fab Academy – Week 14
Date range: 22 - 28 April
Instructor: Saverio Silli,
🧠 Learning Objectives
- What was this week about?
- What skills were introduced?
📋 Assignments
Individual Assignment
- Design a mold around the process you’ll be using, produce it with a smooth surface finish that does not show the production process toolpath, and use it to cast parts.
Group Assignment
- Review the safety data sheets for each of your molding and casting materials, then make and compare test casts with each of them.
🛠️ Tools & Materials
- Software
- Machines
- Materials
👥 Group Assignment
🧪 Process & Workflow
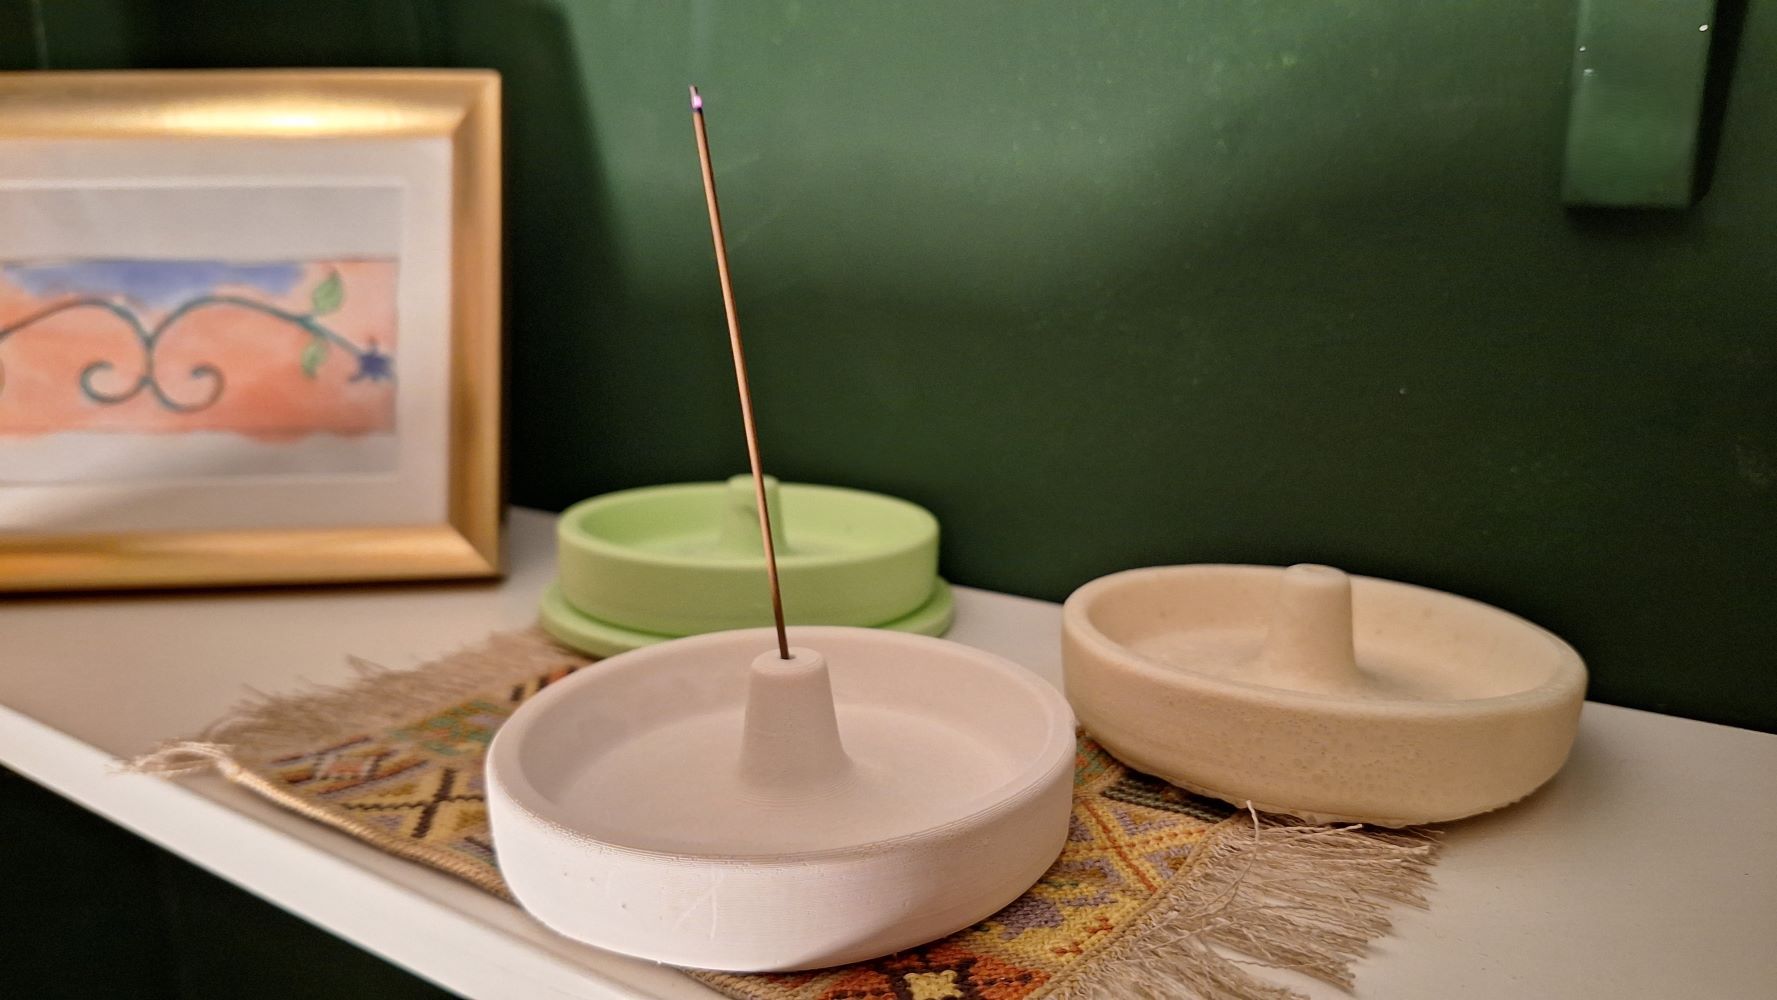
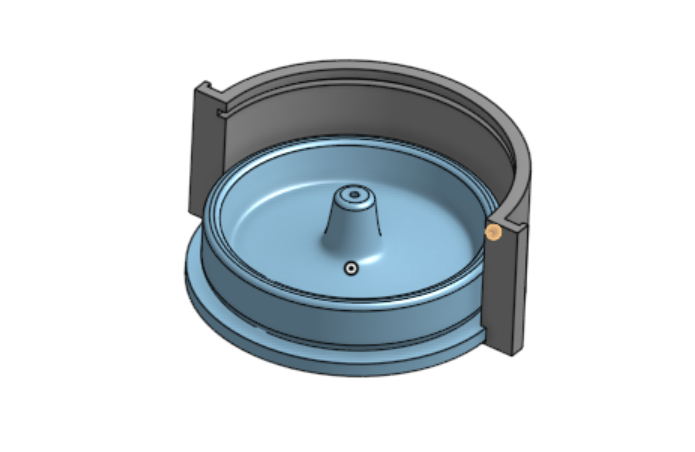
For this week, I decided to create an Incense Stick Holder. The design needed to be functional and aesthetic. To ensure the final piece could be removed easily and had a complex shape, I designed a 3-part mold system in Onshape.
Step 1 – Design
I designed the "Positive" (the final object) first, then created the "Negative" mold around it.
- Part 1 & 2: The outer walls/casing to hold the shape.
- Part 3: The internal core to create the cavity for the incense stick.
Step 2 – Fabrication of the Mold
I chose to 3D print my mold parts to achieve the high detail required for the interlocking pieces.
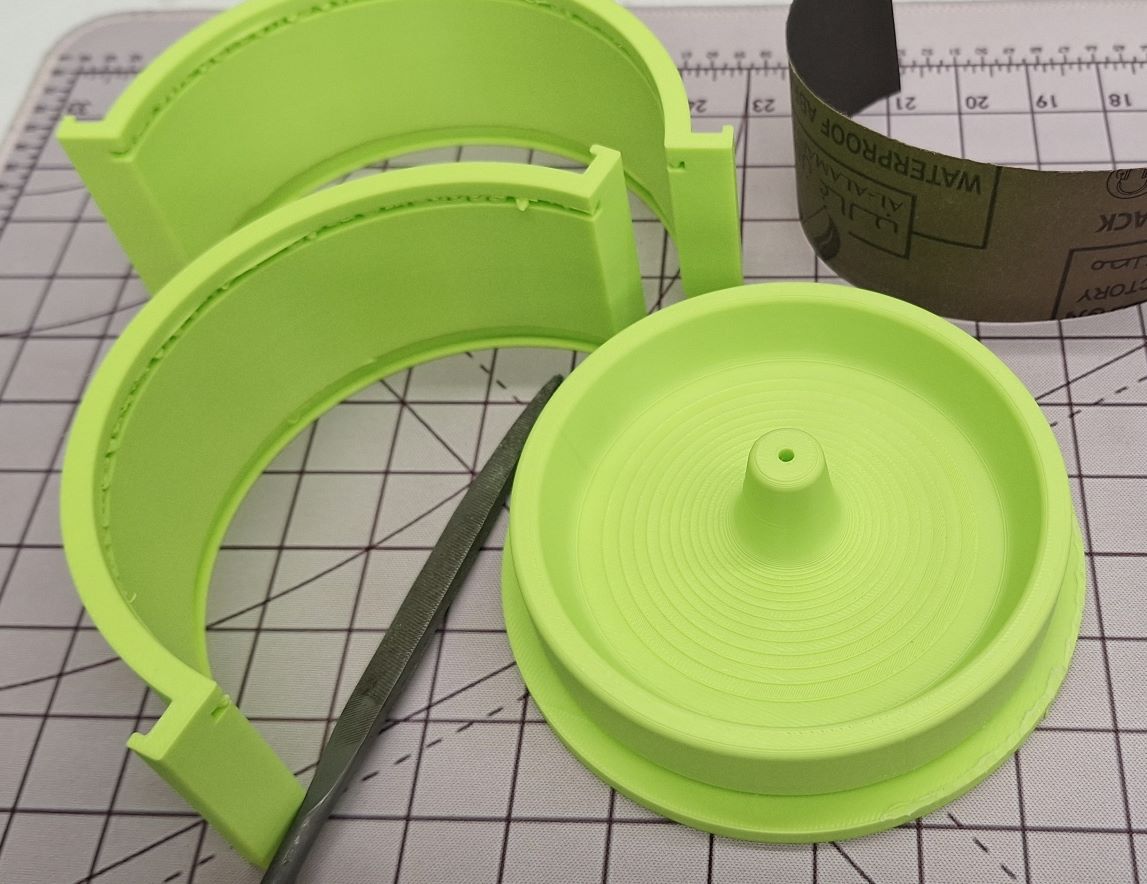
After printing, the surfaces had some layer lines. To ensure a smooth finish on the final cast:
- I sanded the internal faces of the 3D printed mold using progressively finer grit sandpaper.
- To prevent the silicone from sticking to the PLA plastic, I applied a thin coat of WD-40 as a release agent.
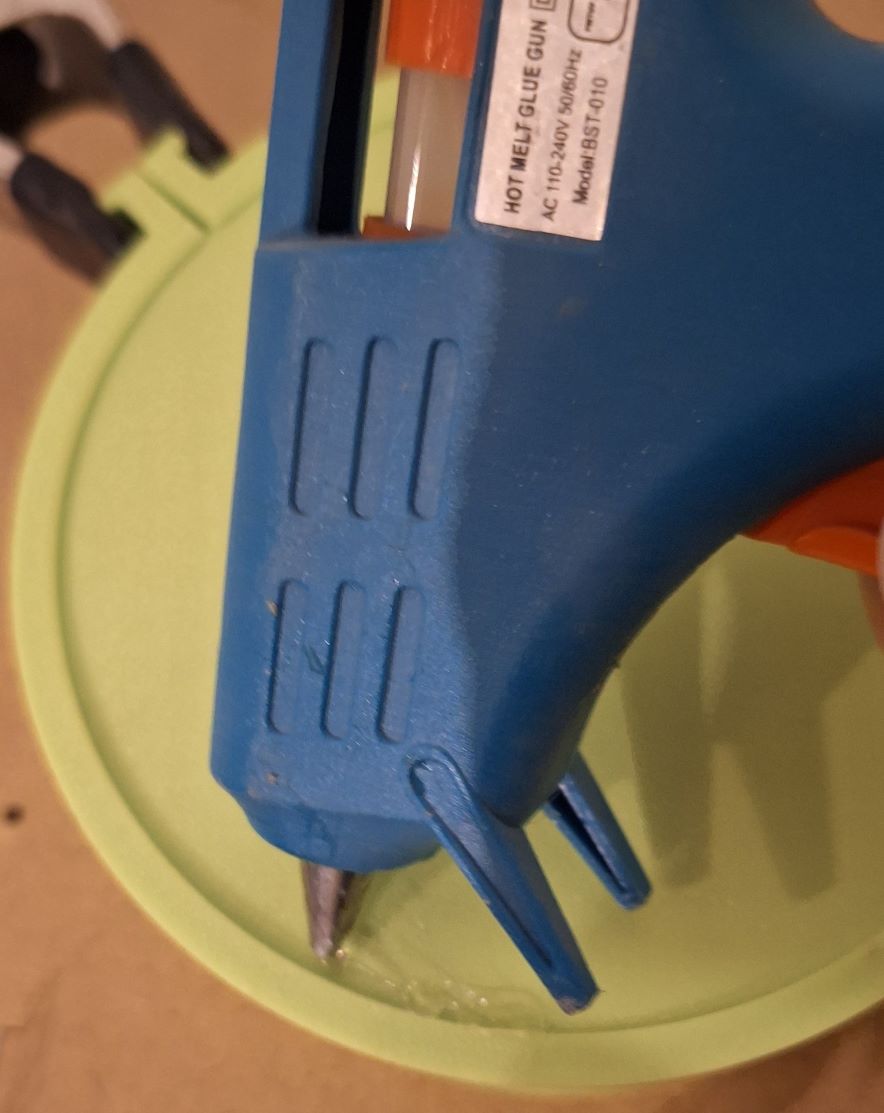
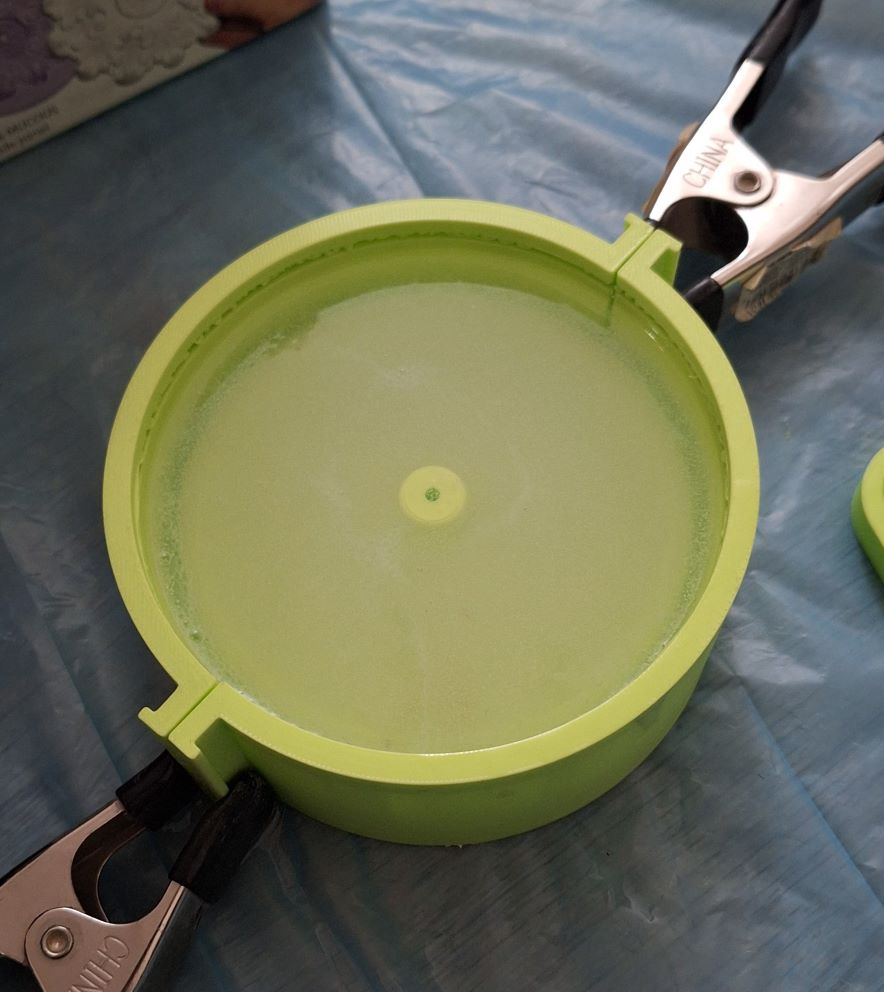
- I also used a hot glue gun to seal all parts together to avoid leaking.
Step 3 – Creating the Silicone Mold
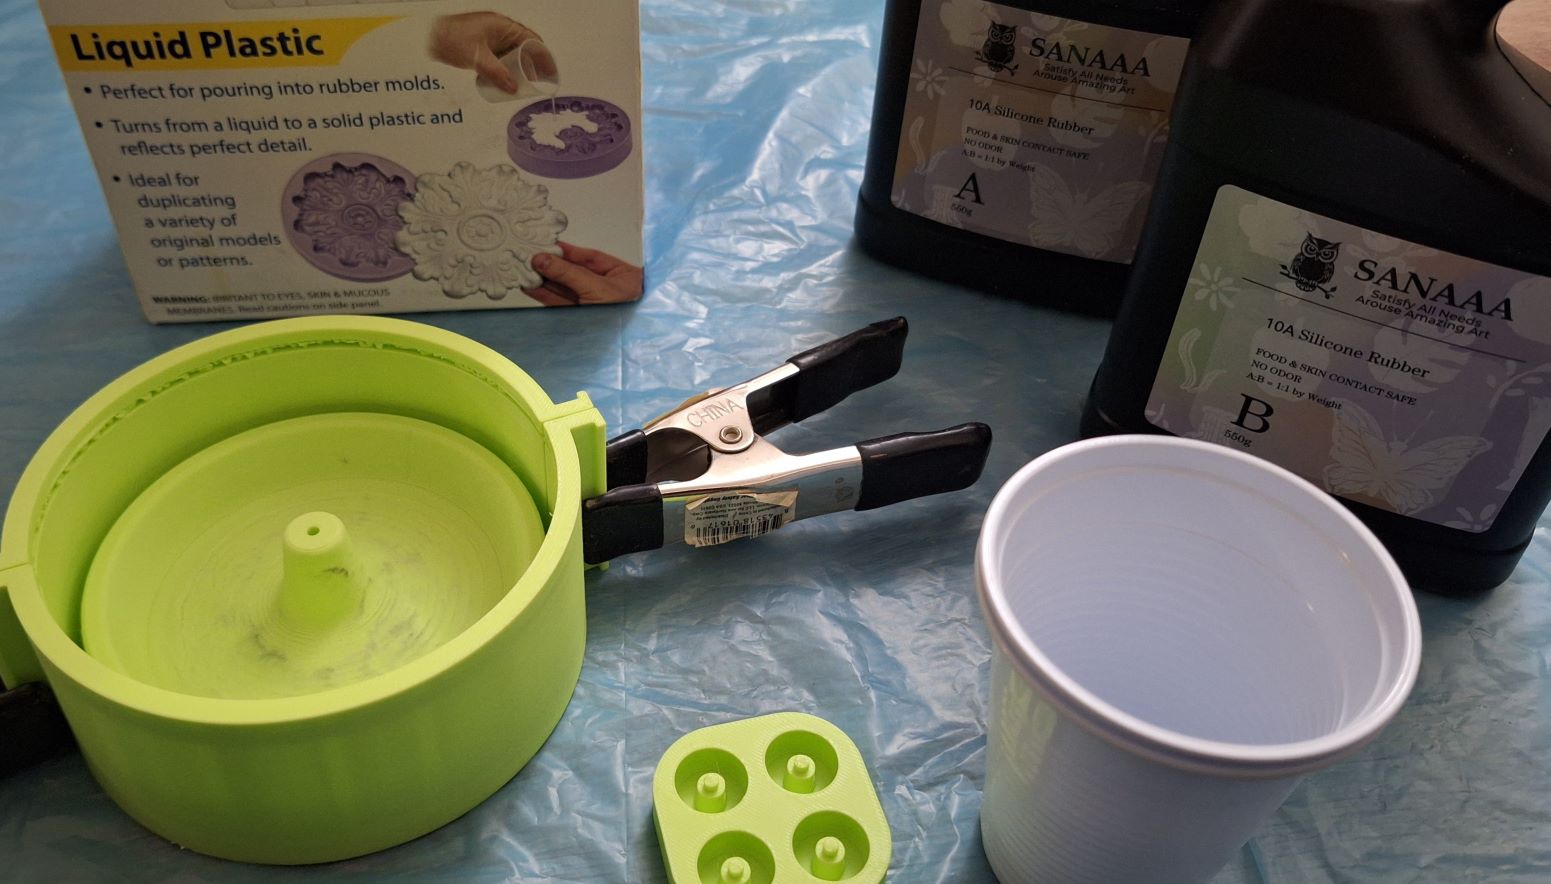
I used a crafts-brand silicone elastomer consisting of Part A and Part B (1:1 ratio).
- I measured equal parts of A and B by volume.
- I mixed slowly to avoid introducing excess air bubbles.
- I poured the mixture into the 3D printed assembly.
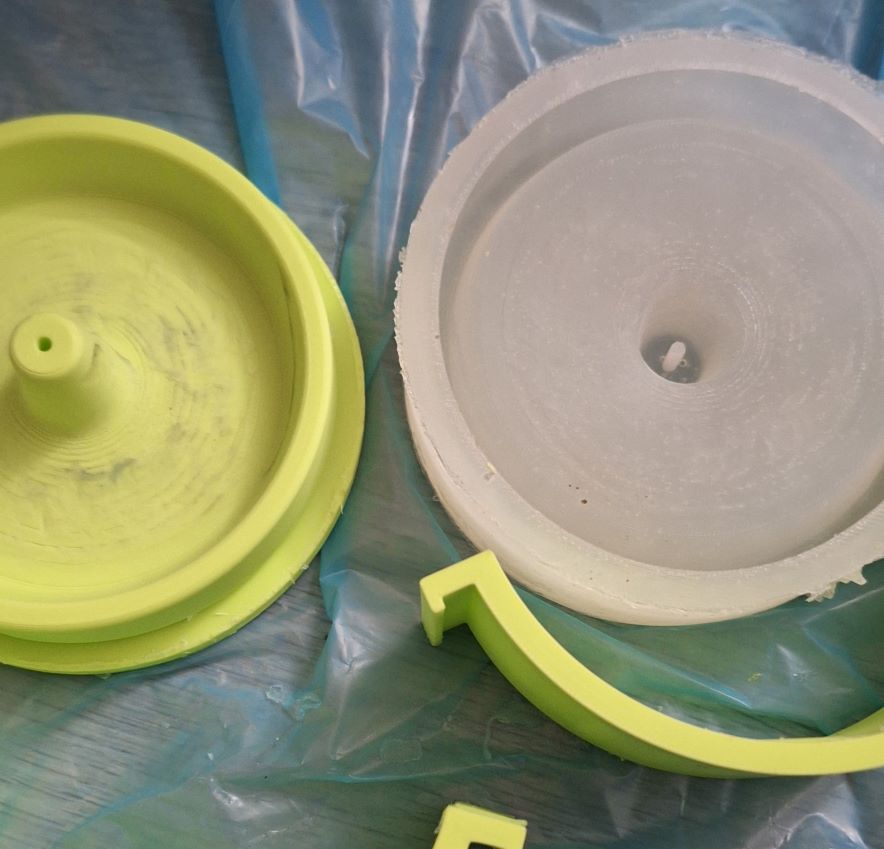
- Curing: I left the silicone to cure overnight.
The next day, the silicone was easily removed from the 3D printed housing thanks to the WD-40 coating.
Step 4 - Casting Experiments
Attempt 1: Smooth-On 321 (Liquid Plastic)
I attempted to cast using Smooth-On 321. To keep the flexible silicone mold stable during the pour, I re-inserted the silicone back into the 3D printed mold walls to act as a rigid "jacket."
- The Issue: Immediately after mixing and pouring, the material began to react strangely. It formed a massive amount of bubbles and started expanding.
- Result: It cured in about 30 minutes, but the texture was "foamy" and full of air pockets. This was likely due to the material being expired or contaminated by moisture.

Attempt 2: Mineral Resin (ResinKitchens)
For the second attempt, I used a material similar to Jesmonite from ResinKitchens. This is a water-based composite material.
- Process: I mixed the liquid and powder components as per instructions 2.5:1
- Curing: It cured in approximately 1 hour.
- Result: The cast was successful! The surface was smooth, the details from the mold were captured perfectly, and it felt much more premium than the plastic attempt.
picture!!
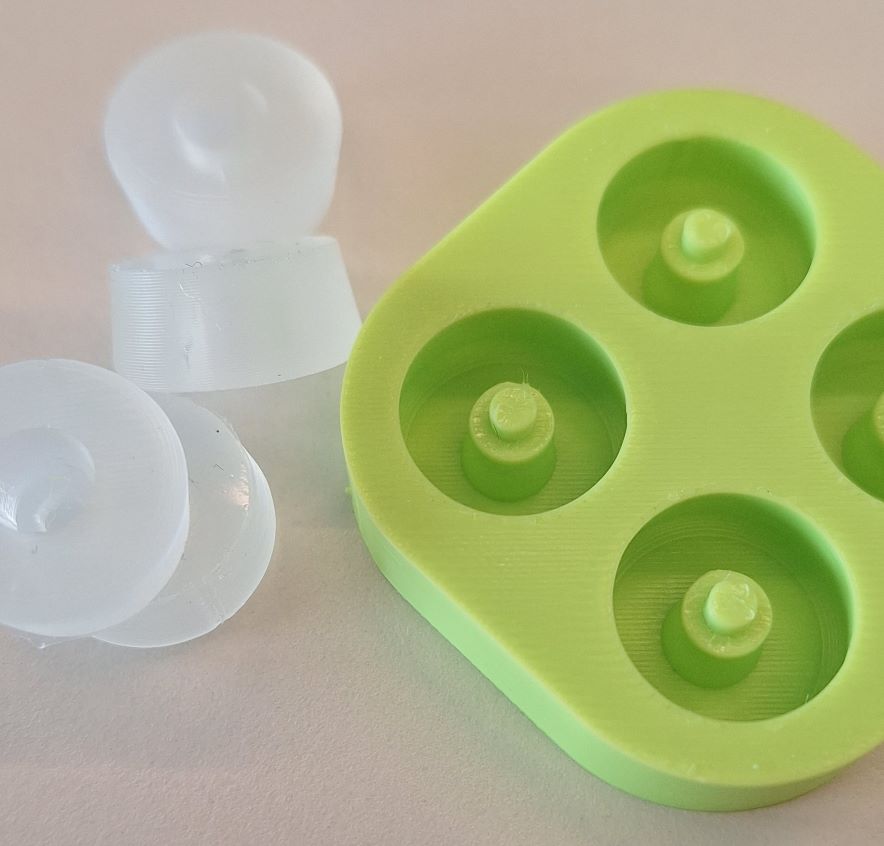
Final Project - Making rubber feet
To add a functional element to my fabrication skills, I decided to cast custom vibration-dampening feet for my final project enclosure. These are designed to be attached with screws.
I Design a simple one-part open mold designed in Onshape, featuring a central pillar to create the screw hole. Then 3D printed the mold. Since it was a simple pull, no complex registration was needed.
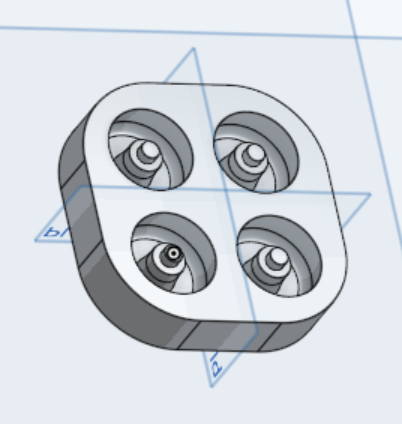
I Poured the same 1:1 craft silicone used for the incense mold. The feet turned out excellent, a little bit too soft.
🧩 Files
- Design files (Tiny Feet)
- Design files (Incense Holder)
- Downloads
📝 Reflection
- Material Reliability: I learned that polyurethane resins (like Smooth-On) are extremely sensitive to shelf life and humidity. The "funny" look of the first cast was a clear indicator of chemical degradation.
- Mold Support: Using the 3D printed walls to hold the silicone mold in place during the second pour was crucial to prevent the weight of the resin from deforming the silicone.
- Release Agents: WD-40 worked surprisingly well as a budget-friendly release agent for the silicone-to-plastic interface.