Week 01 - Principles and Practices, Project Management#
Week 01 is the very first week of Fab Academy 2026! This week is all about understanding how the course works and learning project management, which is basically just a fancy way of saying “planning, organizing, and keeping track of your work.”
Instead of actually making stuff this week, we’re setting up all the tools and systems we’ll use for the rest of the program.
What I Learned This Week#
This week, I learned about these things:
Basics of HTML and CSS Understanding the basics I need to build and customize my own documentation website.
Version control system Learning how to track changes, manage different versions, and keep my documentation and files organized.
Getting Started With Documentation Understanding how Fab Academy wants us to document stuff and how to clearly explain what I’m doing and learning.
Planning Potential Final Projects Brainstorming and sketching ideas for a final project that I’m actually interested in and can do.
Assignments#
The homework for this week was:
• Download, read, and sign the student agreement, then upload it to my repository
• Complete a Git tutorial to learn version control basics
• Make a personal website in the Fab Academy class archive
• Plan and sketch ideas for my final project
My Week Schedule#
| Day | What I Did |
|---|---|
| WED | Class review with Neil |
| THU | Git + Website stuff |
| FRI | About me page |
| SAT | Sketch Final Project + Global open time |
| SUN | Documentation |
| MON | Recitation: version control |
| TUE | Regional Review |
This schedule helped me learn all the new tools while keeping my documentation updated.
Tools I Used#
- Software:
- Git
- GitHub
- VS Code
- HTML/CSS
My Final Project Ideas#
This is where I’m writing down all my ideas for my Fab Academy final project.
Right now, I’m just brainstorming cool things that use building stuff, electronics, computer chips, and digital making tools. Some of these ideas might be too hard or too easy but we’ll figure that out later lol.
Idea 1: TinkerWave – Cool Moving Light Art#
TinkerWave is like an art piece with lights that move!
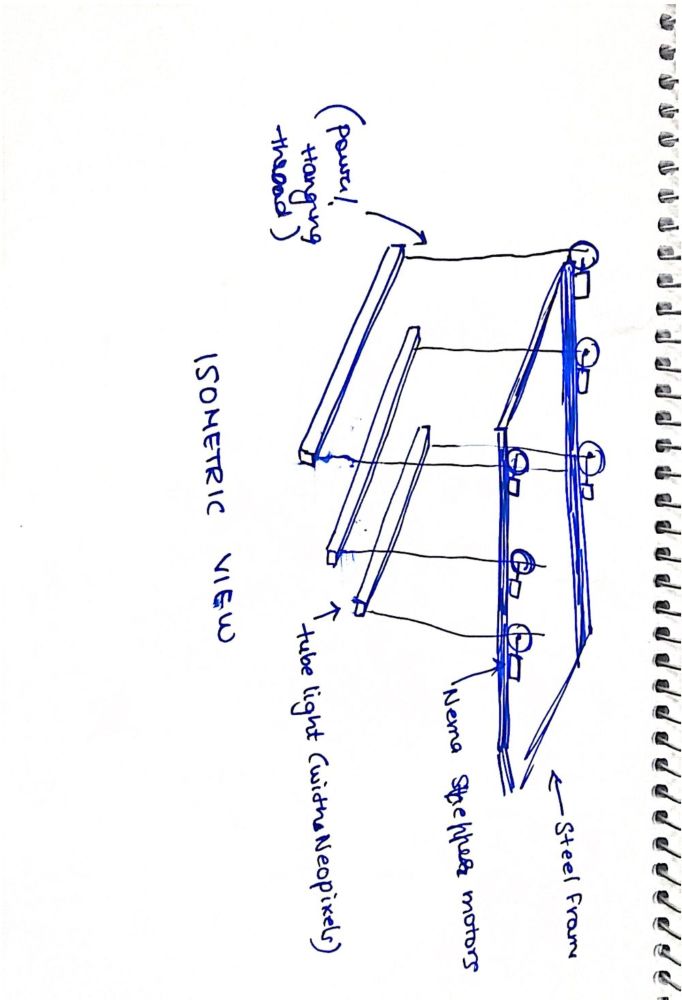
It’s made of about 30 tube lights, but I’ll take out the boring lights inside and put in NeoPixel LED strips so I can make them any color I want and make cool animations.
The tubes would:
- Hang from the ceiling using strings
- Be lined up next to each other with space in between
- Have strings on both ends connected to motors with wheels
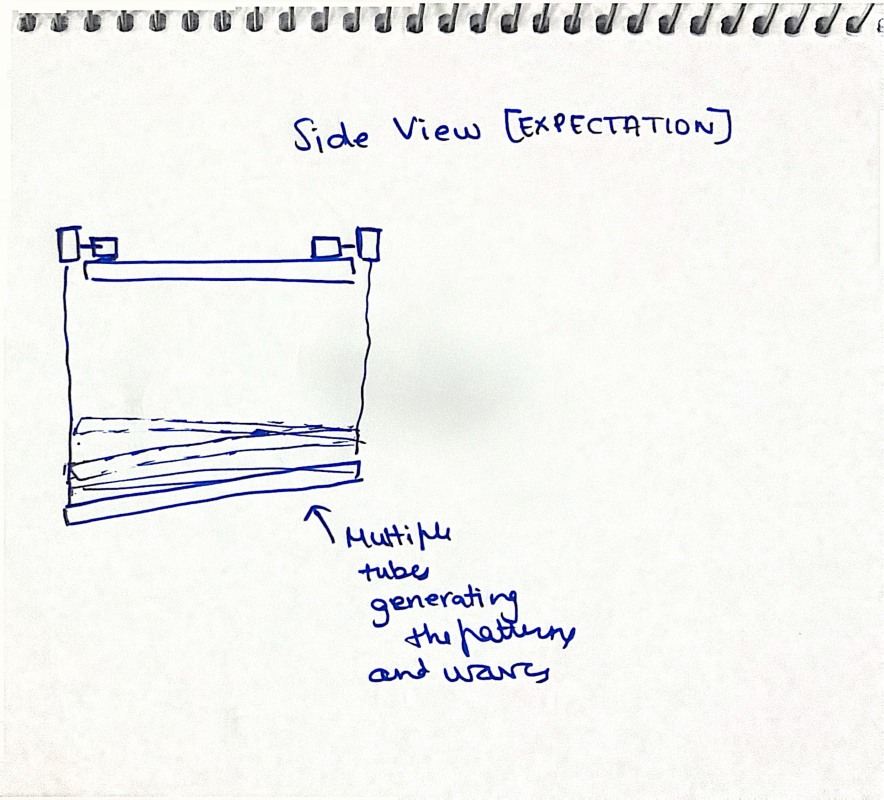
By moving each side up or down, I can make the lights look like waves, slopes, and other awesome moving patterns!
What I Need#
- NeoPixel LEDs
- Stepper motors with wheels and pulleys
- A microcontroller to control everything
- Custom parts to hold it all together
Idea 2: Smart Filament Tracking Dry Box with NFC#
This is a smart filament dry box that keeps my 3D printer filament dry and tells me how much is left.
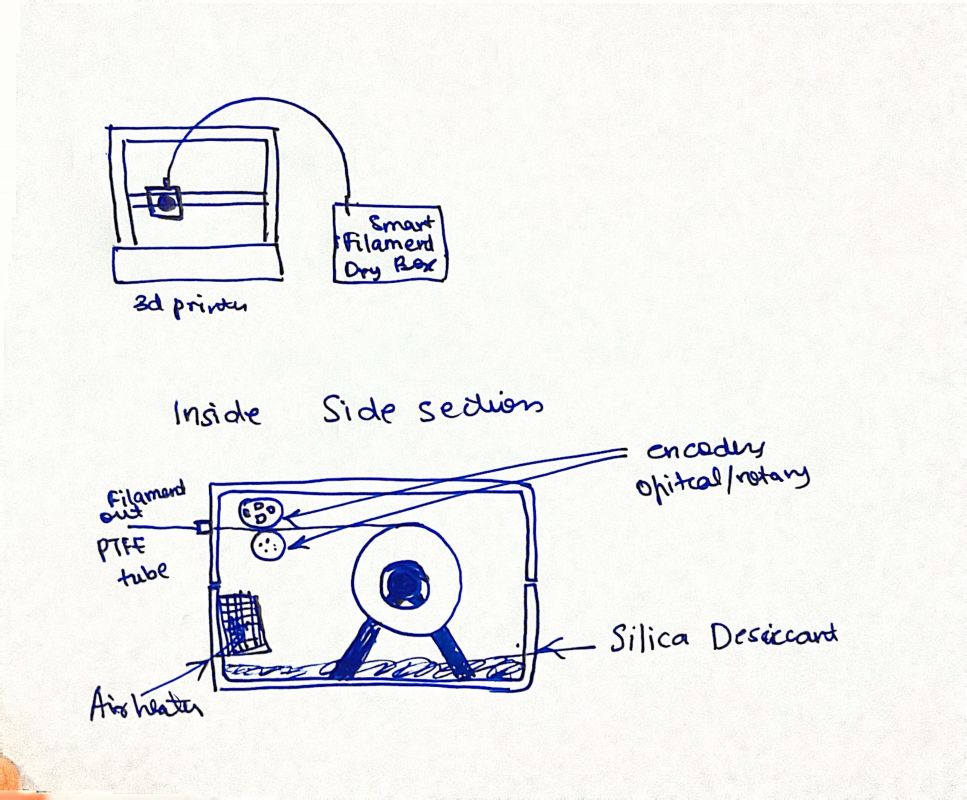
The box would have:
- A sealed dry box enclosure to keep moisture out
- Humidity sensor and active drying system
- Real-time filament usage tracking
I can track the filament by:
- Counting extruder motor rotations (how many times the motor spins) or
- Using a rotary encoder to measure filament movement (a wheel sensor that’s super accurate)
The remaining filament data gets:
- Updated periodically
- Written to an NFC tag (Near Field Communication - it’s like a tiny smart chip) stuck on the filament spool
- Read with my phone or NFC reader before I start printing
What I Need#
- Humidity sensor and drying system
- Rotary encoder / printer signal input
- NFC module
- Microcontroller
- Custom enclosure
Idea 3: Modular Desktop Robotic Arm (Educational)#
A compact, modular robotic arm that I can use to learn and experiment with.
The arm would:
- Have multiple degrees of freedom (DOF - that means how many different ways it can move)
- Be made mostly from 3D-printed structural components
- Use stepper motors or servo motors
- Be controlled by a custom-designed PCB (printed circuit board)
Cool design features:
- Modular joint architecture (each joint can be changed easily)
- Clean cable routing (wires are hidden nicely)
- Parametric CAD design (I can make it bigger or smaller by changing the numbers in the design)
What I Need#
- Motors (stepper / servo)
- Motor drivers
- Custom PCB
- Parametric CAD parts
Idea 4: Smart Tool Cabinet with RFID-Based Access and Usage Tracking#
A smart tool cabinet integrated into a work table that tracks which tools people use.
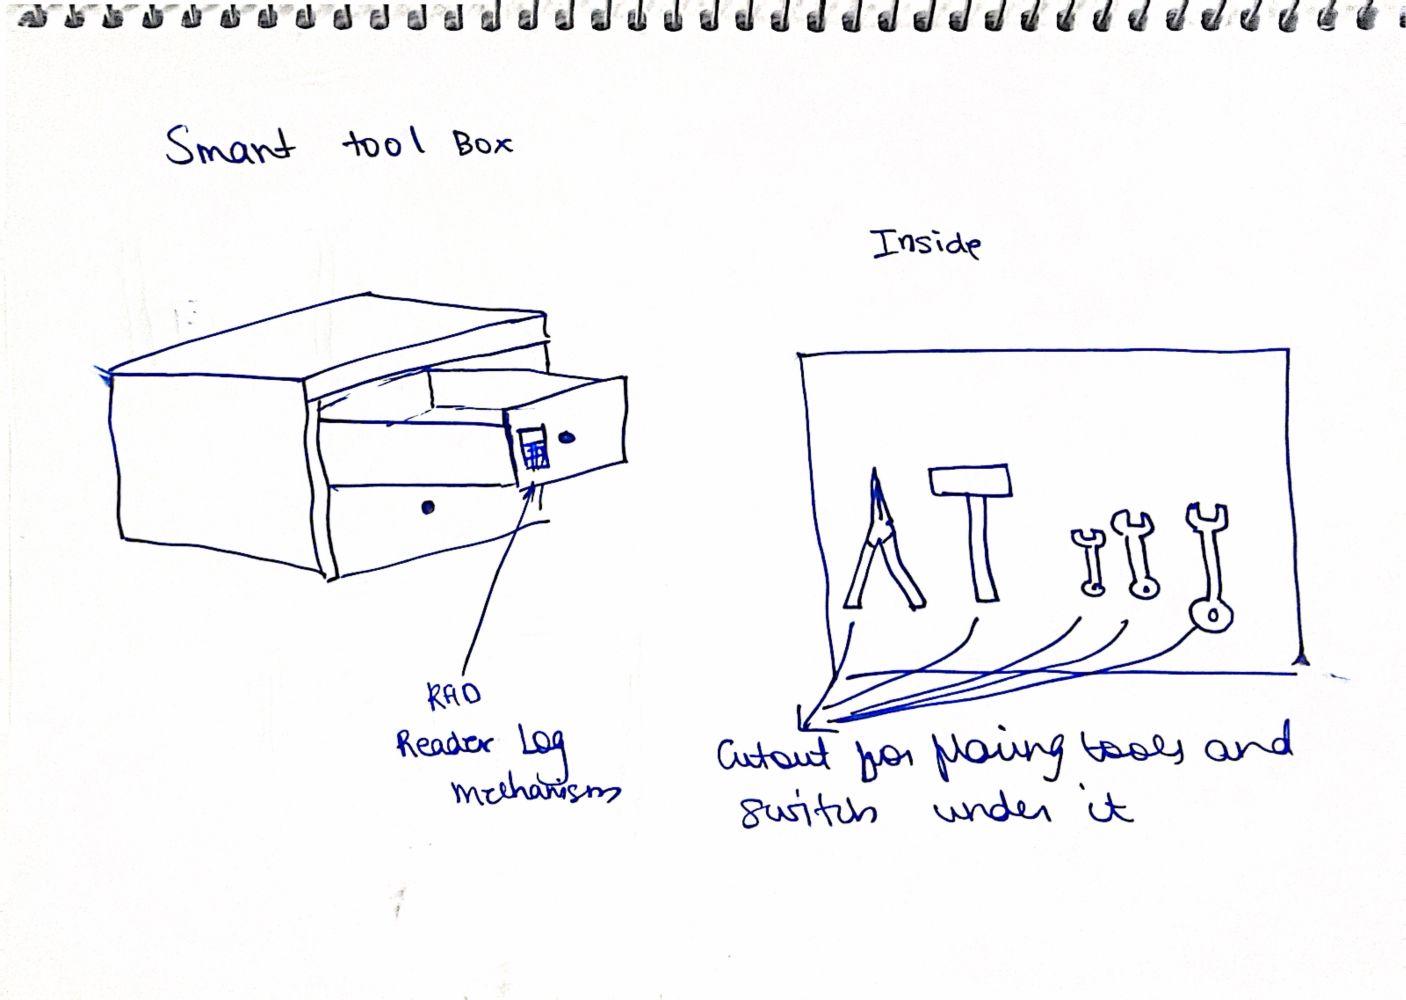
Features:
- Individual drawers or compartments for different tools
- RFID-based authentication (Radio-Frequency Identification - uses special cards like key cards) to unlock drawers
- User identification to know who took which tool
- Tool presence detection using sensors
Every time someone accesses a tool, it logs:
- Which tool was taken
- Who accessed it
- Time and duration of usage
What I Need#
- RFID reader and RFID tags/cards
- Sensors for tool presence detection
- Motorized or solenoid-based drawer locks (electric locks)
- Microcontroller
- Custom table-integrated enclosure
Idea 5: 3D-Printed BLDC Motor with Custom FOC Controller#
This project is about making a fully 3D-printed BLDC motor (that’s a Brushless DC motor - they’re super powerful and smooth!) that can be used in robots, plus making a custom FOC controller (Field-Oriented Control - it’s like the smart brain that makes the motor spin perfectly).
The motor would have:
- 3D-printed stator housing and rotor structure (the parts that don’t move and the part that spins)
- Permanent magnets embedded inside
- Custom copper wire winding configuration
- Design that’s optimized for torque (turning power) and smooth motion
The electronics would have:
- A custom BLDC motor driver PCB
- Phase current sensing (measures the electricity going through)
- Rotor position feedback (knows exactly where the spinning part is)
- FOC algorithms (fancy math code to control everything)
What I Need#
- 3D-printed motor components
- Copper windings and magnets
- Custom motor driver PCB
- Microcontroller capable of FOC
- Current and position sensing
Next Steps#
I’m gonna pick one idea based on:
- Feasibility within the Fab Academy timeline (like, can I actually finish it in time?)
- Complexity and level of system integration (how hard is it and how many things need to work together?)
- Learning depth across multiple domains (how much cool stuff will I learn from doing it?)
- Availability of components and fabrication methods (can I get all the parts and make everything I need?)
Once I figure it out, I’ll pick one and develop it into my final project! Super hyped to see which one I go with.
Learning HTML and CSS - The Basics#
Heads Up!#
I wrote this guide while using Windows, so everything here is for Windows computers. Git works on other computers too, but things might look a bit different on Linux or Mac.
Picking a Text Editor#
So before I could start making websites, I needed a text editor. It’s basically like a super notepad that helps you:
- Write code (HTML, CSS, Markdown)
- Edit files
- Keep your projects organized
Some cool text editors for Windows are:
- Visual Studio Code
- Atom
Which One I Picked#
I went with Visual Studio Code because:
- I already knew how to use it
- It looks really clean and simple
- It works great with Git
- You can use it for tons of different coding stuff
But honestly, you can pick whichever one you like!
How I Got Visual Studio Code#
So here’s how I downloaded VS Code:
- I opened Google Chrome
- Went to the official Visual Studio Code website https://code.visualstudio.com/download
- Downloaded the Windows
.exeinstaller
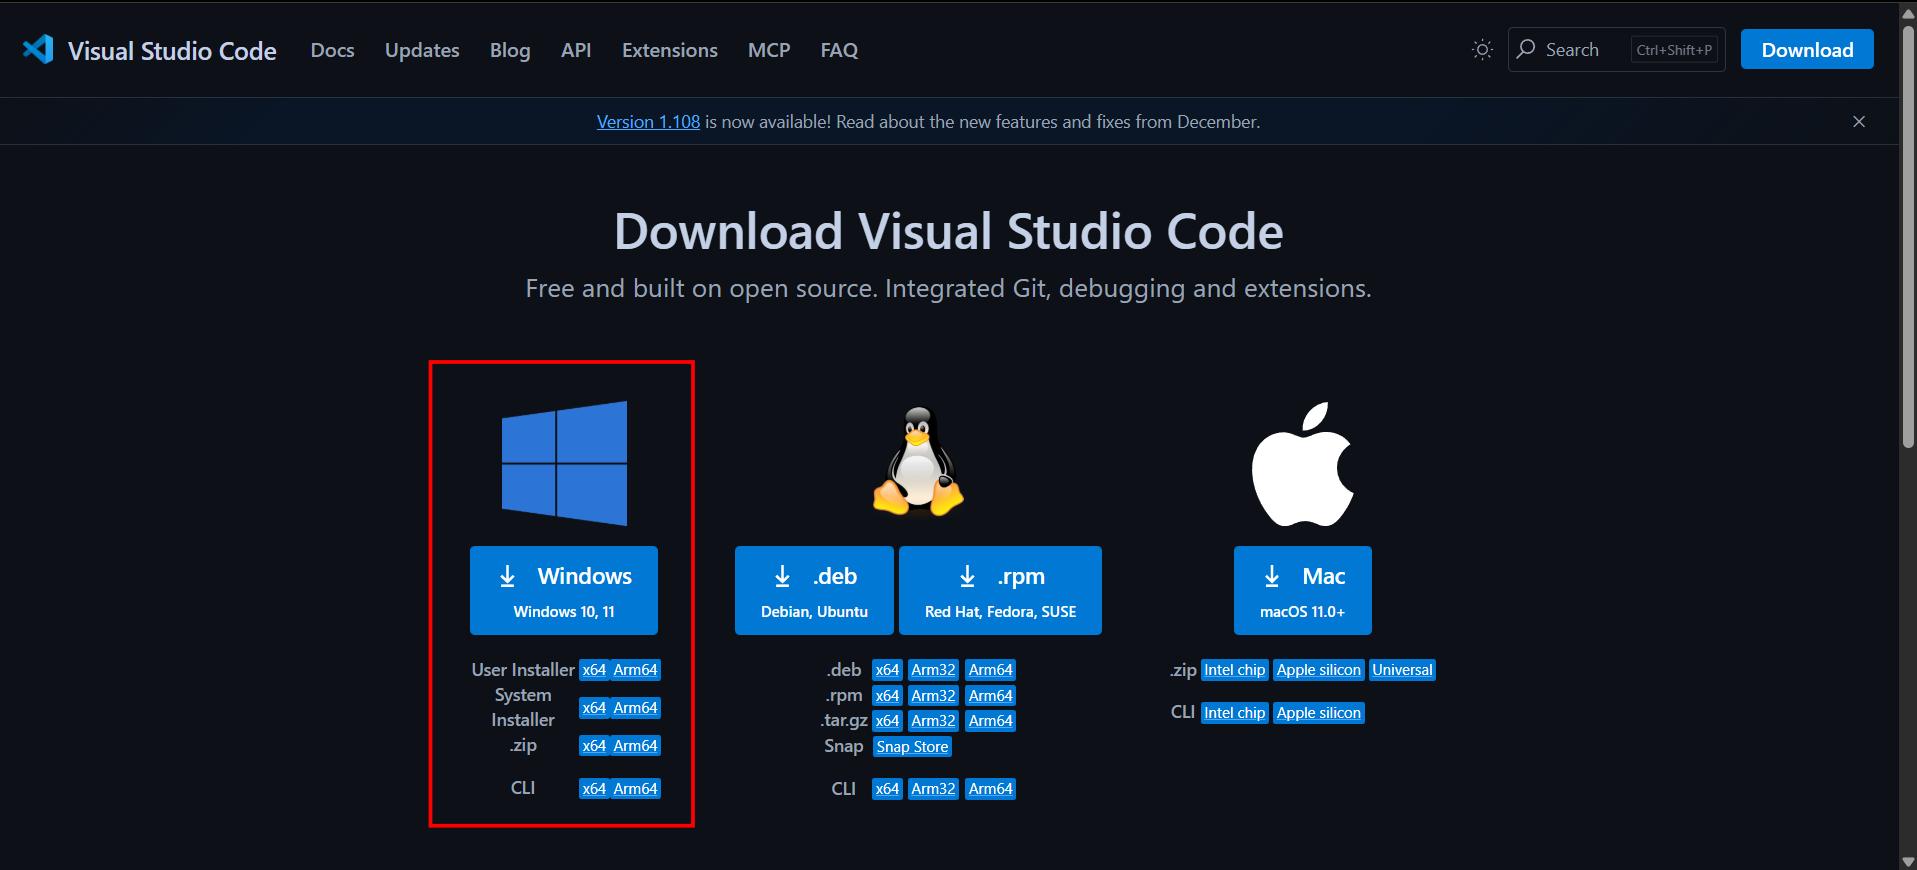
Pro tip: always get it from the official website so you don’t download anything sketchy or sus.
How I Installed Visual Studio Code#
When I was installing it, I just kept most of the settings the way they were.
But I made sure to check this box:
- ✅ Add “Open with Code” action to Windows Explorer
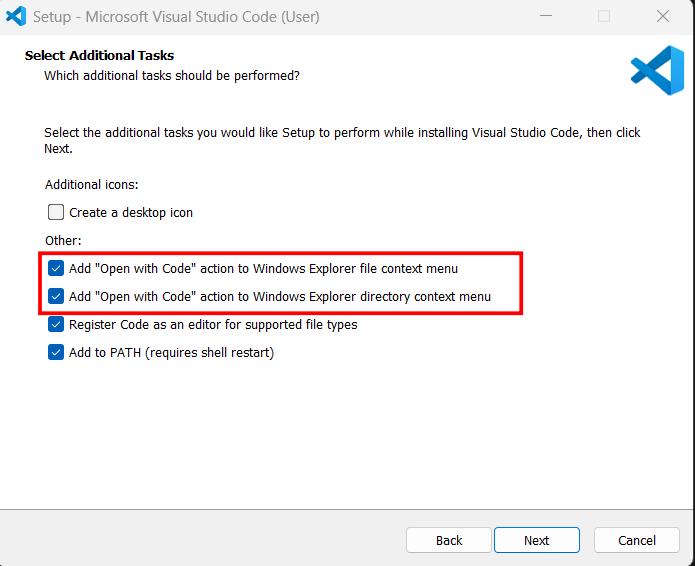
This is lowkey super useful because now I can right-click on folders and open them straight in VS Code!
After that, I was all set!
Adding Extensions#
Extensions are like add-ons that make coding way easier.
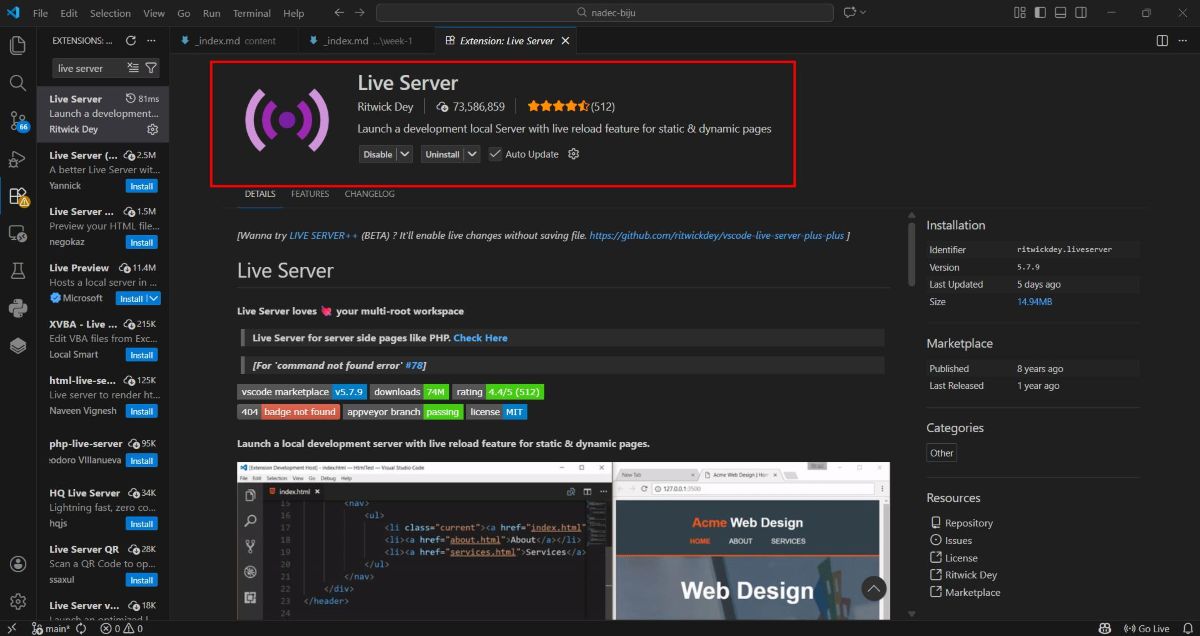
Live Server Extension#
Live Server is awesome because it:
- Opens your website in a browser for you
- Automatically refreshes the page when you save your code
Here’s how I got it:
- I opened VS Code
- Went to Extensions (pressed Ctrl + Shift + X)
- Searched for Live Server
- Clicked Install
Auto Save (So I Don’t Lose My Work!)#
To make sure I don’t lose anything, I did this:
- Clicked on File
- Turned on Auto Save
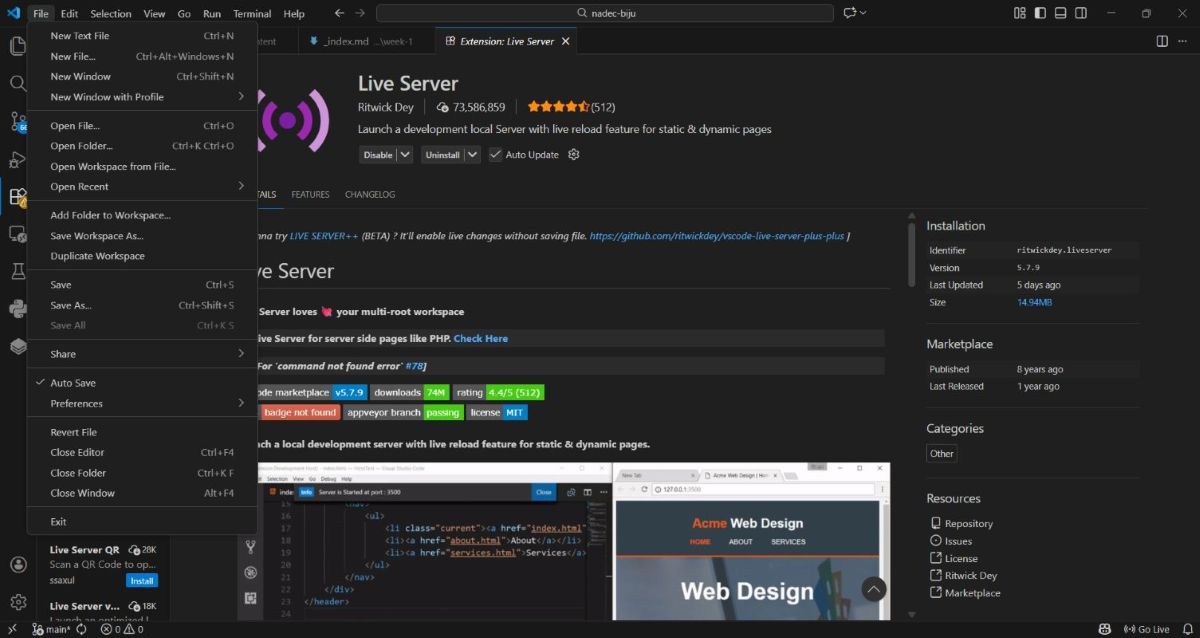
Now my files save automatically while I’m typing. No more losing hours of work, thank god!
Starting with HTML#
HTML is what we use to make websites!
How I Made a New Project in VS Code#
- I opened VS Code
- Clicked File → Open Folder
- Made a new folder and named it something (like
html-basics) - Opened it
This folder is where all my project stuff goes.
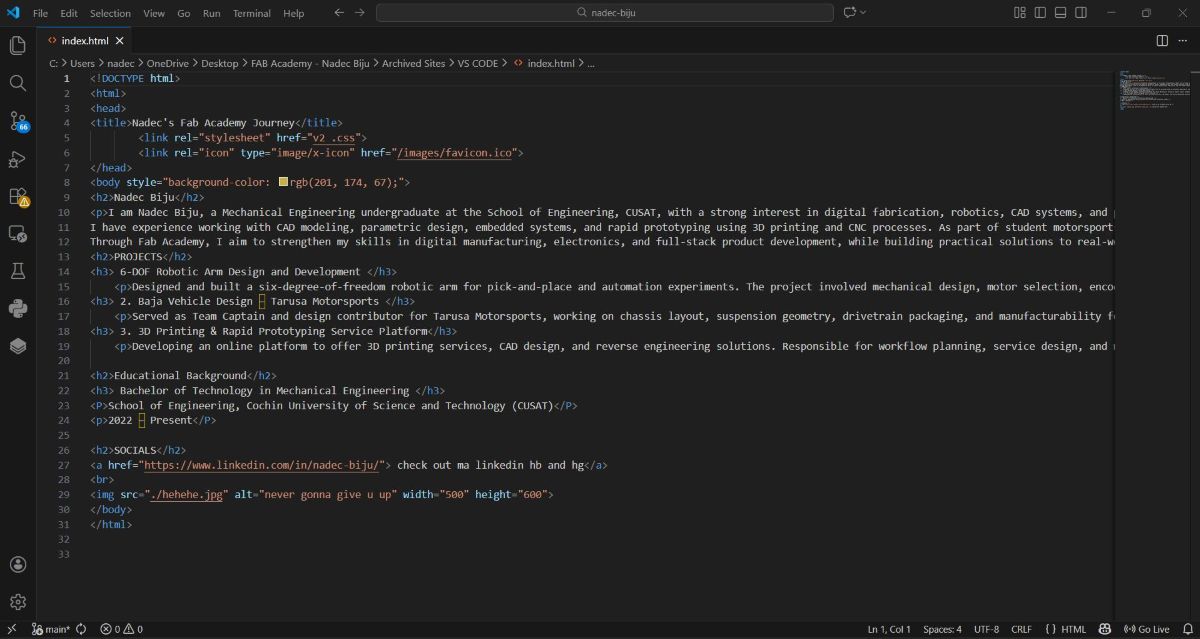
Making My First HTML File#
- I made a new file
- Named it
index.html
Basic HTML Code#
<!DOCTYPE html>
<html>
<head>
  <title>Page Title</title>
</head>
<body>

  <h1>This is a Heading</h1>
  <p>This is a paragraph.</p>

</body>
</html>
What All That Means#
<!DOCTYPE html>#
This tells the browser “hey, this is an HTML file!”
<html>#
This starts your whole webpage
<head>#
This has info about your page
<title>#
This is what shows up on the browser tab
<body>#
This is where all the stuff you actually see goes#
Common HTML Stuff You’ll Use#
Headers and Paragraphs#
<h1>to<h6>are for headers (biggest to smallest)<p>is for regular text paragraphs
Example:
<h1>Main Heading</h1>
<p>This is some regular text.</p>
Adding Pictures#
You can add pictures using the <img> tag:
<img src="image.jpg" alt="Sample Image">src= where the picture isalt= backup text if the picture doesn’t show up
Making Links#
Links are made with the <a> tag:
<a href="https://fabacademy.org">Fab Academy</a>hrefis where the link goes when you click it
Making Things Look Nice with CSS#
CSS (Cascading Style Sheets) makes your website look cool instead of just plain boring text.
Example:
<style>
  body {
    background-color: lightgray;
  }
  h1 {
    color: blue;
  }
</style>
This makes the background gray and the heading blue!
My Practice Website#
I made a test website to practice all this HTML stuff.

- 🌐 Test Site:
https://nb6rules.github.io/fab-purely-html-site/
⚠️ Important:
This website was just for testing and learning. I’m not going to update it and it’s not my real Fab Academy documentation.
My Real Fab Academy Website#
My actual Fab Academy documentation website (the one I’m updating every week with all my work) is here:
- 🌐 Fab Academy Site:
https://fabacademy.org/2026/labs/kochi/students/nadec-biju/
Where All My Code Is#
All my website files are on GitHub if you want to see them.
- 📂 GitHub Repository:
https://github.com/NB6RULES/fab-purely-html-site/deployments/github-pages
Helpful Websites#
If you want to learn more about HTML and CSS, check out:
- https://www.w3schools.com/html/
- https://developer.mozilla.org/en-US/docs/Web/HTML
- https://www.w3schools.com/css/
Learning Git (For Windows)#
What’s Git Anyway?#
Git is like a time machine for your files. It keeps track of every change you make so you can:
- See what you changed and when
- Go back to older versions if you mess something up
- Stay organized with your projects
In Fab Academy, we use Git to keep track of our documentation, code, and design files.
How I Got Git on My Computer#
- I opened my web browser
- Went to the official Git website:
https://git-scm.com/ - Downloaded the Windows installer
- Ran it and just kept clicking next (the default settings are fine lol)
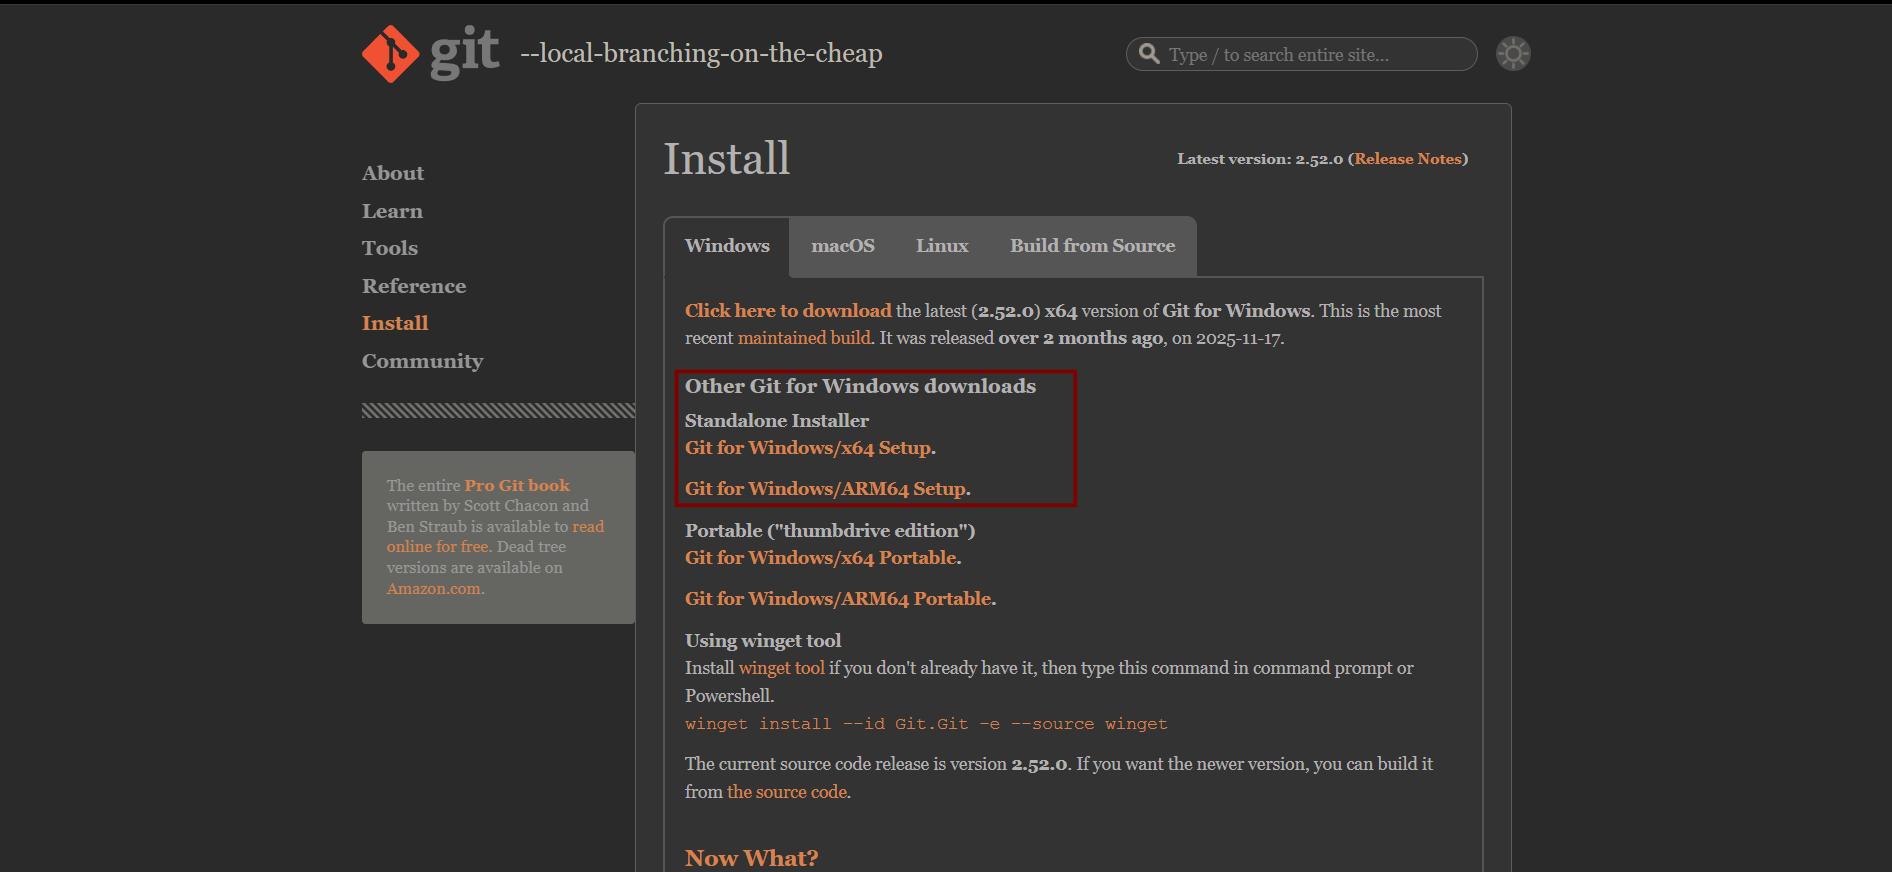
After that, I had something called Git Bash on my computer!
What’s Git Bash?#
Git Bash is basically a special terminal where I can type Git commands on Windows.
It works like a Linux command line, which is what most people use for Fab Academy.
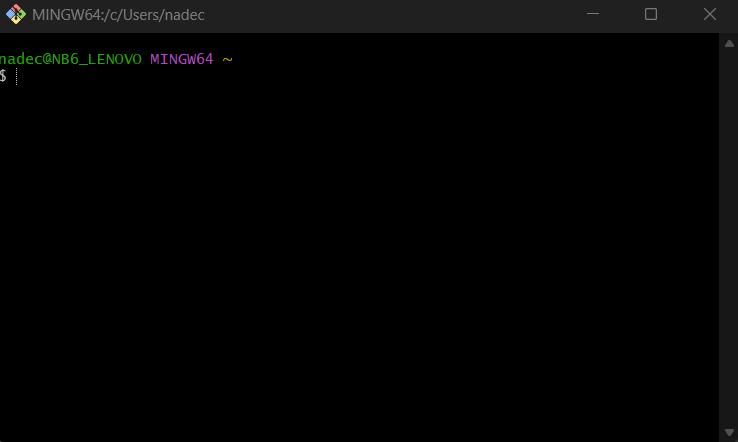
To open Git Bash, I just:
- Right-click inside any folder
- Click “Open Git Bash here”
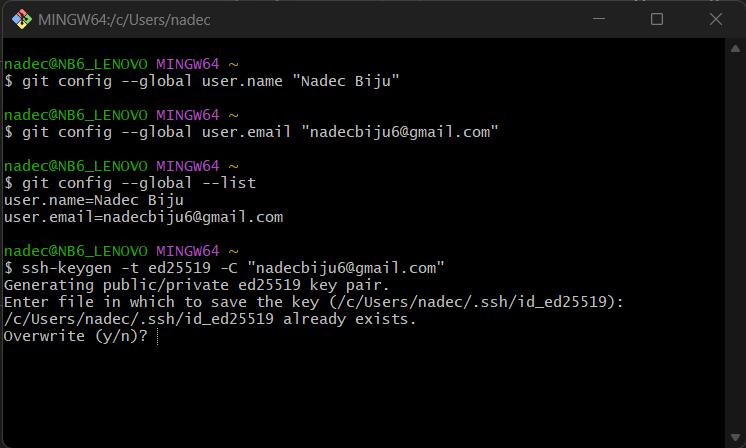
How I Set Up Git With My Info#
Before I could use Git, I had to tell it who I am:
git config --global user.name "Your Name"
git config --global user.email "your-email@example.com"
To make sure it worked, I typed:
git config --global --list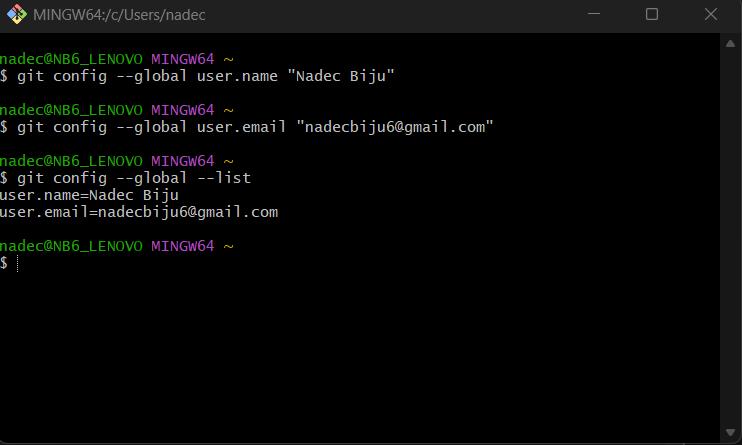
What I Did Next?#
- Learned the basic Git commands
How I Connected GitLab to My Computer Using SSH#
For Fab Academy, we use GitLab to store and submit our documentation.
This part is about how I logged in to GitLab, got my repository, and set up SSH keys on Windows.
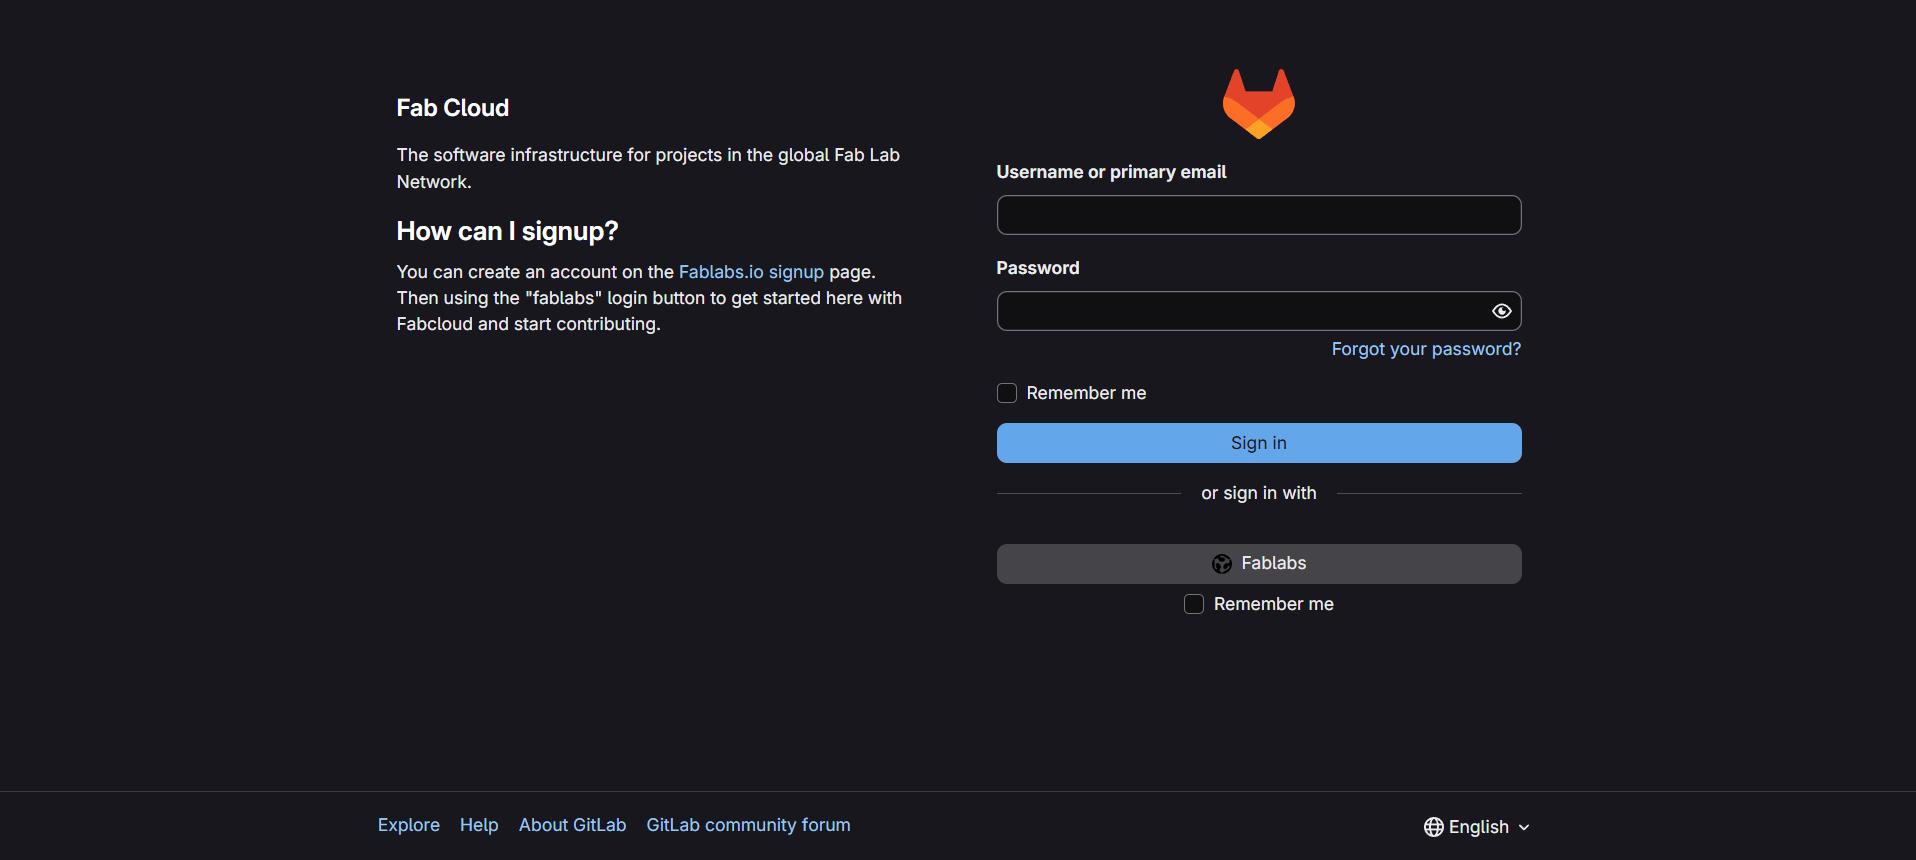
How I Logged Into GitLab#
- I opened my web browser
- Went to the Fab Academy GitLab website
- Logged in with the username and password Fab Academy gave me
- Found my personal repository
How I Made an SSH Key (Windows)#
I opened Git Bash and typed this:
ssh-keygen -t ed25519 -C "your-email@example.com"- I just pressed Enter to use the default location
- You can add a password or just press Enter to skip it
This made two keys:
- A private key (gotta keep this secret!)
- A public key (this one gets shared)
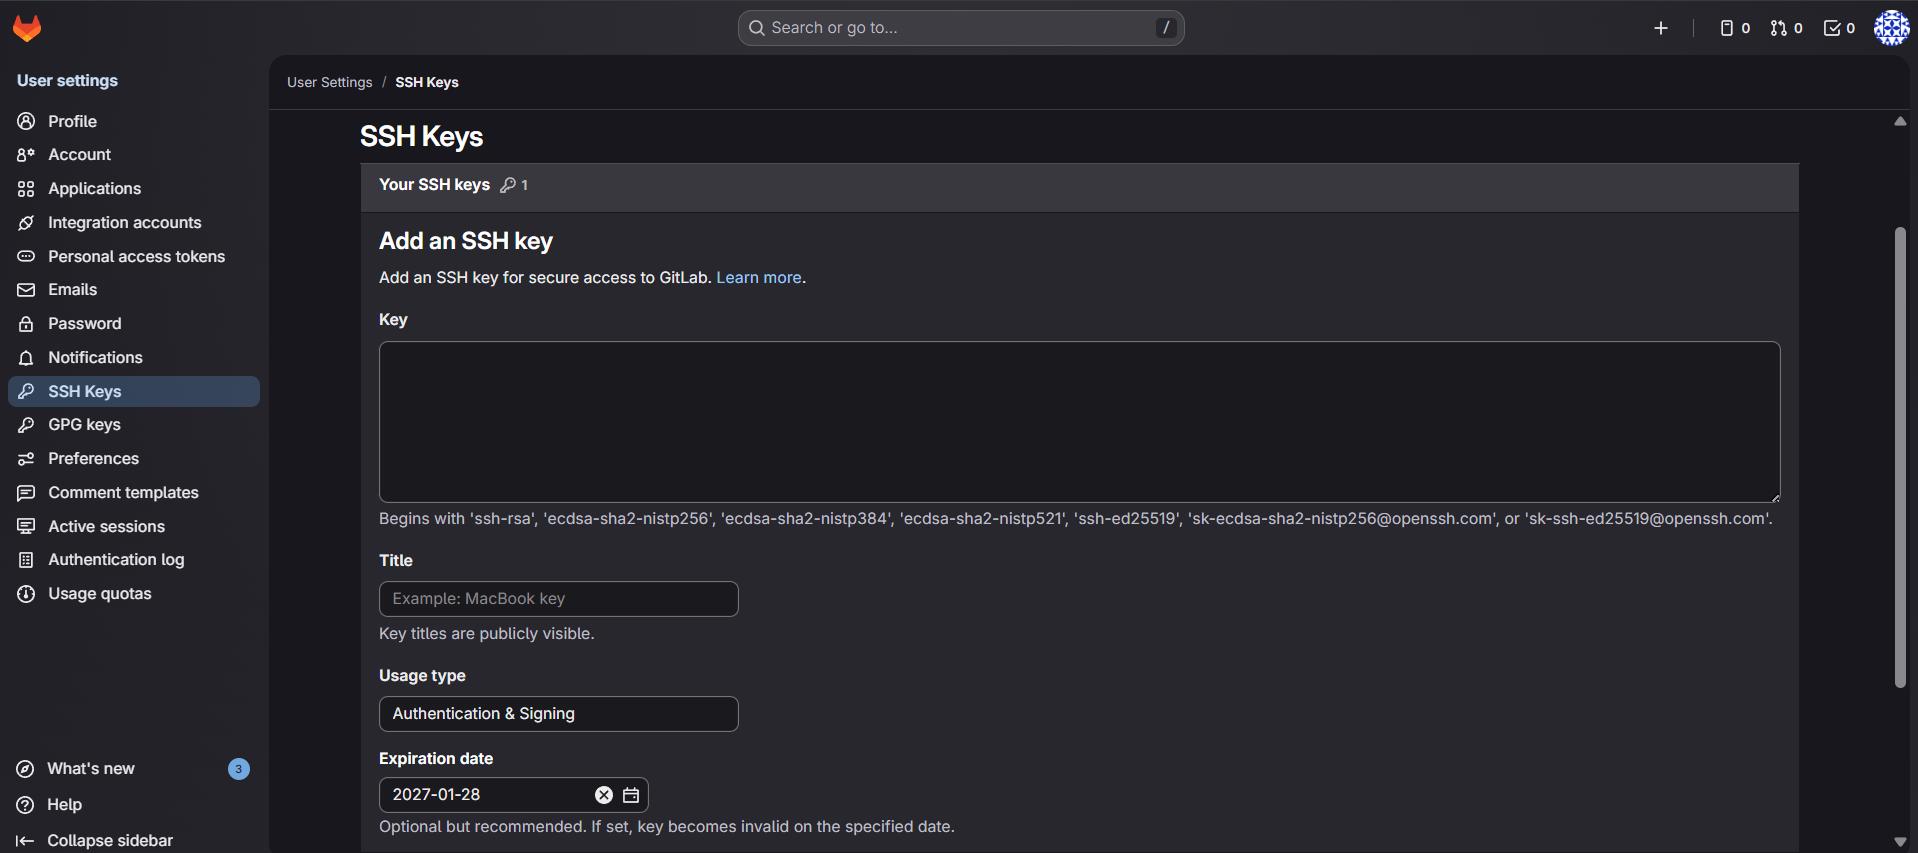
How I Added My SSH Key#
First I started the SSH thing:
eval "$(ssh-agent -s)"Then added my key:
ssh-add ~/.ssh/id_ed25519Got my public key by typing:
cat ~/.ssh/id_ed25519.pubThen:
- I copied everything that showed up
- Went to GitLab → Preferences → SSH Keys
- Pasted it in the Key box
- Clicked Add key
Testing If It Works#
To check if SSH was set up right, I typed:
ssh -T git@gitlab.fabcloud.orgHow I Got My Repository Link (SSH)#
- I opened my repository page on GitLab
- Found the SSH link on the page
- Copied it (it looks something like
git@gitlab.fabcloud.org:username/repo-name.git)
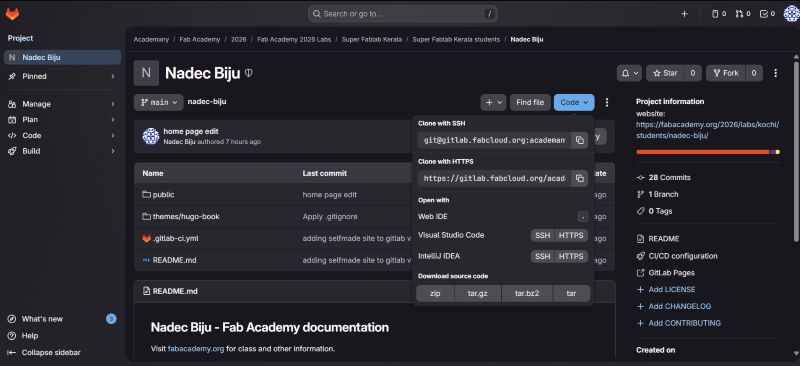
How I Downloaded My Repository#
I went to the folder where I wanted my project and typed:
git clone git@gitlab.com:username/repository-name.git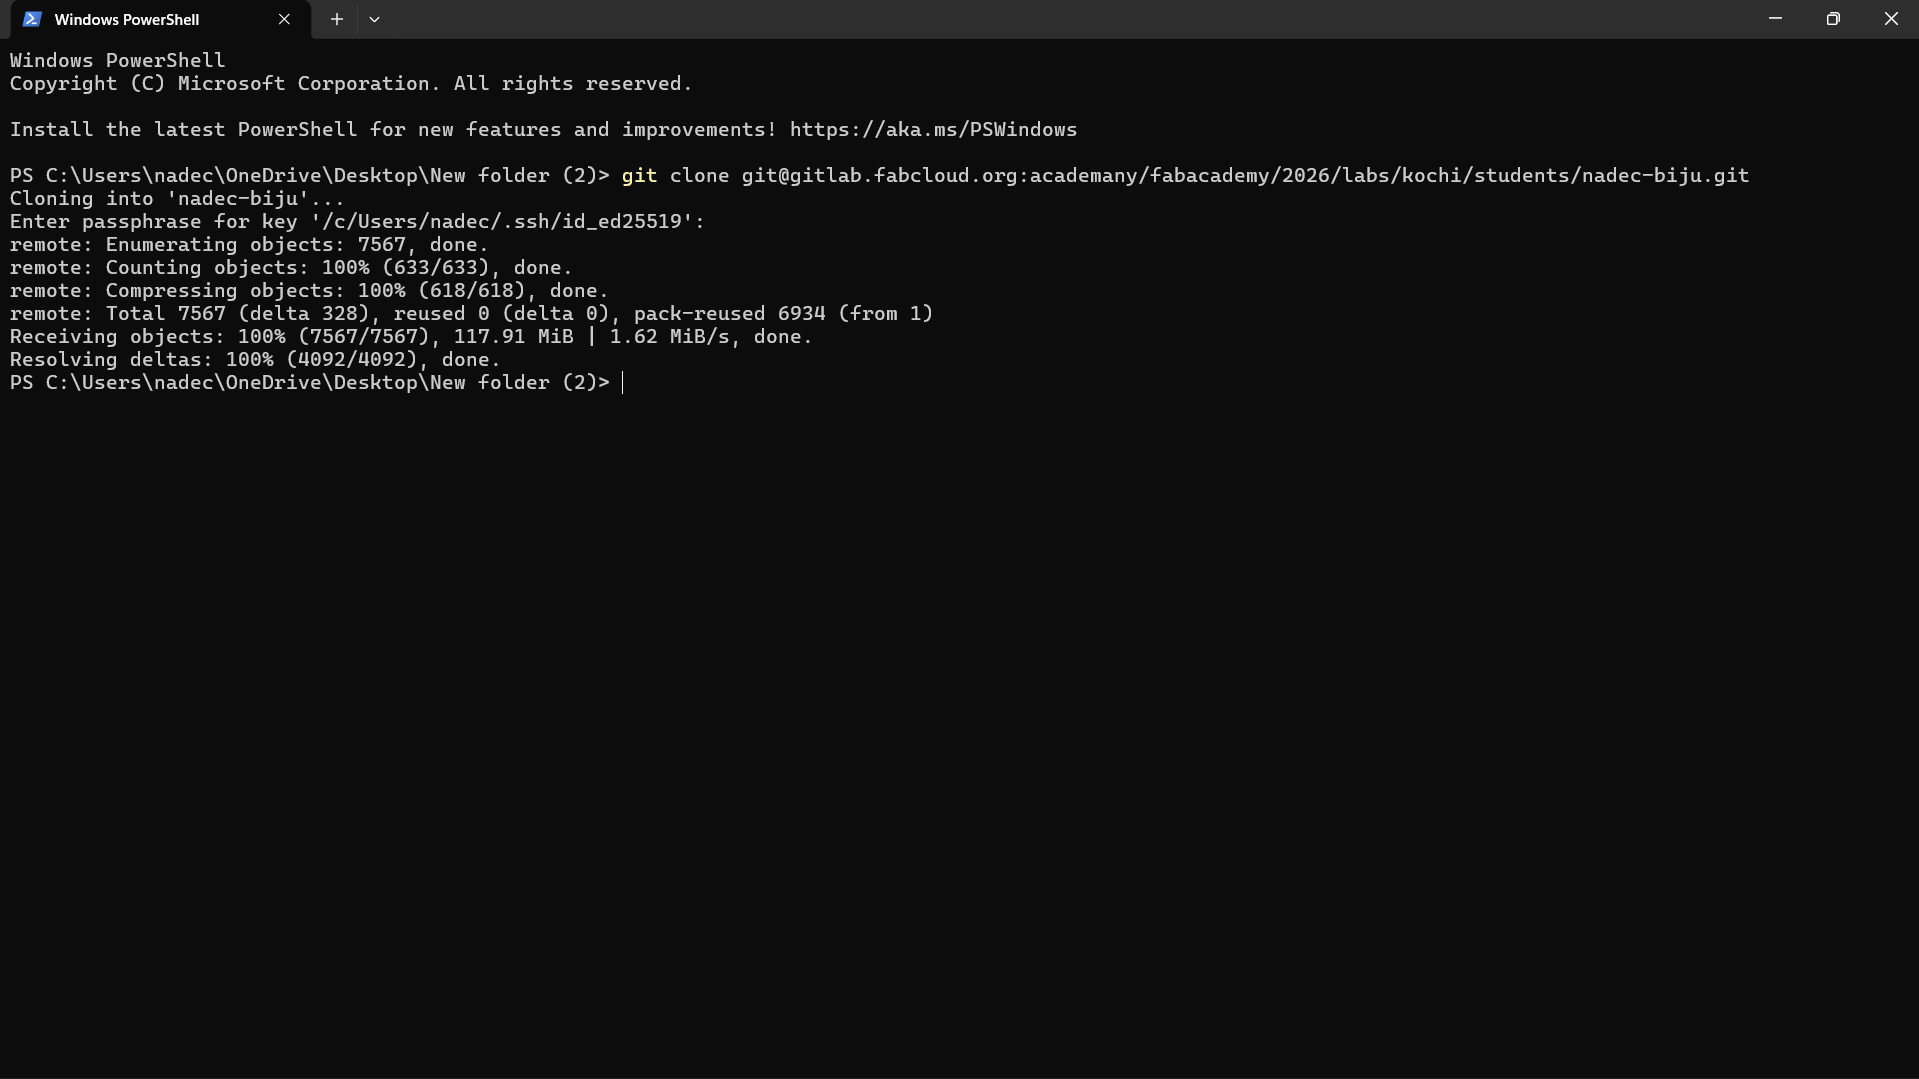
What I Do With Git Every Day#
After I set everything up the first time, here’s what I do every day to update my documentation and files.
First I check what changed:
git status Then I add all my changes:
git add .Save my changes with a note about what I did:
git commit -m "Week 01 documentation update"And finally upload everything to GitLab:
git push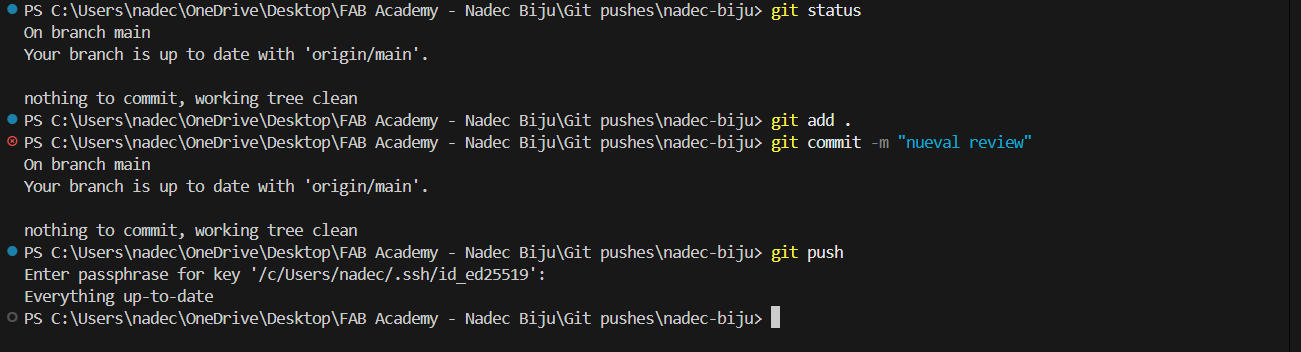
How I Started Making My Documentation Website#
So I made a basic HTML website first to understand how websites work. But then I wanted something better for my Fab Academy stuff.
I talked to my friend Rishi Krishna (https://rishikrishna.com/ ) and he told me about this cool thing called Hugo. It’s way easier than writing HTML for everything!
Why Hugo is Pretty Cool#
Hugo takes simple text files and turns them into a whole website. It’s awesome because:
- You just write in Markdown (which is super easy)
- It makes all the pages and menus for you
- You can add tons of pages without it getting messy
- The website loads really fast
- You don’t have to worry about the design stuff as much
This is perfect for Fab Academy because there’s SO much stuff to document every week.
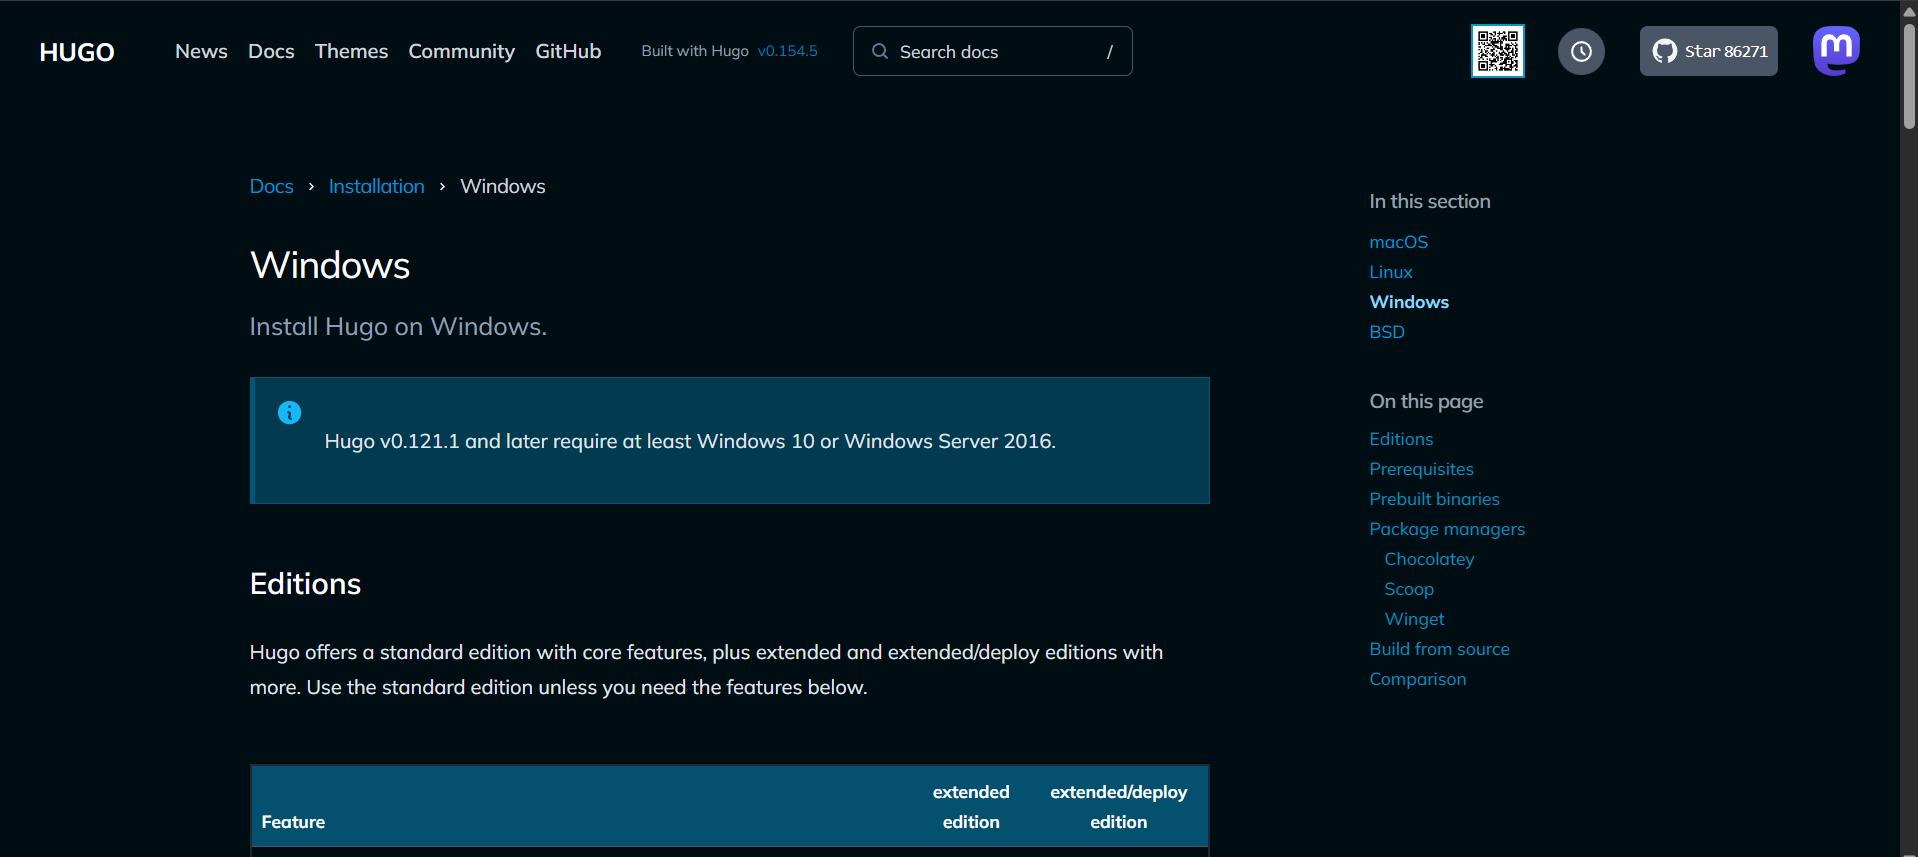
Getting Hugo on My Computer (Windows)#
Step 1: How I Downloaded It#
- I opened my browser
- Went to https://gohugo.io/
- Downloaded the Windows (extended) version
- Unzipped the file I downloaded
Step 2: Making Windows Know About Hugo#
- I put the
hugo.exefile somewhere (I usedC:\Hugo\bin) - Opened System Properties → Environment Variables
- Added that folder to the Path thing
- Closed and reopened VS Code
To check if it worked, I opened Git Bash or Command Prompt and typed:
hugo versionHow I Made a New Hugo Website#
I opened Visual Studio Code and opened the folder where I wanted my website.
Then I typed this in the terminal:
hugo new site nadec-bijuThis made a bunch of folders that look like this:
my-fab-docs/
├── archetypes/
├── content/
├── layouts/
├── static/
├── themes/
└── hugo.toml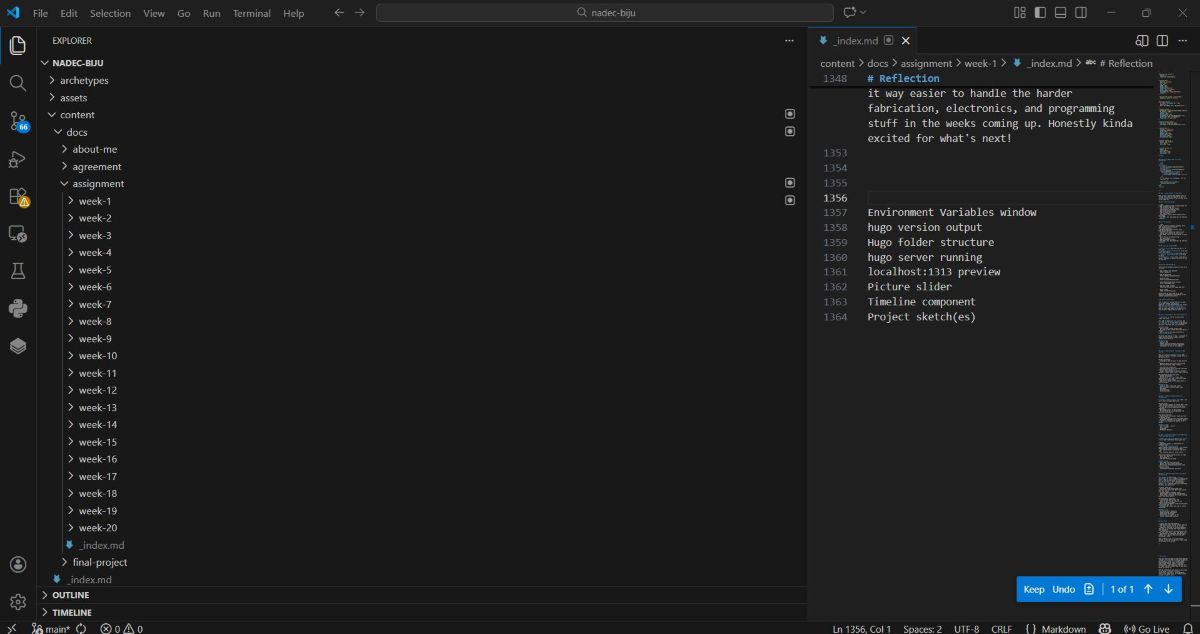
What All Those Folders Do#
| Folder/File | What It’s For |
|---|---|
content/ | This is where all your pages go (in Markdown) |
static/ | Put your pictures and files here |
themes/ | This controls how your website looks |
hugo.toml | Settings for your whole website |
How I Used Hugo with VS Code#
- I opened my Hugo folder in VS Code
- Got these helpful extensions:
- Markdown Preview
- Hugo Syntax Highlighting (optional but nice)
To see my website while I work on it, I type:
hugo server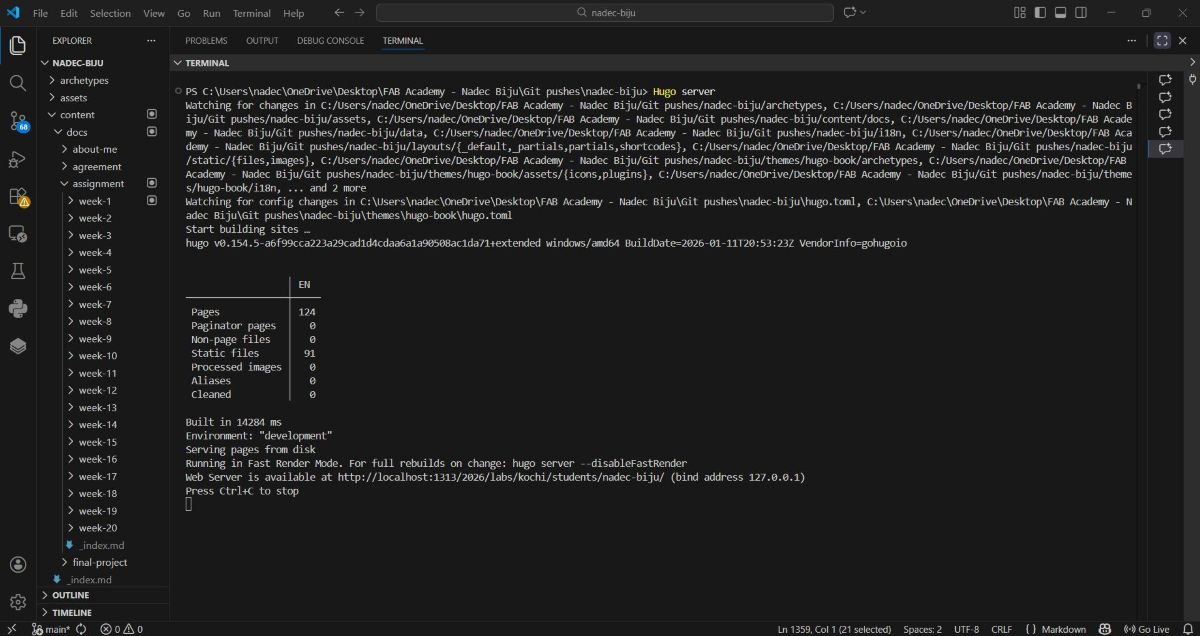
Now I go to http://localhost:1313 in my browser and can see changes in my browser right away!#
Writing Pages in Markdown#
Hugo uses Markdown which is way easier than HTML.
To make a new page, I typed:
hugo new week-01/index.mdThis made a new file in the content/ folder.
Basic Markdown Stuff#
Making Headers#
# Big Header
## Medium Header
### Small Header
Writing Paragraphs#
Just type normally and it makes a paragraph.Making Lists#
- Thing 1
- Thing 2
- Thing 3
Adding Links#
[Fab Academy](https://fabacademy.org)Adding Pictures#
How I Set Up My Fab Academy Website#
My documentation website is organized like this:
- Each week gets its own page
- If I need more detail, I make sub-pages
- All my pictures go in the
static/folder - I use Markdown for everything so it stays simple
This makes it super easy to find stuff and add more as the course goes on.
Where to Put Different Stuff#
| What You’re Adding | Where It Goes |
|---|---|
| Weekly homework | content/week-XX/ |
| Pictures | static/images/ |
| Files to download | static/files/ |
| Design stuff | themes/ |
Only Uploading the public Folder to Git#
When Hugo makes your website, everything goes into the public/ folder. That’s the actual website that people see.
All the other folders (content, themes, etc.) are just for making the website, not for showing it.
For Fab Academy, we only need to upload the finished website files.
Why We Only Upload the public Folder#
- Fab Academy servers just need the HTML files
- Hugo makes the
publicfolder fresh every time anyway - It keeps things smaller and cleaner
- We don’t need all the extra files online
How I Made a .gitignore File#
This file tells Git what NOT to upload.
Step 1: I Created It#
- I opened my Hugo folder in VS Code
- Made a new file called:
.gitignoreStep 2: Told It What to Ignore#
I put this in the file:
# Don't track Hugo source folders
content/
themes/
layouts/
archetypes/
resources/

# Don't track config and temp files
.hugo_build.lock
node_modules/

# Ignore everything by default
*

# But DO track the public folder
!public/
!public/**
This means:
- Ignore all the Hugo source files
- Only upload the
publicfolder
How I Made the public Folder#
Before uploading, I built my website:
hugoThis updates the public folder with all my latest changes.
How I Uploaded to Git#
After building:
git status
git add .
git commit -m "Update website"
git push
Now only the public folder gets uploaded! due to gitignore settings.
Important Thing I Learned#
Hugo remakes the public folder every time you build.
So if you edit something directly in public, it’ll get deleted next time! That would be super annoying.
Always edit your Markdown files, never the public folder.
How I Add a New Page#
Here’s what I do every time I wanna add something new:
Step 1: I Make the Page#
hugo new docs/assignment/week-2/_index.mdStep 2: I Edit the Top Part#
Every page starts with some info at the top:
+++
title = "Week 2 - Computer-Aided Design"
weight = 2
draft = false
+++| Thing | What It Does |
|---|---|
title | The name that shows up |
weight | Changes the order (smaller number = higher up) |
draft | false means show it, true means hide it |
Step 3: I Write My Stuff#
Under that, I just write normally in Markdown:
# Week 2 - Computer-Aided Design

## What I Did

This week I learned about CAD programs...

## Programs I Used

- Fusion 360
- SolidWorks
Step 4: I Add Pictures#
- I put pictures in
static/images/ - Then use them like this:
Step 5: I Check How It Looks#

Step 6: Build and Upload#
When it looks good, I do:
hugo
git add public
git commit -m "Add Week 2 stuff"
git push
When to Use Markdown vs HTML#
Hugo lets you use both Markdown and HTML.
| What You’re Doing | Use This | Example |
|---|---|---|
| Normal text, headers, lists | Markdown | ## Header, - list |
| Pictures | Markdown |  |
| Links | Markdown | [text](url) |
| Tables | Markdown | ` |
| Cool custom stuff | HTML + CSS | <div class="custom"> |
| Interactive things | HTML + JavaScript | <script>...</script> |
Easy rule: Markdown for writing, HTML for fancy stuff.
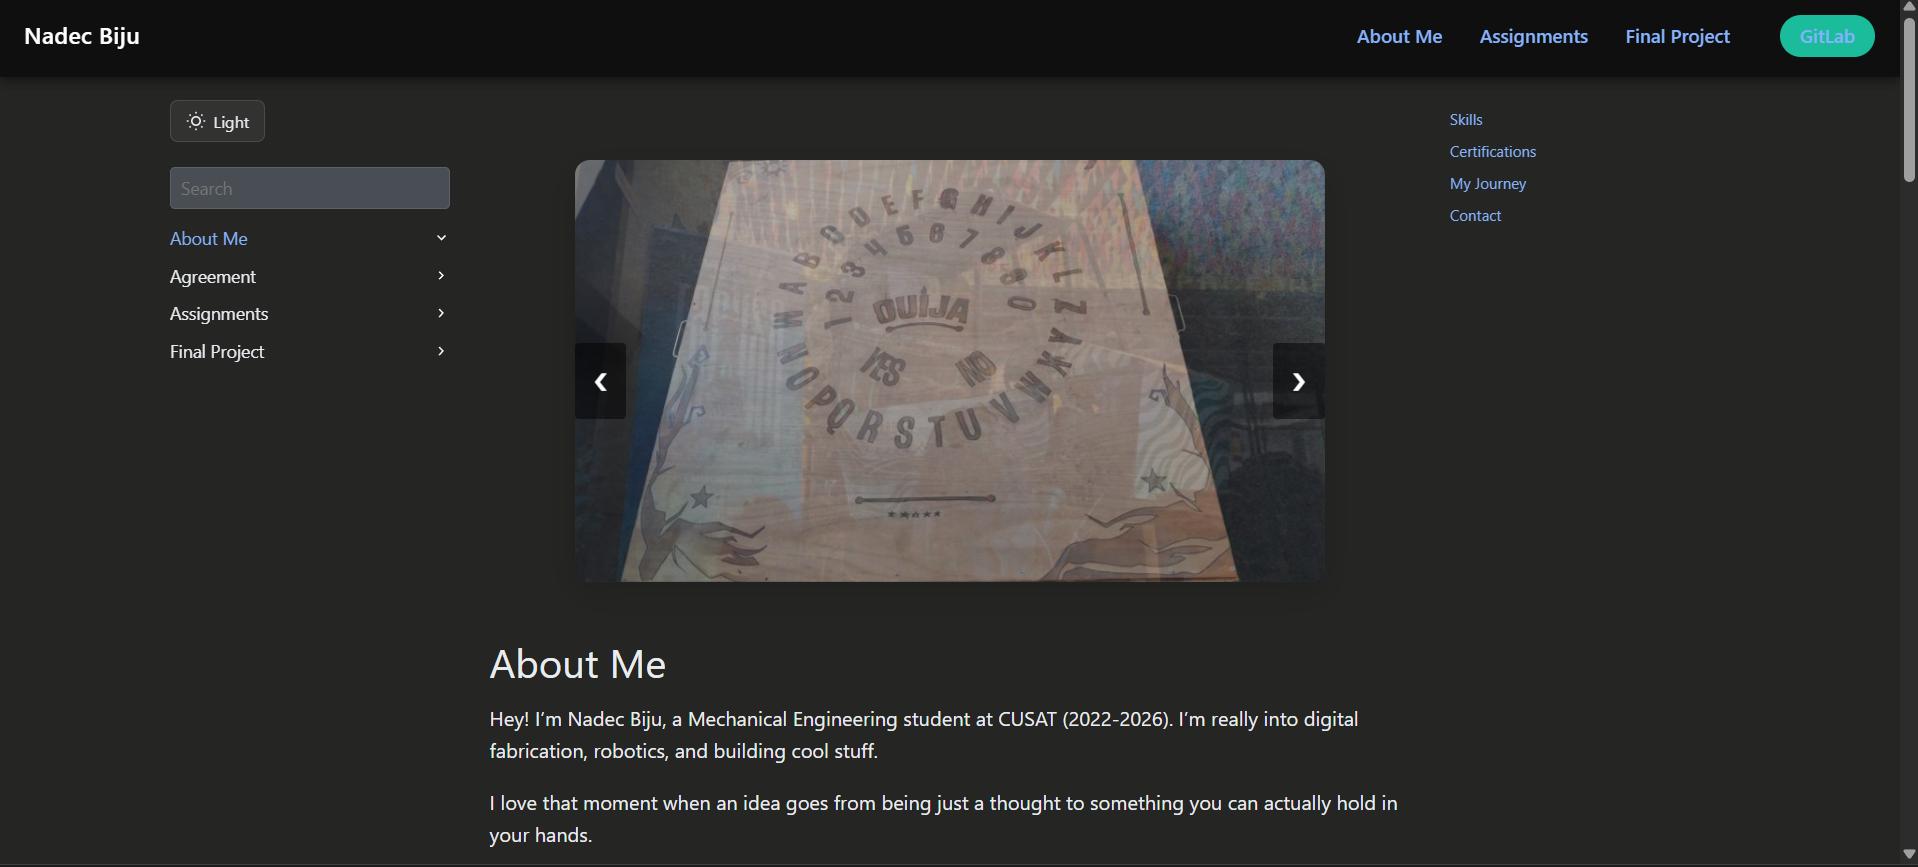
Making Cool Stuff: Picture Slider#
For my About Me page, I made a picture slider to show off my projects. It turned out pretty sick ngl. BTW ChatGpt helped me build this .
The HTML Part#
<div class="carousel-container">
  <div class="carousel">
    <div class="carousel-slide fade">
      <img src="images/gallery-1.jpg" alt="Project 1">
    </div>
    <div class="carousel-slide fade">
      <img src="images/gallery-2.jpg" alt="Project 2">
    </div>
    <div class="carousel-slide fade">
      <img src="images/gallery-3.jpg" alt="Project 3">
    </div>
  </div>
  <a class="carousel-prev" onclick="changeSlide(-1)">❮</a>
  <a class="carousel-next" onclick="changeSlide(1)">❯</a>
</div>
Making It Look Good (CSS)#
<style>
.carousel-container {
  position: relative;
  max-width: 800px;
  margin: 40px auto;
  overflow: hidden;
  border-radius: 12px;
  box-shadow: 0 8px 25px rgba(0,0,0,0.15);
}

.carousel {
  position: relative;
  background: #f0f0f0;
  aspect-ratio: 16/9;
}

.carousel-slide {
  display: none;
  width: 100%;
  height: 100%;
}

.carousel-slide img {
  width: 100%;
  height: 100%;
  object-fit: cover;
}

.carousel-slide.active {
  display: block;
  animation: fadeIn 0.8s ease-in-out;
}

@keyframes fadeIn {
  from { opacity: 0; }
  to { opacity: 1; }
}

.carousel-prev, .carousel-next {
  cursor: pointer;
  position: absolute;
  top: 50%;
  width: auto;
  margin-top: -22px;
  padding: 16px;
  color: white;
  font-weight: bold;
  font-size: 18px;
  transition: 0.3s ease;
  border-radius: 3px;
  background-color: rgba(0,0,0,0.5);
  user-select: none;
  z-index: 10;
}

.carousel-prev:hover, .carousel-next:hover {
  background-color: rgba(0,0,0,0.8);
}

.carousel-prev { left: 0; }
.carousel-next { right: 0; }
</style>
Making It Work (JavaScript)#
<script>
let currentSlide = 0;
let autoSlideInterval;

function showSlide(n) {
  const slides = document.querySelectorAll('.carousel-slide');
  if (n >= slides.length) { currentSlide = 0; }
  if (n < 0) { currentSlide = slides.length - 1; }

  slides.forEach(slide => slide.classList.remove('active'));
  if (slides.length > 0) {
    slides[currentSlide].classList.add('active');
  }
}

function changeSlide(n) {
  currentSlide += n;
  showSlide(currentSlide);
  resetAutoSlide();
}

function autoSlide() {
  currentSlide++;
  showSlide(currentSlide);
}

function resetAutoSlide() {
  clearInterval(autoSlideInterval);
  autoSlideInterval = setInterval(autoSlide, 4000);
}

document.addEventListener('DOMContentLoaded', function() {
  showSlide(currentSlide);
  autoSlideInterval = setInterval(autoSlide, 4000);
});
</script>
ChatGpt Prompt For the Picture Slider#
Create a responsive image carousel/slider for a Hugo markdown page with:
- Fade transition between slides
- Previous/Next navigation arrows
- Auto-slide every 4 seconds
- Mobile responsive design
- Dark mode support
- Clean modern styling with rounded corners and shadow
- Pure HTML, CSS, and JavaScript (no external libraries)
Making Cool Stuff: Timeline#
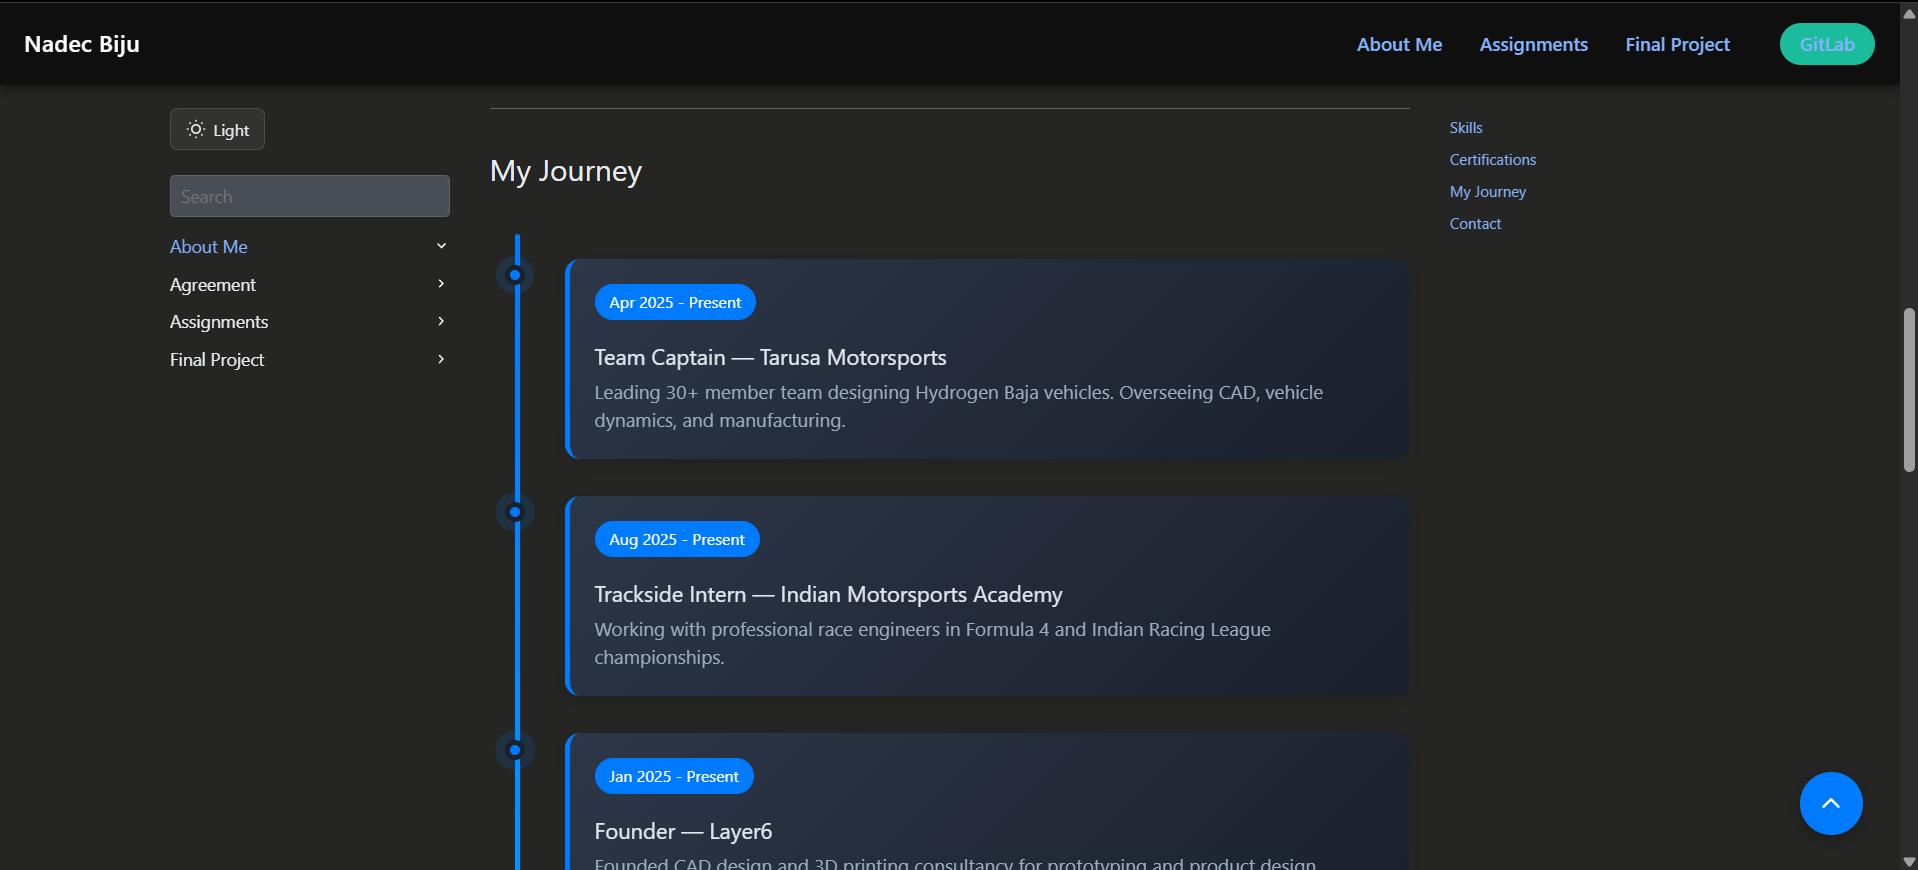
For my My Journey section, I made a timeline to show all my experiences. It looks really clean and professional tbh . BTW ChatGPT helped me a lot with this one. Here’s how I did it:
The HTML Part#
<div class="timeline-container">
  <div class="timeline-line"></div>

  <div class="timeline-item" data-year="2025">
    <div class="timeline-dot"></div>
    <div class="timeline-content">
      <span class="timeline-date">Apr 2025 - Present</span>
      <h3>Team Captain — Tarusa Motorsports</h3>
      <p>Leading 30+ member team designing Hydrogen Baja vehicles.</p>
    </div>
  </div>

  <div class="timeline-item" data-year="2024">
    <div class="timeline-dot"></div>
    <div class="timeline-content">
      <span class="timeline-date">Apr 2024 - Mar 2025</span>
      <h3>Team Manager — Tarusa Motorsports</h3>
      <p>Led team to AIR 7 Overall, AIR 1 Cost Award.</p>
    </div>
  </div>
</div>
Making It Look Cool (CSS)#
<style>
.timeline-container {
  position: relative;
  max-width: 800px;
  margin: 40px auto;
  padding: 20px 0;
}

.timeline-line {
  position: absolute;
  left: 20px;
  top: 0;
  bottom: 0;
  width: 4px;
  background: linear-gradient(to bottom, #007bff, #00d4ff);
  border-radius: 2px;
}

.timeline-item {
  position: relative;
  margin-left: 60px;
  margin-bottom: 30px;
  opacity: 0;
  transform: translateX(-30px);
  transition: all 0.6s ease-out;
}

.timeline-item.visible {
  opacity: 1;
  transform: translateX(0);
}

.timeline-dot {
  position: absolute;
  left: -48px;
  top: 5px;
  width: 16px;
  height: 16px;
  background: #007bff;
  border: 4px solid #fff;
  border-radius: 50%;
  box-shadow: 0 0 0 4px #007bff33;
  z-index: 1;
}

.timeline-item.visible .timeline-dot {
  animation: pulse 2s infinite;
}

@keyframes pulse {
  0%, 100% { box-shadow: 0 0 0 4px #007bff33; }
  50% { box-shadow: 0 0 0 8px #007bff22; }
}

.timeline-content {
  background: linear-gradient(135deg, #f8f9fa 0%, #e9ecef 100%);
  padding: 20px;
  border-radius: 12px;
  box-shadow: 0 4px 15px rgba(0,0,0,0.1);
  border-left: 4px solid #007bff;
  transition: all 0.3s ease;
}

.timeline-content:hover {
  transform: translateY(-5px);
  box-shadow: 0 8px 25px rgba(0,0,0,0.15);
}

.timeline-date {
  display: inline-block;
  background: #007bff;
  color: white;
  padding: 4px 12px;
  border-radius: 20px;
  font-size: 0.8em;
  margin-bottom: 10px;
}

.timeline-content h3 {
  margin: 10px 0 8px 0;
  color: #333;
  font-size: 1.1em;
}

.timeline-content p {
  margin: 0;
  color: #666;
  font-size: 0.95em;
  line-height: 1.5;
}
</style>
Making It Appear When You Scroll (JavaScript)#
<script>
(function() {
  var items = document.querySelectorAll('.timeline-item');
  var observer = new IntersectionObserver(function(entries) {
    entries.forEach(function(entry) {
      if (entry.isIntersecting) {
        entry.target.classList.add('visible');
      }
    });
  }, { threshold: 0.2, rootMargin: '0px 0px -50px 0px' });

  items.forEach(function(item) {
    observer.observe(item);
  });
})();
</script>
ChatGpt Prompt For the Timeline#
Create a vertical timeline component for a Hugo markdown page to display
work experience with:
- Animated appearance on scroll using Intersection Observer
- Gradient line connecting timeline items
- Pulsing dot animation for each entry
- Date badge, title, and description for each item
- Hover effects on timeline cards
- Dark mode support
- Mobile responsive layout
- Pure HTML, CSS, and JavaScript (no external libraries)
My Tips for Using ChatGPT#
- Be specific about what you want it to look like
- Say “no external libraries” if you want simple HTML/CSS/JS
- Ask for dark mode if your theme has it
- Ask for mobile responsive so it works on phones
- Try again - start simple, then make it better. Sometimes it takes a few tries to get it right lol
Adding the Student Agreement to My Website#
i was asked to add the Fab Academy Student Agreement to my website. Here’s how I did it:
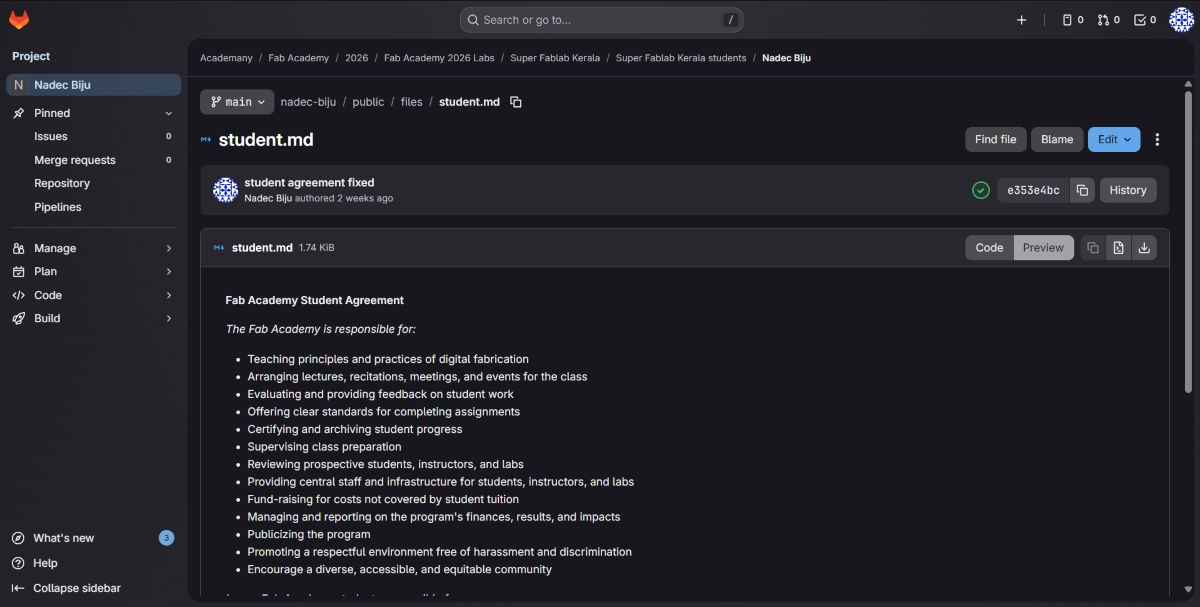
- I created a new Markdown file for the agreement:
hugo new docs/student-agreement/_index.md- I copied the text of the Student Agreement into that file.
- I added a link to the Student Agreement in my agreement page under a button.
 I have also pushed the agreement file to GitLab so it’s all saved and online.
Websites That Helped Me#
These websites helped me figure out how to do all this:
Hugo – Static Site Generator
https://gohugo.io/Hugo Documentation
https://gohugo.io/documentation/Markdown Guide
https://www.markdownguide.org/Fab Academy Documentation Archive
https://fabacademy.org/Hugo Book Theme (GitHub)
https://github.com/alex-shpak/hugo-bookRishi Krishna
https://rishikrishna.com/
These helped me understand how to make websites, use Markdown, and organize my Fab Academy documentation properly.
Final Project Selected: Smart Tool Box#
Project Decision#
After a detailed review and thoughtful discussion with my peers and instructors regarding feasibility, budgeting, and technical complexity, I have come to the final decision of moving forward with the Smart Tool Box project.
This decision was made after careful consideration of:
- Feasibility: Can I realistically complete this within the Fab Academy timeline?
- Budgeting: Is this project within my available resources and budget?
- Technical Scope: Does it align with the skills I’ll learn throughout the course?
- Practicality: Will this be genuinely useful in the lab and beyond?
The Smart Tool Box checks all these boxes and presents an exciting opportunity to dive deep into RFID technology, microcontroller programming, sensor integration, and custom enclosure design. I’m particularly drawn to this project because it addresses a real problem in collaborative maker spaces: tool tracking and usage management.
View Final Project DetailsReflection#
This week really helped me understand that Fab Academy isn’t just about finishing assignments and calling it a day. It’s actually about building good habits and a solid workflow. Like, proper version control, organized documentation, and managing my time well are all super important skills that’ll help me do better work later on.
Getting these habits down early is gonna make it way easier to handle the harder fabrication, electronics, and programming stuff in the weeks coming up. Honestly kinda excited for what’s next!