Week 14 - Molding and Casting#
Week 14 is molding and casting — the week where you stop machining things and start reproducing them. The goal is to design a mold, machine it into wax, pour a silicone negative, and then cast your final part in resin or another material. Simple enough in theory. Slightly chaotic in practice, as I found out.
I’ll be honest — I was completely stuck on what to make. I’m an engineer. My artistic instincts are basically non-functional. I started browsing “functional cast parts” for inspiration, got bored within 15 minutes, gave up, and started scrolling Instagram like a normal person.
And then an ad for a Pixar Cars reel hit me right in the childhood.
That was it. I didn’t need to think anymore. I was making the Piston Cup.
Why the Piston Cup?#
If you haven’t seen Pixar’s Cars — fix that immediately, it’s not optional — the Piston Cup is the championship trophy awarded to the winner of the Dinoco 400. Lightning McQueen spends the entire first movie chasing it. And then in the final lap, instead of taking the win, he stops to push The King across the finish line after Chick Hicks deliberately wrecked him.
That’s the whole Doc Hudson lesson playing out in real time. Winning isn’t everything. Being a good person matters more than a trophy. McQueen proved he actually learned it — on live television, by giving away the win.
That movie was genuinely my introduction to motorsport and cars. It shaped how I think about racing. Building the Piston Cup for Fab Academy Week 14 felt like the only correct choice. 🏆
I was so confident I had the design memorized from childhood that I didn’t even want to look up a reference image. I did eventually pull one up and import it into Fusion just for scale reference — but the geometry was entirely from memory. No regrets.

Group Assignment#
- Review the safety data sheets for each molding and casting material
- Make and compare test casts with each material
- Compare mold making processes
Individual Assignment#
- Design a mold around the process you’ll be using
- Produce it with a smooth surface finish — no visible toolpath marks on the final cast
- Use it to cast parts
Extra Credit Goals
- Use more than two mold parts
- Try different casting materials
📚 What I Learned#
This week was a genuinely different kind of thinking compared to the rest of Fab Academy. Most weeks are subtraction or addition — you either remove material or deposit it. Casting is about replication, and that forces you to think about geometry in a completely different way. Draft angles, parting lines, fill paths, shrinkage — all of it has to be designed in from the start, not patched in at the end.
Key things I picked up:
- How to plan a multi-operation CAM strategy for wax milling in Fusion 360 — adaptive clearing for bulk removal, pocket clearing for floors, finishing for surface quality
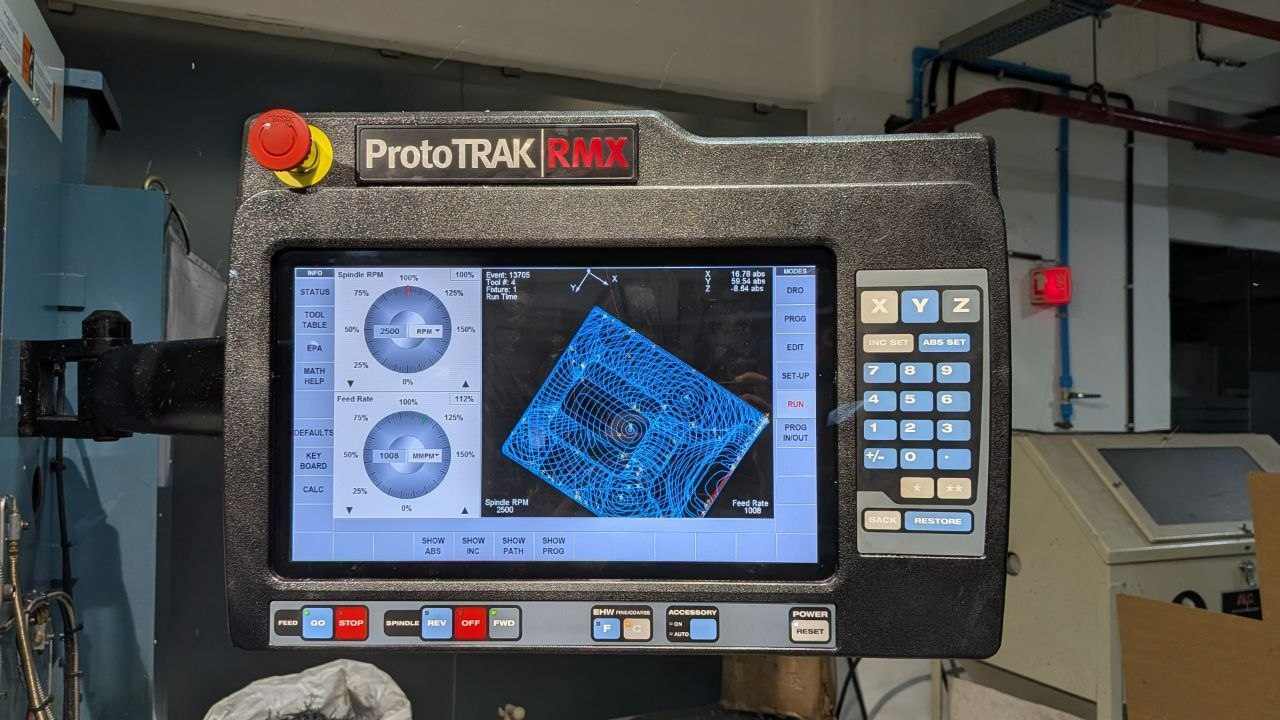
- How to set up and zero the TRAK machine — edge finding, Z-axis referencing, and why setting a reference Z before you start cutting is critical when you have tool changes mid-job
- Why volume measurement before silicone mixing actually matters — guessing quantities is a great way to waste expensive material and your instructor’s patience
- How hardener ratios affect silicone cure quality, and what a bad pour looks like in practice
- Most importantly: when recovering from a mid-job machine stop, always jog Z upward before doing anything else. Do not home the Z axis while the tool is near the workpiece. You will break your endmill. I know this because I broke my endmill. 😬
🛠️ Software Used#
| Software | Purpose |
|---|---|
| Fusion 360 (Design) | 3D modeling of the Piston Cup and mold geometry |
| Fusion 360 (Manufacturing) | CAM toolpath generation and simulation |
| TRAK Machine Controller | Loading G-code and running the milling job |
🗓️ Weekly Schedule#
| Day | What I Did |
|---|---|
| WED | Lecture on molding and casting |
| THU | Concept, reference gathering, CAD modeling in Fusion 360 |
| FRI | CAM setup, toolpath simulation, G-code export |
| SAT | TRAK machine setup and wax milling |
| SUN | Volume measurement, silicone mixing and first pour |
| MON | Second silicone pour + acrylic casting |
| TUE | Regional review |
Group Assignment Summary#
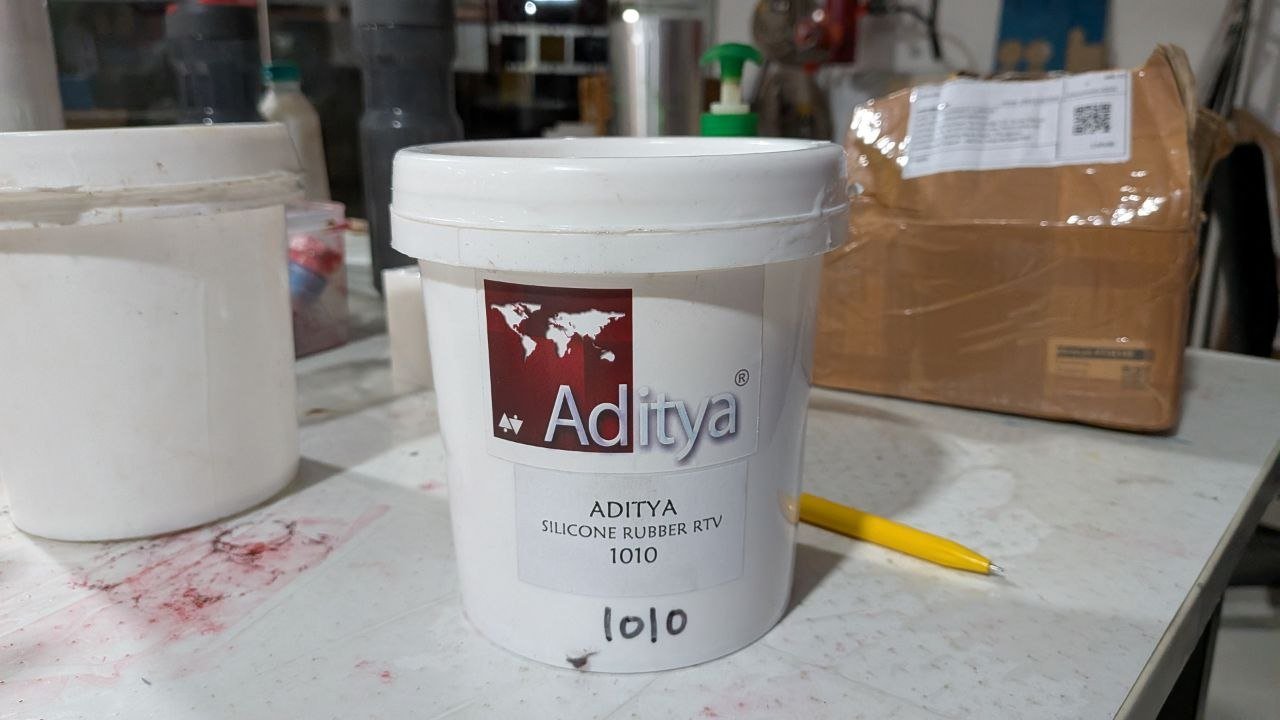
For the group assignment, we went through the safety stuff for all the materials we’d be using this week. Basically, we checked out the datasheets for everything — Aditya Silicone Rubber (2.5–3% hardener, 12–24 hour cure), the clear epoxy (100:50 ratio, super easy), mold release spray, and polyurethane rubber. We also made some test casts to see how the materials actually behave and what happens when they cure. The process was pretty straightforward: measure the volume with water, mix it carefully without making a vortex (that traps air), put it in the vacuum chamber to pull out bubbles, then pour it slowly so nothing gets trapped. For safety, we just wore gloves, didn’t eat near the chemicals, cleaned up spills right away, and stored everything in a cool spot. Getting all this done first meant we knew exactly how the materials worked before we started designing our actual molds.
https://fabacademy.org/2026/labs/kochi/group_assignmetns/week13/
Part 1 – Concept and Mold Design#
💡 Starting with the Bounding Box#
Before touching Fusion, I measured the wax block we’d be milling — this defines the absolute maximum volume the mold can occupy:
| Dimension | Value |
|---|---|
| Length | 89.5 mm |
| Width | 77 mm |
| Height | 38 mm |
I drew a bounding box sketch to these exact dimensions and used it as the design envelope throughout the entire modeling process. Everything — mold walls, cavity, alignment features — had to live within this box. 38 mm of height sounds like a lot until you account for walls, draft, and the fact that the Piston Cup has a fairly tall trophy silhouette. It was tight.
⚙️ Two-Part Mold Design#
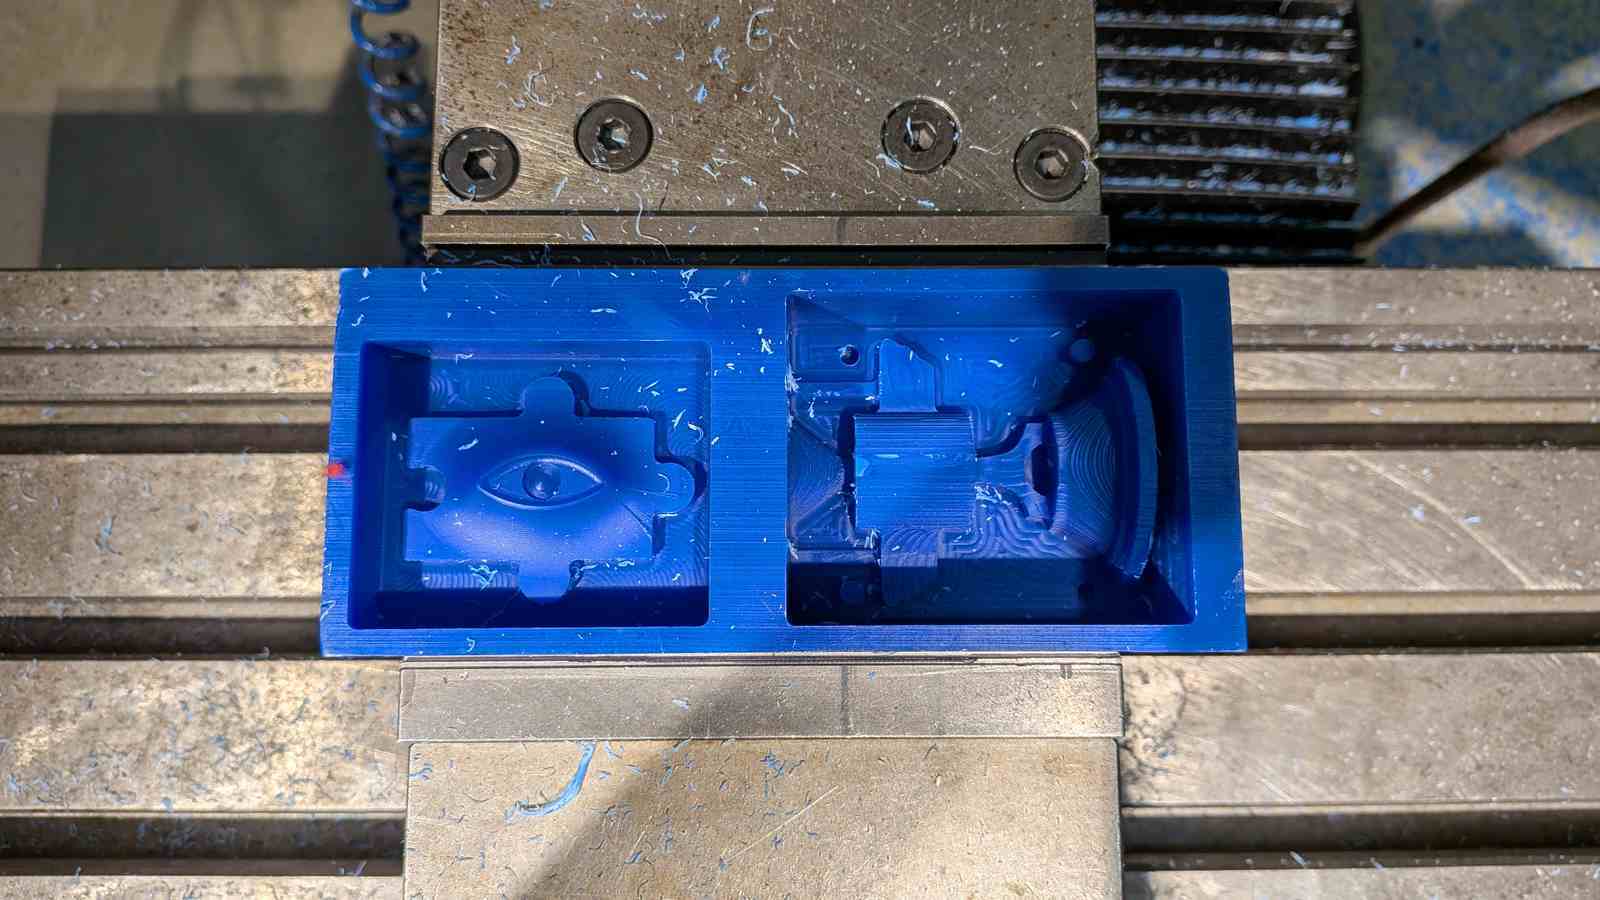
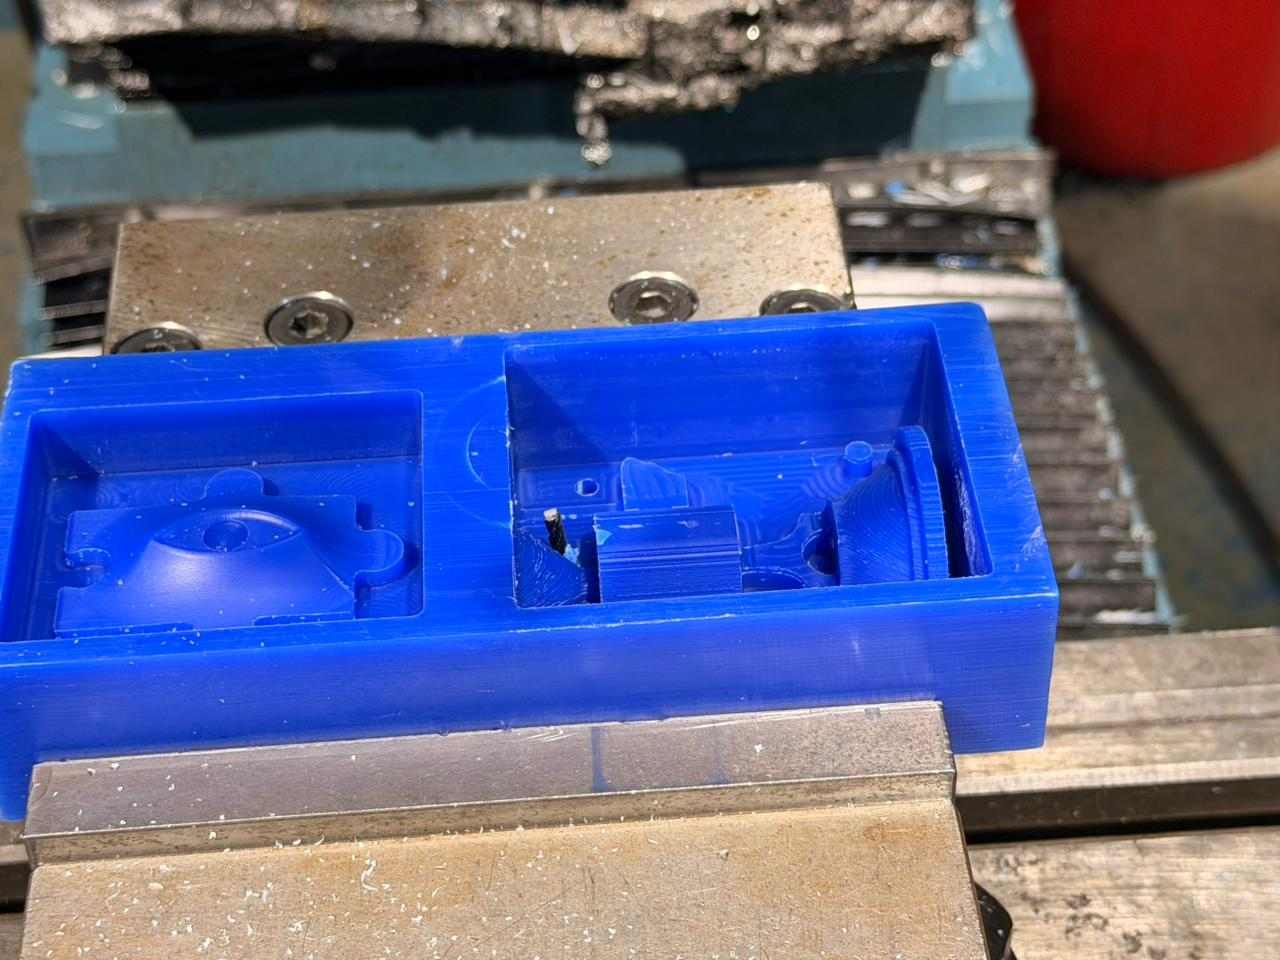
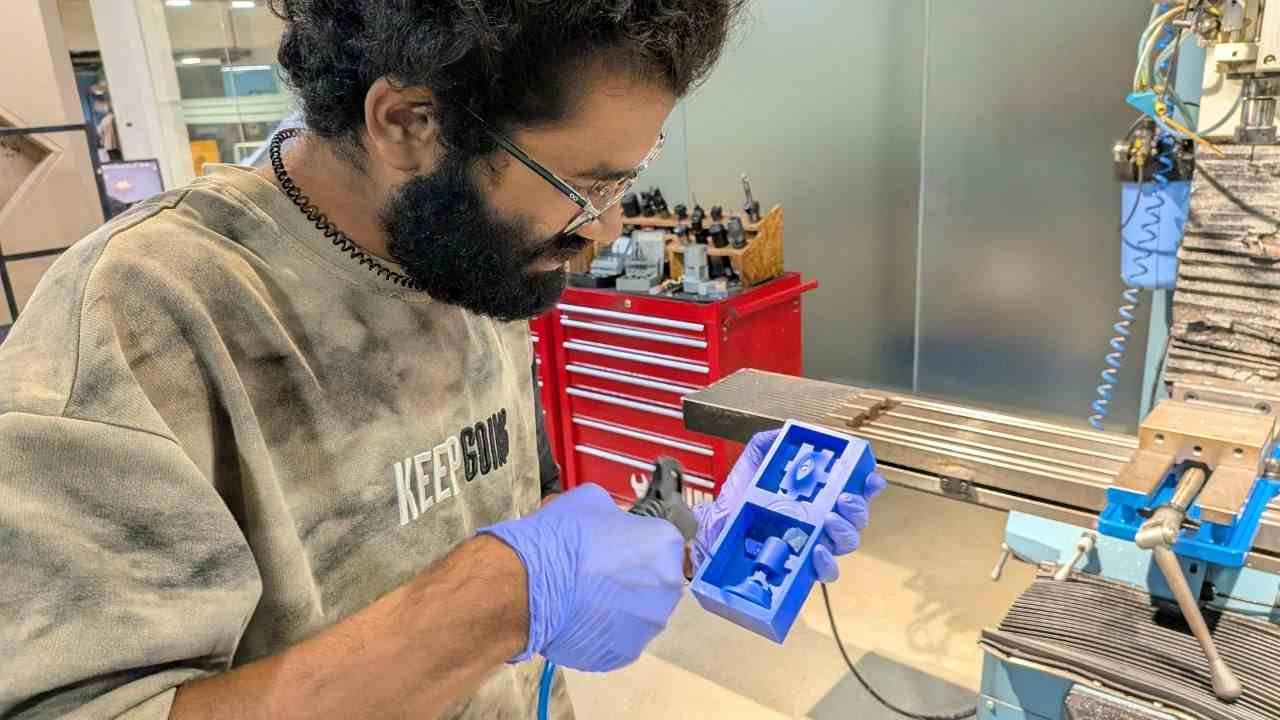
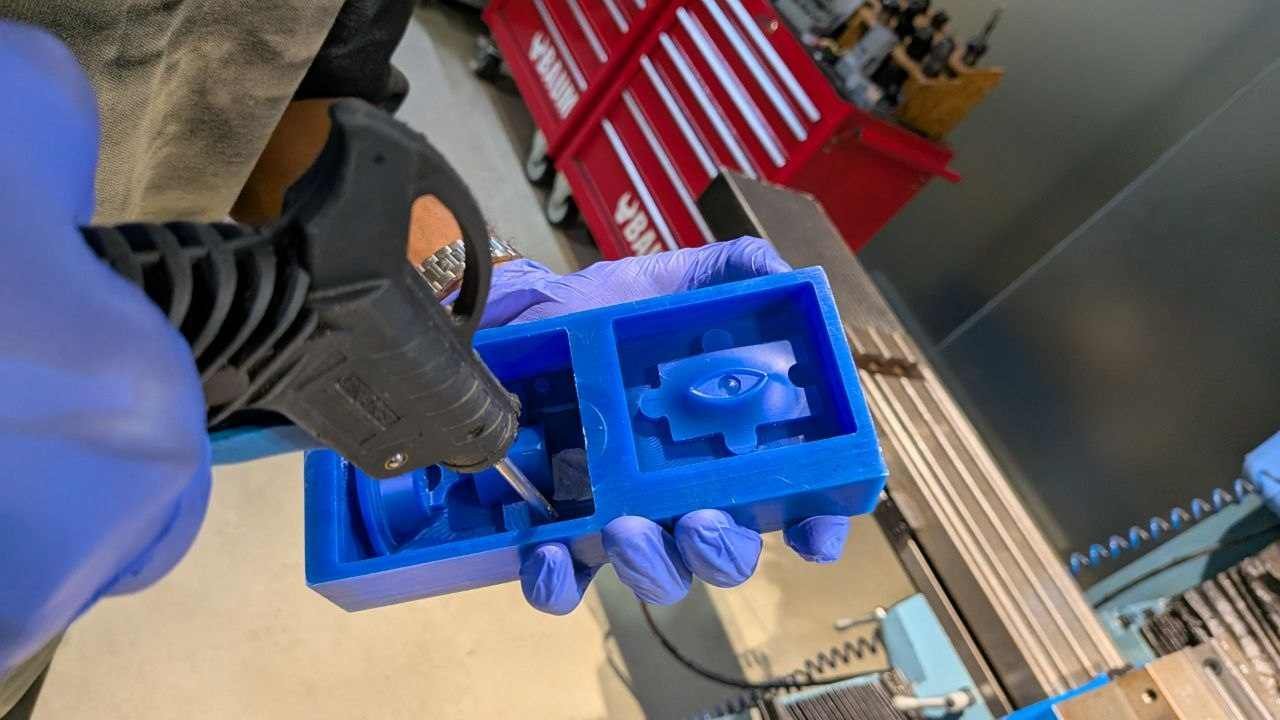
I went with a two-part mold from a single wax block. The Piston Cup is roughly symmetric, so I designed one mold half, milled it once into the wax, and then poured two identical silicone molds from that same wax cavity. Those two silicone halves were then joined together to form the complete two-part mold for the final epoxy cast.
Design constraints I kept in mind throughout:
- 5 mm minimum wall thickness everywhere — thinner walls risk cracking during demolding or under casting pressure
- 3.75 mm minimum gap between the mold wall and the part cavity — the smallest endmill available in the lab is 3.175 mm, so 3.75 mm gives enough clearance for the tool to actually reach everywhere without rubbing
- Registration pins on both halves so they register correctly when joined — without these, the halves will shift during casting and you’ll get a visible step at the parting line on your final part
Getting all of this right while also making the thing actually look like the Piston Cup took a fair bit of iteration. Turns out childhood memory is slightly optimistic about how much detail fits in a 38 mm height envelope. But it’s recognizable, and that’s all that matters.
Part 2 – CAM Setup in Fusion 360#
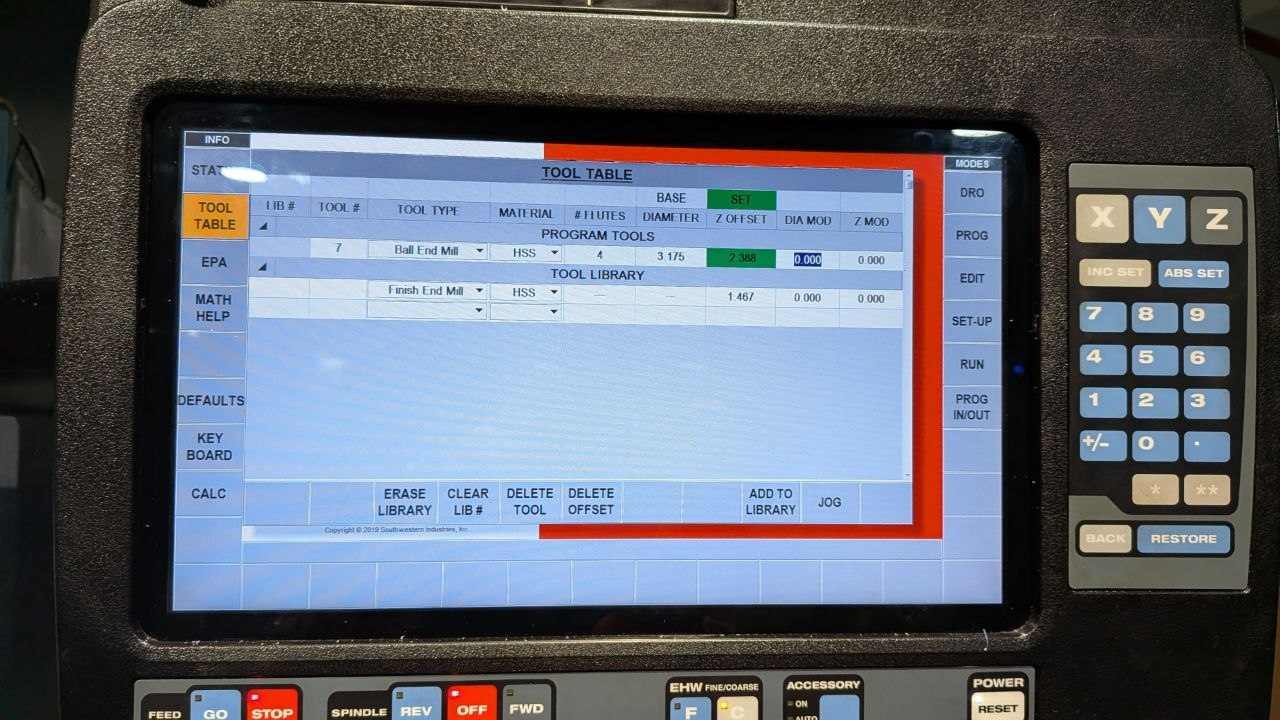
With the mold geometry locked in, I switched to the Manufacturing workspace in Fusion 360 for CAM. The strategy was four operations in sequence, each one refining the surface further:
| Operation | Tool | Purpose |
|---|---|---|
| Adaptive Clearing (rough) | 6 mm single flute endmill | Bulk material removal — fast, aggressive passes to clear most of the wax |
| Adaptive Clearing (semi-finish) | 3.175 mm single flute endmill | Tighter passes on walls and complex geometry |
| Pocket Clearing | 3.175 mm single flute endmill | Flat floor cleanup in recessed areas |
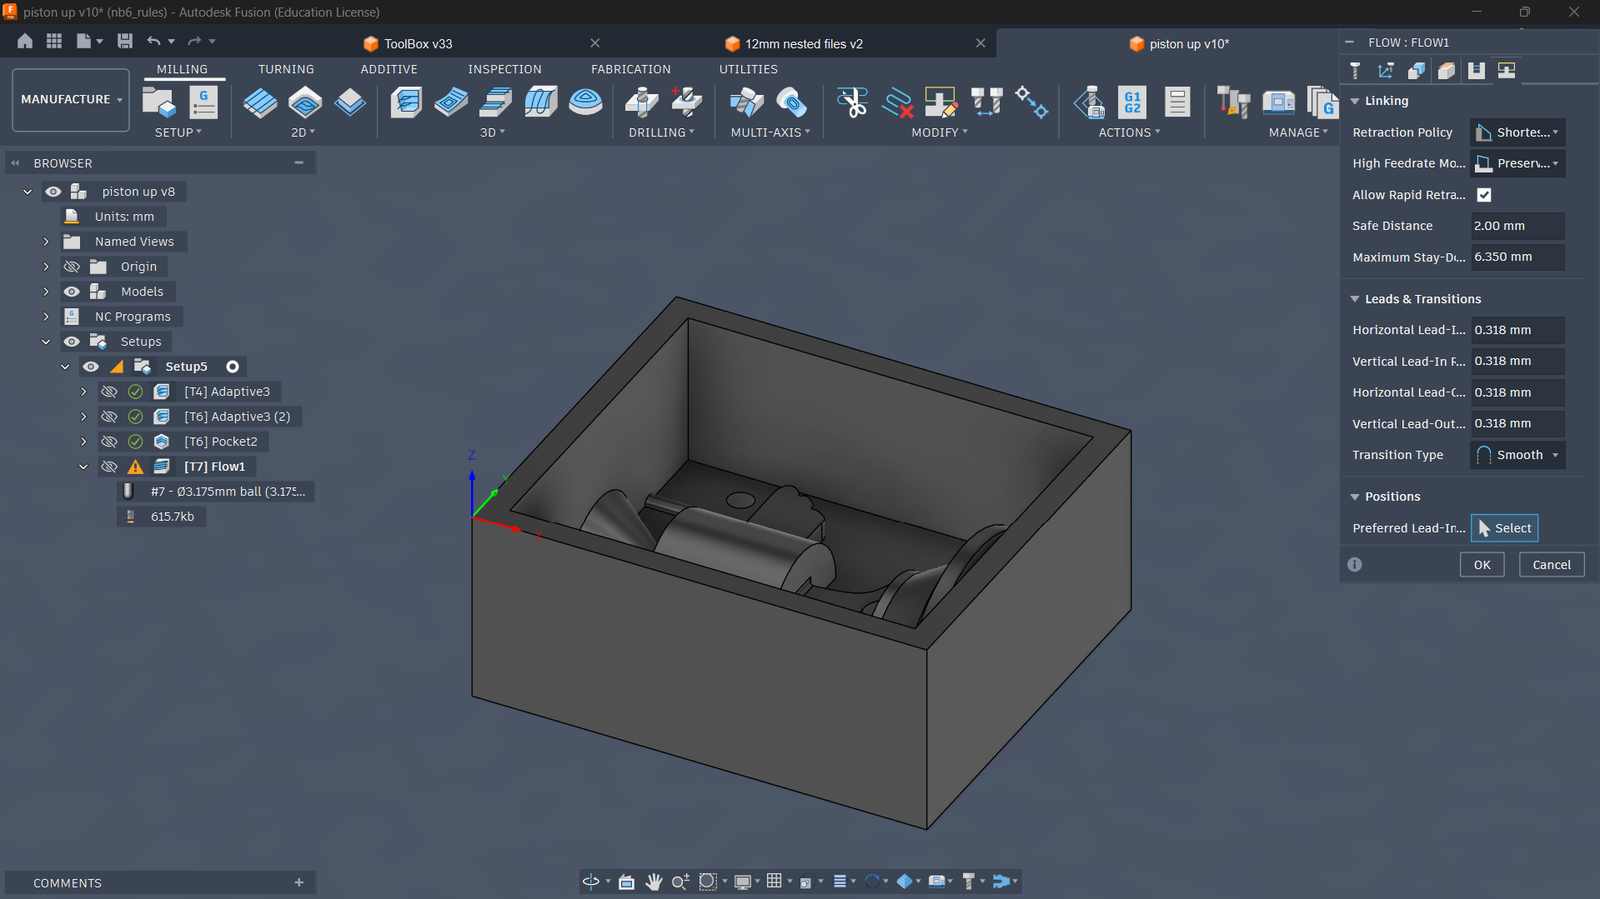
| Flow Clearing (finish) | Ball end mill | Final smooth pass over all surfaces — the ball nose follows the contour of the geometry for a cleaner surface finish than a flat endmill |
The reason for starting with the 6 mm tool is purely efficiency — it removes material much faster, so you use it to eliminate the bulk, then bring in the 3.175 mm for detail and semi-finish work. The final operation is a flow clearing pass using a ball end mill — the ball nose follows the contour of the geometry more accurately than a flat endmill, which is what gives you a smooth enough surface for casting without having to hand-sand the entire wax mold afterward.
After running the simulation and confirming nothing was going to collide catastrophically with the stock, I exported the G-code for the TRAK machine.
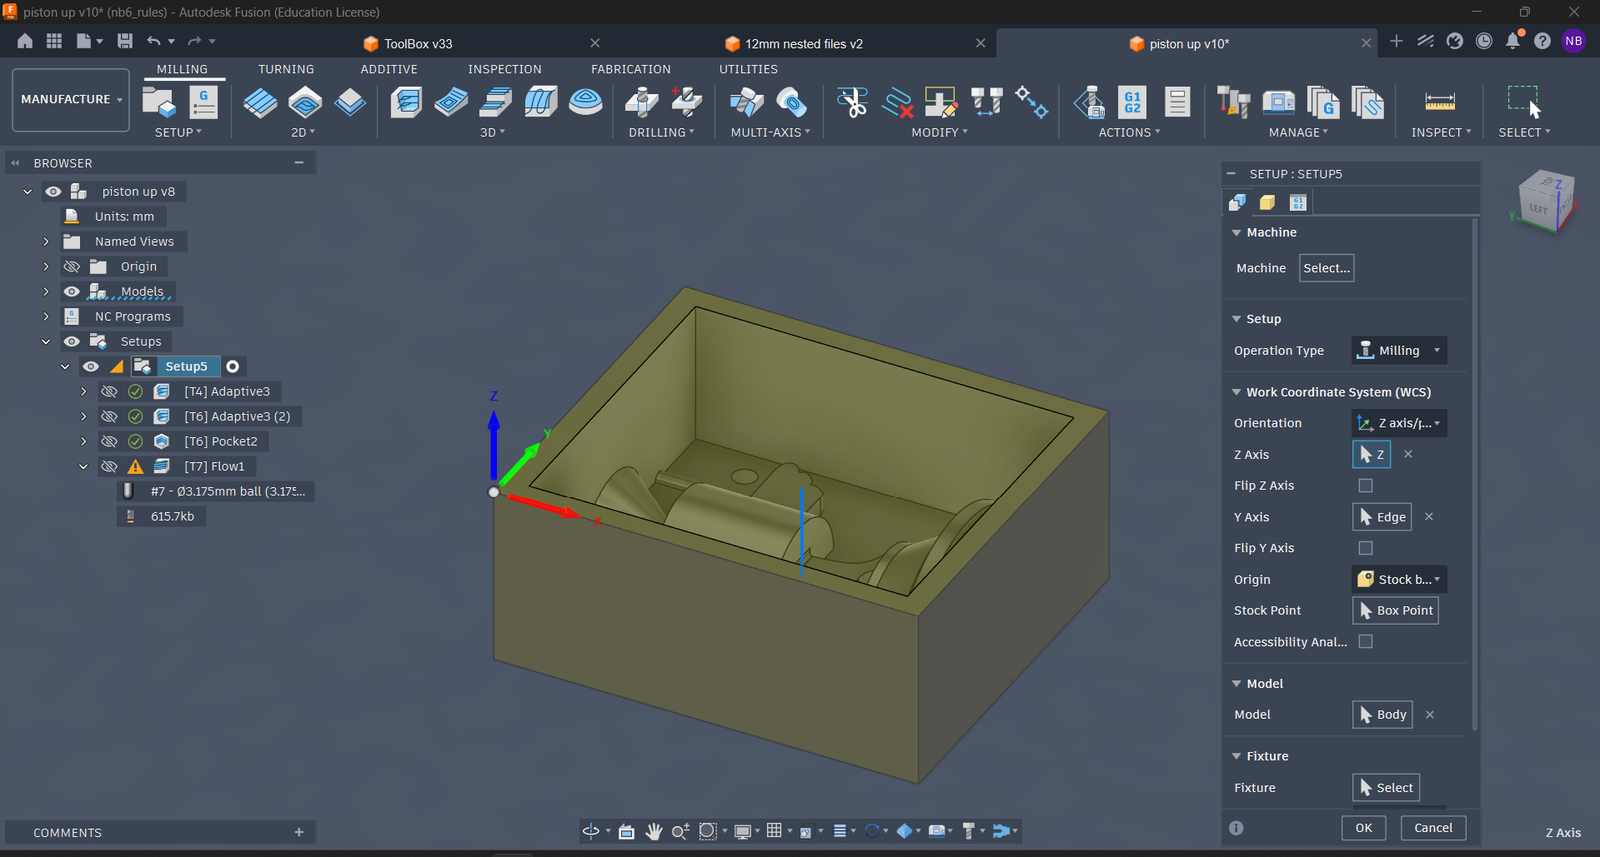
Setting the Work Coordinate System#
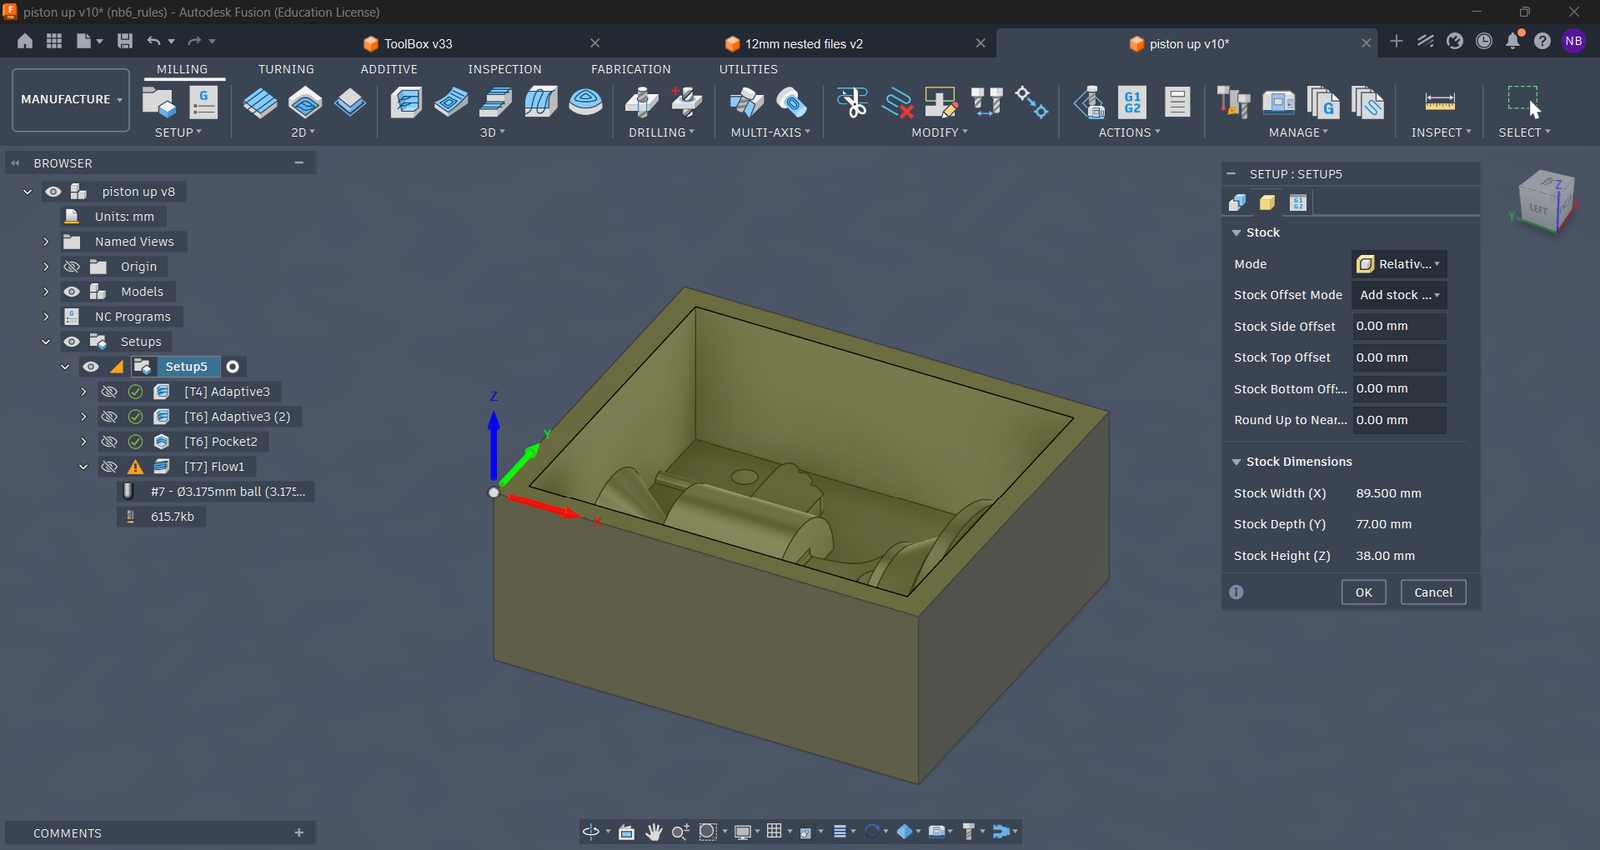
Setting up the Stock Size#
Configuring Parameters for Adaptive Clearing (Using 6mm flat endmill)#
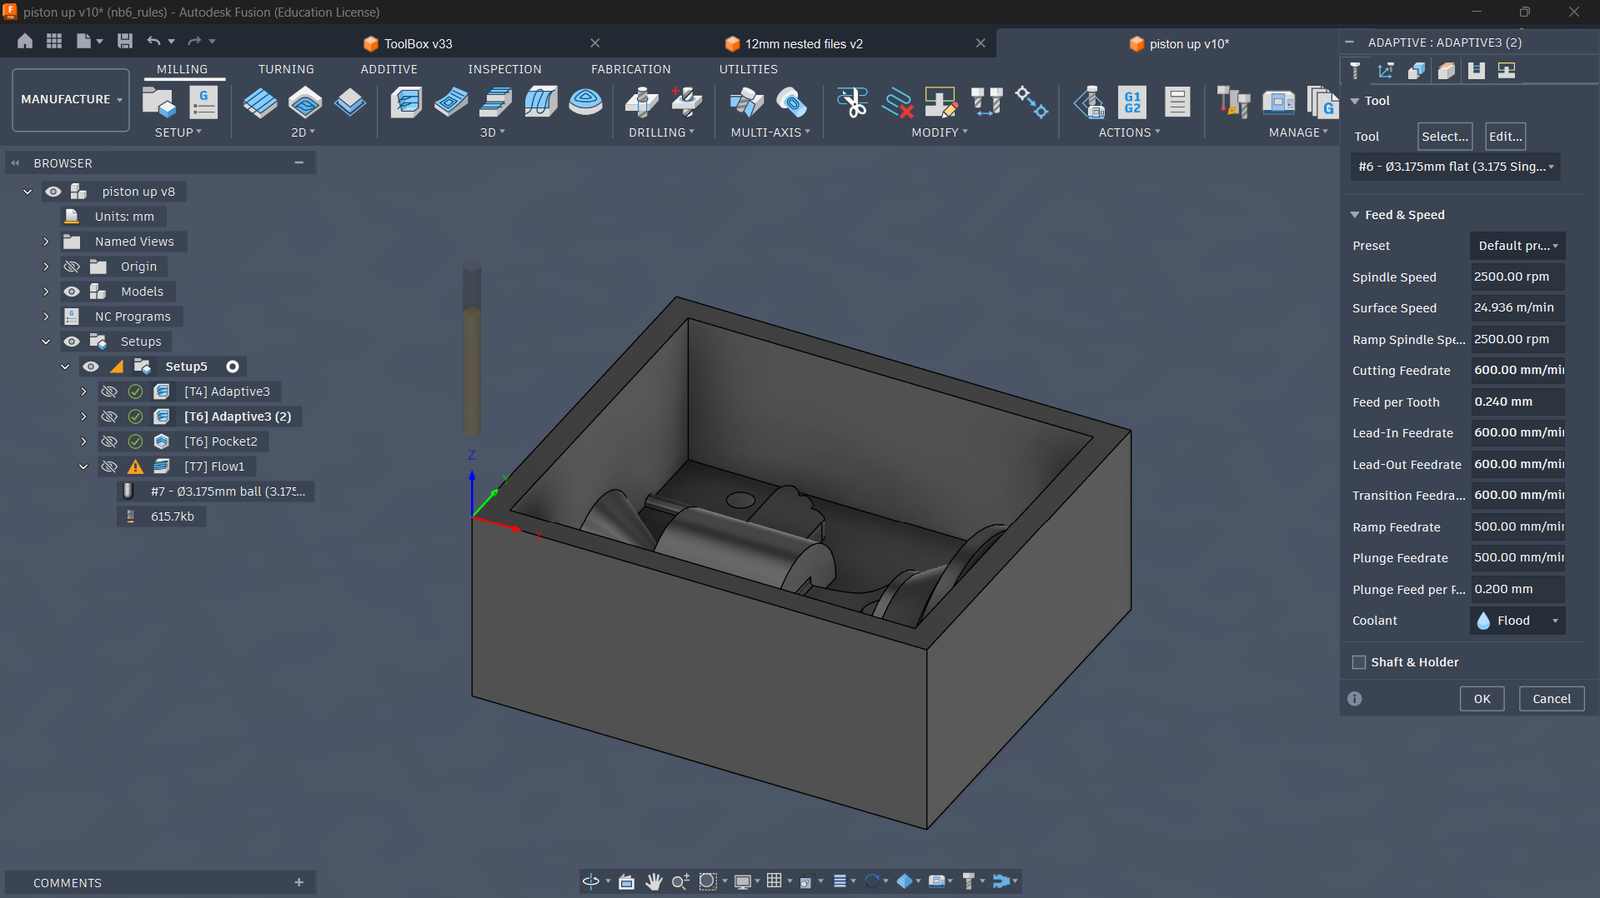
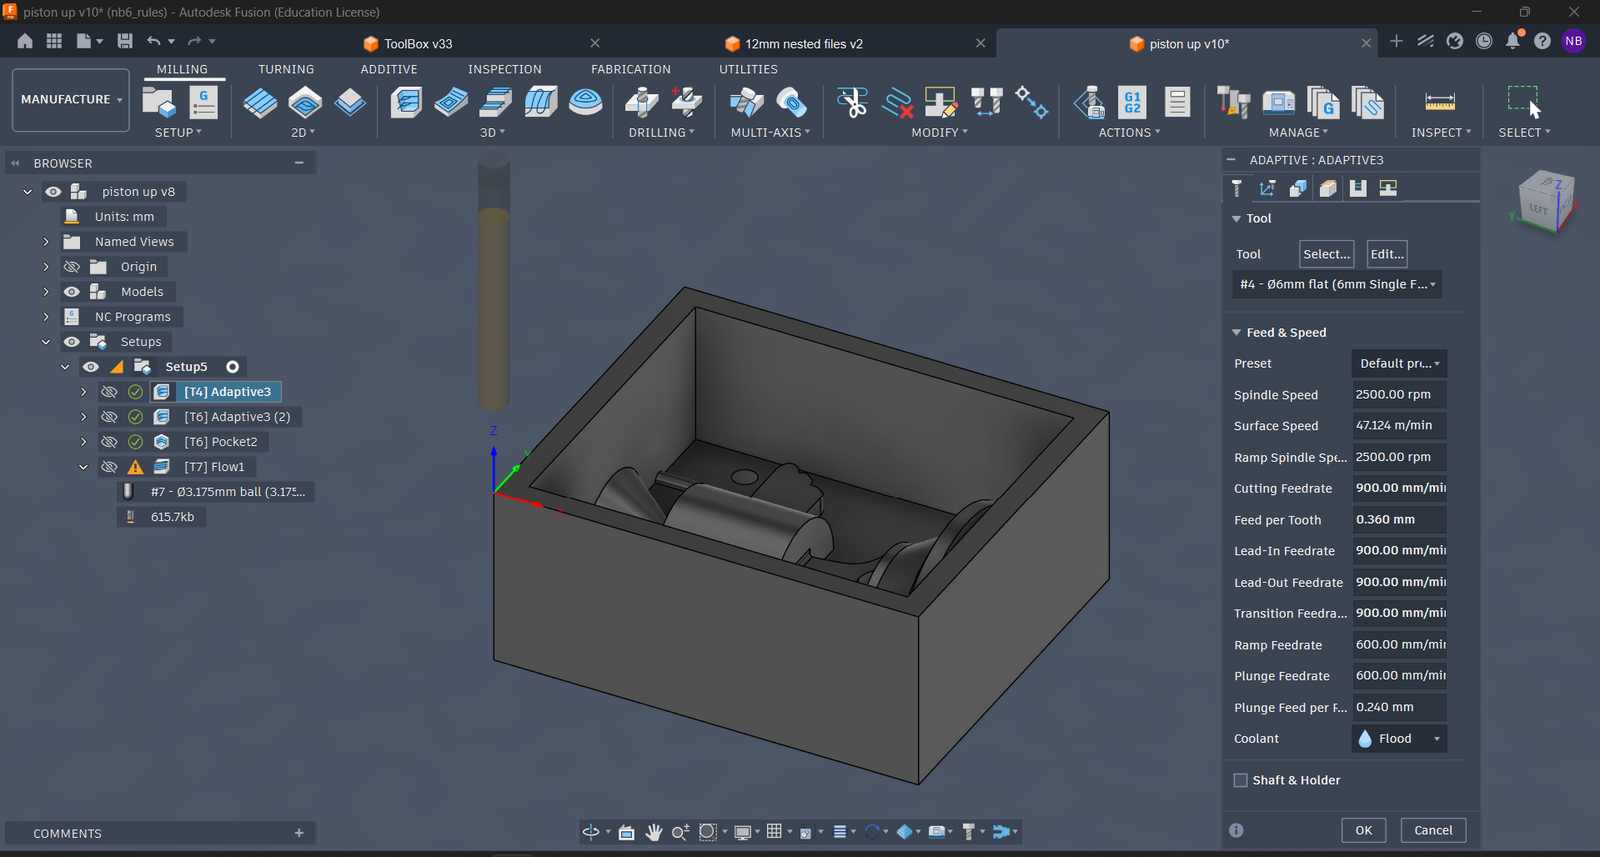 Tool, feed and speed
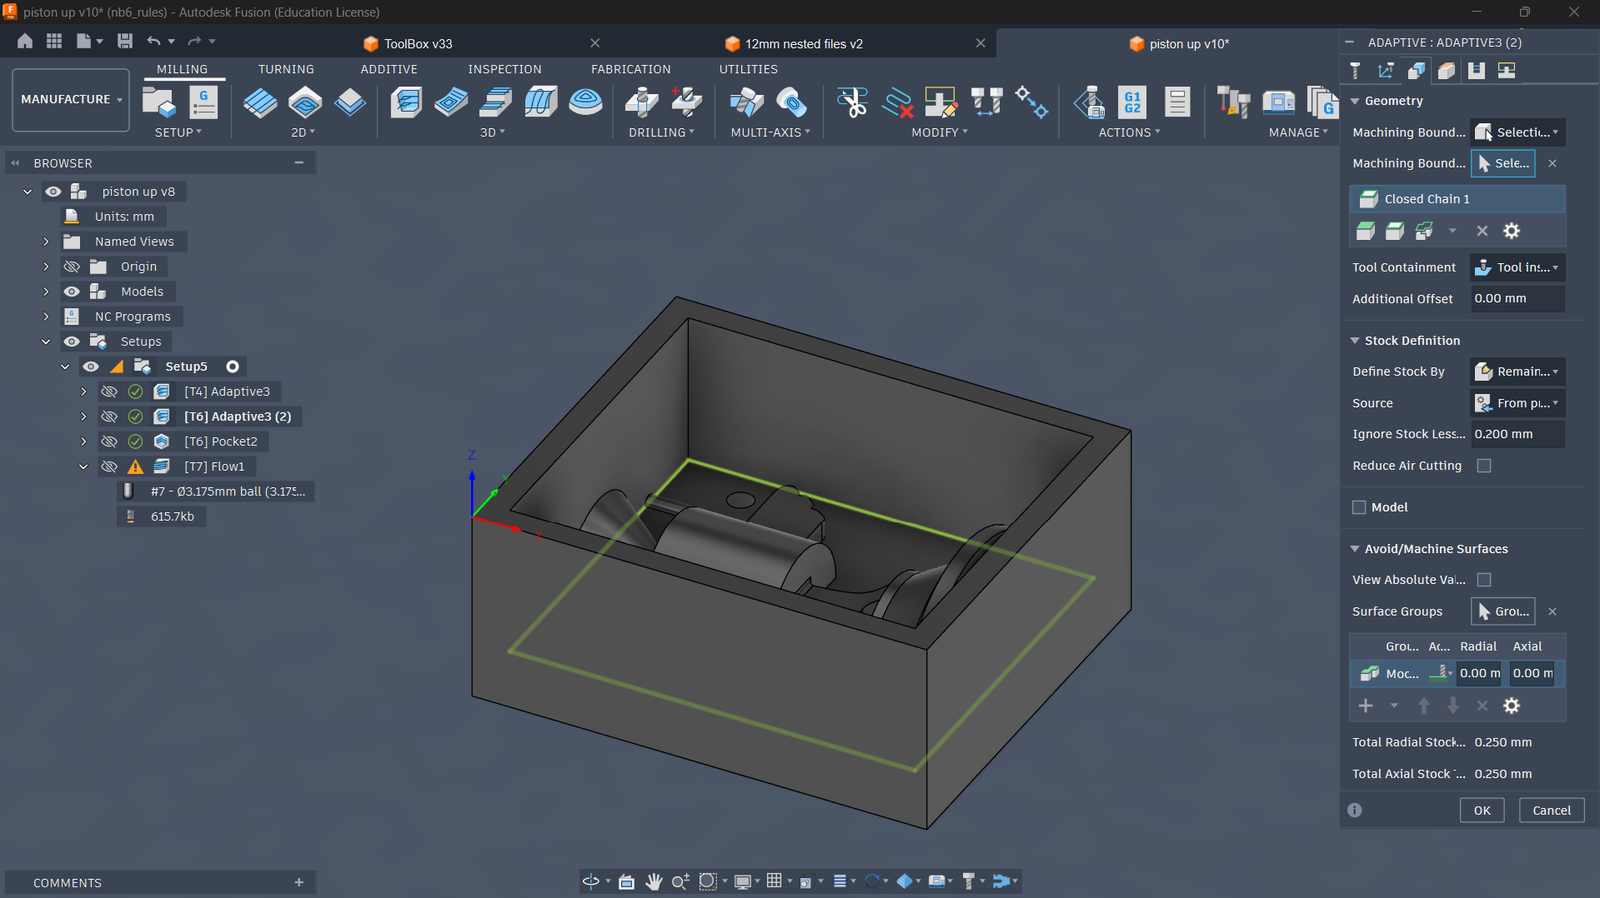
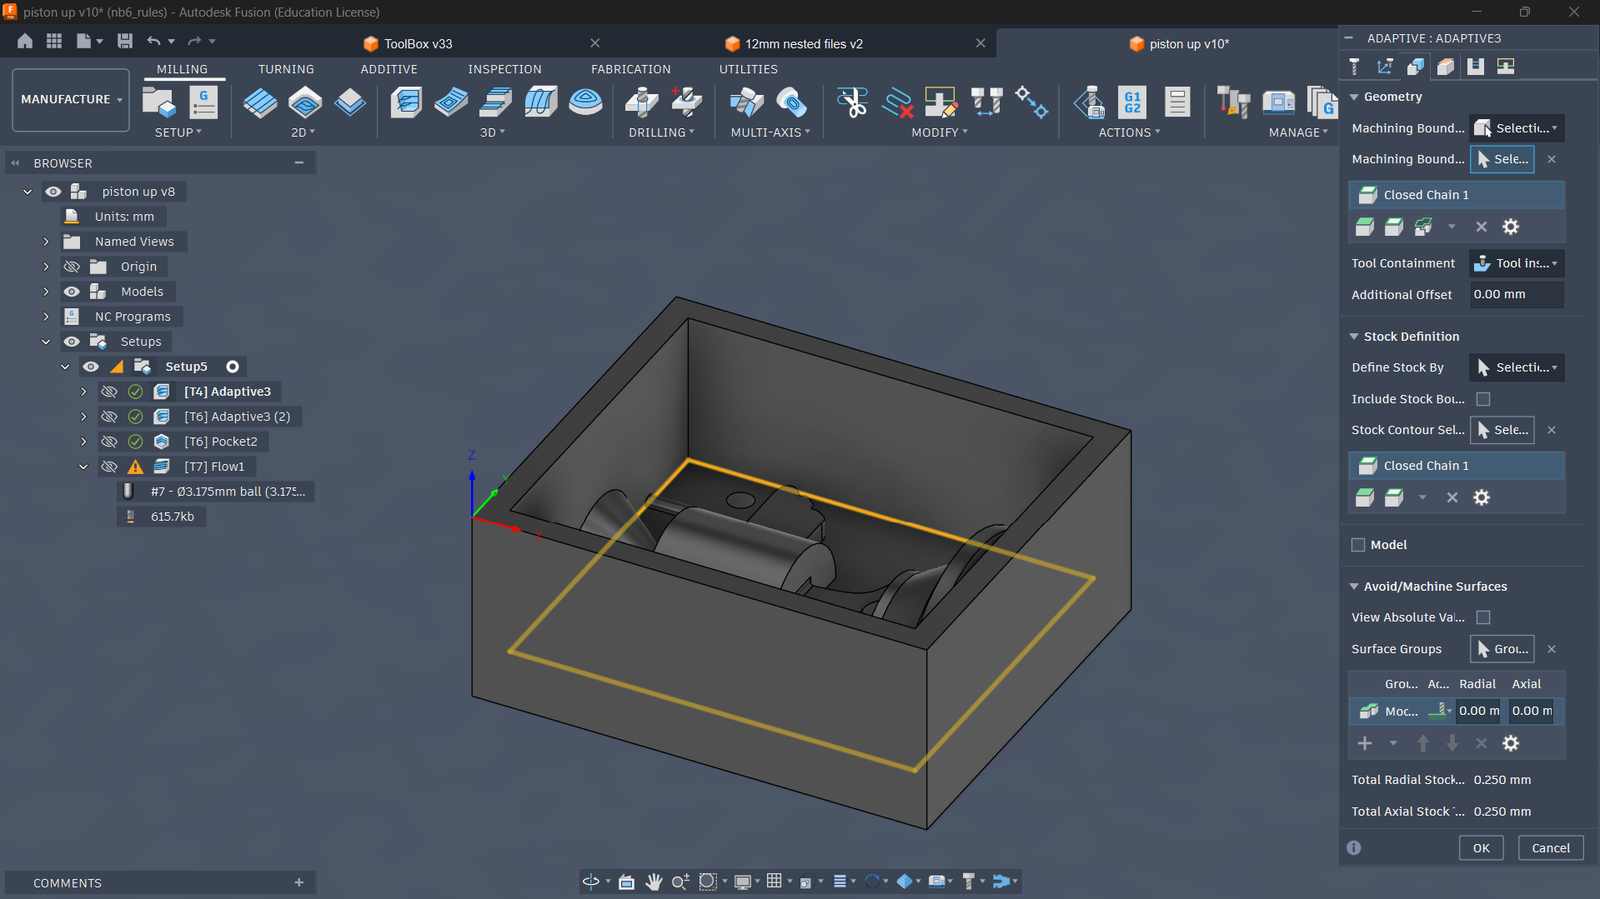 Geometry and Stock definition
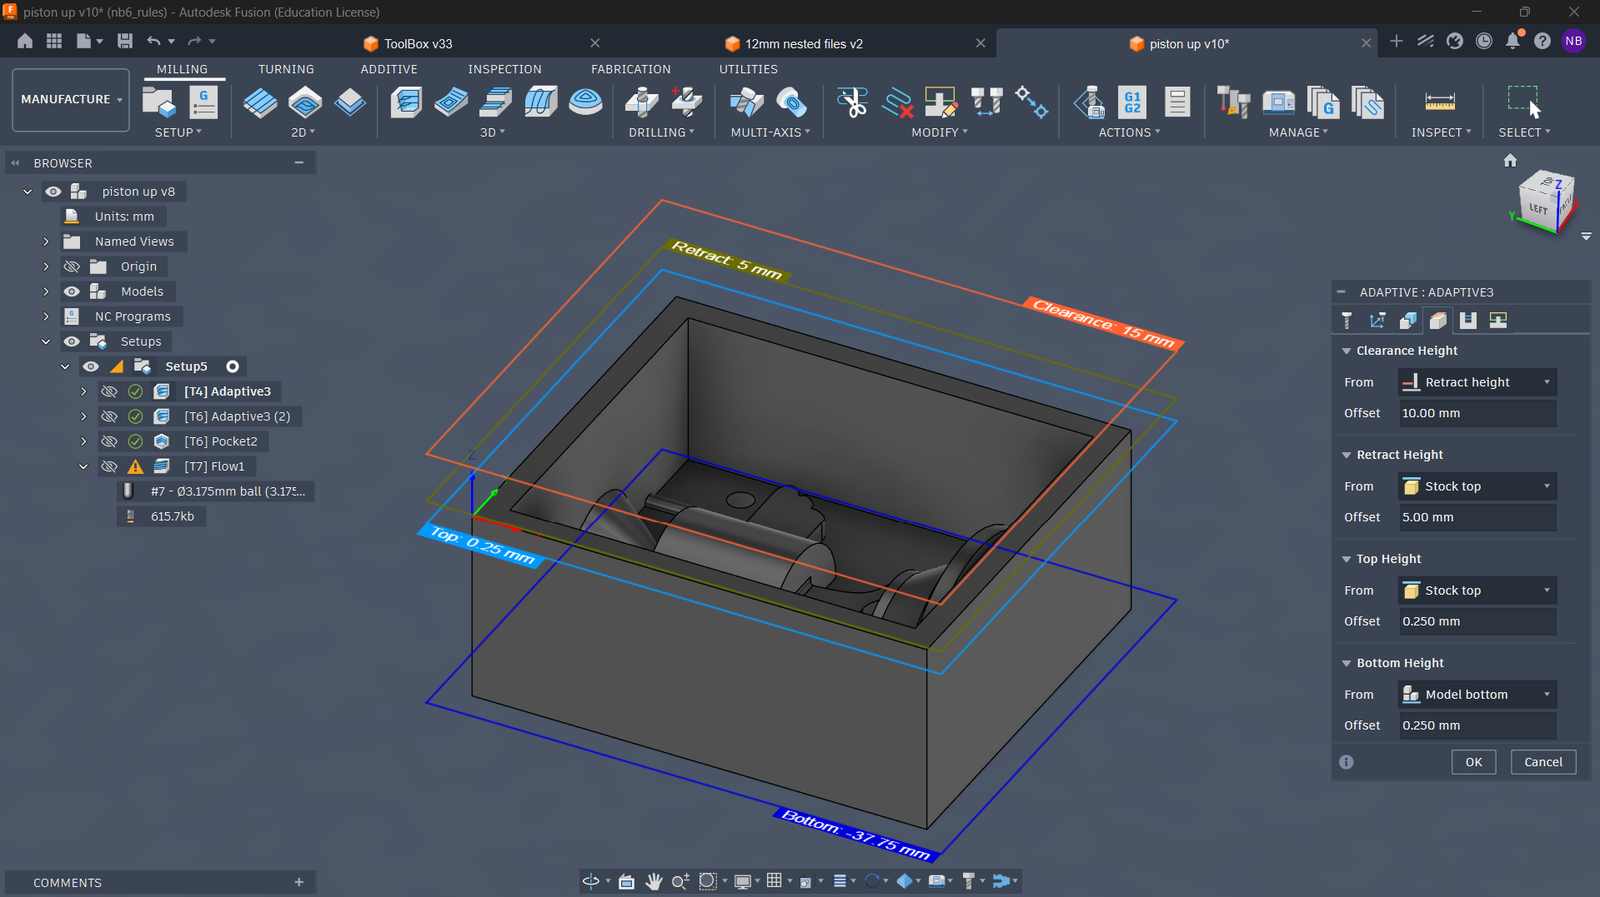 Heights Setup
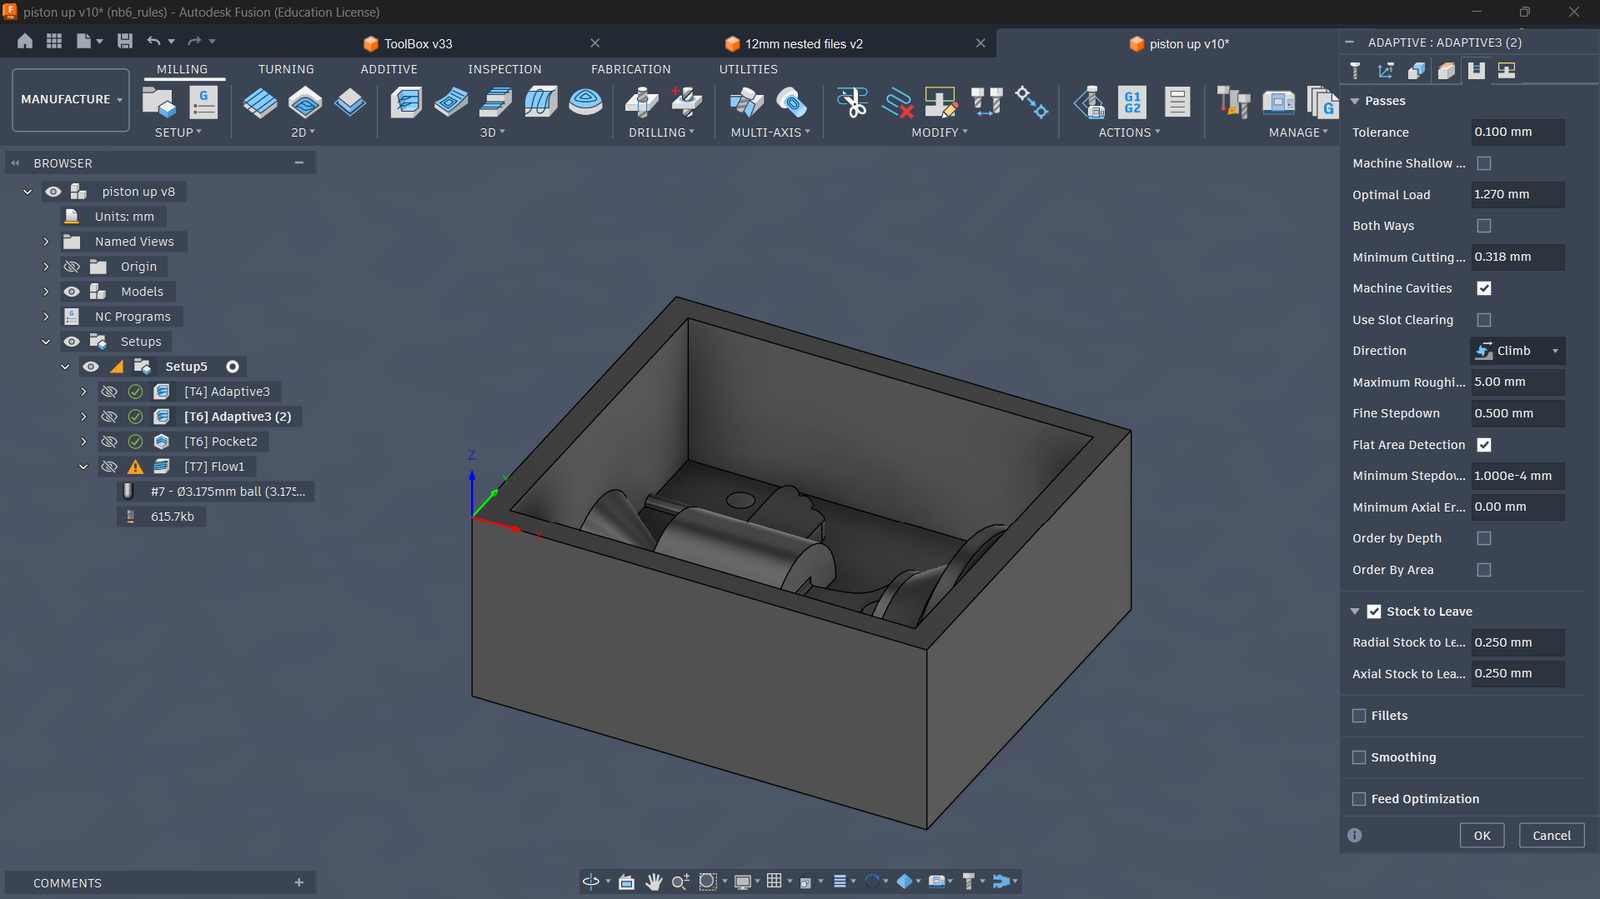
 Passes Parameters
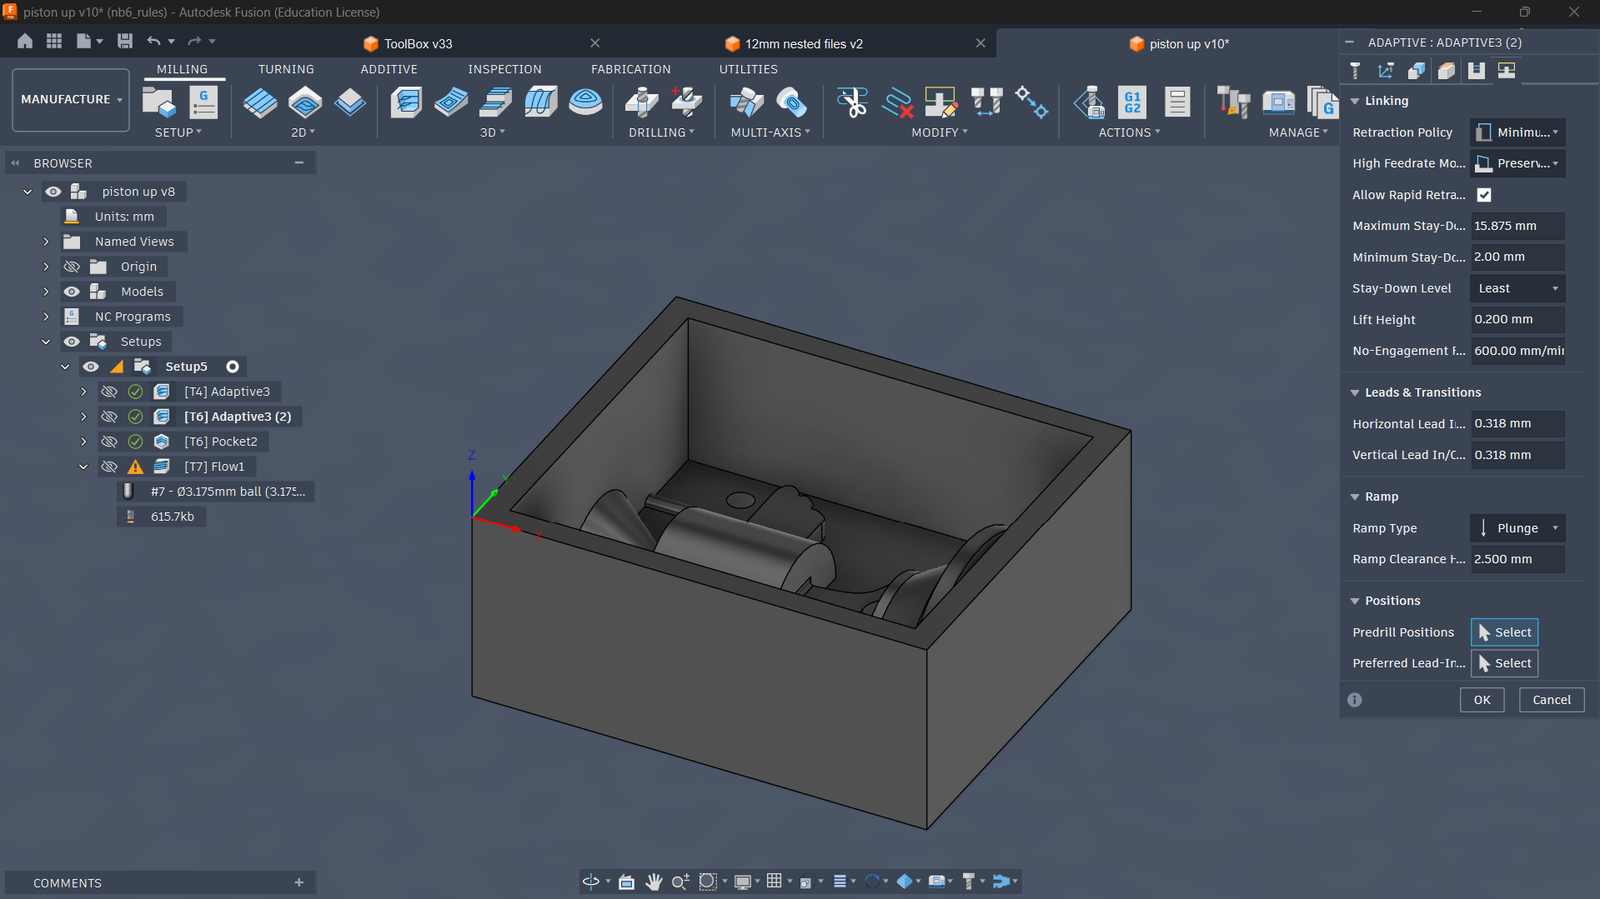
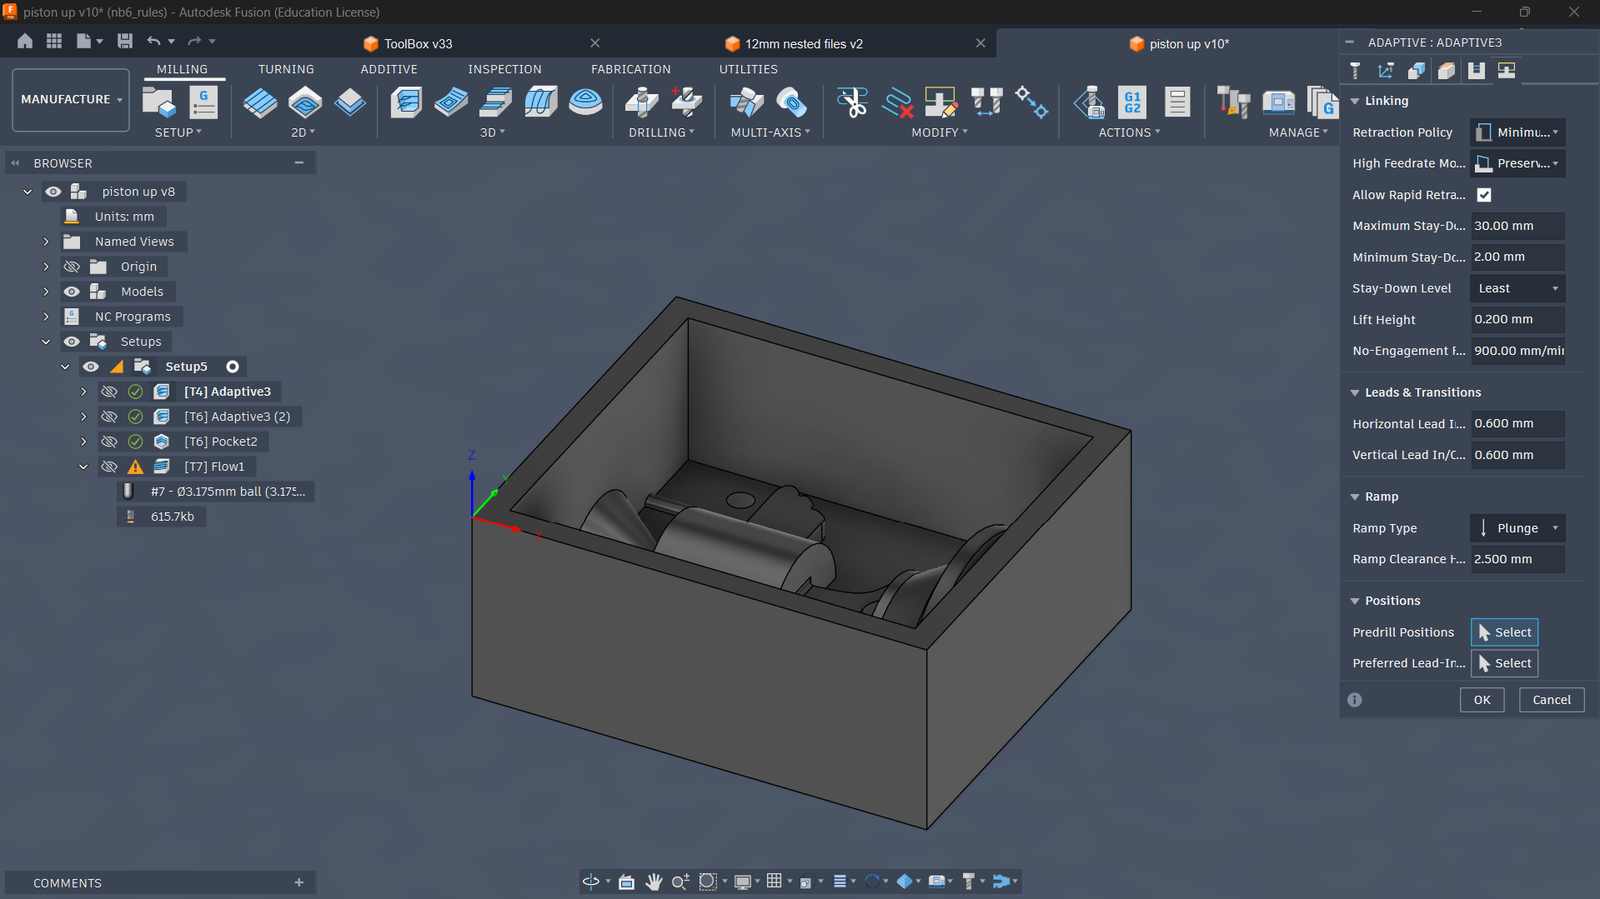 Ramp type setup
Configuring Parameters for Adaptive Clearing (Using 3.175mm flat endmill)#
 Tool, feed and speed
 Geometry and Stock definition
 Heights Setup
 Passes Parameters
 Ramp type setup
Configuring Parameters for Pocket Clearing (Using 3.175mm flat endmill)#
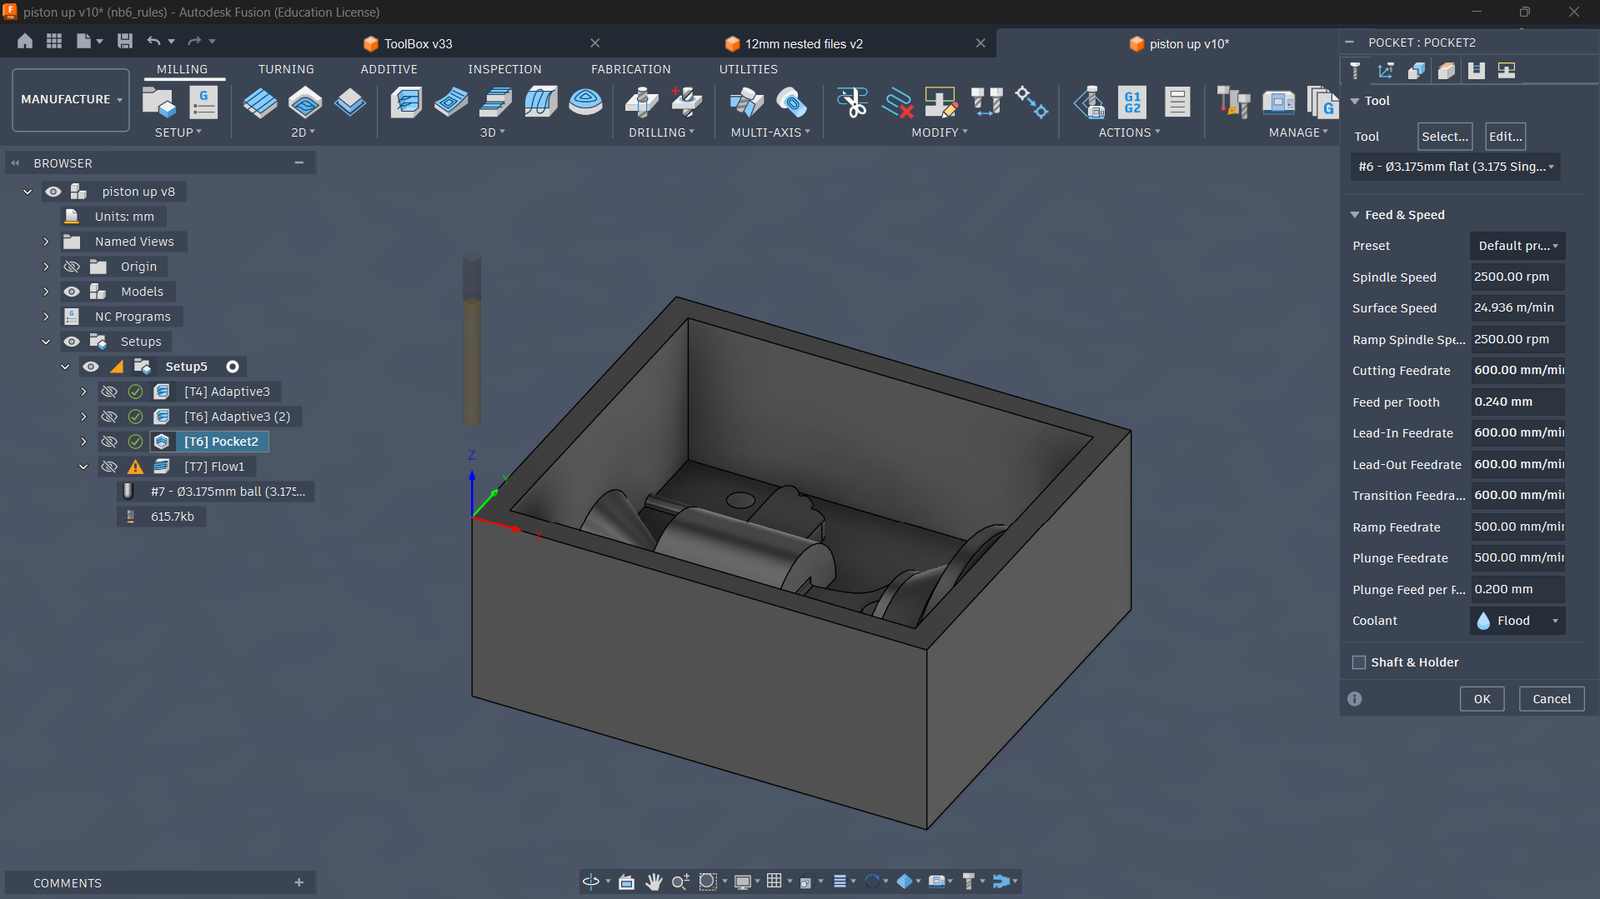 Tool, feed and speed
 Geometry and Stock definition
 Heights Setup
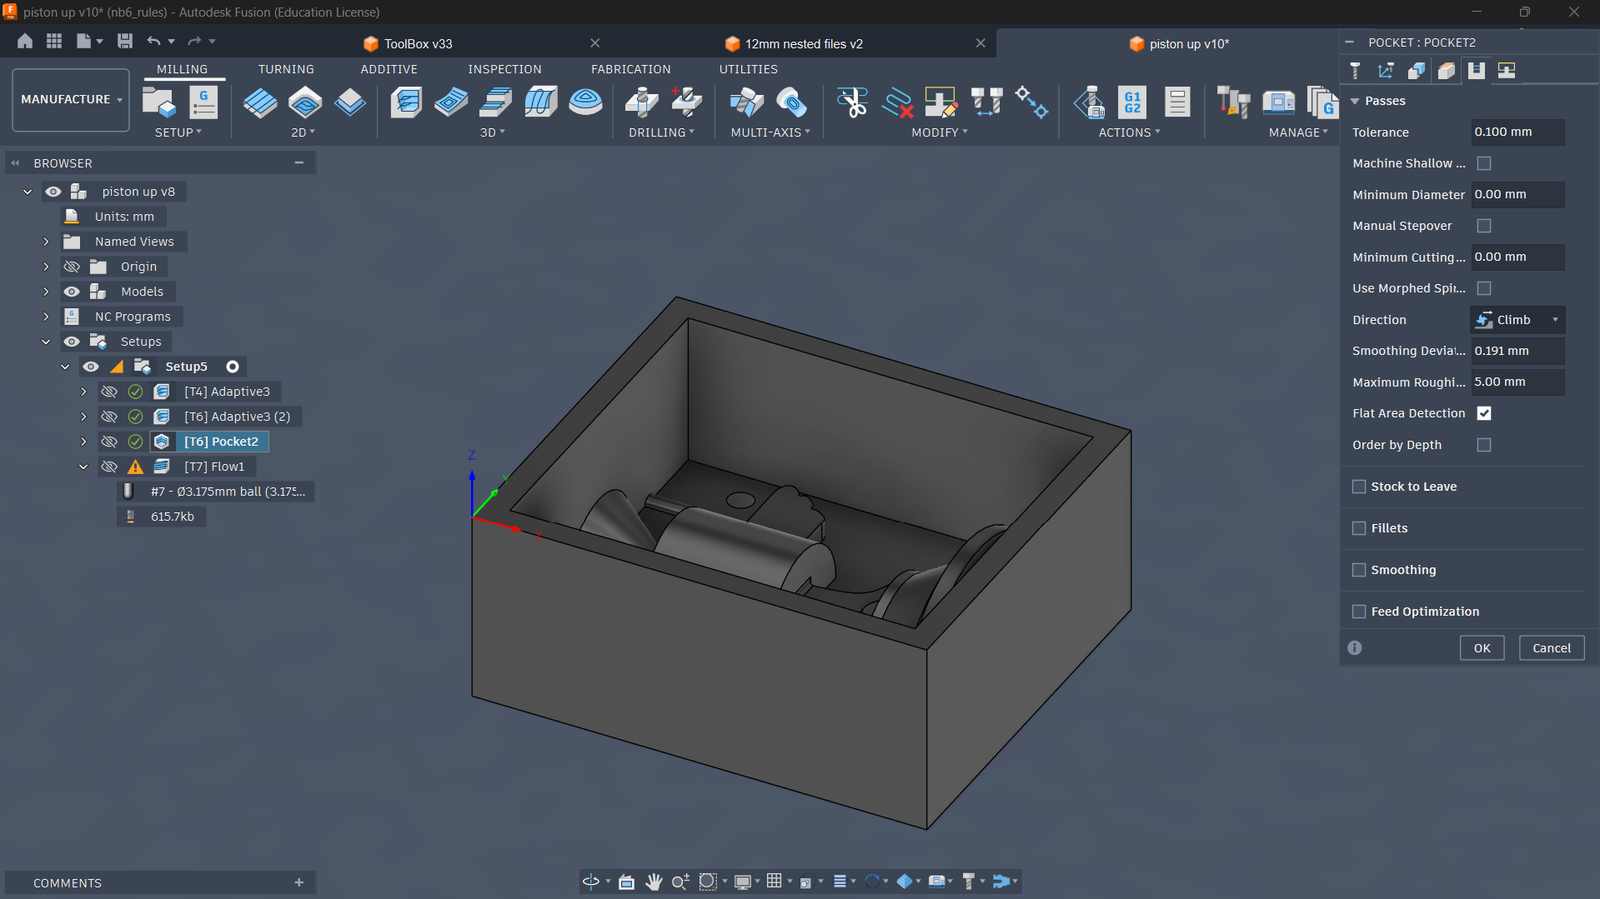 Passes Parameters
 Ramp type setup
Configuring Parameters for Flow Clearing (Using 3.175mm ball endmill)#
 Tool, feed and speed
 Geometry and Stock definition
 Heights Setup
 Passes Parameters
 Ramp type setup
Simulating ToolPath and the Material Removal Process#
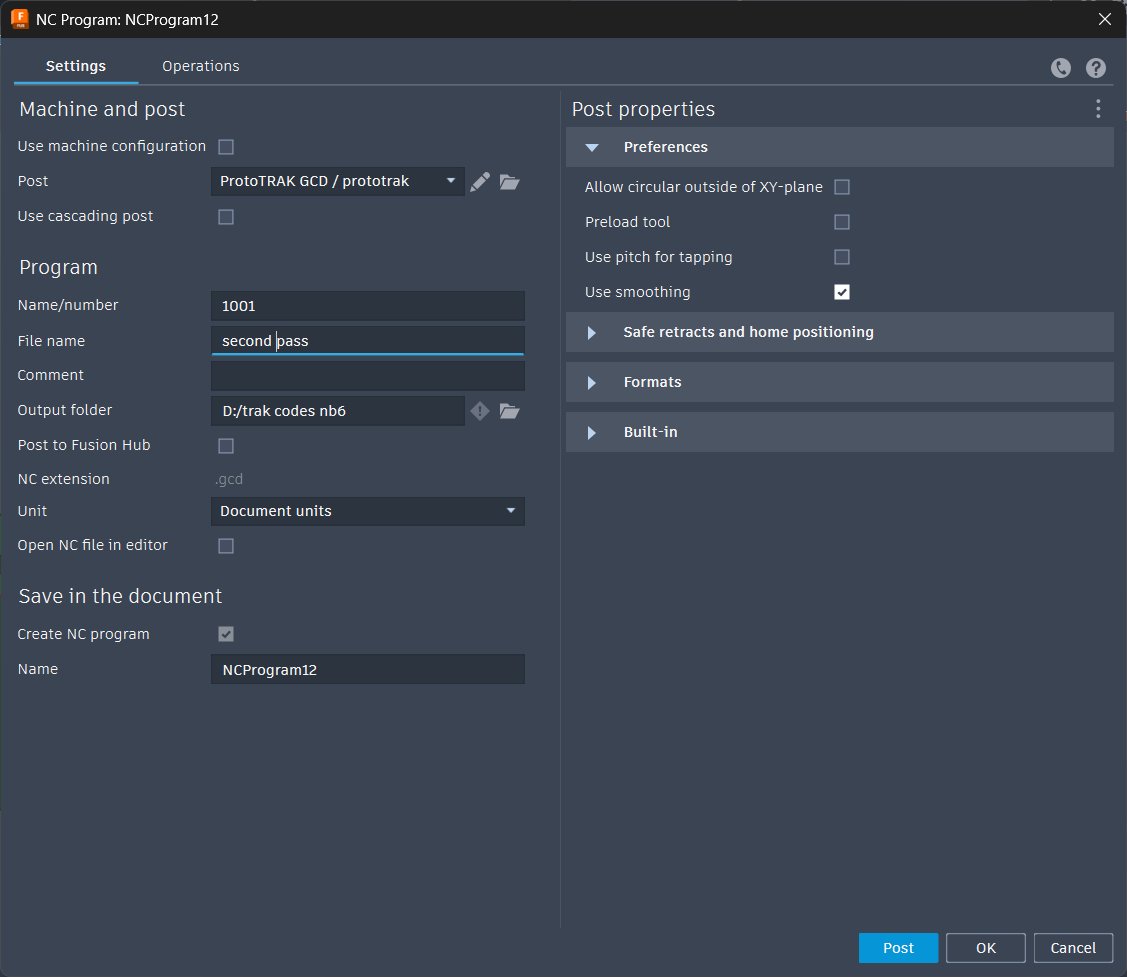
Exporting G-Code for TRAK Machine#
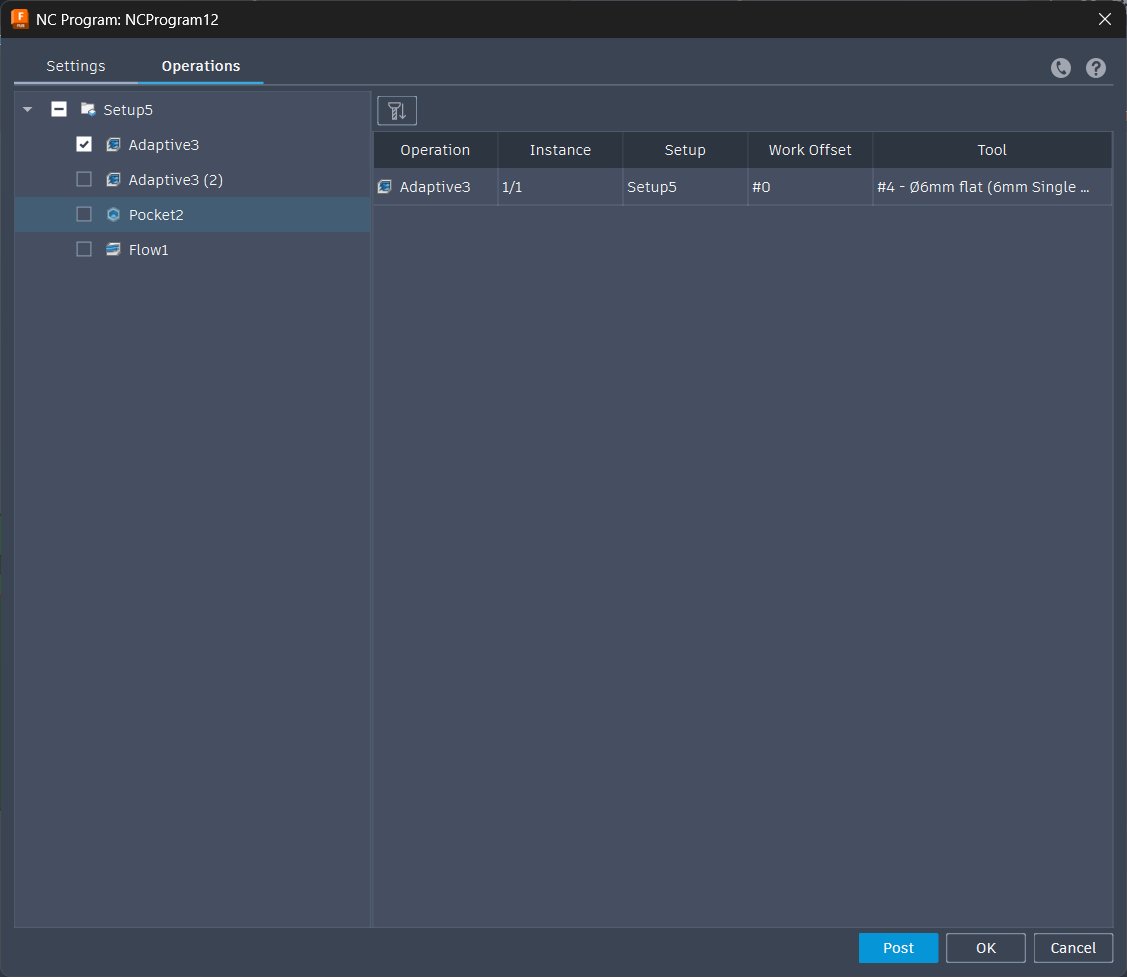 Selecting operations using the 6mm flat endmill
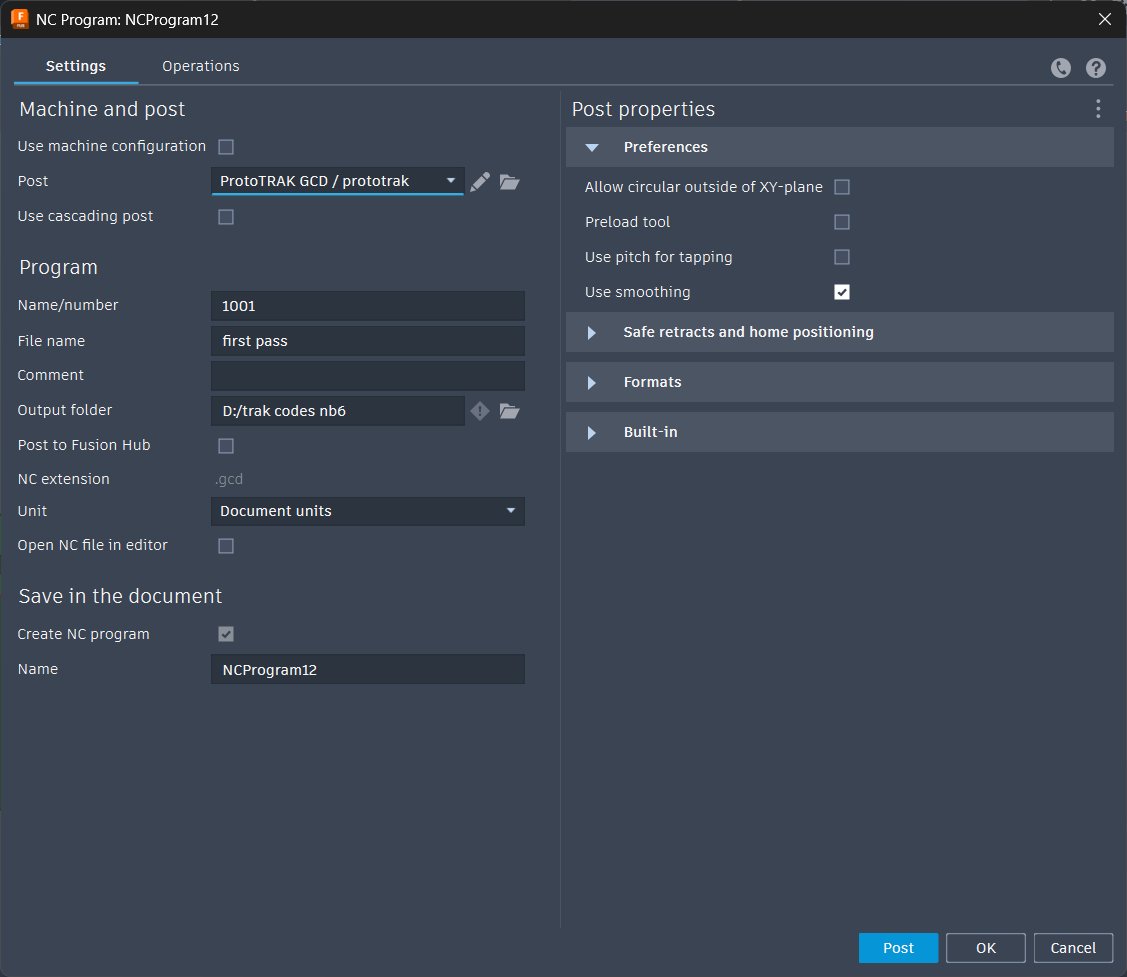 Post processing operations using the 6mm flat endmill for TRAK machine
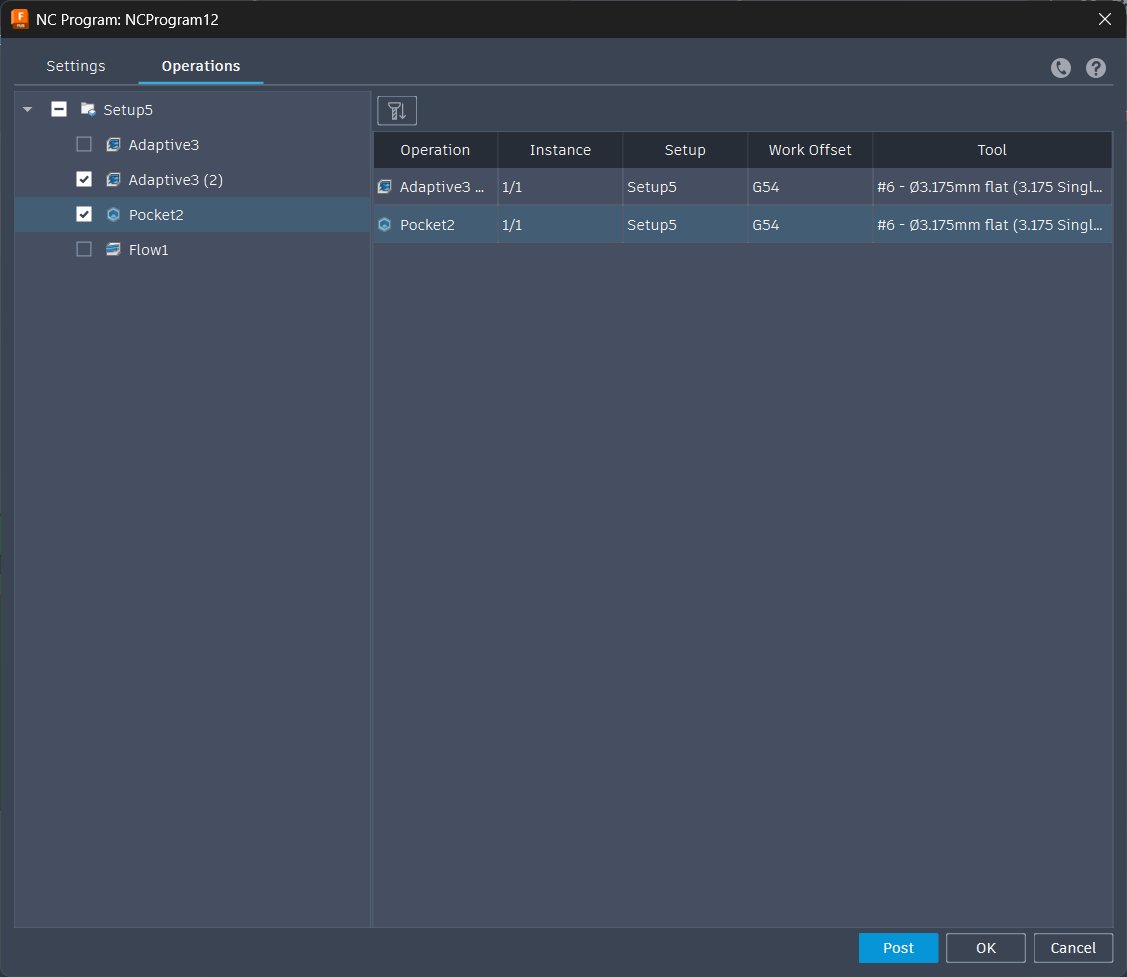 Selecting operations using the 3.175mm flat endmill
 Post processing operations using the 3.175mm flat endmill for TRAK machine
 Selecting operations using the 3.175mm ball endmill
 Post processing operations using the 3.175mm ball endmill for TRAK machine
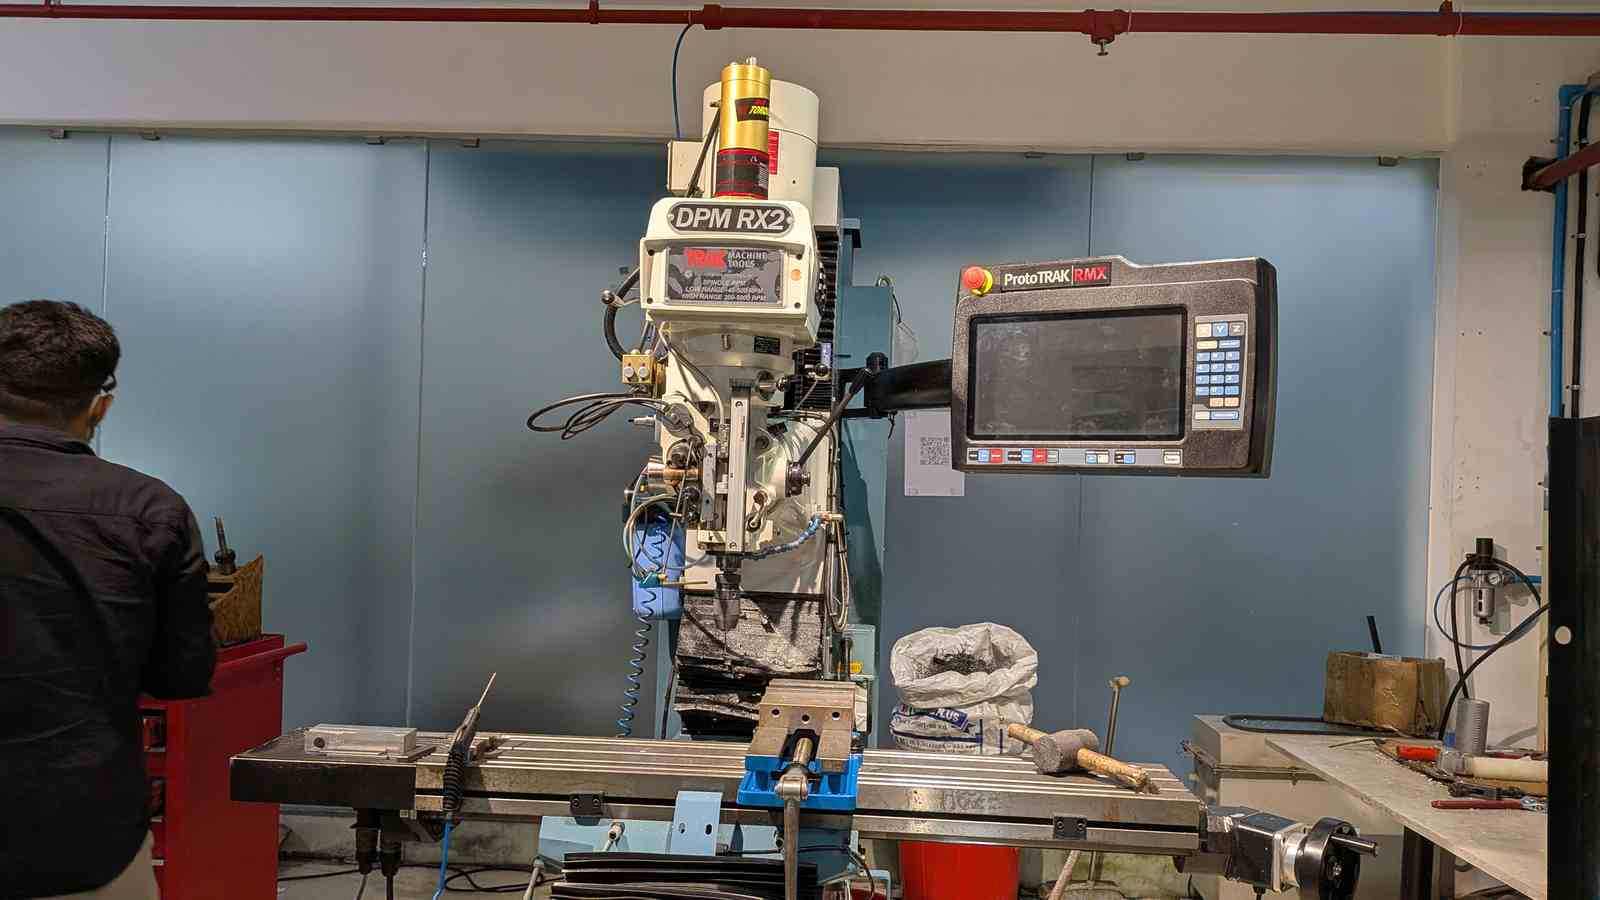
Part 3 – CNC Milling on the TRAK Machine#
🦺 Safety and Pre-Op#
Before touching the machine:
| Equipment | Purpose |
|---|---|
| Safety goggles | Flying wax chips are surprisingly enthusiastic about leaving the workpiece |
| Gloves | Hand protection during setup and part handling |
| Dust mask | Wax powder is fine, airborne, and gets absolutely everywhere |
Also check lubricant and coolant levels before powering on — standard pre-op on any machine tool.
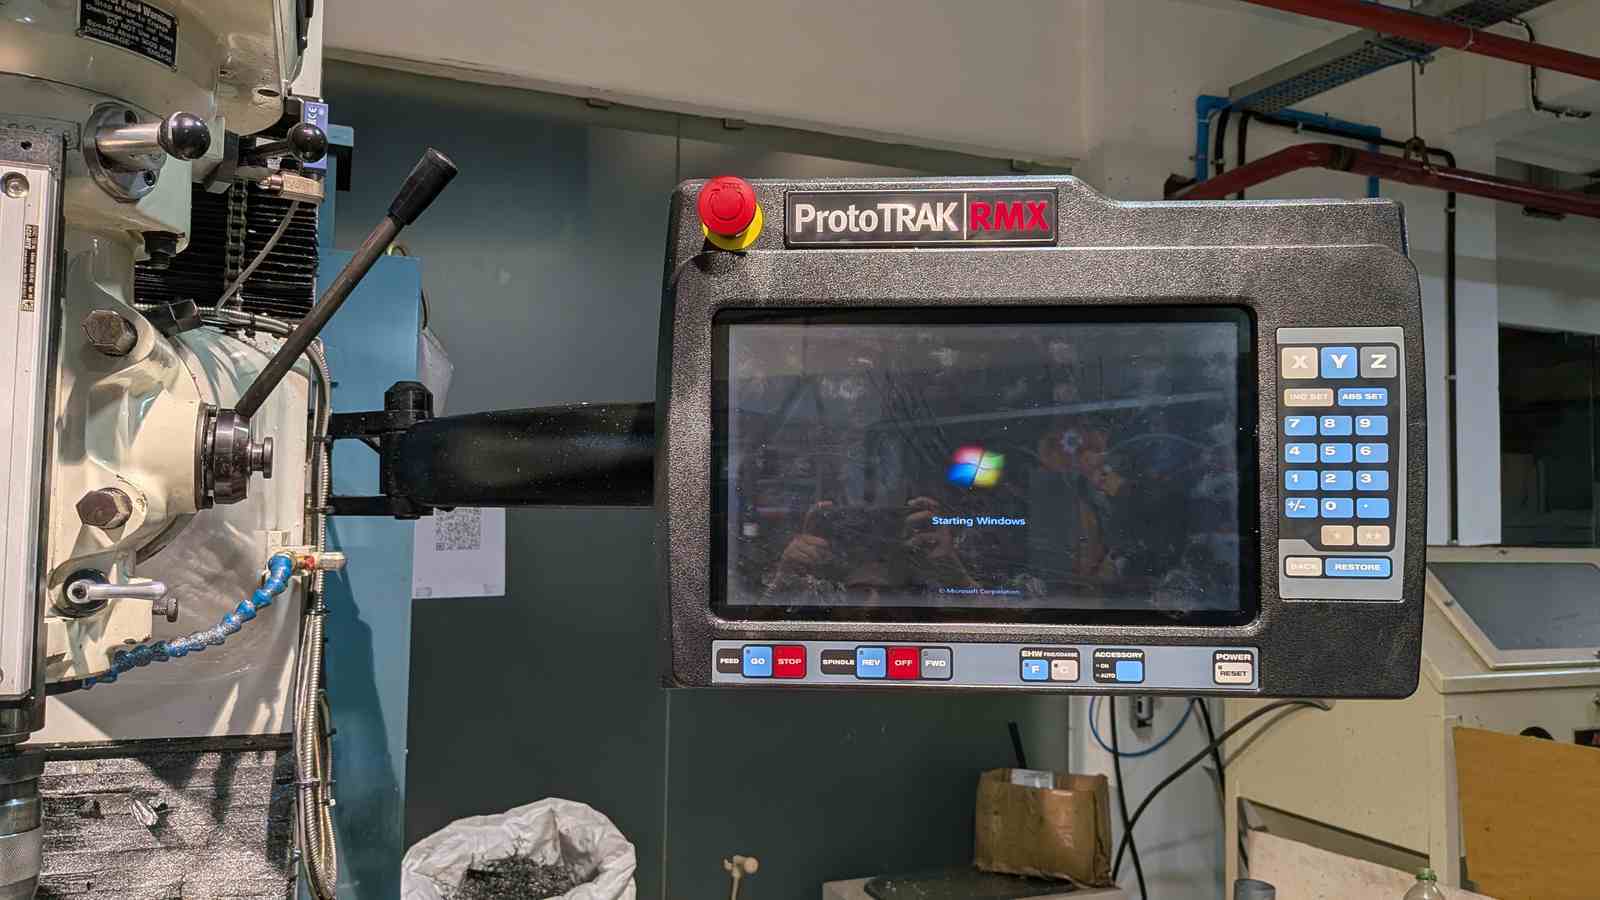
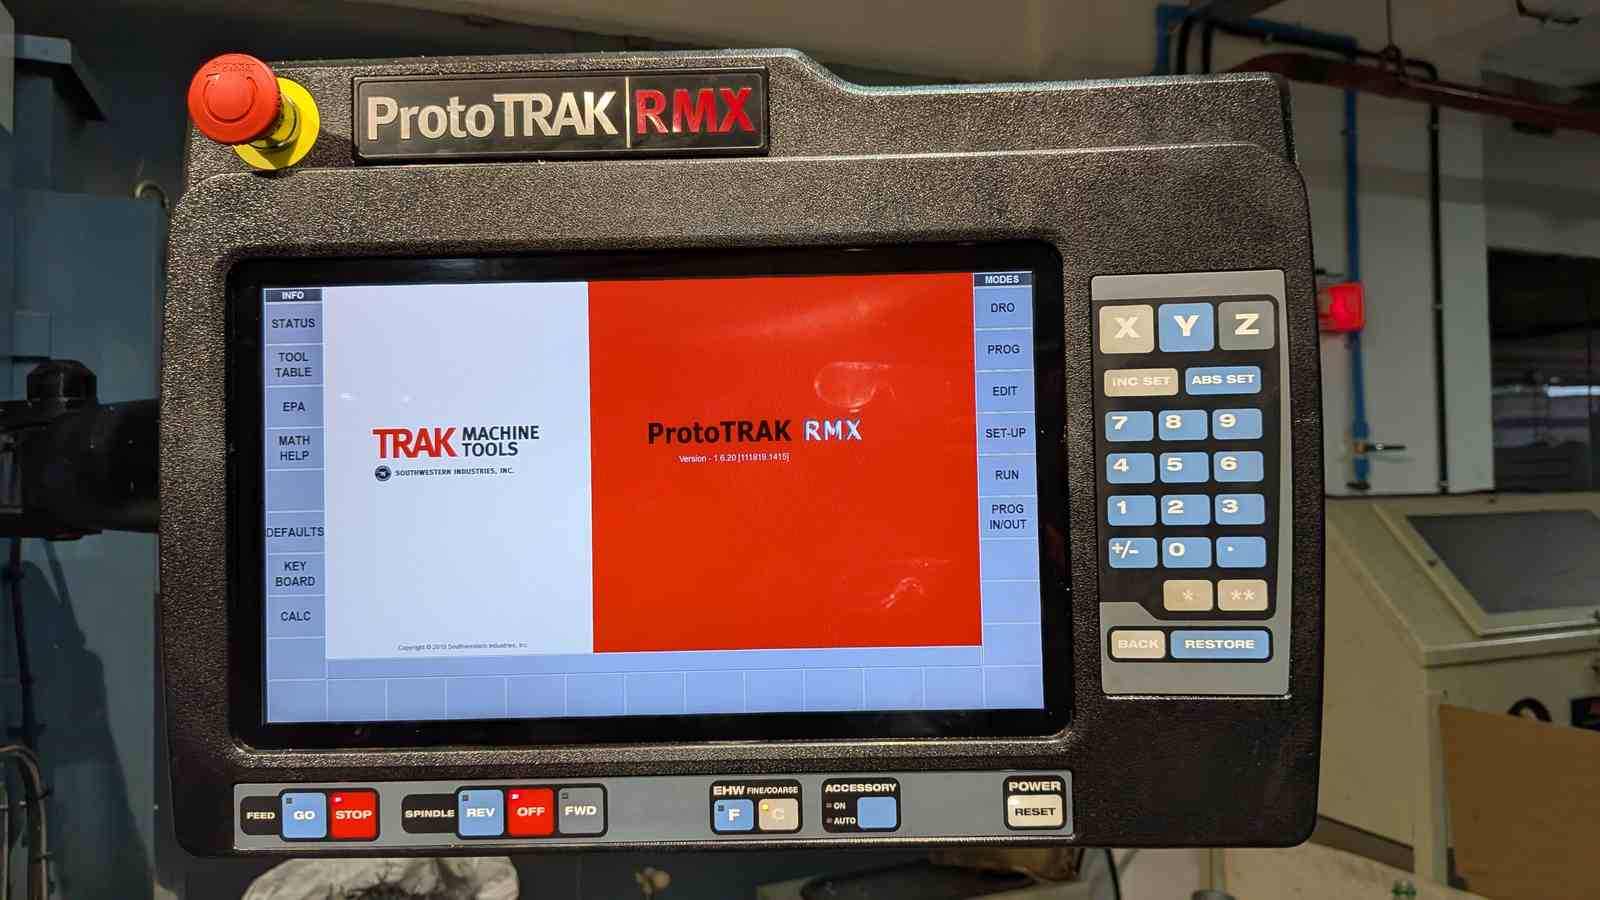
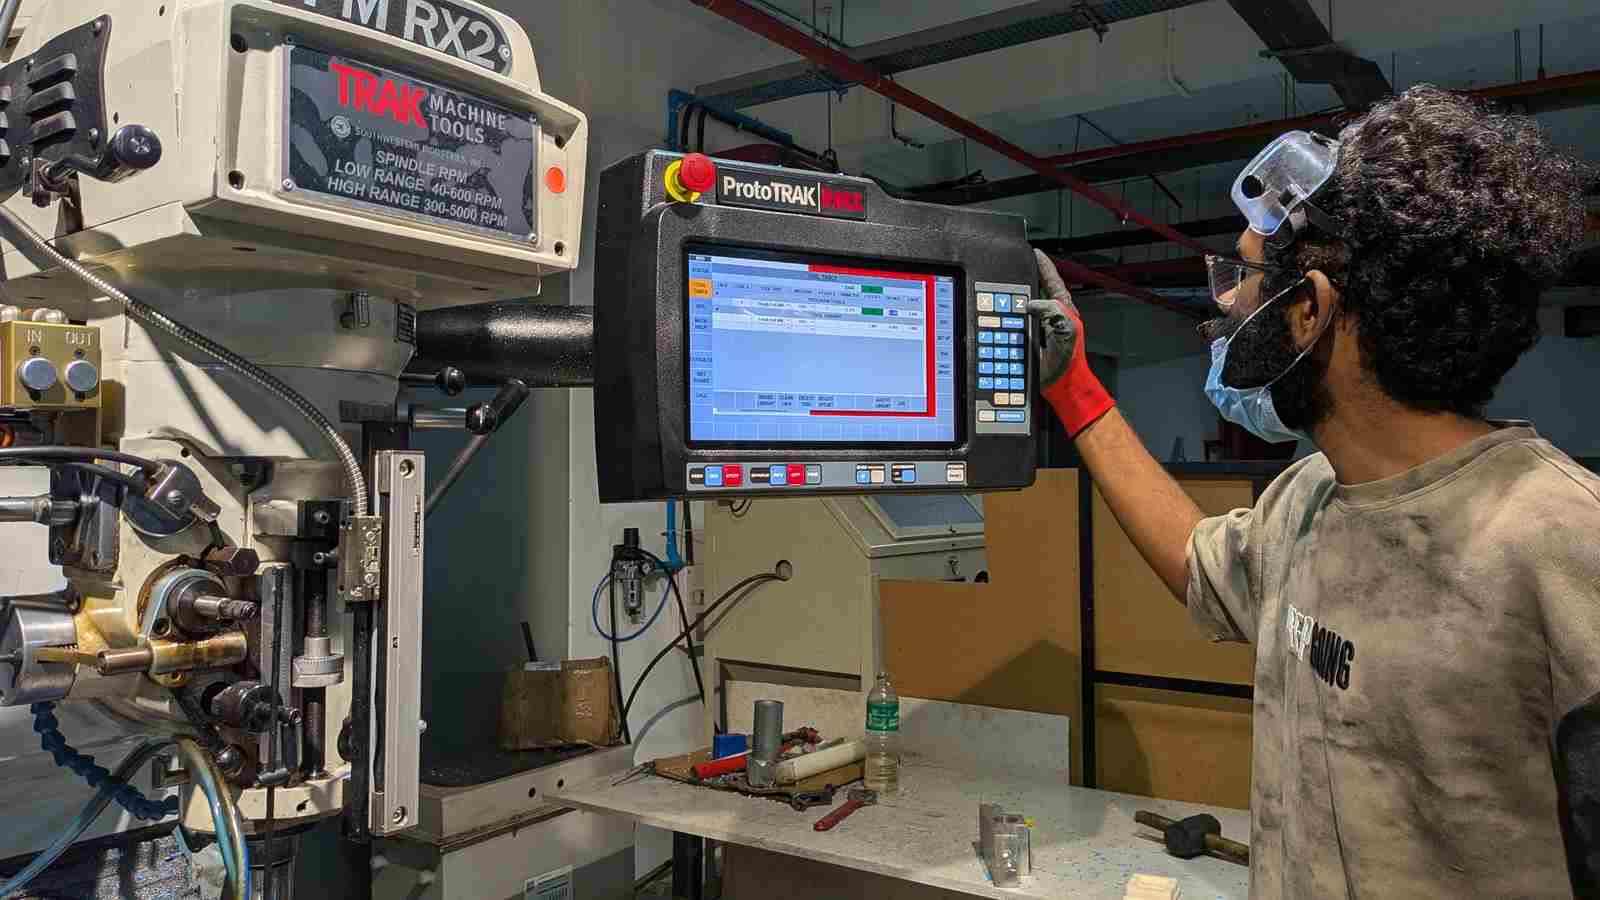
⚙️ Machine Setup#
The TRAK setup process is more involved than something like the ShopBot because you’re managing a reference system that has to survive tool changes mid-job. Here’s the full workflow:
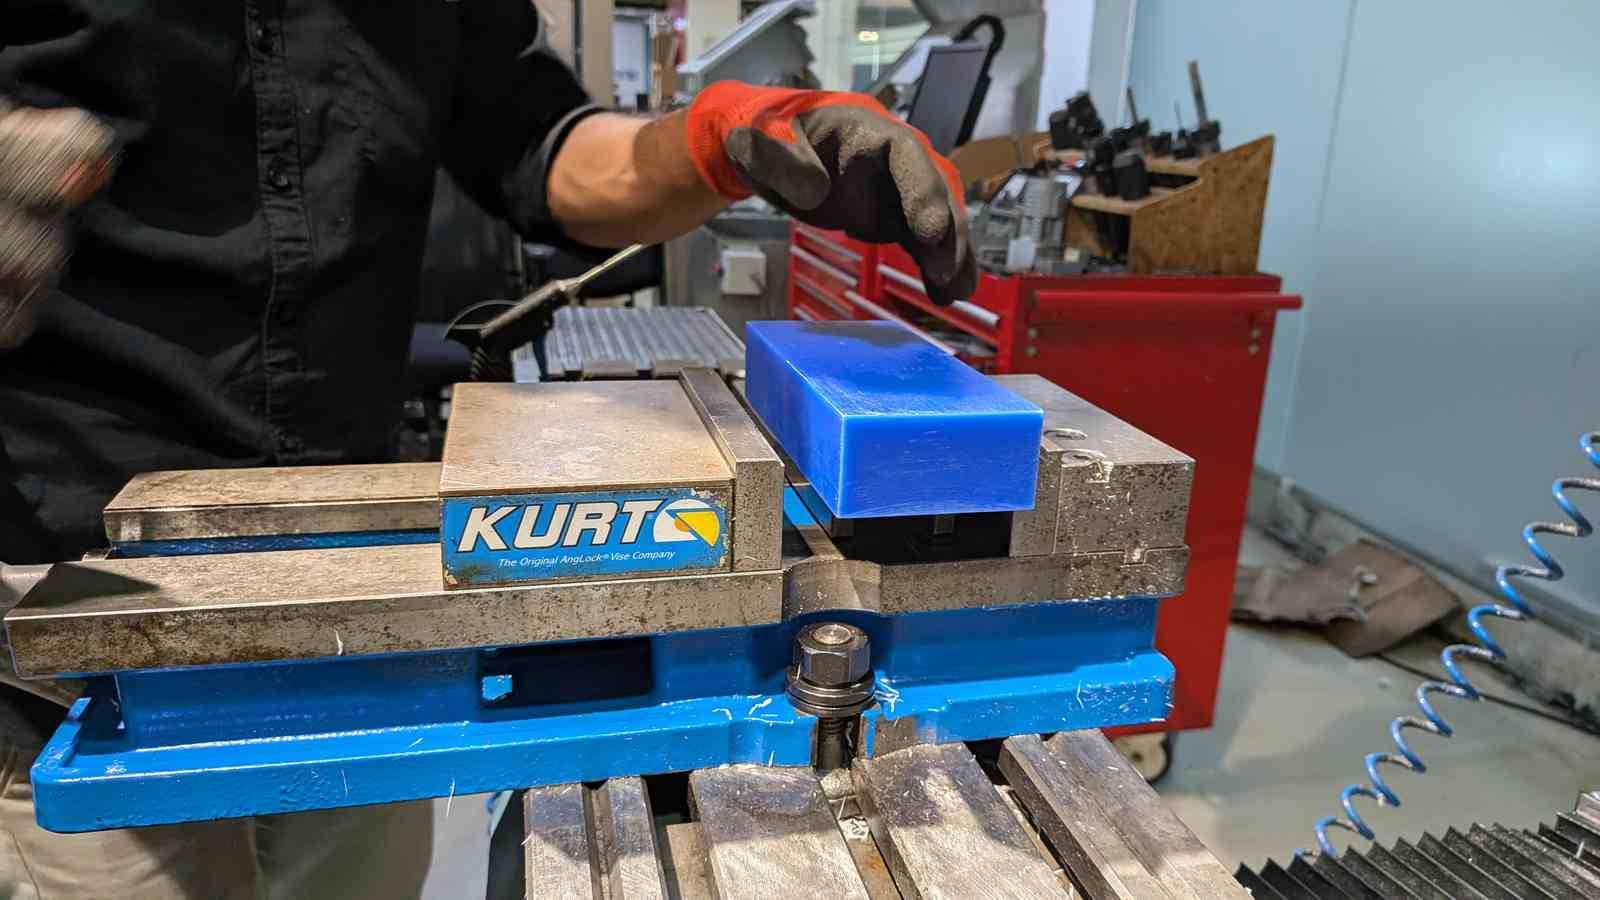
Step 1 — Secure the stock
The wax blank is clamped into the vise on the TRAK bed. Parallel blocks were placed under the wax to lift it to the correct height in the vise — this ensures the top surface of the stock is at a consistent, known height and that the vise jaws clamp on solid material rather than air. Make sure the blank is fully seated on the parallels and the vise is properly torqued — any movement during cutting ruins the job and your day.
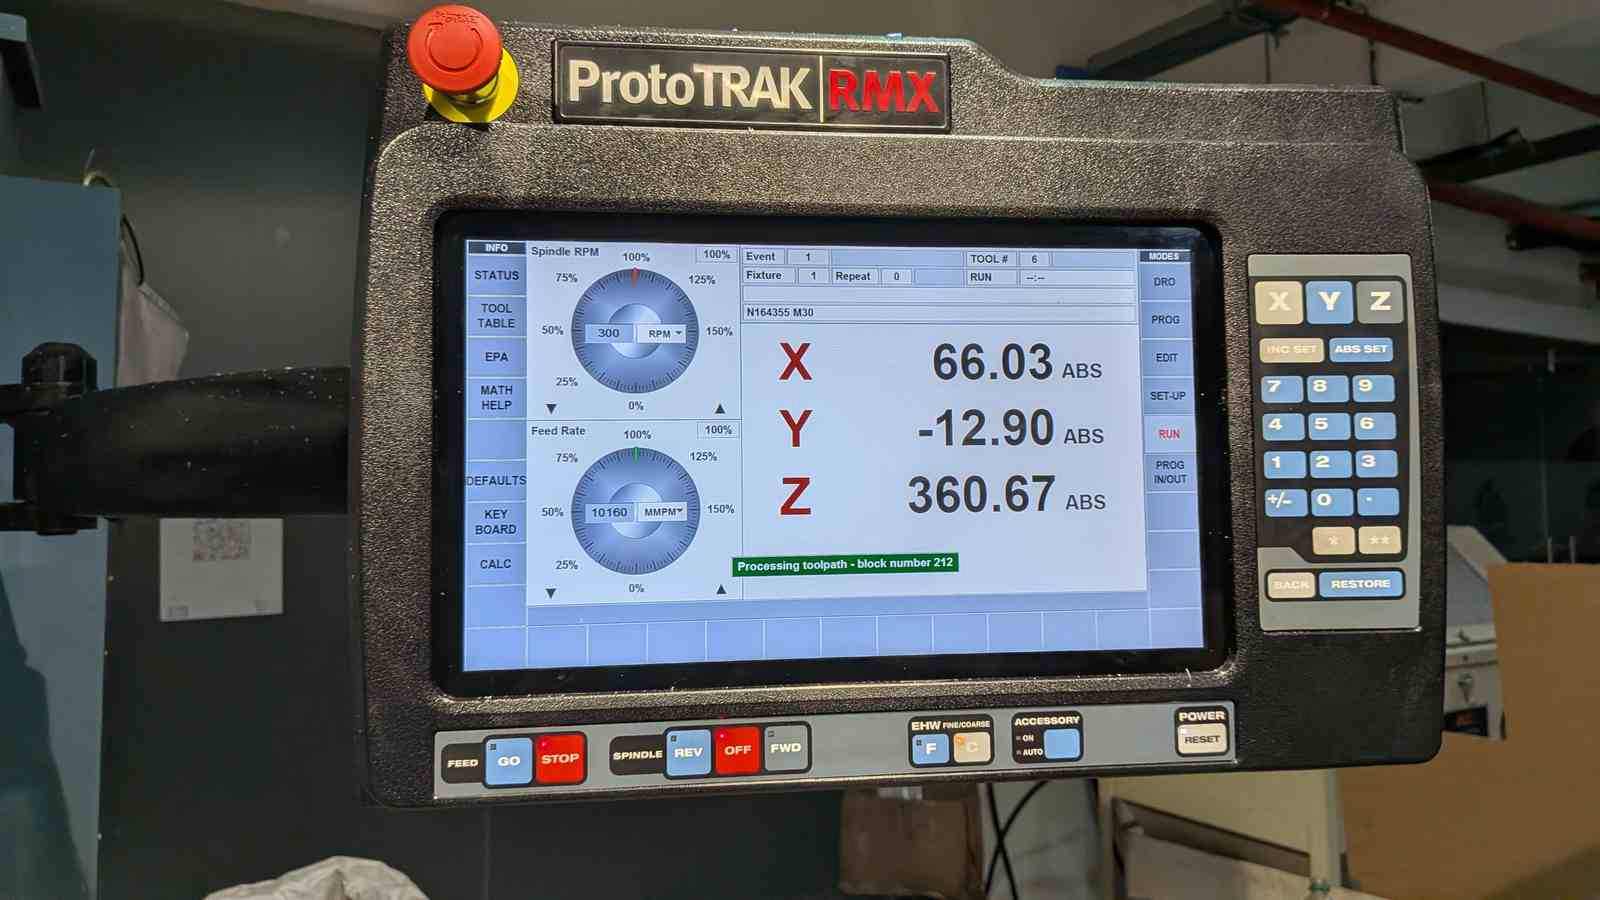
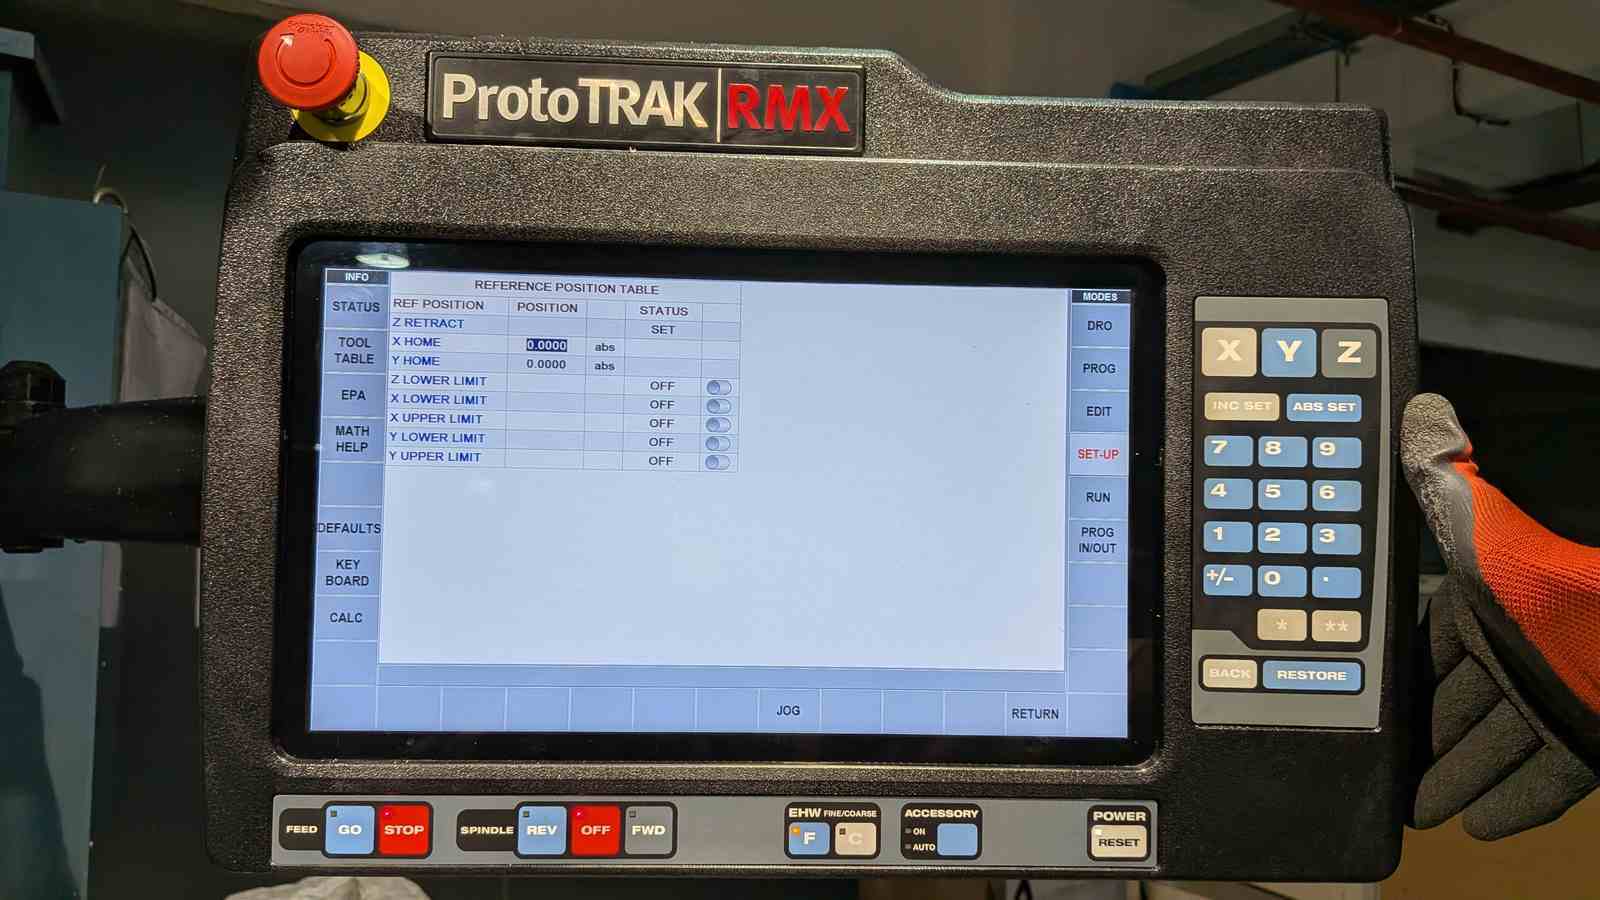
Step 2 — Set machine to DRO mode and establish retraction point
DRO (Digital Read Out) mode lets you jog manually and read exact coordinates. Set the retraction point — the safe height the machine returns to between operations.
Step 3 — Edge finding for X and Y
Install the edge finder in the spindle. Jog to the X edge of the wax, touch off, enter the offset into the controller. Repeat for Y. This establishes the work coordinate system — the machine now knows where (0, 0) is relative to your stock.

Step 4 — Set Z with the first tool
Swap the edge finder for the 6 mm endmill. Jog down carefully to the top surface of the wax, touch off, and zero Z from there.
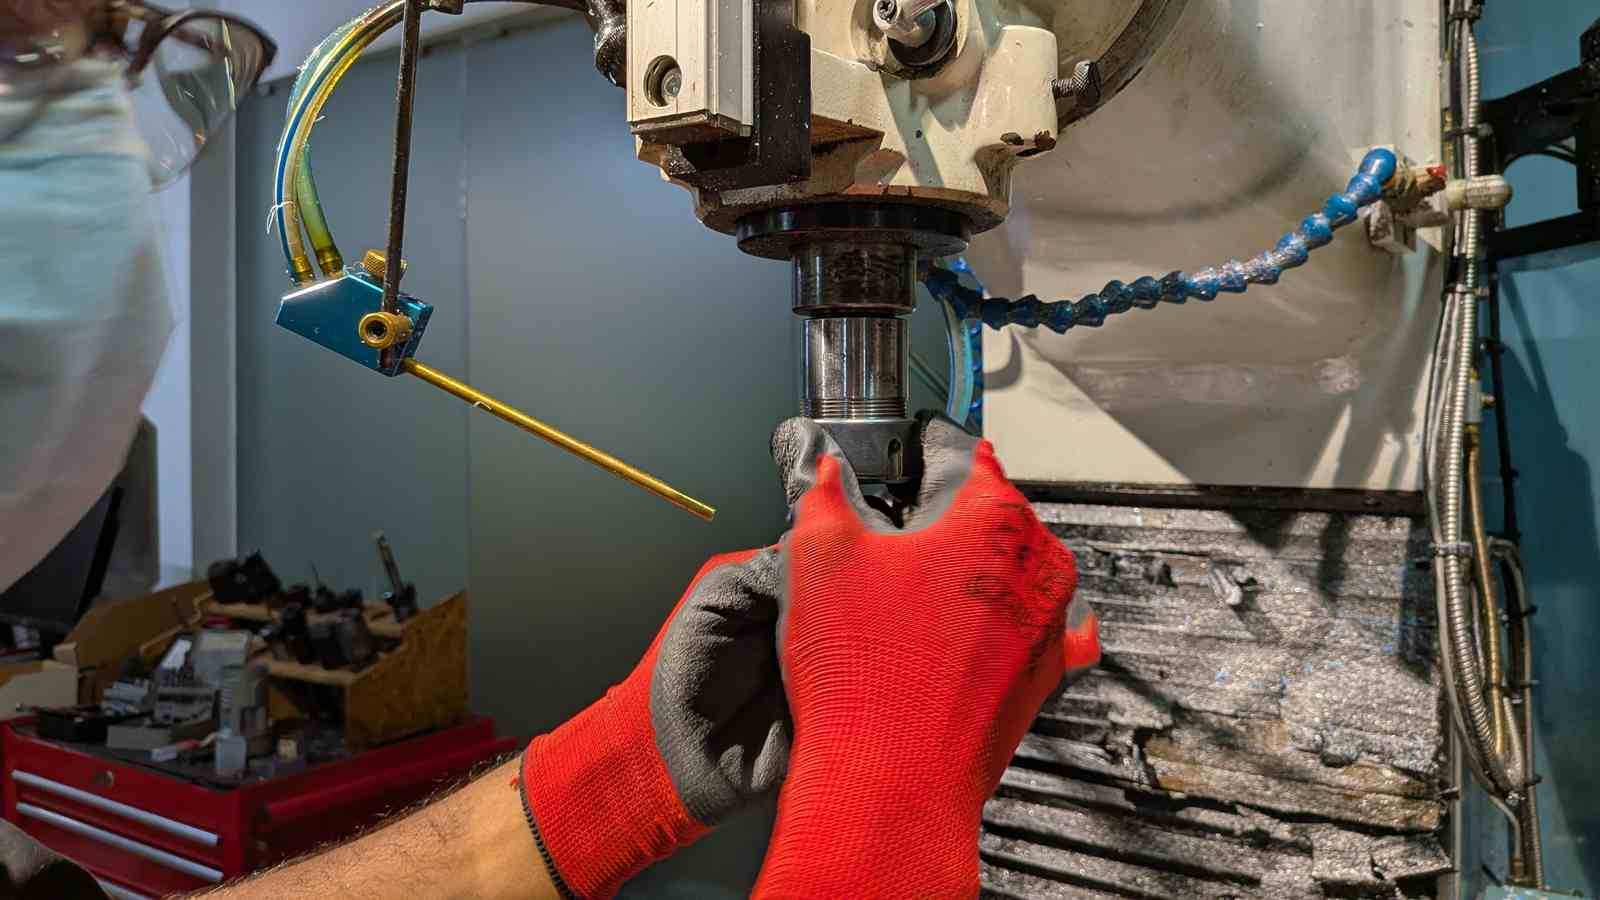 Fixing endmill inside the chuck
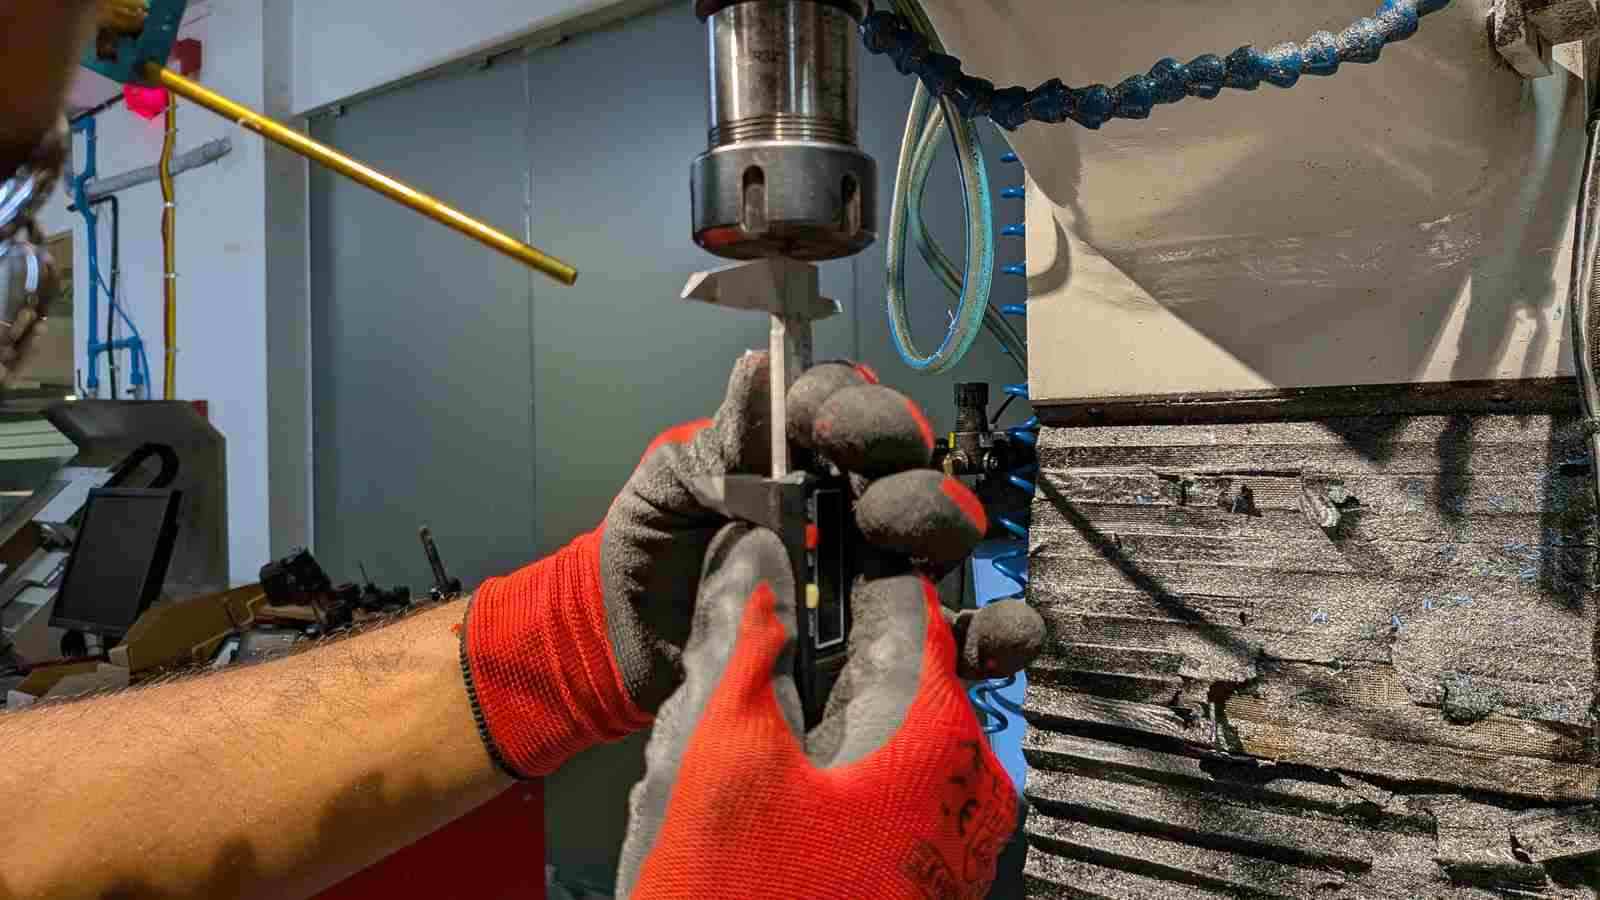 Measuring if there is suffiencent lenght of the endmill outside the chuck
Step 5 — Set a reference Z (this step matters more than you think)
Before starting the job, save a reference Z offset from the current top surface. This is what allows you to re-zero Z correctly after a tool change — if your first operation machines away the top surface, you no longer have a physical reference point. The saved offset solves this. I’ll refer back to this step shortly.
Step 6 — Load G-code and run
Load the program, select the correct tool, turn on the coolant air jets, set to Tracking mode, and rotate the handwheel to bring the machine to the first reference point.
Enable tracking, start the spindle. Feed the G-code manually via the handwheel for the first few passes — verify cut depth, orientation, and that the tool is behaving as expected. Once confirmed, stop the manual feed and switch to NC Run mode to run the program automatically.
After the 6 mm adaptive clearing completes, swap to the 3.175 mm endmill, re-zero Z using the saved reference offset, and repeat the run sequence for the remaining operations.
💥 The Endmill Incident#
The machine stopped mid-cut due to a fault. Nothing was damaged at that point — just an error that needed clearing.
In trying to recover, I needed to move the Z axis. Completely reasonable. What I did instead was press Z down instead of Z up — drove the spindle (off) straight into the wax stock.
Snapped the endmill clean off.
 Error code shown
 Endmill inside wax block after the incident
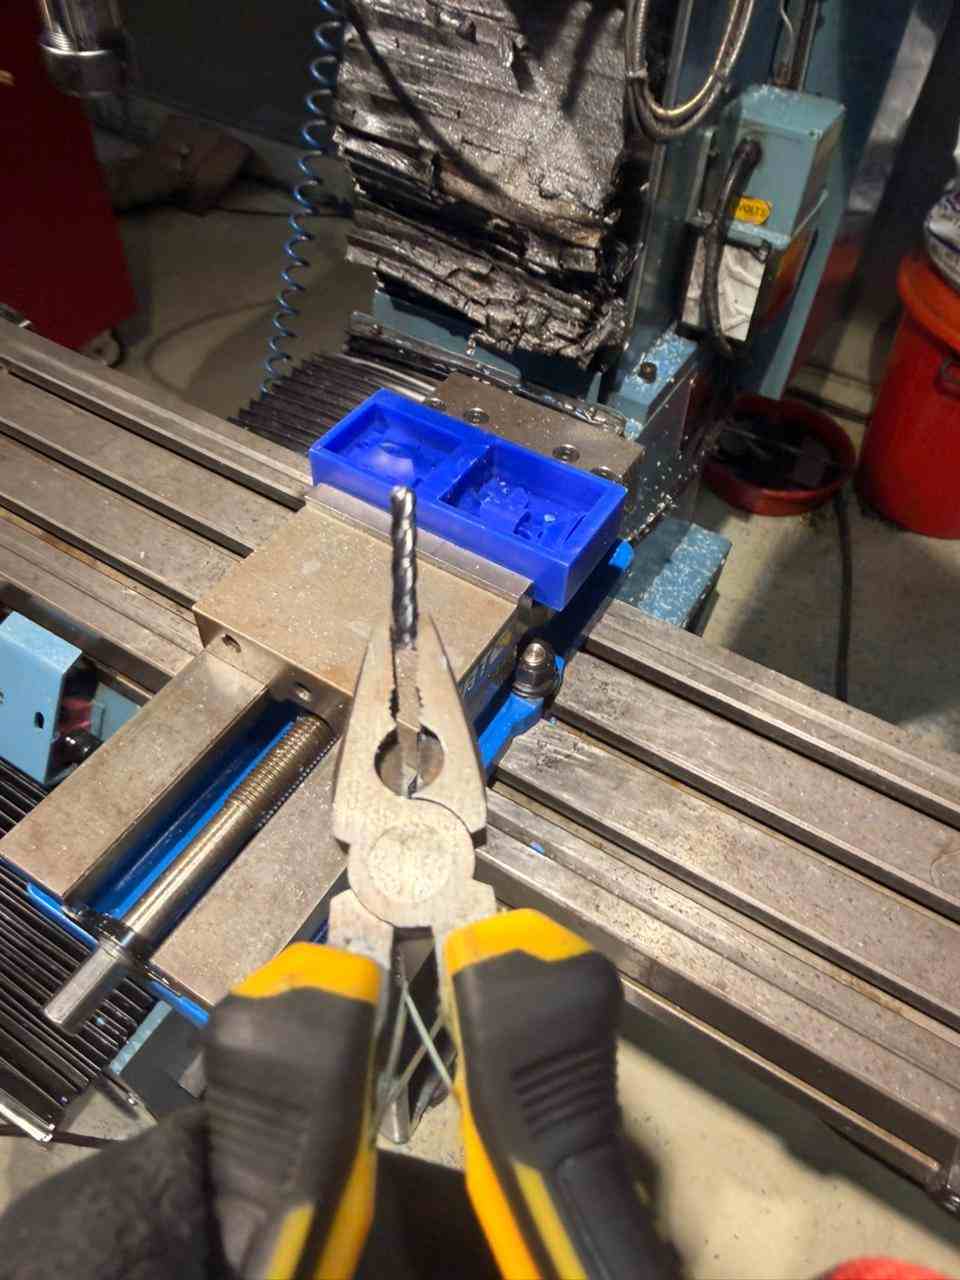 Broken endmill after removal from the wax block
🔴 Lesson learned the expensive way: When recovering from a mid-job stop and moving Z, always press Z up first to clear the workpiece. Z down near the stock with the spindle off is just a slow-motion endmill sacrifice.
Replaced the endmill, re-zeroed using the saved reference Z offset (told you it would come back), and carried on. Everything else ran clean.
btw a small hole was created in the wax block and i had taped over it so that the silicon doesnt pass through it and it was successful.
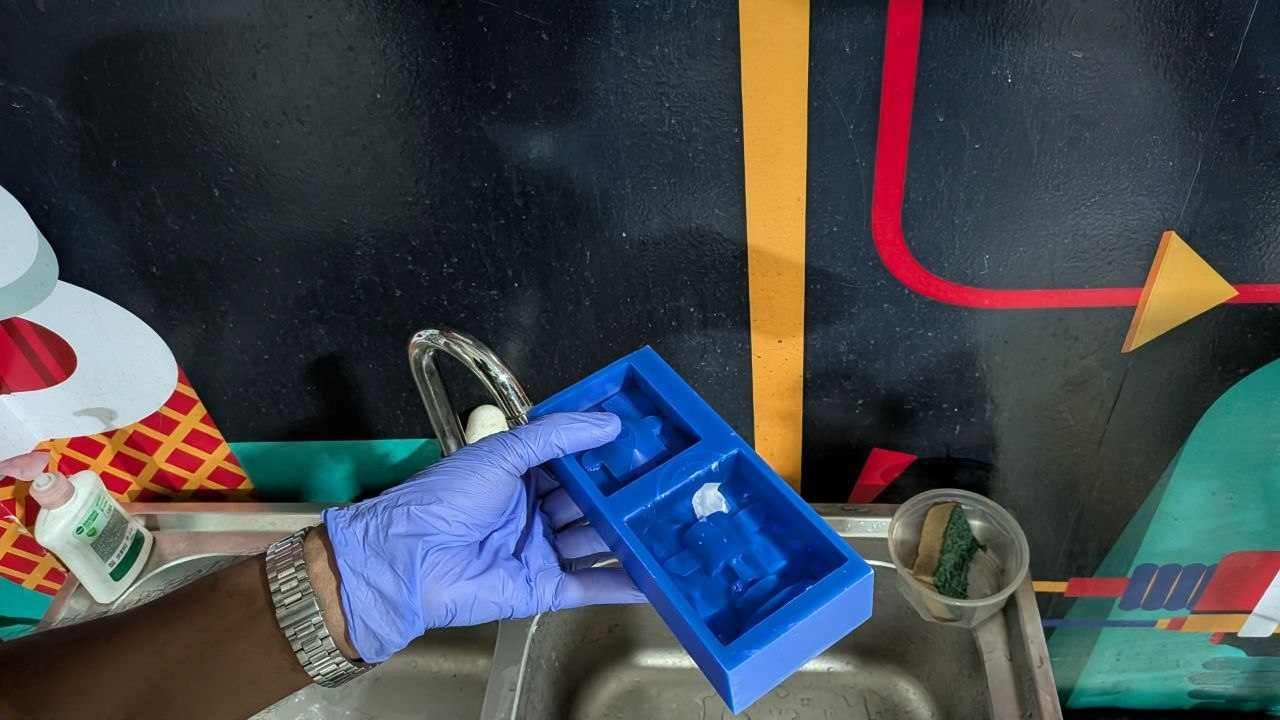
Part 4 – Silicone Mold Pouring#
After the TRAK job finished and the wax was out of the vise, the first step was cleaning. Both cavities got a thorough blast with compressed air to remove all residual wax powder and chips. Any contamination left in the cavity will end up on the face of your silicone mold — and therefore on every part you cast from it.
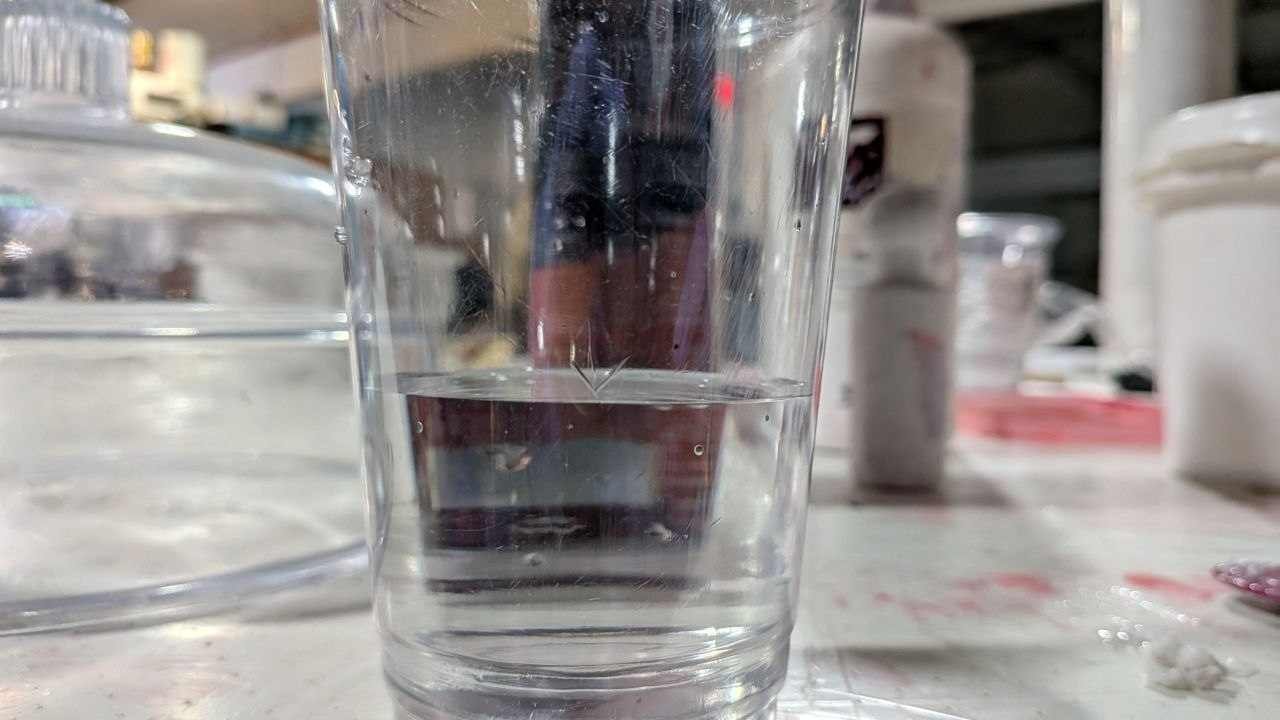
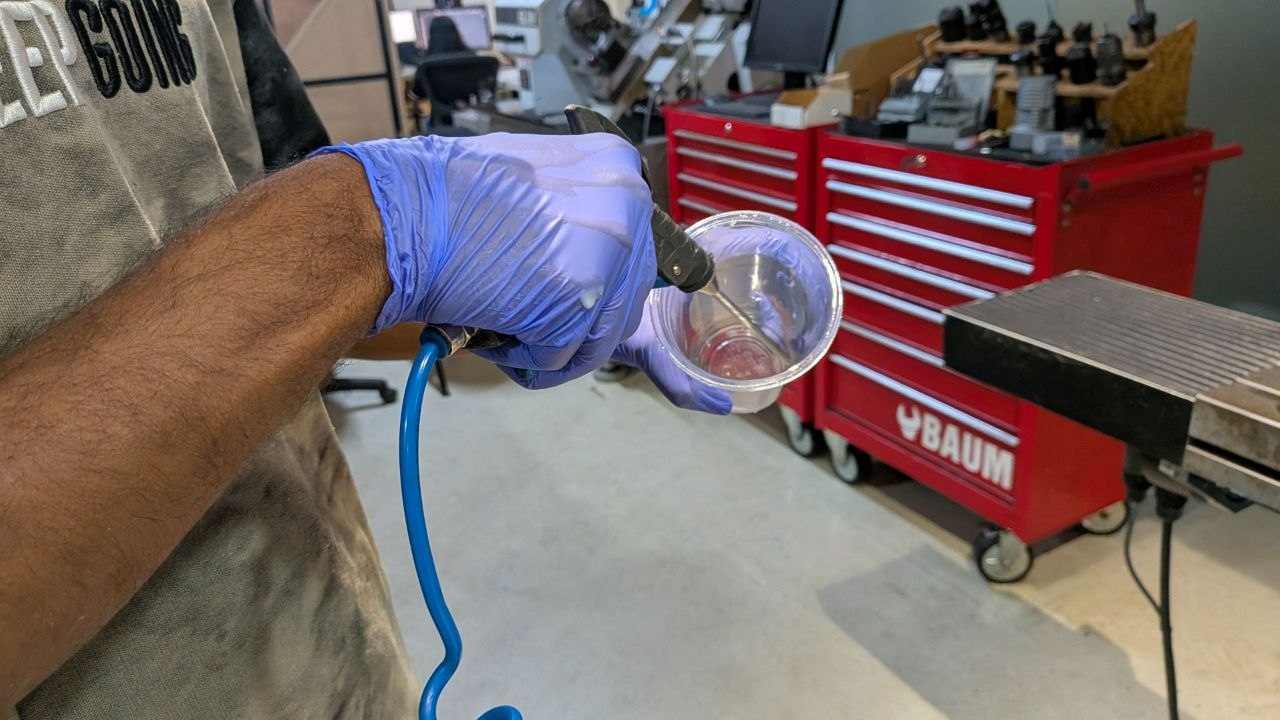
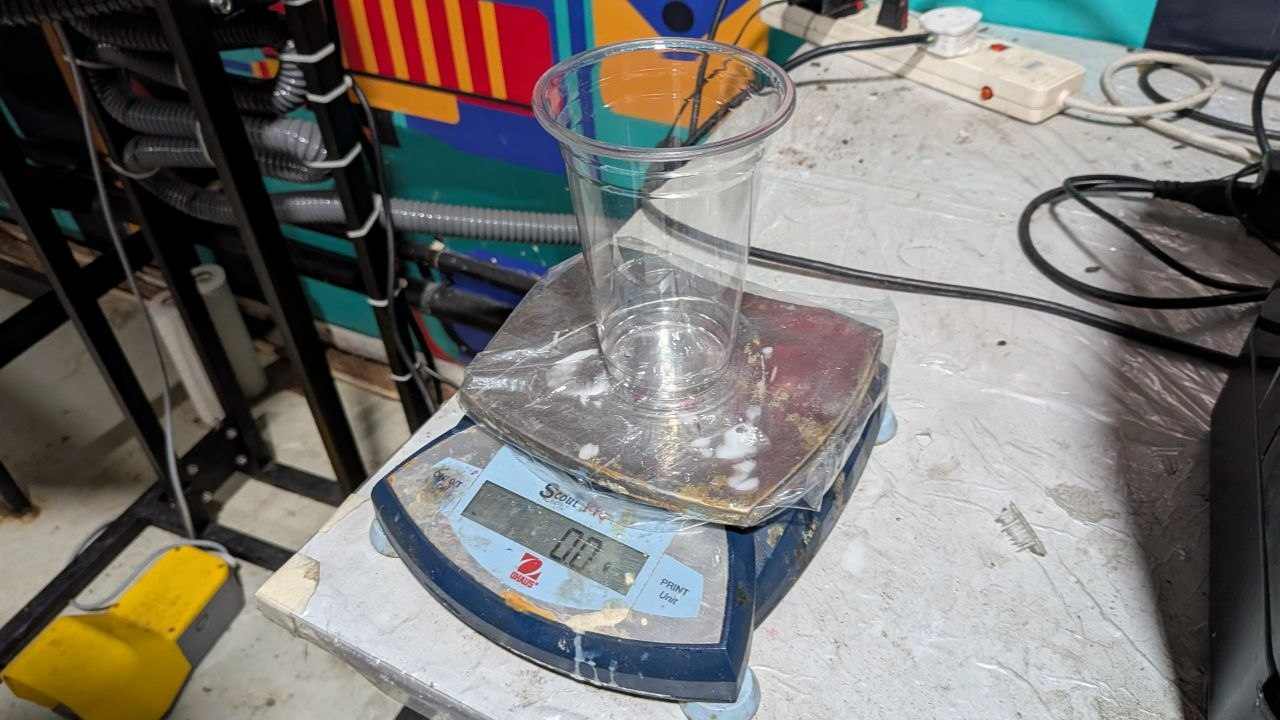
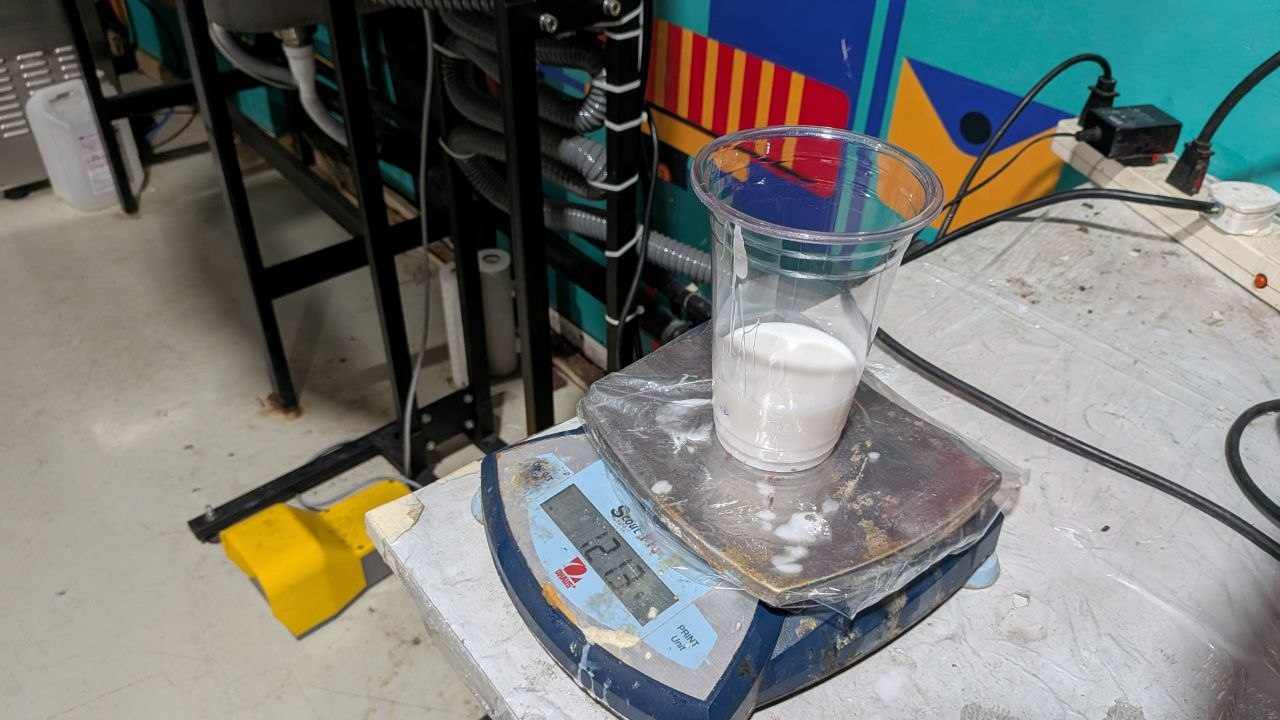
📏 Volume Measurement#
Rather than guessing how much silicone to mix — which wastes expensive material and is generally a bad habit — I measured the cavity volume directly:
- Fill both mold cavities completely with water
- Transfer all the water into a disposable cup
- Mark the water level with a marker — this is your target mixed volume
- Blow all the water out of both the wax and the cup with compressed air until fully dry
Water contamination interferes with silicone cure, so getting everything completely dry matters. This method gives you the exact quantity you need without any math or guesswork.
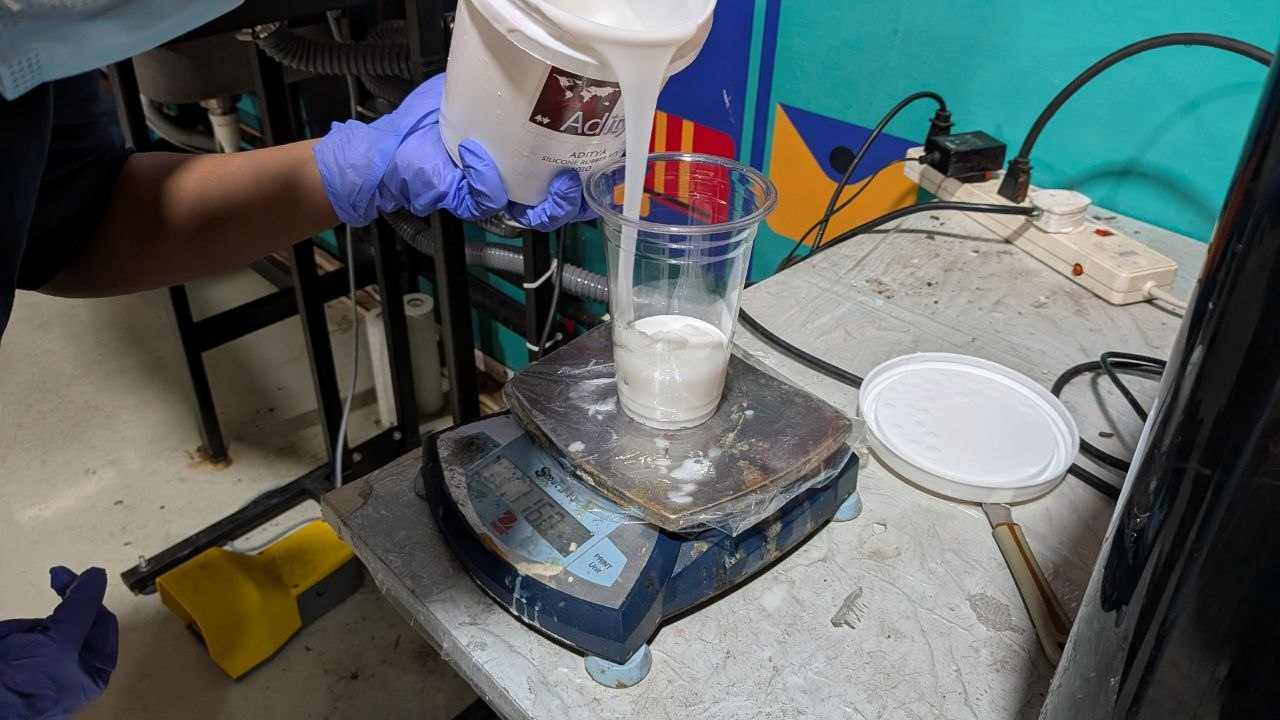
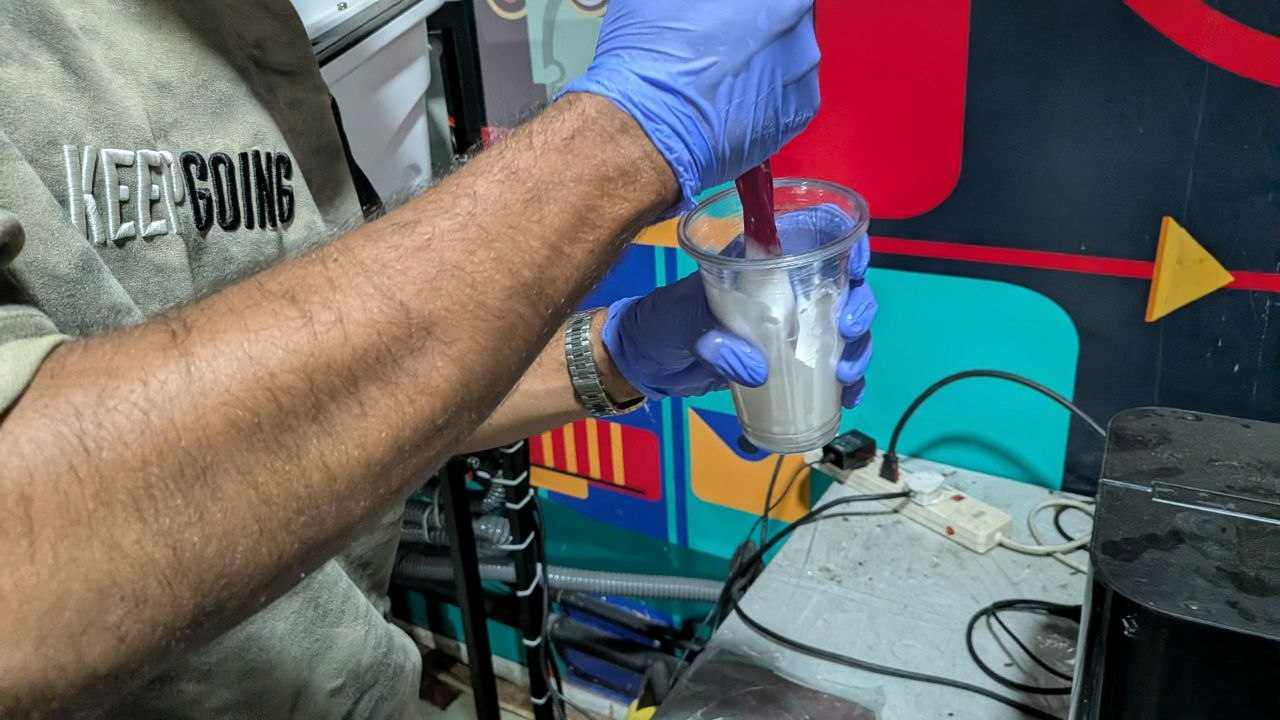
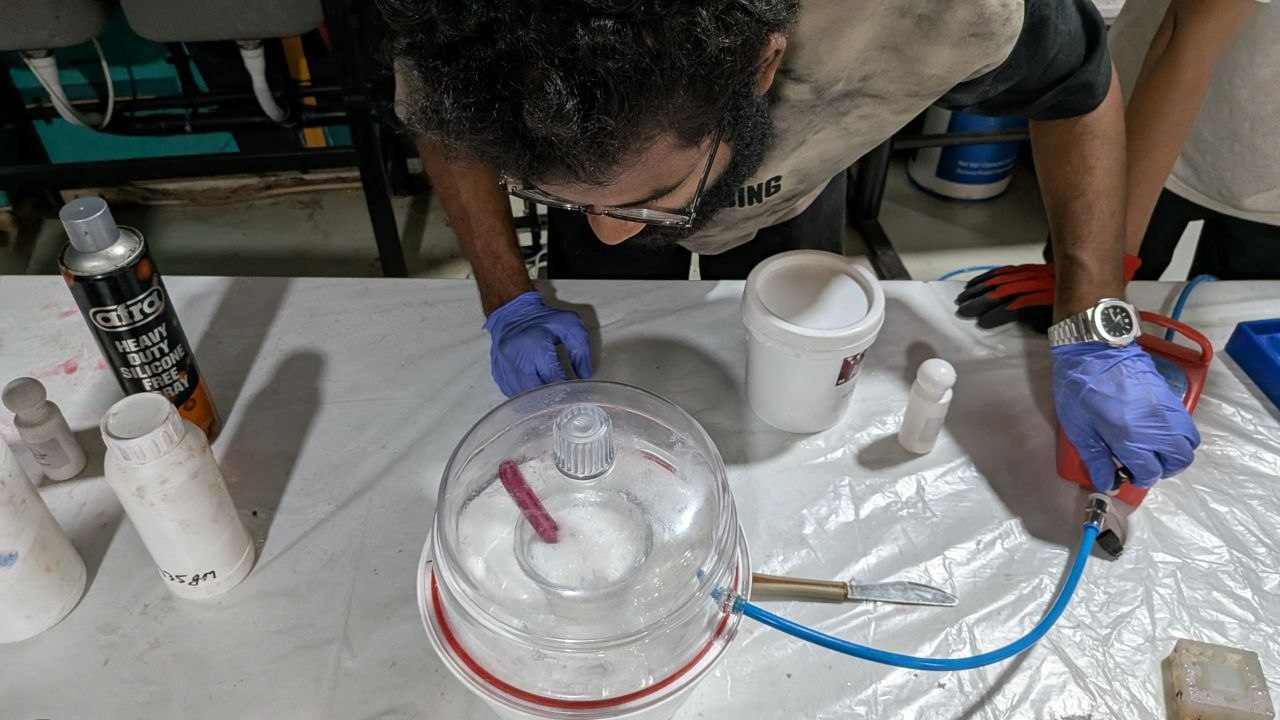
🧪 Silicone Mixing and Pour#
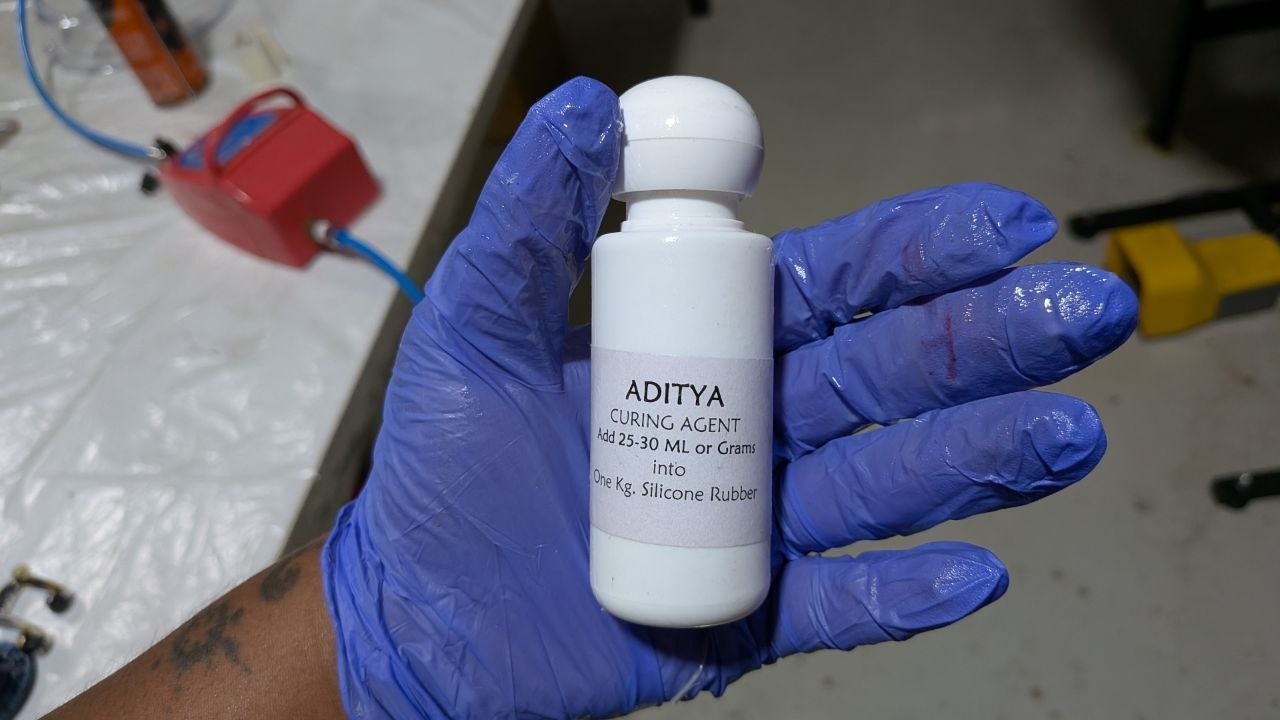
Two-part silicone, mixed at 25:1000 (hardener to silicone by mass) — the bottle recommends anywhere from 20–25, and I went with the upper end of the range.
Process:
- Pour silicone into a clean container up to the marked volume line
- Weigh the total mass on a scale
- Calculate hardener quantity at the 22:1000 ratio, add it
- Mix thoroughly — scrape the sides and bottom of the container, not just stirring the middle
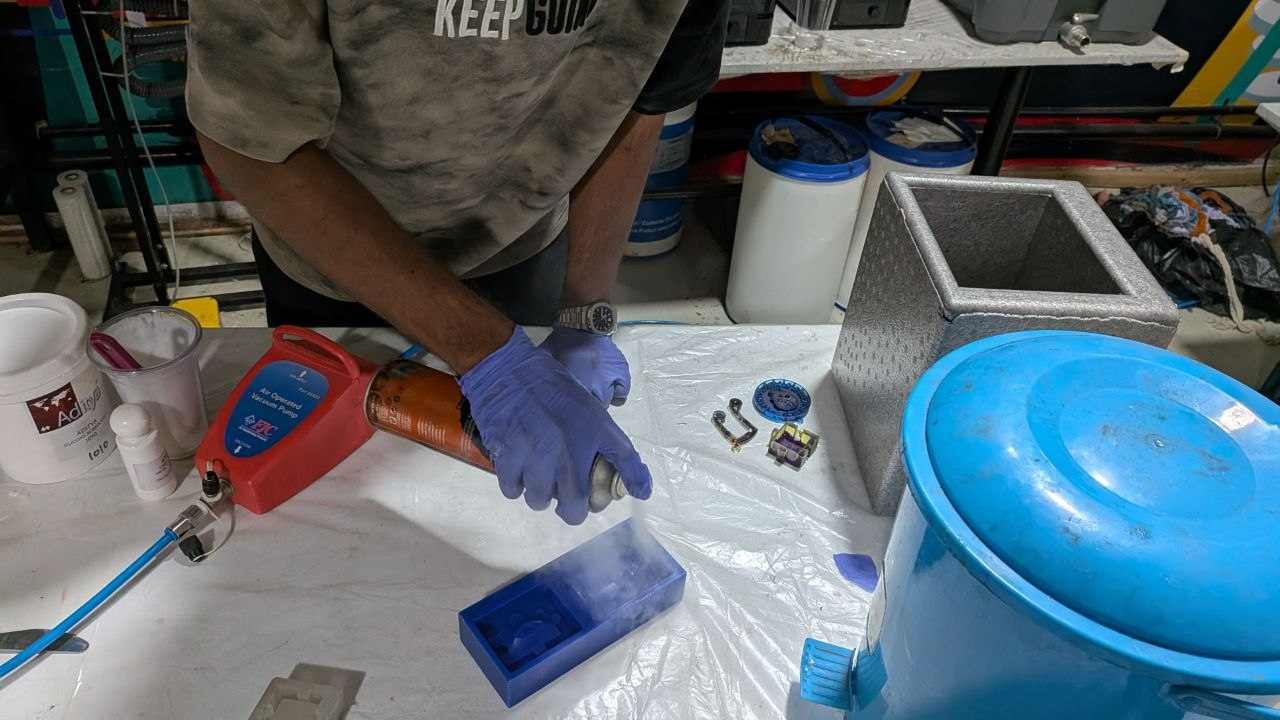
- Place in the vacuum chamber to pull out trapped air bubbles
- Pour the degassed silicone slowly into the wax cavity, pouring from one edge so it rises and pushes air ahead of it rather than trapping bubbles
- Leave to cure fully before demolding
Measured weight of silicone 121.3
Hardener weight at 22:1000 ratio = 121.3 * 22 / 1000 = 2.67 g
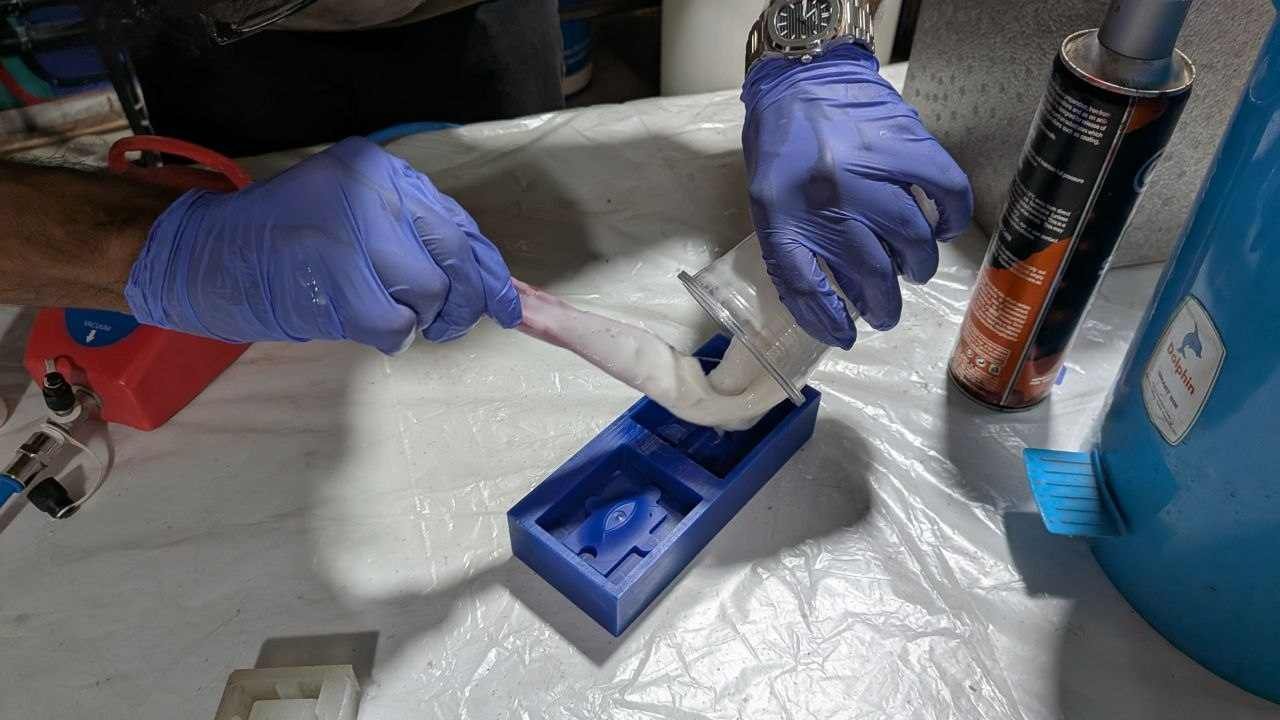
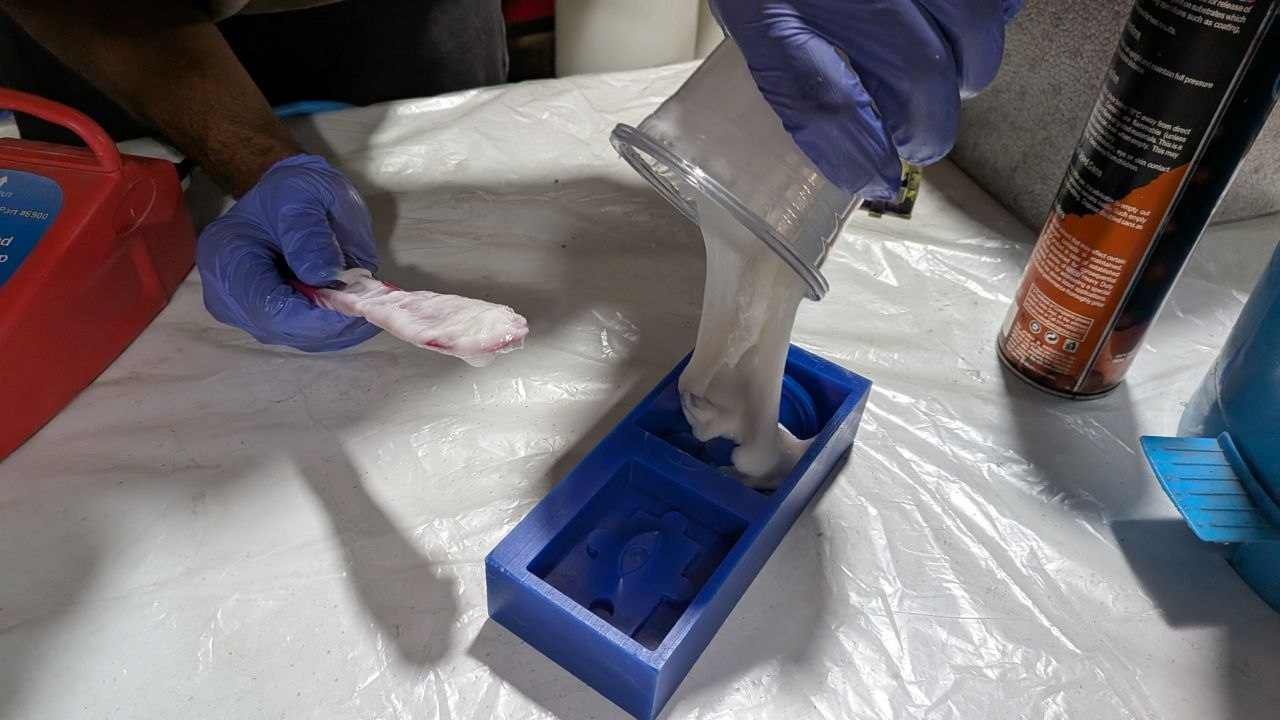
❌ First Pour — Bad Fill#
The first pour came out with a bad fill. The cavity wasn’t completely filled and the mold surface had visible defects.
I’m genuinely not 100% sure what caused it — best guesses:
- Hardener ratio — I used 25:1000 as per the bottle’s upper recommendation (range is 20–25). That should have been fine, so the ratio probably wasn’t the culprit — but it’s worth noting for future reference that working at the lower end of the recommended range tends to give more working time and a more controlled cure
- Pouring technique — pouring too fast or from the wrong angle traps air that no amount of vacuum chamber time can fix after the fact
- Insufficient vacuum time — if the silicone wasn’t fully degassed before pouring, any remaining bubbles end up embedded in the mold face
I ran a full second pour after troubleshooting — more careful with the ratio measurement, longer vacuum chamber time, slower pour. The result was noticeably cleaner.
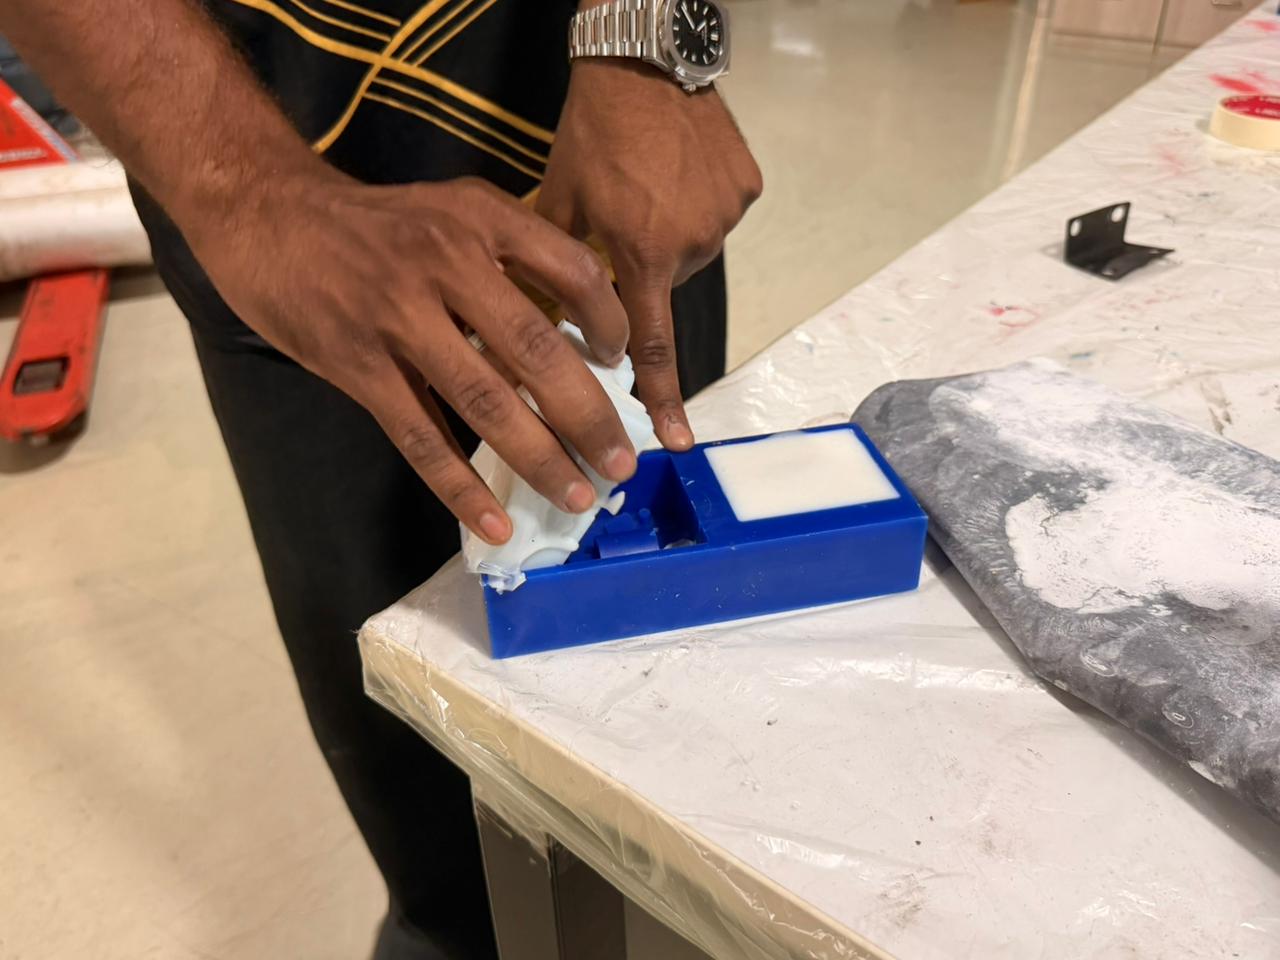
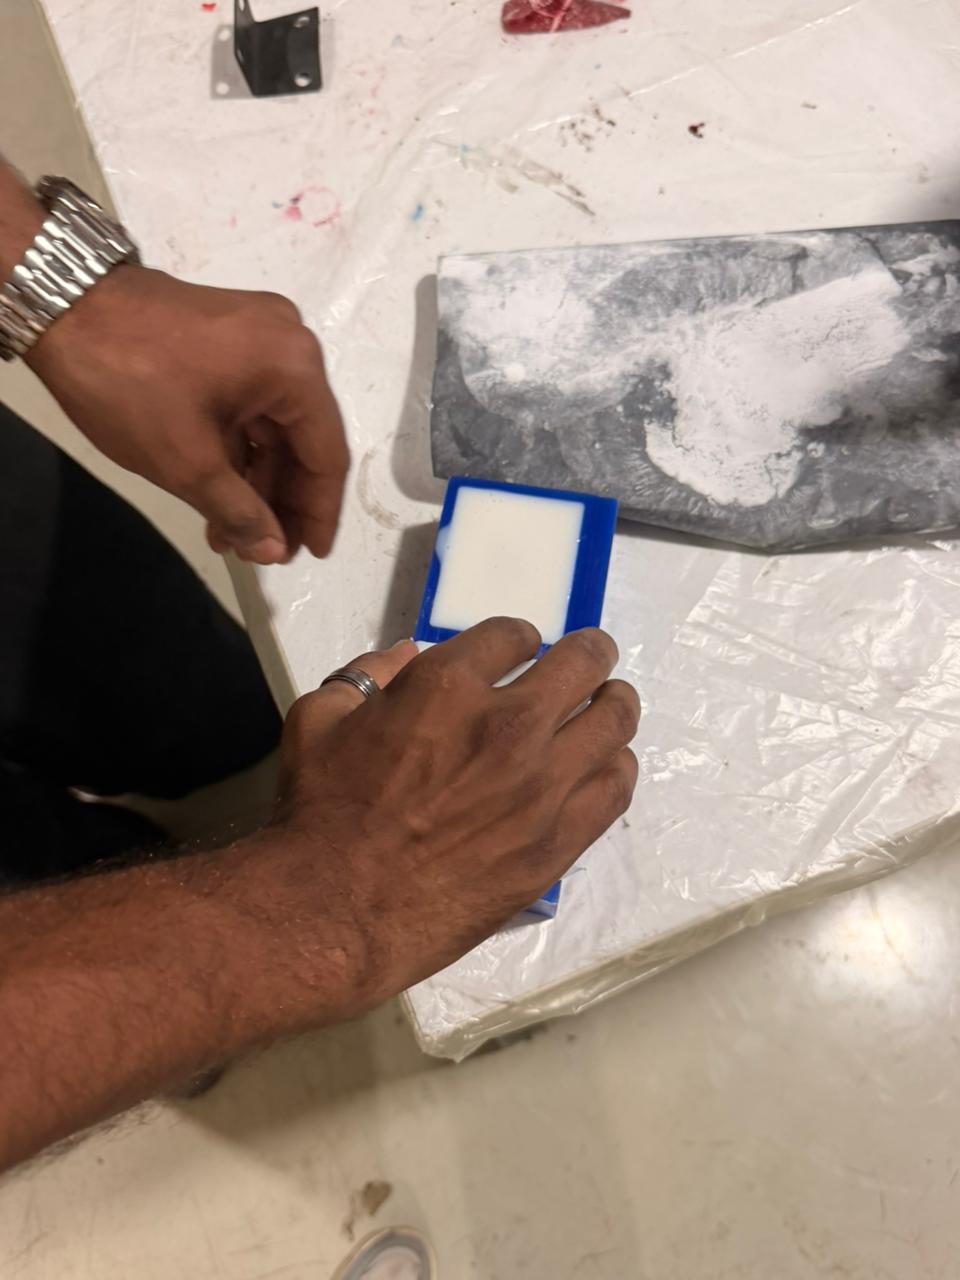
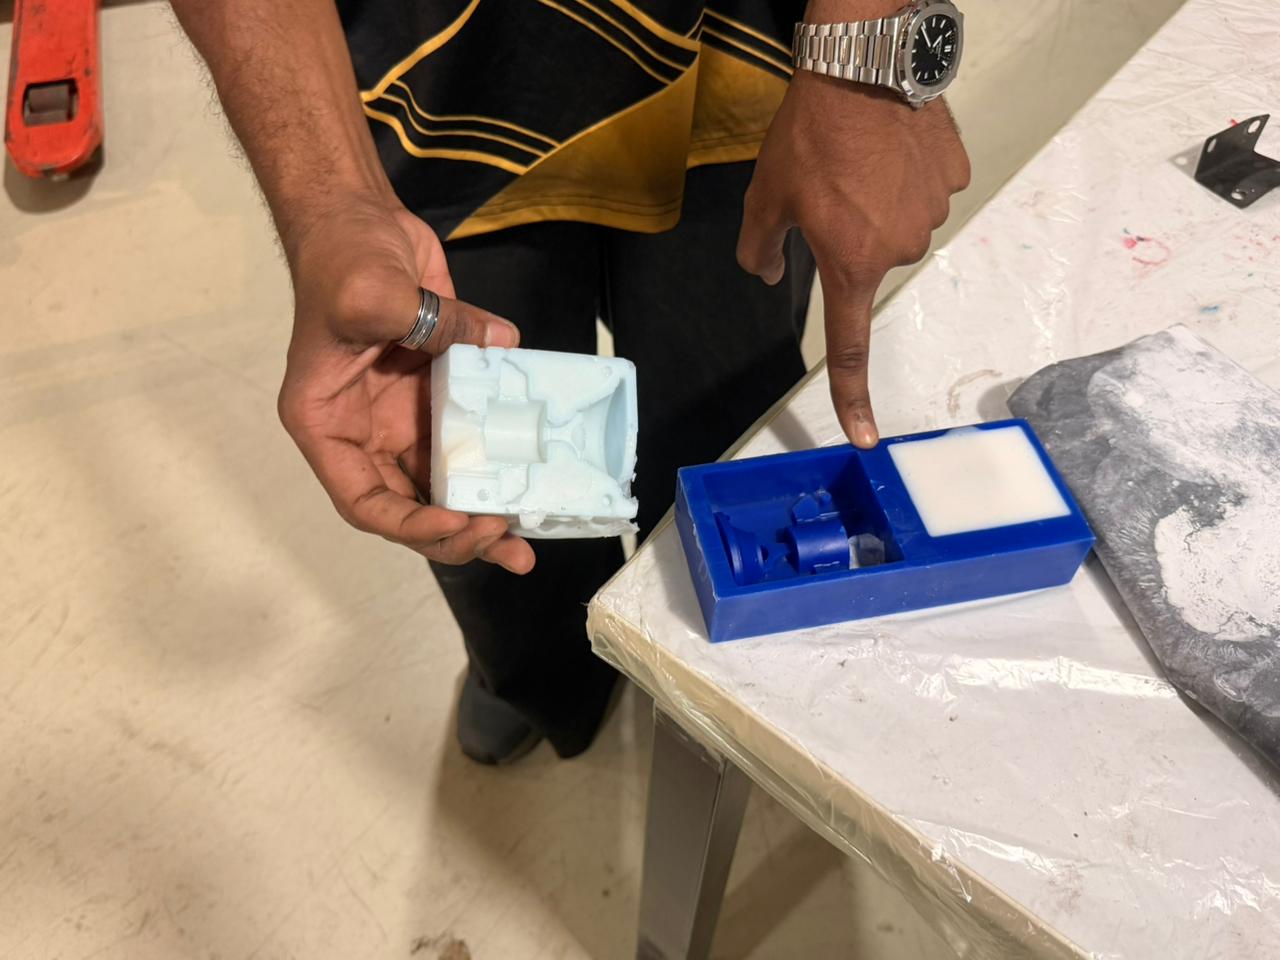
Part 5 – Epoxy Casting#
Once both silicone mold halves had fully cured and were demolded from the wax, the two halves were joined together and epoxy resin poured in at the required mixing ratio.
Hero Shots#
🔗 Helpful Resources#
- Smooth-On Silicone Safety Data Sheets
- Fusion 360 Manufacturing Workspace Docs
- TRAK Machine Programming Guide
Reflection#
Molding and casting is a genuinely different mindset compared to everything else in Fab Academy. Every other week is essentially about making one thing — one PCB, one milled part, one 3D print. Casting is about designing for replication. The wax mold is a tool to make the silicone mold, which is a tool to make the final part. You’re three steps removed from what you actually want, and every step has its own failure modes.
What I found most interesting was how much the design has to account for the process and not just the final geometry. Wall thickness, draft angles, parting lines, fill paths — none of that shows up in the final cast part, but get any of it wrong and either you can’t machine the mold, can’t fill it with silicone, or can’t demold without destroying everything. It’s the kind of design constraint that only makes sense once you’ve actually done it.
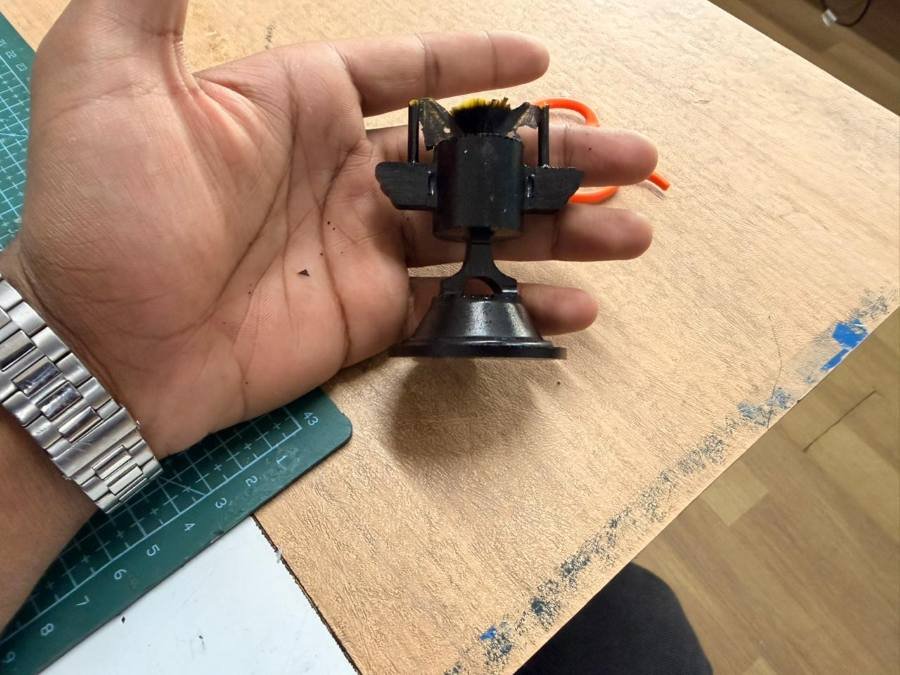
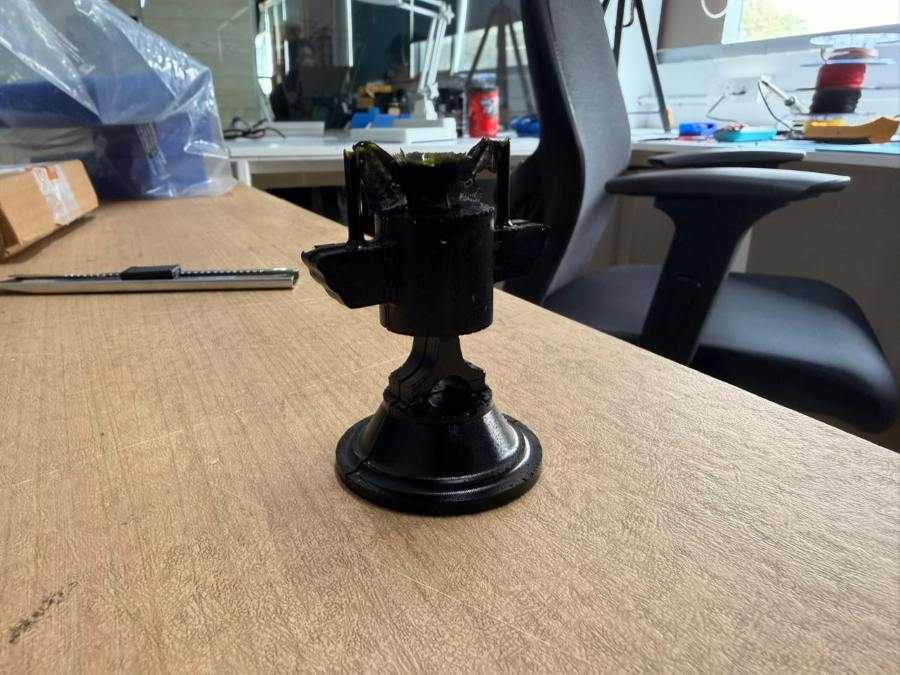
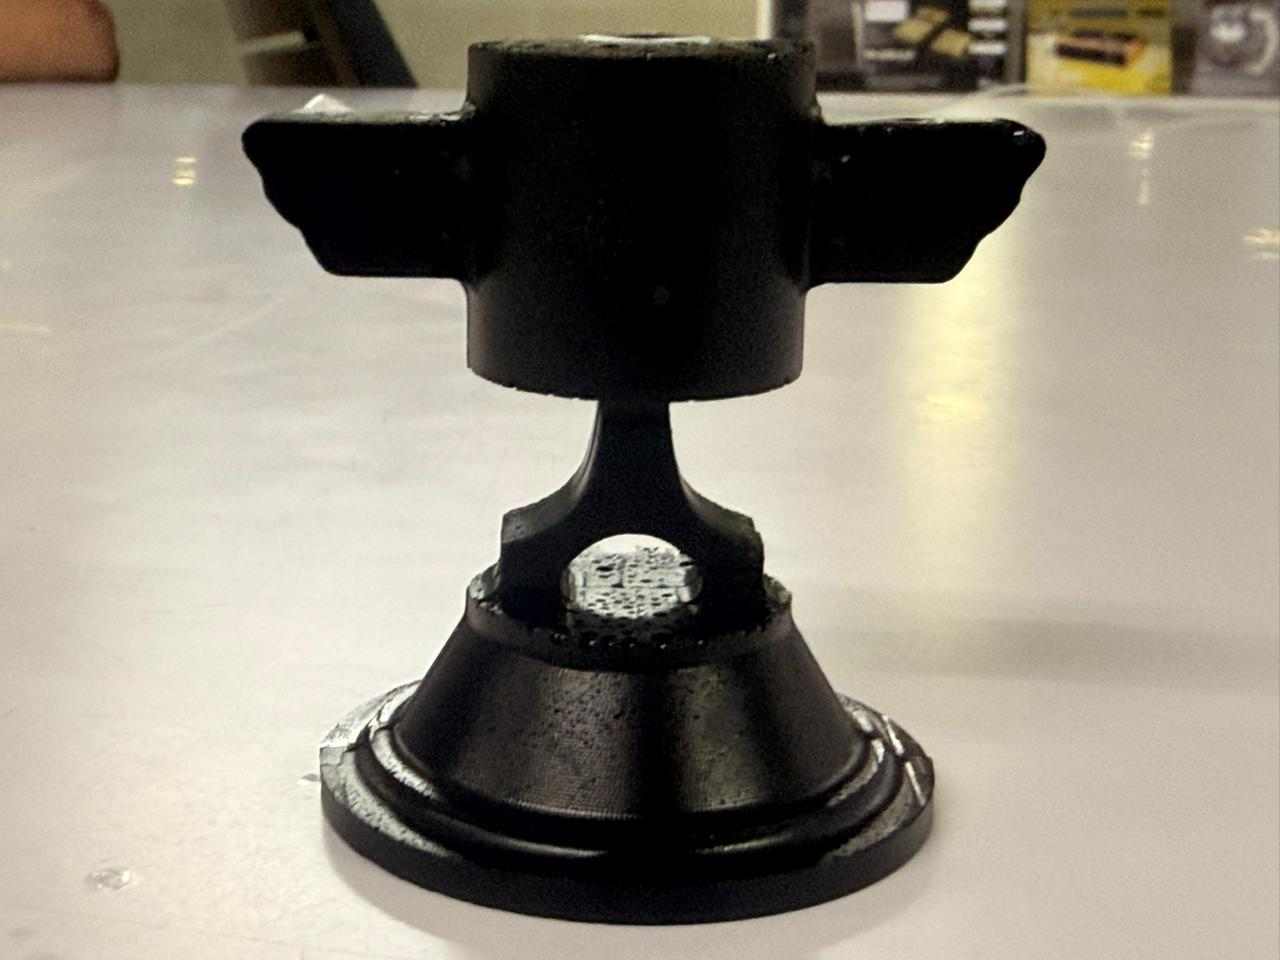
The Piston Cup turning out recognizable was a genuinely good feeling. There’s something different about a cast object compared to a milled one — it feels like you made a decision that this shape should exist more than once. Which, for a trophy from a movie that introduced me to motorsport, feels right.
Next up: Week 15. Getting close to the end now 😎