Week 19: Invention, Intellectual Property, and Income
License mark

I chose the CC BY-SA 4.0 license for my final project
Assignment
- Develop a plan for dissemination of your final project
- Complete your final project, tracking your progress:
- what tasks have been completed, and what tasks remain?
- what’s working? what’s not?
- what questions need to be resolved?
- what will happen when?
- what have you learned?
1. Dissemination plan
1-1. Tasks that need to be done
I am writing this on June 3, and my final project presentation is on Monday, June 8. In four days, I need to finalize these items:
- Wire and test the new PCB board
- Finish the 3D modeling
- Modify the firmware to store interim image files on the SD card
- Integrate the robot
- Assemble a 1-minute video
- Prepare a slide
1-2. License
I chose CC BY-SA 4.0, the Creative Commons Attribution-ShareAlike 4.0 International license. I was heavily inspired by the OSTR: Open Source Turtle Robot project, and I want to build more drawing robots and use the same license. OSTR adopts CC BY-SA 3.0 US. CC BY-SA 4.0 is the proper successor to CC BY-SA 3.0 and is applicable internationally, not only in the US.
1-3. What will be on the slide
Submission requirements are as follows according to the Fab Lab Kannai instruction:
- file name: presentation.png
- size: 1920x1080 pixels
- your name, project name, Fab Lab name
- photo/render/sketch of your project
- brief description of what your project is/does
- “Fab Academy 2026”
My final one-page slide will include these items, along with the mandatory parts above.
- A final photo of the robot drawing the portrait
- An explanation of the system, emphasizing that everything is done at the edge
1-4. The 1-minute video scenario
The requirements are:
- file name: presentation.mp4
- 1080p HTML5, less than about 1 minute, less than about 25 MB
- Explain your project
Below is my scenario for the final project.
| Time | Visual | Caption |
|---|---|---|
| 0–3s | Hand-drawn sketch, first concept drawing, rough notes | I imagined a tiny portrait-drawing robot. |
| 3–6s | Still image of the final robot, cute front view | So I made one. |
| 6–10s | Short video showing the whole robot as the pen starts moving | Meet my 5-bar portrait robot. |
| 10–15s | A person stands in front of the robot and faces the camera | Stand in front of the robot. |
| 15–18s | Close-up of a hand pressing the button | Make your best face. Press the button. |
| 18–23s | Close-up of the camera eye / XIAO ESP32S3 Sense area | The robot takes your photo. |
| 23–30s | Flash-card style sequence: face detection → crop → grayscale → binary image → edge detection | Inside its tiny brain, the image becomes a drawing. |
| 30–34s | “No internet” icon or the robot running by itself | No internet connection is needed. |
| 34–40s | Fusion exploded animation showing the internal structure and three servos | Three servos move the mechanism. |
| 40–45s | Close-up of the moving 5-bar linkage, showing the left and right shoulder servos | Left shoulder. Right shoulder. Pen up and down. |
| 45–53s | Best video of the robot actually drawing the portrait, possibly sped up | It draws your face, line by line. |
| 53–57s | Finished portrait on paper, ideally shown next to the original face or photo | From one button press… to one portrait. |
| 57–60s | Robot, finished drawing, and final message | I imagined it. I made it. And it draws. |
1-5. Future possibilities
The robot could be a good starting point for developing your own robot. Just like OSTR - Open Source Turtle Robot above, I would like to write up a recipe for building the robot so anyone can make it. I would also like to offer opportunities to simply purchase a kit through marketplaces such as Seeed Studio Bazaar, using programs like Seeed Studio’s Licensed Products Program. Currently, the robot is built around the Seeed Studio XIAO ESP32S3 Sense, so it could be a good fit for those programs. I would refine the circuit and 3D model to make sure they are safe and durable before marketing the robot on such platforms.
2. Final project progress tracking
2-1. Custom PCB Board
After I decided to switch from NEMA17 stepper motors to three serial bus servo motors because of the motor size and the available GPIO on the XIAO, I tried and retried to mill the PCB board.
| Image | Description |
|---|---|
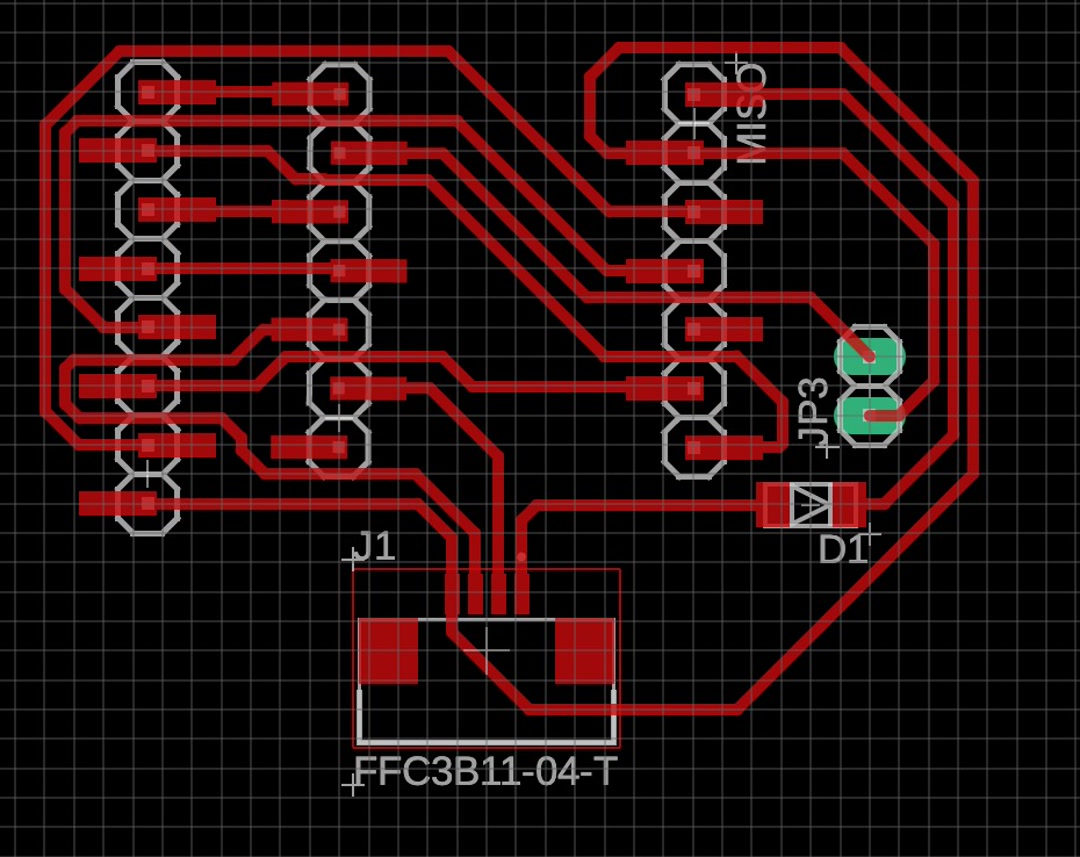 |
First version, using a separate FE-URT-1 driver board, with the same 5V line going to the XIAO through a Schottky diode - not milled |
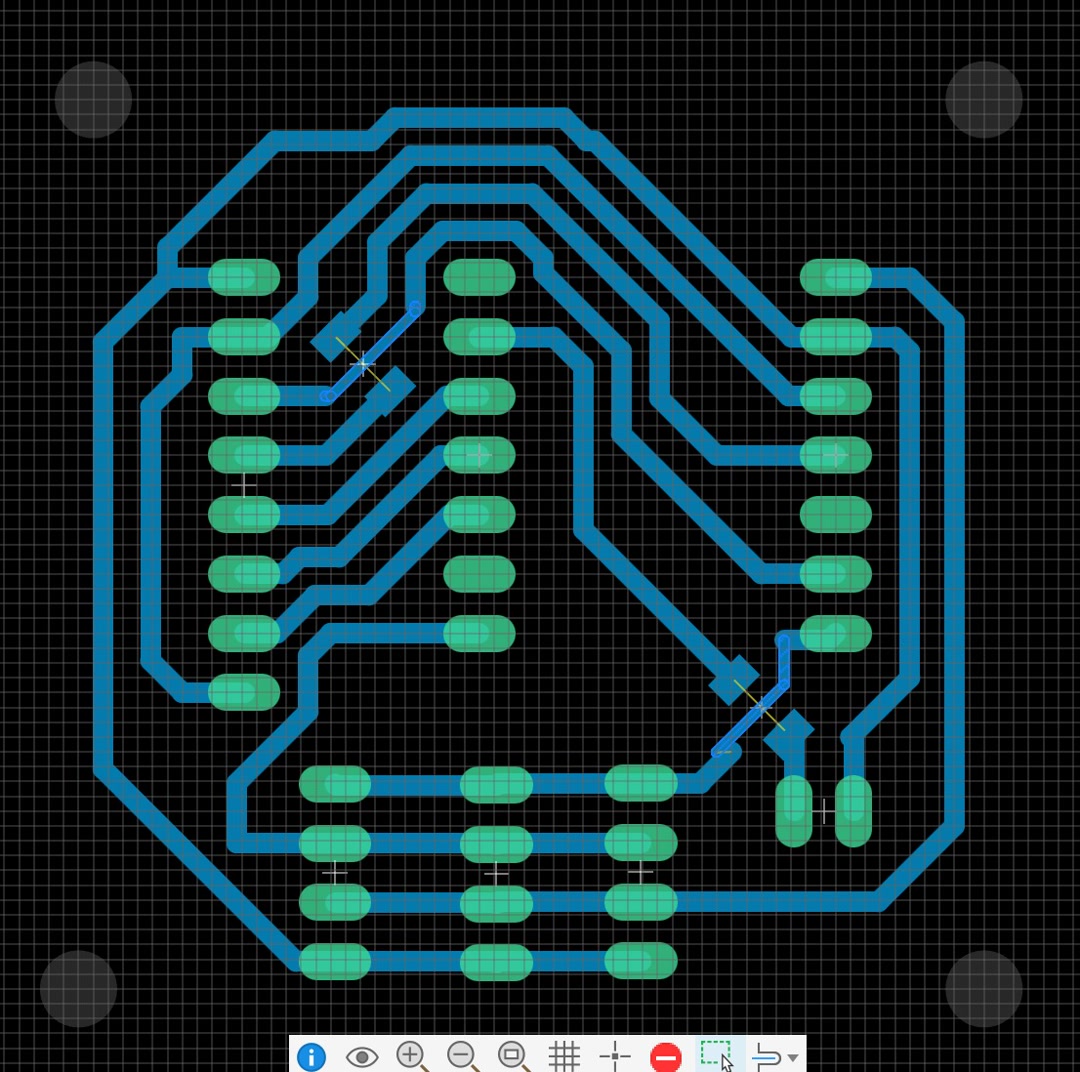 |
Second version, hoping to drive 3 motors from the XIAO 5V pin - failed |
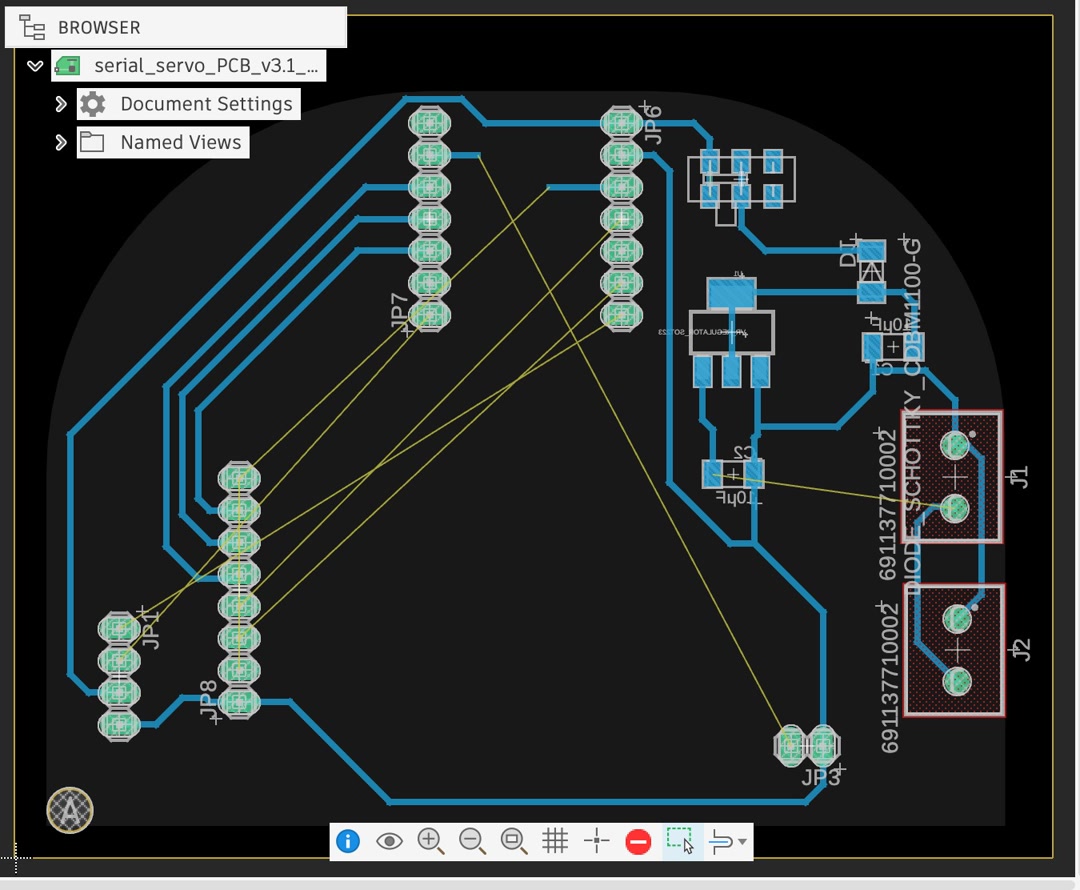 |
Third version. After two cameras with longer cables from AliExpress failed to work, I thought I needed to design the board in the shape of the robot head. |
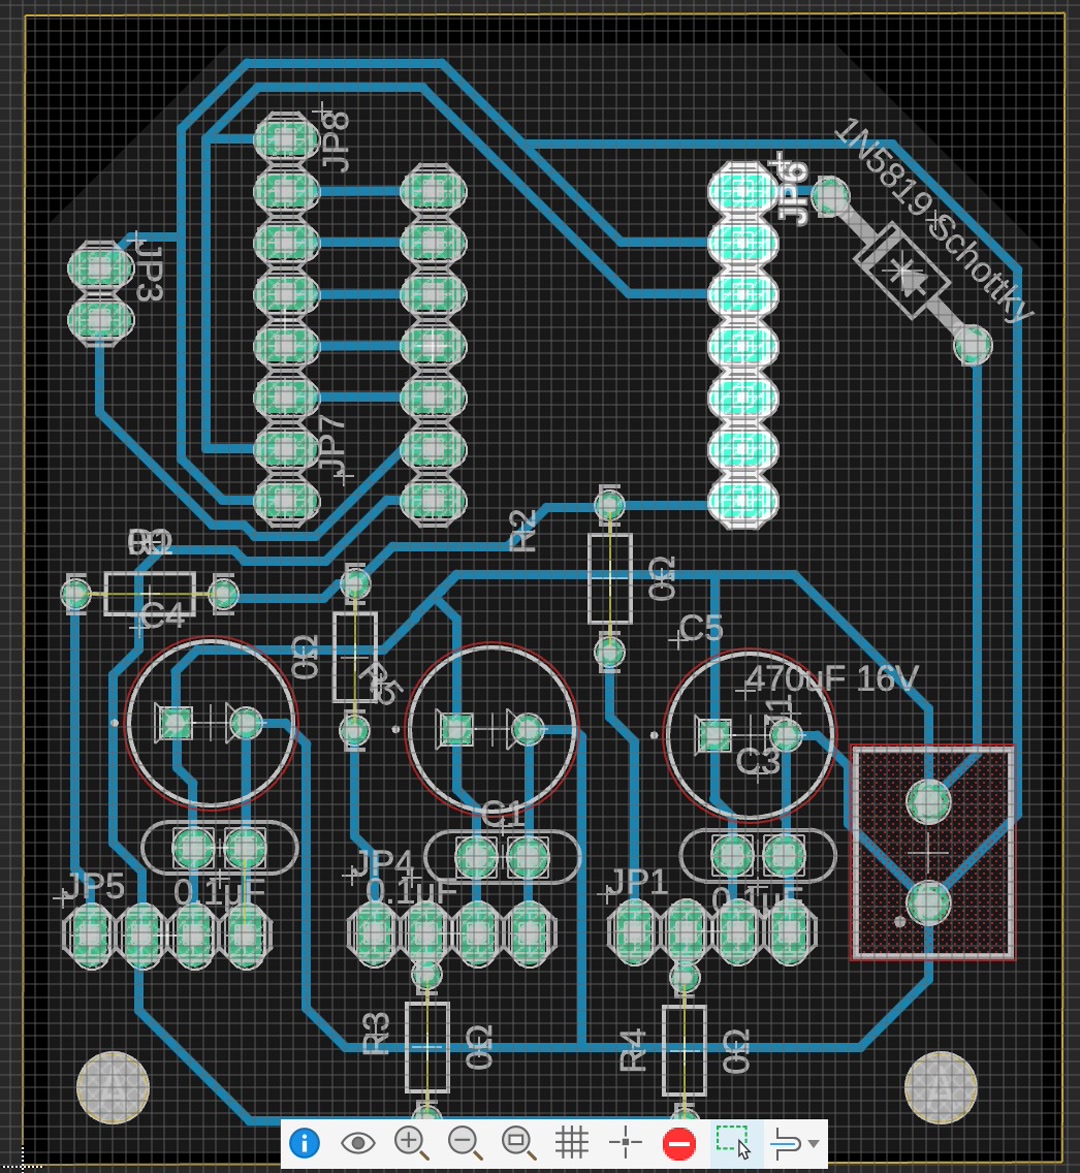 |
Fourth version. After finding a working camera with a longer cable and testing that the motor works from a 5V power supply, I had more freedom. I had a hard time with SMD, so this time I designed mostly with through holes as a fallback. |
2-2. 3D Model
| Image | Description |
|---|---|
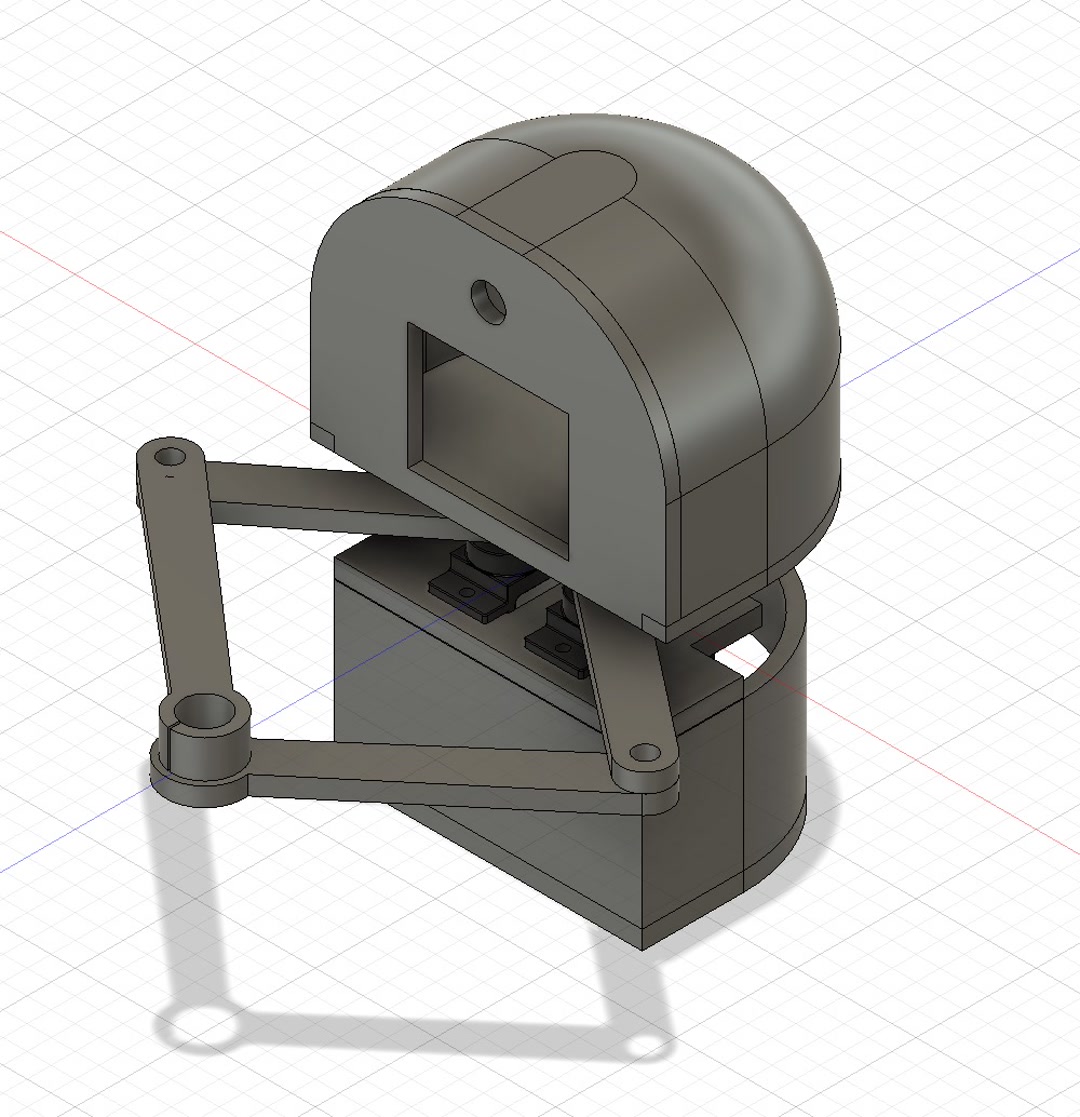 |
Basic shape |
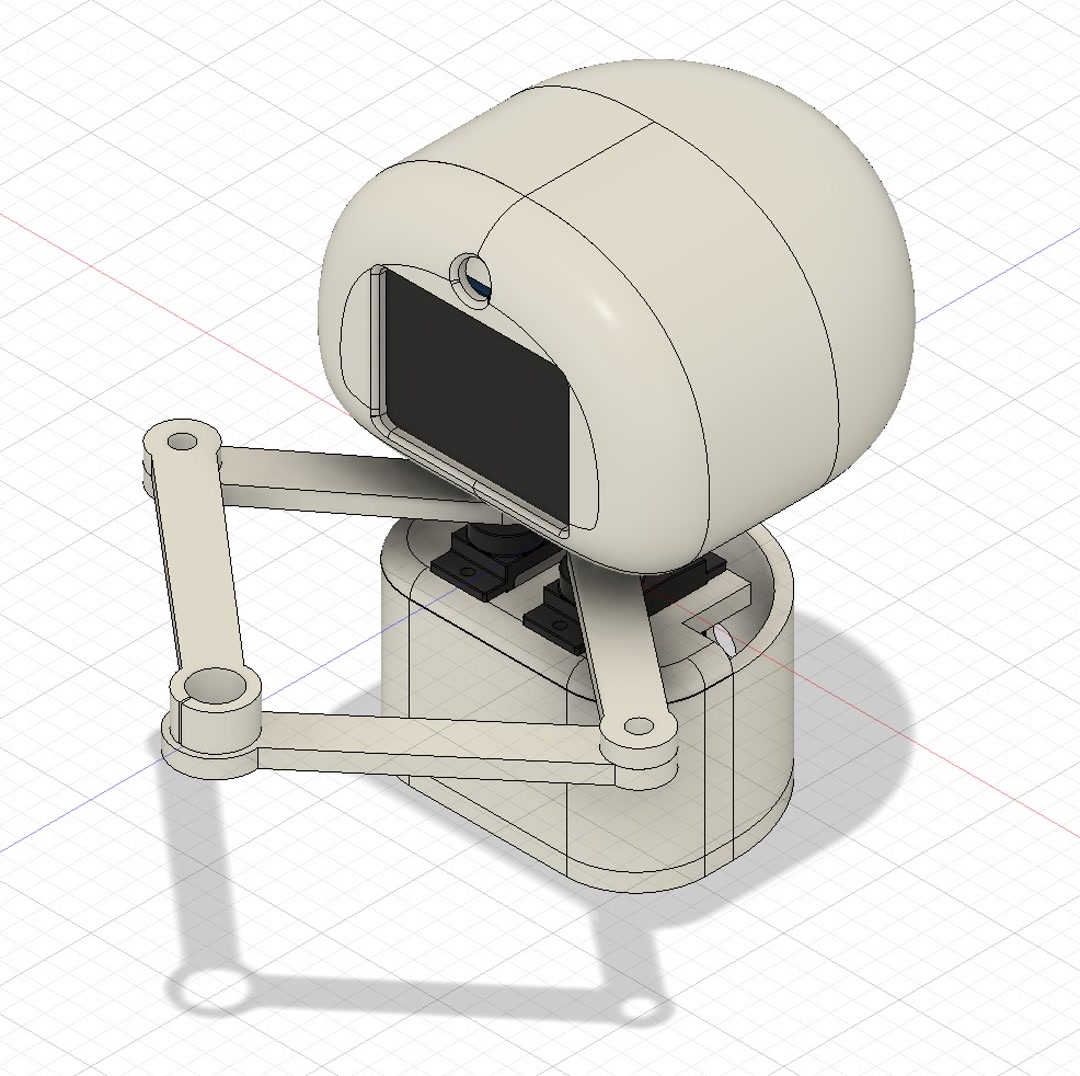 |
Tweaked toward a cuter design, but I had difficulty designing the press-fit parts and closure |
2-3. Software
I have been having trouble figuring out how to draw smooth lines. I found that speed control for the two motors is key: the two motors need to run at different speeds so they arrive at the destination at the same time.
| Image | Description |
|---|---|
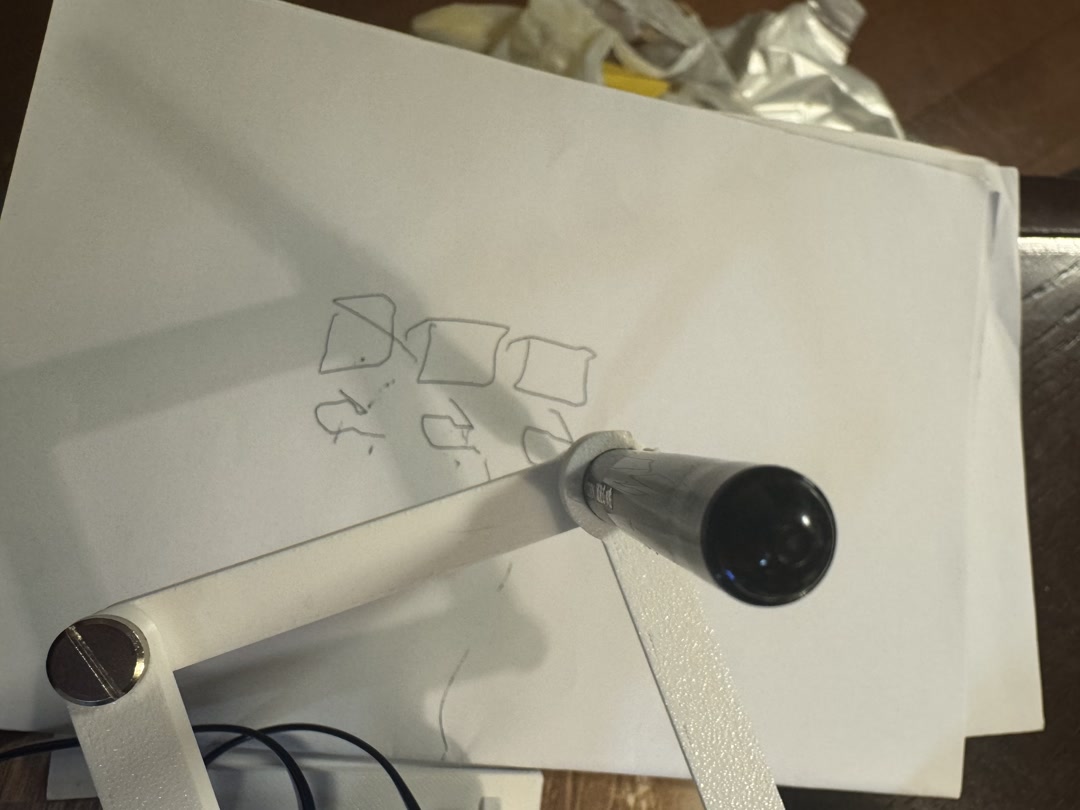 |
Test shape for the software to draw smooth lines |
2-4. What tasks have been completed, and what tasks remain?
Completed
- Systems integration plan
- PCB board design and milling
- 3D model design
- Basic firmware
Remain
- Wire and test the new PCB board
- Finish the 3D modeling
- Modify the firmware to store interim image files on the SD card
- Integrate the robot
- Assemble a 1-minute video
- Prepare a slide
2-5. What’s working, what’s not?
Working
- 5V supply from an external DC adapter to drive the serial servo motor
- The third batch of OV3660 cameras with longer cables (75 mm) arrived from AliExpress
- TFT LCD preview and switches are working fine
Not Working
- The first two batches of OV3660 cameras with longer cables (75 mm) from AliExpress
- 5V supply from the XIAO to drive the servo motor
- Press-fit nails with a round 3D model. If the print direction is different, the size can differ a lot.
- Micropython firmware, the camera recognition worked with special version, but I could not run the esp-dl, the edge deep learning module to detect faces. I shifted back to C++.
2-6. What questions need to be resolved?
- Test the new compact PCB board
- Finalize the press-fit design of the 3D model
Reflections - What I learned
- I’ve heard of “supply-side time management,” the “80-20 rule,” and even the “95-5 rule,” meaning that the remaining 5% of a project can take 95% of the time. I had heard this again and again, but I did not fully understand it. This week, it was almost painful to learn how true it is.
- Everything takes time. For example, learning how to solder is not enough. You need to practice. The process is frustrating, but I realized that this is how my learning happens.
- In the future, I will include more time for iteration, because the first design normally will not work perfectly.
Checklist
- [X] Created a dissemination plan for your final project
- [X] Outlined future possibilities and described how to make them probabilities
- [X] What tasks have been completed, and what tasks remain?
- [X] What’s working? what’s not?
- [X] What questions need to be resolved?
- [X] Planned what will happen when?
- [X] What have you learned?
AI Usage
- I used Codex for grammar checking, and made the final review.