Week 03: Computer-Controlled Cutting
Parametric press fit kit and sandblasted glass
This week I made a parametric triangle press-fit construction kit from cardboard using the laser cutter, and used the vinyl cutter to cut the FabLab Kannai logo as a sandblasting resist to etch a glass. I caught a cold partway through the week, so some steps are hazy — but the machines did their job!
Assignments
Group assignment:
- Do your lab’s safety training
- Characterize your lasercutter’s focus, power, speed, rate, kerf, joint clearance and types.
- Document your work to the group work page and reflect on your individual page what you learned.
Individual assignments
- Design, lasercut, and document a parametric construction kit, accounting for the lasercutter kerf.
- Cut something on the vinyl cutter.
1. Group Assignment
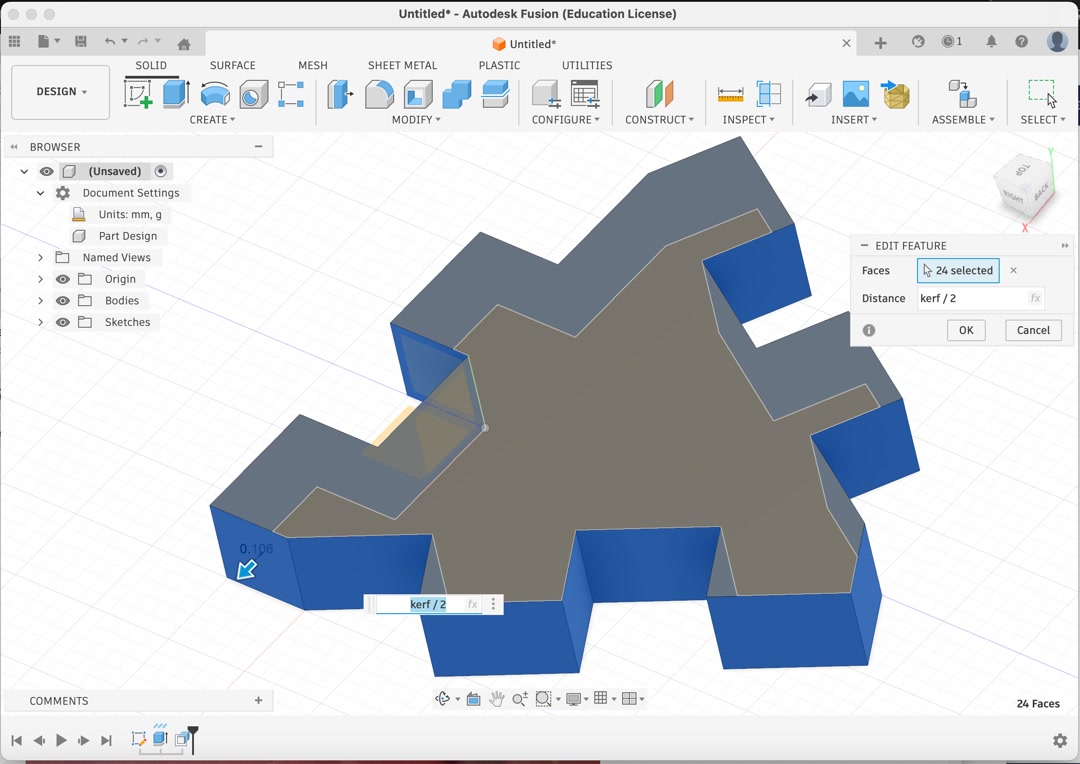
We completed laser safety training and characterized the laser cutter settings — measuring kerf, testing different power and speed combinations, and finding optimal focus. The kerf value we measured was used directly in my parametric Fusion 360 design as a parameter (kerf/2 offset on joint faces), so the pieces would press-fit snugly without being too tight or too loose.
What I learned from safety training: - Never leave the laser cutter unattended while cutting - Make sure the exhaust/ventilation is running - Know where the emergency stop is
2. Parametric Press-Fit Kit
Design in Fusion 360
I designed a triangle-based press-fit construction kit in Autodesk Fusion 360, inspired by a design from Fab Academy 2015.
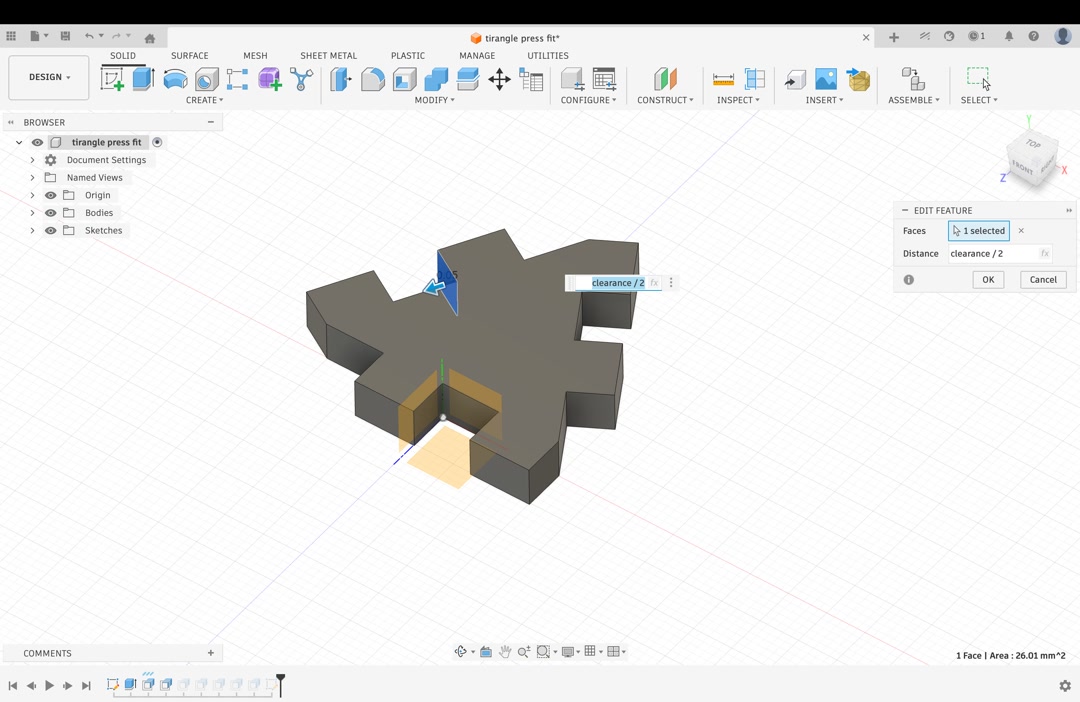
The key to making it parametric was defining kerf as a user parameter, then applying a positive kerf/2 offset to all joint slot faces so the pieces account for the material removed by the laser.
I then applied a negative clearance/2 offset to the same joint slot faces, so the pieces fit together without being too tight to assemble.
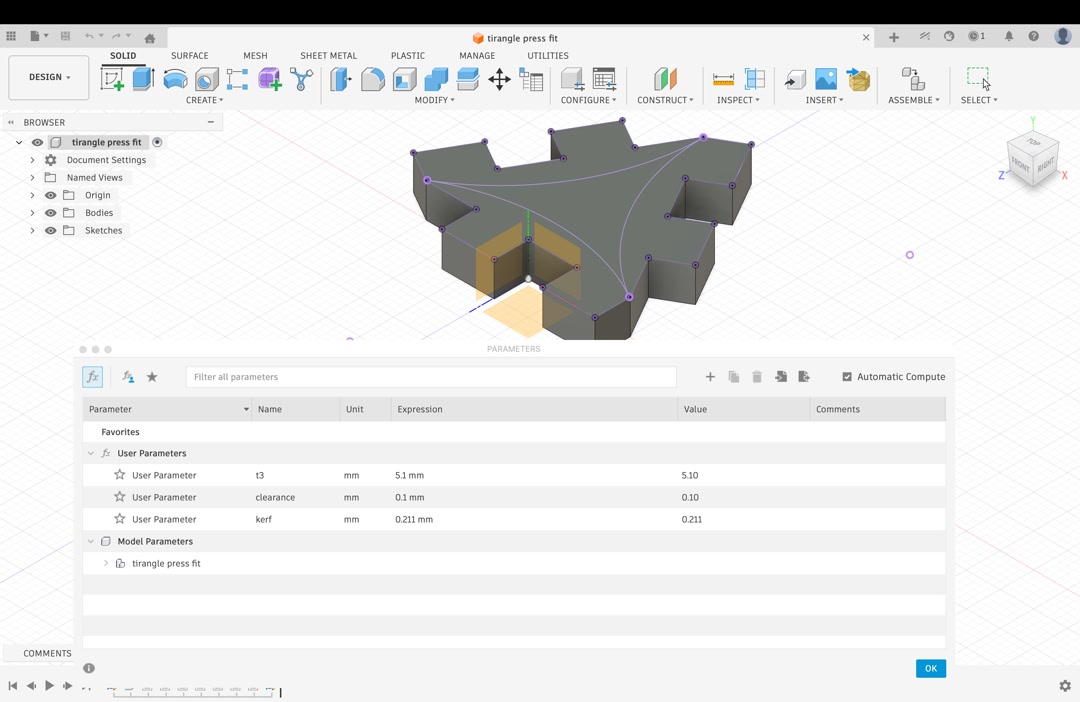
Here is the list of my parameters. The kerf of 0.211mm, clearance of 0.1mm and the cardboard height of 5.1mm are all taken from measurements in the group assignment.
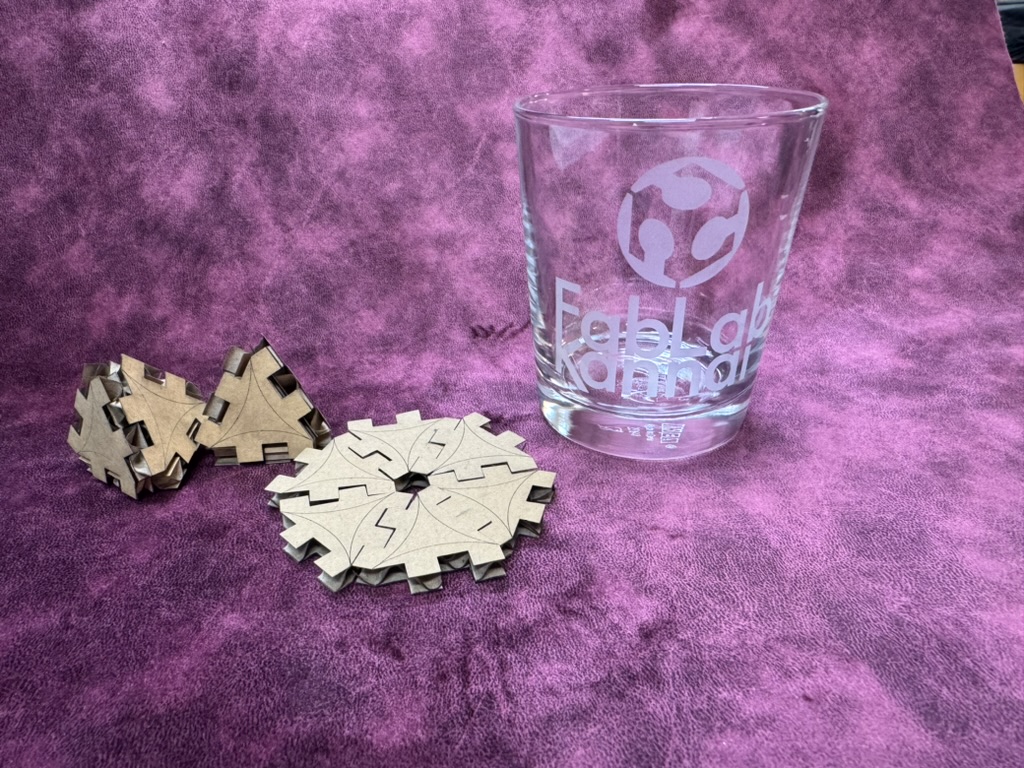
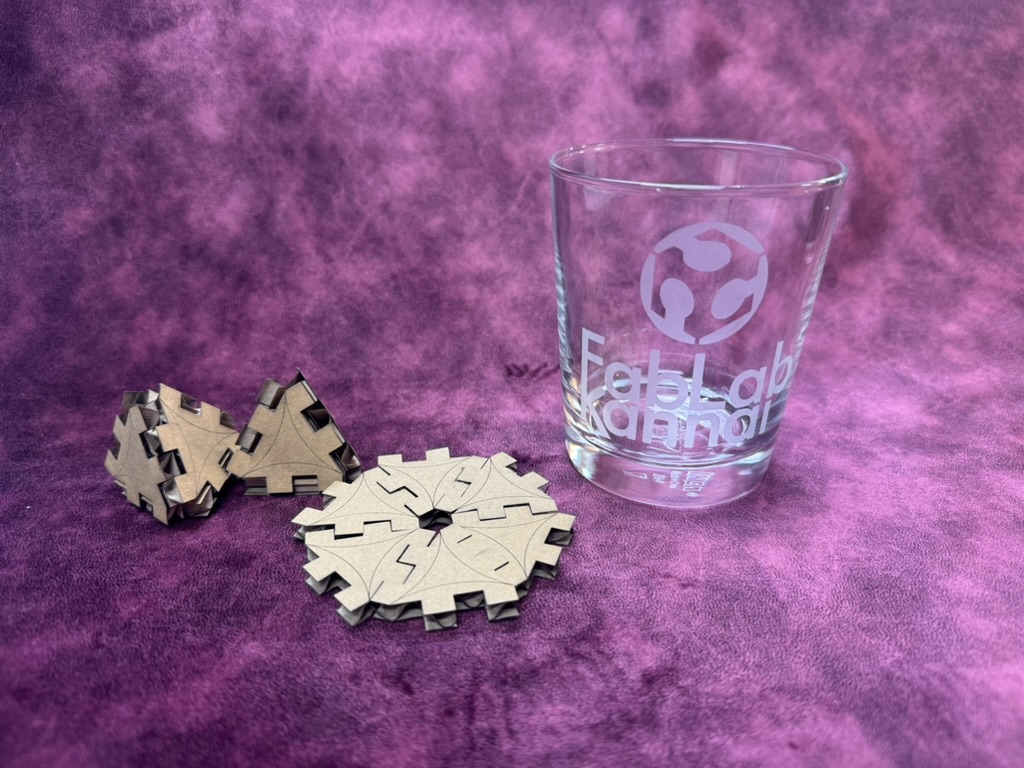
The triangle piece has notches on each of its three sides, allowing pieces to slot together edge-to-edge (for flat snowflake-like patterns) or at angles (for 3D structures like a tetrahedron).
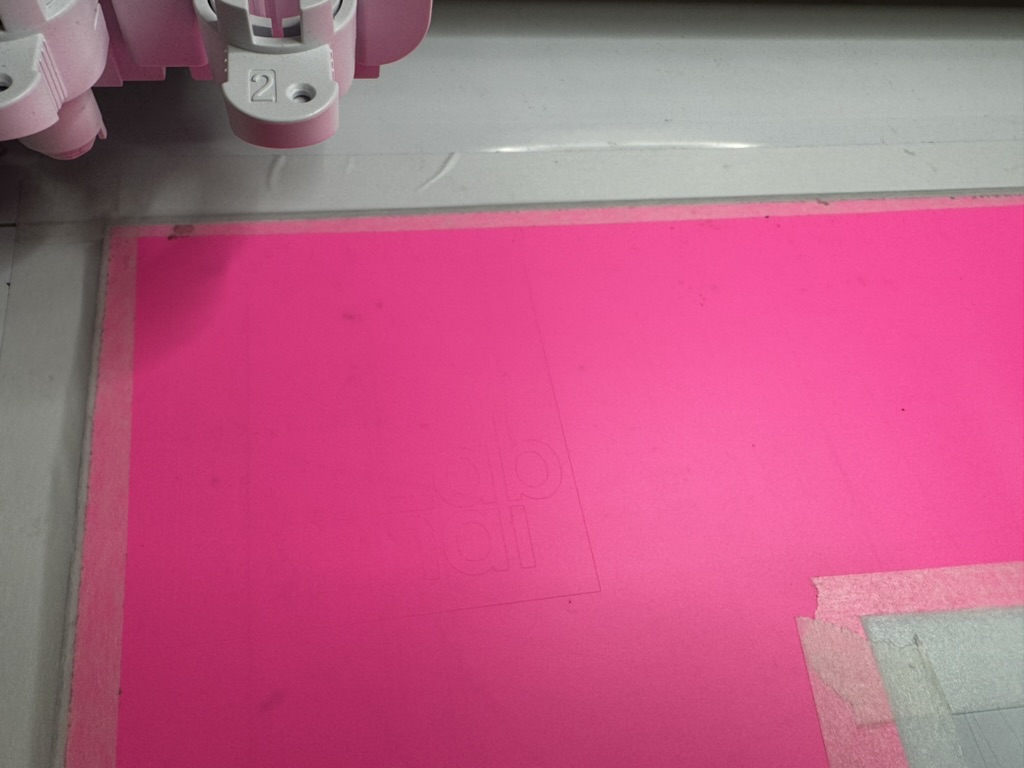
Laser Cutting
I designed a curved engraving, but the first trial was not very visible.
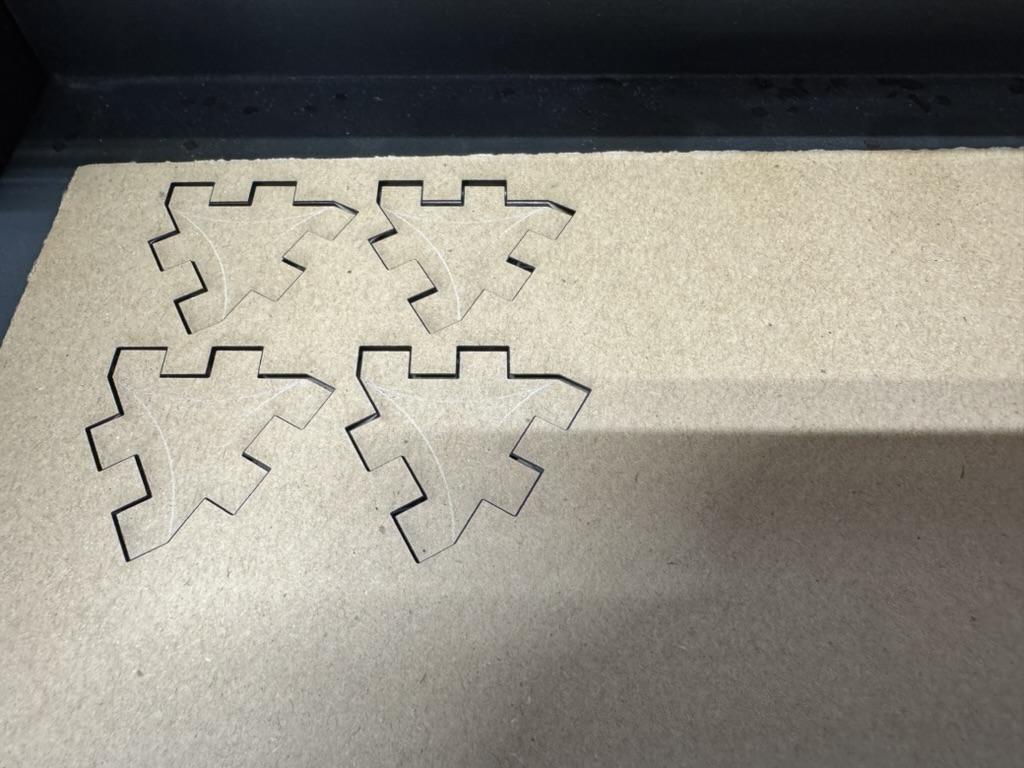
I decided to use a low-powered cut instead of engraving, and the pieces came out cleanly:
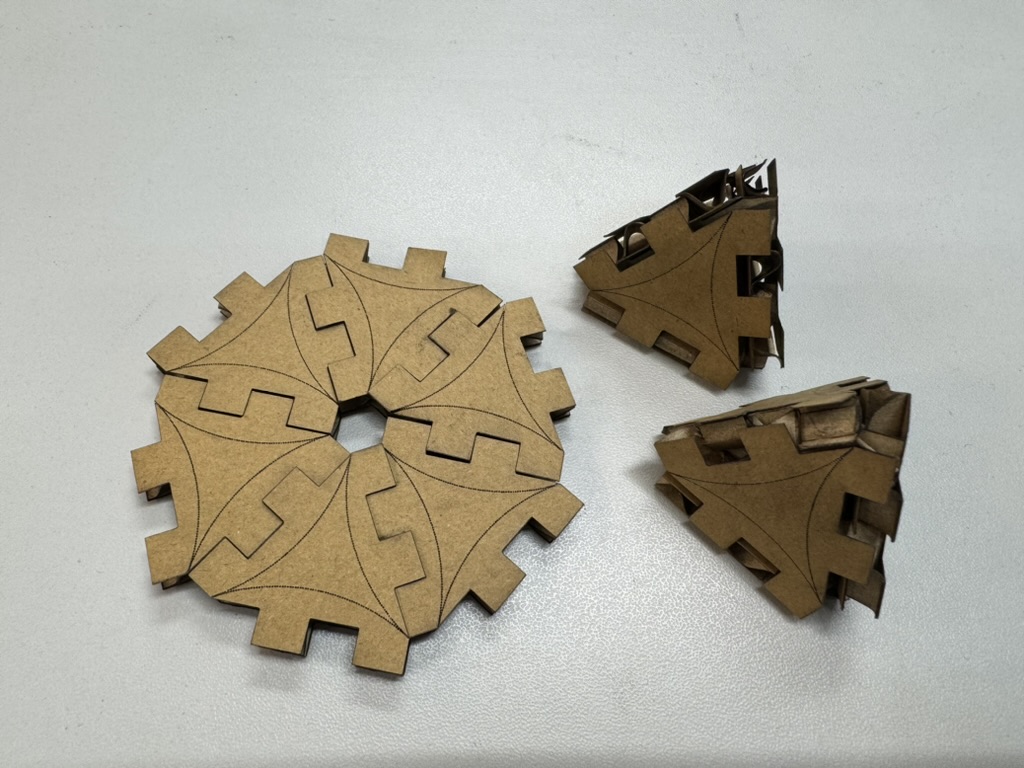
The pieces snap together satisfyingly. The joint clearance was just right — firm enough to hold their shape but easy to assemble and disassemble. You can build flat mandalas or 3D pyramidal forms depending on how you orient the connections.
3. Vinyl Cutter
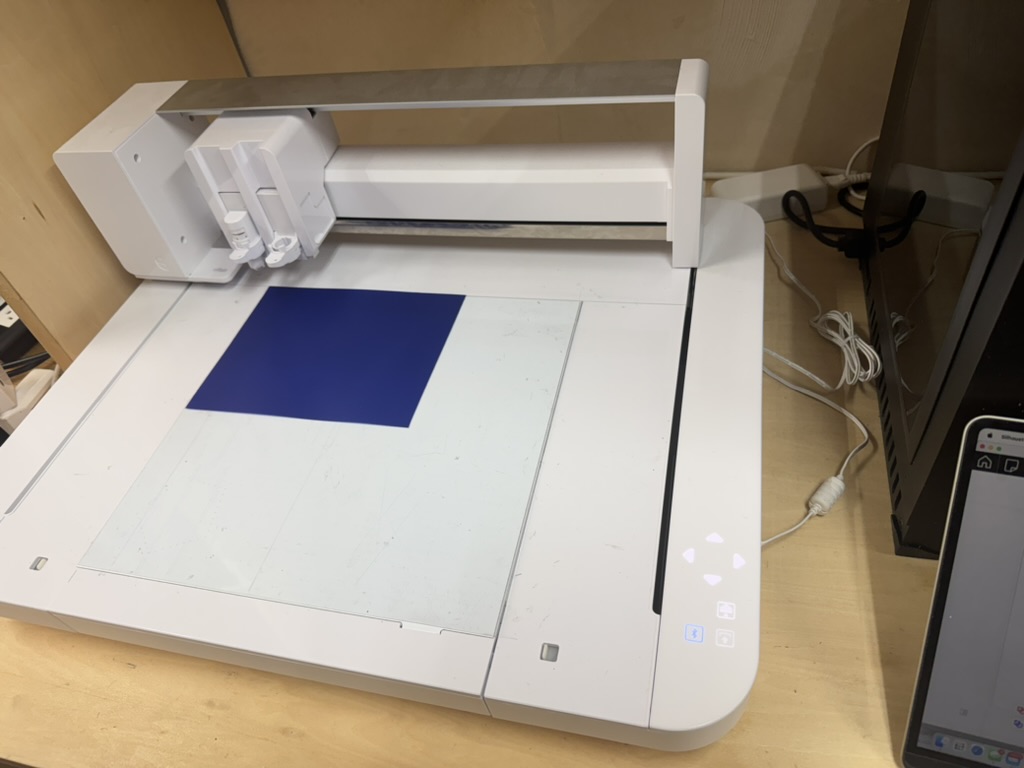
The lab has a Silhouette Curio 2 for vinyl cutting, operated through Silhouette Studio.
First attempt: Turtle (failure)
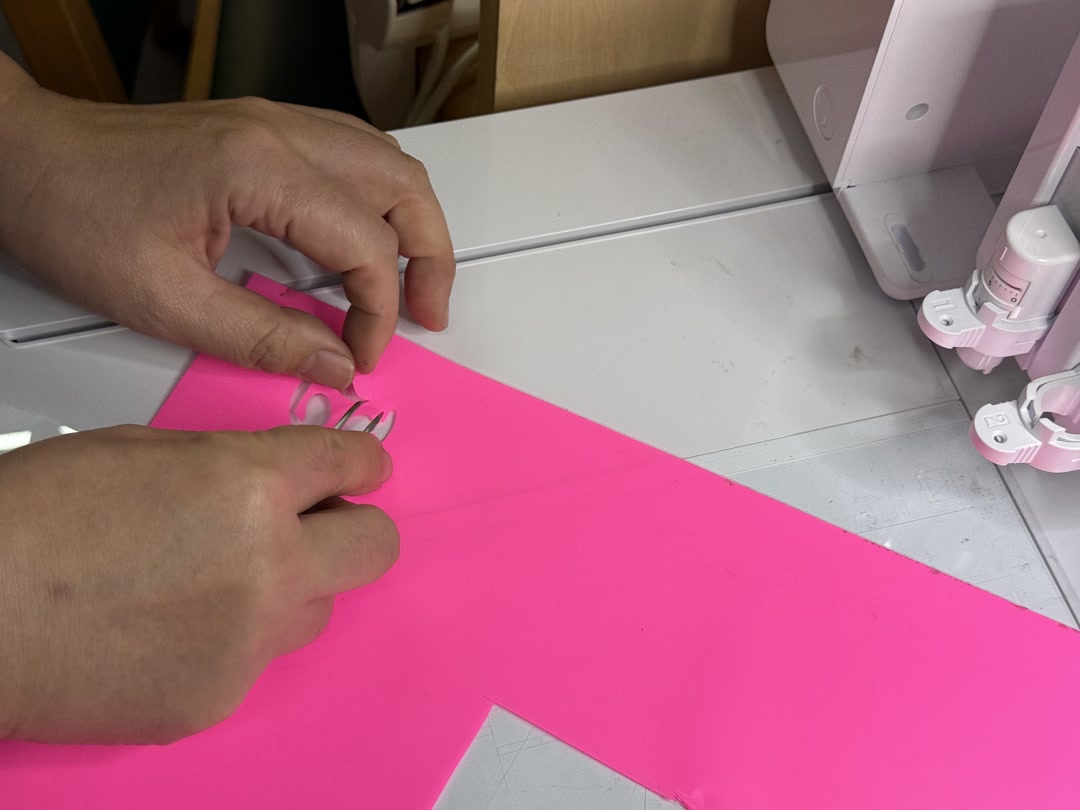
My first idea was to cut a decorative turtle design on blue vinyl. The machine cut it fine, but the design had far too many tiny internal pieces to weed — most of the detail was lost trying to pick out the small fragments.
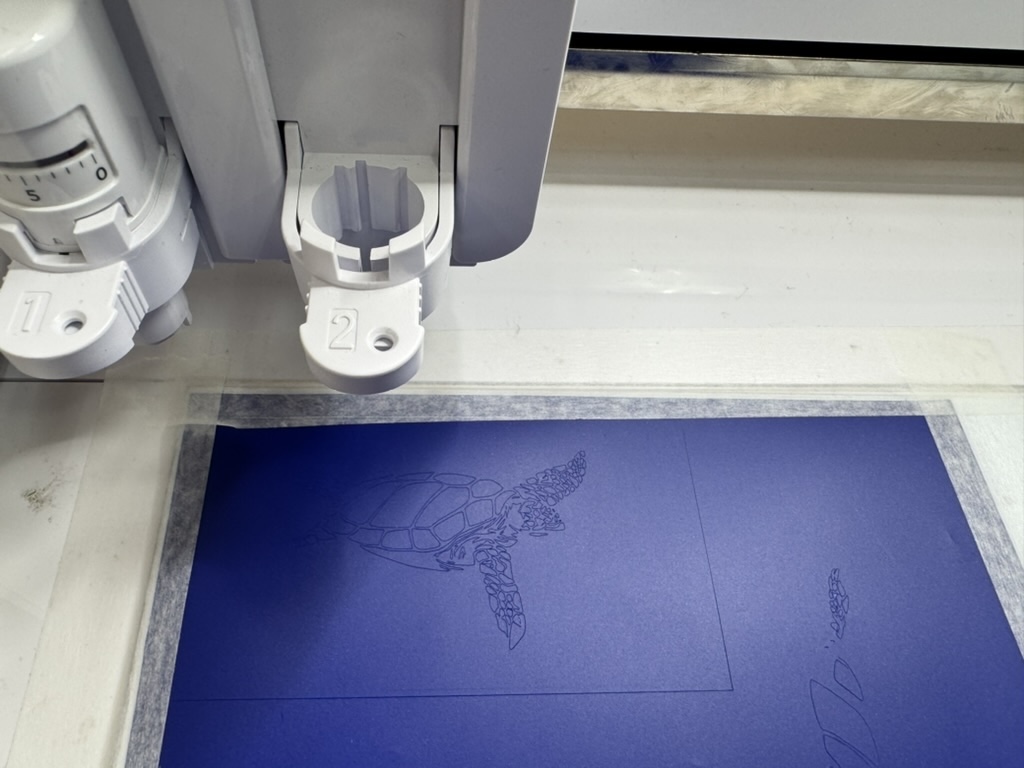
Lesson learned: Keep designs simple for vinyl cutting, especially when small details are involved. Fine lines and small islands are very hard to weed cleanly.
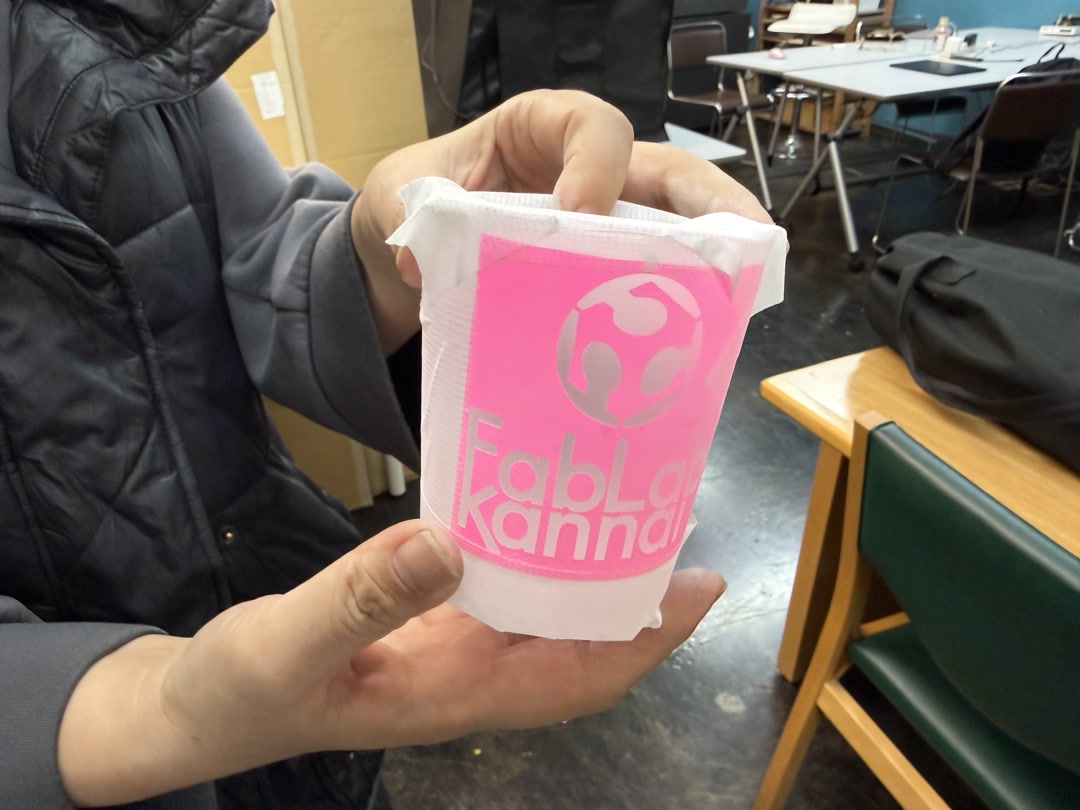
Second attempt: FabLab Kannai Logo (success)
I switched to the FabLab Kannai logo, which has clean bold shapes — much more suited to vinyl. I used pink vinyl and set up the cut in Silhouette Studio.
![]()
Settings used: - Material: Vinyl, Glossy - Action: Cut - Force: 10 - Speed: 5 - Blade Depth: 2
After cutting, I weeded the excess vinyl — removing the background and leaving only the logo shape:
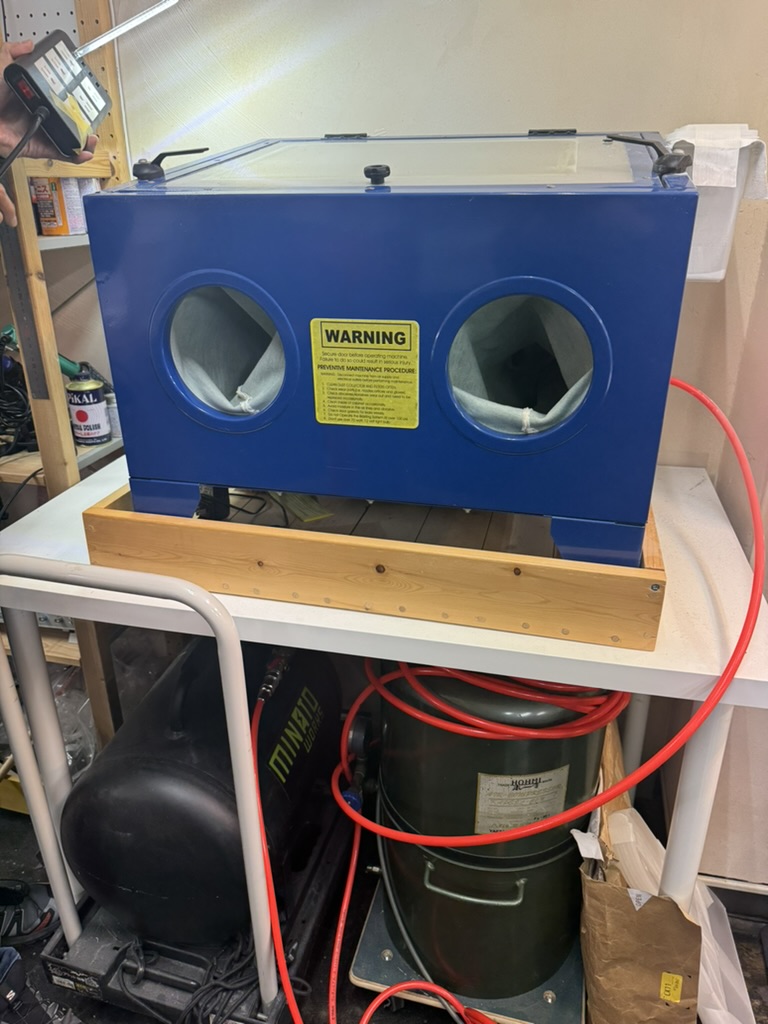
4. Sandblasting with Vinyl Mask
Rather than just sticking the logo onto something, I used the vinyl cut as a sandblasting resist mask to etch a glass.
Process
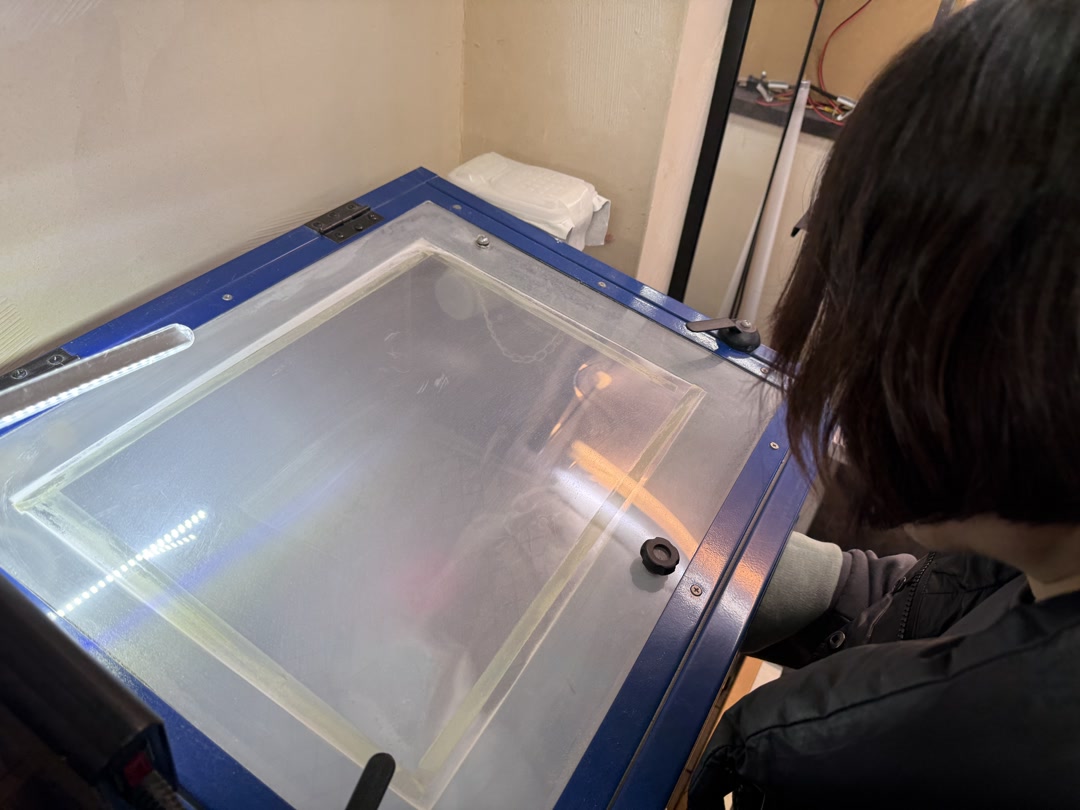
Step 1 — Apply vinyl to glass
The cut logo was applied to a glass tumbler using transfer tape, pressing it down firmly so no sand could get under the edges.
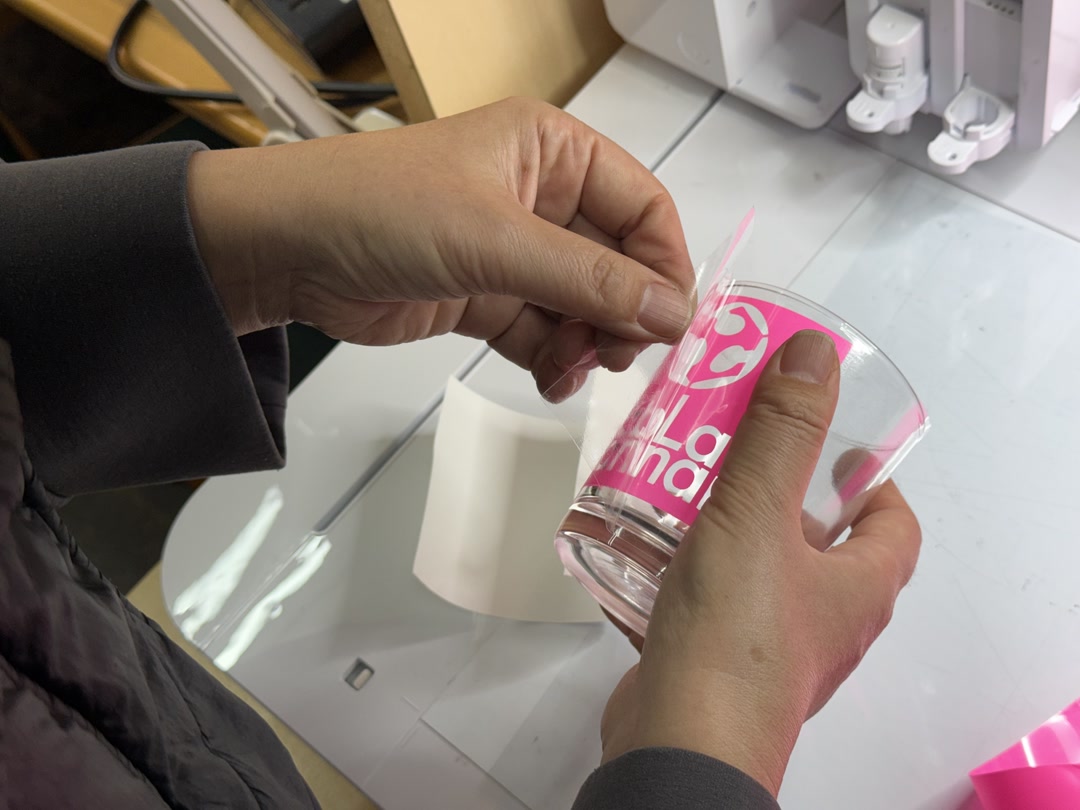
Then I covered up the rest of the glass so that it would remain clear and transparent.
Step 2 — Sandblast
The glass went into the sandblast cabinet. The sand blasted away the exposed glass surface, leaving a frosted/etched finish, while the vinyl mask protected the area beneath it (leaving it clear).
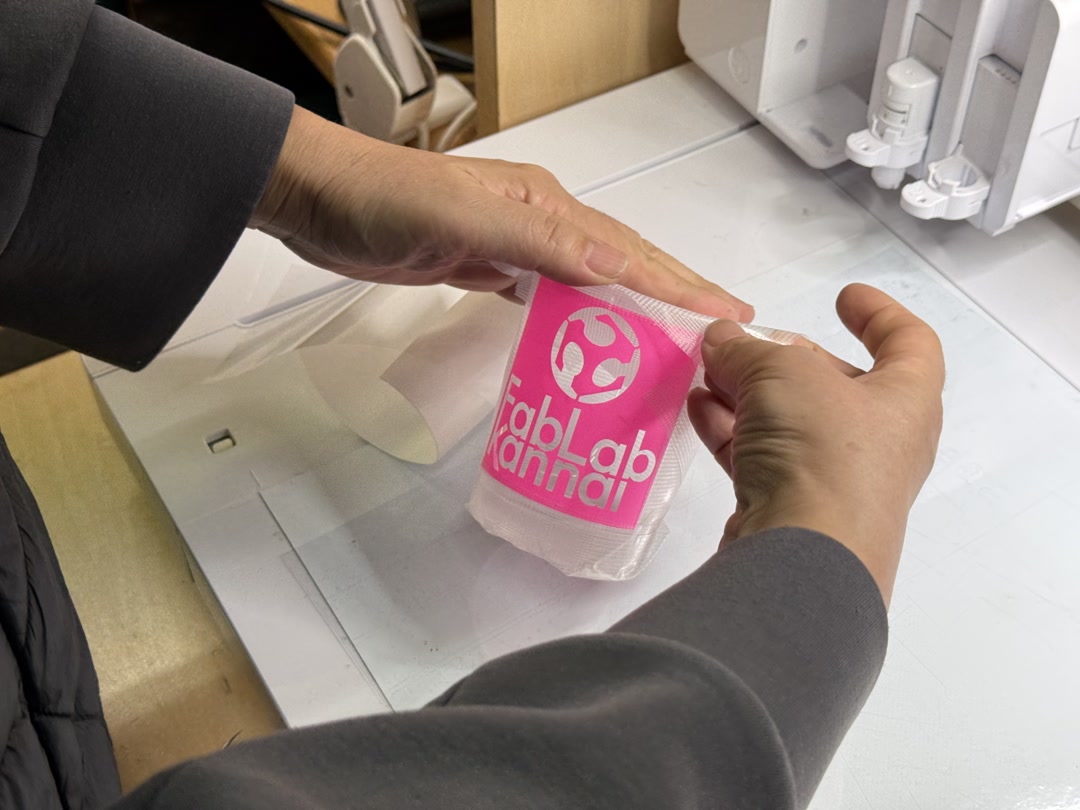
Step 3 — Peel and reveal
After sandblasting, peel off the vinyl mask to reveal the etched logo.
The final result — a glass tumbler with the FabLab Kannai logo permanently frosted into the surface:
Reflections
I had used Fusion 360 before this week, but laser cutting, vinyl cutting, and sandblasting were all new to me. I expected the machines to be relatively forgiving once the design was ready; the vinyl cutter in particular was more demanding than I anticipated.
The parametric kerf approach worked well — applying the measured value directly as a Fusion parameter meant the press-fit joints came out snug on the first cut. The sandblasted glass result also exceeded my expectations.
What went less well: my first vinyl design (a turtle) had far too many small internal pieces to weed cleanly. My engraving attempt on cardboard was too faint to read, so I had to switch to a low-power cut instead.
Next time I would mentally pre-weed a design before cutting — anything with small isolated islands will almost certainly fail — and run a quick engraving test on scrap material before committing to the final piece. All in all, the result was satisfying — using a vinyl mask as a sandblasting resist to etch a glass tumbler felt like real craft.
Checklist
- [x] Linked to the group assignment page.
- [x] Reflected on your individual page what you learned of your labs safety training
- [x] Explained how you created your parametric design.
- [x] Documented how you made your press-fit construction kit.
- [x] Documented how you made something with the vinyl cutter.
- [x] Included your original design files.
- [x] Included hero shots of your results.