Molding and Casting
link to Fab Academy class links
Group assignment:
- Review the safety data sheets for each of your molding and casting materials
- Make and compare test casts with each of them
- Document your work to the group work page and reflect on your individual page what you learned
Group Work
See our group page click here: Molding & Casting
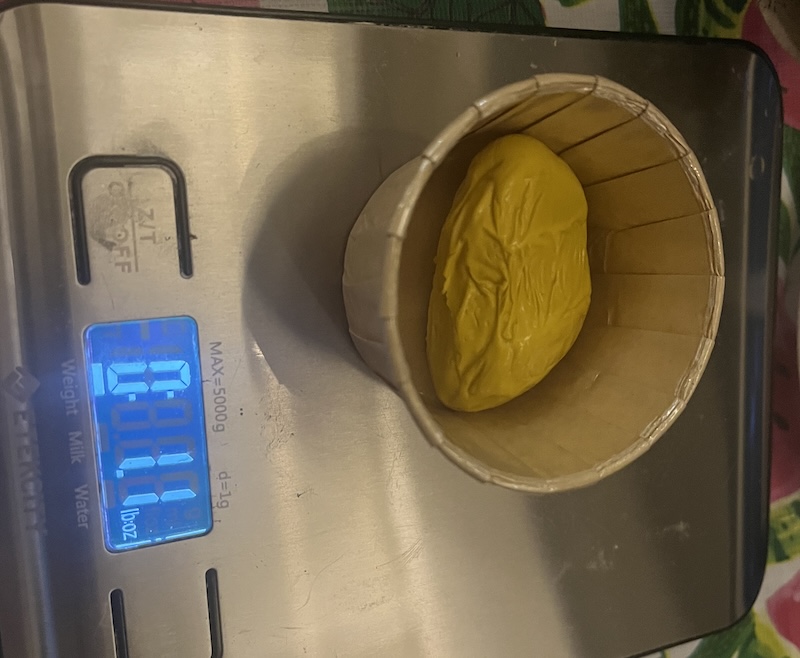
The wax cast made from the large vacuum mold Angela made, turned out well.
This week I Girl Scout encampment themed "Nature's Magic." I am in charge of programing for about 130 scouts ages 6-18, and over 200 people in total. I have been learning, gathering materials, preping crafts, and teaching instructors throughout the school year in preparation for this weekend. One of the stations the scouts dipped beeswax candles and made beeswax firestarters. Beeswax is a slow, clean burning, hard wax, which makes it perfect for dipping tapered candles and as it turns out, milling to make molds.
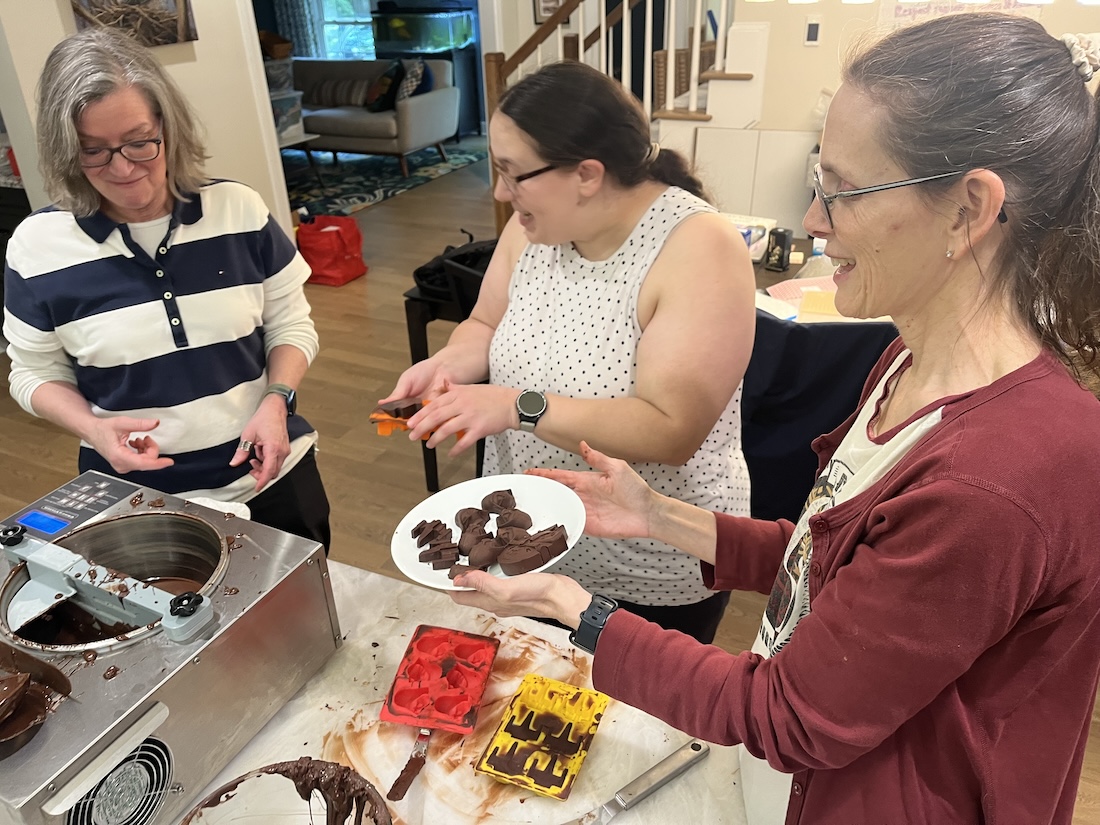
I got back from encampment Sunday mid day, and had just enough energy to unpack my car, and set up the wax. On Monday I prepaired the wax and chocolate for our group meeting that afternoon as well as wrapping my daughter's birthday gift, and dealing with repair men. Durring our group time I taught my group how to cast with chocolate. Chocolate must be in temper to use, meaning the crystaline structure of the cocoa butter is in it's strongest form. When chocolate is in temper it creates a crisp shiny shell. A molded and filled chocolate is called a bonbon. With properly tempered chocolate the filling is sealed within the chocolate like a canning jar, and bacteria cannot get inside. If the chocolate is not in temper bacteria can get into the filling, and liquid can leak out as well.
You can eat bonbons that with untempered chocolate for a few days if they are kept refrigerated. Tempered bonbons can be left at room temperature for a week or more depending on the filling.
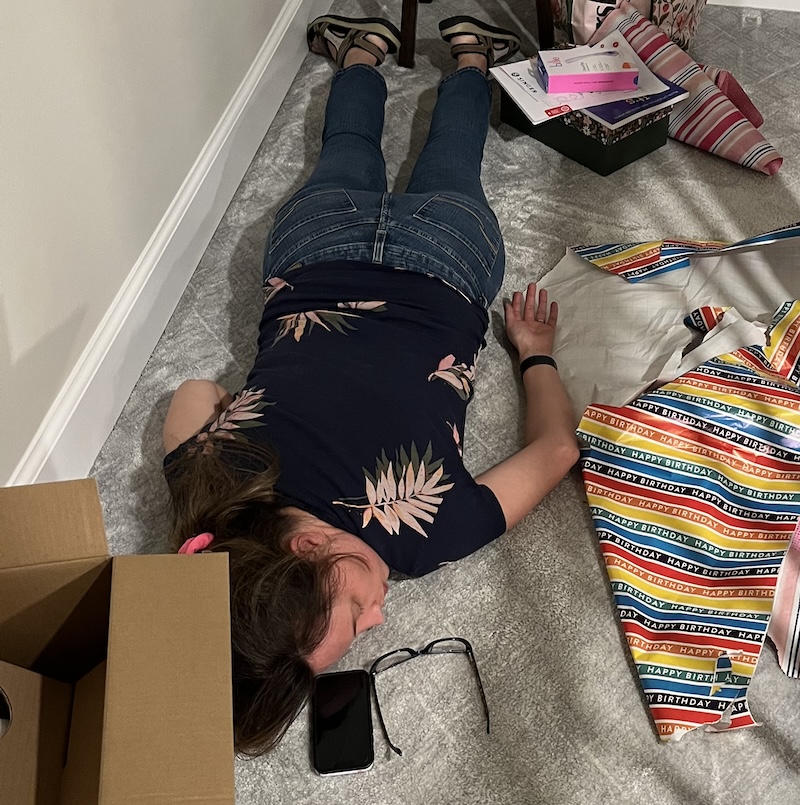
By the time the group left, and my daughter went to get ready for bed after opening her gifts, I was exhausted!
After a power nap, I was up and continuing my molding and casting work, because Tuesday I was helping my daughter and friend make 50+ mini Derby pies for their school project on Kentucky. I did take some pictures of molding pie shells in my tartlet molds, filling them, and baking them. I figured they would fall into molding and casting week too. However, I think I have enough on this page as is, and decided not to add it.
Individual assignment:
- Design a mold around the process you'll be using, produce it with a smooth surface finish, and use it to cast parts
In culinary school we learned to mold and cast using food safe materials.
-
silicon molds
- reusable
- takes a day to make
- can cast a range of materials at different temperatures
- coat item creating the mold with vasaline so that it will release
-
sugar
- damp sugar molded, and dried to make molds
- use with poured sugar decorations
- will leave crystals on the cast
-
corn starch
- design pressed into cornstarch
- must brush off remaining cornstarch
- one time use, but great for large quantaties of simple designs
-
play dough
- quick molds
- not reusable
- coat with vasaline to release casts from mold
-
gelatin molds
- desserts, like a charlotte royal, tiramisu, Jello, are made to look pretty by filling a mold with a gelatin mousse
- gelatin is used to make molds too. I haven't used them for food, but have used them in chemistry!
I tried materiom.ai to get new ideas for my dragon hatching shells!
For my conversation with materiom.ai click here
Here are my thoughts after each of materiom-ai's suggestions:
Starch-based: Starch can be cast into molds and will dissolve in water. The rate of dissolution can be controlled by crosslinking the starch with citric acid or other bio-based crosslinkers. - I have used starch before, but it creates too much leftover waste, and can be difficult as starch and water creates ublec that is a non-neutonian fluid
Sugar-based: Similar to starch, sugars like sucrose or glucose can be caramelized and cast. These will dissolve readily in water. - sugar will bring bugs, and gets sticky
Alginate: Alginate, derived from seaweed, can be crosslinked with calcium ions to form a gel-like cast. This can be dissolved by introducing a chelating agent like EDTA, which removes the calcium ions. - this is an interesting idea, I need to look into chelating agents, but some fresh pineapple juice could break down gelatin and alginate
Poly(vinyl alcohol) (PVOH): PVOH is water-soluble and can be cast into films or molds. It dissolves readily in water, and the dissolution rate can be adjusted by varying the degree of polymerization or by adding plasticizers like glycerol. - I have made plastics from starches, acids, I would like to experiment with the more.
Could I use sodium polyacrylate, the super absorbant polymer in diapers, to fill the mold. Then break it down with salt? Or gelatine, and break it down with fresh pineapple juice. I could turn that into a dessert. A mango-coconut pate a bombe semifreddo with a white chocolate dragon inside. But, the pate a bombe would be too stable.
I think this will work to create: - 1 cup mango juice - 1 packet of unflavored gelatine - 1 cup cold coconut cream - fresh pineapple juice
- in a bowl that can hold 1 quart of liquid, bloom the gelatine in a bit of the mango juice
- heat remaining juice to hot, but not boiling
- pour into bloomed gelatine while gently whisking
- stir as it cools, can use icebath, don't let set up
- add cold coconut cream, and whisk until soft peak
- pour into molds, can layer with cake and/ or cooked fruit, add dragon too
do not add fresh fruit unless you are sure it doesn't contain the enzyme Bromelain that breaks down gelatin
- freeze
To serve: 8. remove from freezer 10-15 minutes before serving 9. sprikle with caster sugar 10. caramelize sugar with butane torch 11. serve immedietly with a small pitcher of fresh pineapple juice
You can then crack into the dragon's egg and/or desolve the gelatin with the pineapple juice. Desolved or solid it should taste delicious.
Idea PCB mold
Can I make a mold of a pcb board then fill the traces with aluminum?
Metal casting
See 2015 fab academy week09 wang.tse-kang for information on working with pewter, which has a melting point below 300 degrees farenheit. This makes it more usable then aluminum. Led free pewter is used in solder. It is conductive, but not as much as aluminum or copper. Could I make a pewter inlay on my table? It would be very expencive!
I could cast the mold in wax, and use copper paint. Through hole components may work to be pushed into the wax. Wax is an insulator so it may work?
An edible alternative would be difficult. Maybe creating the traces with an electrolyte solution like gaterade mixed with sodium alginate, and set with a calcium chloride solution? Or maybe a gelatine?
Molding Work
Chocolate
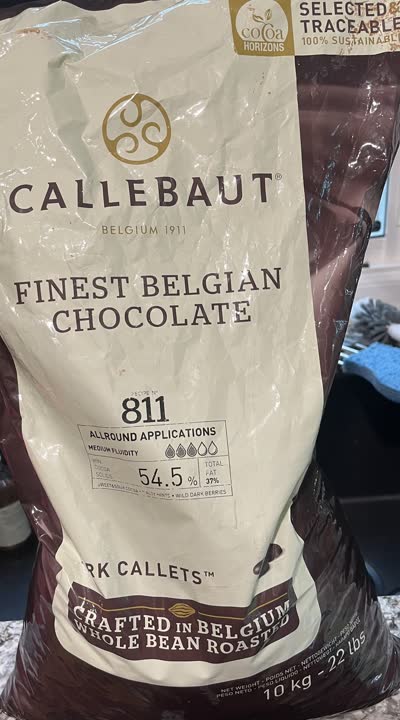
My favorite chocolate to use is Callebaut 811 which has 54.5% cocoa solids, and would be considered dark, but not bitter, chocolate.
This bag held 22 pounds of chocolate!
This is my medium size tempering machine. It is a ChocoVision Revolution V with the holey baffel, which can hold up to 9 pounds of chocolate. It melts and tempers white, milk, or dark chocolate. It also has a program for extended temper, which reheats the chocolate at regular intervals to prevent having to start the whole tempering process over again.

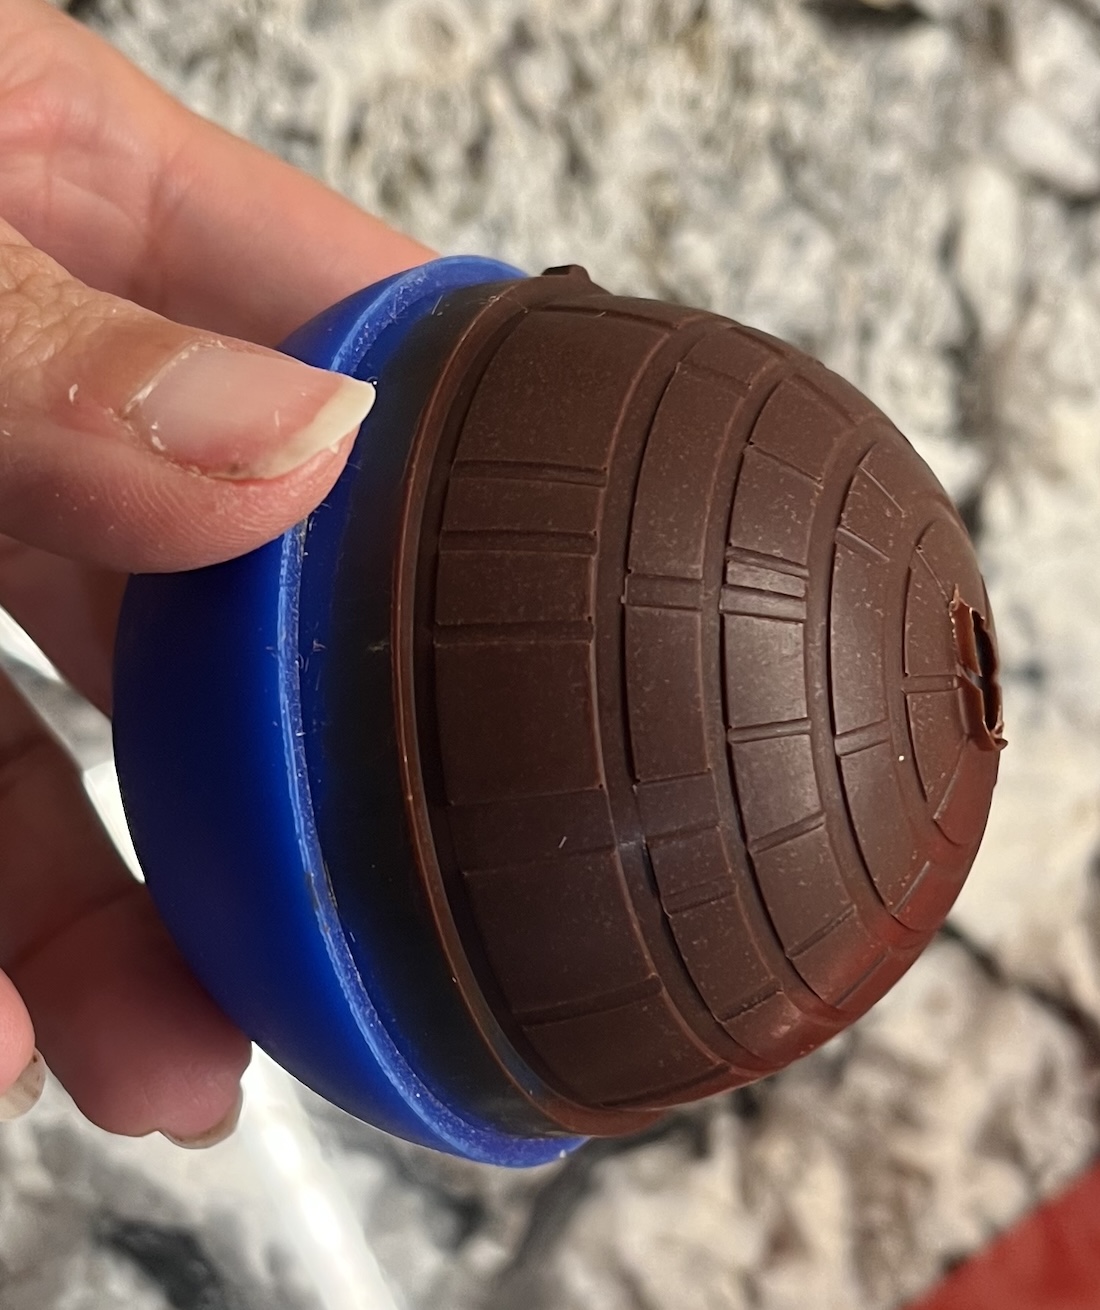
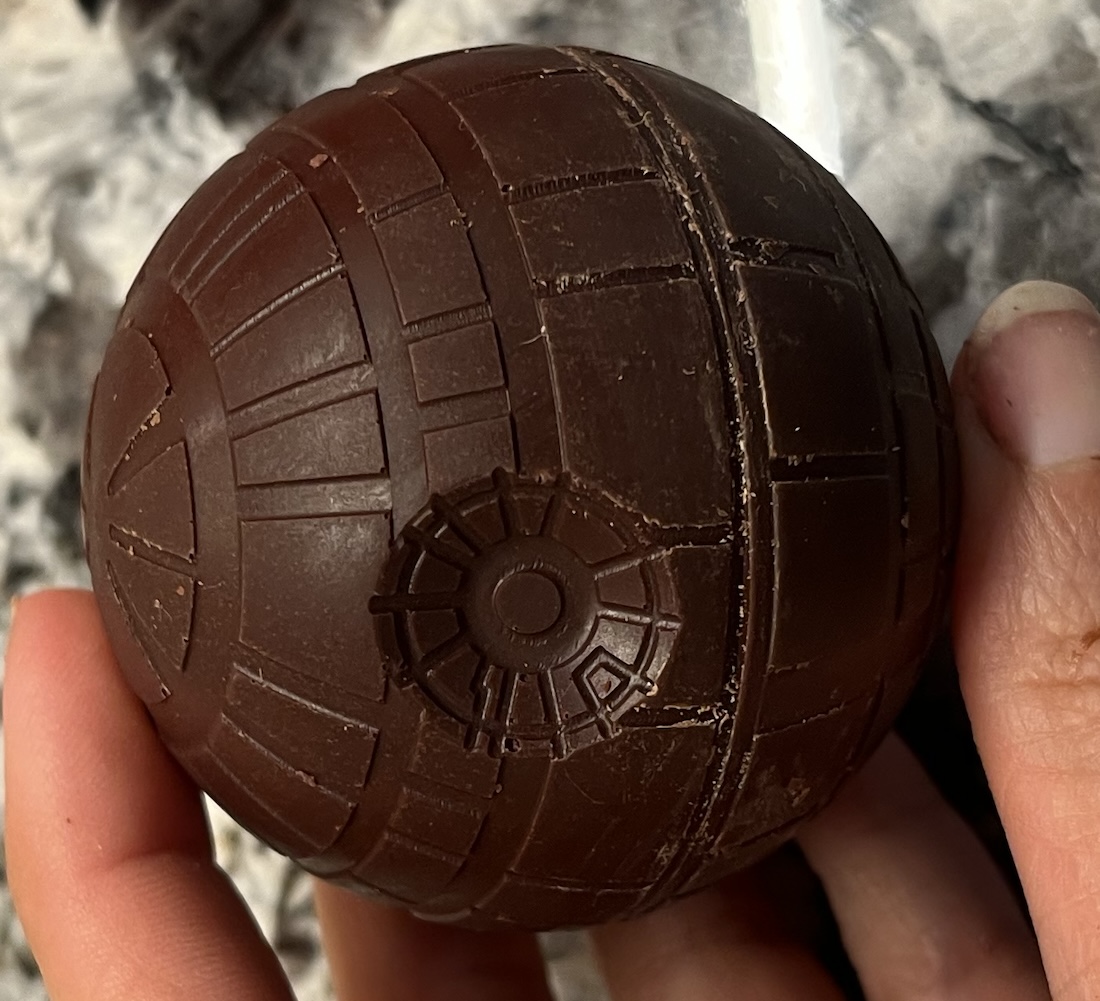
This is an empty 2 part chocolate mold of the Death Star from Star Wars. It is made from silicone, not by me, and the 2 halves fit together.
To fill the mold, I pour tempered chocolate into the bottom half of the mold.
I then close the mold, and rotate to coat the interior. After revolving the mold around a few times, I let the excess chocolate fall out of the hole in the top.
You can see that the chocolate coats the hole, and seals it.

Put the mold in the refrigerator for 10 min or more, and then unmold.
Wax Casting
PPE for using hot wax: - cloths you don't mind throwing away - pants not shorts - closed toed shoes
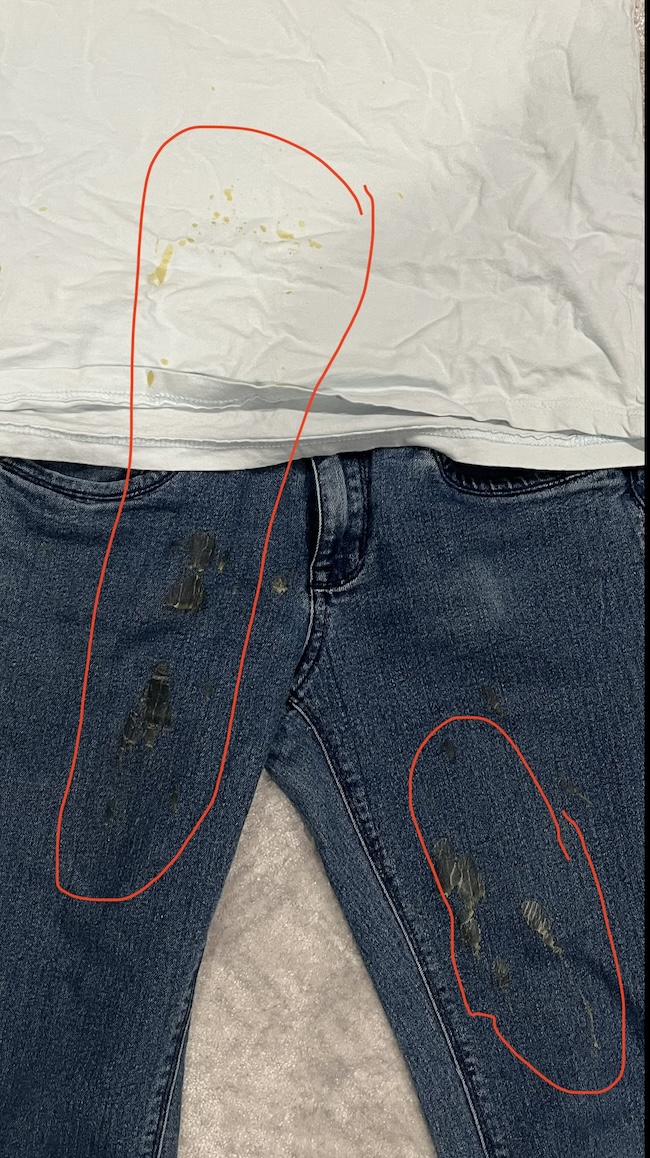
I had a container break, and spilt hot wax on myself. I was very glad that my cloths protected me. I was not burnt at all. However, our teenage helper at the encampment was wearing short shorts, and got a first degree burn on her leg when some wax spilt on her.
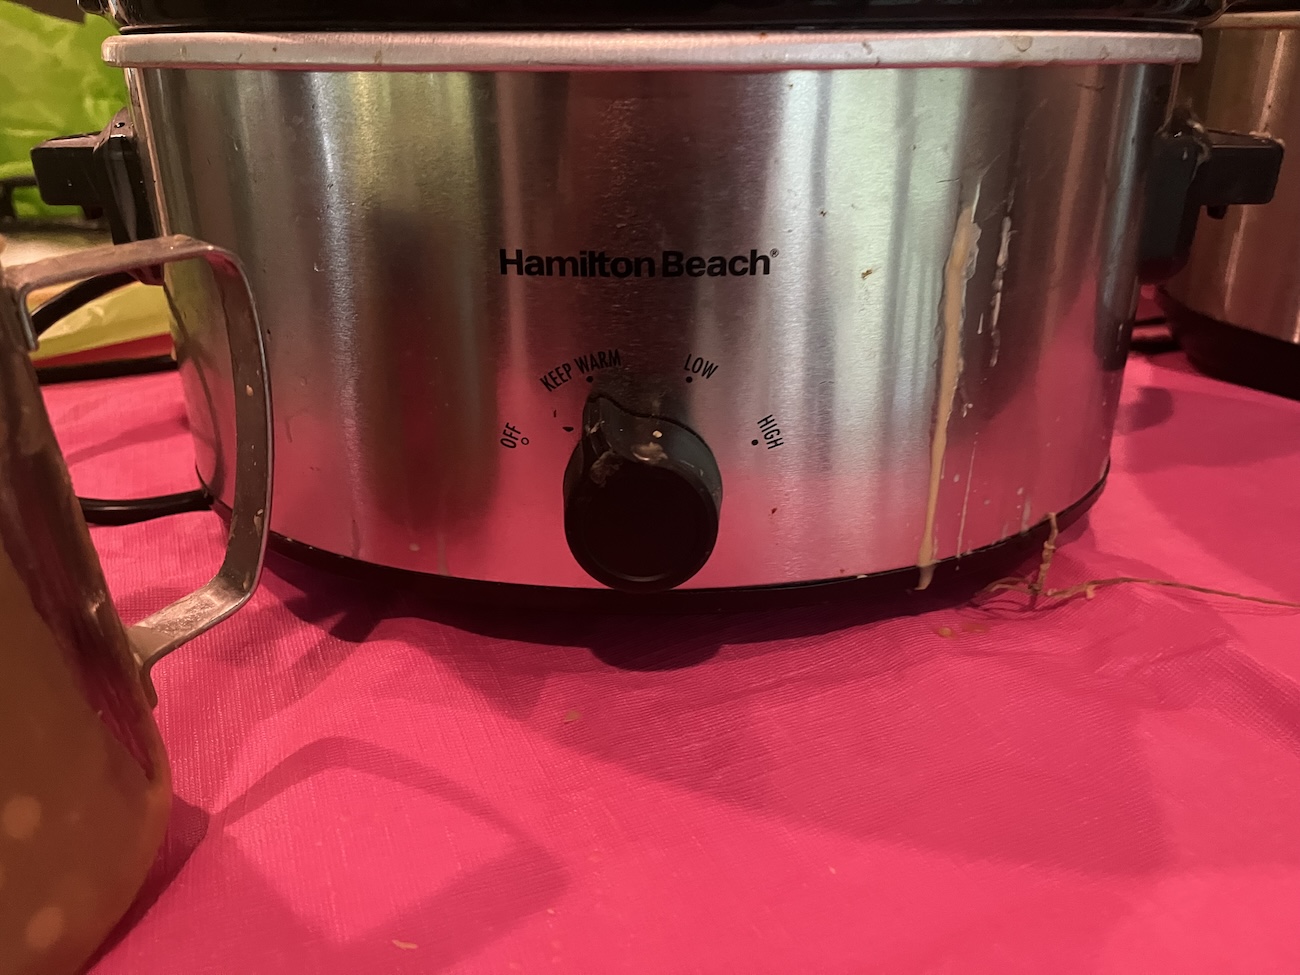
Melt wax in a crockpot. I picked up a few crockpots at the local thrift store. Only use the warm setting.
I purchased wax from a coworker at Charlottle Latin, whose family runs a commerchial bee keeping business. Her products can be found here at honeyandhive1.com.
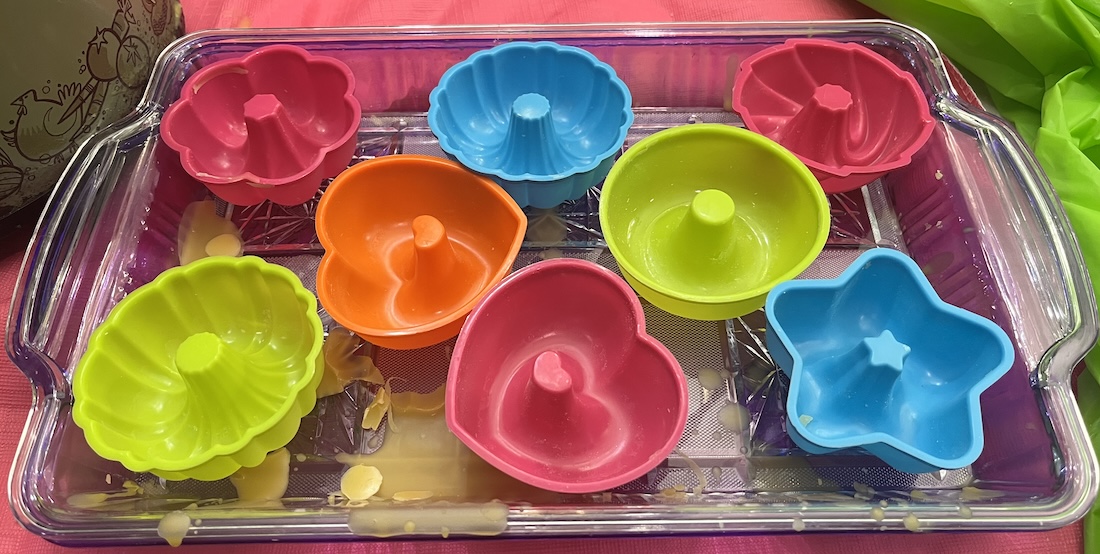
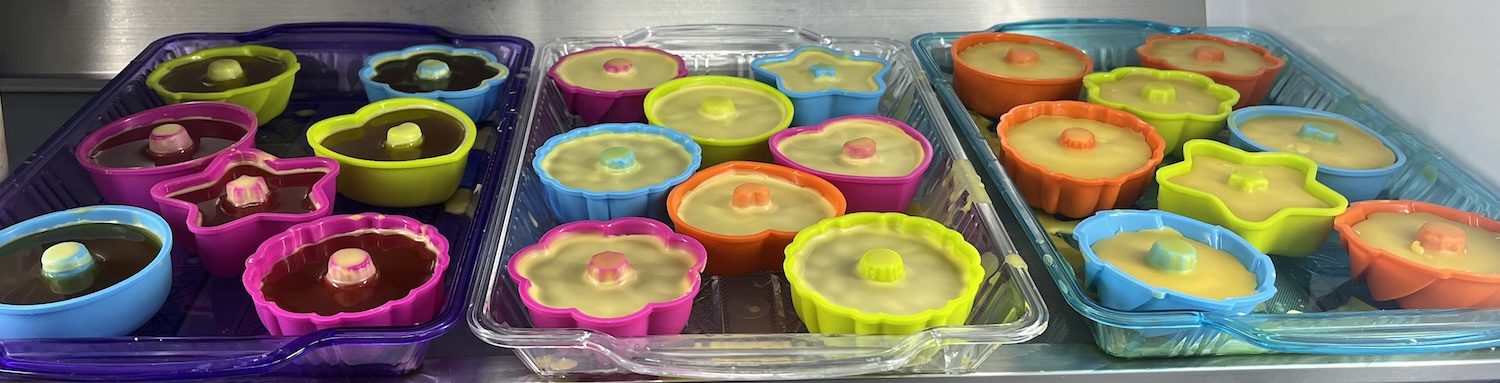
The 40 pounds of wax I ordered came in large 1 pound bricks that could only fit in one of my crockpots. So before encampment I melted and molded the wax into smaller pieces using these mini bunt molds I have had for years, but never used.
note that the bees wax is food grade, and I can reuse my molds for food in the future, but I chose these molds because I was unsure if they would get fully cleaned after being used for wax.
The wax set in my refrigerator in about 20 minutes or a bit longer when left at room temperature.
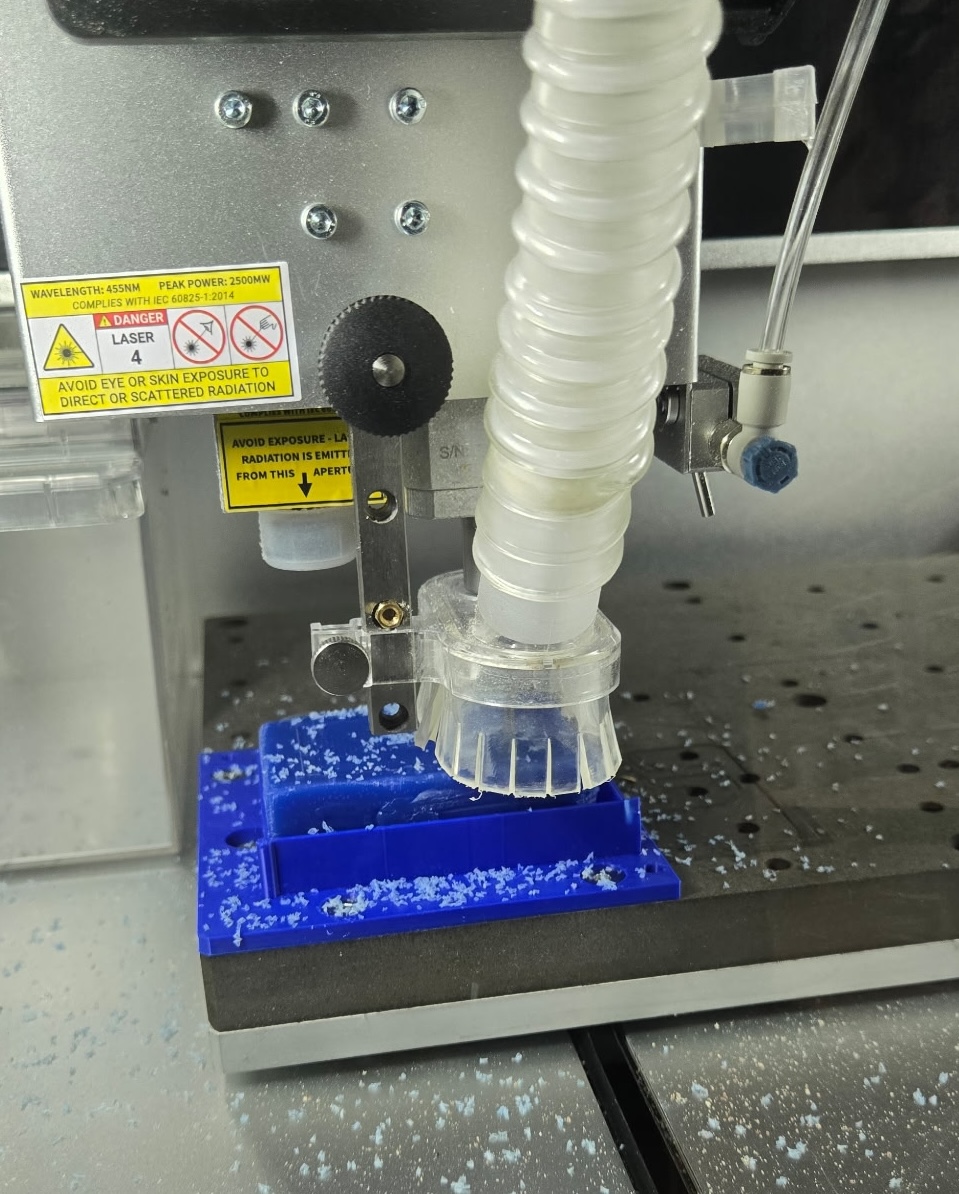
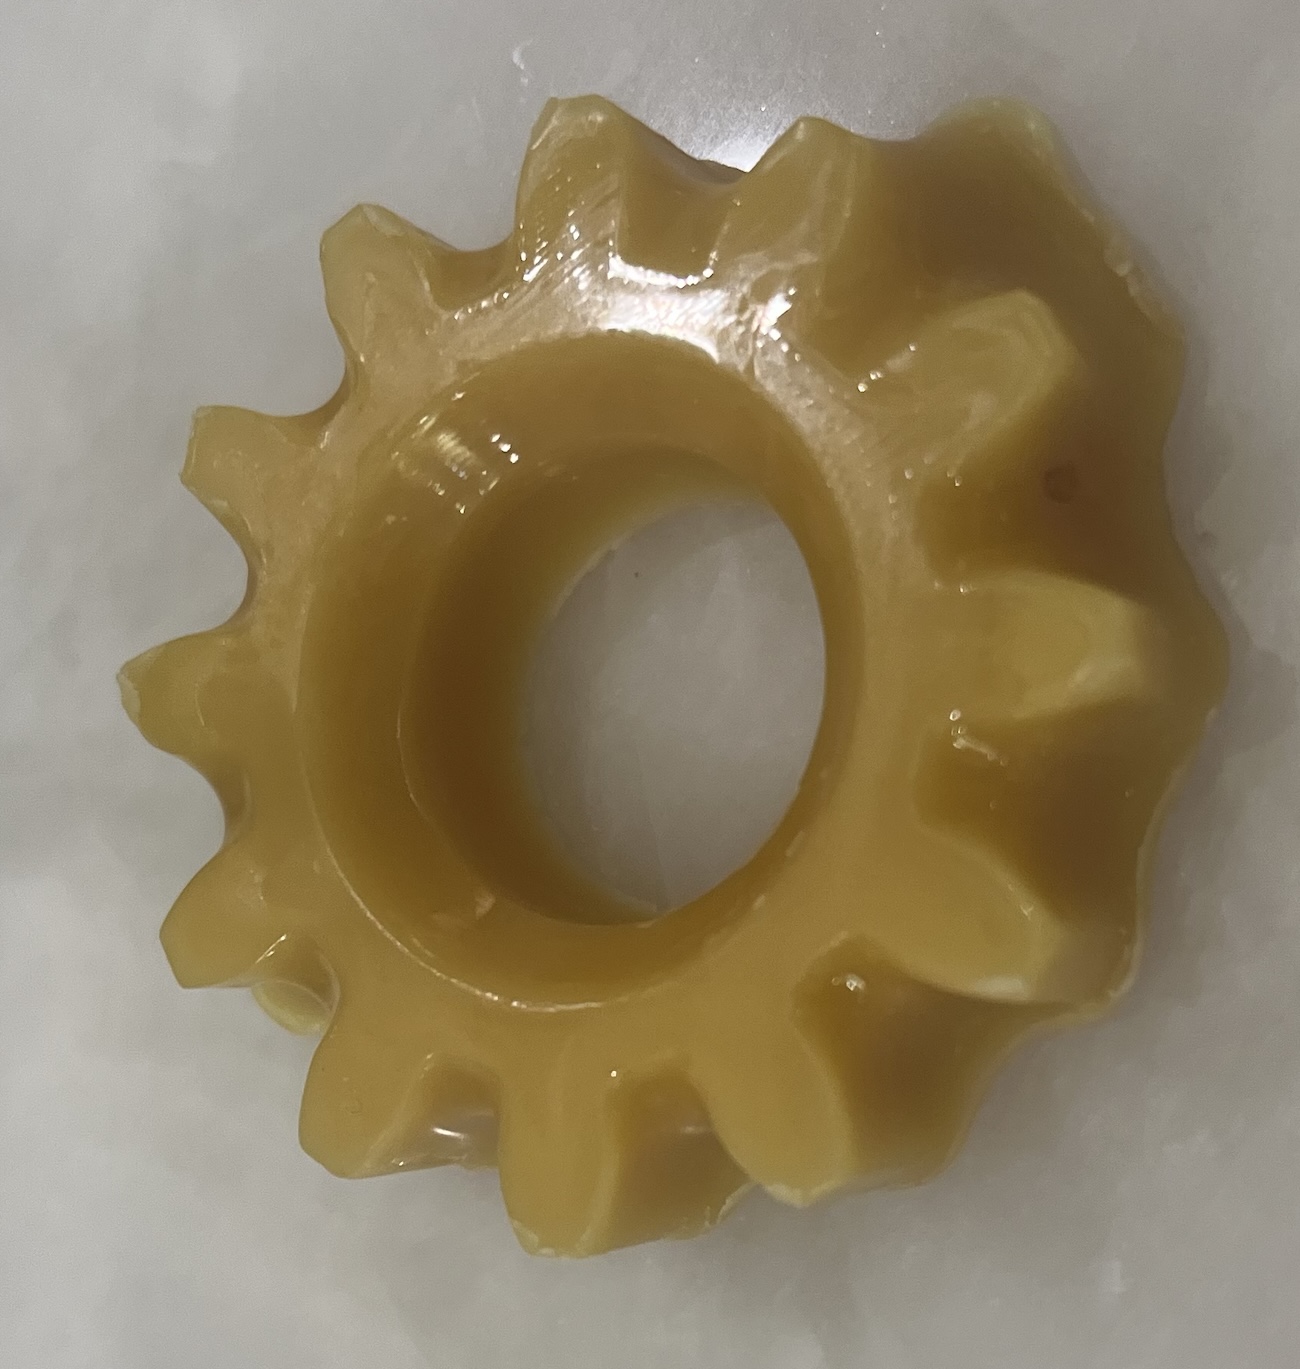
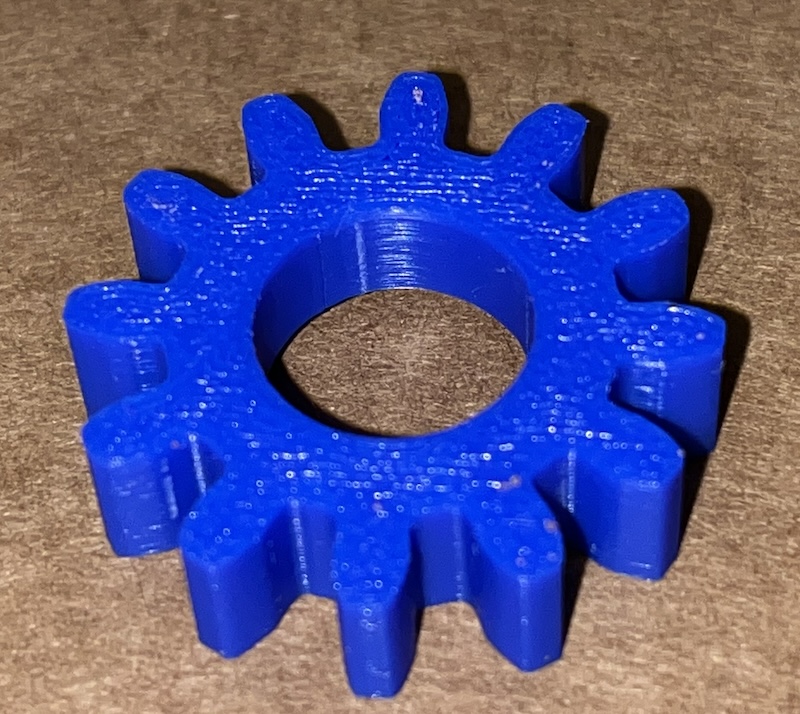
Removing 3D Print Lines
You can clearly see the 3D print lines on this gear.
Heat Gun
I tried to remove the lines with my heat gun, but it warped the pla.
The heat gun worked great on the stringing I had under my gold dragon't tail though.
Acetone
wear gloves, and work in ventilated area
I tried to remove lines with acetone, but it made the lines worse. Acetone vapor chambers are typically used with ABS, but I had heard you could directly apply the acetone to the pla to smooth it.
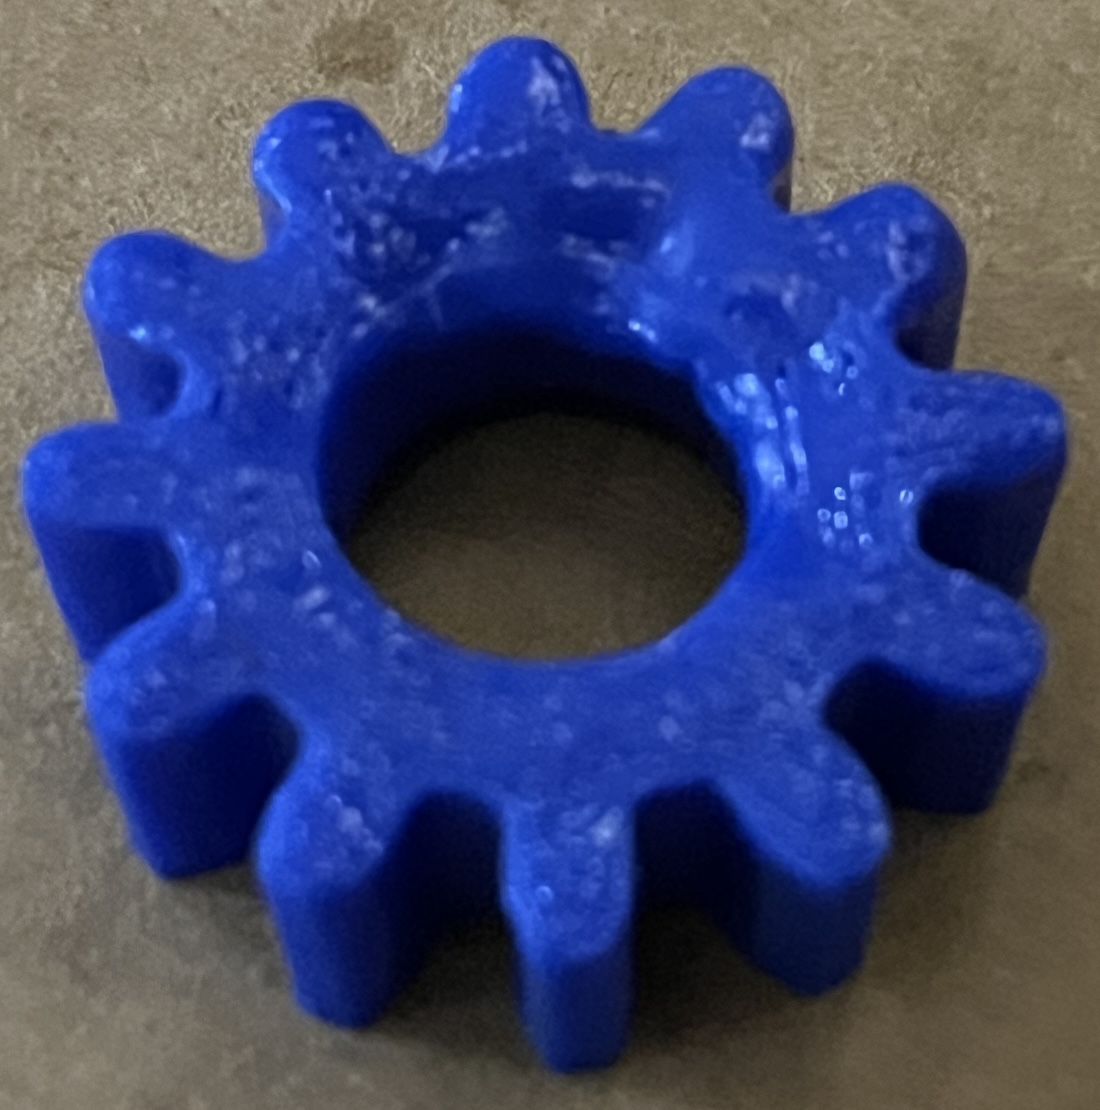
Wax
I though, "If only I had something food safe, that I could dip or pour over my prints, like poured fondant when decorating cookies." Then I remembered I had a crockpot full of melted wax on my counter!
I brushed melted wax onto my print. If it got to thick, I used the heat gut to melt excess off.
The neck had extra wax built up, but I smoothed that with the heat gun.
Securing chopstick with wax inside dragon egg half.
Using wax to hold chopstick in center of my egg so that I could dip it in bees wax to smooth out print lines.
Smoothed egg half after dipping in bees wax.
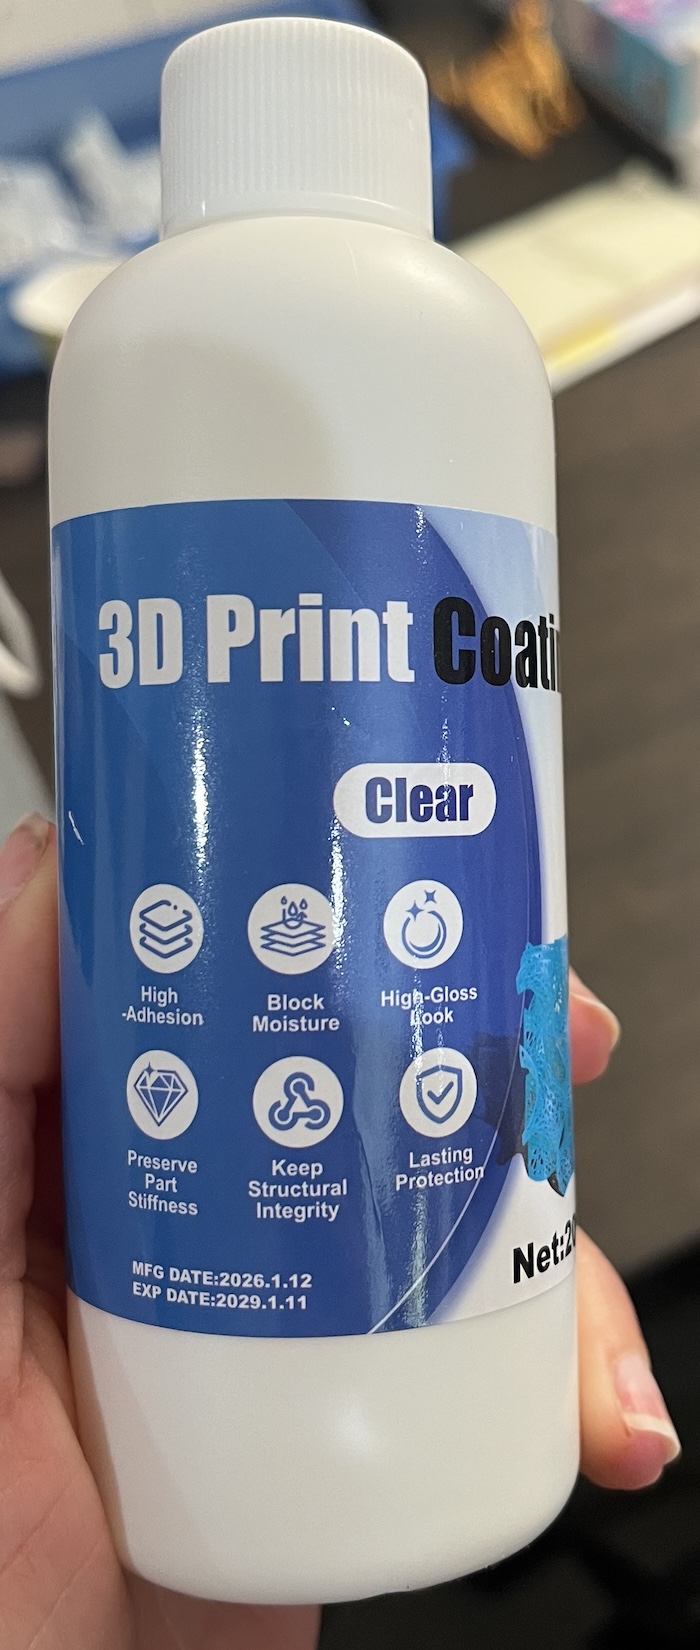
Print Filler
I wanted to try filling in the printer lines with this product Tom got us for the lab. It didn't have any information on the bottles about food safety so I only used it for Fizzbit's head. I left this mold for last because I was mostly casting with edible materials, even the beeswax is food grade.
I tried using the 3D print filler from class, letting it dry, and sanding. It seemed to work, but the dust had filled the lines, and would brush off.
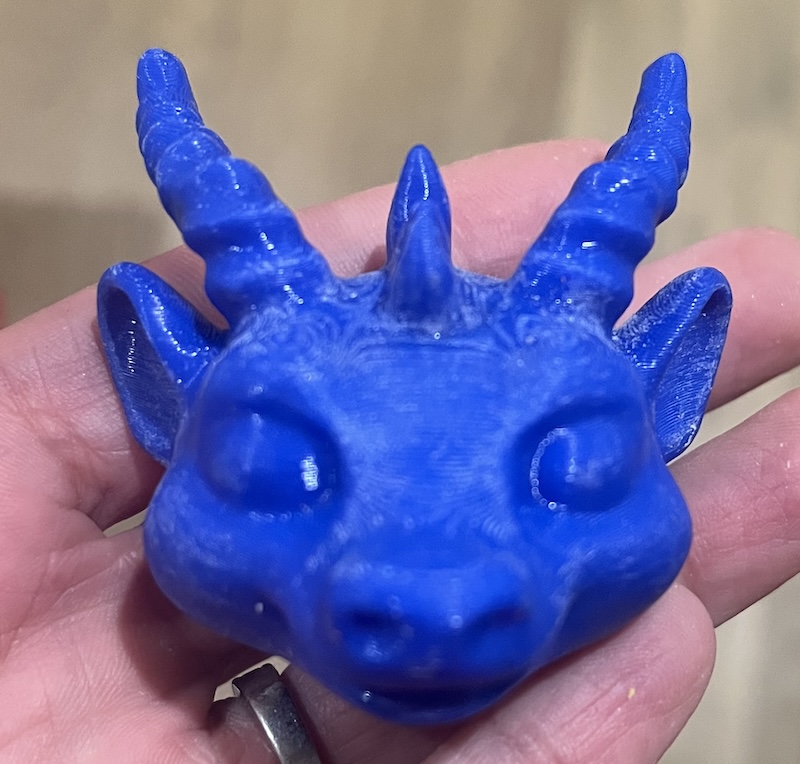
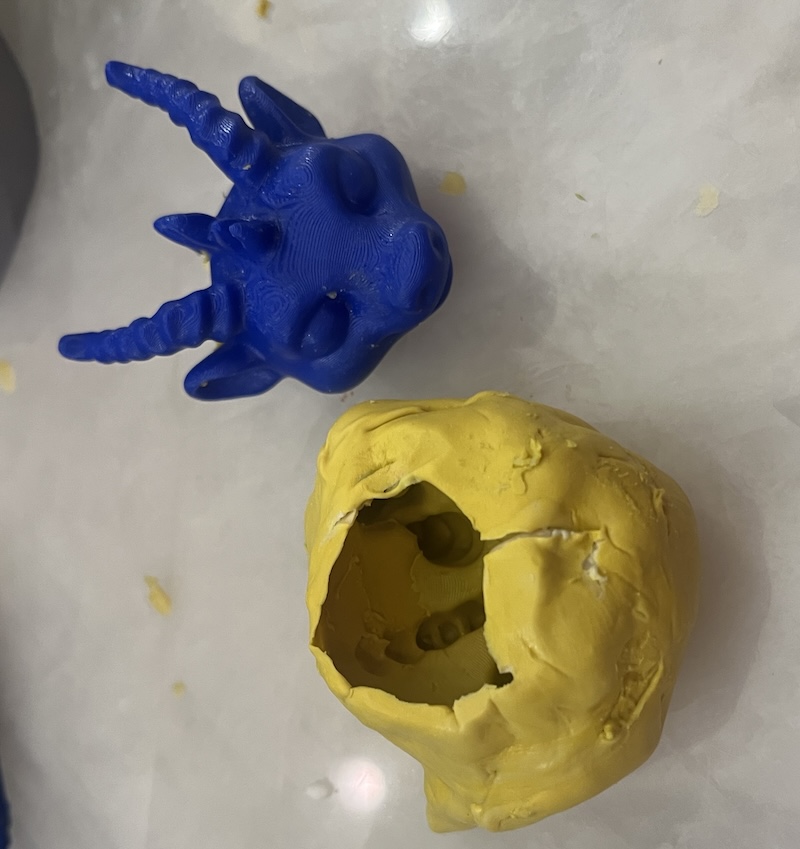
An attempt to cast Fizzbit's head using the remaining silicone putty, which was just a bit too little to make a good mold. The tips of the horns are barely covered.
I had hoped to cast Fizzbit's head for my final project, but it would be far easier to print it.
Food Safe Silicone
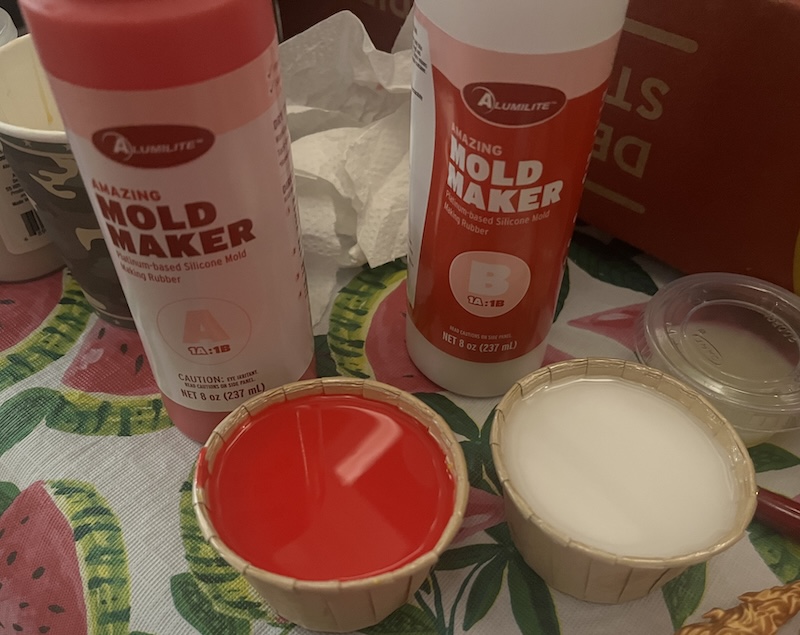
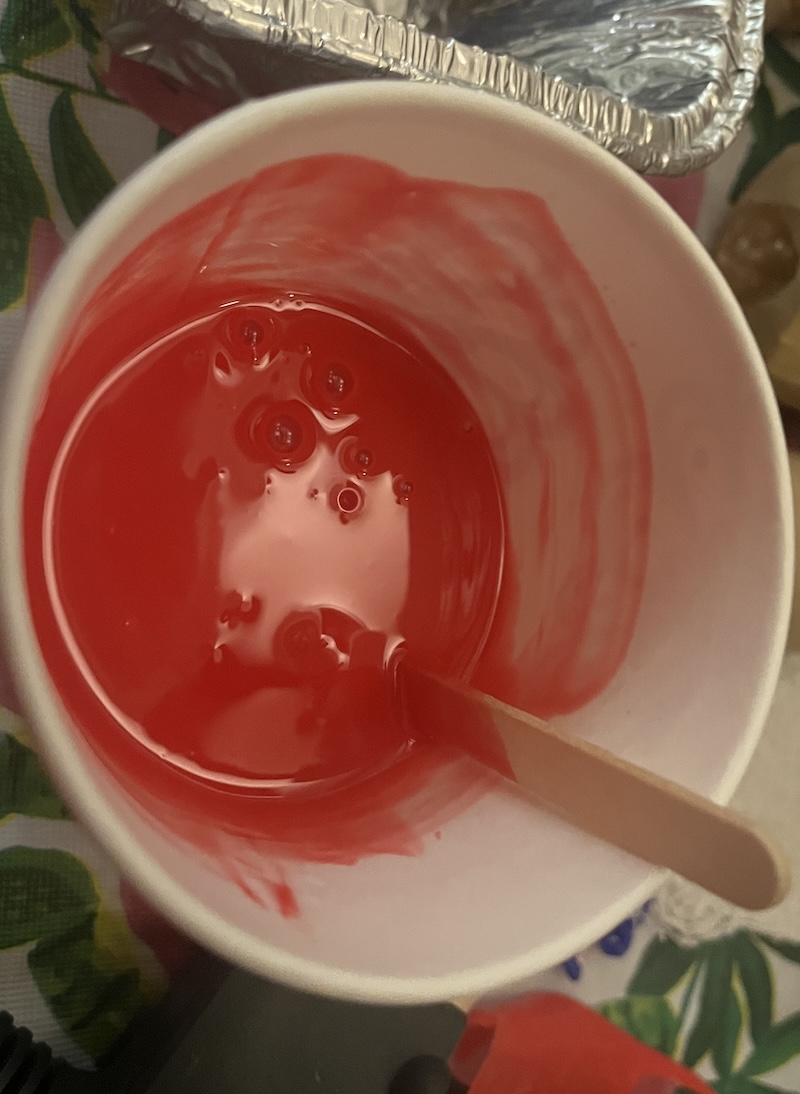
I used 2 types of food safe silicone for my molds. Both made by Alumilite:
Amazing Mold Maker by Alumilite
-
a fast curing (30 minutes), food safe silicon that pours easily, self levels, and doesn't trap bubbles.
-
Part A and B are mixed in a 1-1 ratio.
-
Wear gloves, eye protection, and work in a well ventilated area.
 Image from Alumilite.com
Amazing Mold Putty by Alumilite
-
a 2 part silicone putty that is food safe, and fast drying (20 min).
-
Part A and B are mixed in a 1-1 ratio.
-
Wear gloves and eye protection, and work in a well ventilated area.
 Image from Alumilite.com
Click here for Amazing Mold Putty MSDS
Dragon relief in sky
I used meshy to create this 3d file in week 7.
dragon in clouds
I hope to one day make it into a hinge for my magic table. For this week I will make a mold of it to use for my daughter's drago themed birthday cake.
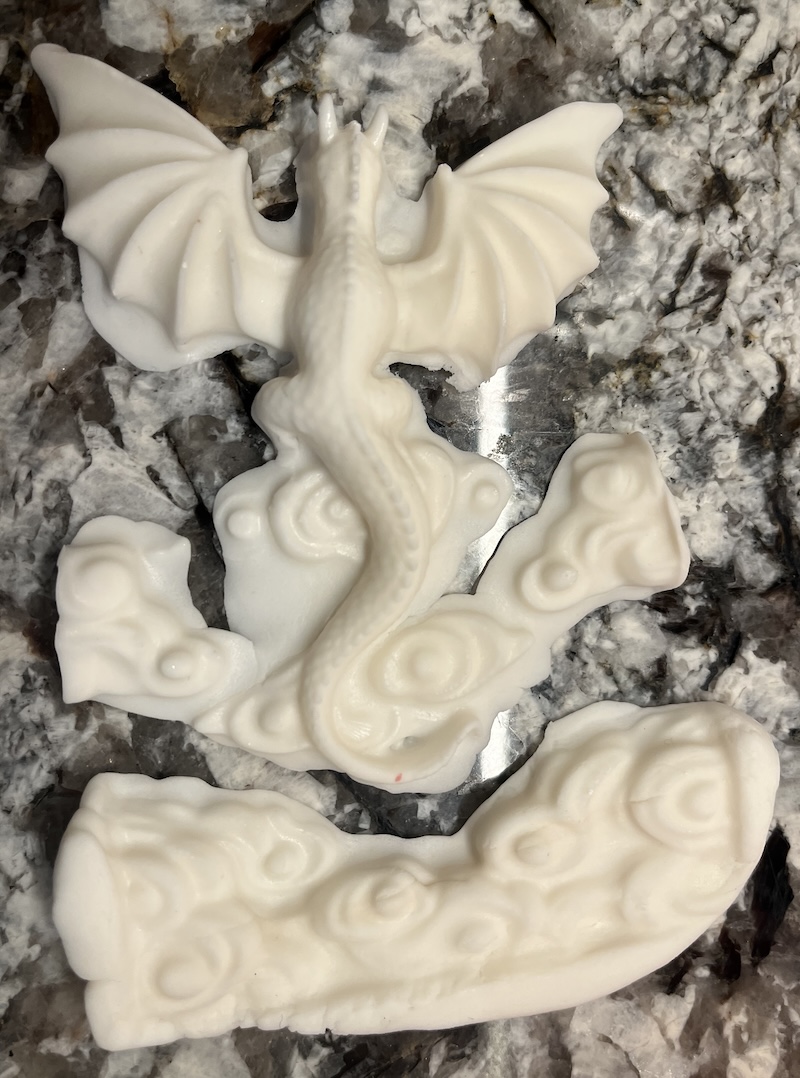
To prepare my mold I used bees wax. Since it is used to mill and mold I thought I would work to coat my print to remove lines, and fill a gap that is between the dragon and the back of the print. I hadn't realized the dragon sat above the back before printing. That space would cause problems with creating a mold, because the silicone would set under it, and I would have difficulty unmolding.
The wax worked great!
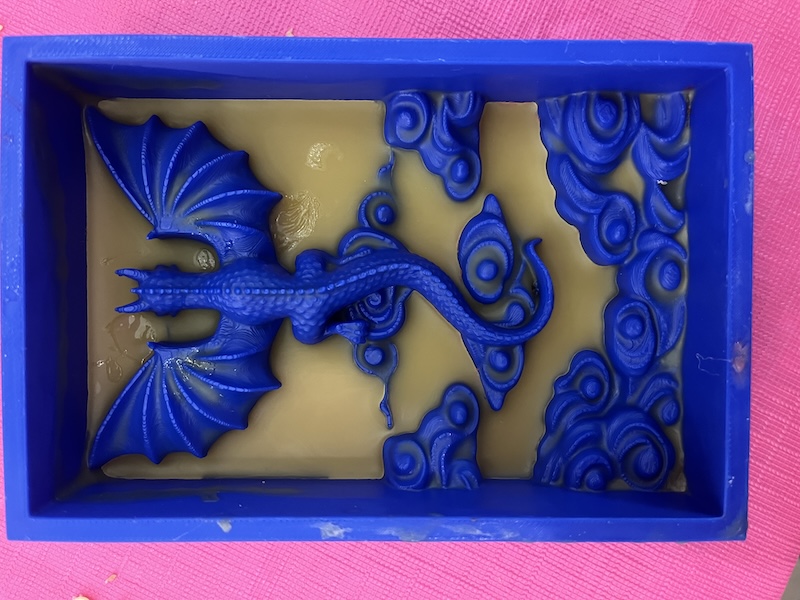 I used food safe silicone to create the mold.
Unmolding:
Finished mold:
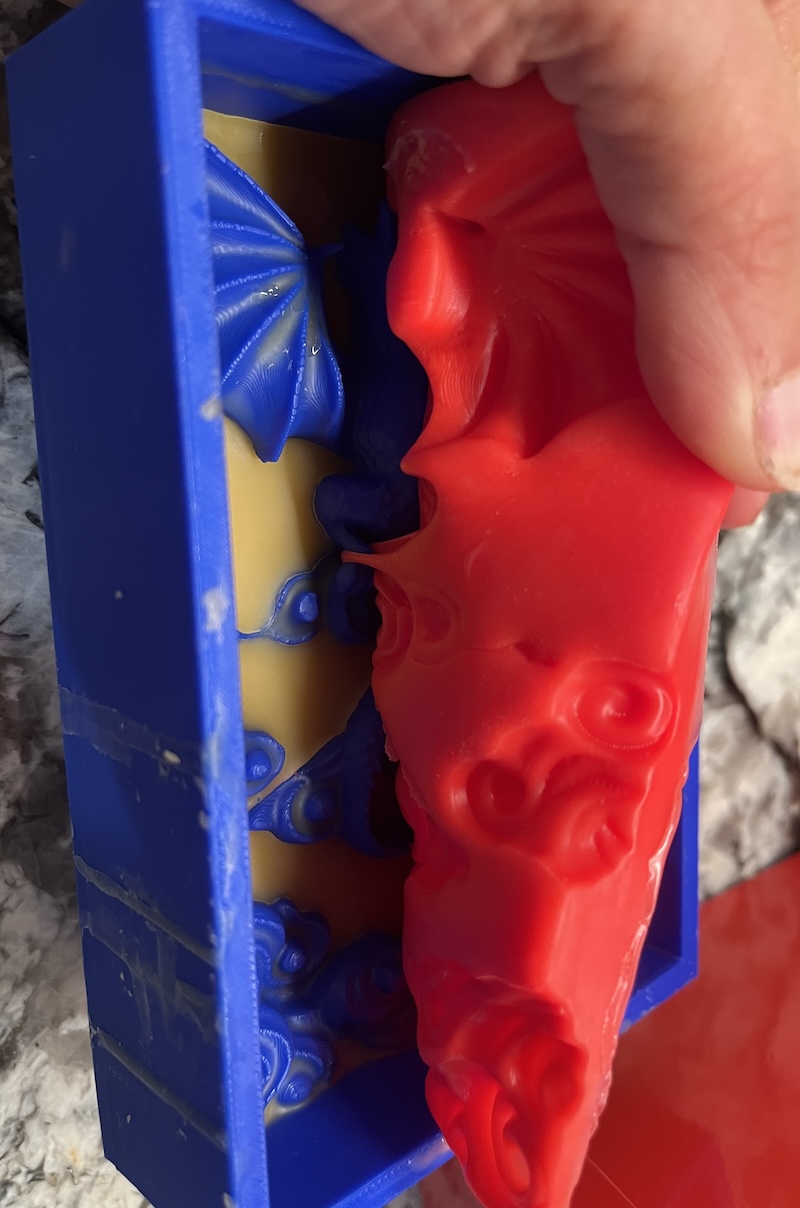
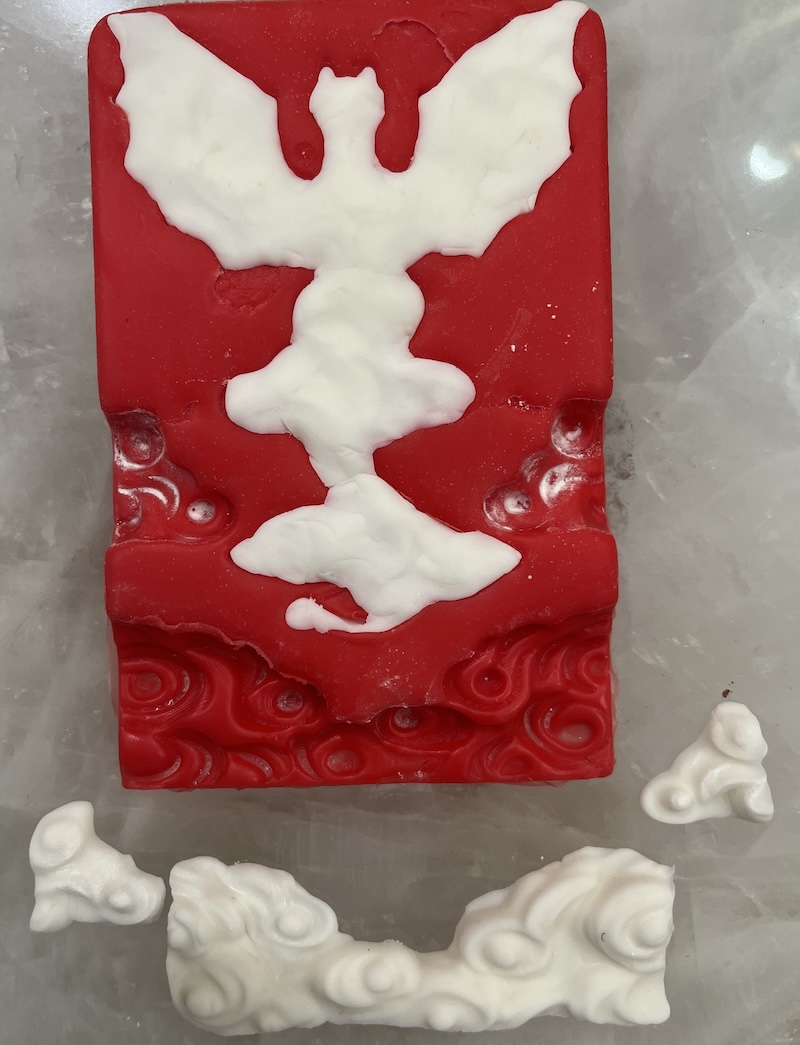
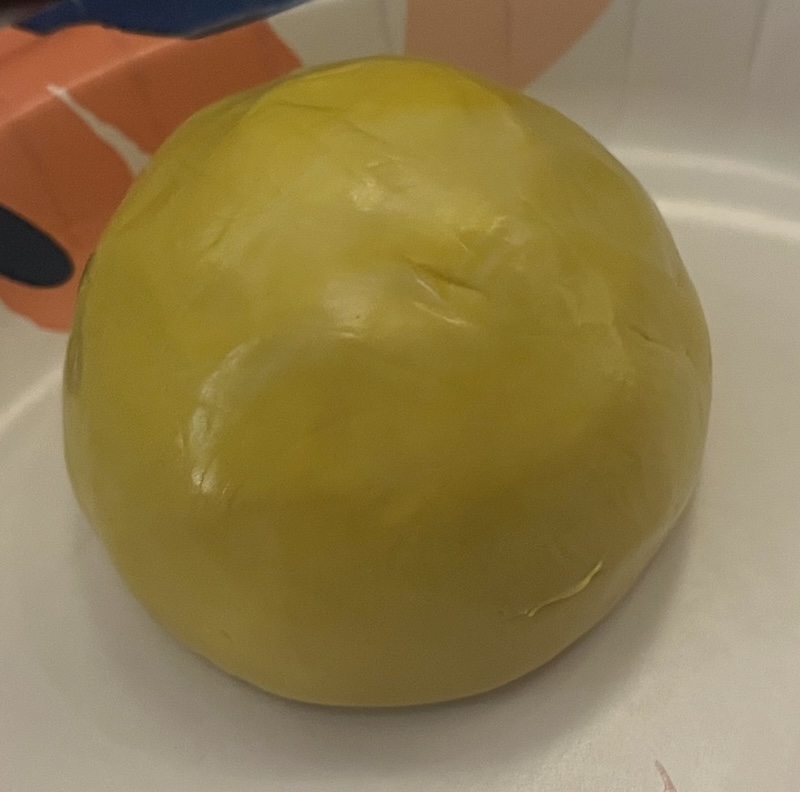
I first created a fondant cast of the dragon. To help release the fondantcoated I dusted my mold with corn starch.
I worked the fondant until soft, and pushed it into the mold, and tried to remove excess.

It came out well, but there was more excess then I had hoped for. Also fondant is very soft.
Since I plan to use this on the side of the cake I switched to a half and half mixture of fondant and gum paste. Gumpaste dries hard. The added fondant will allow my kid to not break a tooth when they decide to eat it. You can see where I have a crease line in the tail. I added extra material there, and it is a weak spot. It ended up breaking when I moved it before it had fully set. I glued it back on with gum paste glue (gumpaste mixed with water).
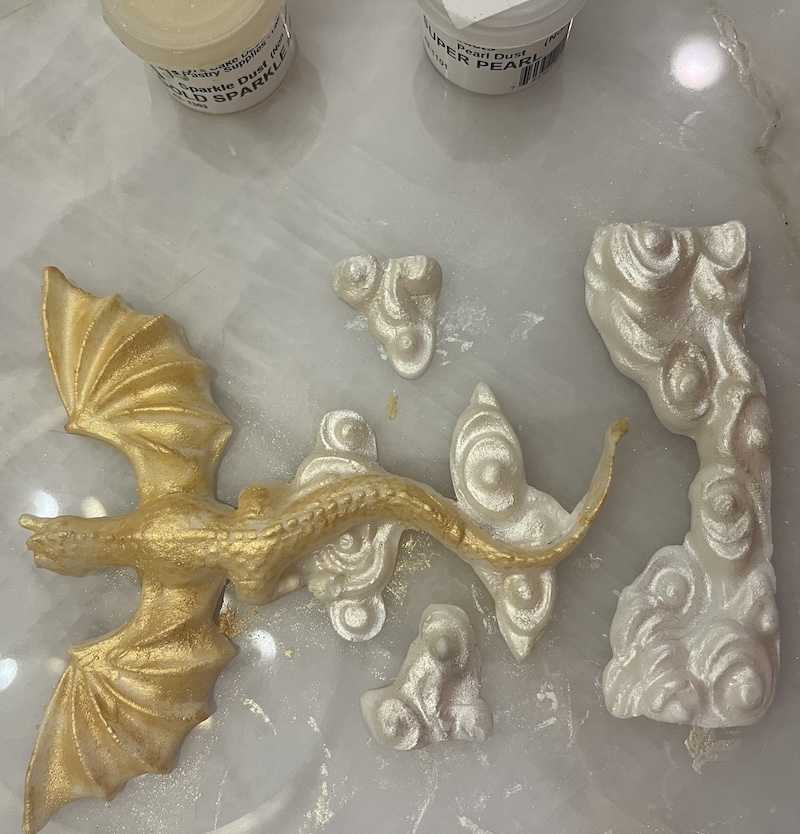
It unmolded well, and I had less extra material.

I finished the model by carving away any extra material, and painting with luster dust mixed with burbon.
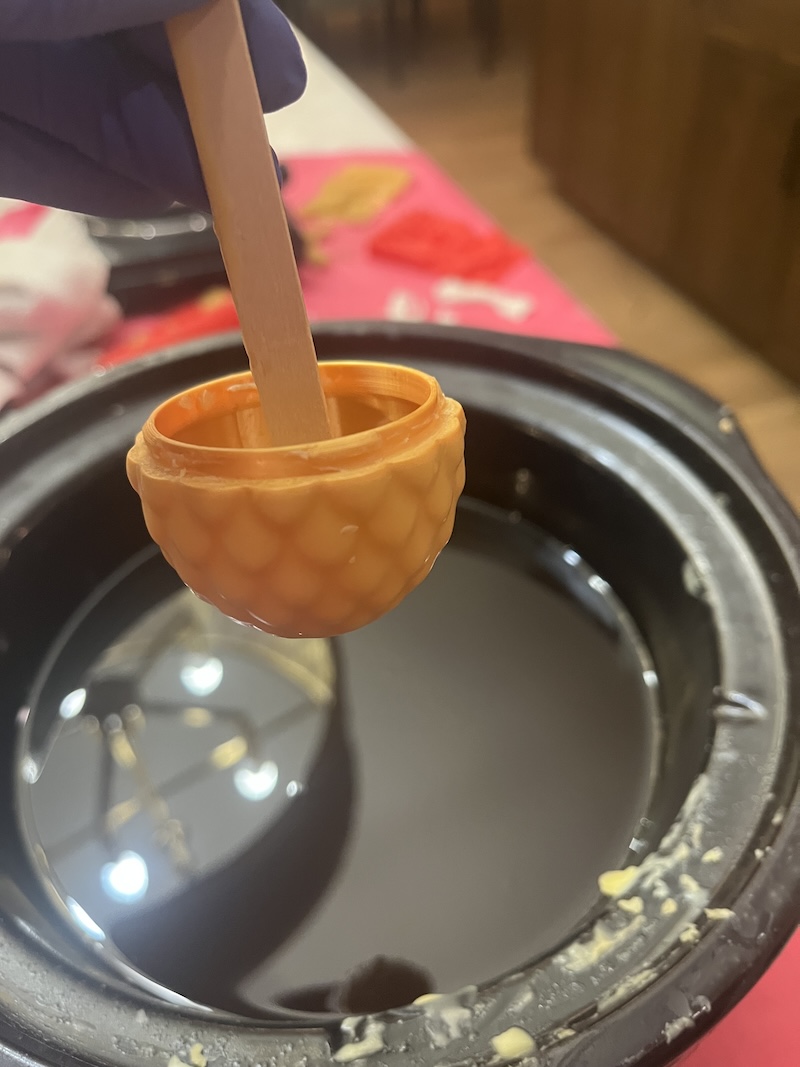
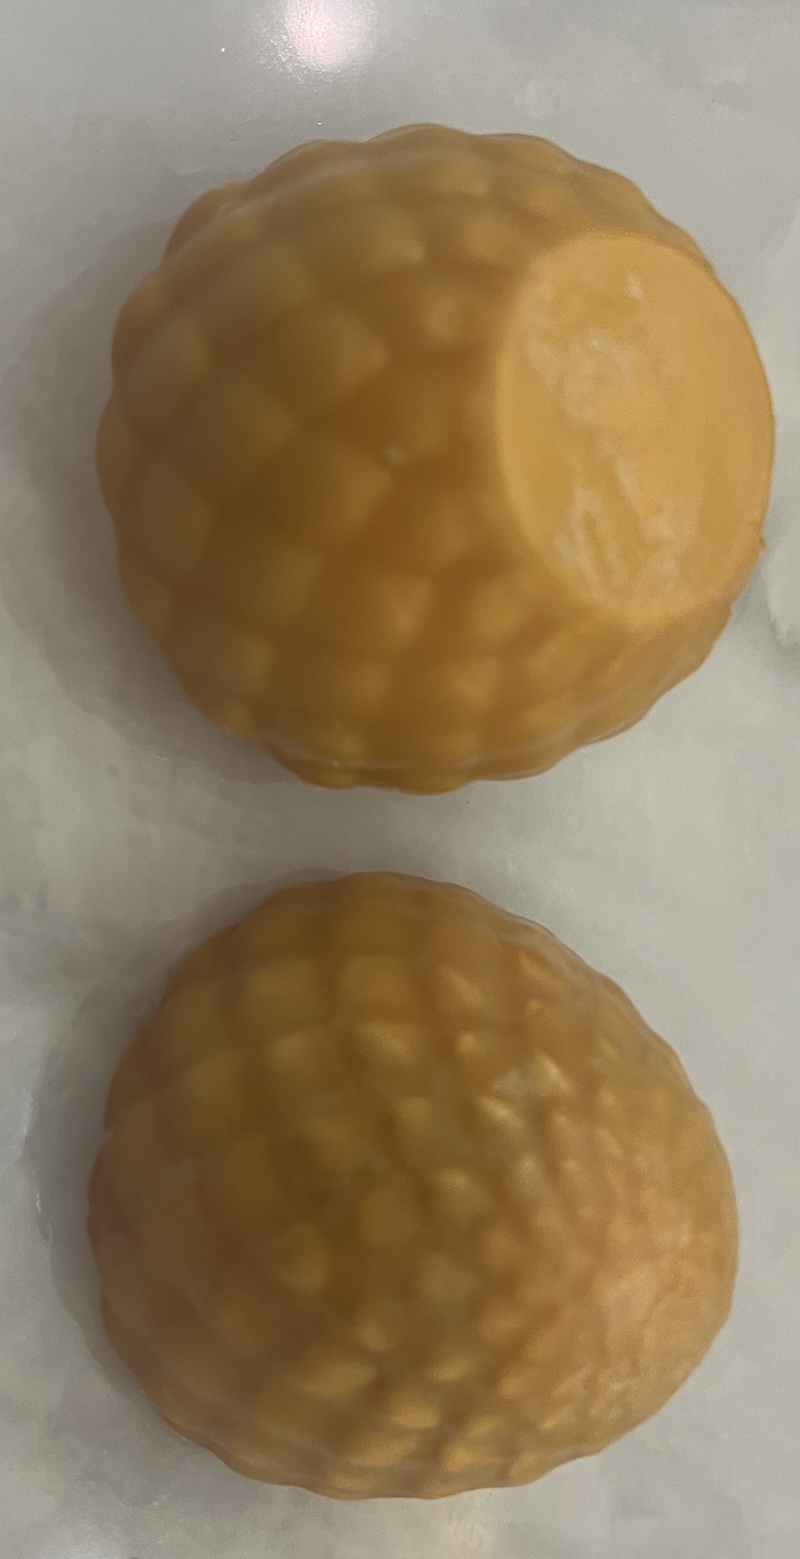
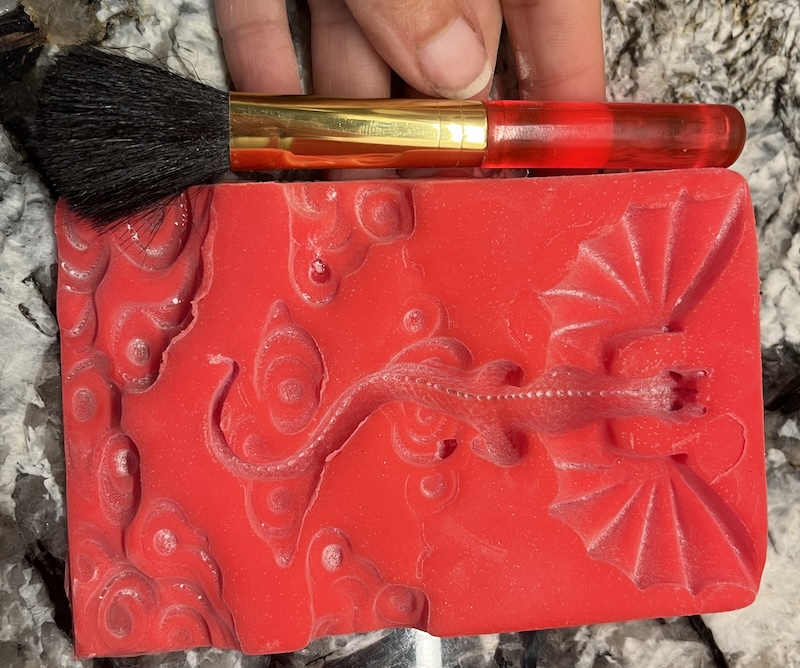
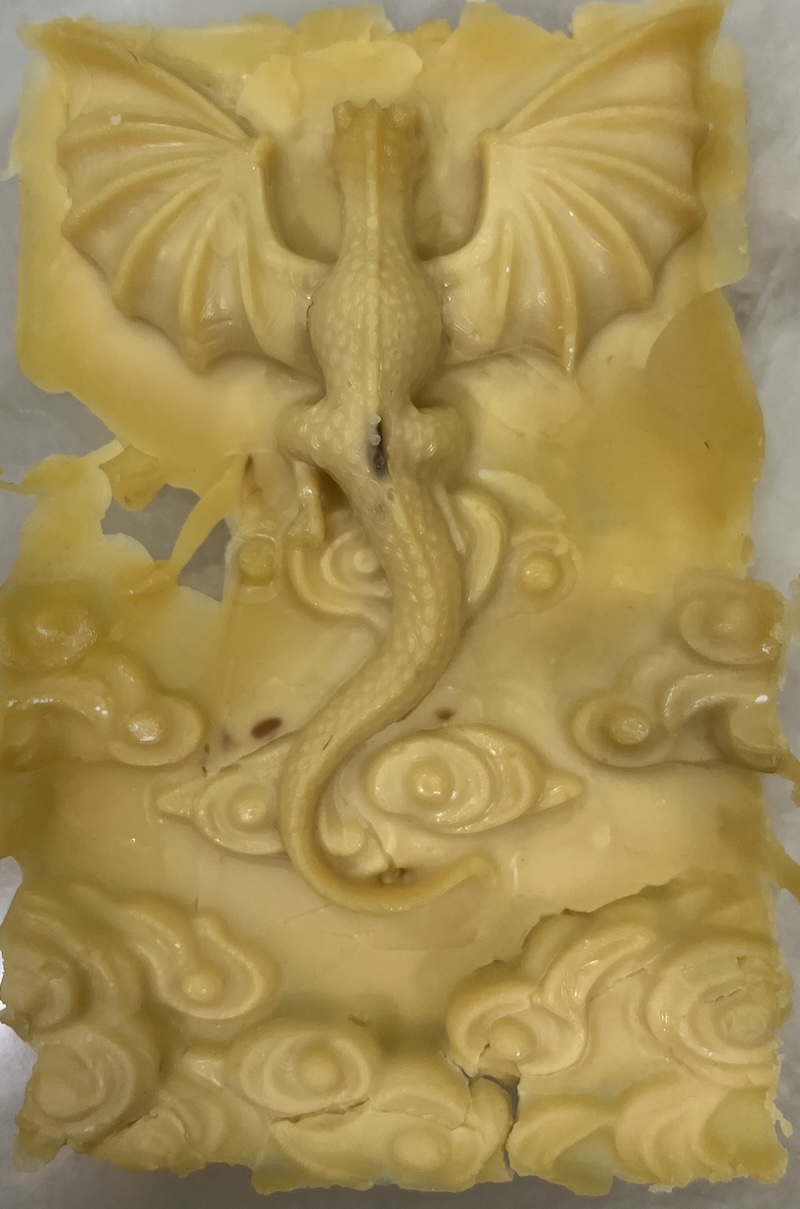
I also cast it out of bees wax.
The dark spot on is from impurities in the bees wax. The wax I used has been minamally refined.
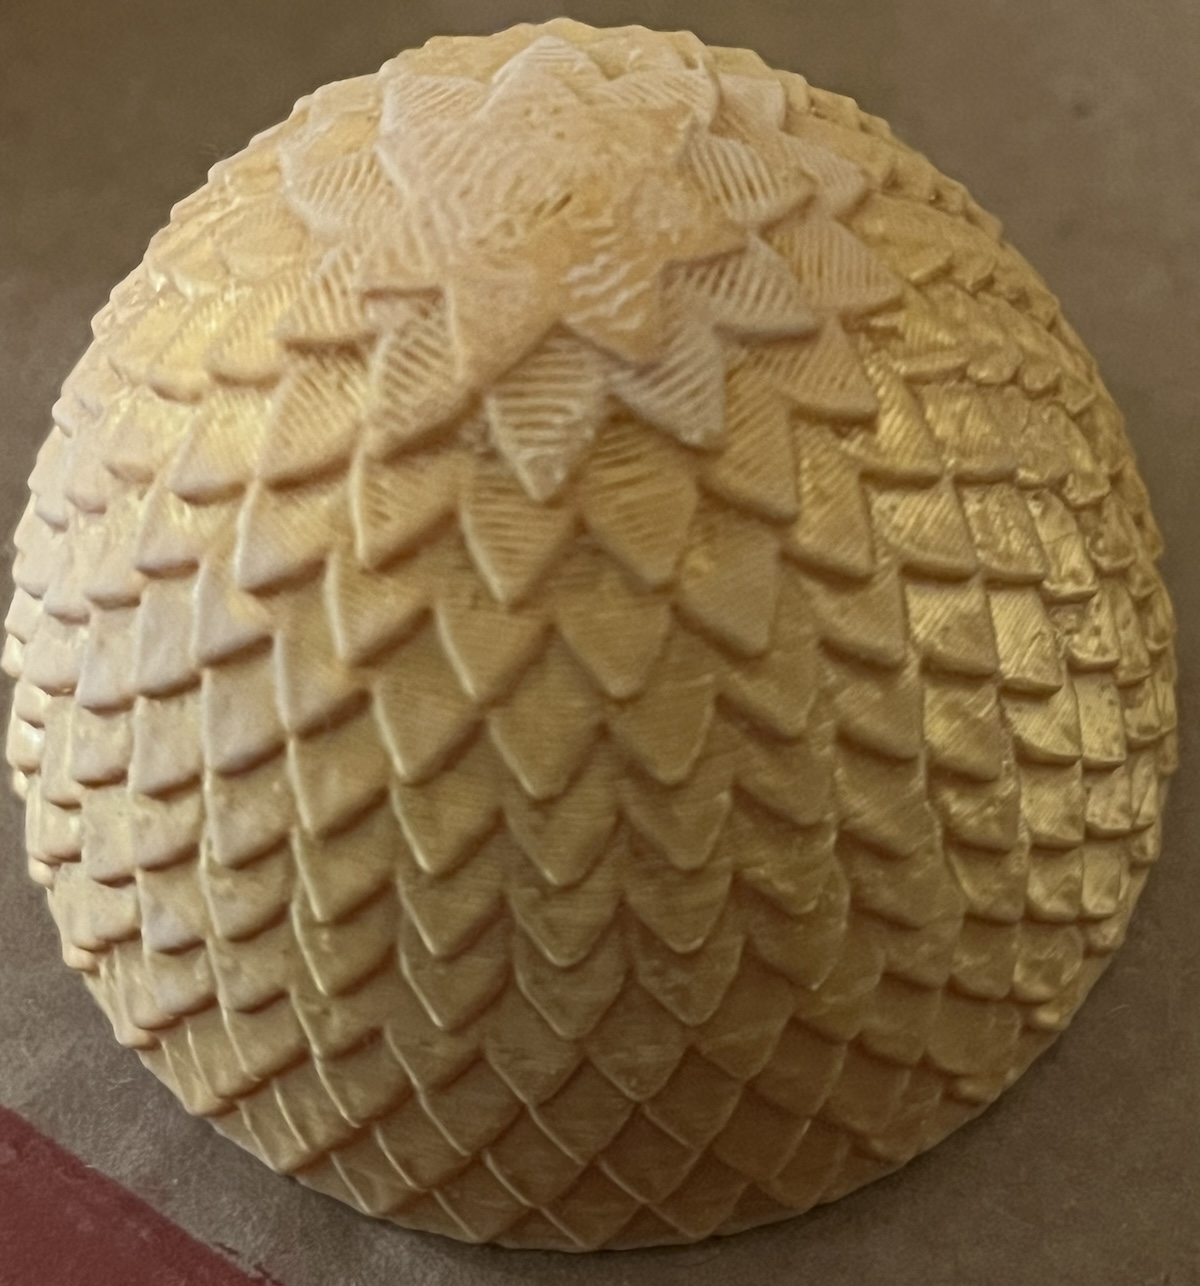
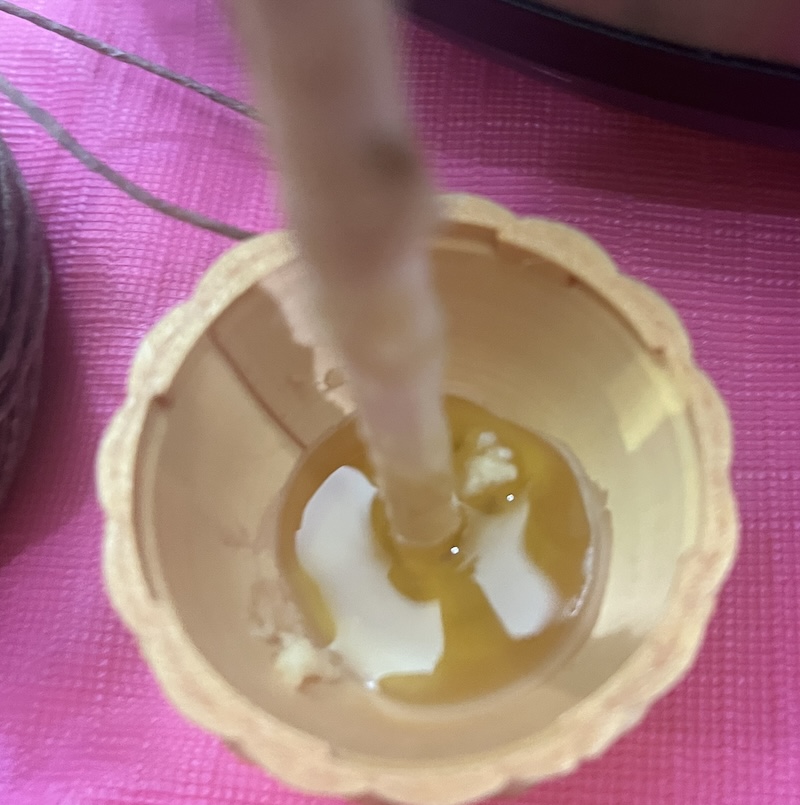
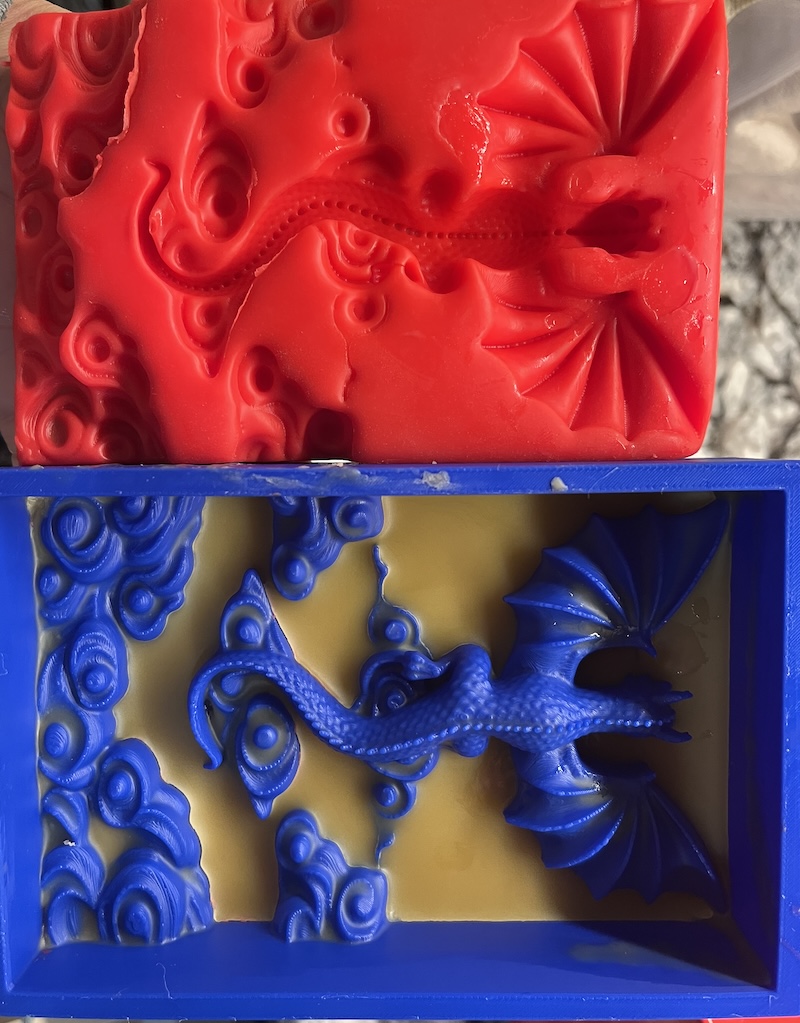
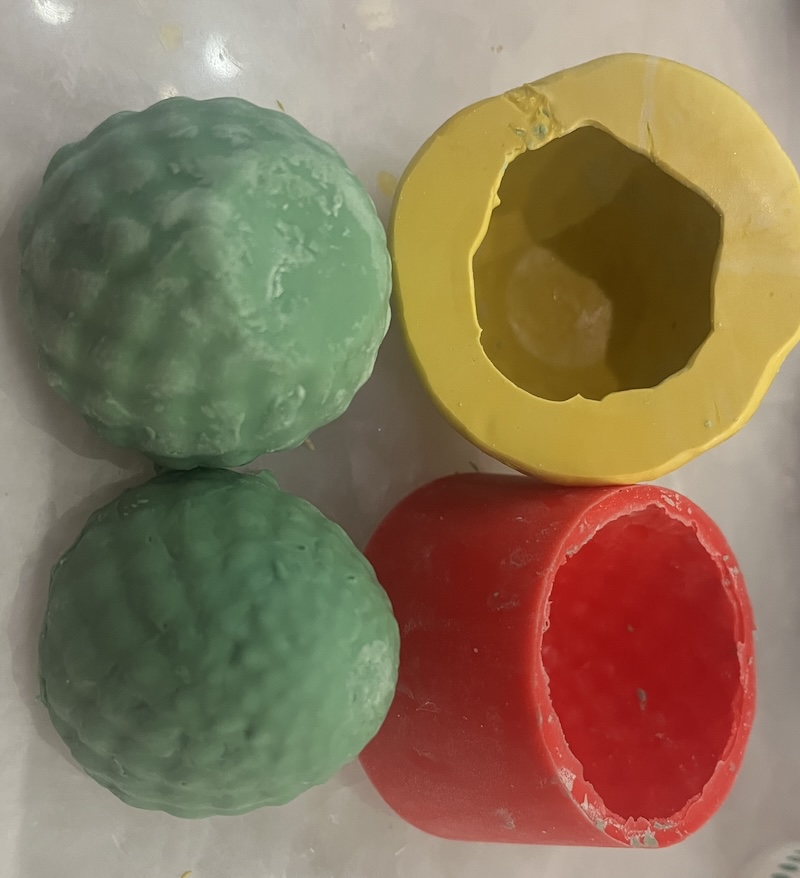
Dragon's Egg
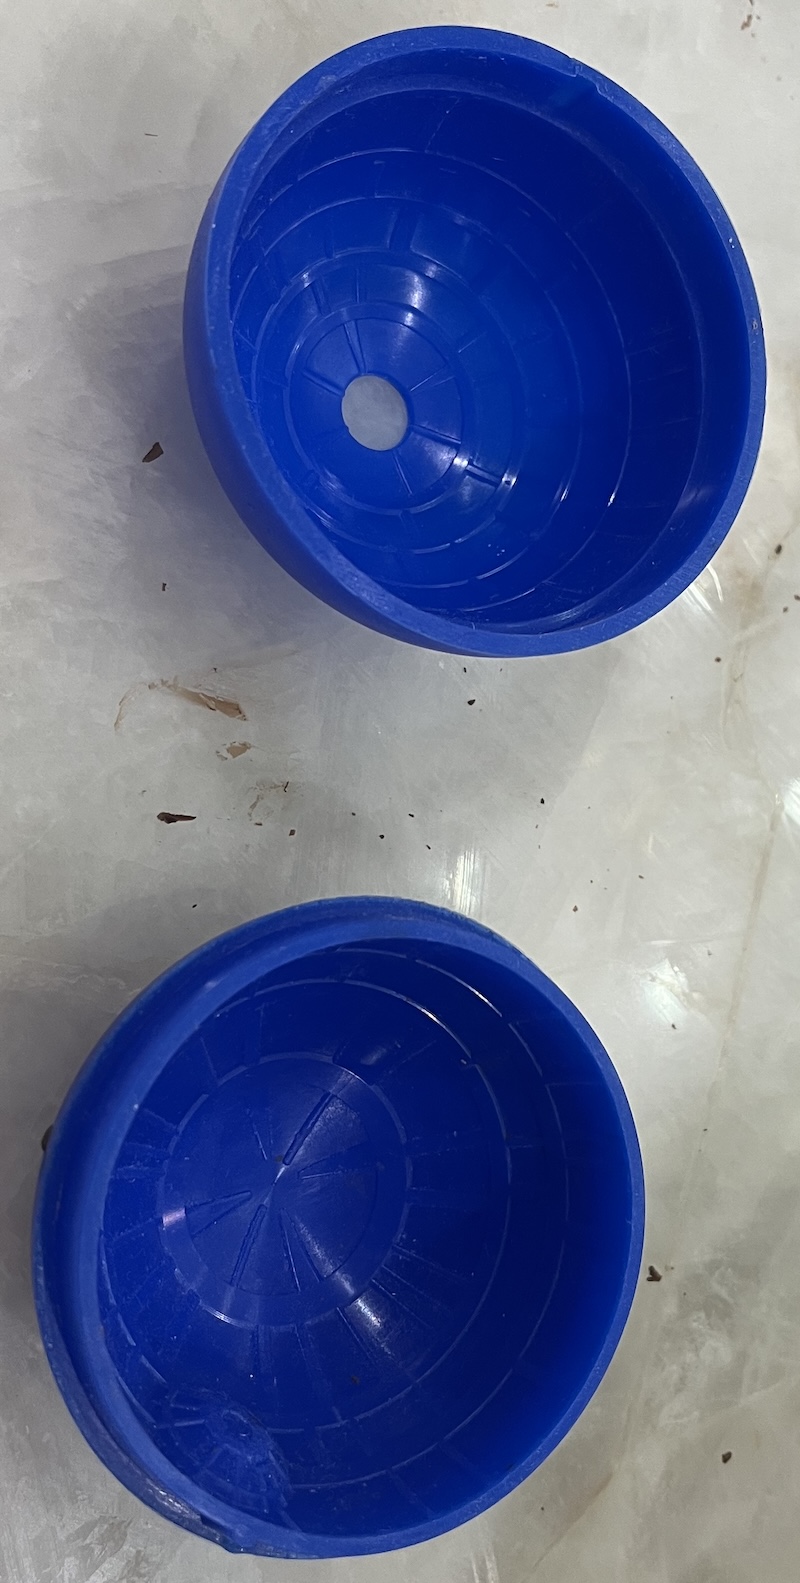
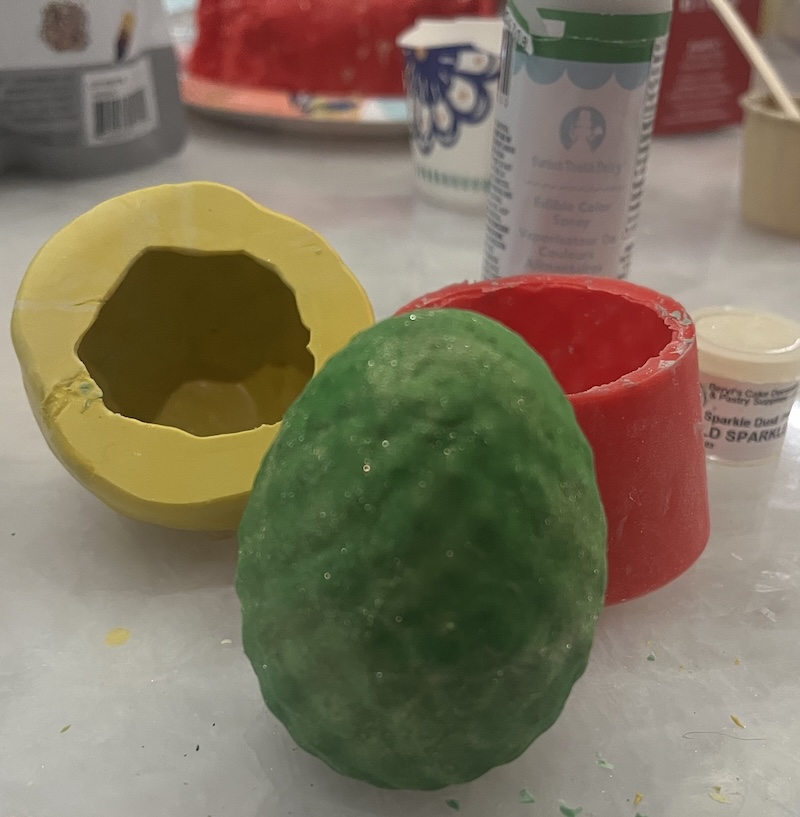
I had enough silicone mold maker and silicone putty to cast 1 side of the egg each. This gave me an excelent oppertunity to compair the materials.
Half dragon egg covered in silicone putty.
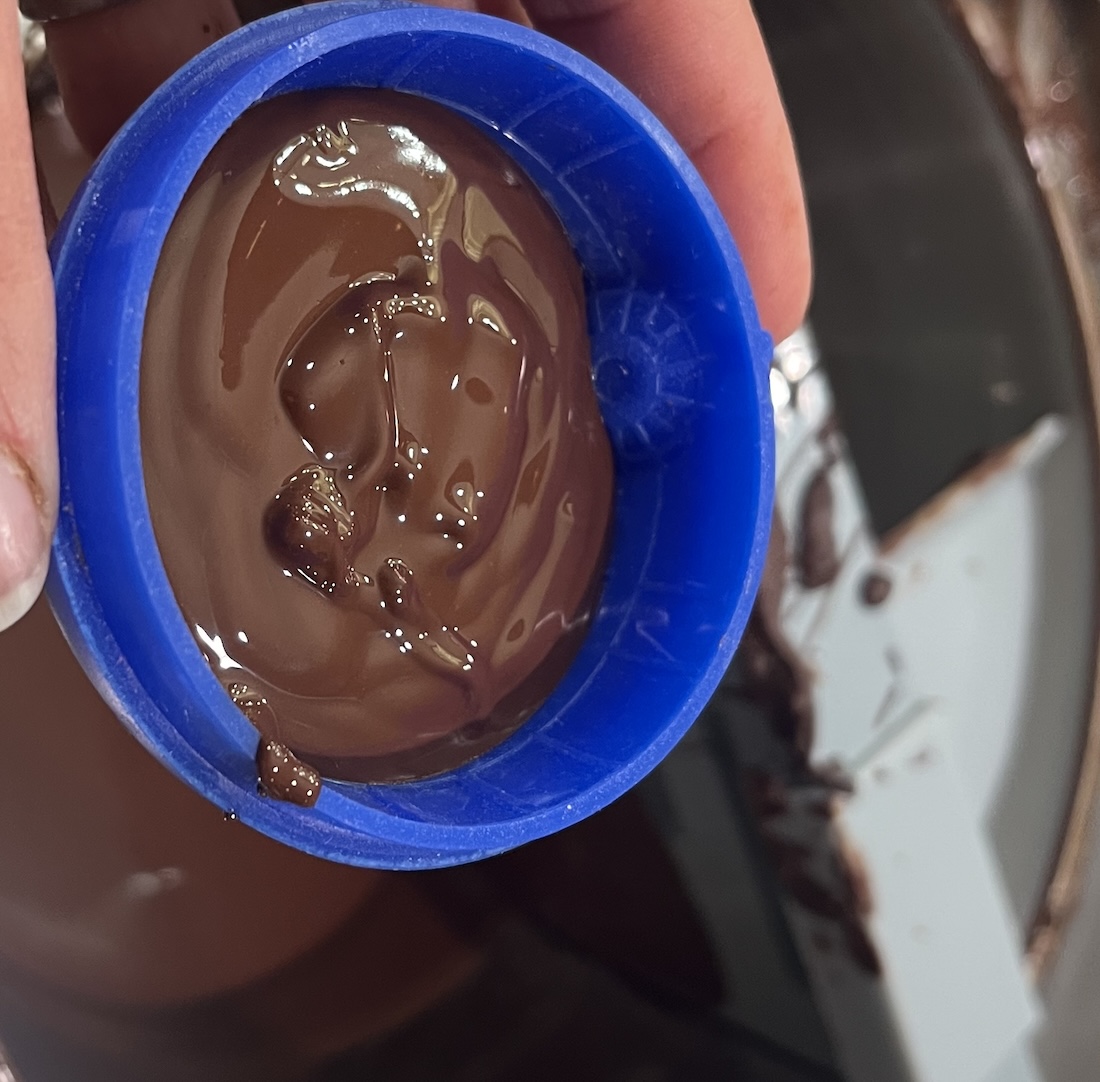
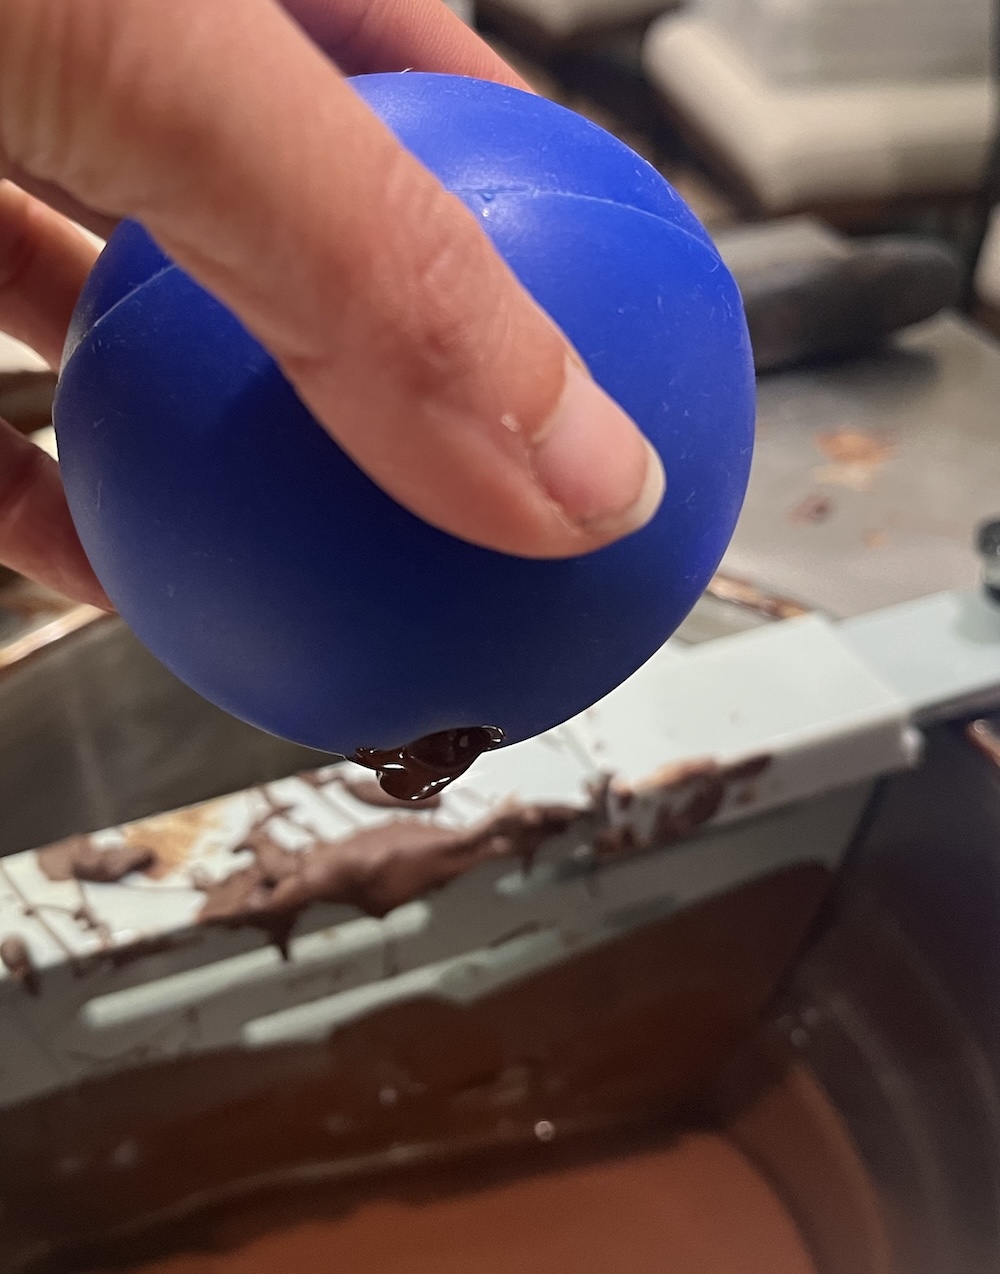
I cast the dragon's egg in green candy melt "chocolate." The red silicone mold was softer than the yellow one made from the putty, and worked great. The yellow mold was too hard, making it difficult to remove the shell without it breaking. I had to make that shell extra thick, but it worked. If I cast a solid material it would not be a problem. This can be done with the candy melts, but is difficult with real chocolate. Chocolate will trap its heat as it cools from the outside in. This causes the the chocolate to pull itself out of temper if poured too thick. I do not make shells thicker then 1/4 inch unless I pour them in layers.
To connect the halves I warm a pan, and hold the halves on the flat pan to melt the rim, then quickly stick the 2 sides together, lining up the shell patern. Melted chocolate can be carefully applied to fill any holes or mistakes. A warm tool is helpful to fix mistakes.
Typically a molded chocolate for a showpiece is then sprayed melted, colored cocobutter to hide imperfections or hazyness. Brittnee Kay has an informative cocoa butter airbrush tutorial. Click here for Chocolate Airbrush Tutorial | Spray Cocoa Butter on Chocolate Molds.
I do not have a cocoa butter airbrush, yet, so I used a food coloring spray that is typically used on fondant. I knew it would not be great, and I was correct. I also added some gold luster dust to make it shiny.
Silicone molds will leave chocolate hazy. I prefer polycarbonate molds, which leave the chocolate crisp and shinny. They must be clean and dry before using. My favorite molds have 2 parts that connect magnetically. The best have a full metal back that provides a smooth surface should you not use a transfer sheet, cleans easily, and does not have multiple magnets that can fall off should the mold get damaged after years of use. I am just now experiencing this problem with some of my oldest molds after more then 10 years of use.
During group chocolate and wax molding day at my house, Camille used this triangle mold to make her bonbons. Chocolate Transfer Sheet Mold Polycarbonate Chocolate Mold DIY Handmade Chocolate Magnetic Chocolate Mold Candy Mould Triangle Shaped (19347)
My signiture bonbon is the s'more, and it needs my biggest mold to hold the filling, which is a 1 part mold. As such, I can not use transfer sheets. Instead I hand paint each cavity with colored tempered cocoa butter before adding chocolate. For a link to that mold click here: polycarbonate chocolate mold polycarbonate chocolate bar mould Bullet Clear Hard Plastic candy pastry tools - Big Size (19322)
Silicone Putty
Amazing Mold Putty by Alumilite is a 2 part silicone putty that is food safe, and fast drying (20 min). It mixes in a 1:1 ratio. Wear gloves and eye protection, and work in a well ventilated area.
Image from Alumilite.com
Click here for Amazing Mold Putty MSDS
Measureing silicone putty:
Mixing silicone putty:
Attempting to create an interior mold that could be removed. It didn't work. That putty is very stiff when cured.
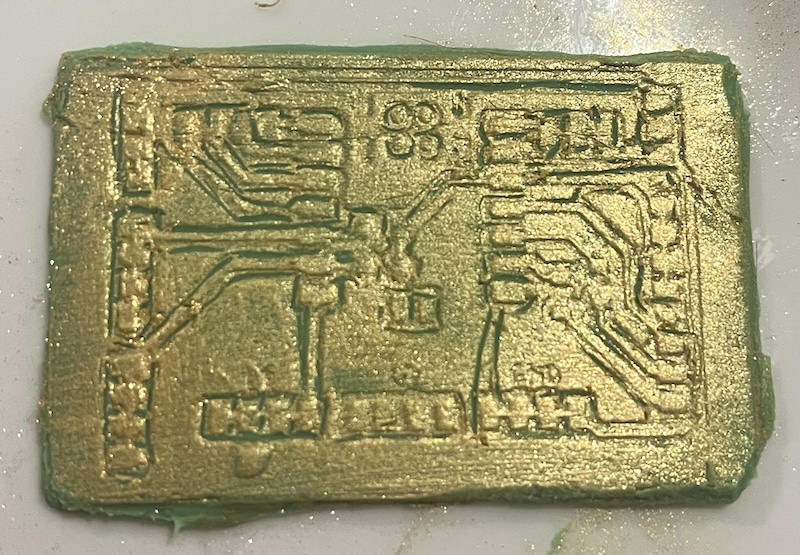
Using putty to make mold of PCB board.
Chocolate PCB board decorated with gold luster dust. There is a bump in my mold that is seen on the bottom left of my chocolate pcb. Since it was not perfect I didn't take extra time cleaning up the edges. To trim the edges to make a straight rectangle I would use a hot knife to slowly melt through without pushing, which could cause the chocolate to break. With real tempered chocolate this would pull the edges out of temper, and could ruen the look of your piece. Alternatively I could use a small sharp knife to carve off the excess like pealing a potato, but you must be carful not to hold the chocolate with hot hands or you could melt the whole thing.
This is actually green candy melts, not real chocolate. Candy melts are made to act similar to white chocolate, but be easy to work with. They use fats like palm oil that do not need to be tempered. However, they are unable to achieve the crispness of real chocolate.
Amazing Mold Maker & Dragon Mold
Amazing Mold Maker by Alumilite is a fast curing (30 minutes), food safe silicon that pours easily, self levels, and doesn't trap bubbles. Part A and B are mixed in a 1-1 ratio. Wear gloves, eye protection, and work in a well ventilated area.
Click here for Amazing Mold Maker MSDS
Measuring Mold Maker parts A and B by volume.
Mixing Mold Maker, a food safe, fast curing silicone mold.
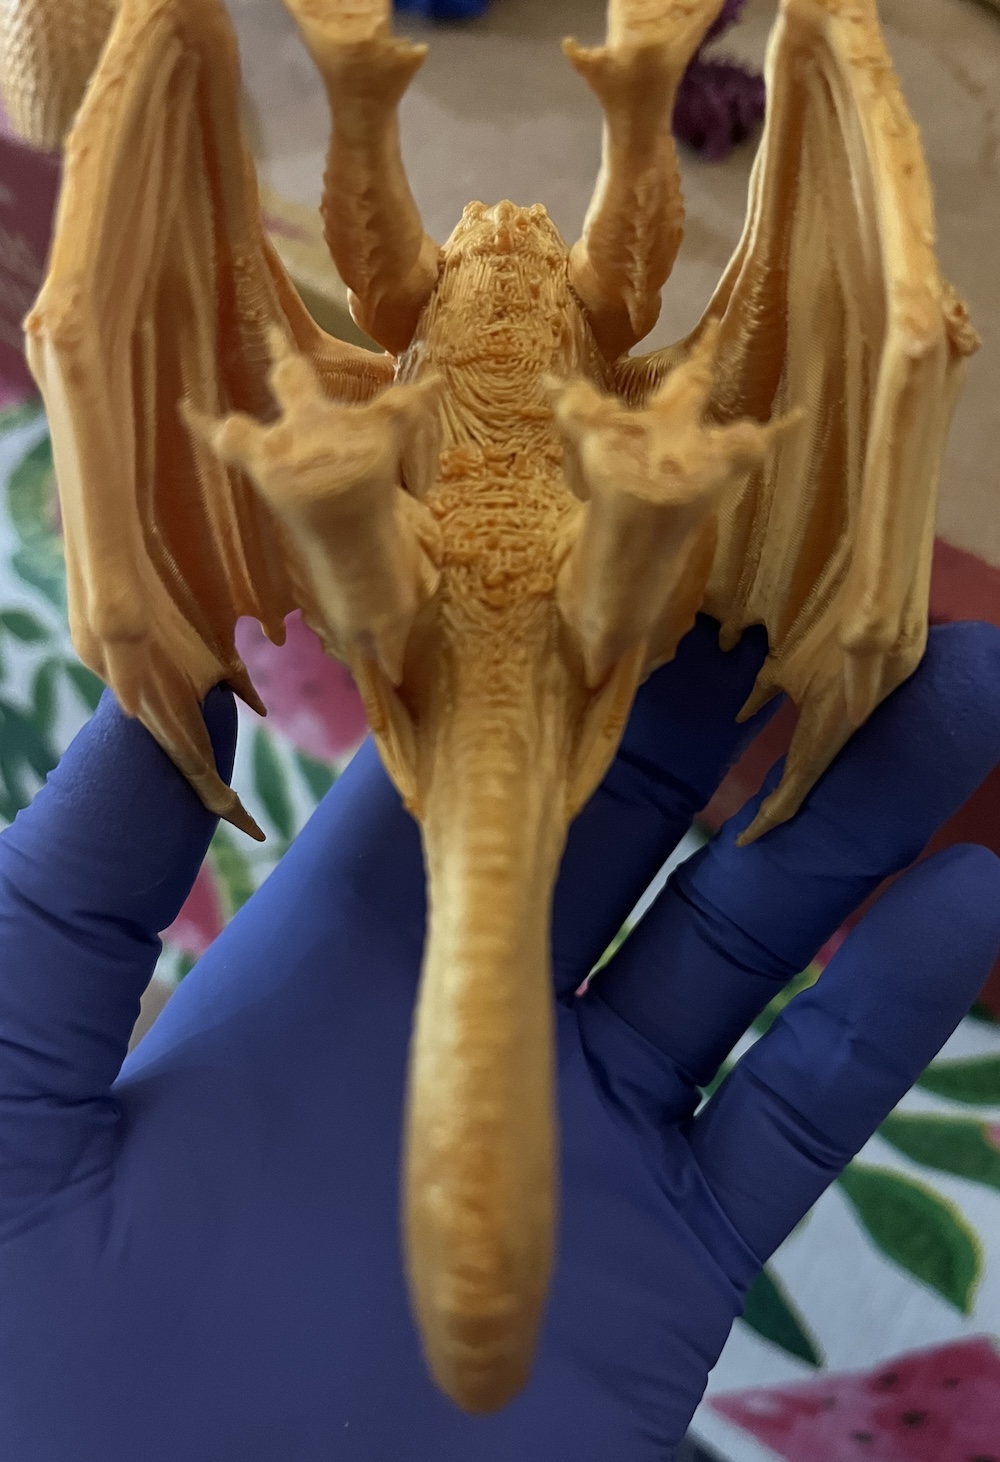
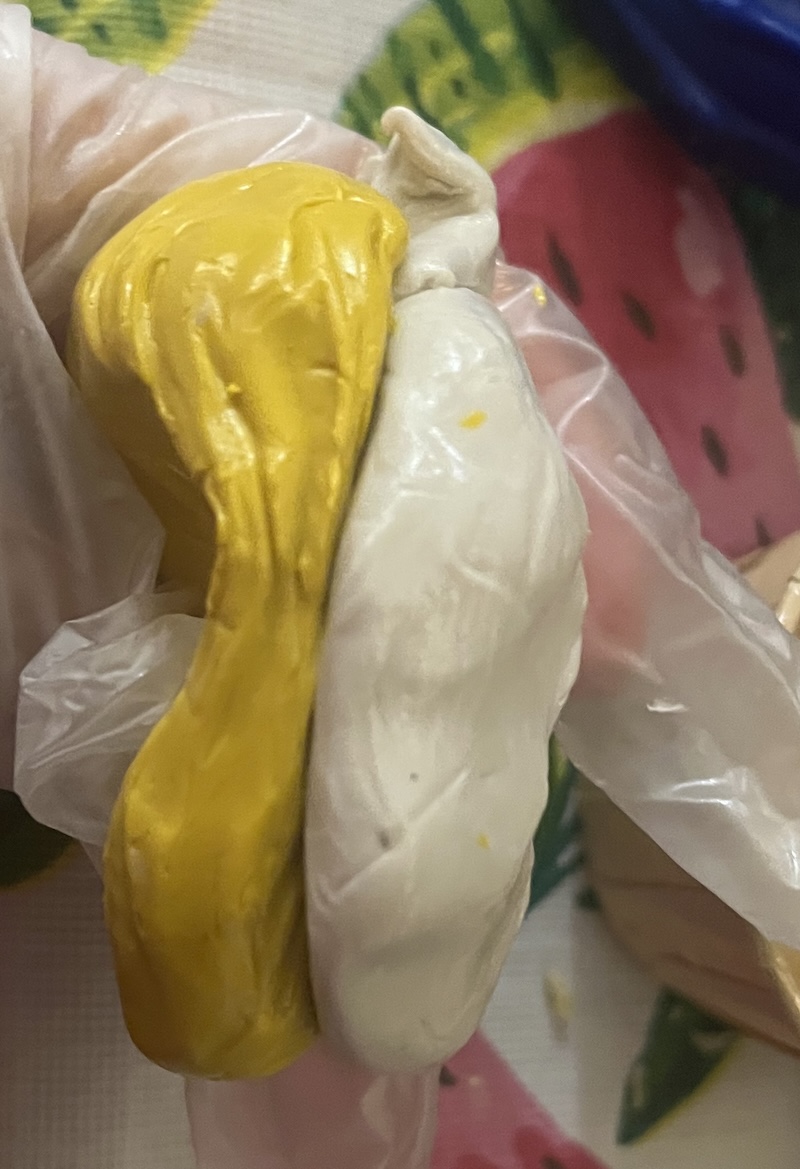
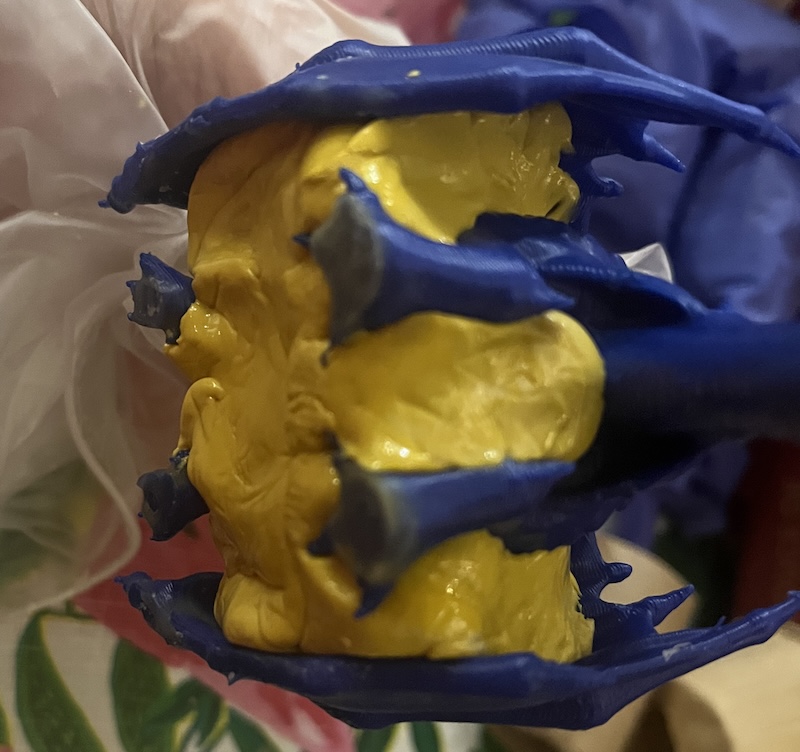
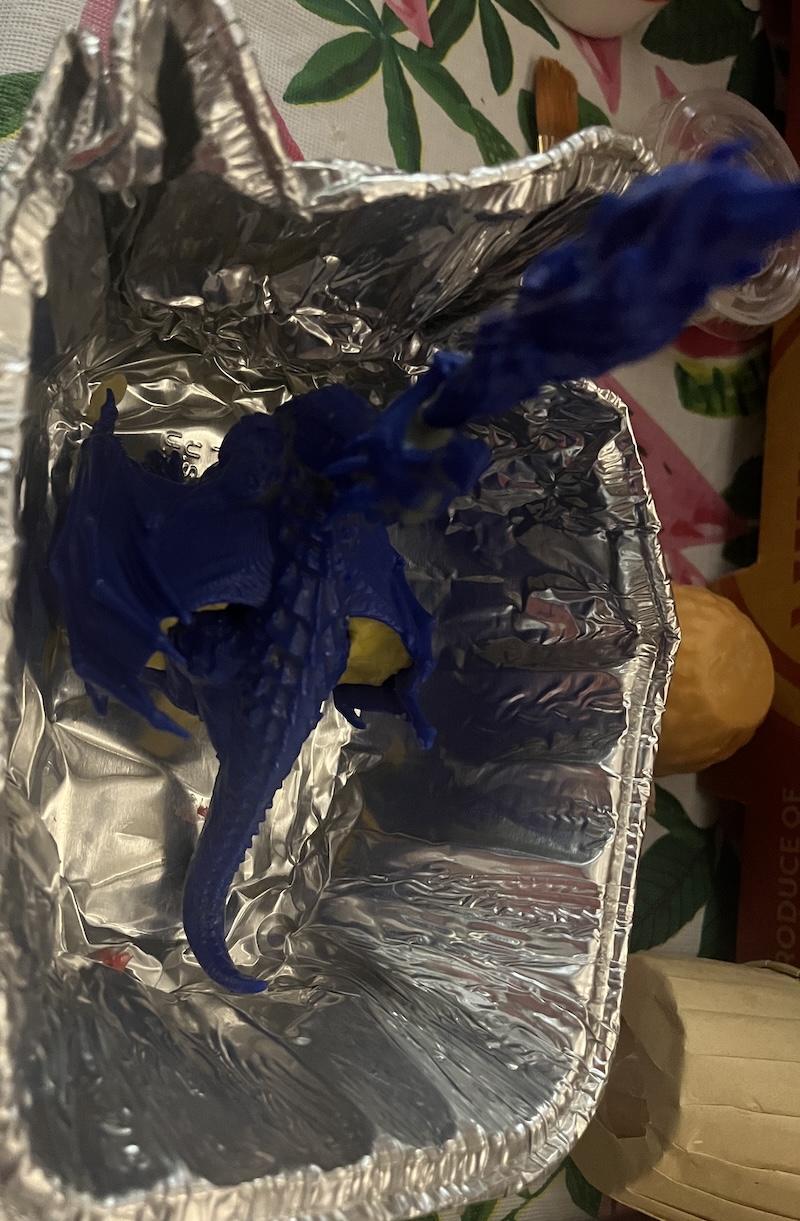
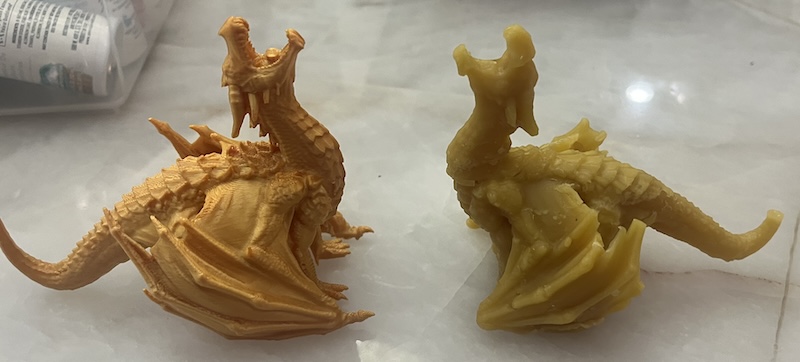
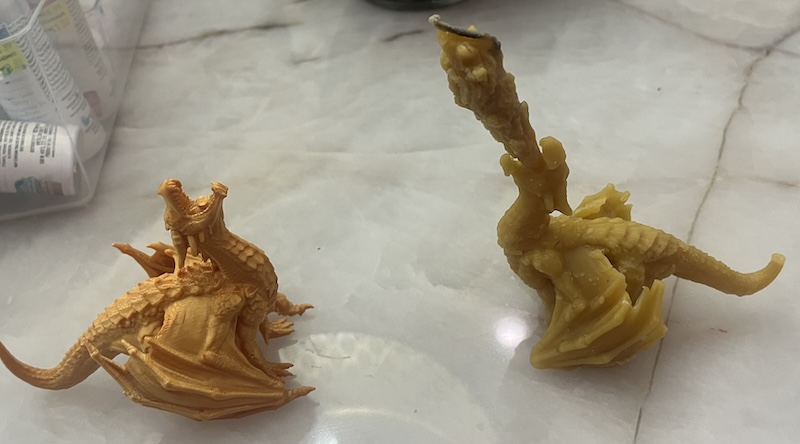
I printed 2 dragons to use in casting. One is gold and the other blue.
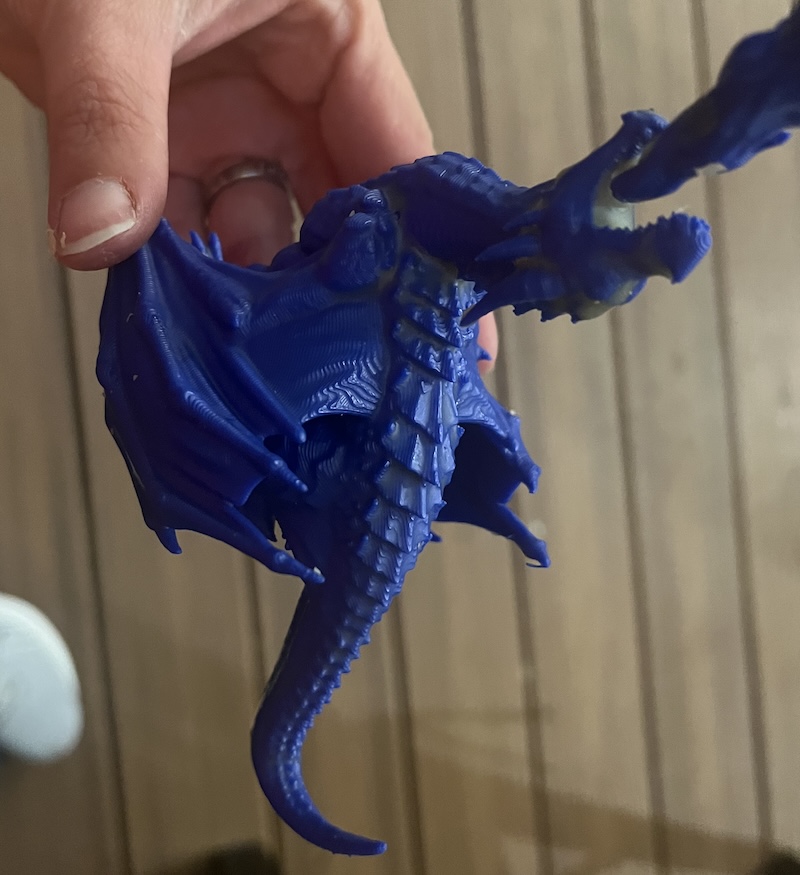
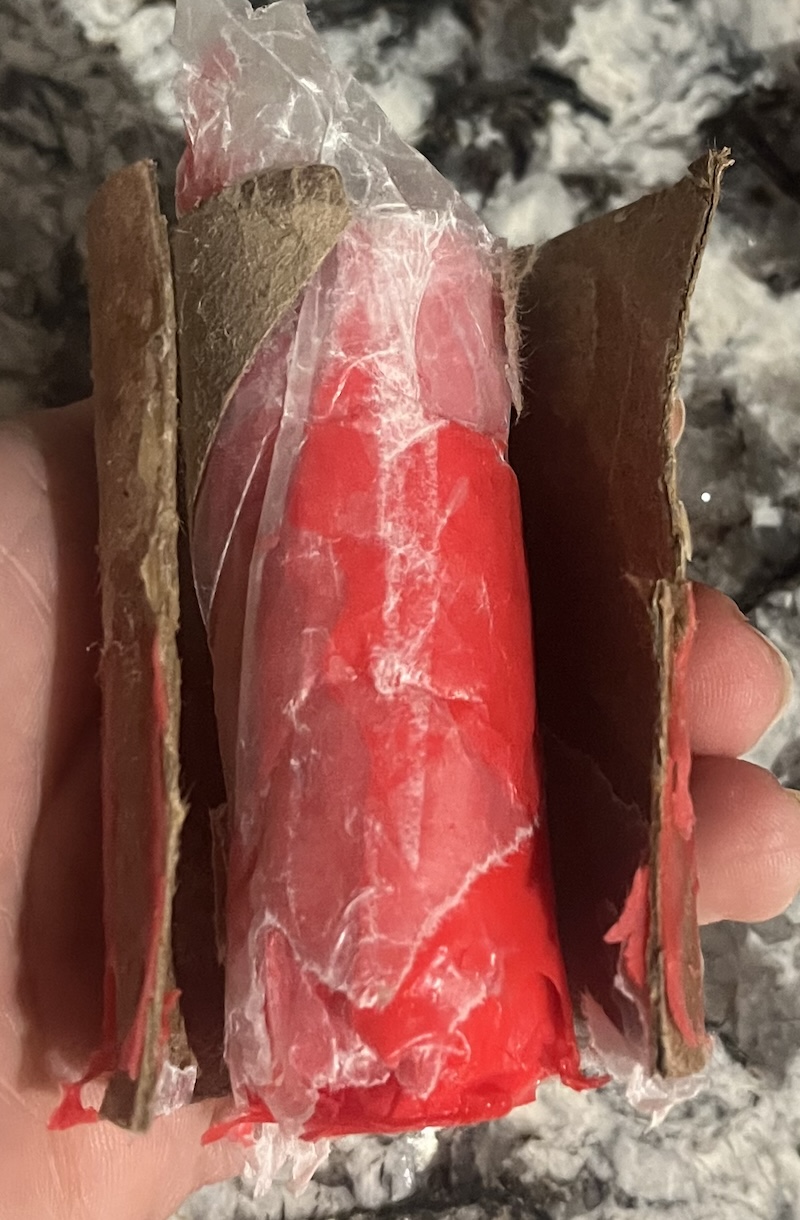
I used a small cardboard tube to contain the head while molding so that I wouldn't waste silicone. My problem was that the tube would not stay upright, and the silicone poured out the bottom into the cup. To fix this I glued the tube into a new cup, and quickly poured the silicone into the tube again.
Unmolding the silicone from the tube left paper in the silicone. Later when I molded the flame only I lined the tube with wax paper, and secured the tube with bees wax. In culinary school we were taught to cut the mold to create an opening. This is because we used molds primarily for fondant work, and you can not pour fondant. Instead we would push the fondant into the mold, and press the mold firmly together. Then unmold the material, and clean up the edge.
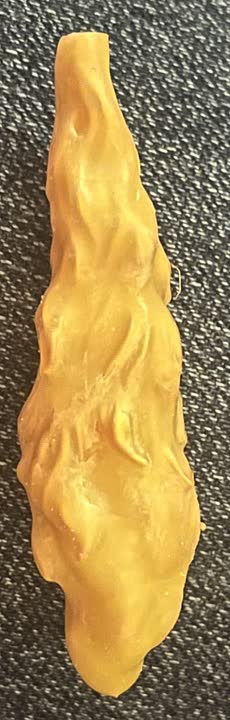
Wax head and flame in mold:
Unmolding wax head:

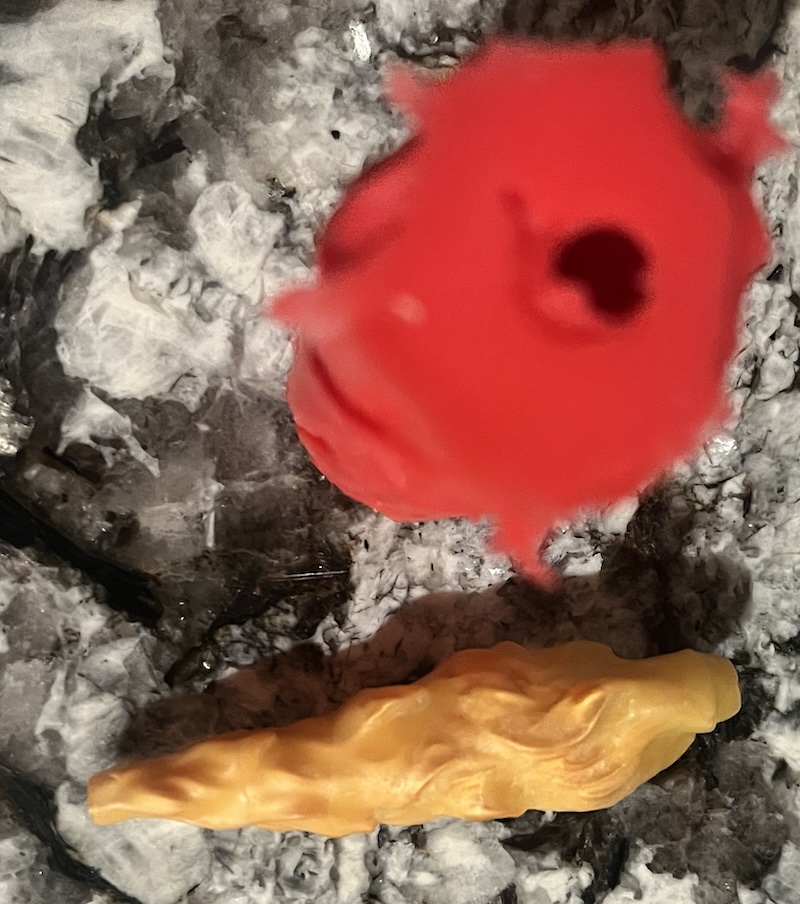
Wax head:
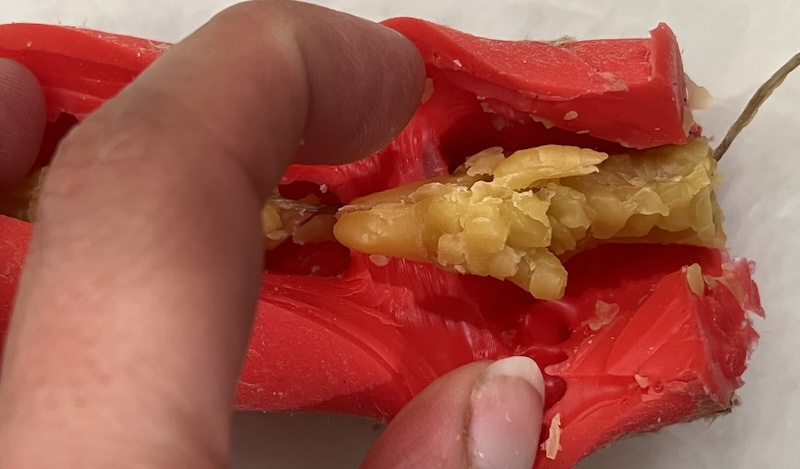
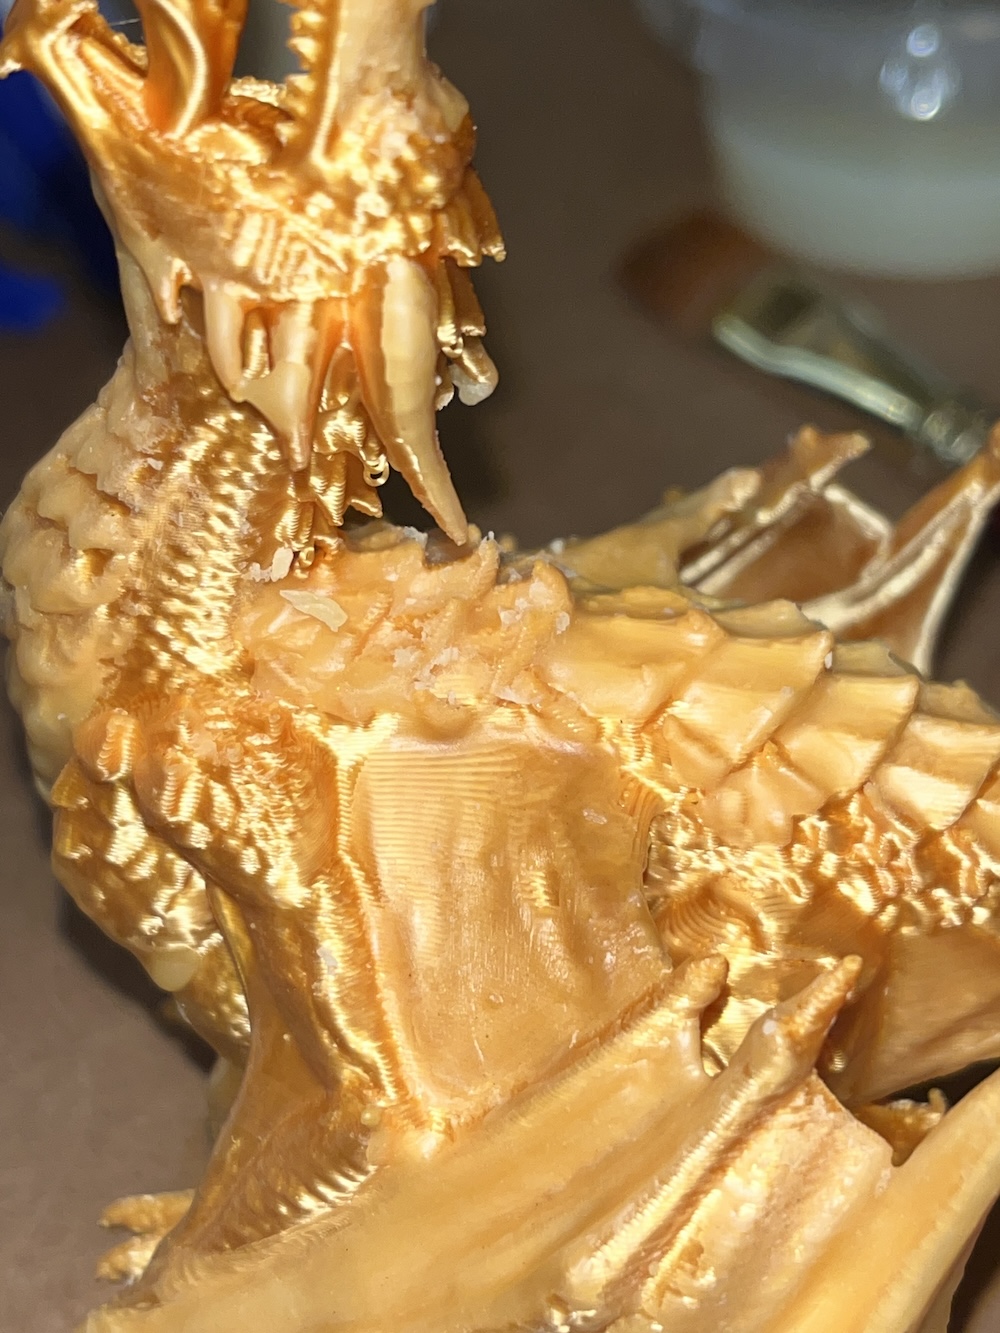
The wax flame came out gritty looking. There is too much detail in my mold for wax.
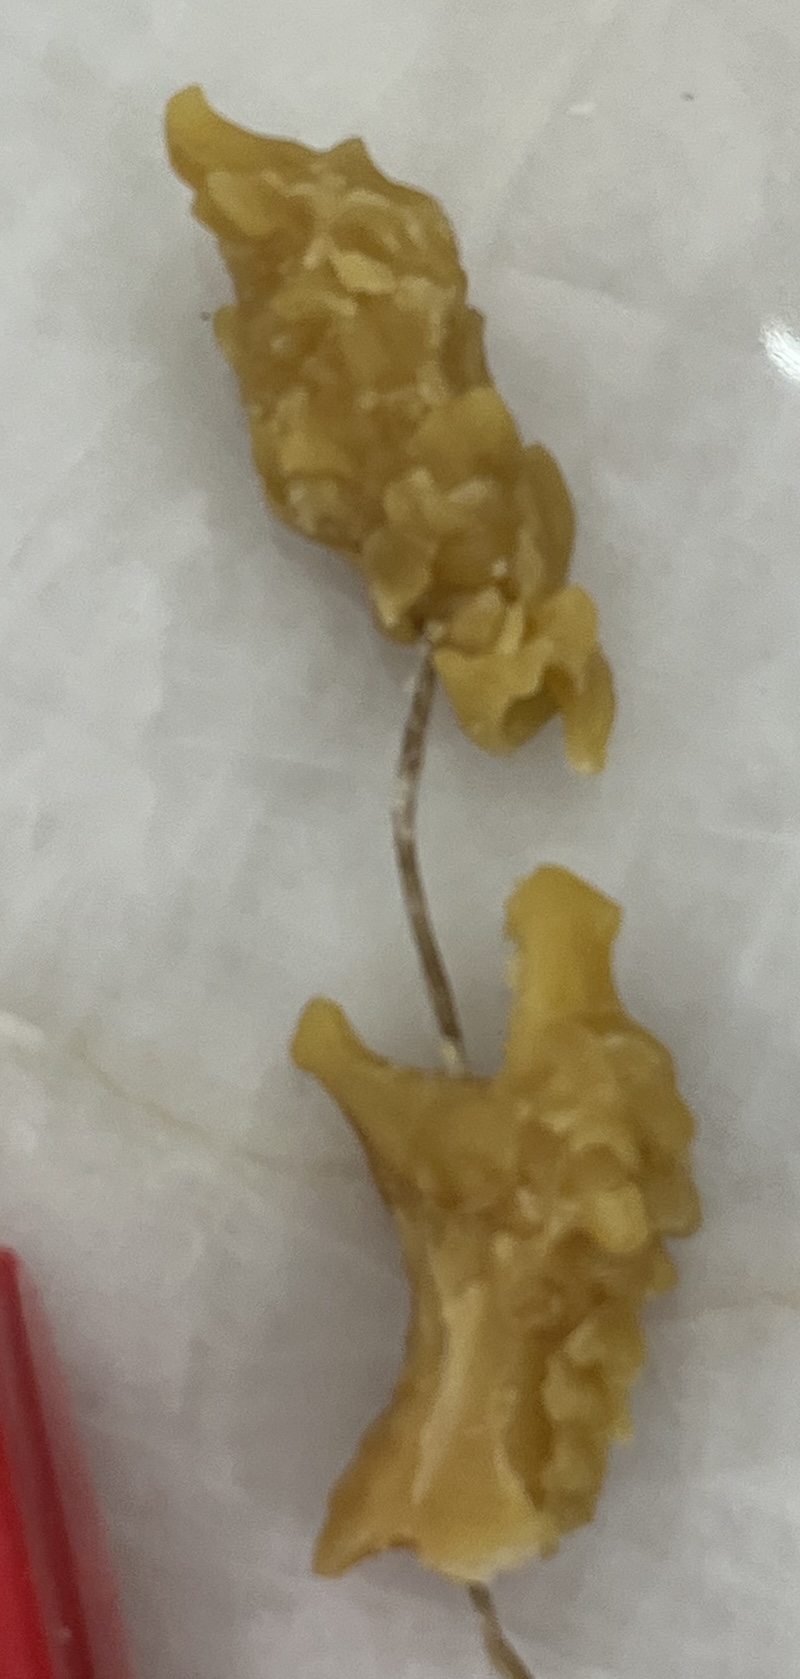
I coated the flame of my 3d print with wax to soften the edges, and recast.
Dragon flame mold, unmolding. In order to use as little silicone as possible, I cast the dragon's flame in a small cardboard tube that I lined with wax paper, and stuck into a paper cup using bees wax to seal the bottom.
Dragon's body
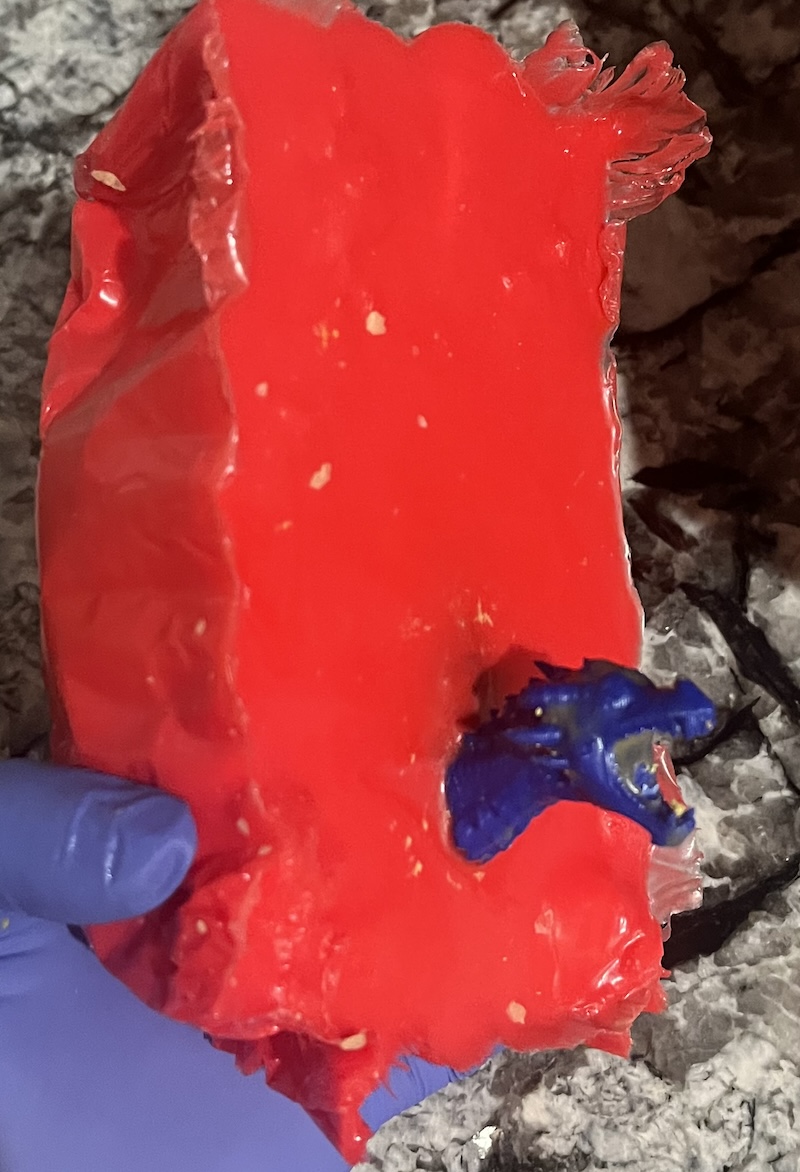
I customized a container to hold my dragon by crimping the edges of a disposable aluminum loaf pan. The mold was huge, and the silicone is not cheep. I tried to have as little extra space as possible. Also, when the mold is thick it is really hard to unmold.
There was so much empty space being filled by the silicone that I didn't have enough mix to cover my dragon's back compleatly. I added some cotton balls coated in silicone to the mold to take up more space.

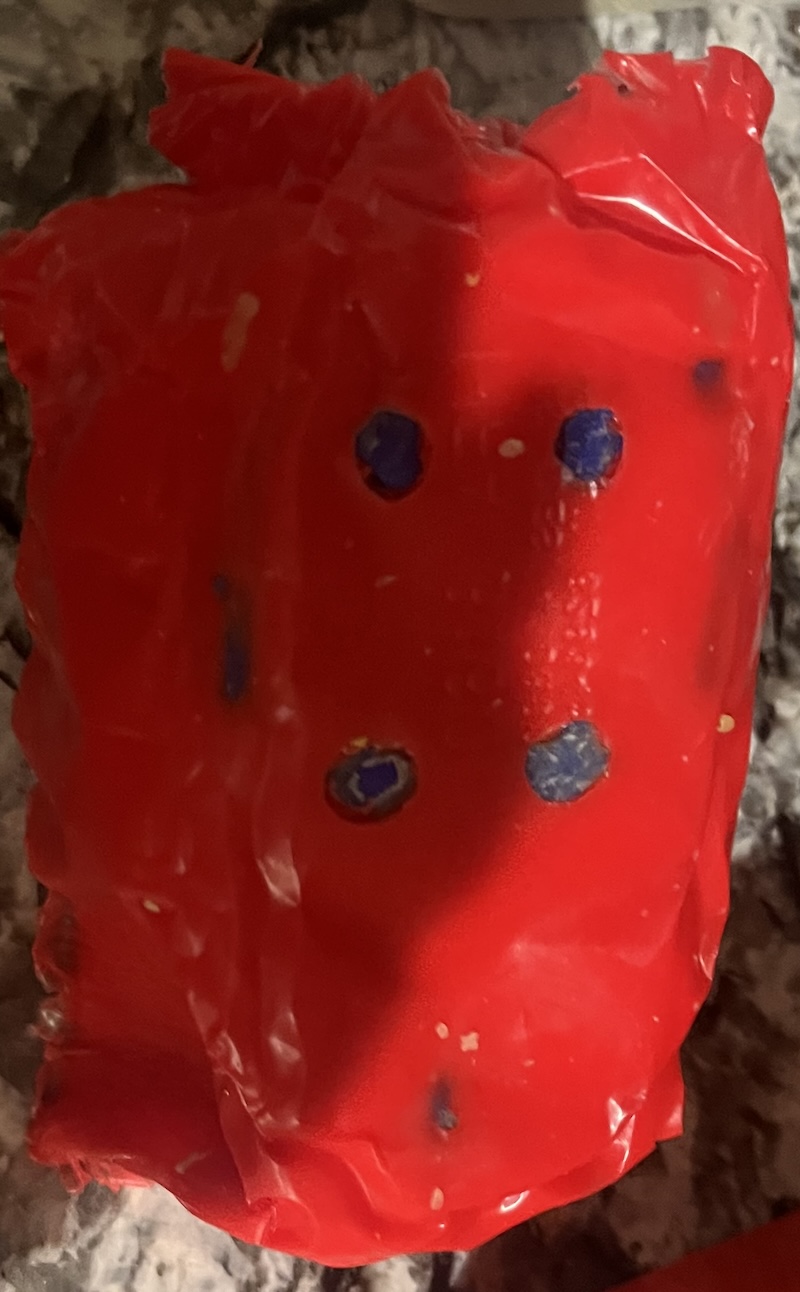
Top of dragon mold.
Bottom of my dragon mold. You see where the feet were stuck to the bottom, but the silicone putty inbetween the legs did not reach the bottom of the pan so the red silicone covered it.
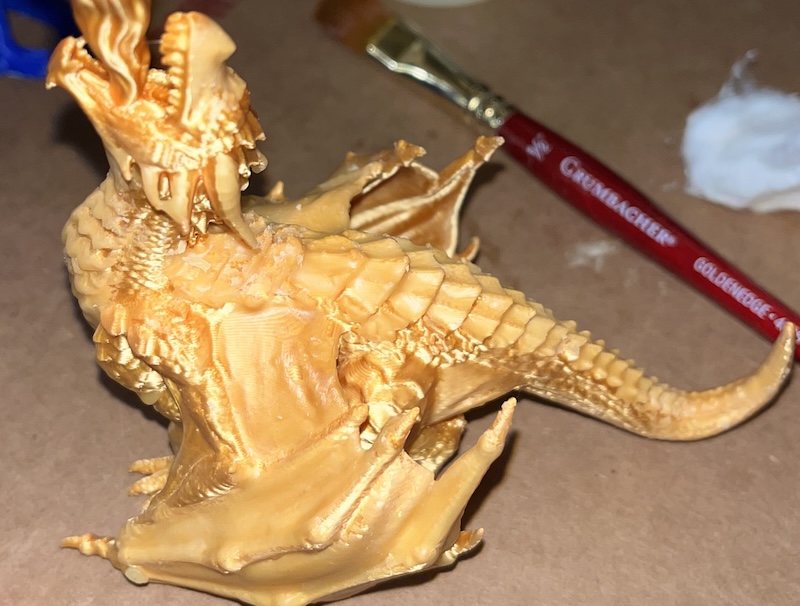
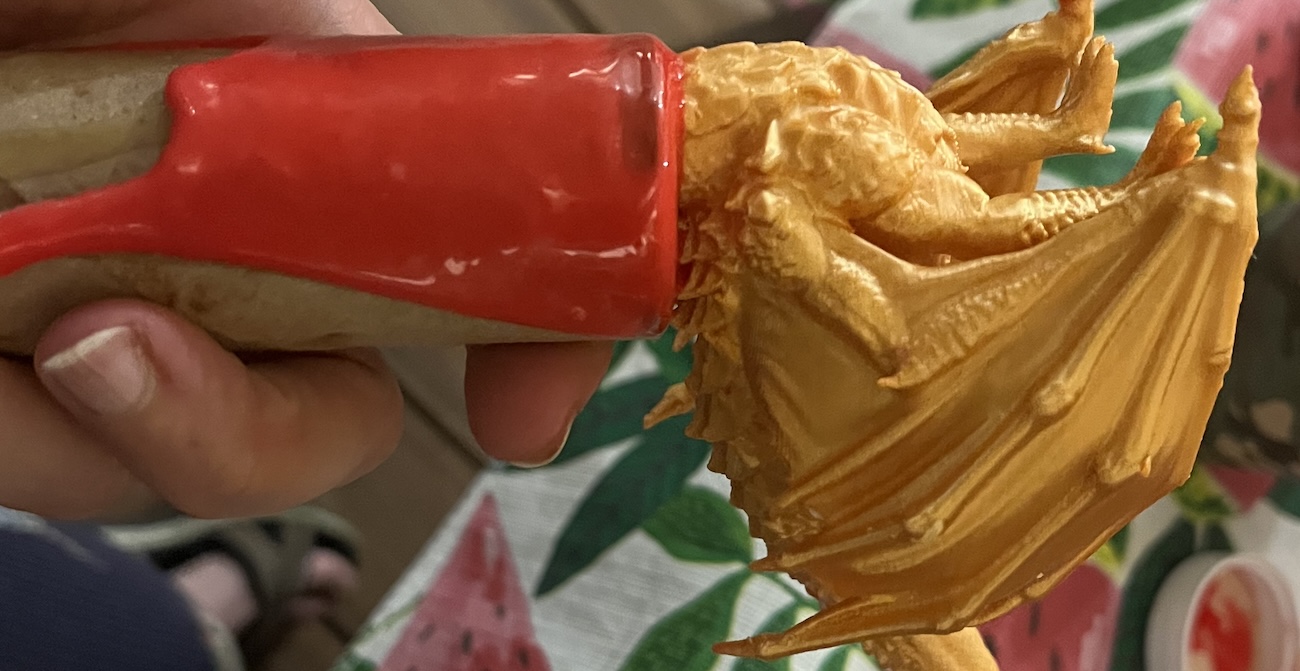
Wax dragon! The mold was difficult to get the wax into and out of. I should have turned the mold as I filled it to make sure the tops of the wings were filled.
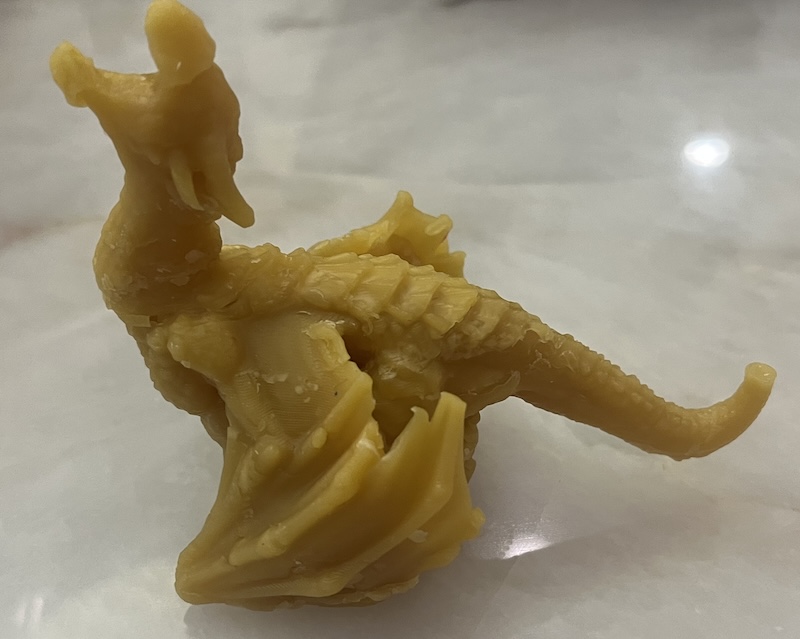
Original model next to beeswax cast.
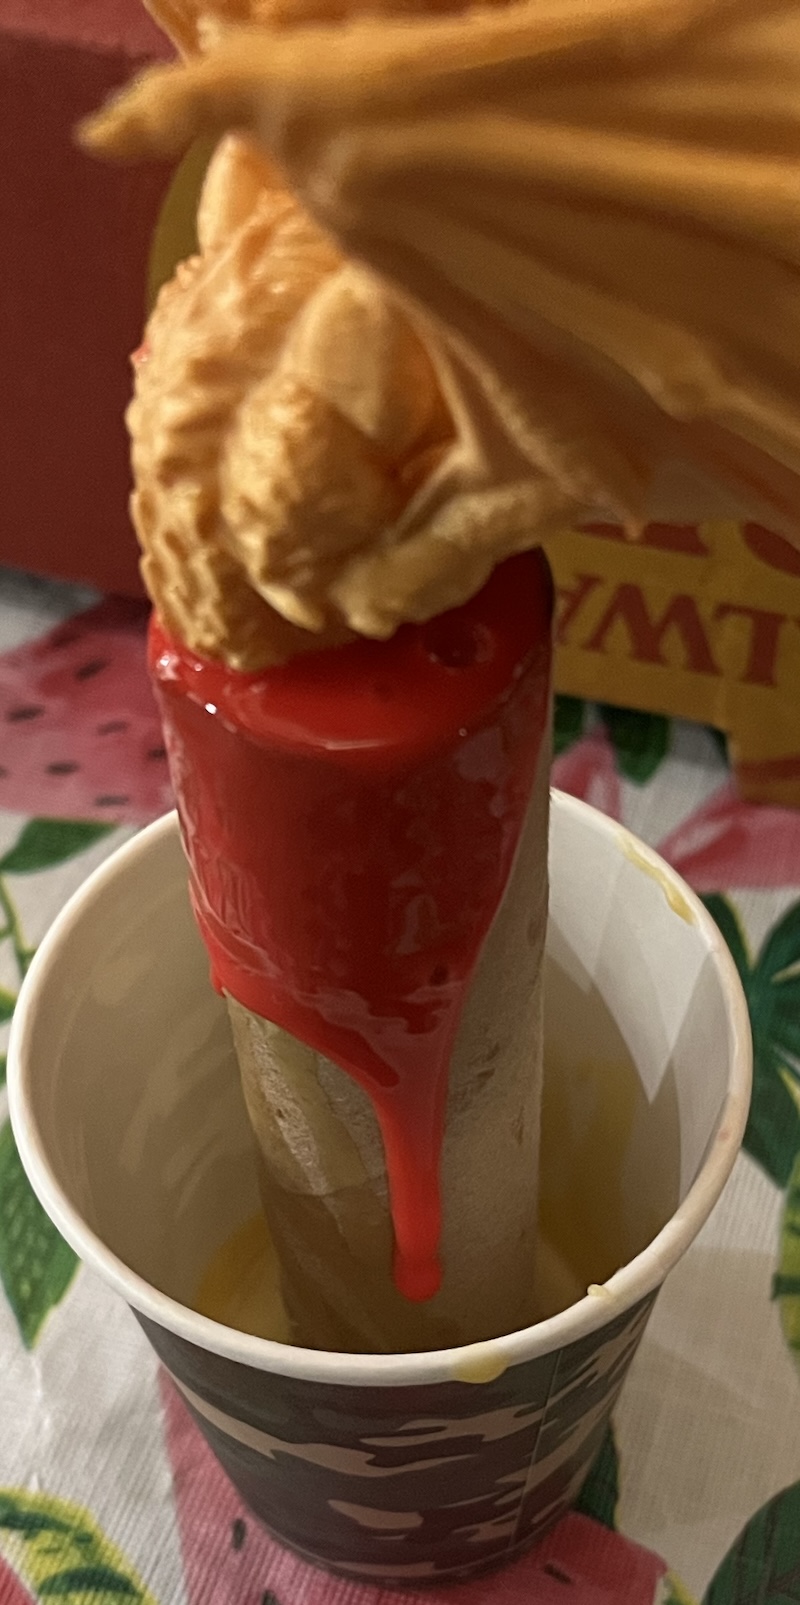
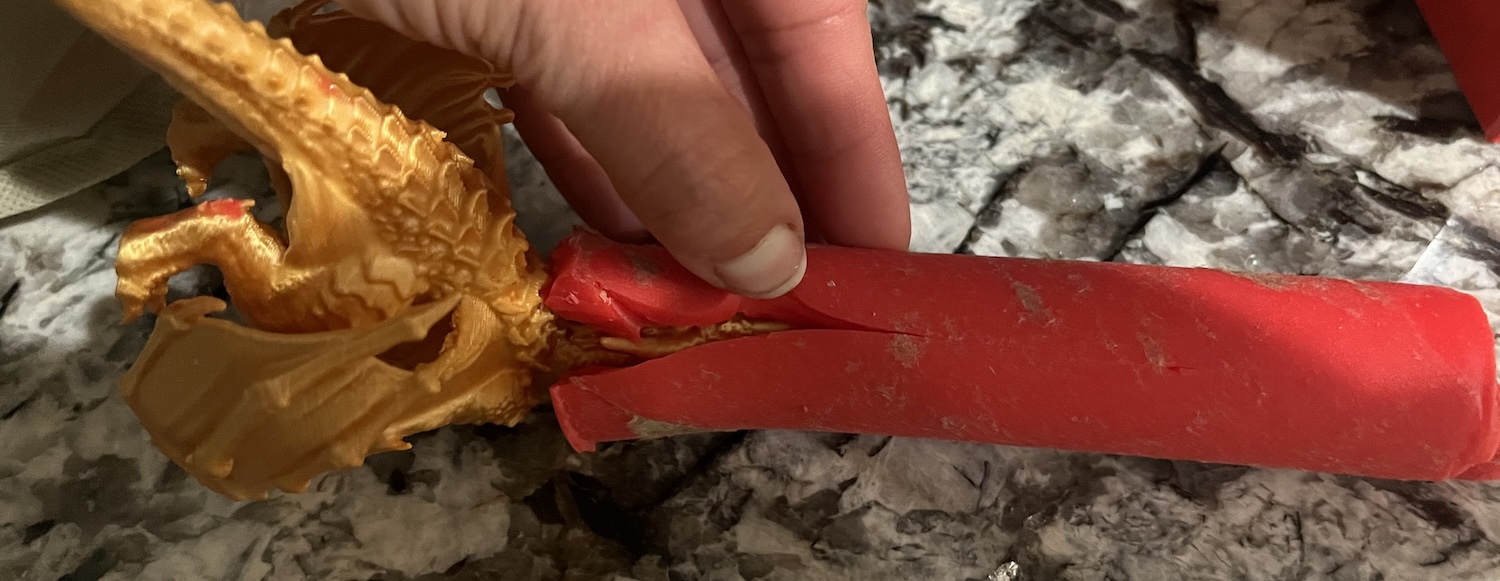
Adding the flame candle into the mouth.
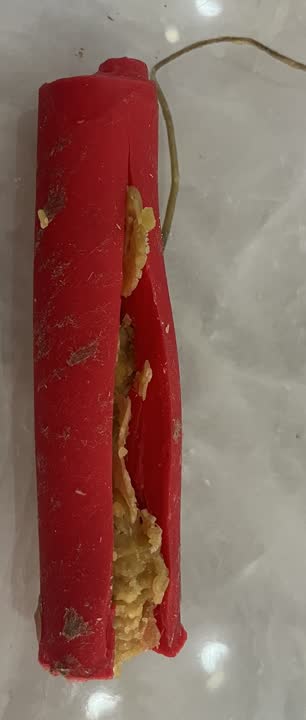
Candle Videos
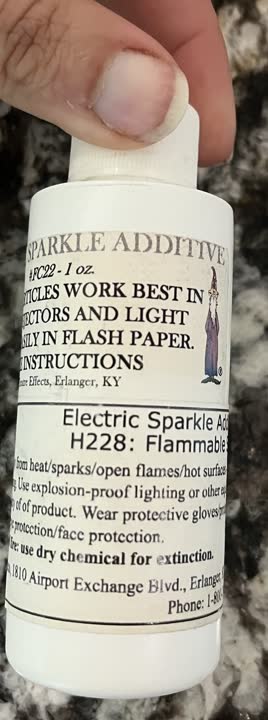
This is the sparkle powder used to make the candle spark. Camile and I tested to determine the best way to create a sparkling candle in hopes of using a fun material to cast with, and make a cool candle for my daughter's dragon themed birthday cake!
My daughter had her own vision for her birthday cake, and made it with a little help from me. She used my dragon mold to make wings, but molded their heads herself. She used the flame part of my dragon candle to have the evil dragon shooting fire.
Other Images
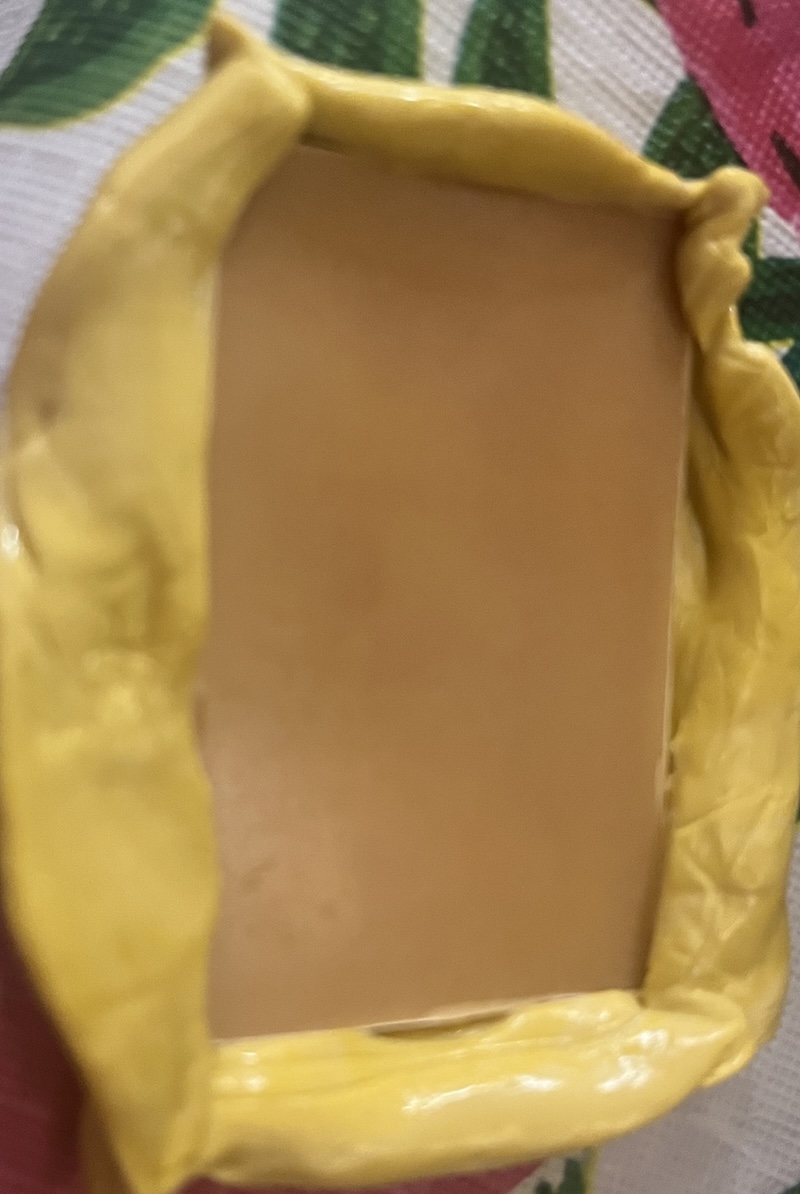
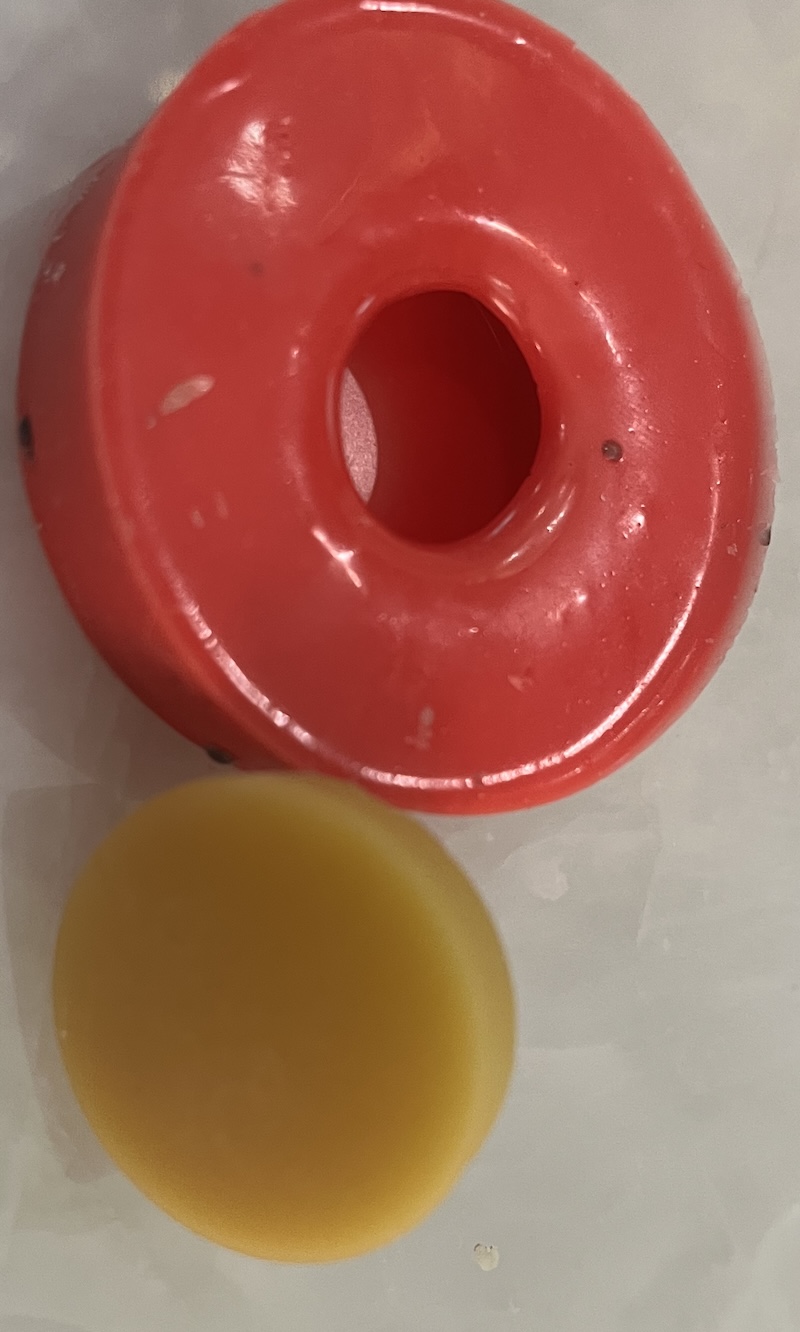
Last year I thought it would be fun to make epoxy drawer pulls for my craft room. I made this silicone mold of a drawer knob. They looked terrible! This week I used some bees wax to cast. It turned out perfectly smooth.
Files
Dragon in the clouds stl file is below. Open in bambu, and scale to 7%. Dragon in the clouds
Dragon candle dragon candle
Fizzbit's head fizzbit's head
Dragon's egg, which was found in Bambu Online Models. dragon's egg