Mechanical Design
link to Fab Academy class links link to my class lecture notes, click here, machine week link to Cardboard Machine Kit by Nadya Peek: click here
Group assignment:
- Design a machine that includes mechanism + actuation + automation + function + user interface
- Build the mechanical parts and operate it manually
- Document the group project and your individual contribution
See our group page here: Machine Week
Individual assignment:
- Document your individual contribution to the group project
Our group met to come up with an idea for our Machine week project. I had come up with a design that would involve parts of each of our final projects. However, after hearing from every Fab Academy graduate that machine week will be extremely difficult, we all decided that simpler is best. We are making a cookie decorator. This will be a pen plotter with the z axis free to move, allowing the pen to apply light pressure over an uneven cookie surface. It will use edible ink markers to write on cookies that have been iced with royal icing. It could also be used to draw on edible icing sheets, rice paper, or fondant sheets.
Research on gears:
I thought it would be useful to have gears to control the pen movement, extruder drip tray, and sprinkle distributer. I researched different gears, and decided beviled gears would be needed for 90 degree axis of rotation changes, and a Scotch yolk mechanism would be great for lifting the pen.
Youtube video on different types of gears: Gear Types - Types of Gear - Different Types of Gear by Learning Engineering
Toothless Gears Make Much More Torque Than Conventional Ones, Here's How. Cycloid Drive Explained by Driving for Answers
Mechanisms EVERY Mechanical Engineer Should Know by Engineering Gone Wild
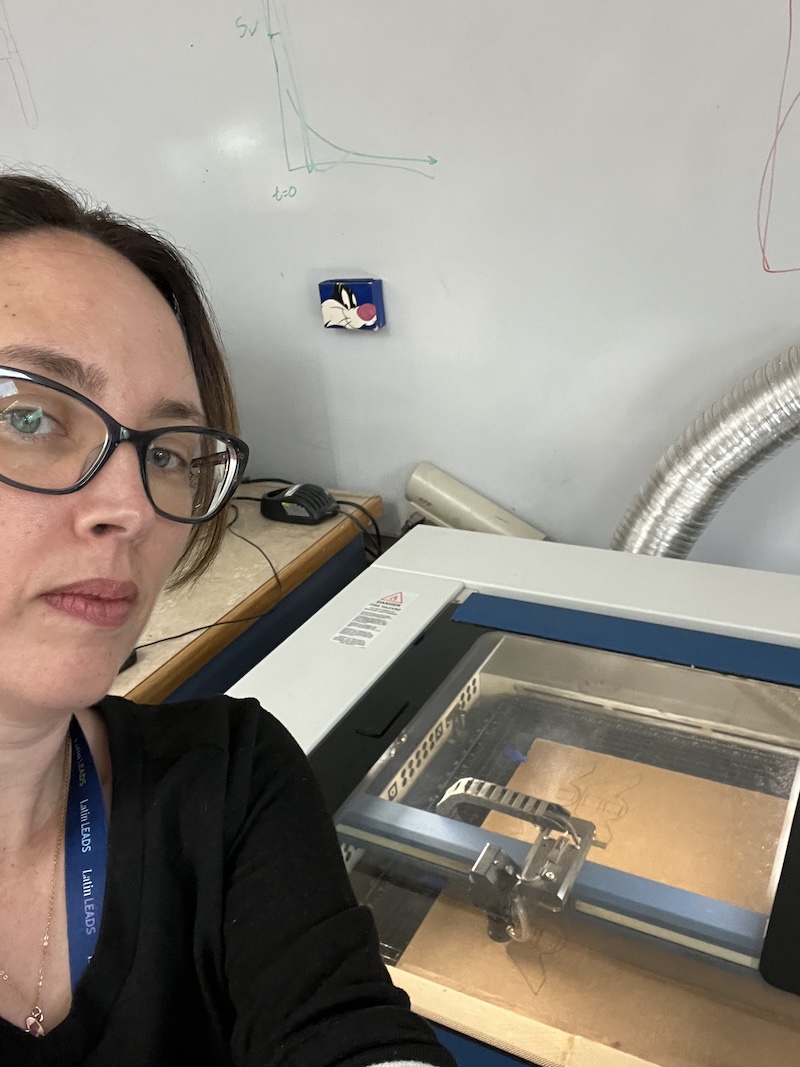
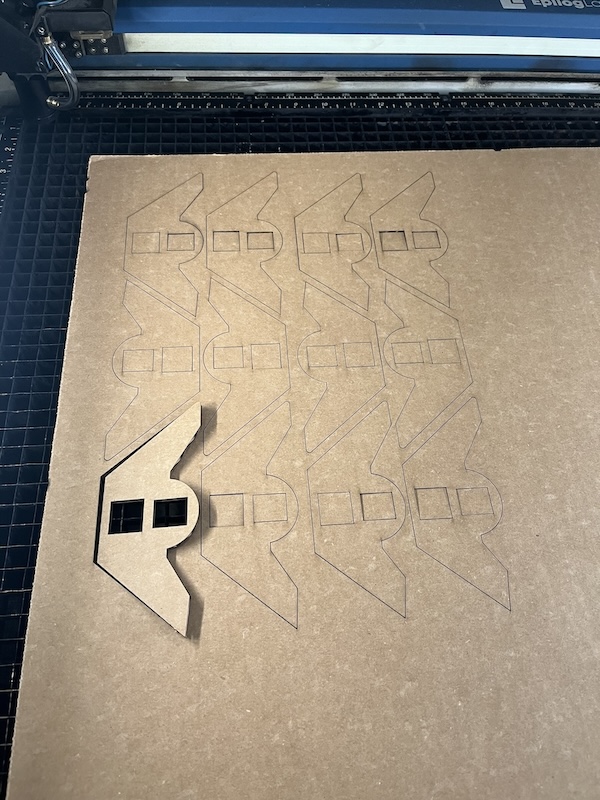
Laser cutting test Tilty Feet
I laser cut Camille's Tilty Feet file in cardboard so that we could quickly test the feet.
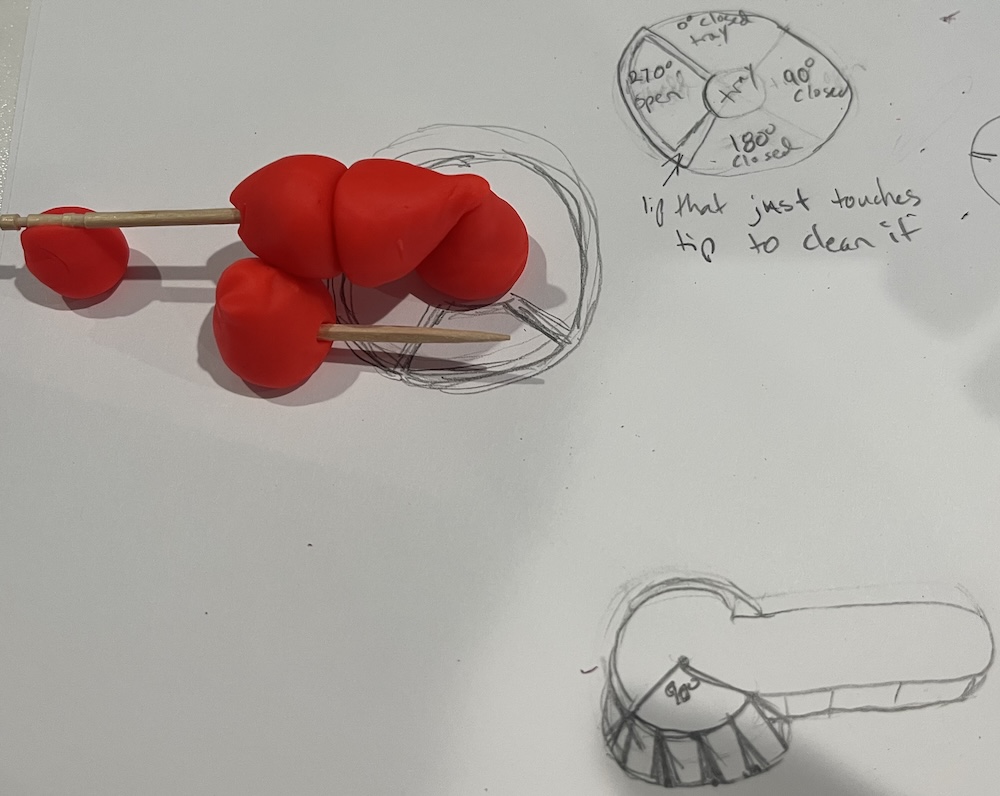
Visualizing: sketching and modeling
I was having trouble visualizing so I shaped playdough into cone shapes to roughly model beveled gears interacting with possible designs.
Using lever arm to lift pen, as we originally planned:
Using scotch yolk to lift pen:

My sketch of component assembly:
I also made a model using lego car wheels.
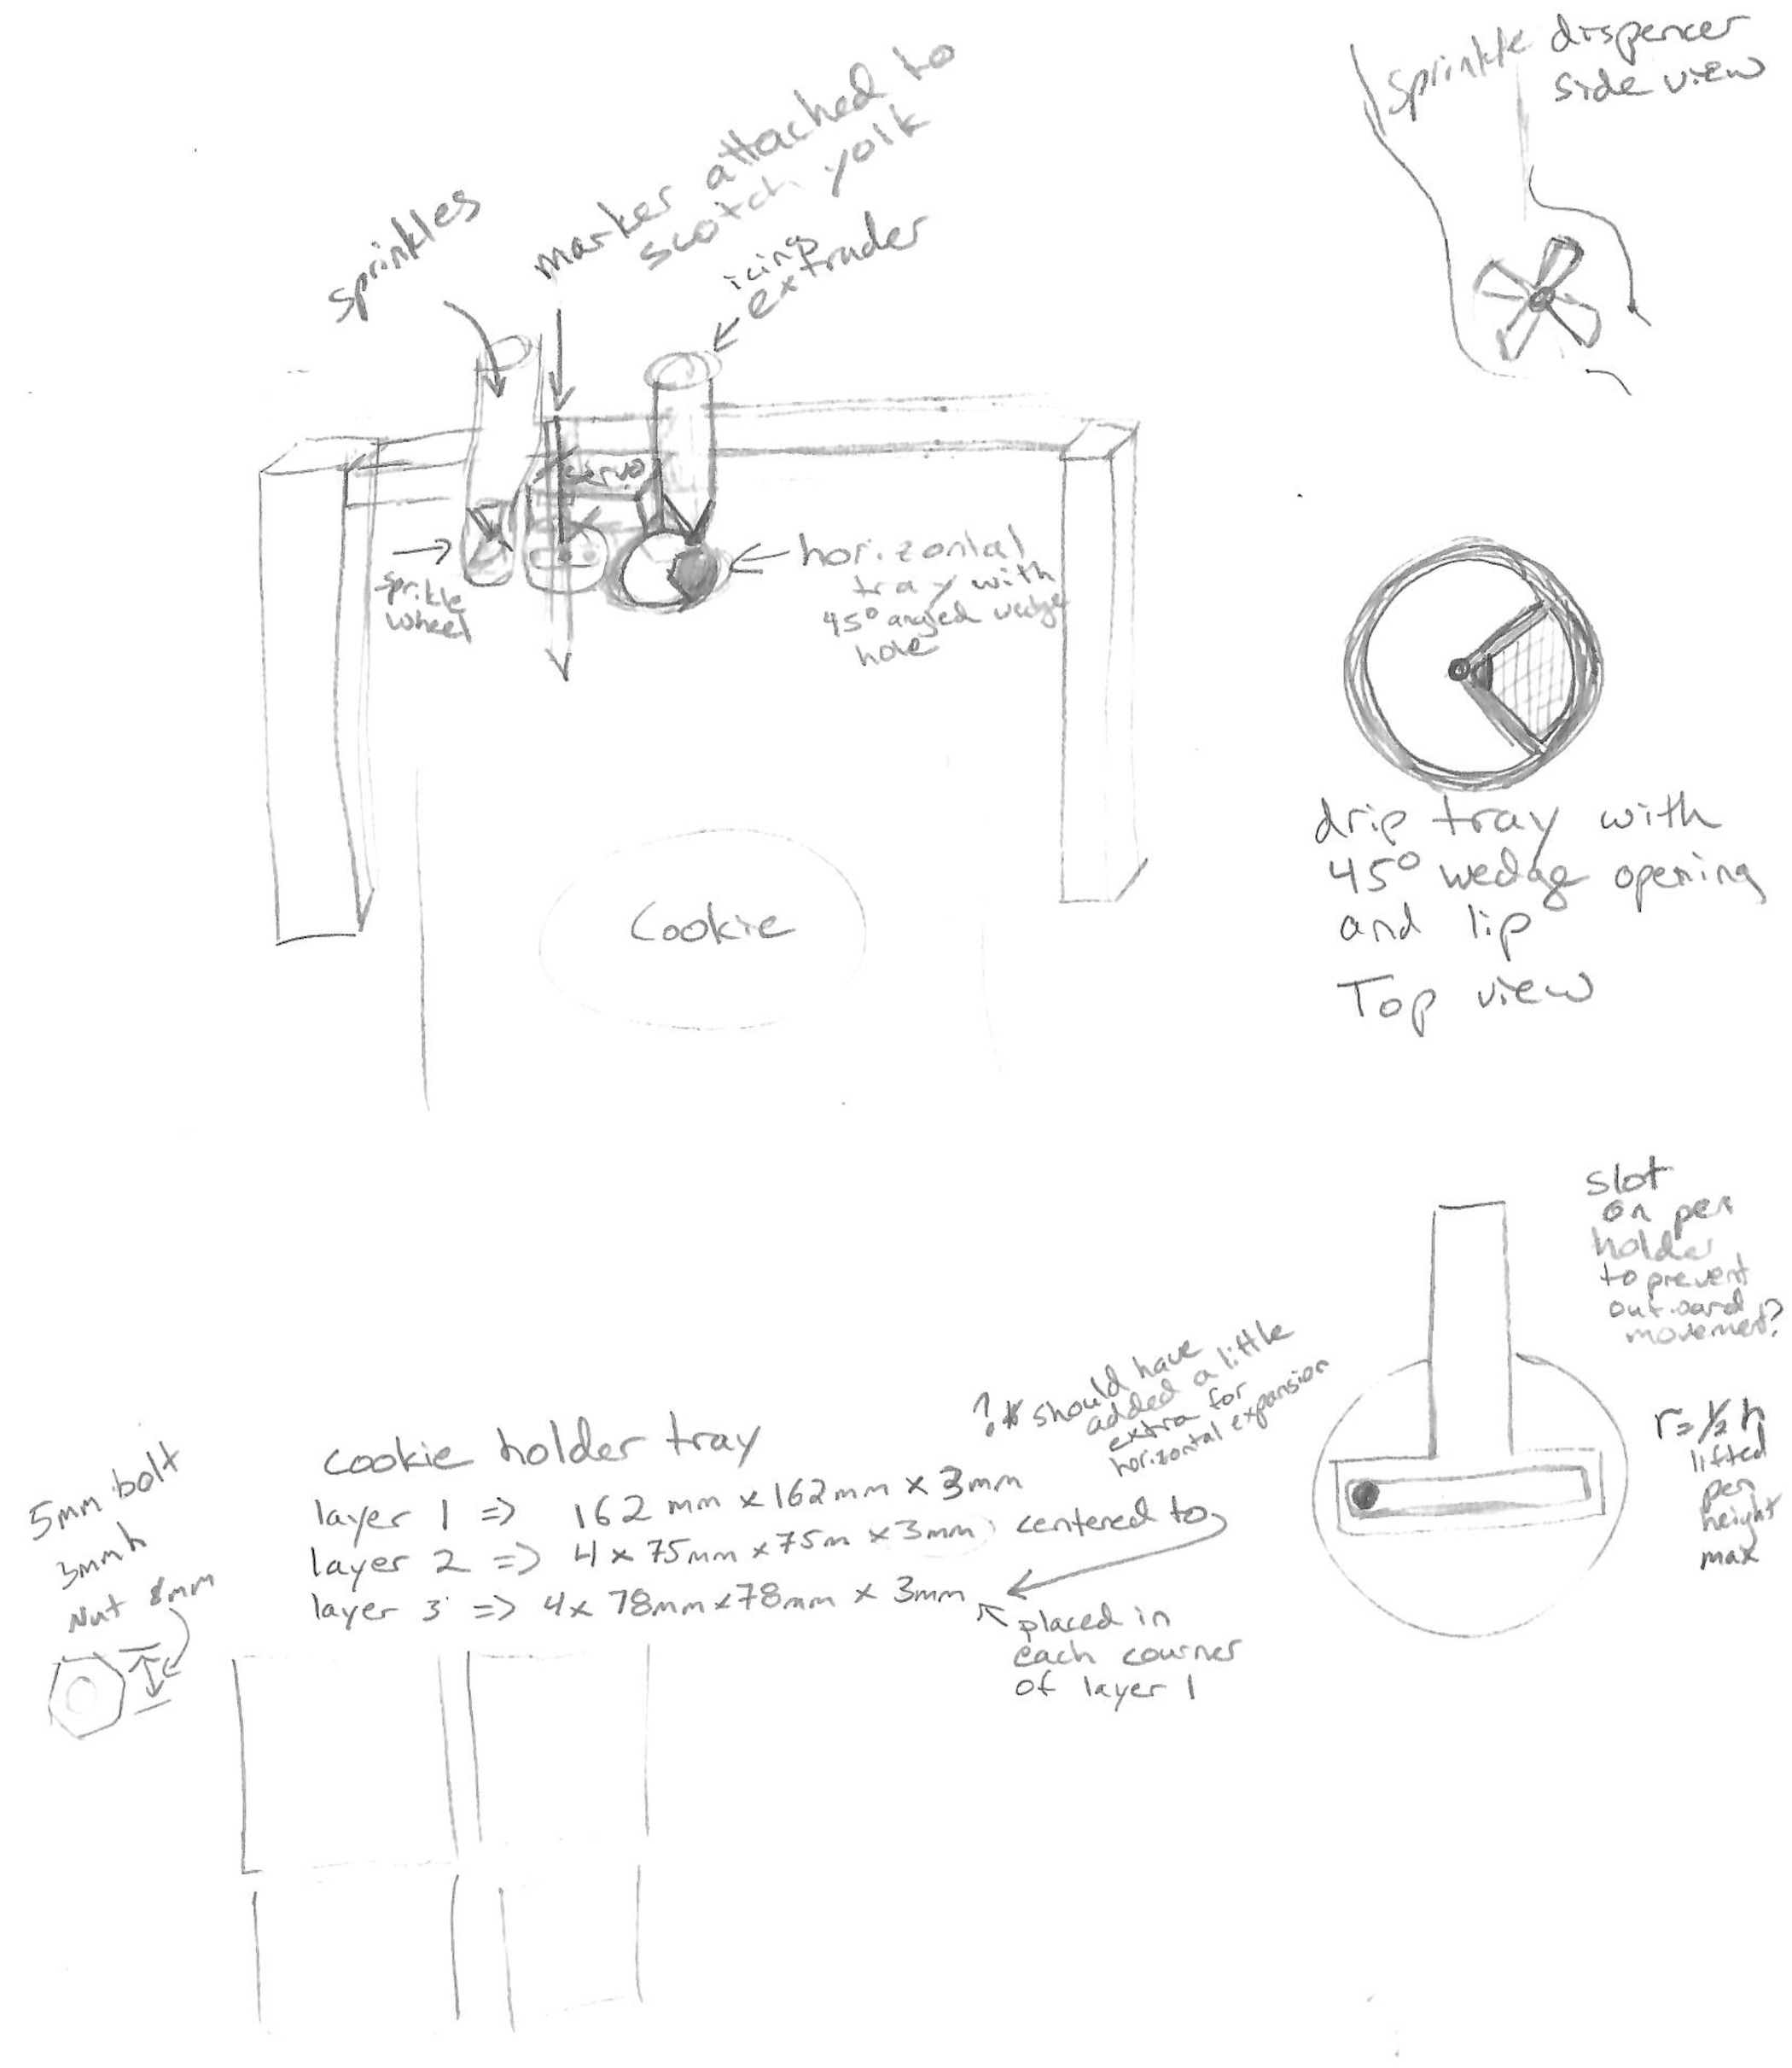
Cookie decorating machine concept
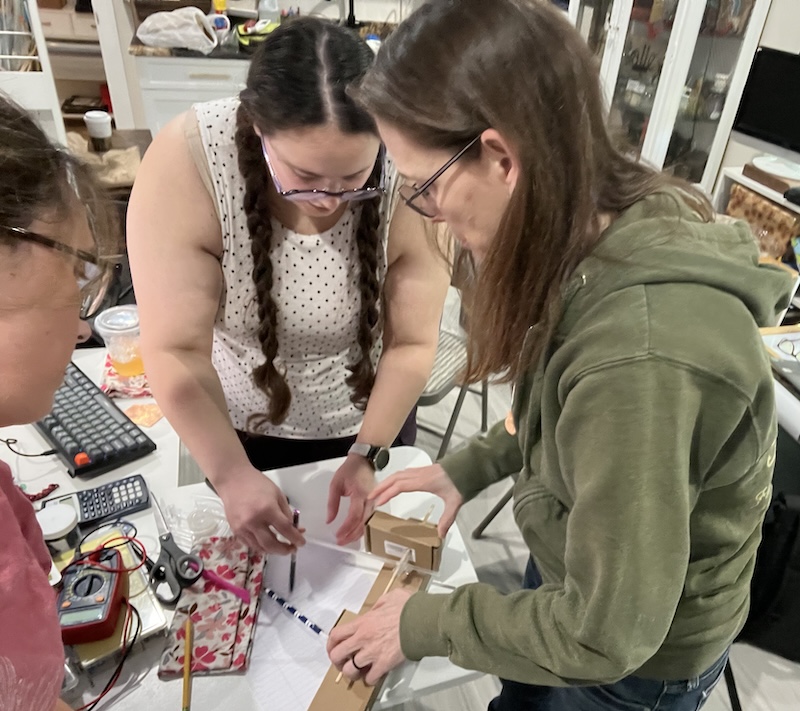
To beter envision my design I talked through what I wanted.
-
an edible ink marker attached to the scotch yolk to be lifted as needed
-
an icing extruder above the drip tray that rotates so that the extruder tip is over an opening to extrude icing, and over a drip tray when not extruding. The tray will have a lip to clean off icing from the nozzle before extruding
- the drip tray is part of the beveled gear that connects with the scotch yolk gear at a 90 degree angle, it is rotating around the z axis where as the gear of the scotch yolk rotates around the y axis
-
a sprinkle distributer, like a wheel in a bowl that pushes a scoop of sprinkles out over the cookie
- the sprinkle wheel fits inside the sprinkle bowl, and rotates around the y-axis
-
if the servo is set to angle 0 degrees the pen is down, 90 degrees the pen is up and tray is catching icing, 180 degrees the pen is up and icing is being extruded and as it moves from 180 to 270 the sprinkles fall, and at 270 the drip tray is catching drips
-
all components are connected to the housing of the servo motor
-
the servo motor is connected to a moving x and y plotter, while the cookie is stationary
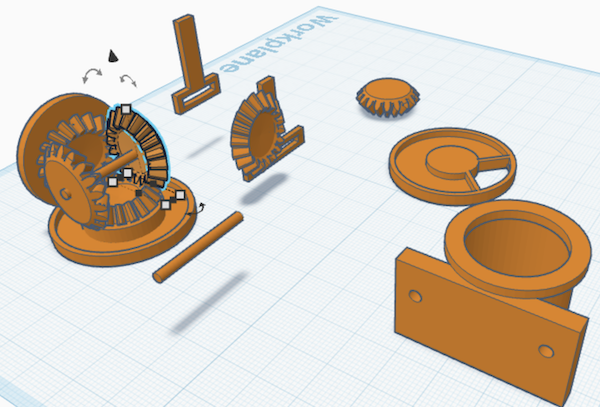
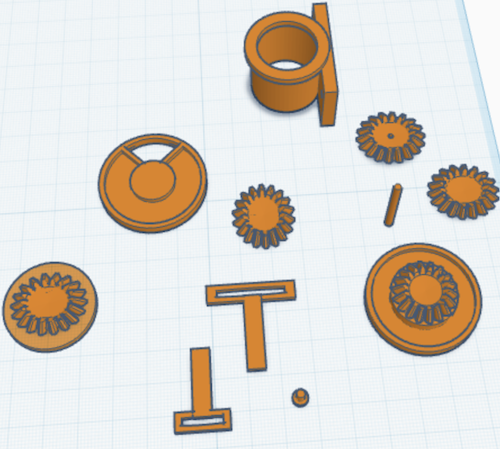
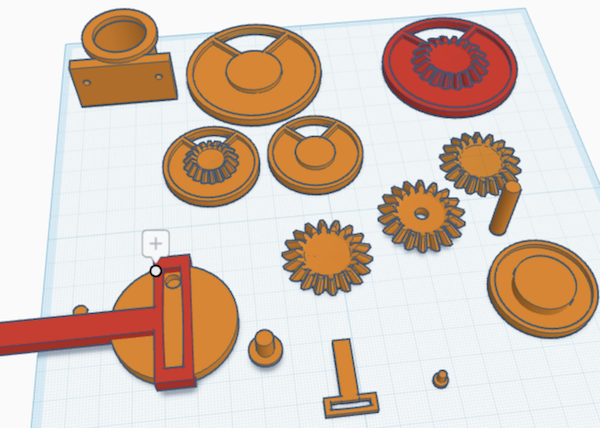
I did a lot of 3d printing and testing, using models from bambu and creating my own in tinkercad. I would like to say that I chose to use Tinkercad solely because my licence through CLS had lapsed, but I like the simplicity of Tinkercad. I have always designed with items that I have around, so additive and subtractive modeling is intuitive. Once I get a better idea, and my licence is renewed, I can build it in Fusion.
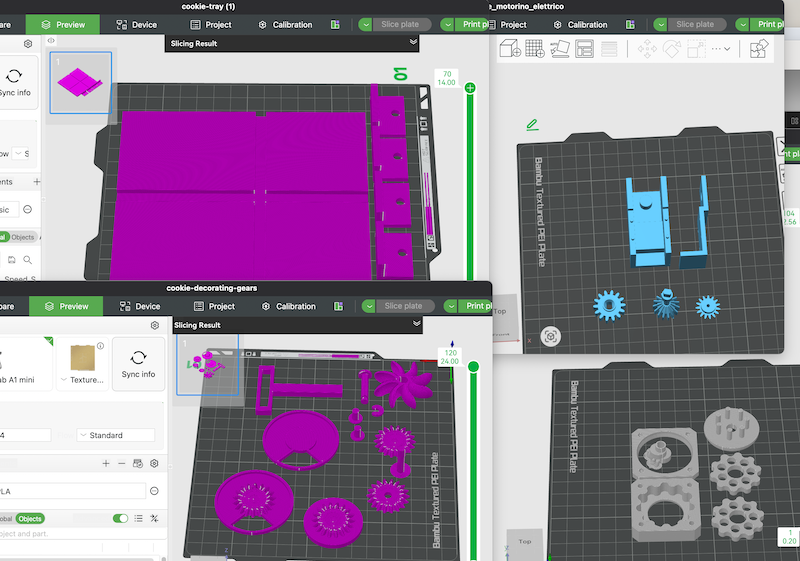
After bringing in my project in we decided that simle is best for this week, and didn't use them.
Research on extruders:
3D Printing Frosting, Peanut Butter, and Jelly - Syringe Extruderby Andrew Sink
Andrew Sink was using the tutorial by Constantijn below.
Easiest Way to Print With Clay by Constantijn
Constantijn's part 2 video
SUCCESS!! 3D Printing with Nutella & Peanut Butter
Research on stepper motors:
StudioPieters has a wonderful guide to the DRV8825 stepper motor driver. To go to their website click here
Ariat-technology's website is where we found the information on A4988 stepper motor drivers. Click here for A4988 Working Principle, Pinout and Features
We were using scrap parts, and were told that the DRV8825 and A4988 drivers were interchangable, which is true to an extent. They can both be used to drive our machine, but they should not be mixed. Also their pinout diagrams are reversed! We found out the hard way after buring out the DRV8825 driver.
We decied to use A4988 drivers for our project on the advice given during Global Open Time. Looking at the data sheets, the DRV8825 is able to run at higher voltages, and more precice movements, but we did not feel that was nessisary.
This image from makerstore.com.au is the stepper driver configurations for the two drivers we had been using.
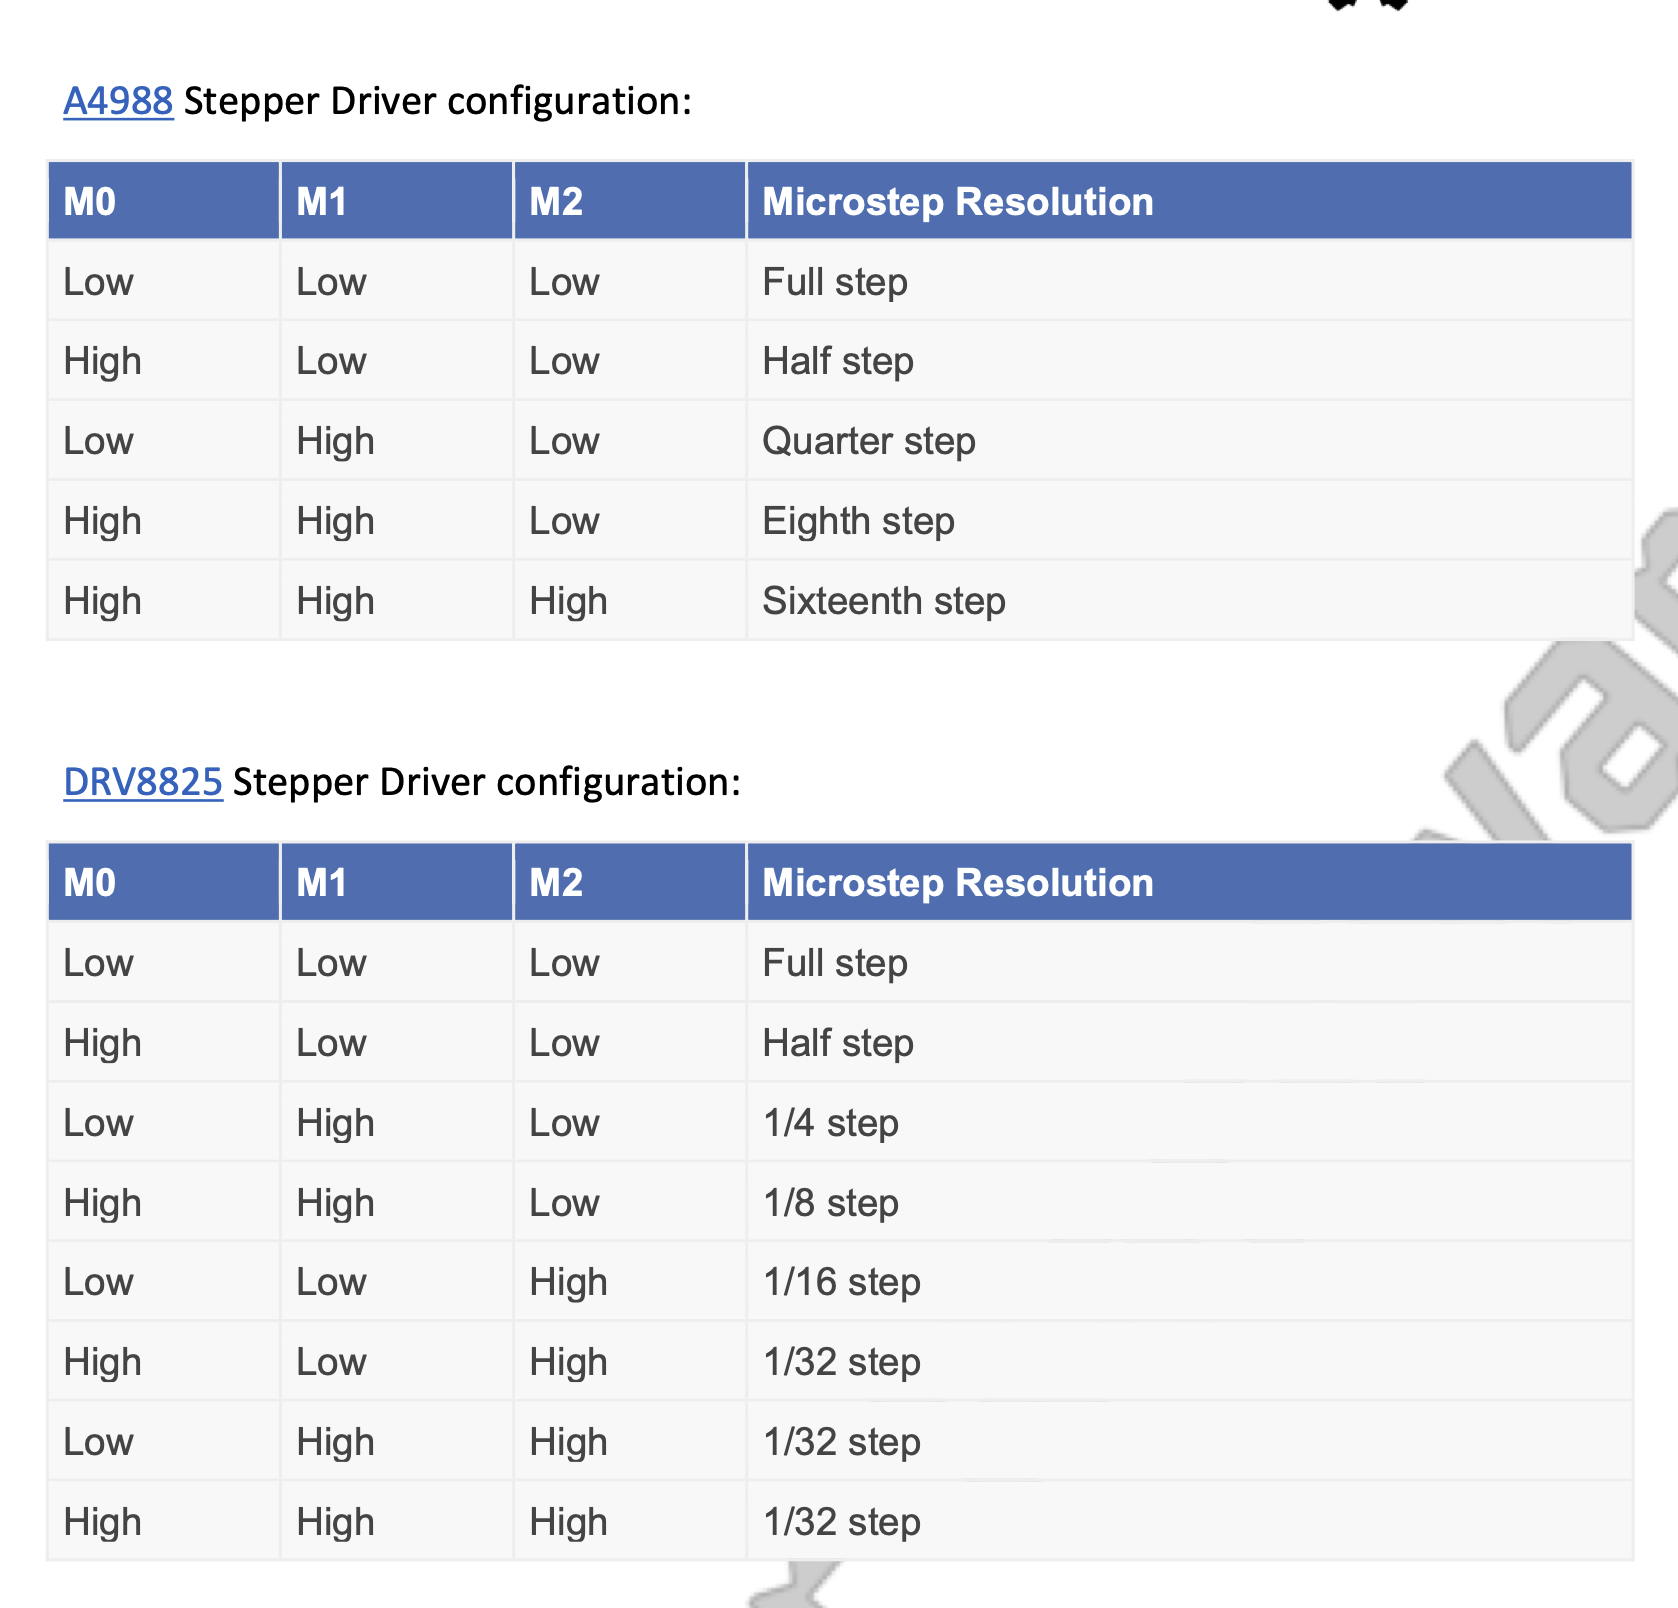
ther are 3 pins used for each driver, but only the DRV8825 has 8 options, which I would have guessed as 2^3 is 8 from binary coding. However, 3 of those options are the same 1/32 step. I wonder if these correspond to specific 32nds? Like 1/32, 3/32, 5/32, 9/32...?
Baking Cookies
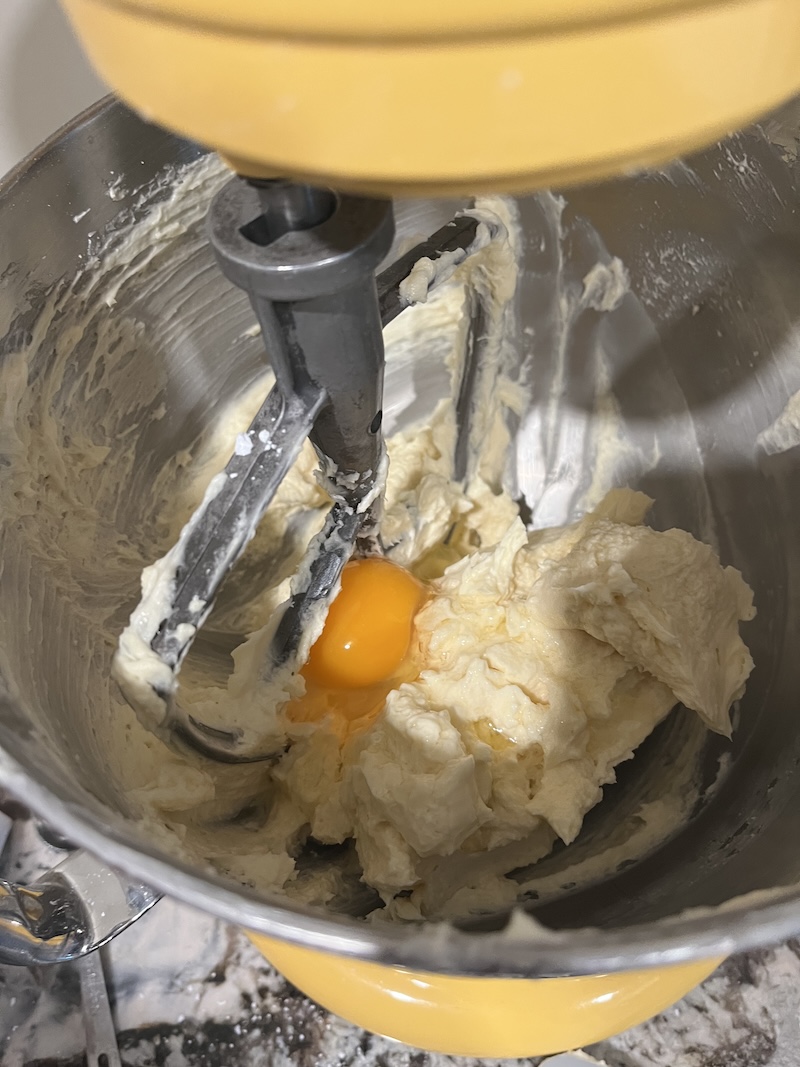
This is a scaled down recipe from my time at a commercial bakery.
Sugar Cookies 11.4oz powdered sugar 13.7oz butter 2 eggs 1 tsp vanilla 1lb 9oz lb cake flour
Cream sugar and butter, slowly add eggs and vanilla. Mix in flour. Wrap dough in plastic wrap, and chill 30 min or more.
Roll out the dough to 1/4 inch thick.
tip 1 place dough between 2 1/4inch dowels, and roll your rolling pin along the dowels to make level cookies tip 2 roll your dough between to sheets of plastic wrap, making sure to pull off the plastic every once and a while to give your dough room to move. This keeps your counters and rolling pin clean, but more importantly, it prevents your dough from getting to tough from added flour used when rolling.
Cut out your shapes using a cookie cutter, pizza cutter, or knife.
you can 3D print any cookie cutter shape you want!
Place 1 inch apart on a cookie sheet lined with parchment paper. Bake 350 degrees F for 10-12 min. They should be firm to the touch, and just starting to brown around the edges.
Ice with poured fondant.
I make my poured fondant by eye, but here is an approximate recipe. This is the least precise recipe you will ever use in baking.
Poured Fondant 1 lb Powdered sugar 1Tbs corn syrup warm water optional few drops of flavoring and/ or coloring
Add water while mixing until you reach a consistency that doesn't all drip off your spoon immediately. Add more water or powdered sugar as desired. Spread over cookie, and let dry.
tip wear gloves, plop the cookie face first into the icing. Lift up the cookie, and wipe off excess around the edges using your gloved finger.
Fairy Wings
With the weight of the pen, motor, and fairy dust fan, Tilty was not balanced. While we were adding a counter balance of a large bolt, I noticed the bolt looked like the head and body of a fairy. So I created a file for 3D printed fairy wings to act as the counter balance.
First I had meshy create an image of a fairy with geared wings using Nano Banana Pro. Here is my prompt that the "helper" helped me to refine.
"A monochromatic, 3D-printable steampunk fairy, slender and intricately detailed. Its articulated wings are meticulously formed from interlocking gears, emphasizing clean lines and sharp edges suitable for printing. A small, textured backpack is integrated, enhancing its mechanical aesthetic. The entire figure possesses a consistent, solid material appearance, highlighting form and shadow for a tactile, sculptural quality, optimized for a single-material output."
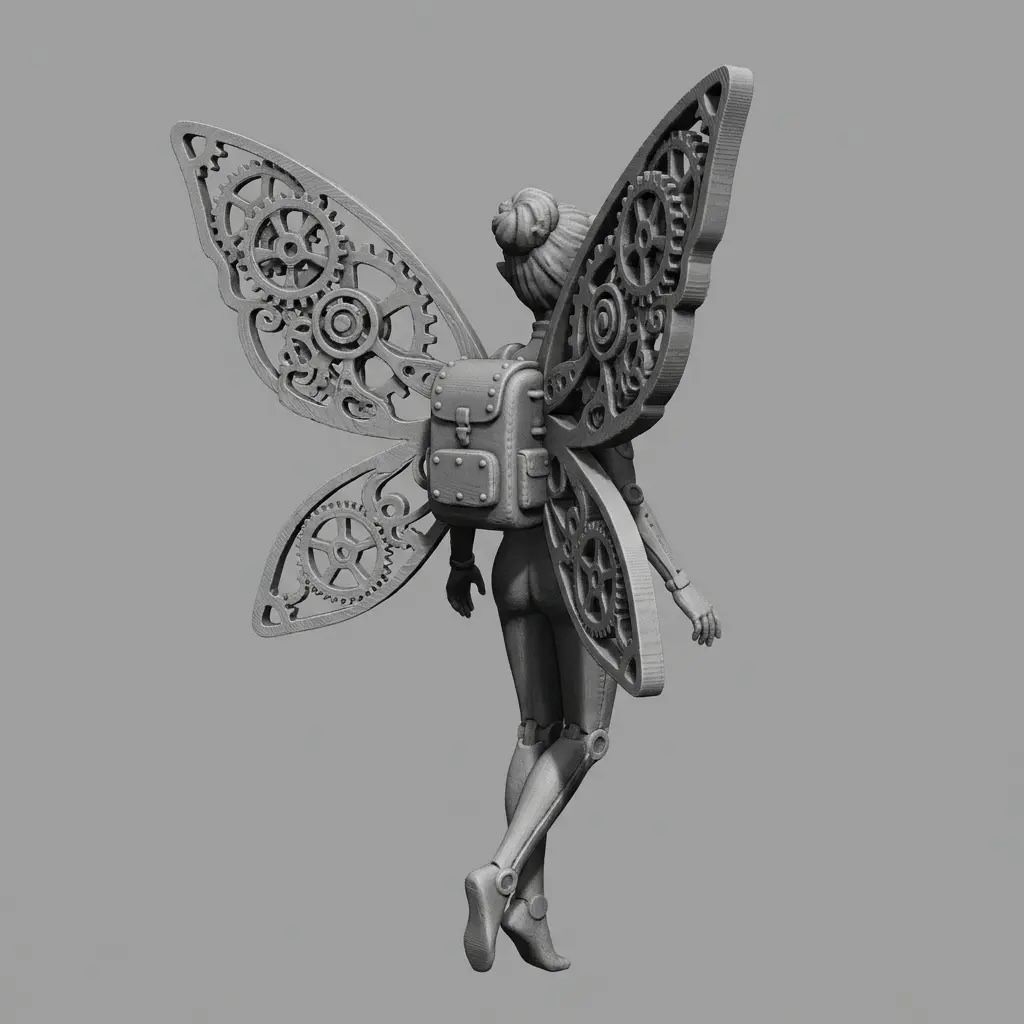
I then used that image as my prompt for image to 3d. tilty fairy 3d
I then used the cut tool in bambu to cut the wings off the fairy, and save them as individual files. I then uploaded them into TinkerCad. (My Fusion account had expired, and I needed to get the lab to renue my licence.) I had to do this in parts because TinkerCad will not import large files.
In TinkerCad I added pen holders, and attached the wings to a piece that could fit on top of Tilty. I then opened my file in bambu, and printed it.
Installing Universal G-code Sender
As the group worked we ran into some troubles with the code being run from Camille's Window's computer. Since I have a mackbook, I downloaded the programs and files needed to run the machine using Kim's code. I used Claude to help guide me through the installation process, because I missed the big "READ ME" file Kim had added to our group documents.
I had some thoughts on how to controll our z-axis, the servo that moves the pen. I ran my ideas by Claude, and adjusted the xycode_grbl file accordingly.
See this document Universal-G-Code-transcript to follow my work with Claude or this document universal-G-Code to see the easy to follow summary Claude created.
I had been trying a custom xy_code_grbl, but it wasn't working. Kim showed me that she had been using a different code. I uploaded the grbl library into Arduino IDE, and ran the example file in arduino as the firmware file for the Arduino Uno.
The second Tilty was set up by Kim with an Arduino Uno 3, Our original Tilty is an Arduino Uno ? Kim said she had trouble with the Arduino Uno 4. Maybe that is why Tilty was giving us trouble?
I altered the config.h file to define Z_MMFOR_MAX_SPINDLE_RPM from 15.000 to 0.00, and the MIN from 19.000 to 90.000. I also made sure that the z-axis commands were not commented out.

The code uses the Arduino pin not the CNC shield's pin. The CNC's pin we needed to use was z-, Thanks Kim!
Now the servo lifts the pen moves when z is > 0.
SVG Fab Academy logo
I opened the Fab Academy logo.jpg in CorelDraw.
![]()
I did a quick bitmap trace, because it is a simple file. Then I removed the white so that only the colored sections remained. I made svg files for each colored section both filled in and just an outline. I wanted the option to run each color separately.
My files can be found here
G-code from SVG
I then created a gcode for the entire outline of the logo.
jscut.org was suggested by Claude to change my svg into g-code. It is an open software. Here is the github page
It is noted on the github page that LaserWeb4 is the successor. Here is a link to laserWeb4's gitlab page
I have not tried LaserWeb4 yet.
I measured my tool size by lightly touching my edible ink pen onto a paper, and measuring the dot.
While creating files for each color section's outline, and each color's section being filled in, I quickly realized that I did not need to have each colored section separate, jscut works to create a toolpath based on the area your select.
I also realized that pausing the program instead of running a new program for each color change would likely reduce opertunities for errors. Should I wish to use different colors, I manually pause the program when the z-axis changes to lift the pen. I then switch the pen, and restart.
Outline Fab Academy logo gcode
Here is the file for the complete logo being colored in. Full color logo
Problem with home position
When printing the g-code we noticed the machine started far off the cookie as the zero position. I had to go back to the jscut.org program to adjust the offset so that the machine would start closer to the cookie.
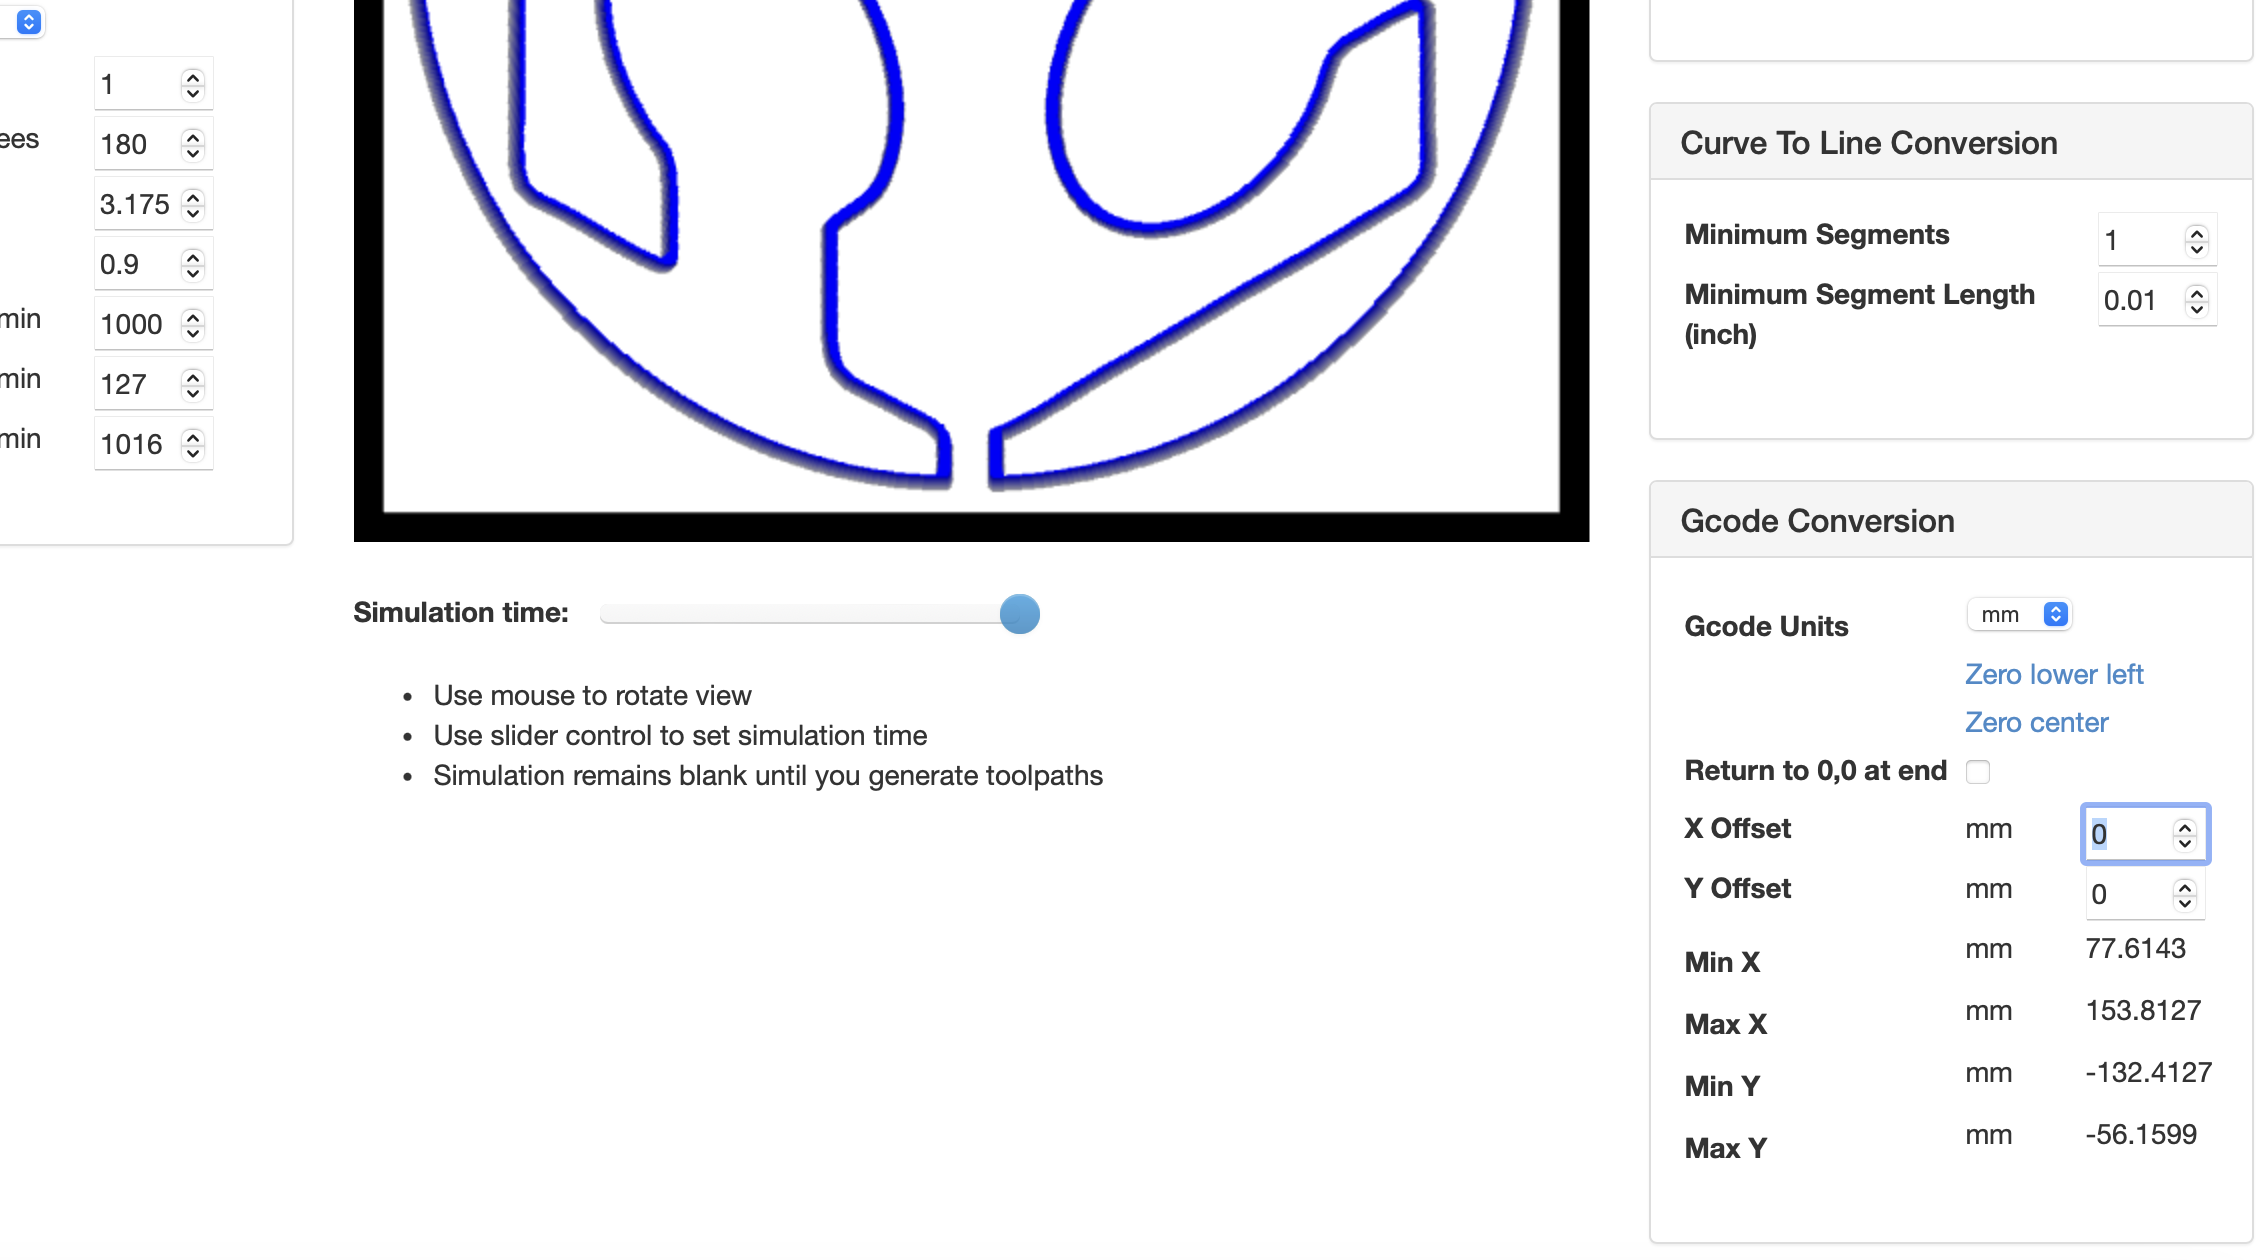
Since I noticed this after running the code, I was able to see that the pen did not drop until x130, y-103. So I changed the offset to x130, y-103.
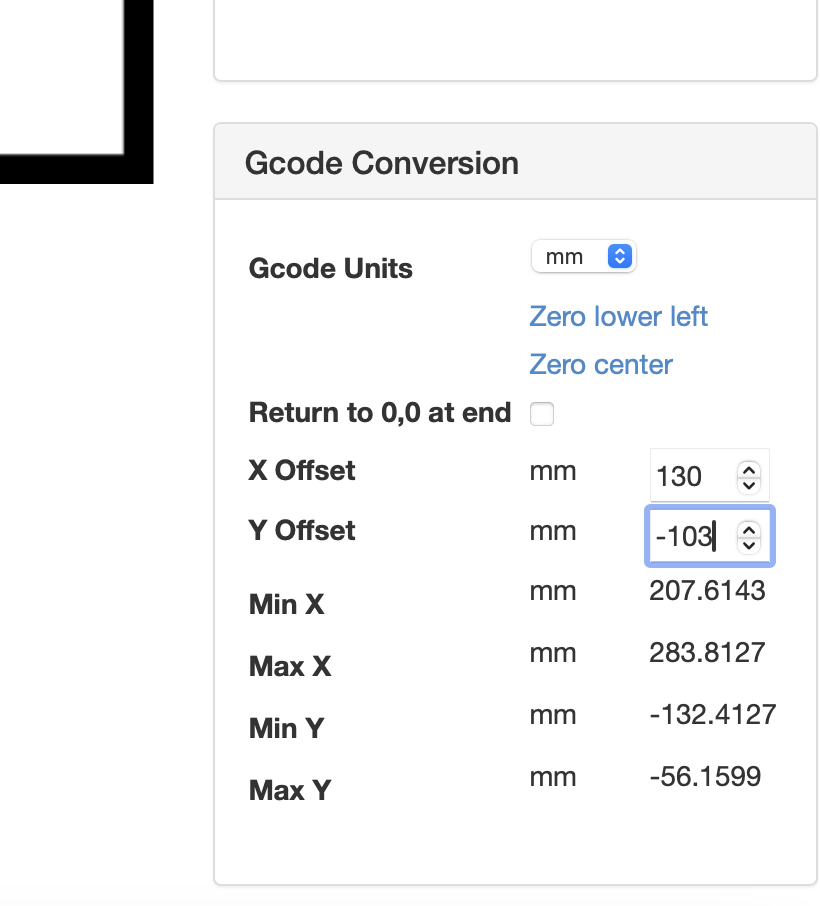
However, this set the machine even farther away! See where it has the Min X is increased by 130, and is now way to far away for the machine. So I changed the offset to x-130, y103.
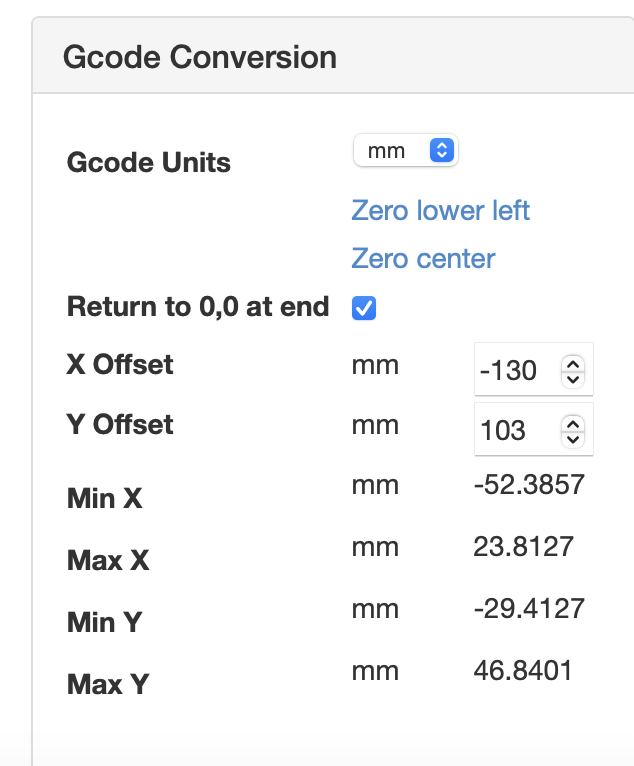
We were then able to send the g-code through UGS to Tilty! At every z movement the program moved the servo, and the pen lifted or dropped. The pen lifted as the program moved to another color. At that point I paused the program to switch pens, and then started it again.
We had to use the secondary Tilty, because Tilty would not link to my computer. Since it is the one we were having so much trounble with, we think it is the machine, and just used our practice "not so" Tilty to run the program as a test. It worked!
This video is in tripple time, and was spead up by Claude by dropping in the video along with the prompt, "can you make this video 3x fast?" I sped up a video in the past, and have it documented, but I want to go to bed. Thank you Claude.
Power Point Slide
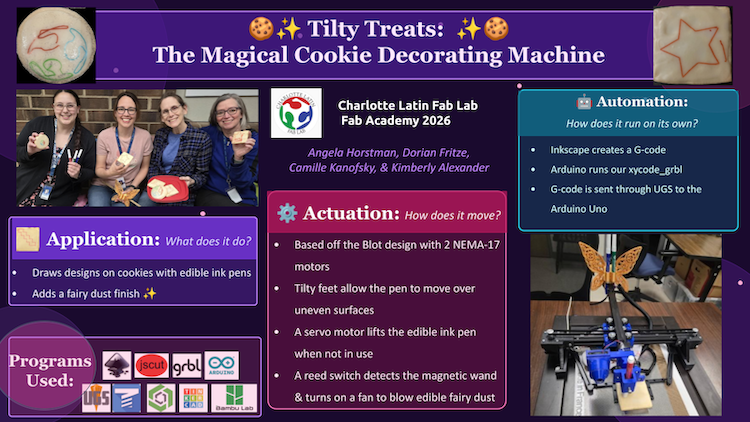
I found the requirements for our final project, and assumend the machine week project had the same ones. 1920 x1080 pixels with your name, project name, Fab Lab name, photo, and description.
I created this slide:
It looks very boaring, and old. I gave Claude.ai this prompt:
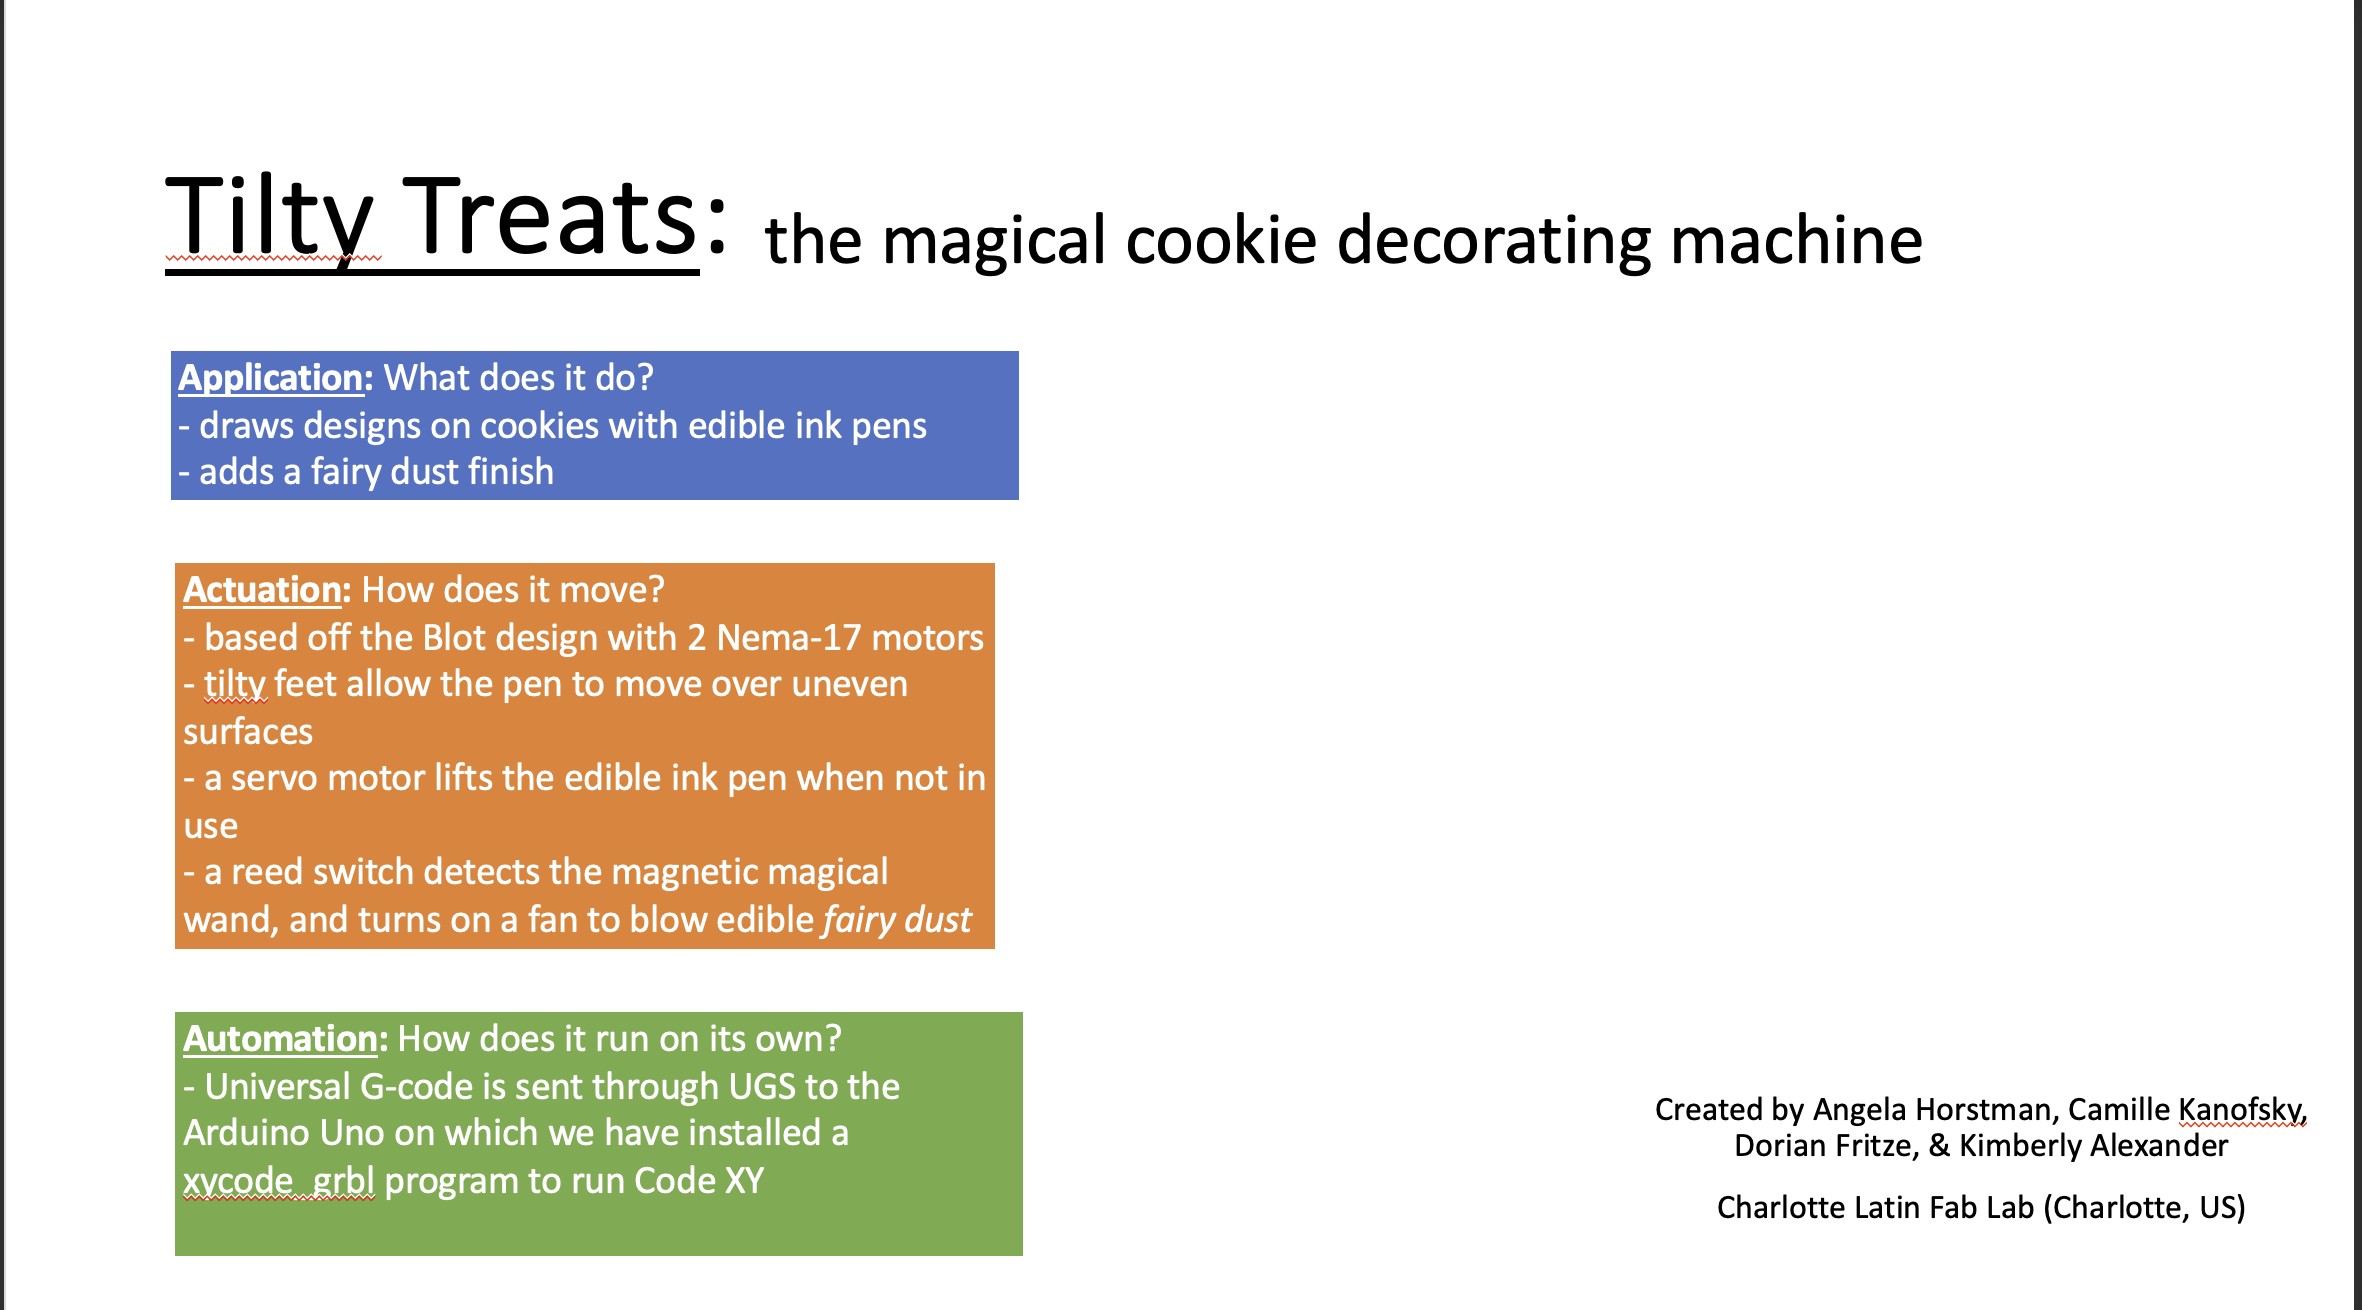
"can you make a magical/ cookie related slide that is 1920 x 1080 pixels that has this information: as the title "Tilty Treats: the magical cookie decorating machine", Application: What does it do? - draws designs on cookies with edible ink pens - adds a fairy dust finish Actuation: How does it move? - based off the Blot design with 2 Nema-17 motors - tilty feet allow the pen to move over uneven surfaces - a servo motor lifts the edible ink pen when not in use - a reed switch detects the magnetic magical wand, and turns on a fan to blow edible fairy dust Automation: How does it run on its own? - Universal G-code is sent through UGS to the Arduino Uno on which we have installed a xycode_grbl program to run Code XY
Created by Angela Horstman, Camille Kanofsky, Dorian Fritze, & Kimberly Alexander Charlotte Latin Fab Lab (Charlotte, US)"
And Claude.ai created this!
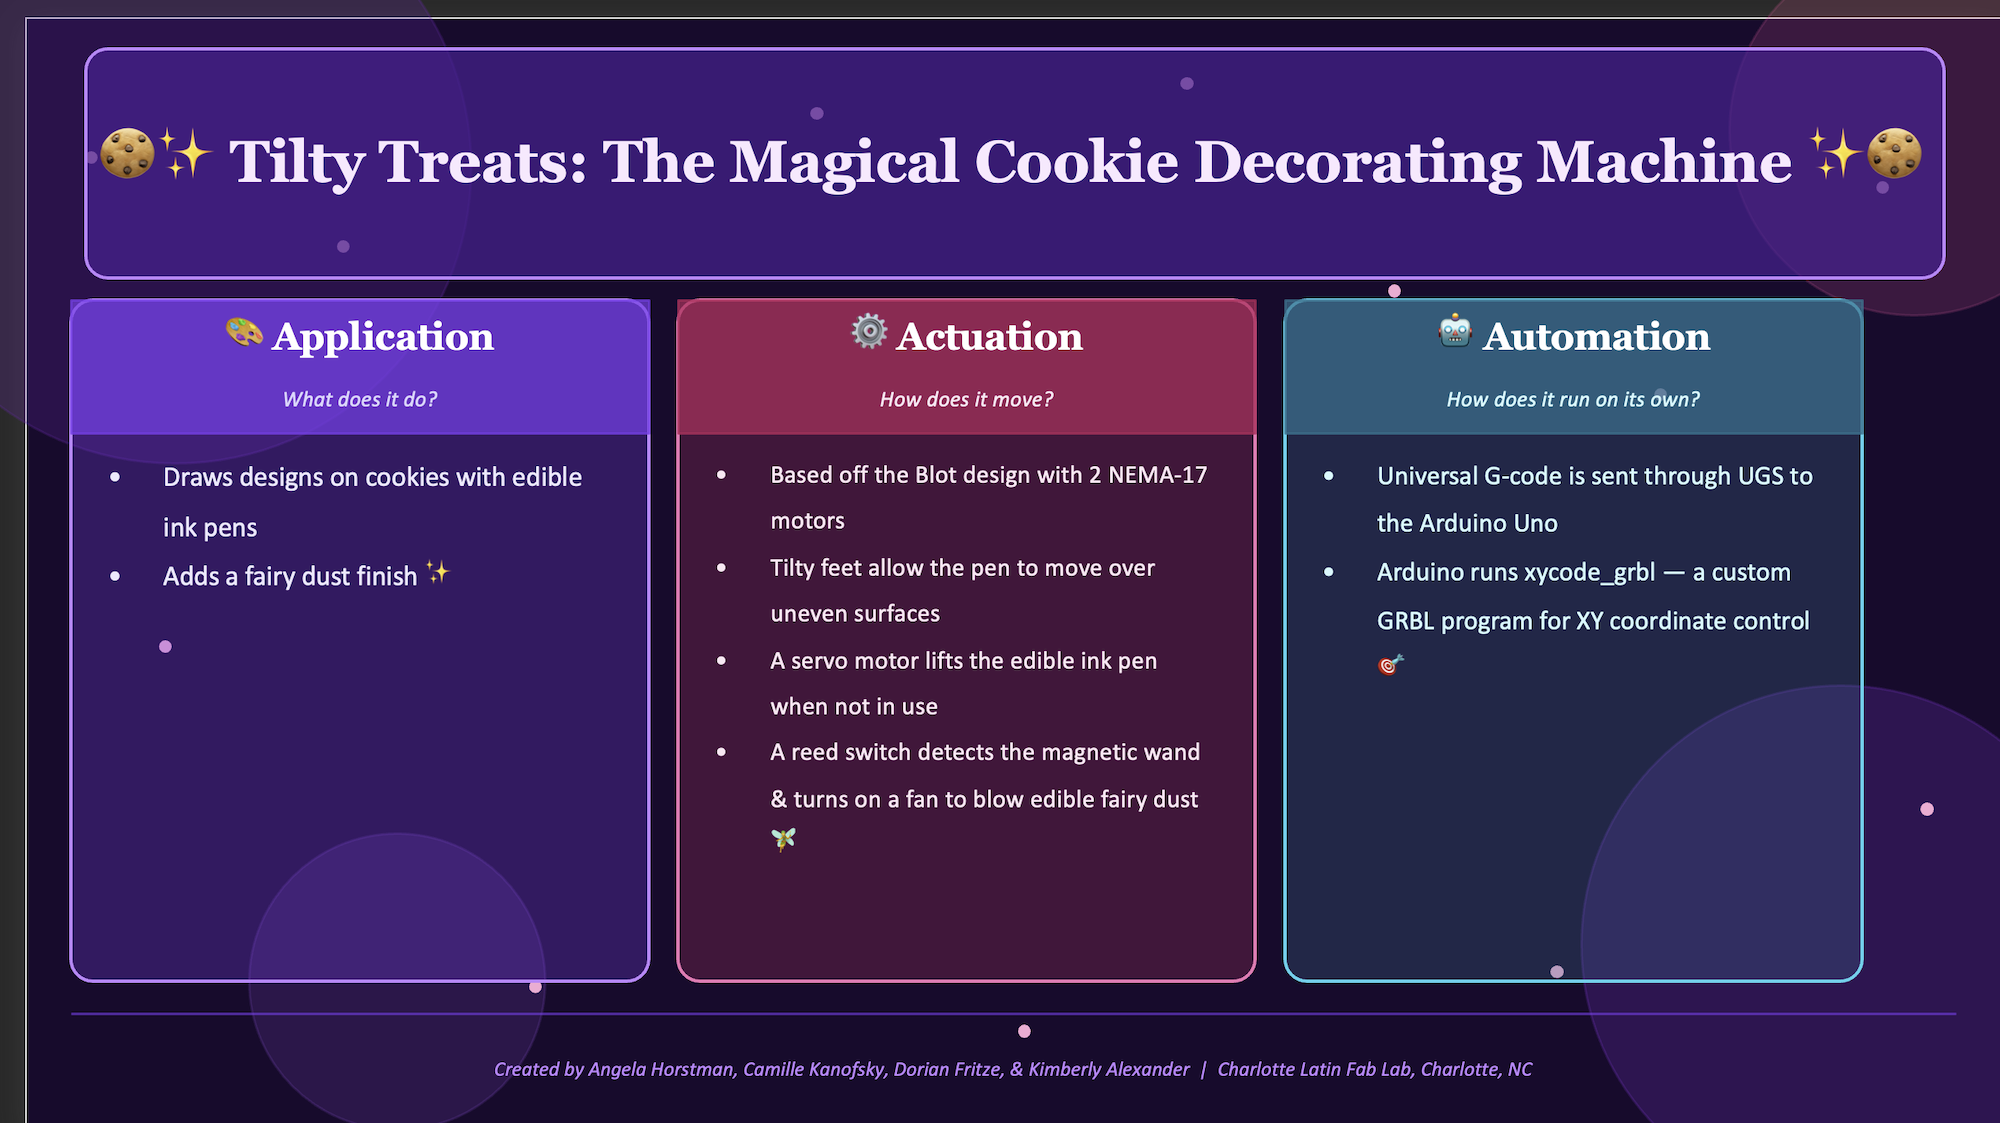
I continued to work on it to create our final:
Making our Video:
I cam up with a story board for our video after Mr. Dubick joked that all we needed was a little magic on our machine.
Props:
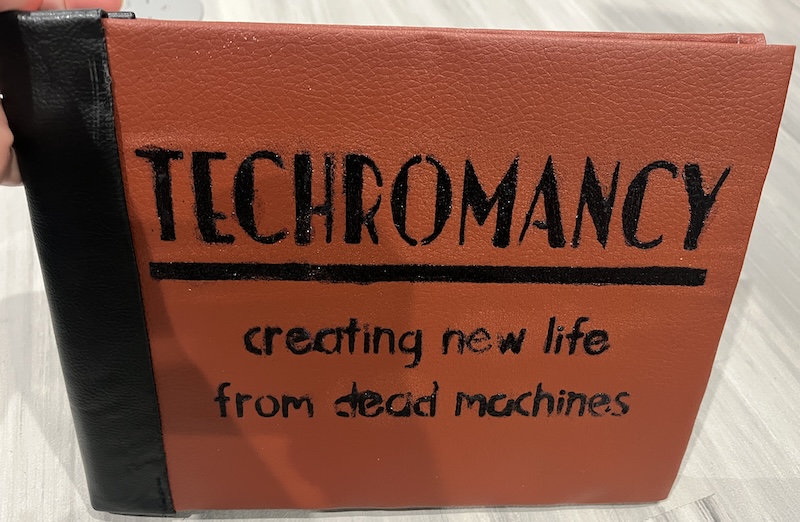
Books were made using my Cricut machine to cut stencils for the Titles.

I then applied a glue and embossing powder,
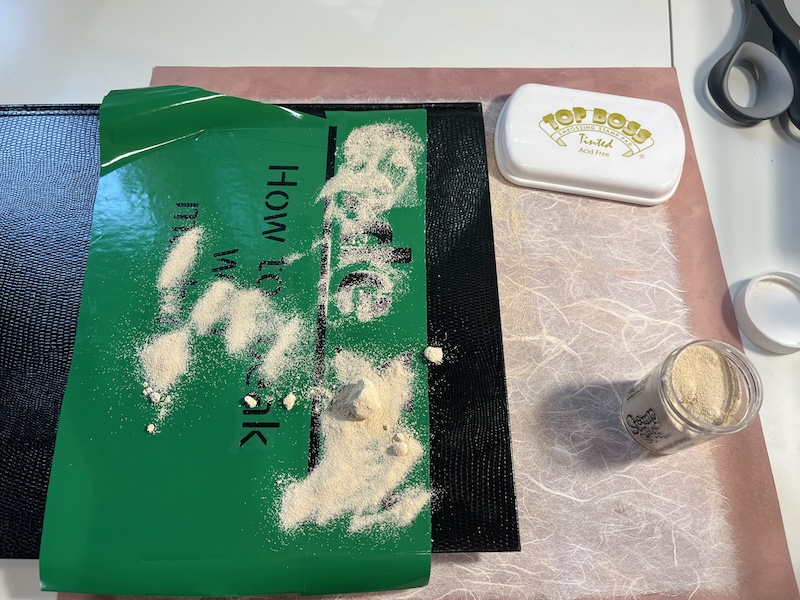
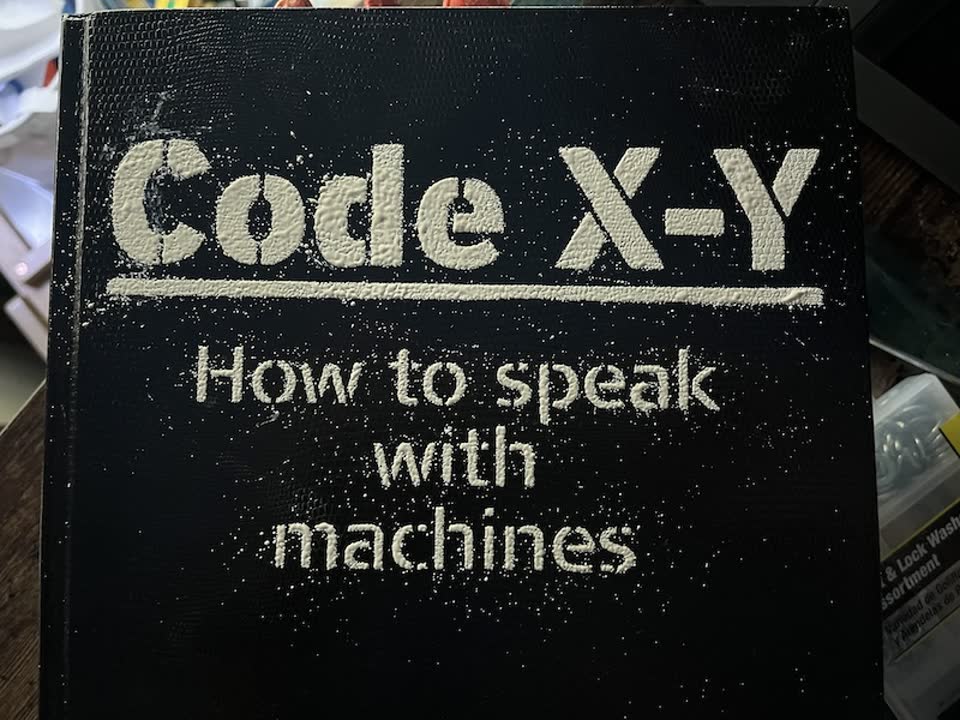
and melted the embossing powder with a heat gun, just like soldering paste. To make our:
Code X-Y spell book
Cookbook
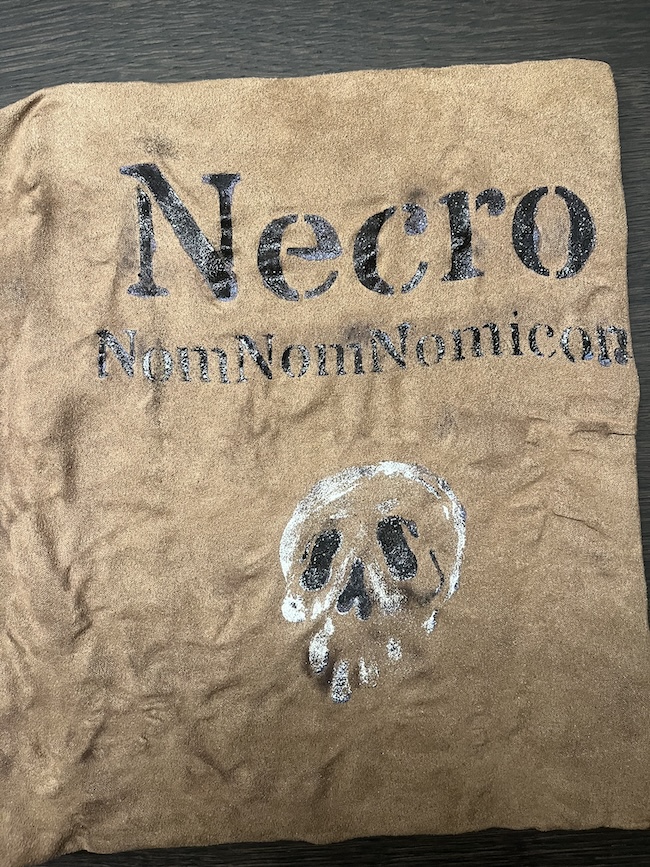
and Techromancy spellbook
The kitchen area in the video fetured my week 7 cabinet.
Angela 3D printed the scrying crystal.