Applications and Implications
link to Fab Academy class links
We were given this terminal command to compress our videos for this week.
ffmpeg -i input.mov \
-ss 0.0 -to 10.0 \
-vf "scale=1920:1080" -r 25 \
-c:v libx264 -profile:v high -level 4.1 -pix_fmt yuv420p \
-preset medium -crf 26 \
-movflags +faststart \
-c:a aac -b:a 192k \
output.mp4
I uploaded the code to Claude, and asked it to explain the code to me. My compression program works really well, but I needed 1080p and mine makes it 720p. I could have used an altered version of the code on my original, but I decided that having the compressed file enlarged would probably make a smaller file than the original compressed to 1080p. I also altered the code so that I would not crop my length.
For my final video use the same code, but remove
-ss 0.0 -to 10.0 \
Final Project Slide
Final Project Video Teaser
Individual assignment:
Propose a final project masterpiece that integrates the range of units covered
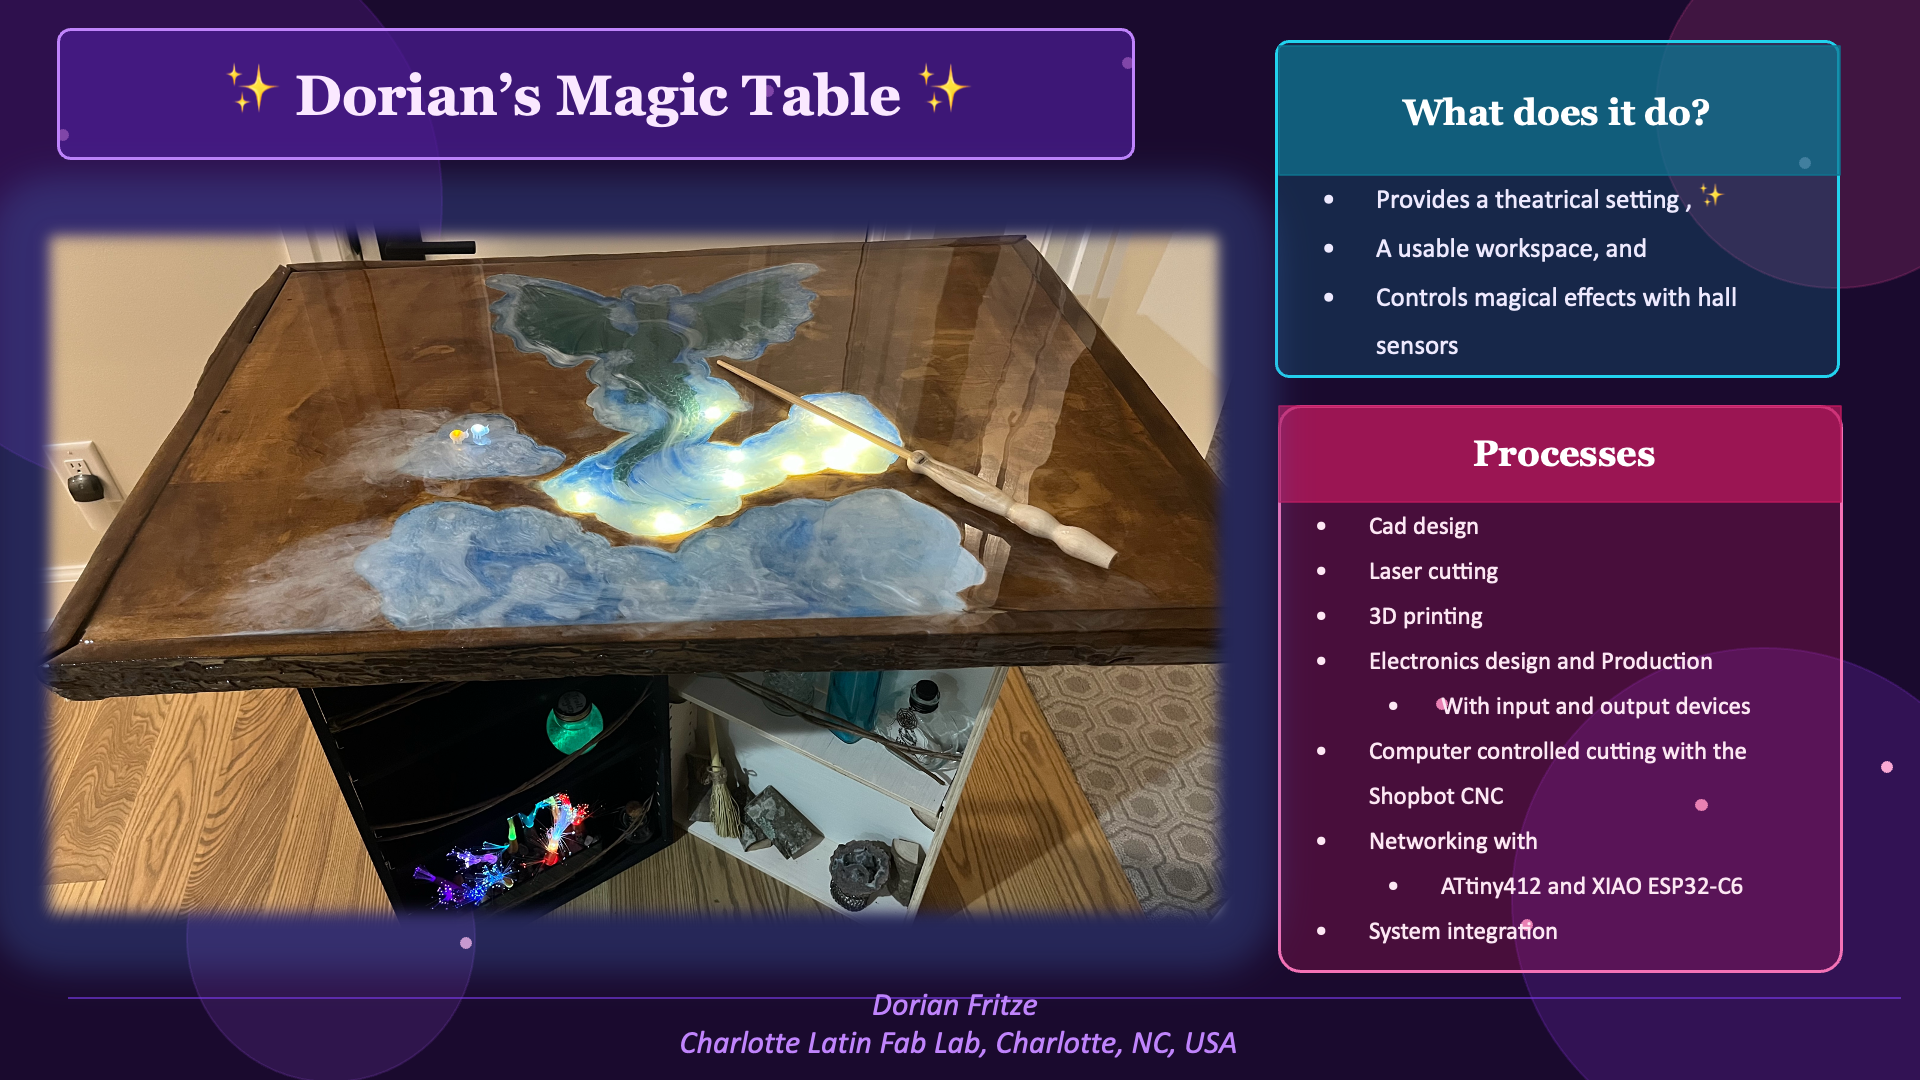
Dorian's Magic Table! an interactive table for my magic shows that showcases the wonder of science
What does it do?
- it is an interactive showpiece, and work table that uses hall sensors to trigger magical effects
Who's done what beforehand?
- I have seen many touch tables, but not hall sensor tables. However, the principle is similar.
Smart table - interactive LED table - near disaster! by 120 Woodcraft shows an interactive LED table that uses proximity sensors. I did not want to use proximity sensors because everyone could set them off, but I liked the way the components were integrated.
What did you design?
-
CNC cutting files
- parametric cabinet
- routered table top
-
3D files
- dragon inlay
- sensor covers
- wireless led bugs
- creature cadge
-
Electronic design: pcbs
- ATtiny412 Node board
- XIAO esp32-C6 Teacher board
- RGB LED board
- Switch-2N3906 board
What sources did you use?
- Fab Academy Open Time
- Getting Started in Electronics by Forrest M. Mims, III
- Claude.ai
- Meshy.ai
- [Smart table - interactive LED table - near disaster!](https://youtu.be/L82zj9mbCQY?si=9m2IxW27g9xMOyfh) by 120 Woodcraft shows an interactive LED table that uses proximity sensors.  I did not want to use proximity sensors because everyone could set them off, but I liked the way the components were integrated.
What materials and components were used?
- plywood
- sweet gum live edge scrap wood
- epoxy resin
- 100nF
- CP_Elec_100uF_Panasonic_EEE-FN1E101UL
- LED_RGB_CreeLED_PLCC4
- Conn_Header_JST_PH_1x04_P2mm_Vertical_SMD
- Conn_USB_C_Socket_PowerOnly
- 4.7K
- 150R
- 5.1K
- Sensor_HallEffect_Analog_A1324LLHLT-T
- ATtiny412-SS
- XIAO ESP32-C6
- TVS0500DRV
- wire
- lever nuts
- cable clamps
- liquid electrical tape
- pcb boards
- solder
- solder paste
- flux
- led fairy lights
- transformer and wireless leds
- wood pla
- clear pla
- FTDI programmer
Where did they come from?
- the Fab Lab
- DigiKey
- Amazon
- Michael's Arts and Craft Store
- my random supplies
How much did they cost?
- about $171 + tax
What parts and systems were made?
- parametric cabinet
- routered table top
- dragon inlay
- sensor covers
- wireless led bugs
- creature cadge
- pcbs
    - ATtiny412 Node board
    - XIAO esp32-C6 Teacher board
    - RGB LED board
    - Switch-2N3906 board
What processes were used?
- Project Management
    - website design and documentation
    - Post-it Kanban Board

- CAD
    - Fusion360
    - TinkerCad
    - CorelDraw

- Computer controlled cutting
    - Epilogue Laser engraver (bottom)
    - Cricut vinyl cutter stencils for props

- Embedded Programming
    - Arduino IDE 2 for programs to connect inputs and outputs

- 3D printing
    - dragon inlay
    - sensor caps
    - bugs
    - creature cage
    - magical plants

- Electronics
    - design with KiCad

- Computer Controlled Machining
    - Shopbot CNC to mill top, and cabinets

- Electronics Production
    - milling PCBs with Carvera

- Inputs
    - hall sensors

- Outputs
    - LEDs both simple and RGB
    - Transformer for wireless transfer


- Networking
    - XIAO ESP32-C6 to ATtiny412s

- Mechanical Design
    - (Fizzbit)

- Molding and Casting
    - mold and cast a candle
    - used resin to fill inlay

- Interface and Application Programming
    - Arduino IDE 2 serial monitor

- System Integration
    - wire management inside table top, (and between cabinet backs)

- Embroidery
    - (costume embellishment)
What questions were answered?
- so many question on how things work
- How to program an ATtiny412?
- With a FTDI breakout board!
- How to communicate between an ESP32-C6 Teacher and ATtiny412 nodes running on 5V?
- I2C communication through a BSS138 bi-directional Level Shifter
-
How do I connect my wall adaptor to power my project?
- Splice the wire, and connect to a LM2596 Buck Converter, but make sure to adjust the voltage before connecting to the table circuitry.
I am using an old AC adaptor that has been sitting around for 20 years, so it is not worth it to buy a connector that fits.
- How to program an ATtiny412?
What worked? What didn't?
Didn't
- milling details on plywood when limited on time

- connecting edges of top to hide plywood edges

- making whisps of clouds flowing over the carving onto the top, it looks bad

- quite a few pcb designs

    - check footprints and orientation

    - capacitors are important

    - JST connecters are great for the product, but not prototyping.

            - use terimial blocks (through hole screwed header connectors) for prototyping.  The screws keep coming loose, and the wires fall out
Did
- connecting through hole components from below kept the top of my pcb less crowded

- painting the carving so the epoxy can stay clear, and details can be seen.

- using batting and white mica powder to make clouds that hide the sensor caps

- 3D printing sensor caps to allow access into the carved part of the table

- my programing!

- my teacher board with lots of connections for a I2C bus, and common grounds and power

- my ATtiny412 student node design using the cut piece to support the sensor.
How was it evaluated?
- if it can make a circuit turn on using my magic wand that has a magnetic tip
    * yes it works!!

- modular circuit design that allows for future magic circuits to be easily added

    * absolutly! I switched out a student node the night before the presentation, and I easily reloaded the ESP32-C6 Teacher program at the FabLab to change the IP address for Processing

- looks good, fits in a magical setting, with no electronics visable to break the magic spell
    * yes, some are visable if you look, but that was helpful in troubleshooting.  There are 2 sensors caps that are currently in use, and can not be seen at all!  I had to add a red led to them so I could see if they were being triggered.
Bill of Material
Click here for my full BOM