Wildcard Week
link to Fab Academy class links
Individual assignment:
- Design and produce something with a digital fabrication process not covered in another assignment
Embroidery!
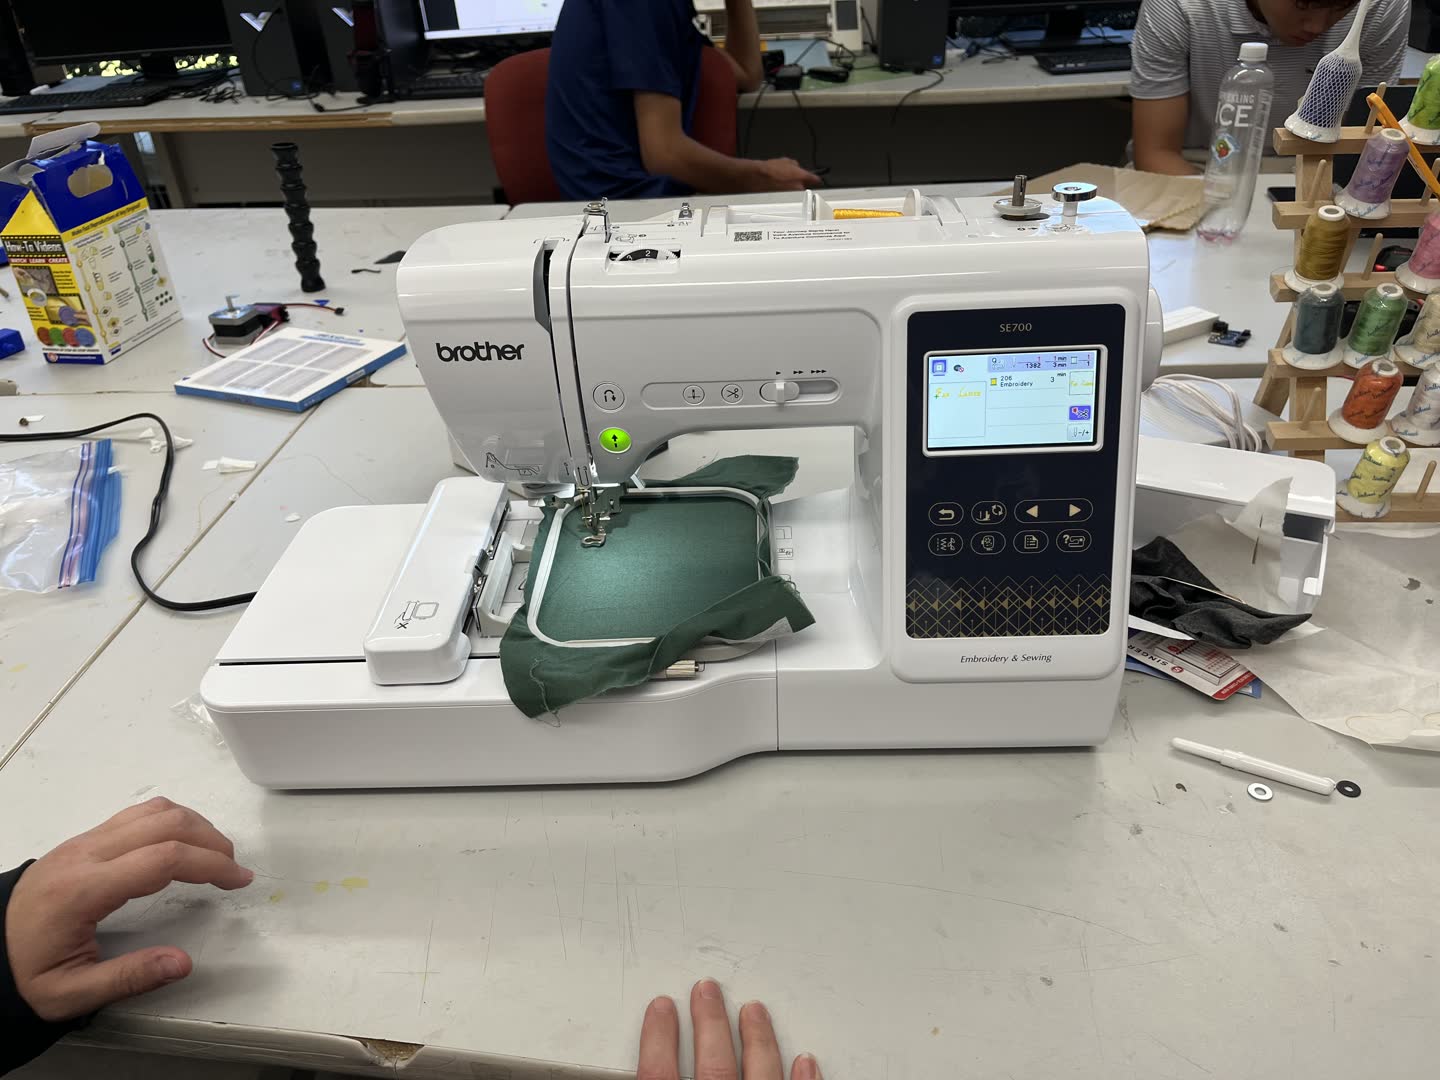
Our amazing group all wanted to learn how to use the Fab Lab's Brother SE7000 Embroidery & Sewing machine. So we worked together to do a simple text design using software on the sewing machine. Then each of us created files to make on our own.
I have used regular sewing machines for years, but never an embroidery machine. I have been looking forward to playing with the Lab's machine for months now. I love that sewing/embroidery is recognized as part of an engineering lab when it has stereotypically been seen as a Home-Economics class tool. I feel like it is an approachable artistic foothold for those who do not think of themselves engineers. In fact, one of our art teachers was excited to learn the embroidery machine, and joined us. She is now hoping to take the class in 2 years.
We were lucky to be able to phone my mother for help as we set up the machine. She recently got a Brother embroidery machine, and has made simple designs using the machine's internal software. I will be repaying the favor by teaching her how to make custom designs.
Setting up the machine
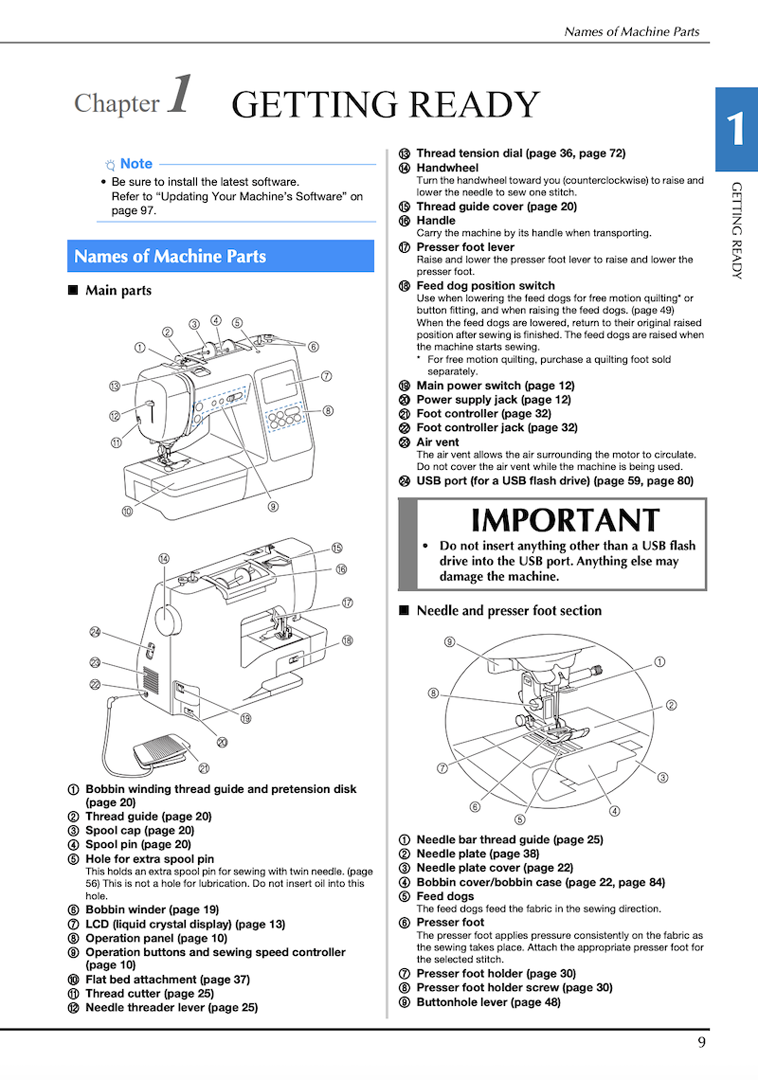
The Brother SE700 manual is linked here
Here is the machine parts diagram from page 9 of the manual for easy reference.
For embroidery the foot pedle is not used, so I did not plug it in.
Use 60 weight embroidery thread for the spool and bobbin.
Some machines use a lighter bobbin thread, and when we had a bobbin issue, we thought it was because our bobbin thread matched the spool. However, that is not the case with this machine.
Change the pressure foot to the embroidery foot "Q" by first pressing the back of the pressure foot holder to pop off the previous foot. There is a small needle clamp screw on the side of the pressure foot bar. Loosen it and attach the embroidery foot around the bar. Secure by tightening the screw.
Check that your needle is straight, and the correct size.
To change the needle loosen the thumb screw that holds it in place. Remove the old needle, and replace with the a new universal needle that matches your fabric choice.
The flat side of the needle goes towards the back of the machine!
I used a 75/11 universal needle for embroidering the cotton fabric.
Make sure the spool thread feeds from behind, and has a cap larger then the spool diameter so that the thread does not get stuck.
Make sure your needle is in the highest position by rotating the large knob on the right side of the machine, and that the pressure foot is raised. The pressure foot lever is behind the needle.
This machine has easy to follow images printed on the machine for each step of threading the needle. It is very similar to Singer and Viking machine threading until the automatic threader (steps 7 & 8).
To use the automatic threader, guide the thread through the guide disk (step 7), and cut on the thread cutter on the left side of the machine (step 8). Then push down on the lever on the left side of the machine to thread the needle. Slowly release the lever, and the thread should be poking through. Grab the loop, and pull the end all the way through the needle.
Place the bobbin in the bobbin holder under the needle. The bobbin thread should form the letter "P" so that the thread is unwinding counter clockwise. Guide the thread through as directed on the machine. Hold the end of the upper thread and either push the needle up/down button twice or manually rotate the wheel on the right of the machine until the needle goes down and up. The upper thread will catch the bobbin thread. Pull the bobbin thread out a bit so that there is about 2 inches of lead thread behind the needle. This keeps the threads from knotting on themselves.
Replace the flat bed attachment with the embroidery unit. There is a clip under the left side.
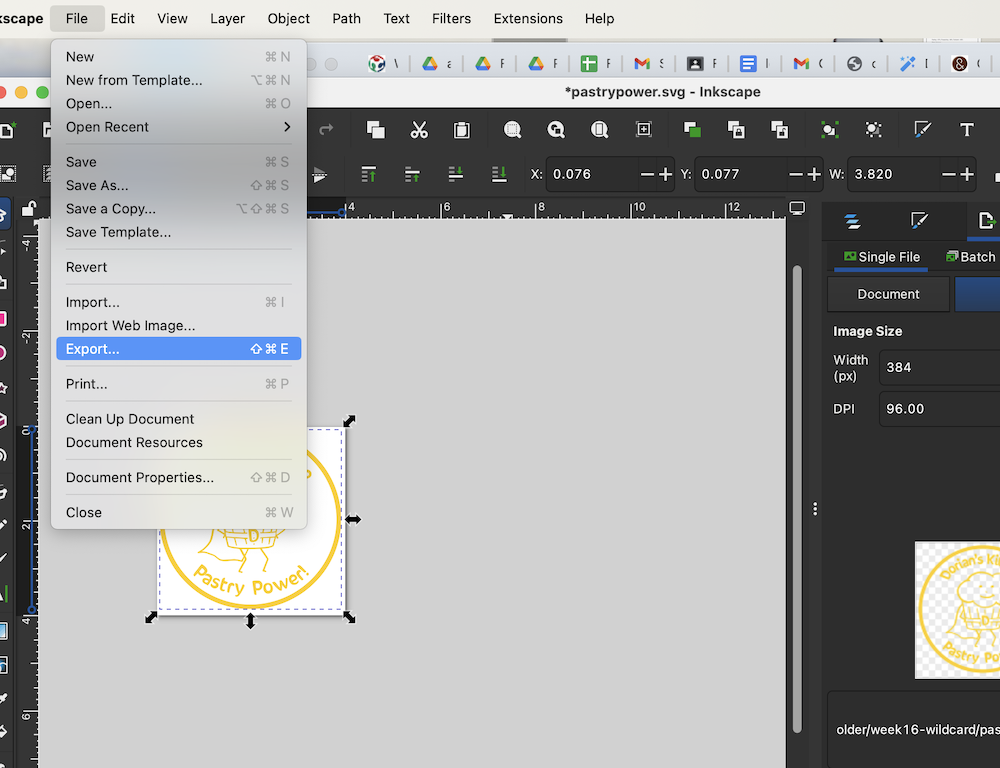
Creating a design in Inkscape
I downloaded Inkscape. To download Inkscape click here
I then followed this tutorial to download the inkstitch extention.
Make sure to close and reopen Inkscape after installing an extention.
How To Install Extensions In Inkscape
This tutorial from Teach Me 3DP was very helpful. She clearly walks you through each step.
Embroidery with Inkscape: The Fill Stitch
Create a new document, and change the properties to match your hoop size.
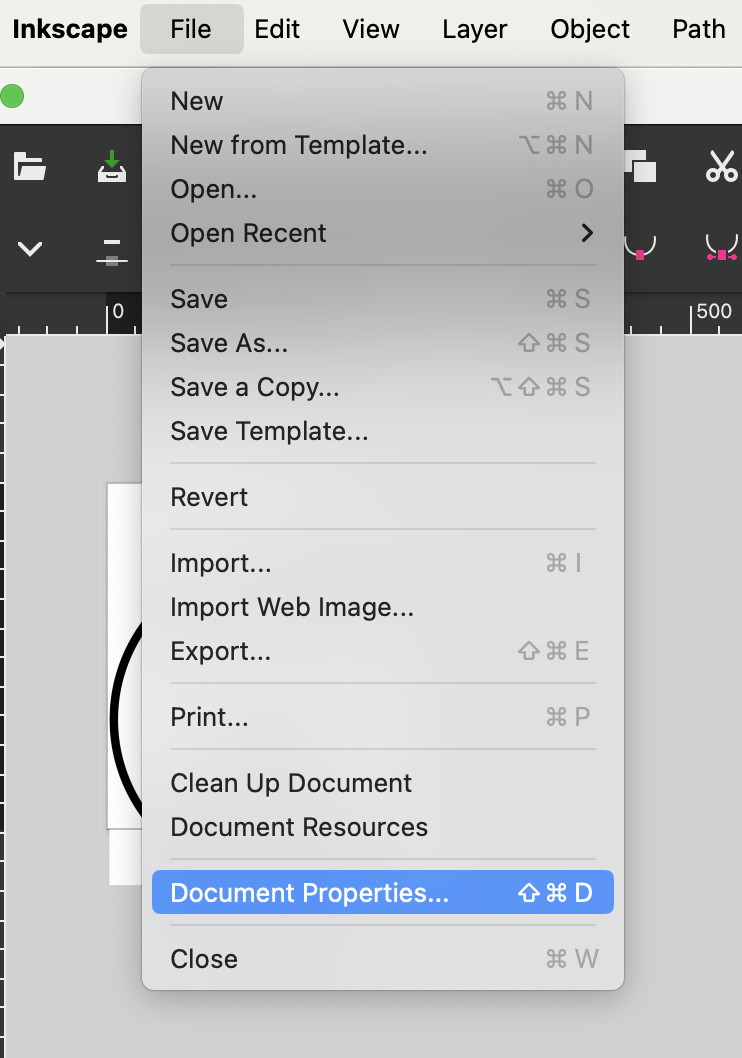
I set my properties to 4"x4". I did not have the machine in front of me, and I knew that 4"x4" was smaller then the hoop size. I figured I could then adjust as needed on the machine. I was wrong, as the video says, the size you set in document properties will be what the machine thinks is your hoop size. Luckily, since 4"x4" was smaller then my hoop size I was fine. I just printed in the center of the hoop, and had plenty of room.
Import your image:
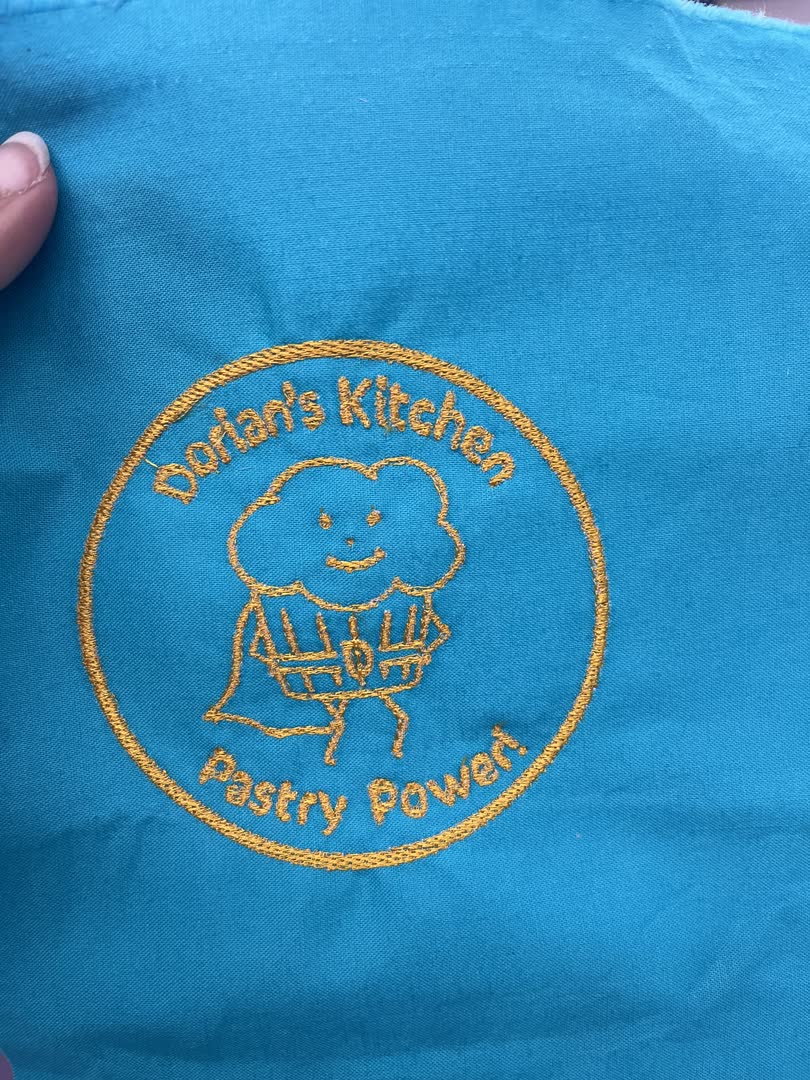
I imported my old logo from when I had a bakery business. You can import an svg or jpeg.

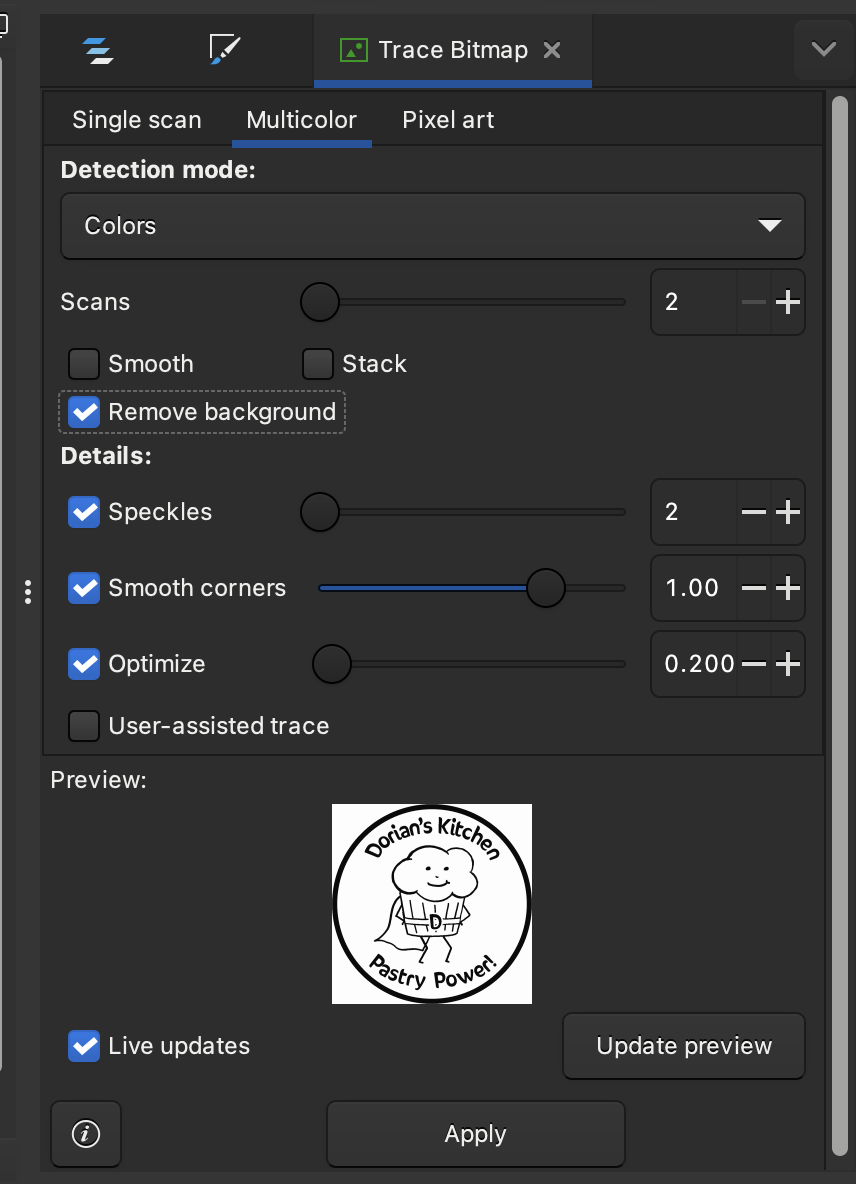
Trace the bitmap through menu Path -> trace bitmap
I chose mulitcolor even though I only wanted 1 color thread. I filled in 2 for scans which means 1 color scan for the image, and 1 color scan for the background.
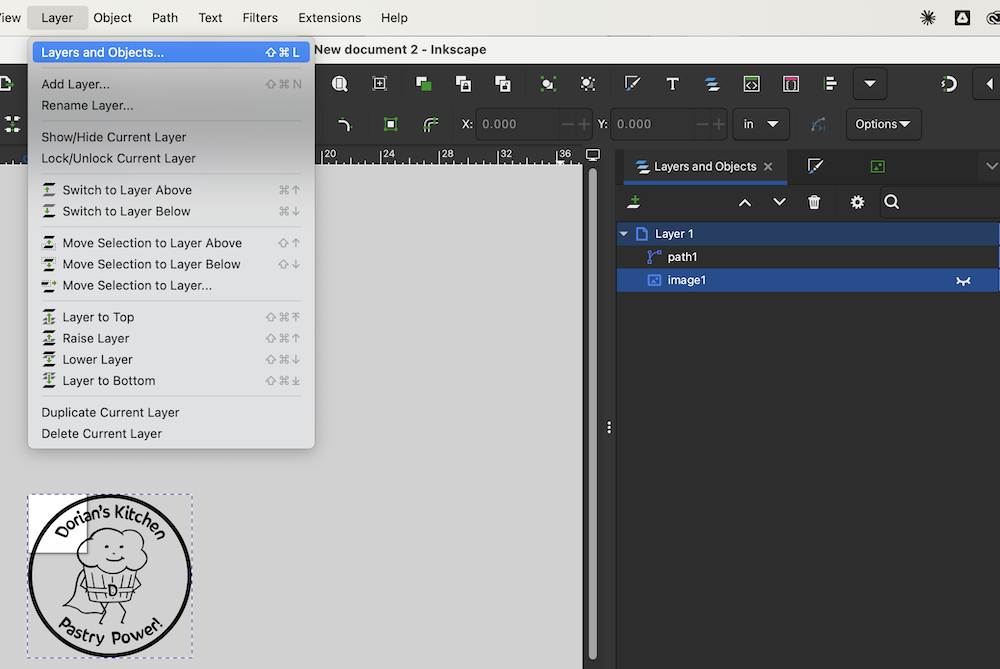
Next I went to layers and objects. I hid the image, which was the starting image, and could then see the path clearly. I then changed the color to be the thread color I wanted. Yellow, it matches my mixer!
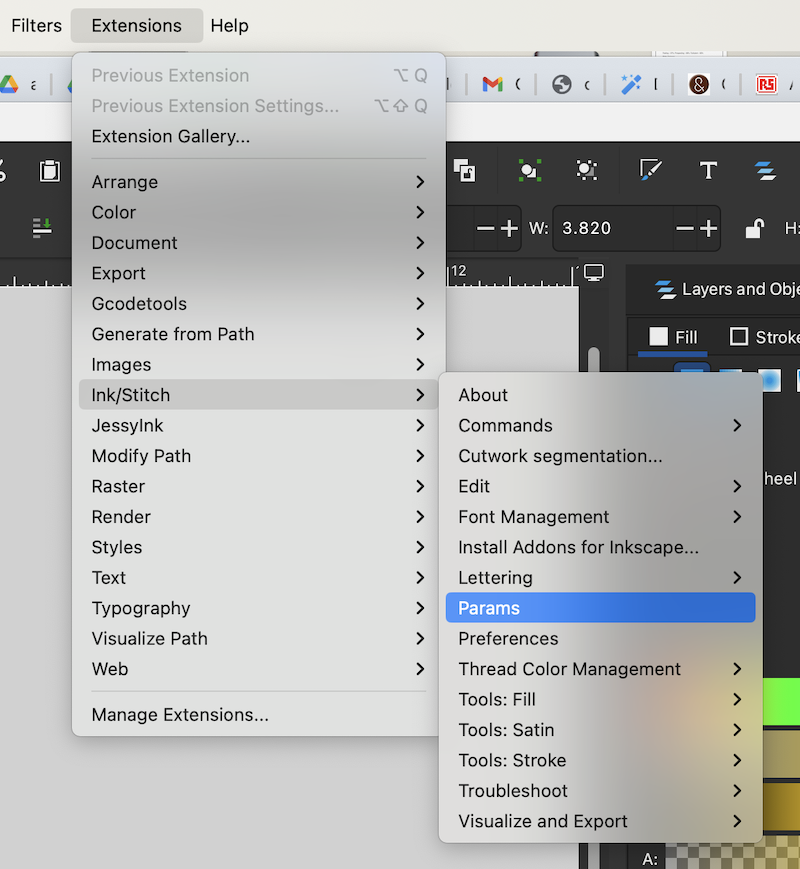
To see a preview, and make adjustments I went to extensions -> ink/stitch -> params.
At first the ink/stitch option was not visable. I needed to close the program, and reopen it to load that extension since I had just downloaded it.
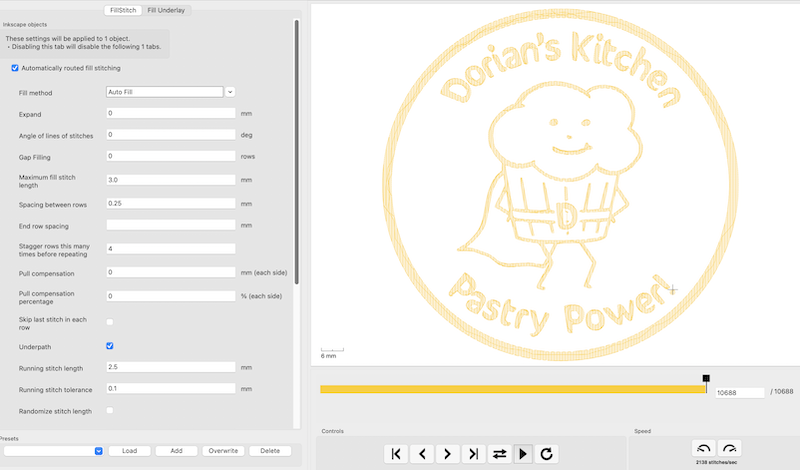
I tried out different fills, but decided to use the autofill.
Autofill:
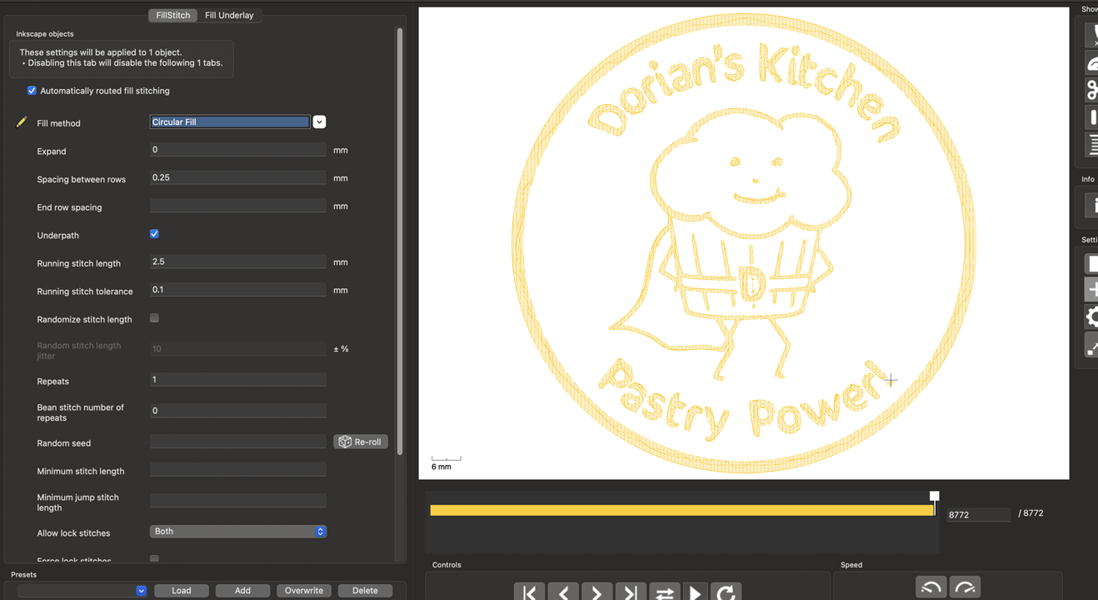
Circular fill:
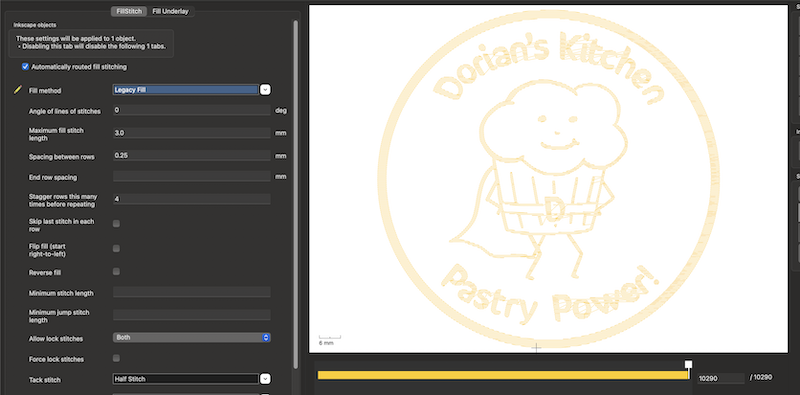
Legacy fill:
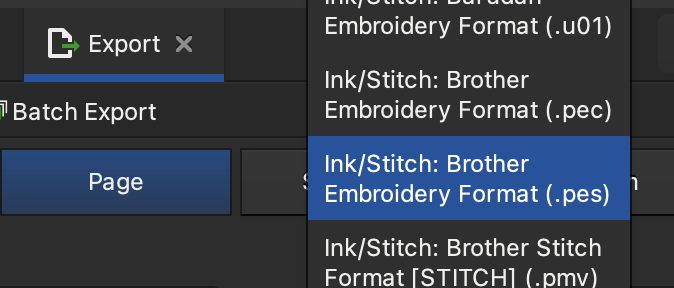
Export the design as a .pes for brother embroidery machines:
Preparing material
Make sure to iron on a backing, interface, to your fabric. We used Pellon medium weight fusable interfacing. Click here for information sheet
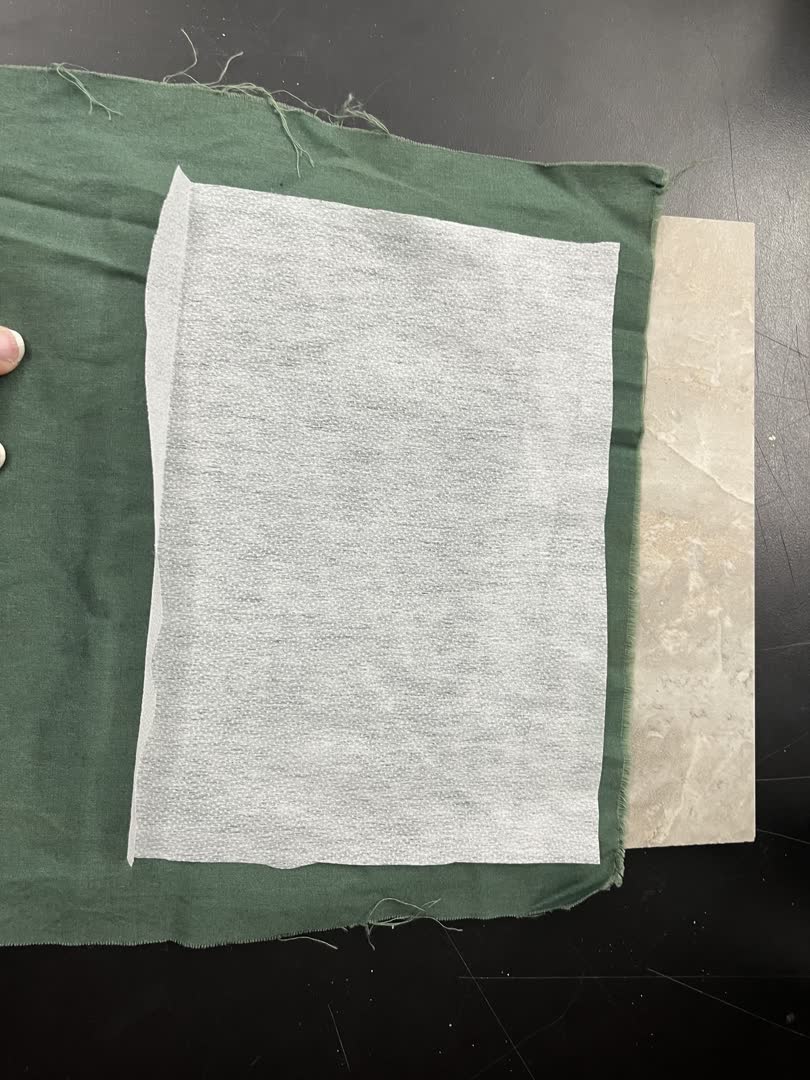
Fusable interfacing irons onto your project, and provides structural support to prevent puckering in your fabric from the multiple stitches pulling your fabric when embroidering. We probably should have used a thicker interface, but I had this at my house. There are also dissolvable interfacing options so that the backing disappears in the wash, leaving a clean embroidered area on both sides of the fabric.
For this test I cut my fabric to just over the embroidery hoop size. When embroidering something like a shirt, you only cut the interfacing to about a half inch larger then the embroidery ring to give you clearance to tighten the fabric in the ring.
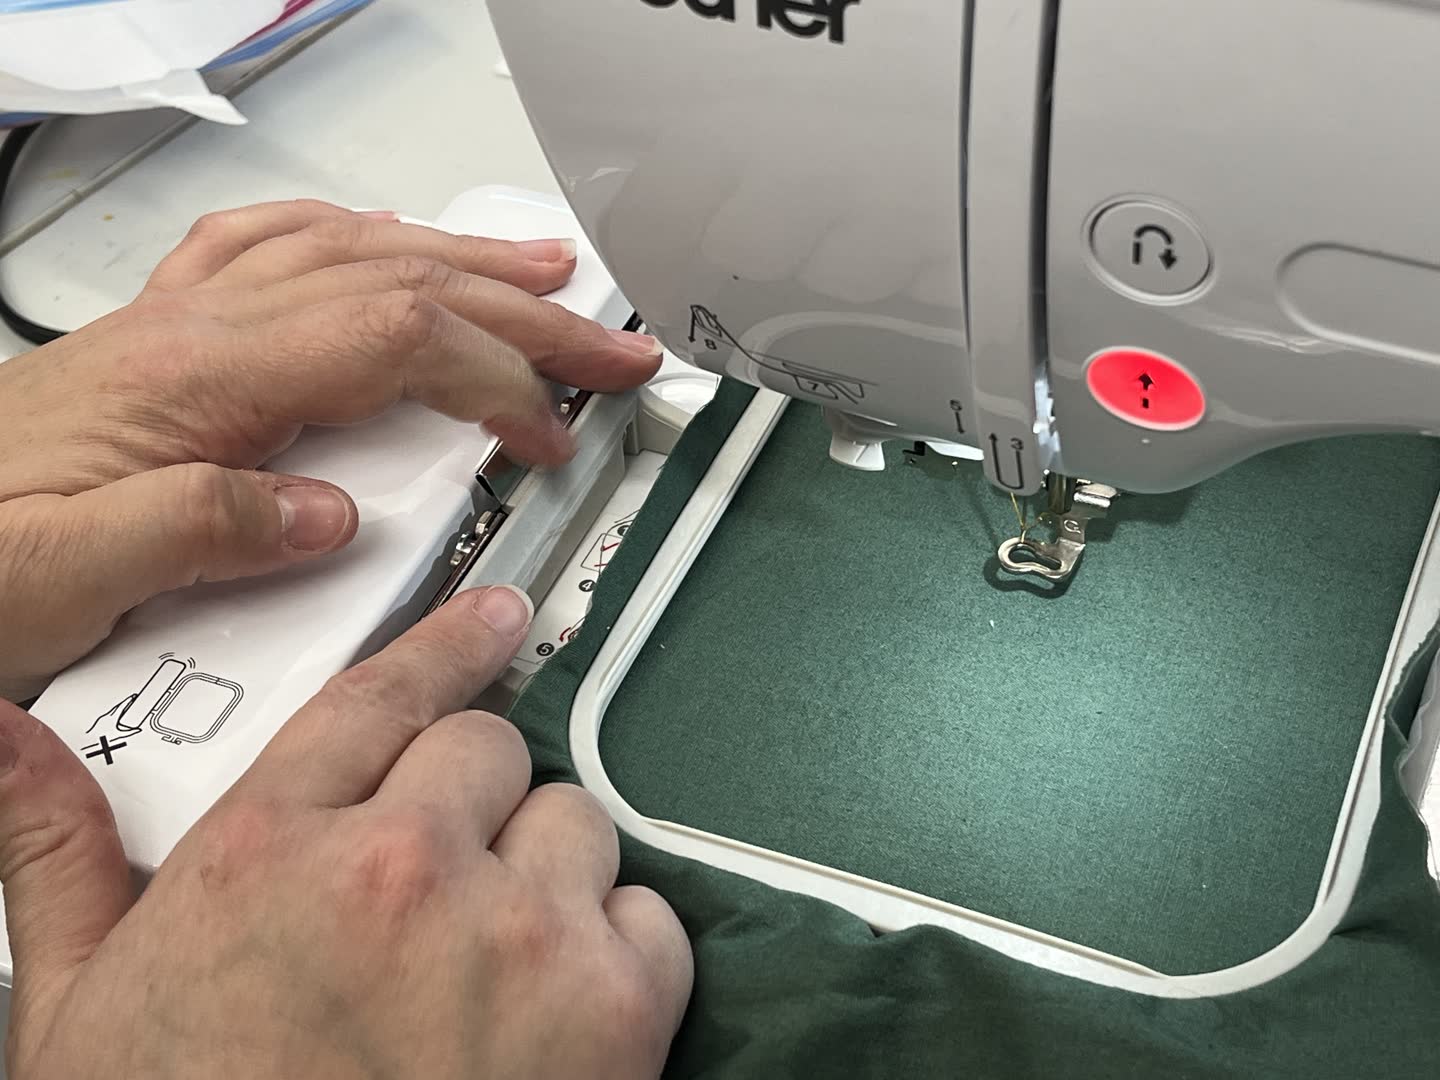
Open the embroidery ring into 2 pieces. Place your fabric over the bottom piece, and push the top piece into the bottom. Then secure the rings together tightly with the set screw. Pull the fabric along the edge of the ring as you go to remove any wrinkles that form. your fabric on the ring, and
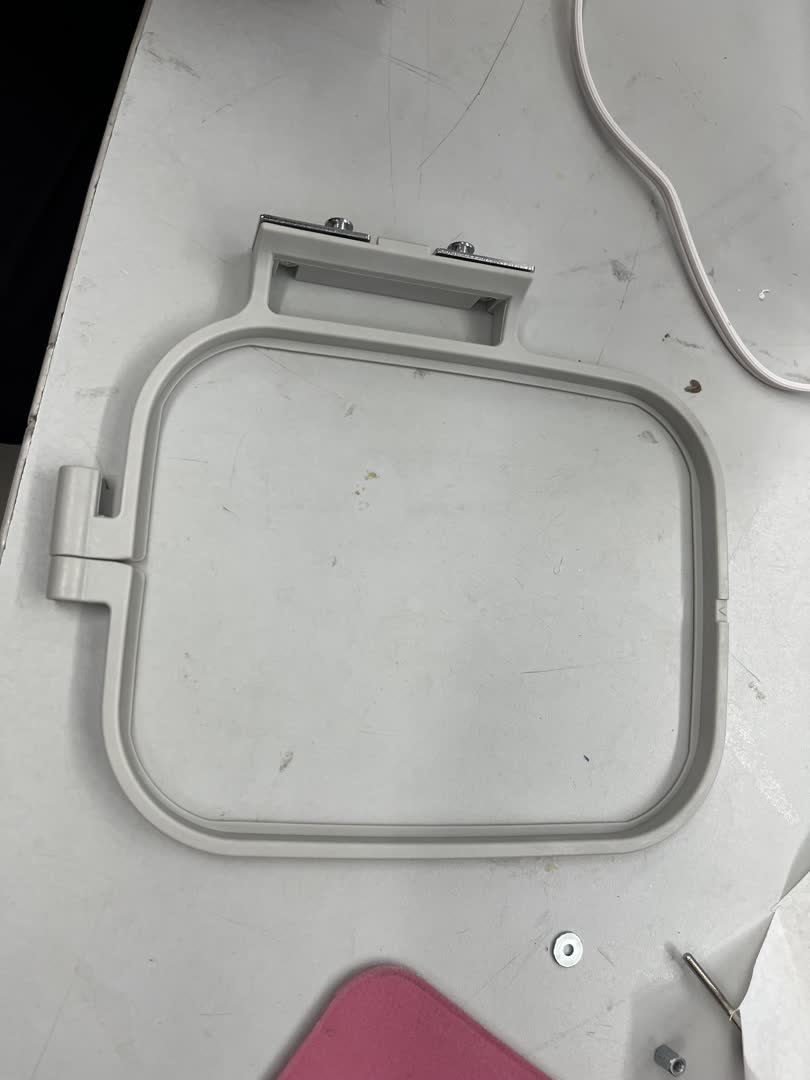
Slide the embroidery hoop attachment onto the embroidery arm of the sewing machine.
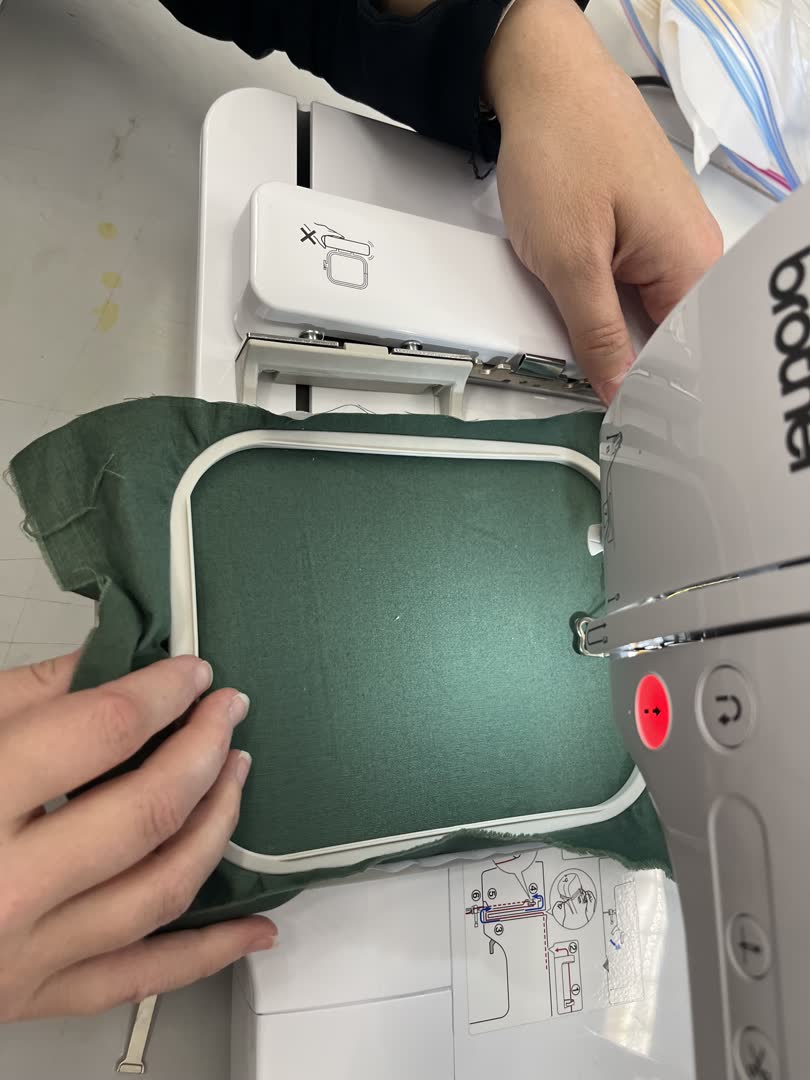
Push to secure into place.
Setting up your design
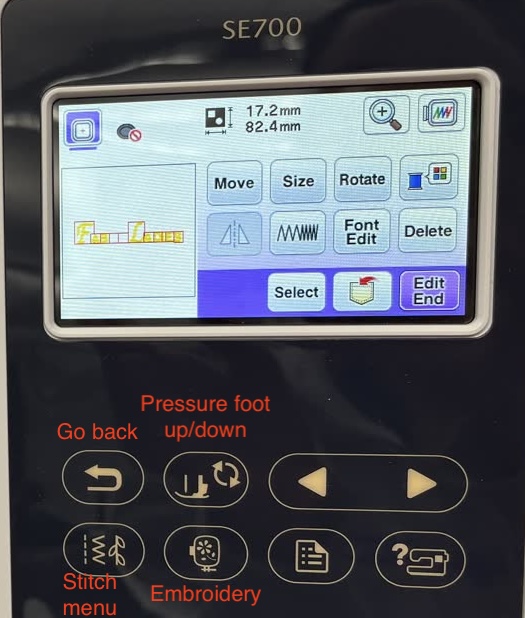
The menu on the touch screen display is where you access the features built into the machine.
Angela played with the fonts as I prepared the fabric. She created a basic embroidery file directly on the sewing machine.
Choose the Move button to shift the center point of your design.

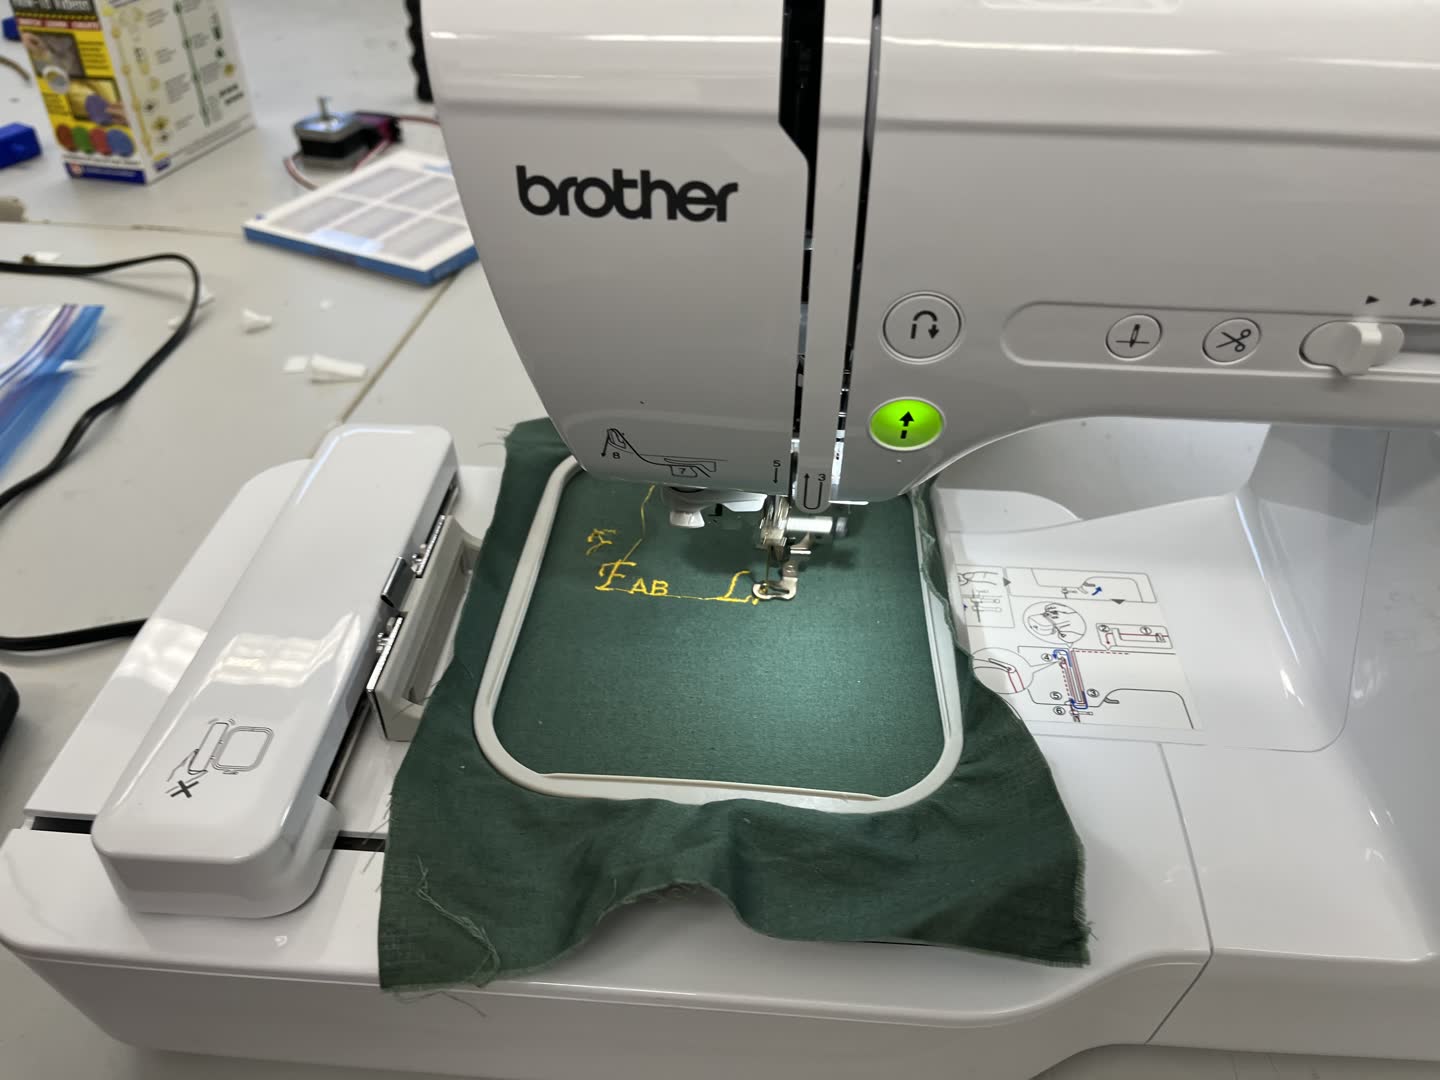
When we tried to start stitching there was an error.
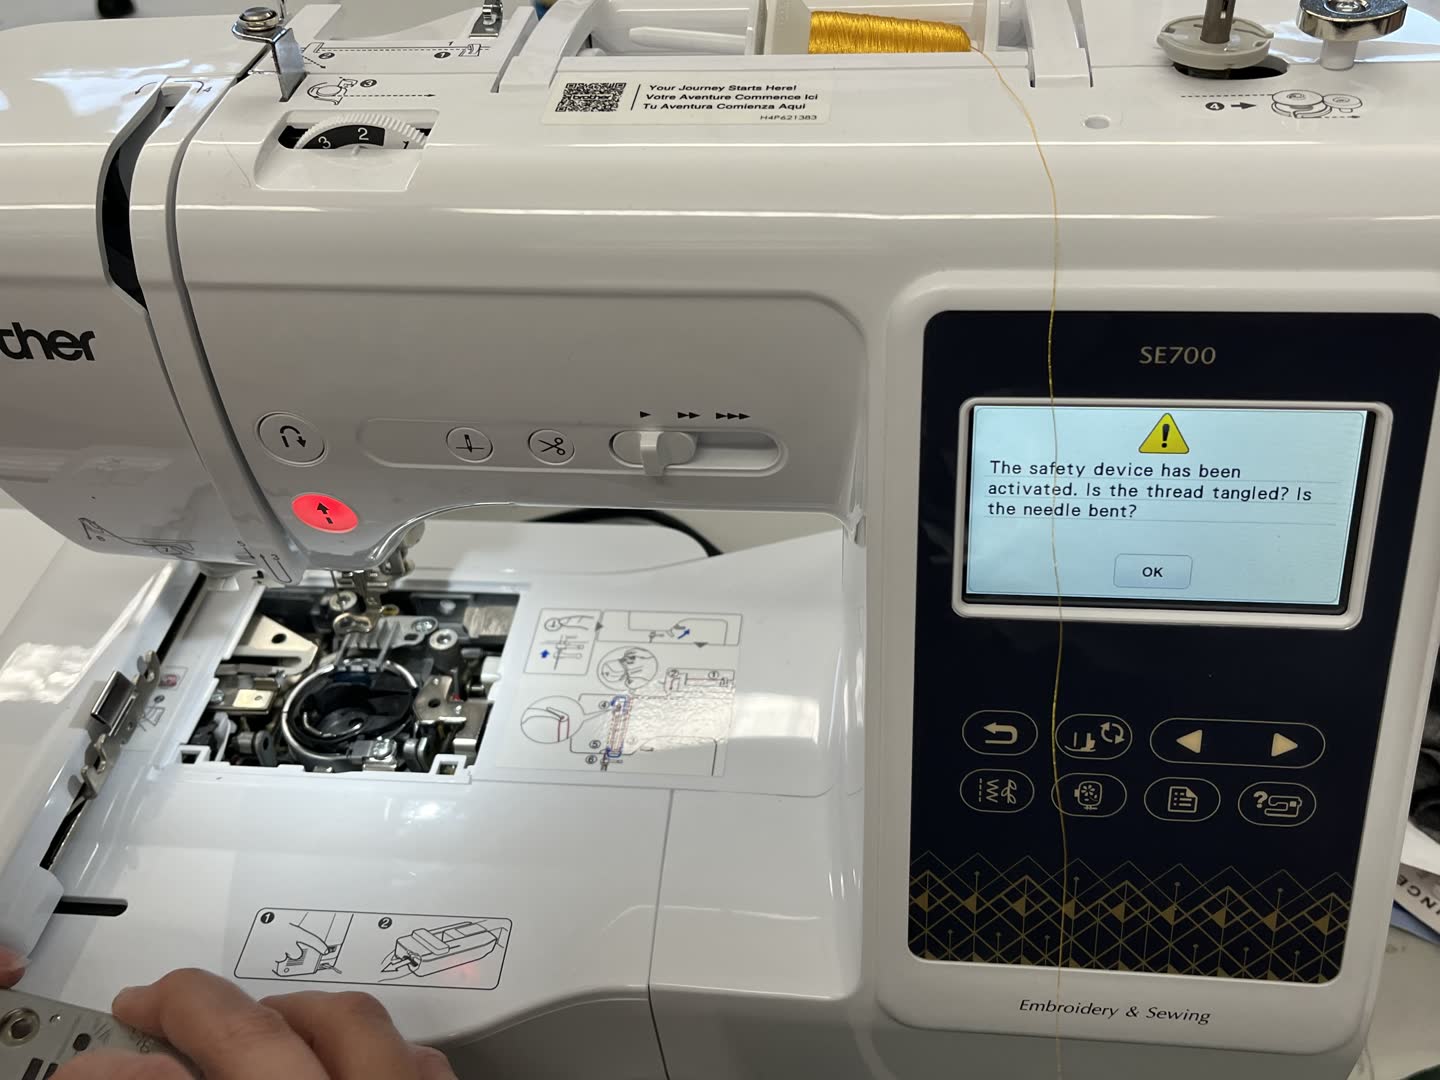
I didn't trust the needle to be straight so we changed it out, and tried again.
First try:
The machine starts slow then picked up speed. Then it got stuck!
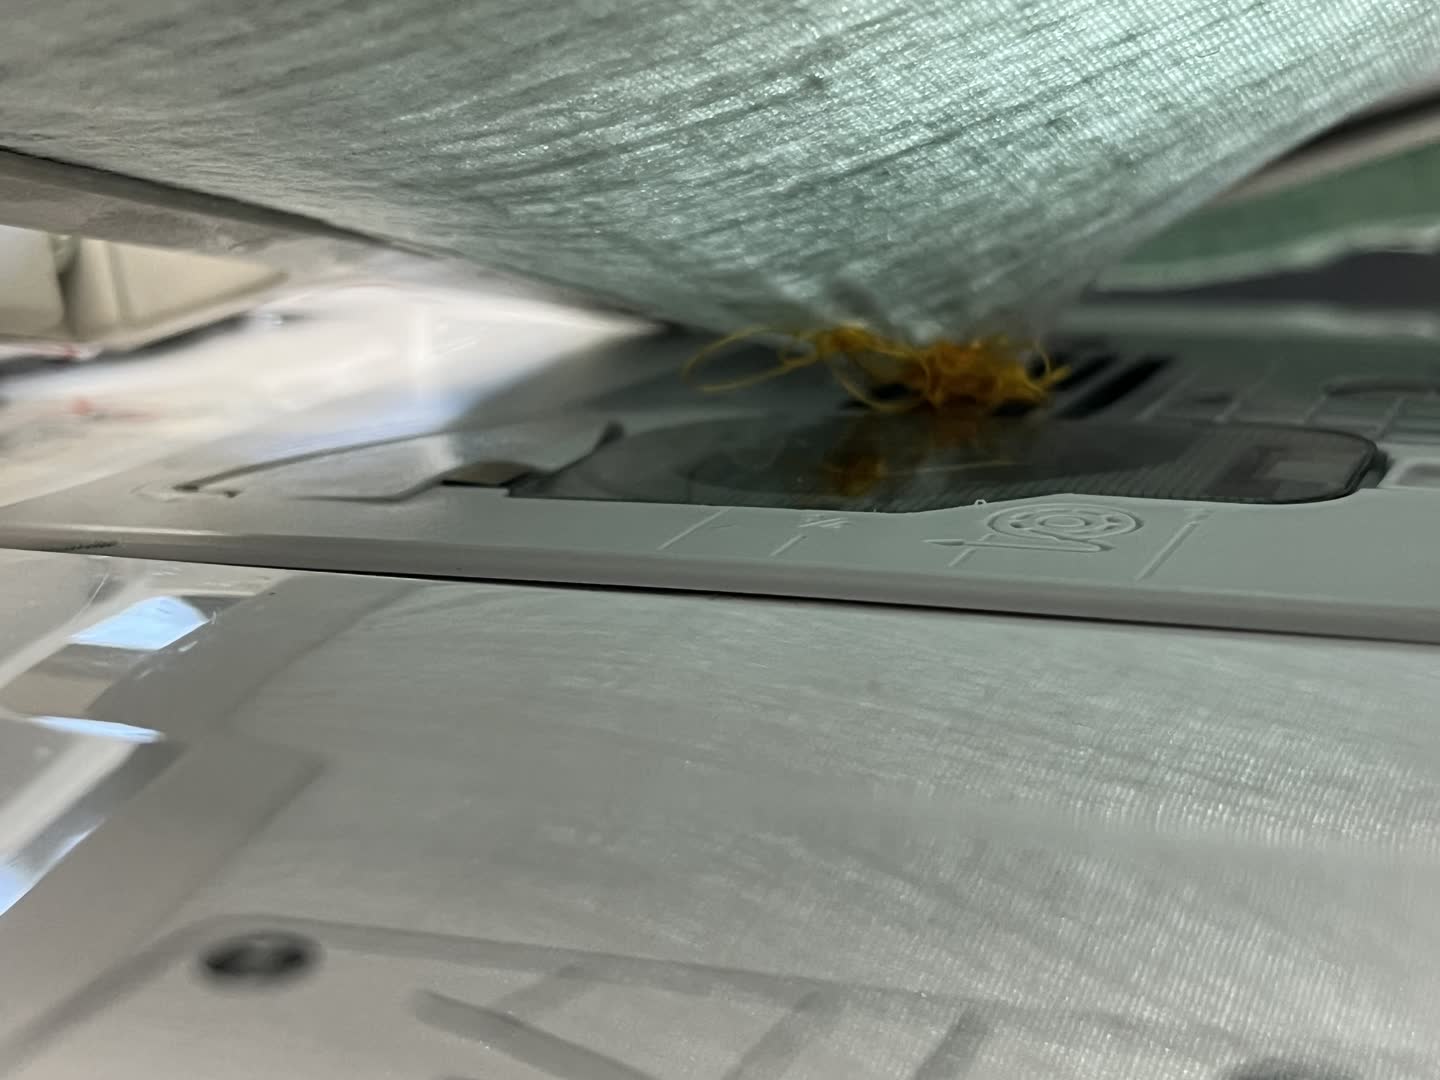
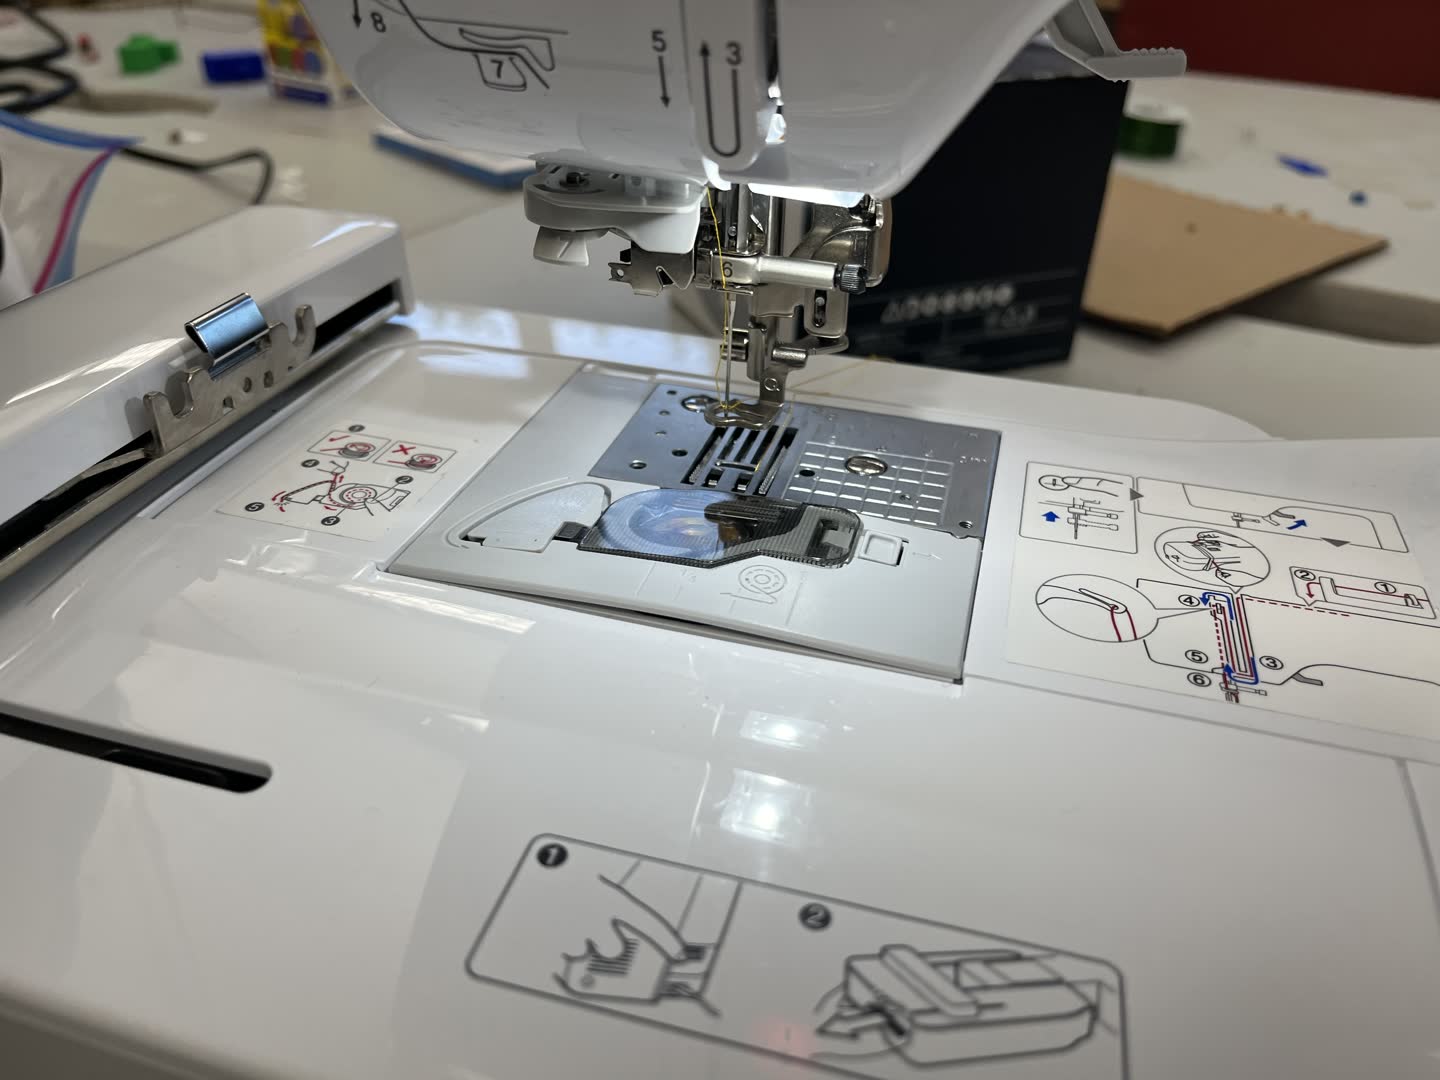
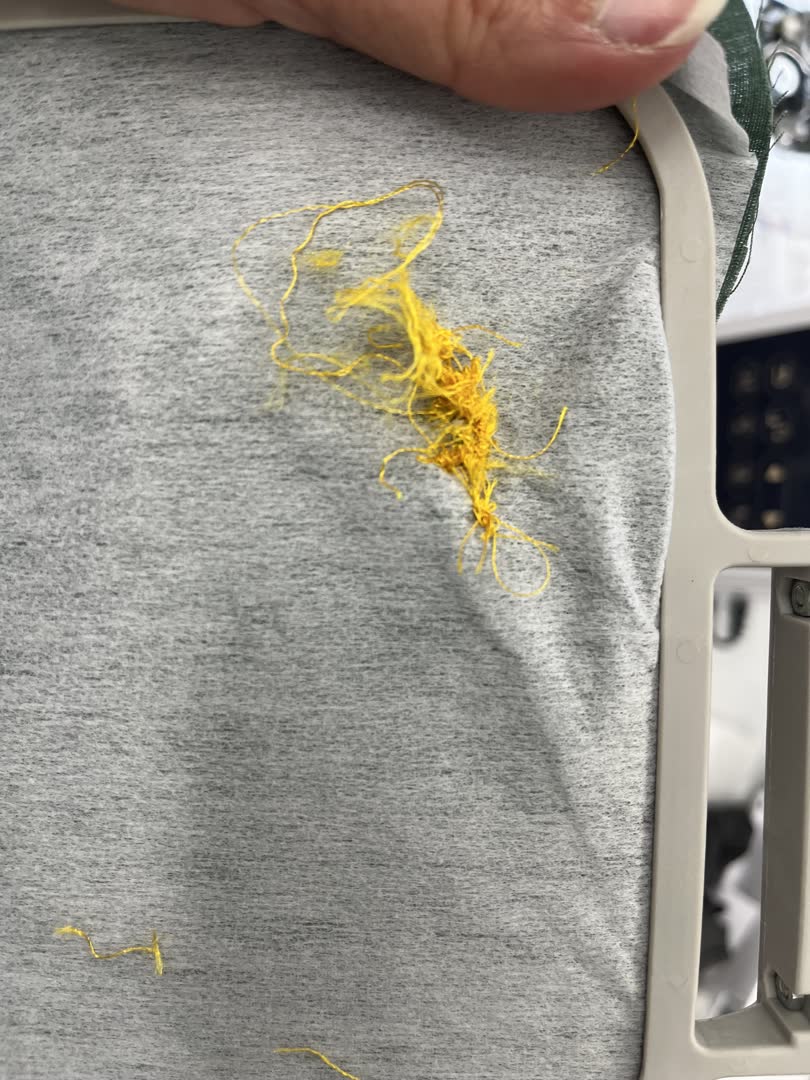
After trimming the thread sticking the fabric to the machine, we could see how tangled the bobbin thread had gotten.
This is the back of the material.
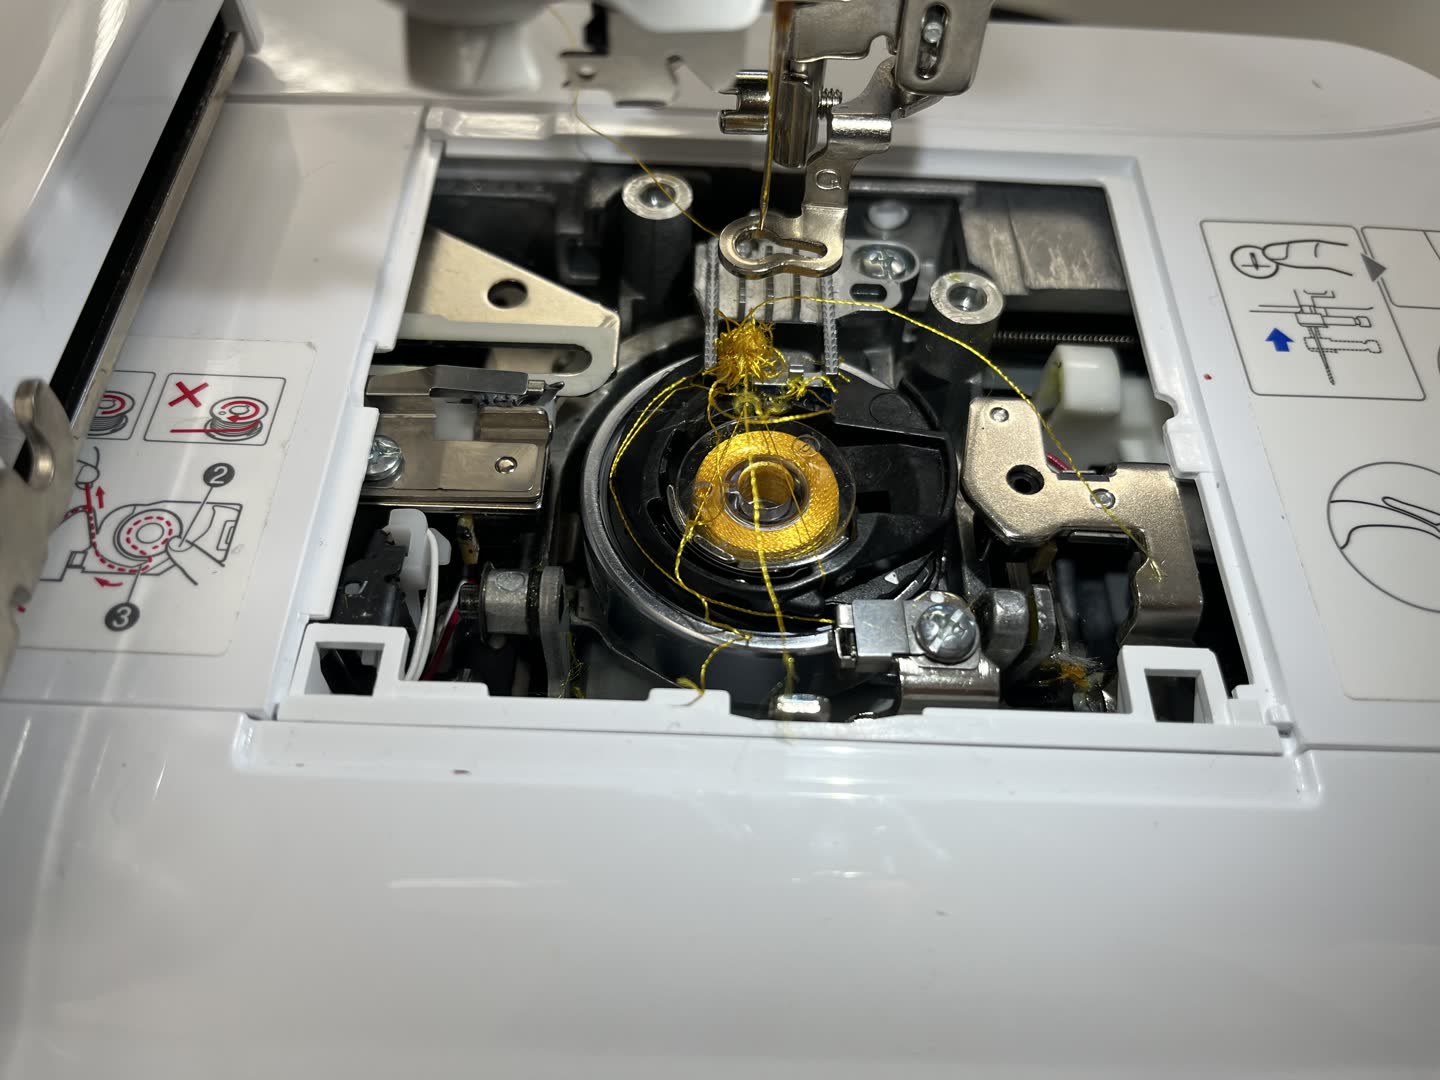
Looking back at my pictures, I can see a bow in the baseplate over the bobbin. Had I noticed this before, I may have saved myself some trouble. That is why I usually rethread the needle and bobbin when starting up a machine that has not been used in awhile or is not mine. Haste makes waste as they say.
The bobbin was so stuck in the machine we had to remove the baseplate to get it out. I have never had this happen before. We were consulting with my mother, who got a similar Brother embroidery machine a few months ago. She was very helpful walking us through different steps like using the self threading needle. It was especially helpful to watch how easily she was able to remove her bobbin, because we then knew for a fact there was something wrong with our setup.
The bobbin size seemed correct when we examined it, but we didn't trust the winding. In the Fab Lab's supplies there was a set of prewound white bobbins. My mom said some machines use a different bobbin thread than the top thread. So rather than take a chance winding another bobbin with matching thread, and having it be the wrong thread type, we decided to use the white bobbins. You can't see that thread in the embroidery anyway.
The manual does say to use the same thread for both top thread and bobbin. So our problem was likely caused by previous user loading error.
We reattached the embroidery hoop, and moved the design further down. Then restarted the program. It turned out great! (But I seem to have forgotten to take a picture of the final embroidery!)
Loading a custom file onto the machine
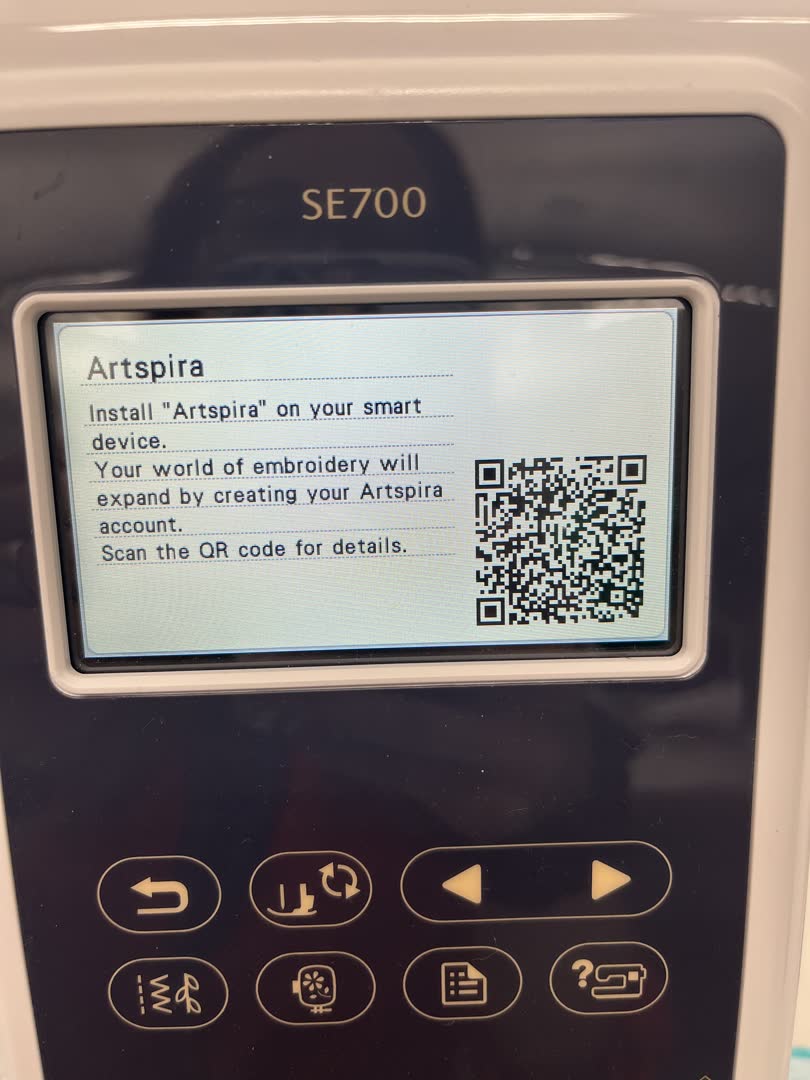
I had a bit of difficulty loading my file onto the machine. I didn't have a thumb drive, so I download the Artspira app for brother sewing machines. Below is the QR code to upload the app.
However, since the app was on my phone, and not available on my computer, I had to send the image from my computer to my phone. But I could only open the file in the app if it was saved from Chrome. (I am sure there is an easier way, but I don't know what it is). Anyway, I had to upload to my google drive on the computer, then download through google drive on my phone. To then upload to the app on my phone.
I opened and logged into the Artspira app:
Then opened my .pes file:
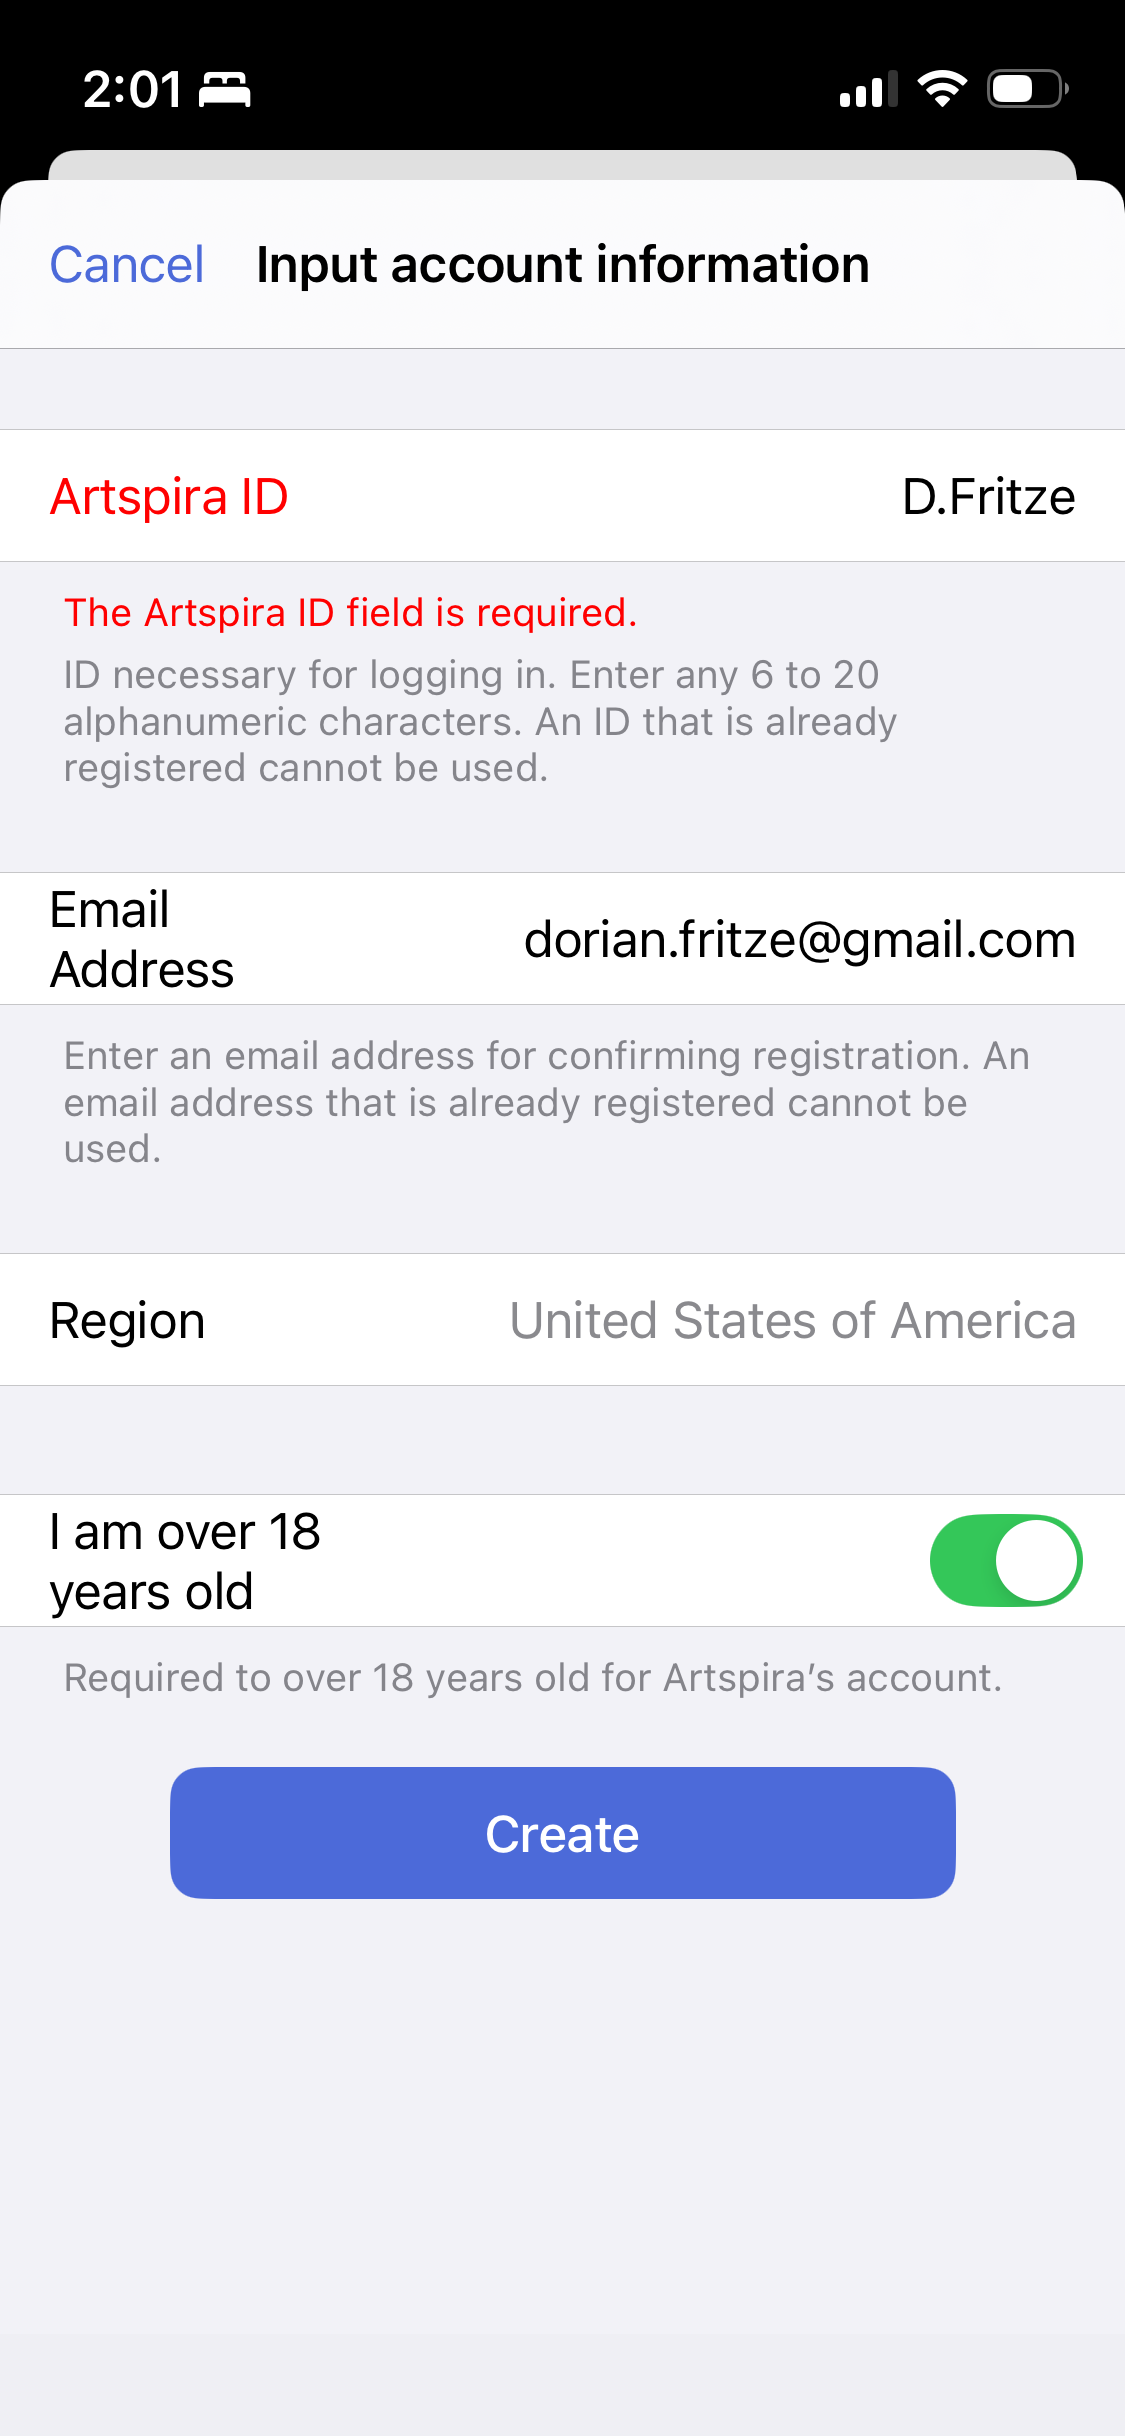
Next I had to connect the machine to my phone. After much confusion, and a desparate call to Angela, I was able to connect. I had been afraid to choose "register," because I thought it was registered to the lab. Once I registered by following the onscreen instructions, it was easy to import my design.
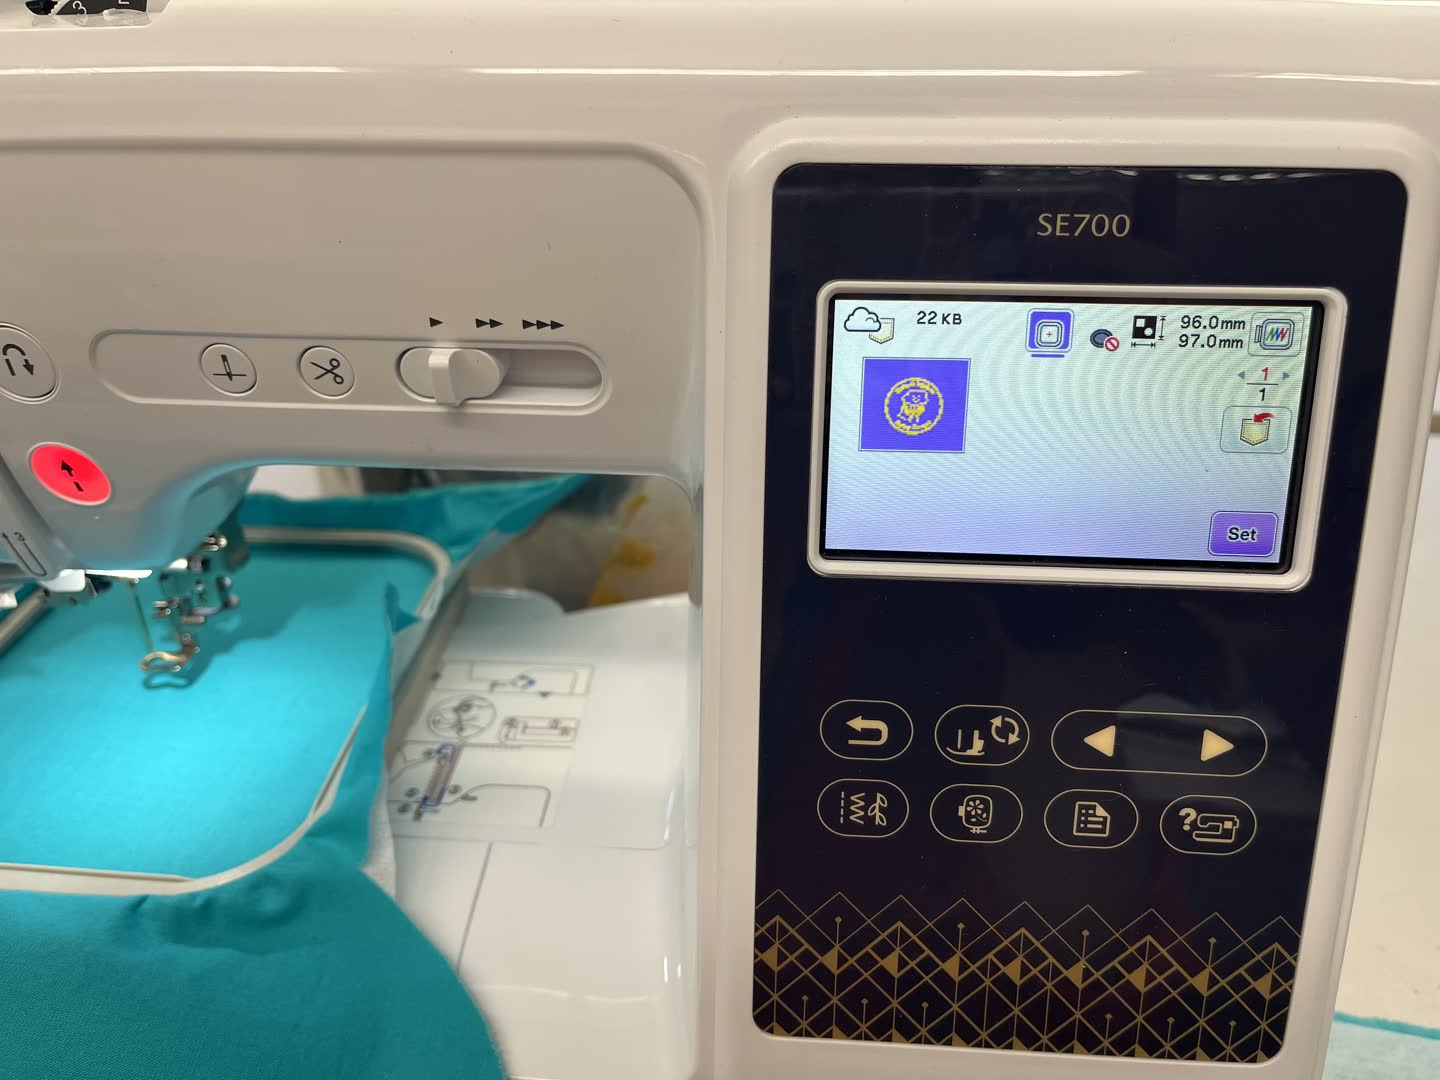
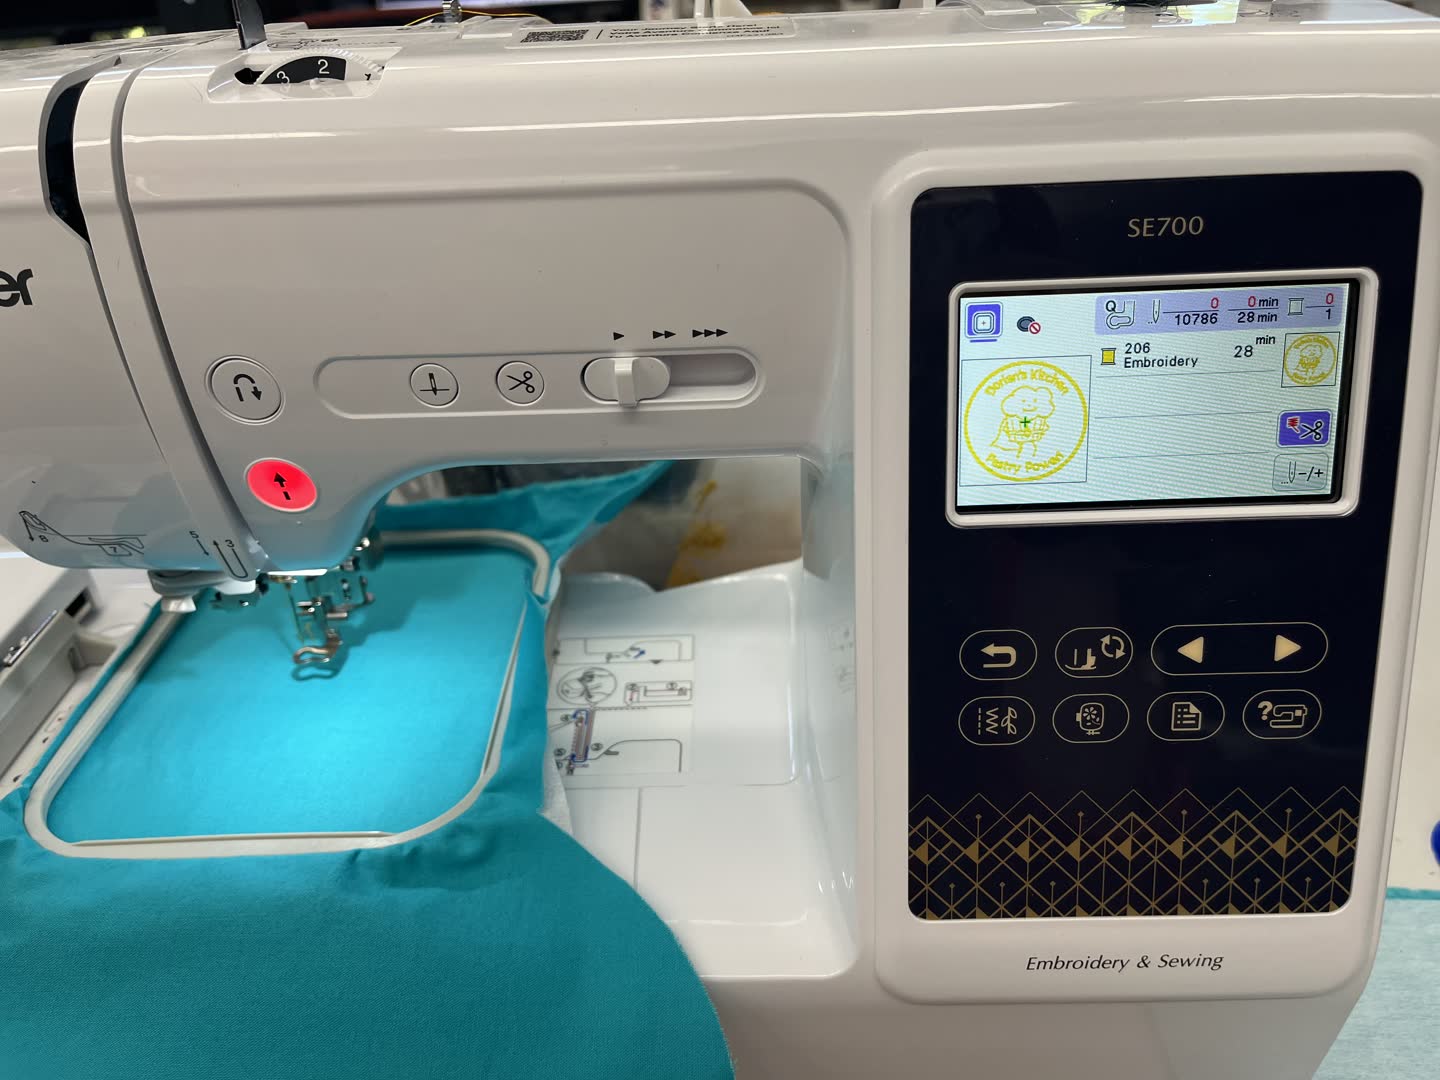
Once set as my embroidery file, I was able to see the, stitch count, 10786, the time to make my design, 28min, and the number of spools needed, 1.
As mentioned above, my document settings in inkscape were set to 4"x4" so I was not able to move my image once on the machine. That was fine by me, as I was going to center it anyway. I started the machine!
The machine made a quick circle first.
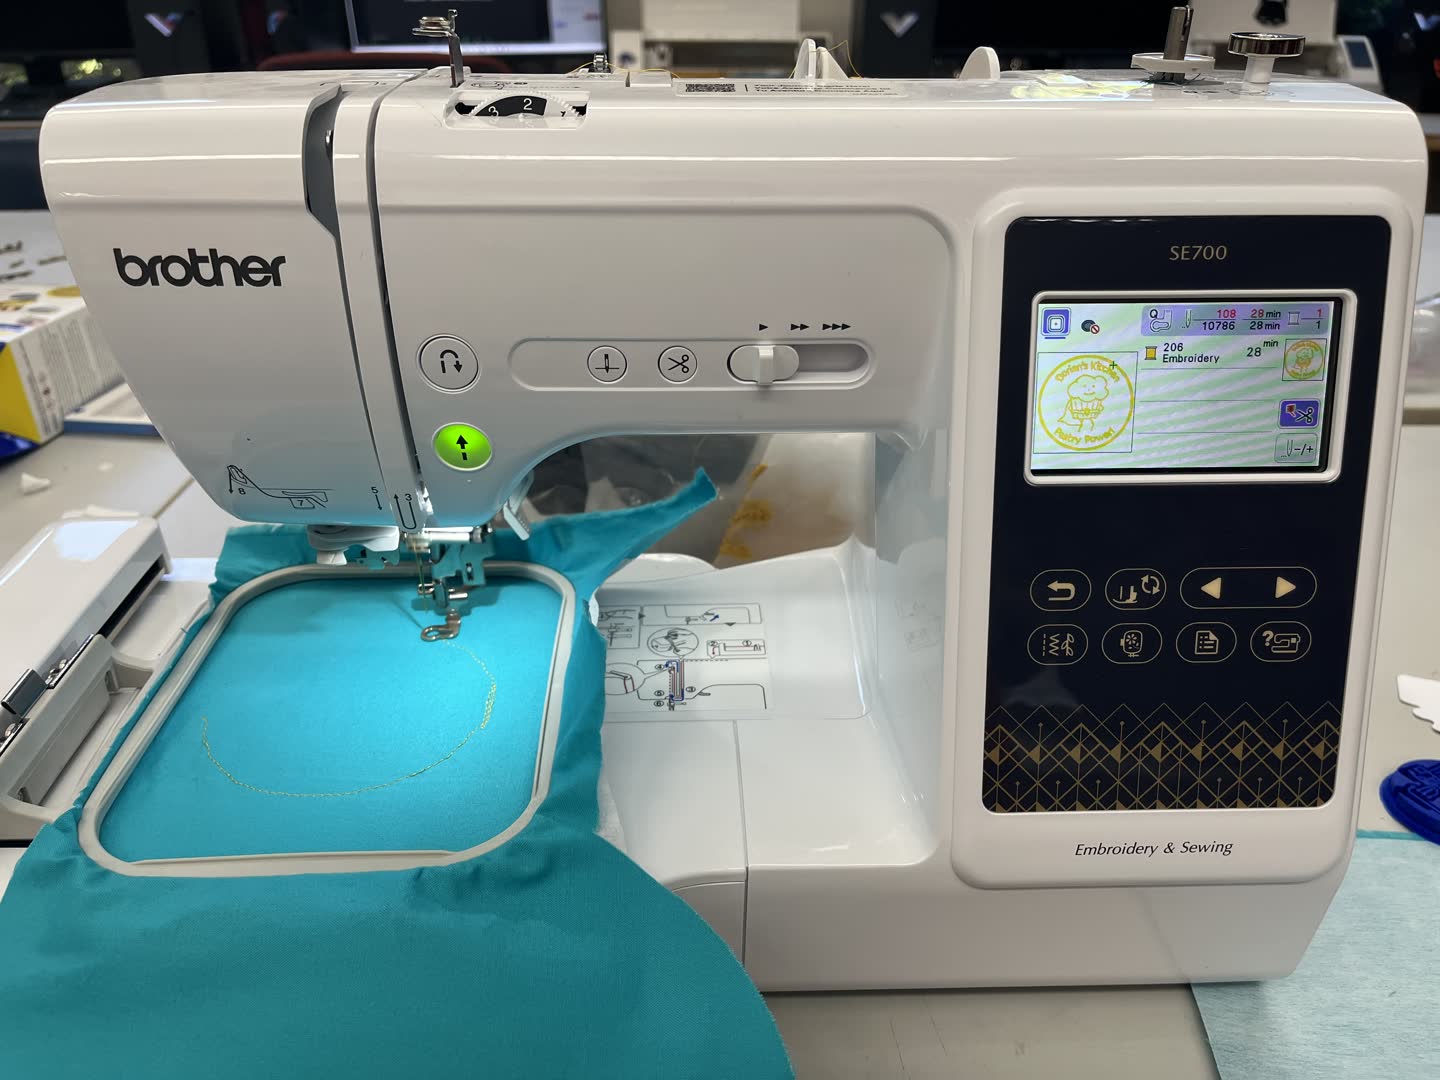
Then it went back over the line to create the thick embroidery. Unfortunately my needle bent right as the second pass started.
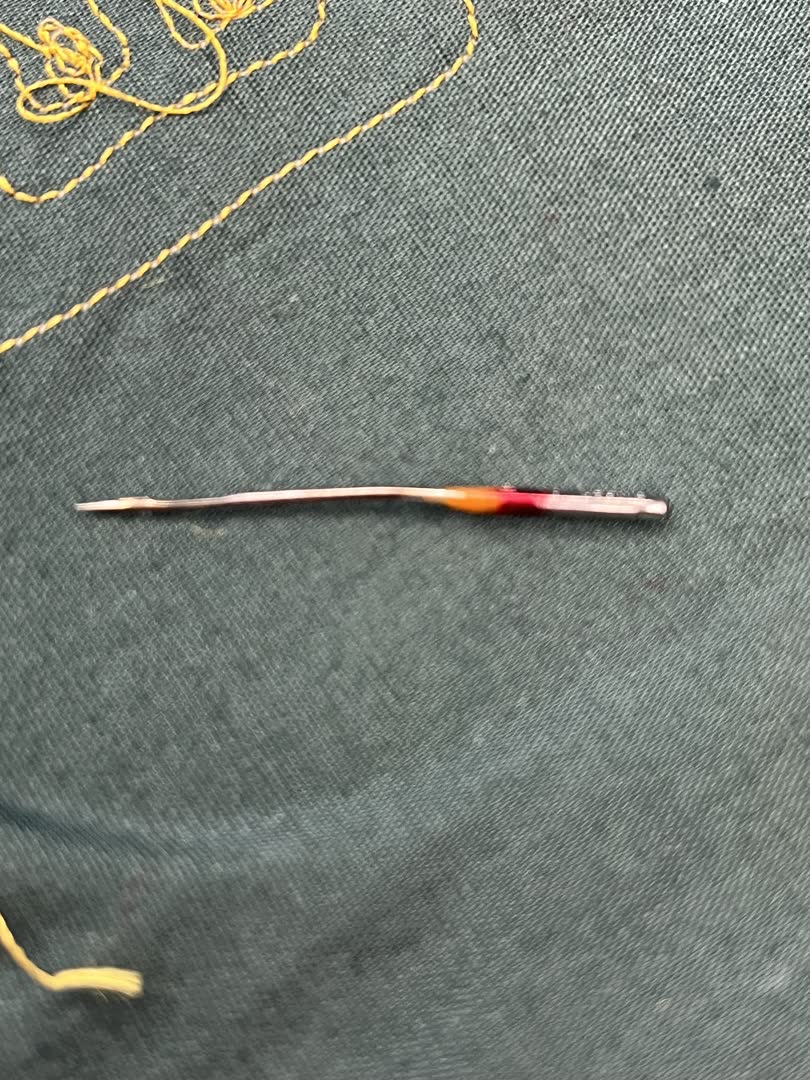
I was able to pause the program, and replace the needle without removing the embroidery hoop. I then restarted the program. Luckily the machine went over that spot multiple times, completely covering the loose end.
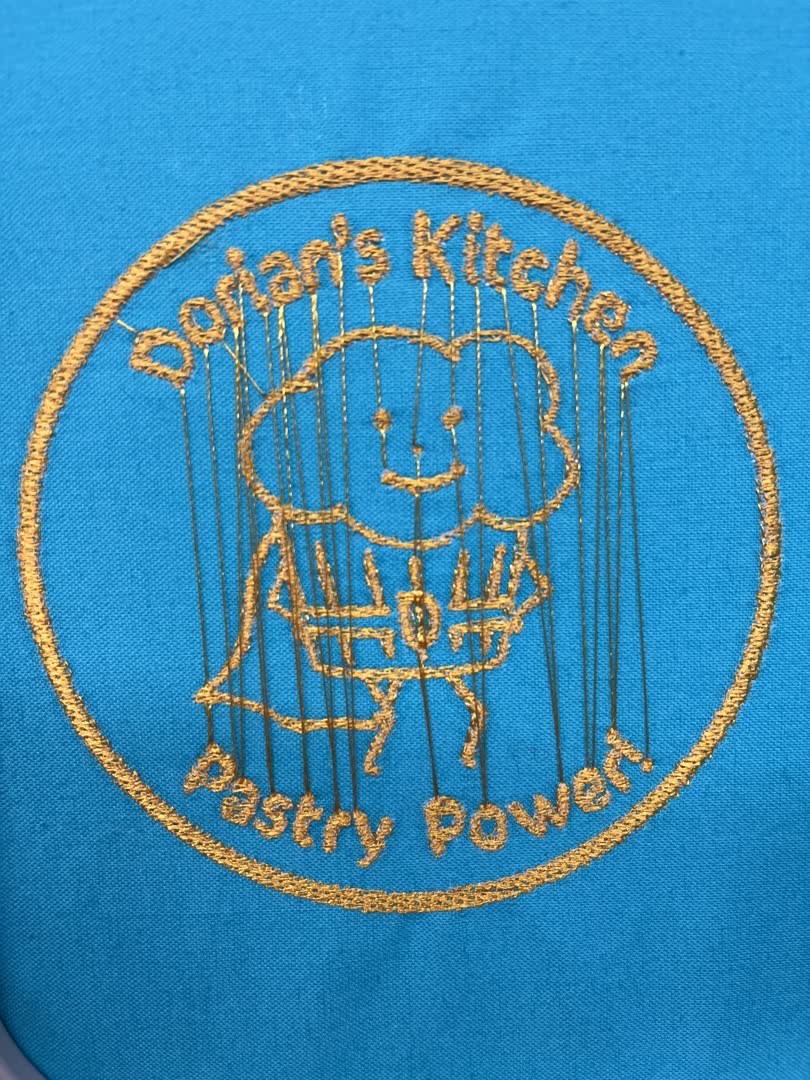
This video and image show my file almost done being embroidered.
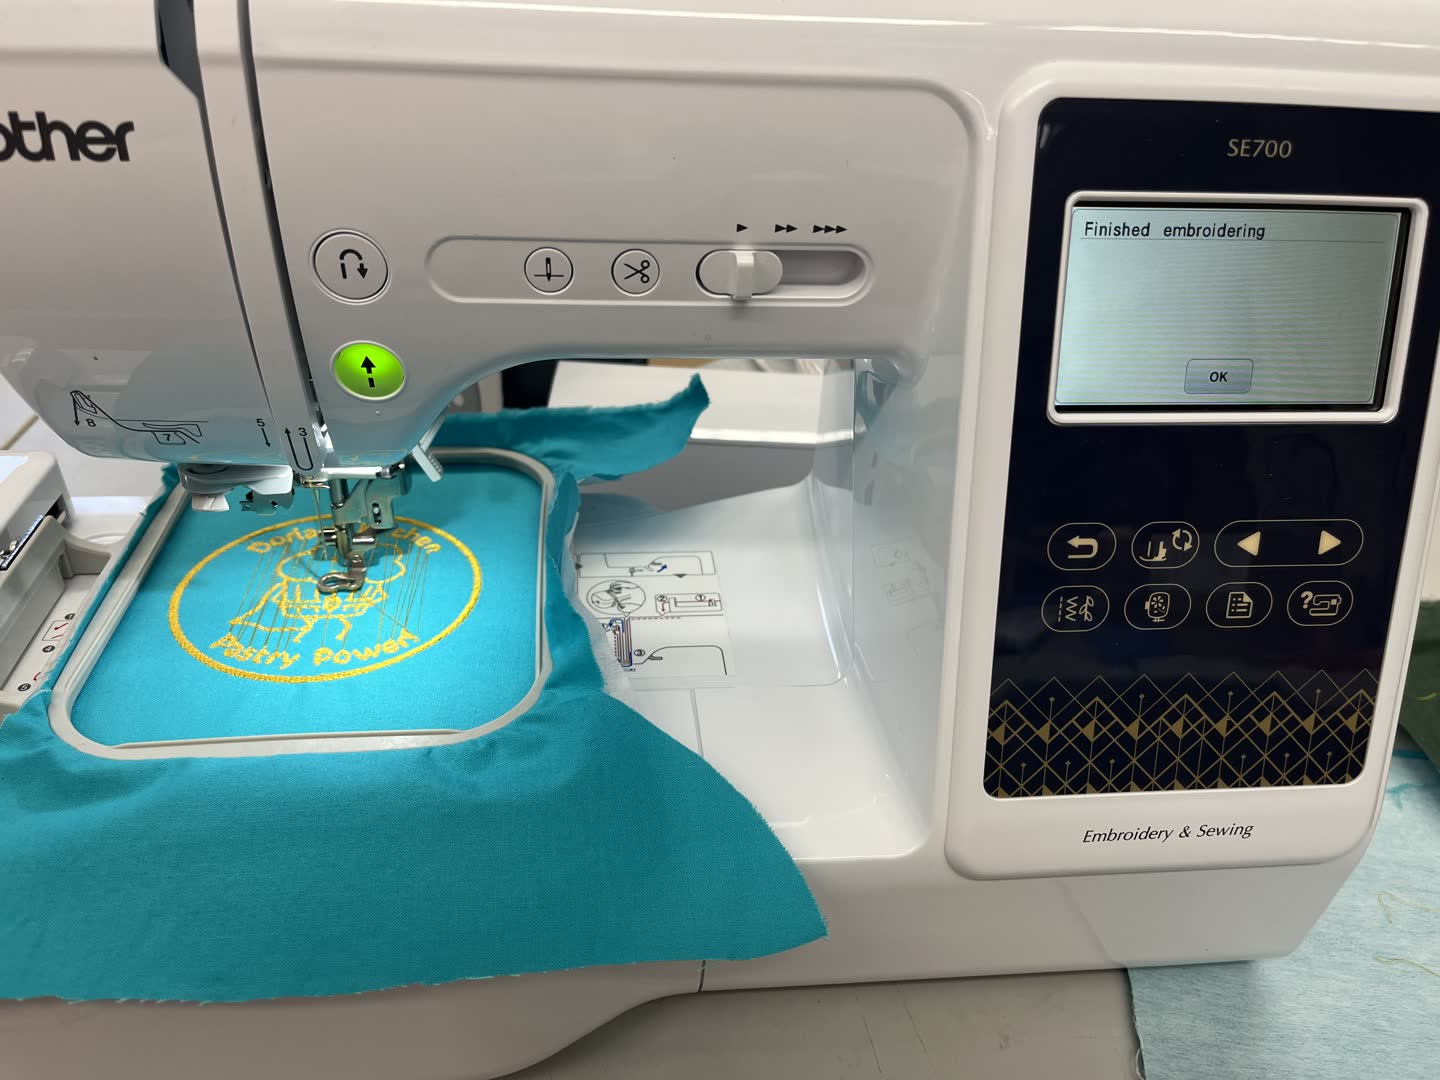
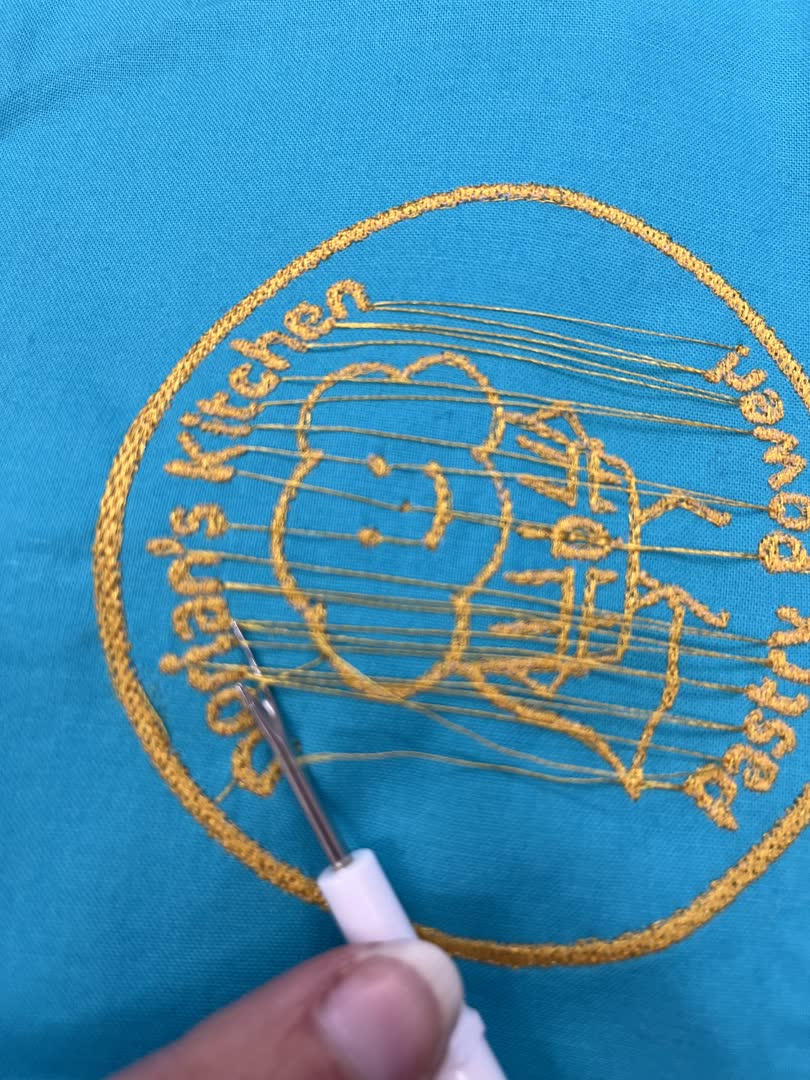
When the machine moves between parts of the design it leaves a thread trail.
I used a seam ripper to cut the extra thread, but a nice pair of small sewing shears would have been better.
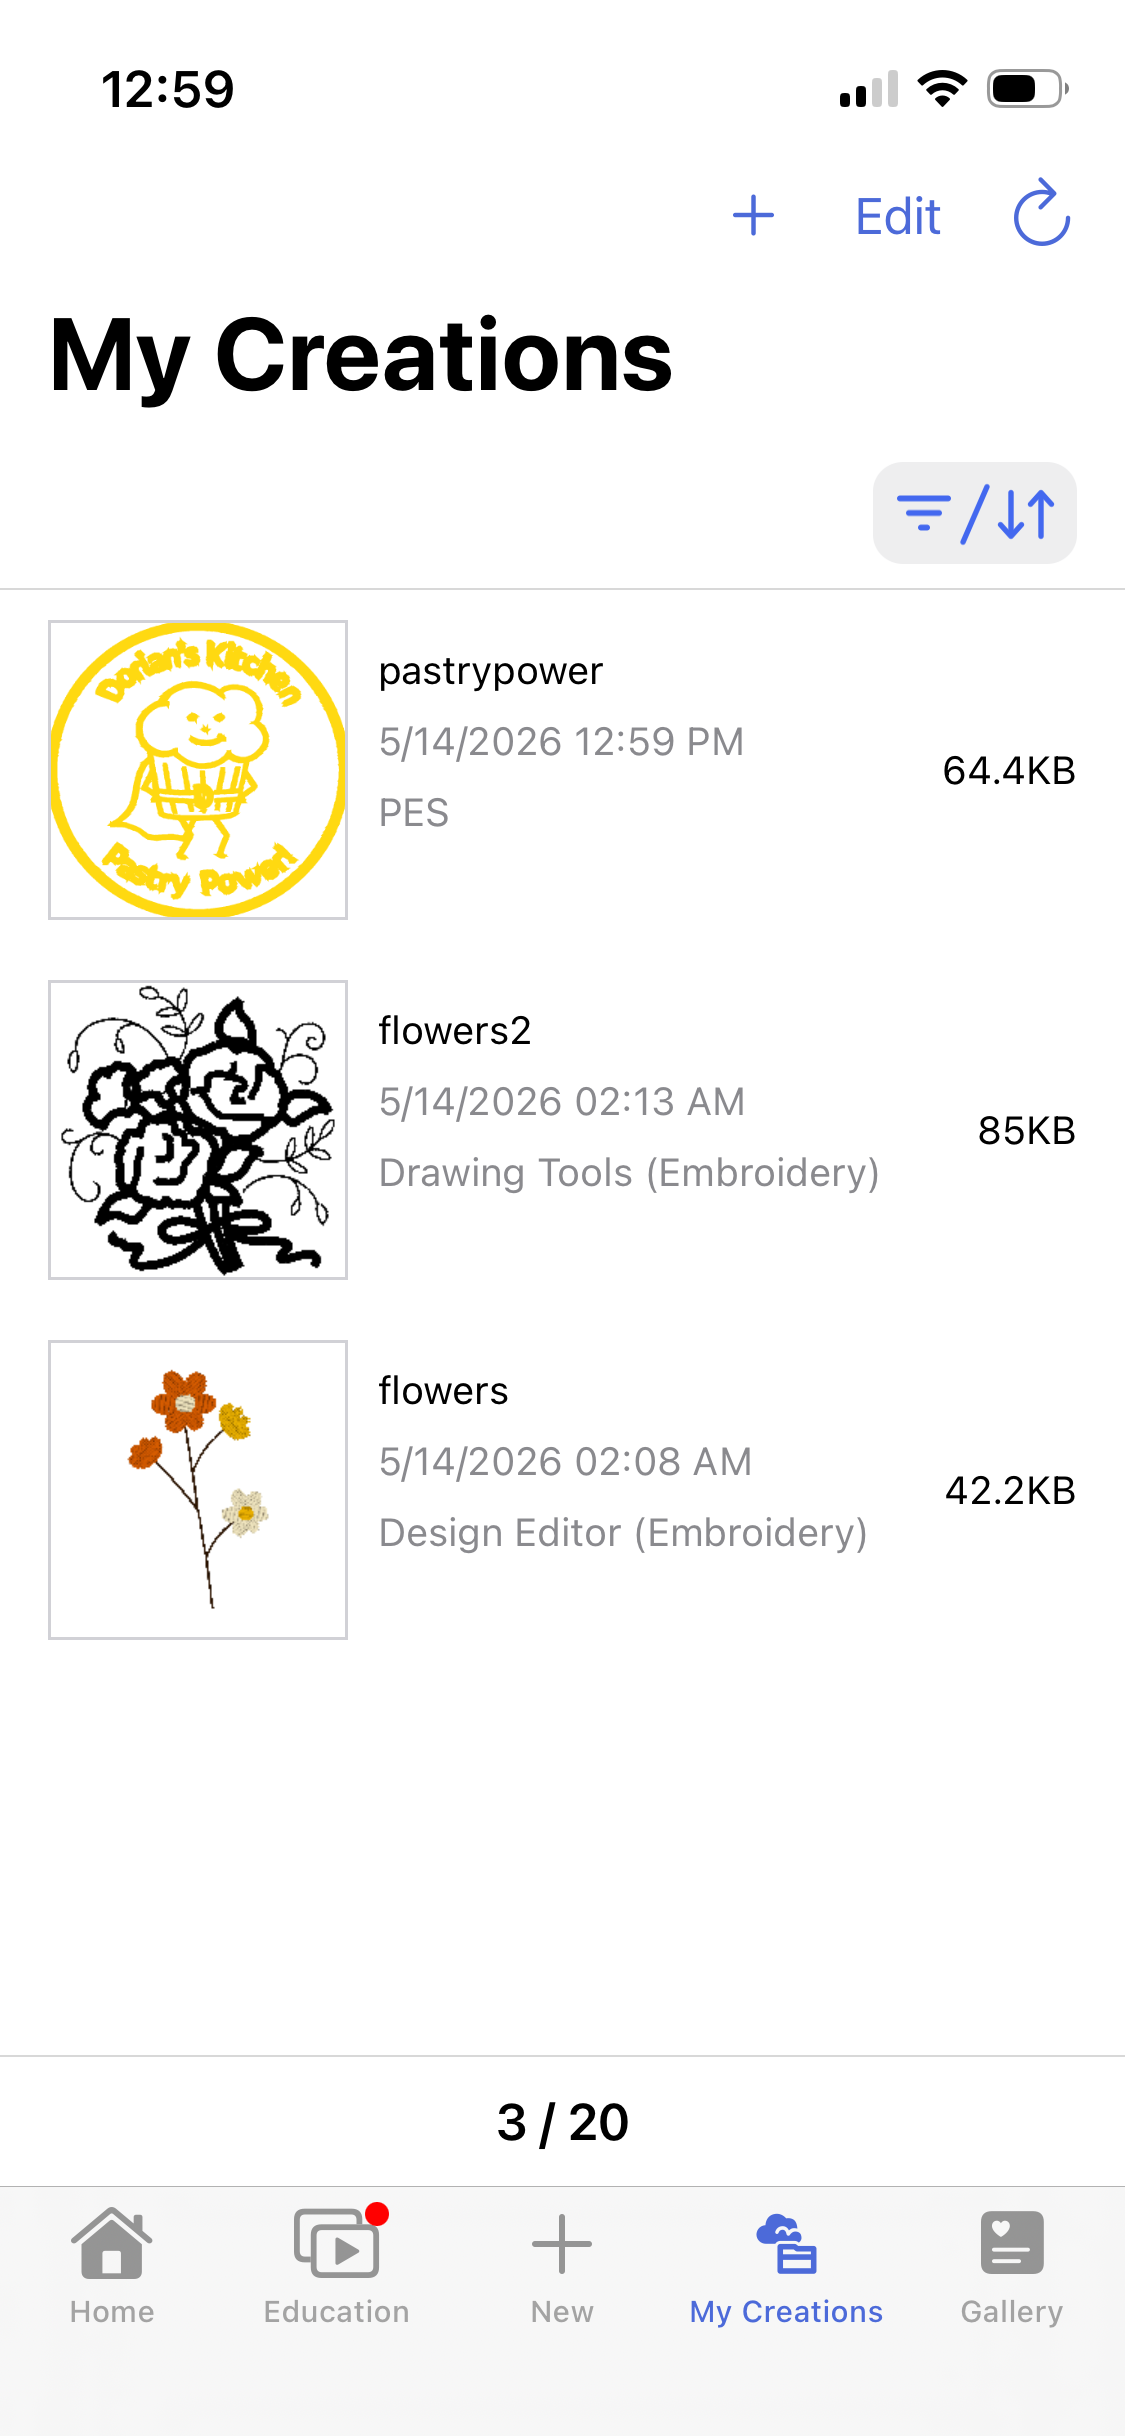
I am quite happy with how my Pastry Power design turned out, and will be embroidering it on an apron once I finish my final project!
Files: