Week 13 Molding and Casting
Designing and Fabricating 3D printed and Wax Molds - McKinnon Collins
Designing 3D Printed Mold
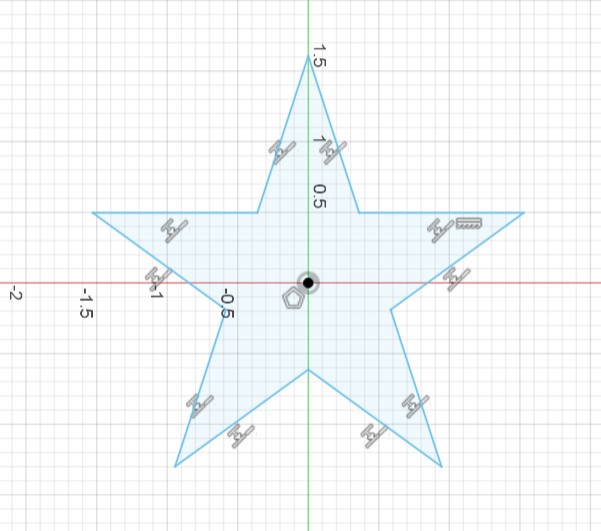
I designed this star shape in Fusion, then created a small box around it to hold the silicone. I chose the star as the shape to compare because it has sharp angles.
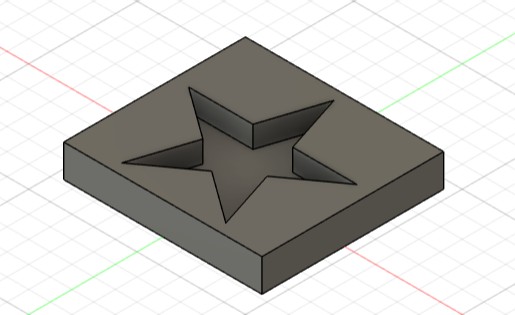
This is the complete model.
Click here to download my model as a .stl file
Slicing
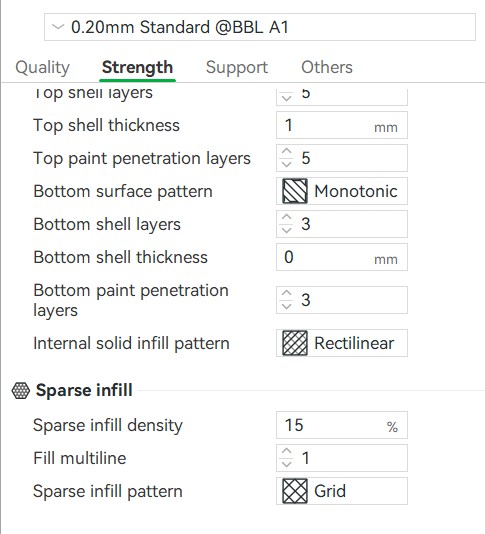
I used the 0.20mm preset. This way, my model prints precise, but also efficiently.
Printing
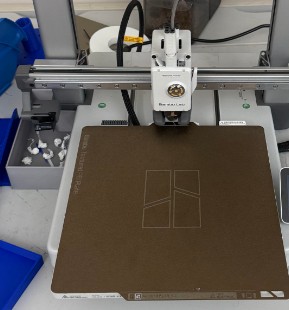
I used the Bambu A1 3D printer with a textured PEI build plate.
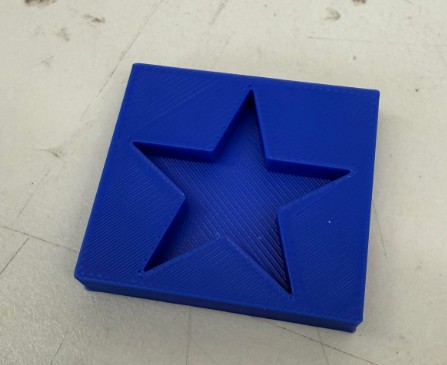
The print came out well. No supports were needed. The angles came out very sharp, but still rounded a small bit.
Removing Layer Lines
To minimize layer lines from the 3D printed mold, I used XTC-3D Brush on Coating for 3D Printed Parts. This is a brush on coat that preserves 3D prints, but also hides their layer lines. By using this on my 3D printed mold, I can get a smooth surface 3D printed mold.
The coating comes with a Part A and Part B.
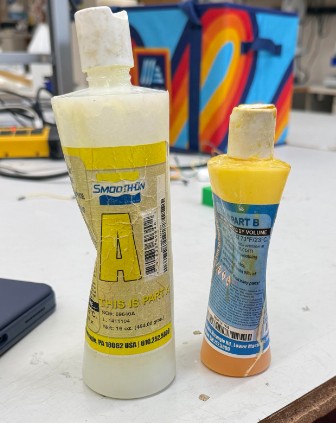
By volume, the mixture ratio is 2 parts A to 1 part B.
Designing Wax Mold
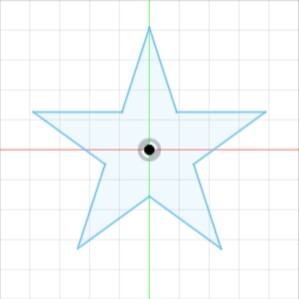
I designed the same sized star I did for the 3D printed mold, this time, just a 2d sketch by itself.
This way, I can just cut the star shape into the wax. I exported it as a DXF file.
Click here to download the .dxf file
Tool Path
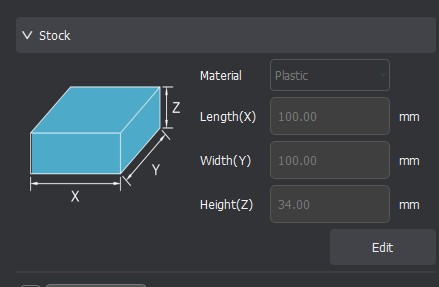
In Makera Cam, I set the stock to the size of the bracket and the wax. (I will talk about the bracket later).
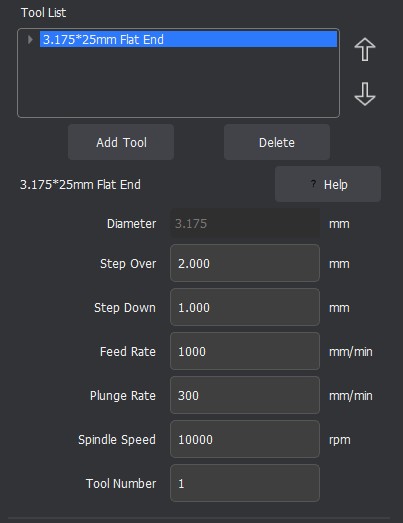
To make the toolpath, I selected the line and tool. These are the speeds and feeds I used, along with the bit.
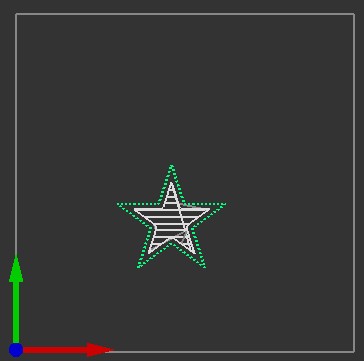
This is the toolpath that Makera Cam generated. I then exported the toolpath as Gcode.
Click here to download the gcode file
Material Setup
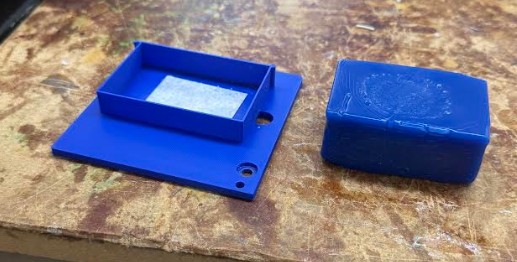
This is the bracket and the wax I will be using. In the bracket, there is double sided tape which will be holding the wax to the machine bed.
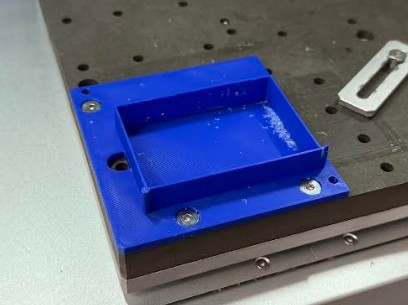
This is the bracket on the machine bed.
Milling Machine Controller
In Carvera Controller, the controller software for the Carvera milling machine, I uploaded the file.
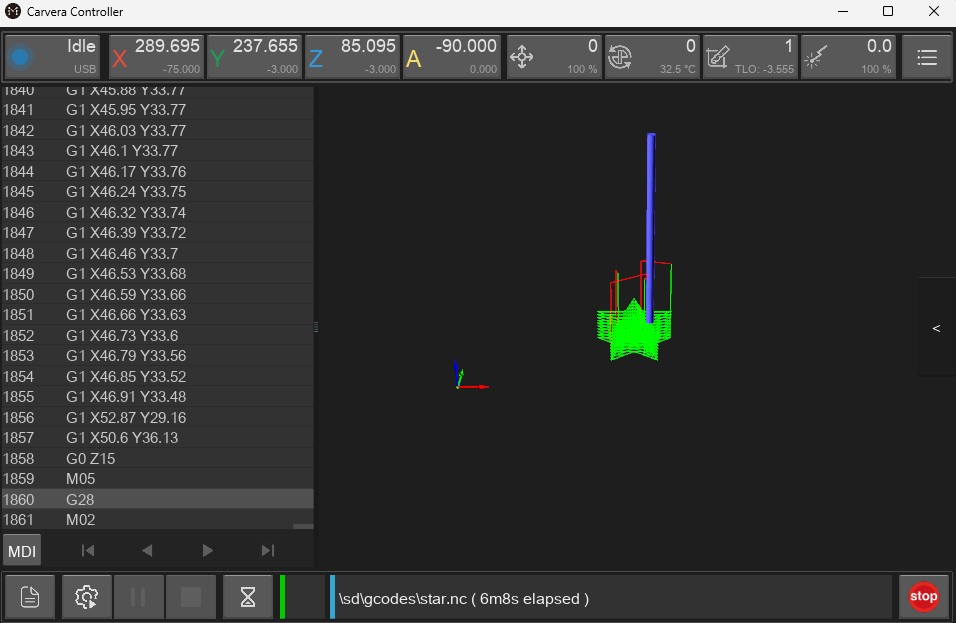
This is the preview of the gcode in the software before I send it to the machine.
Milling the wax
After I sent the file to the machine through Carvera Controller, The machine leveled itself, then selected the right bit and cut the material.
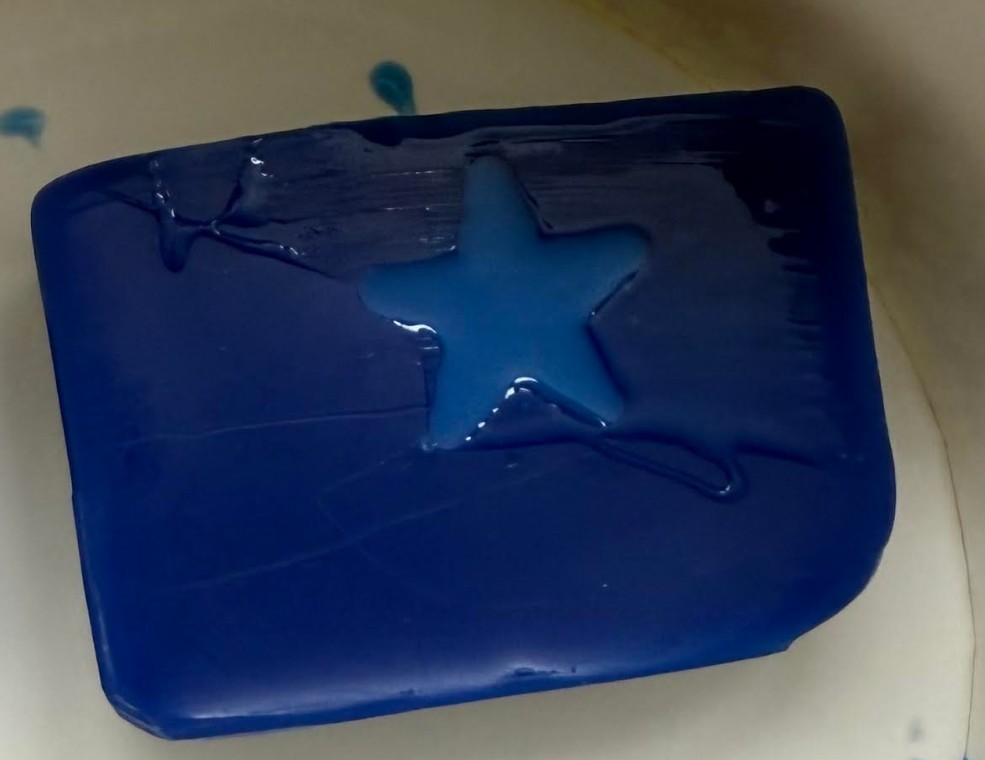
This is the wax after milling. As you can see, the star came out well. The angles are not as sharp as the 3d printed mold because the bit’s diameter is larger than the diameter of the filament.
As you can see, Yian Hu poured silicone into the mold.
Urethane Rubber - Max Negrin
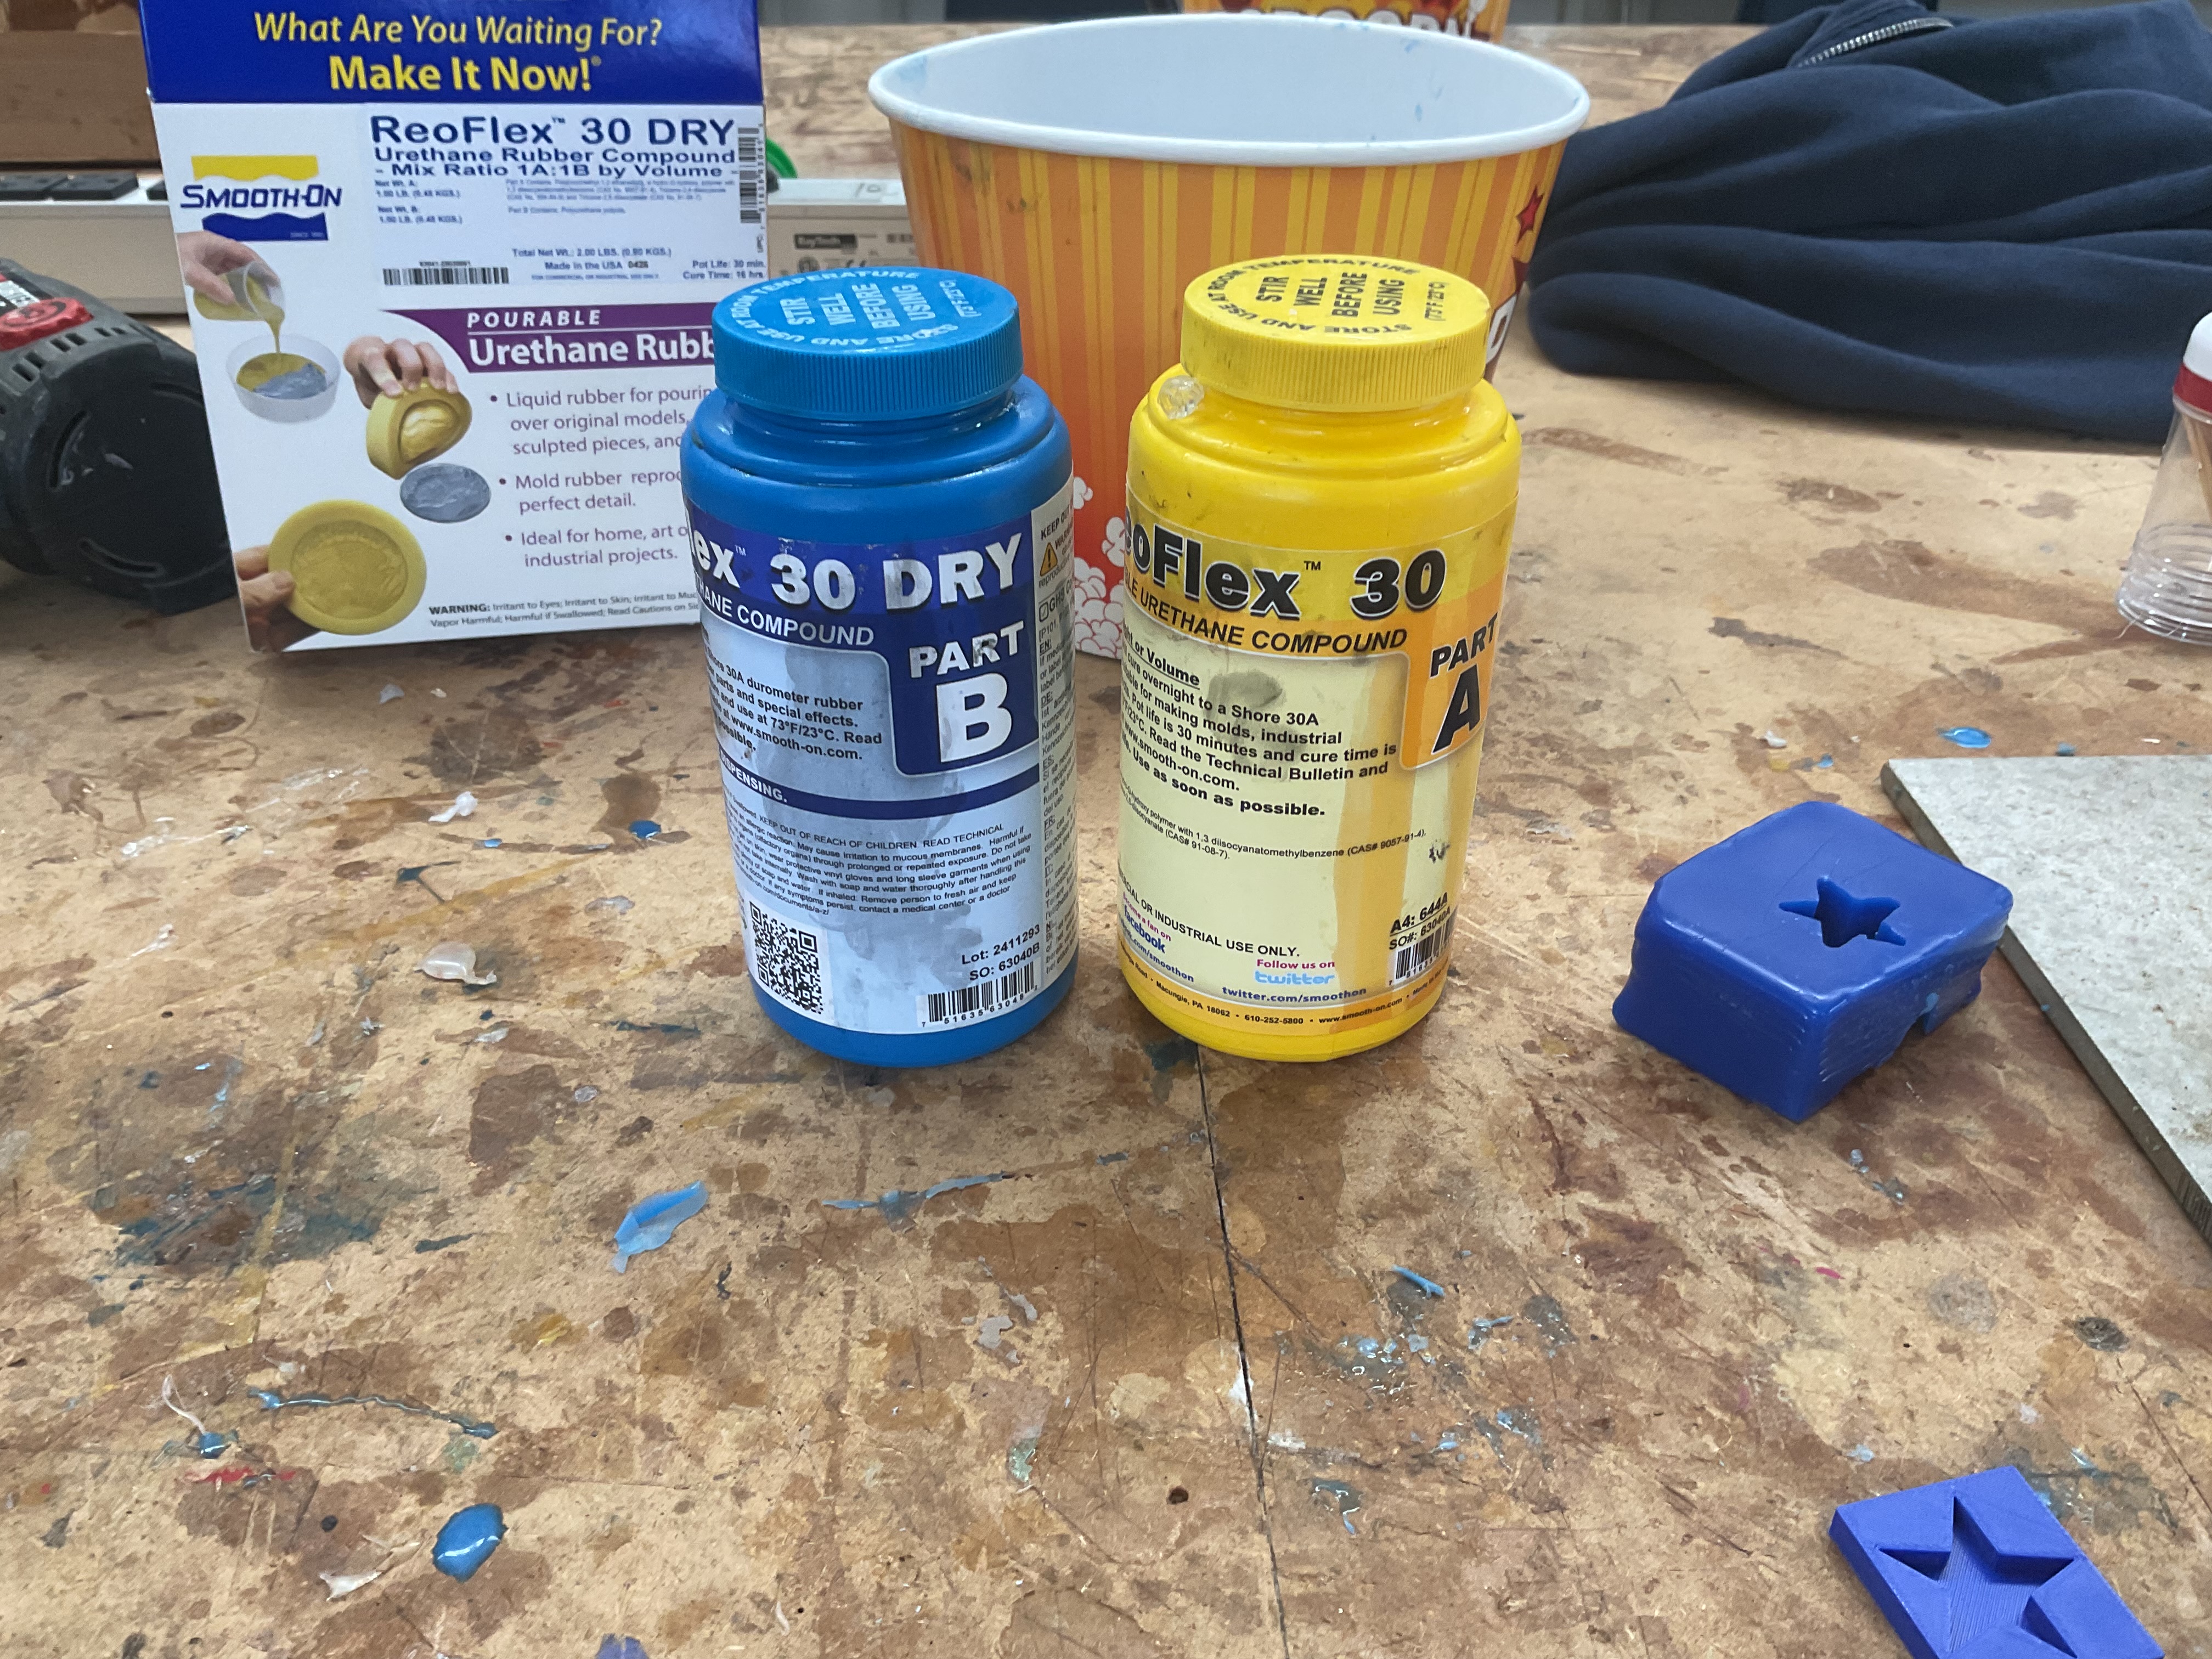
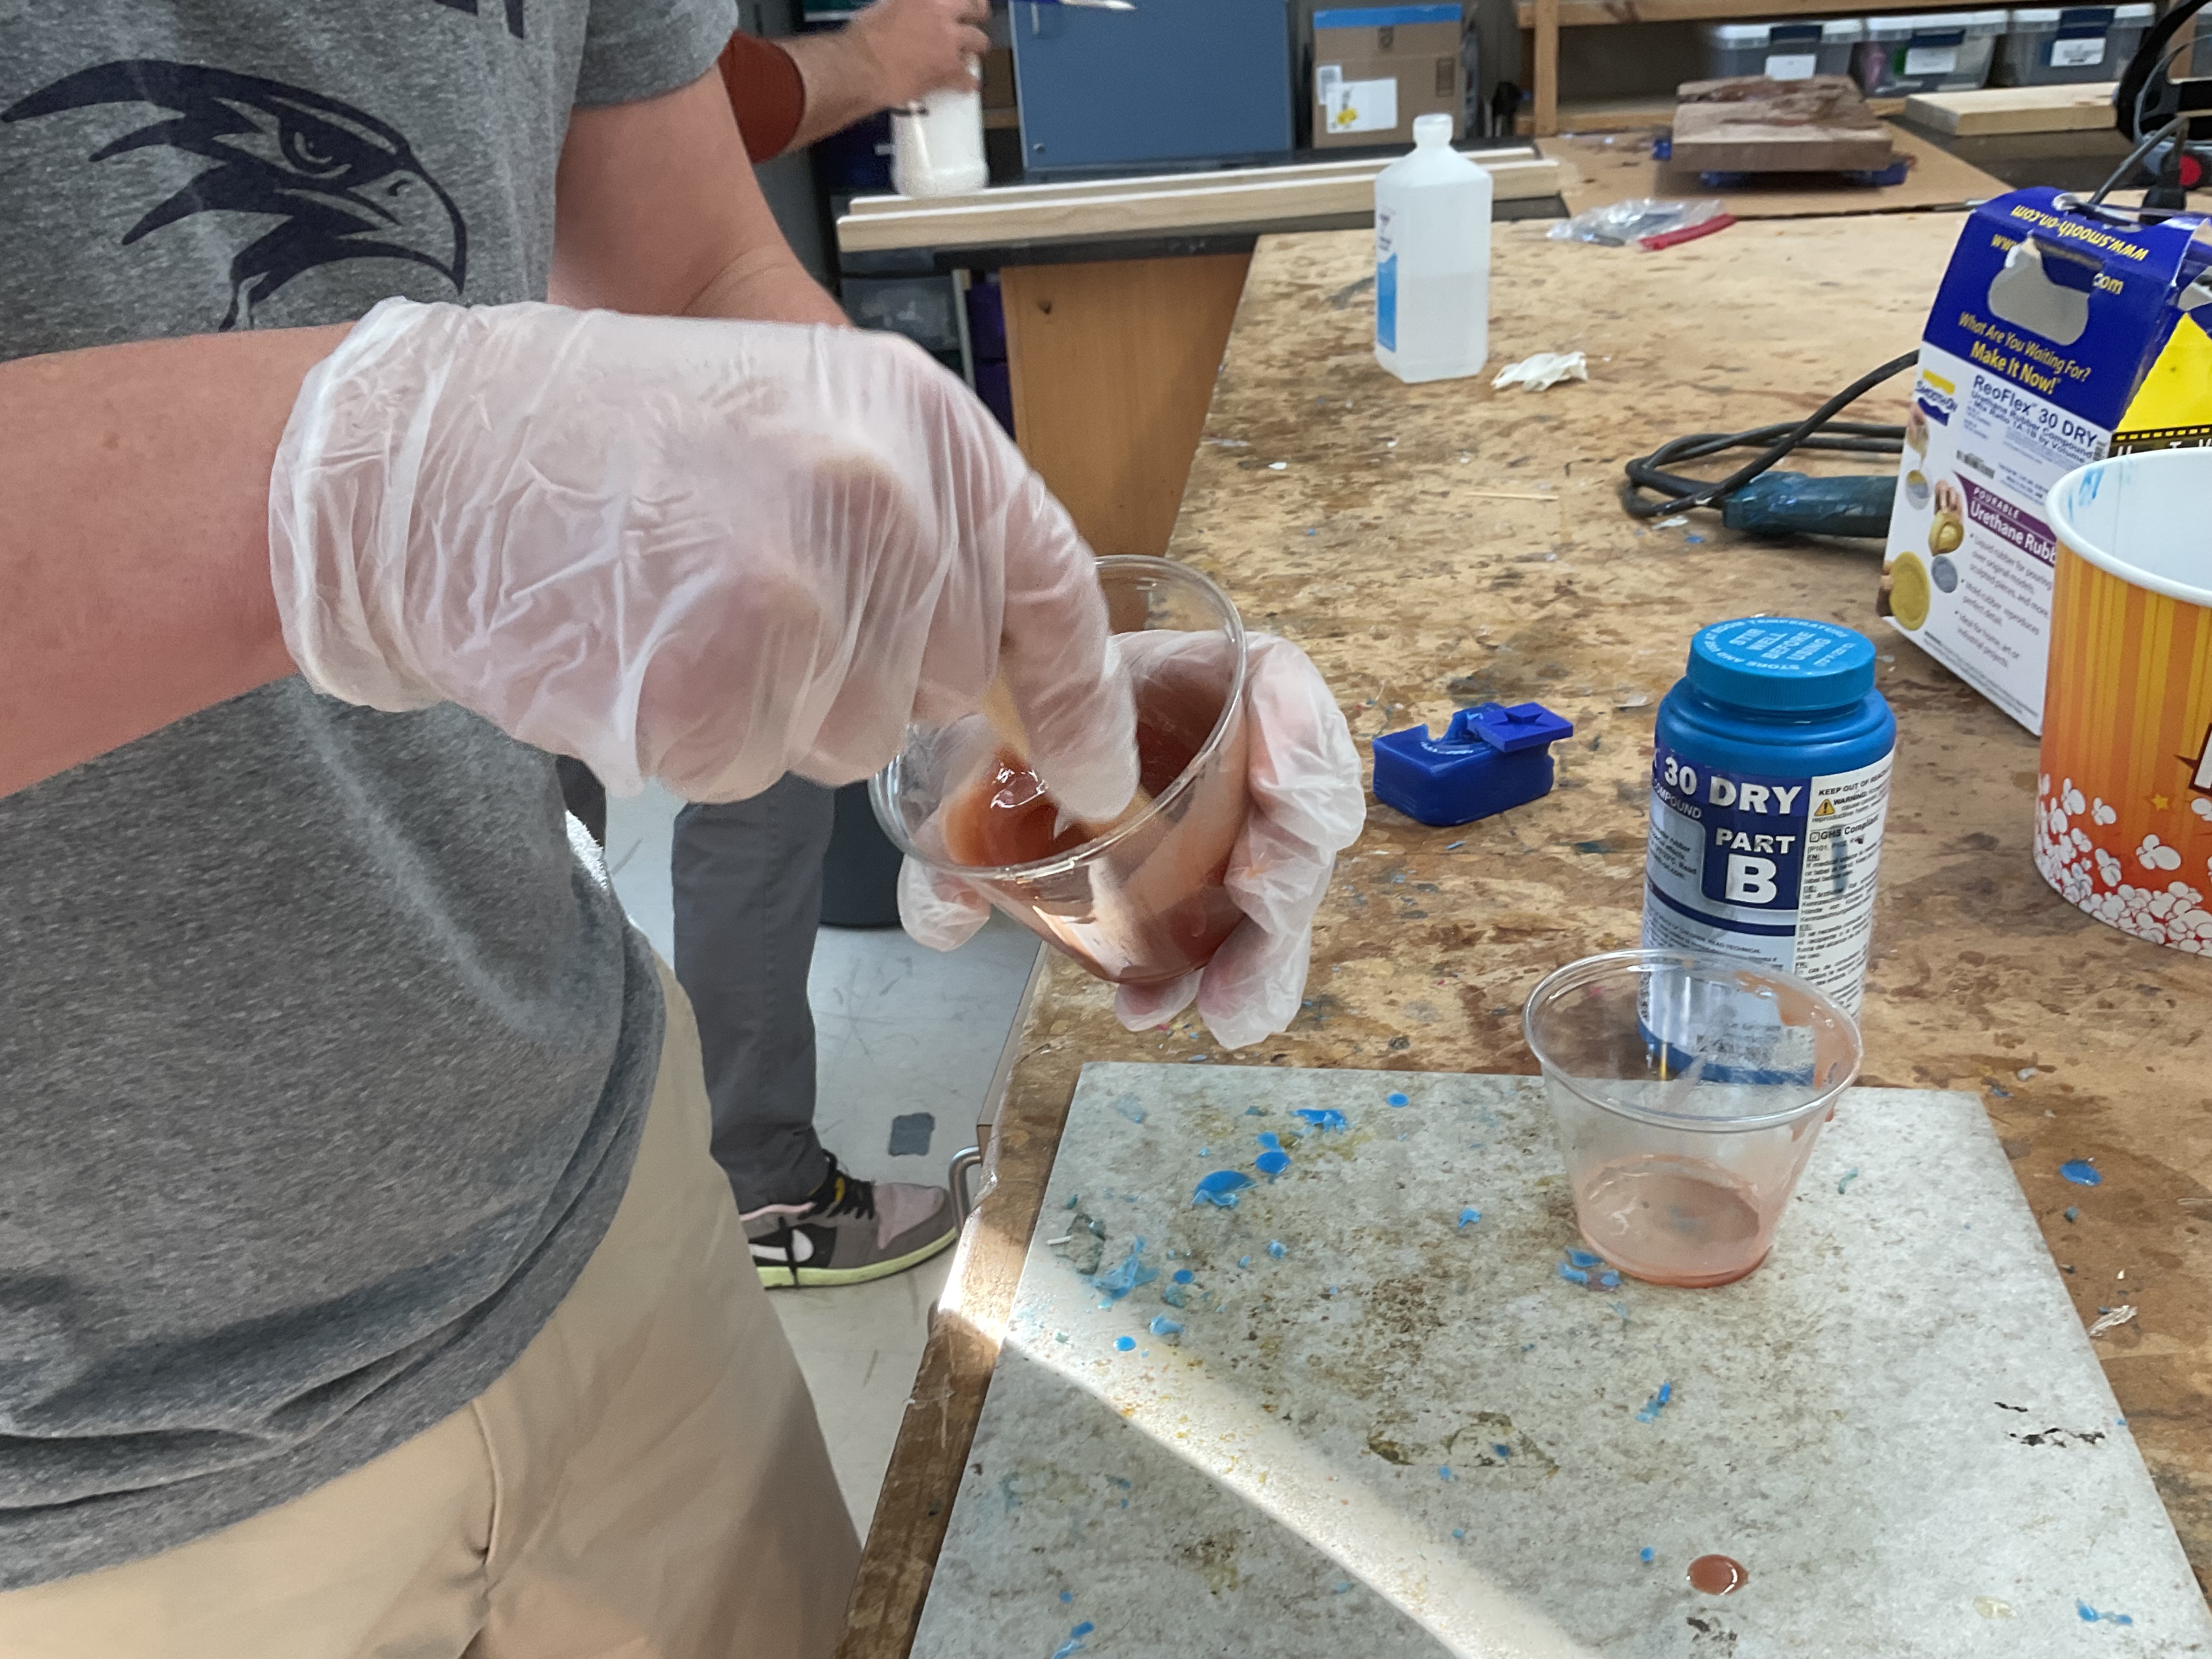
Another material we have for modling and casting is Urethane rubber. Urethane rubber is a tough, flexible casting material known for its high tear strength, abrasion resistance, and ability to capture fine detail with precision. It cures into a durable, slightly elastic rubber that performs well in molds, prototypes, and functional parts that need both resilience and longevity. We used ReoFlex 30 DRY from Smooth-On, the company that made the previous silicone rubber. You can access the material’s datasheet here. The process for this material is exactly the same as the silicone rubber - mix part A and B in a ratio of 1:1 by volume, mix thoroughly, then pour in your molds. First, I took my material:
And filled two clear cups to the same level with part A and B:
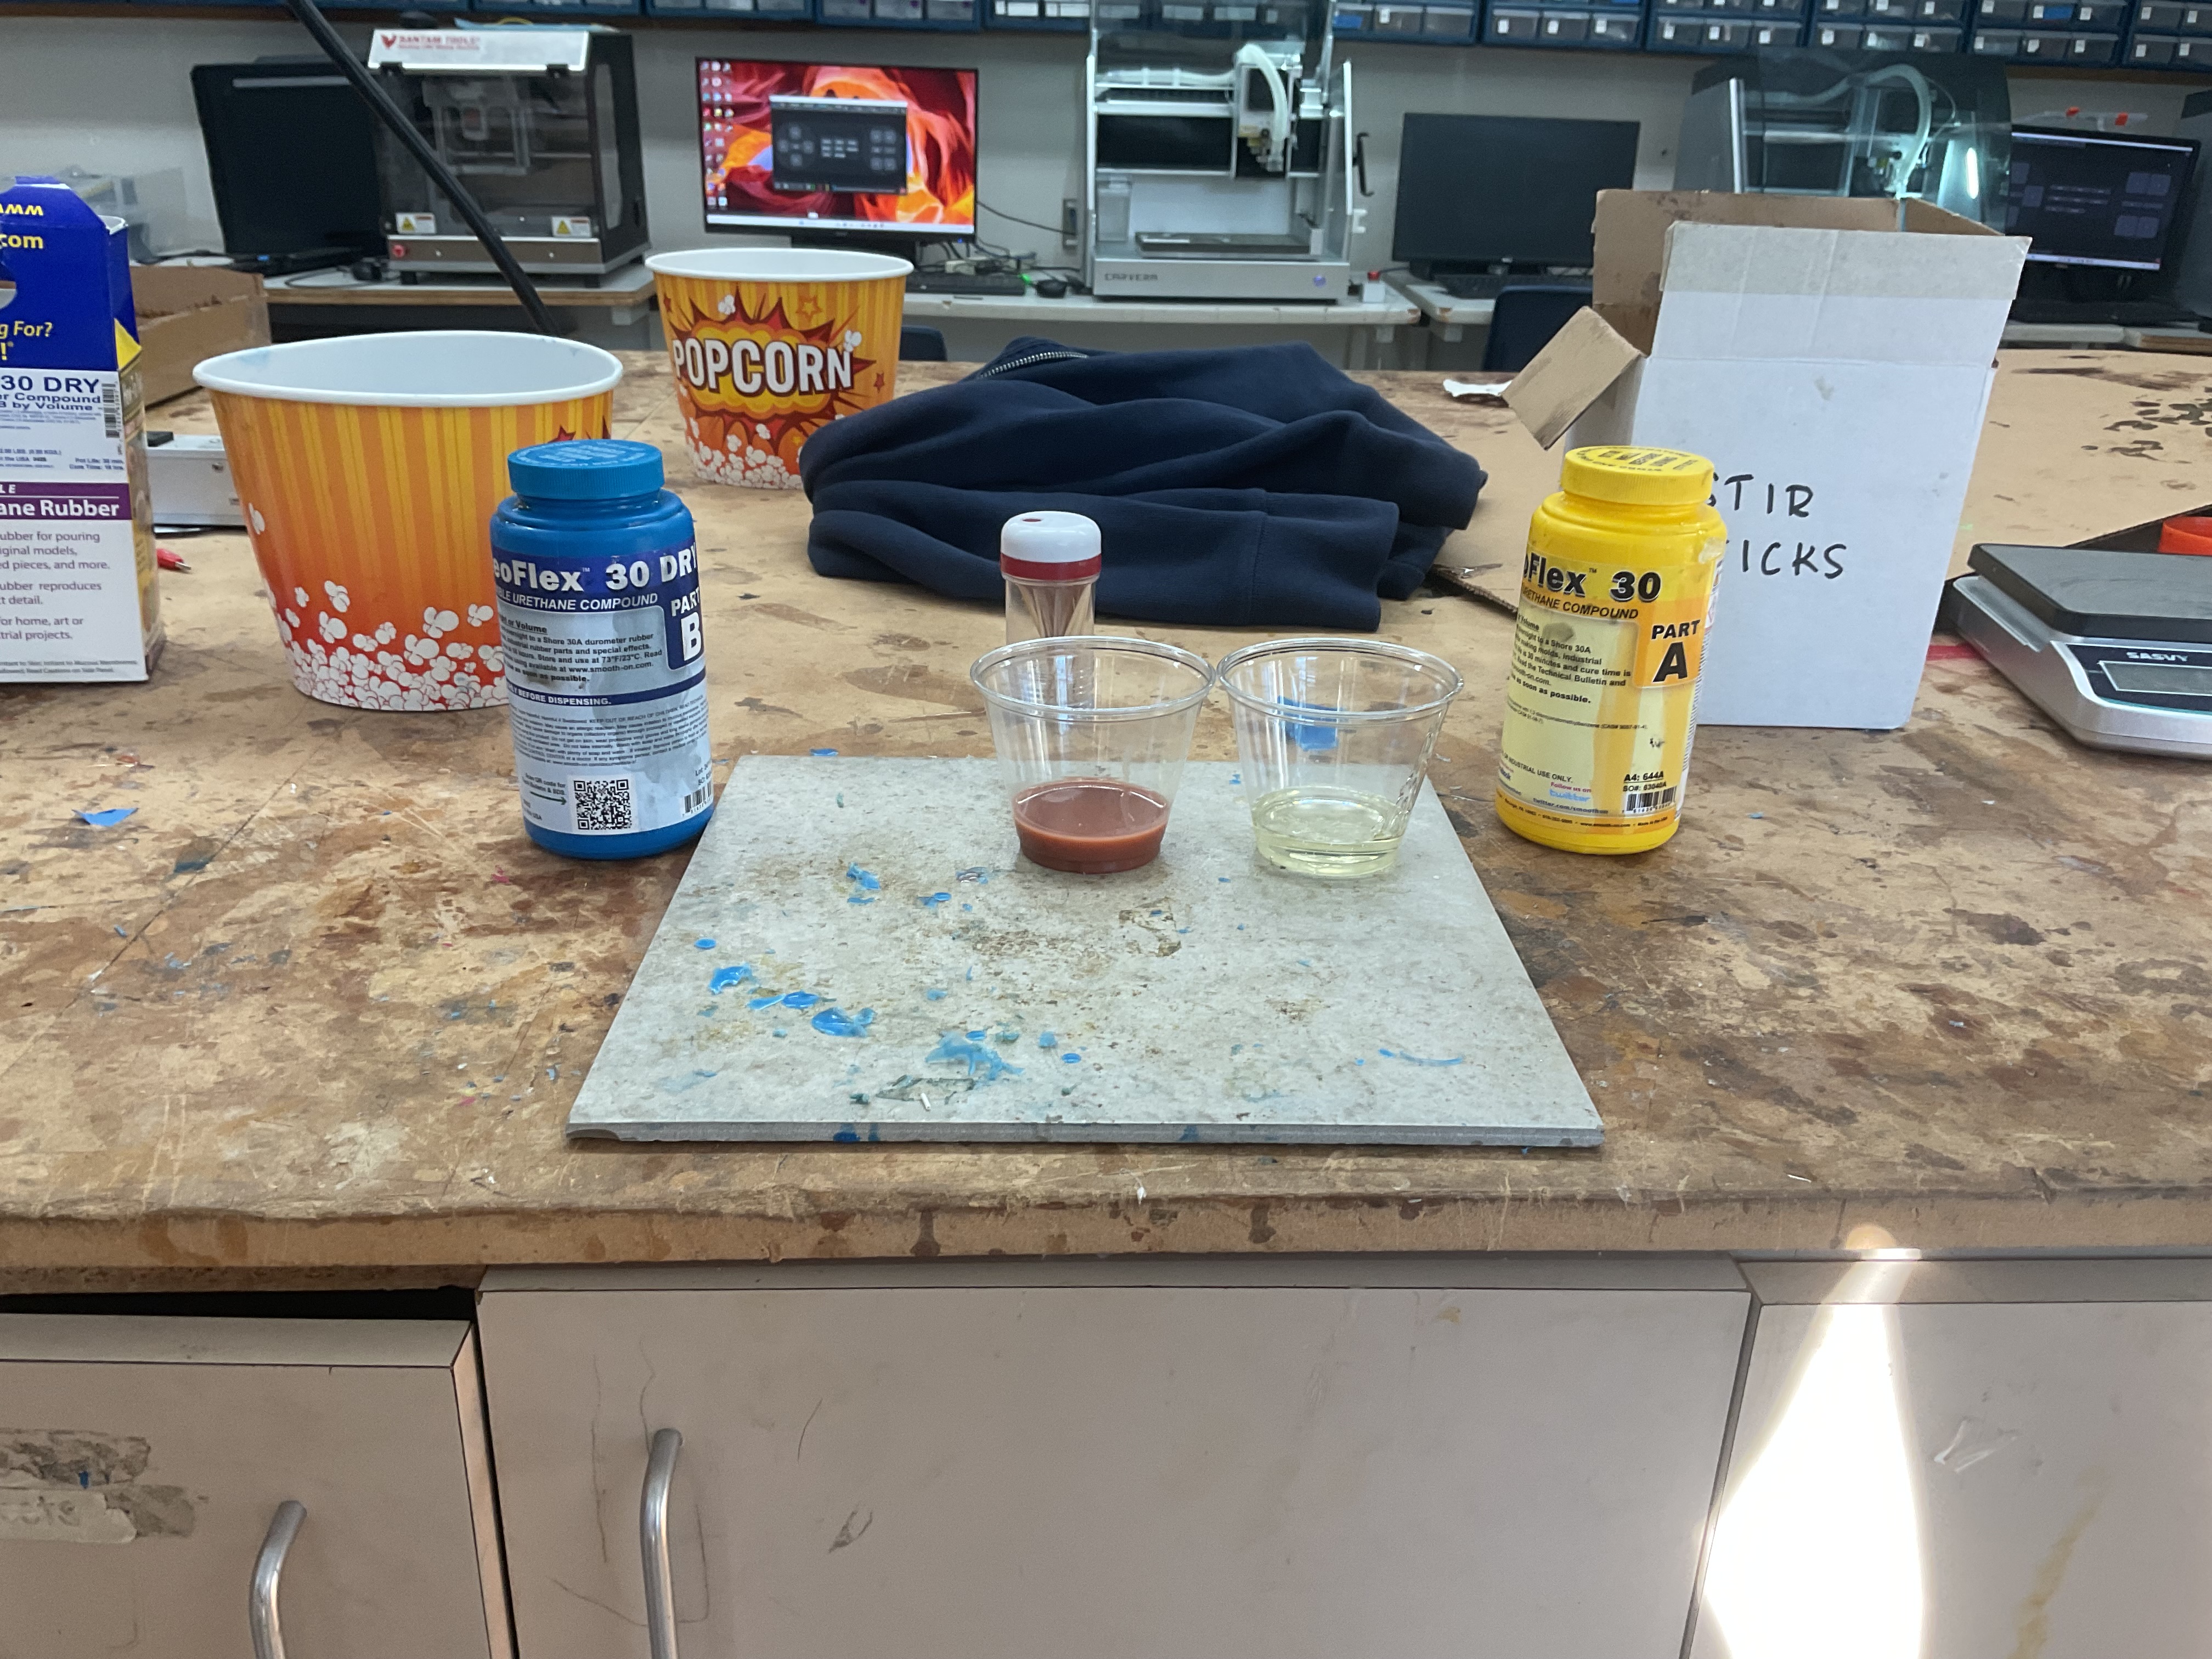
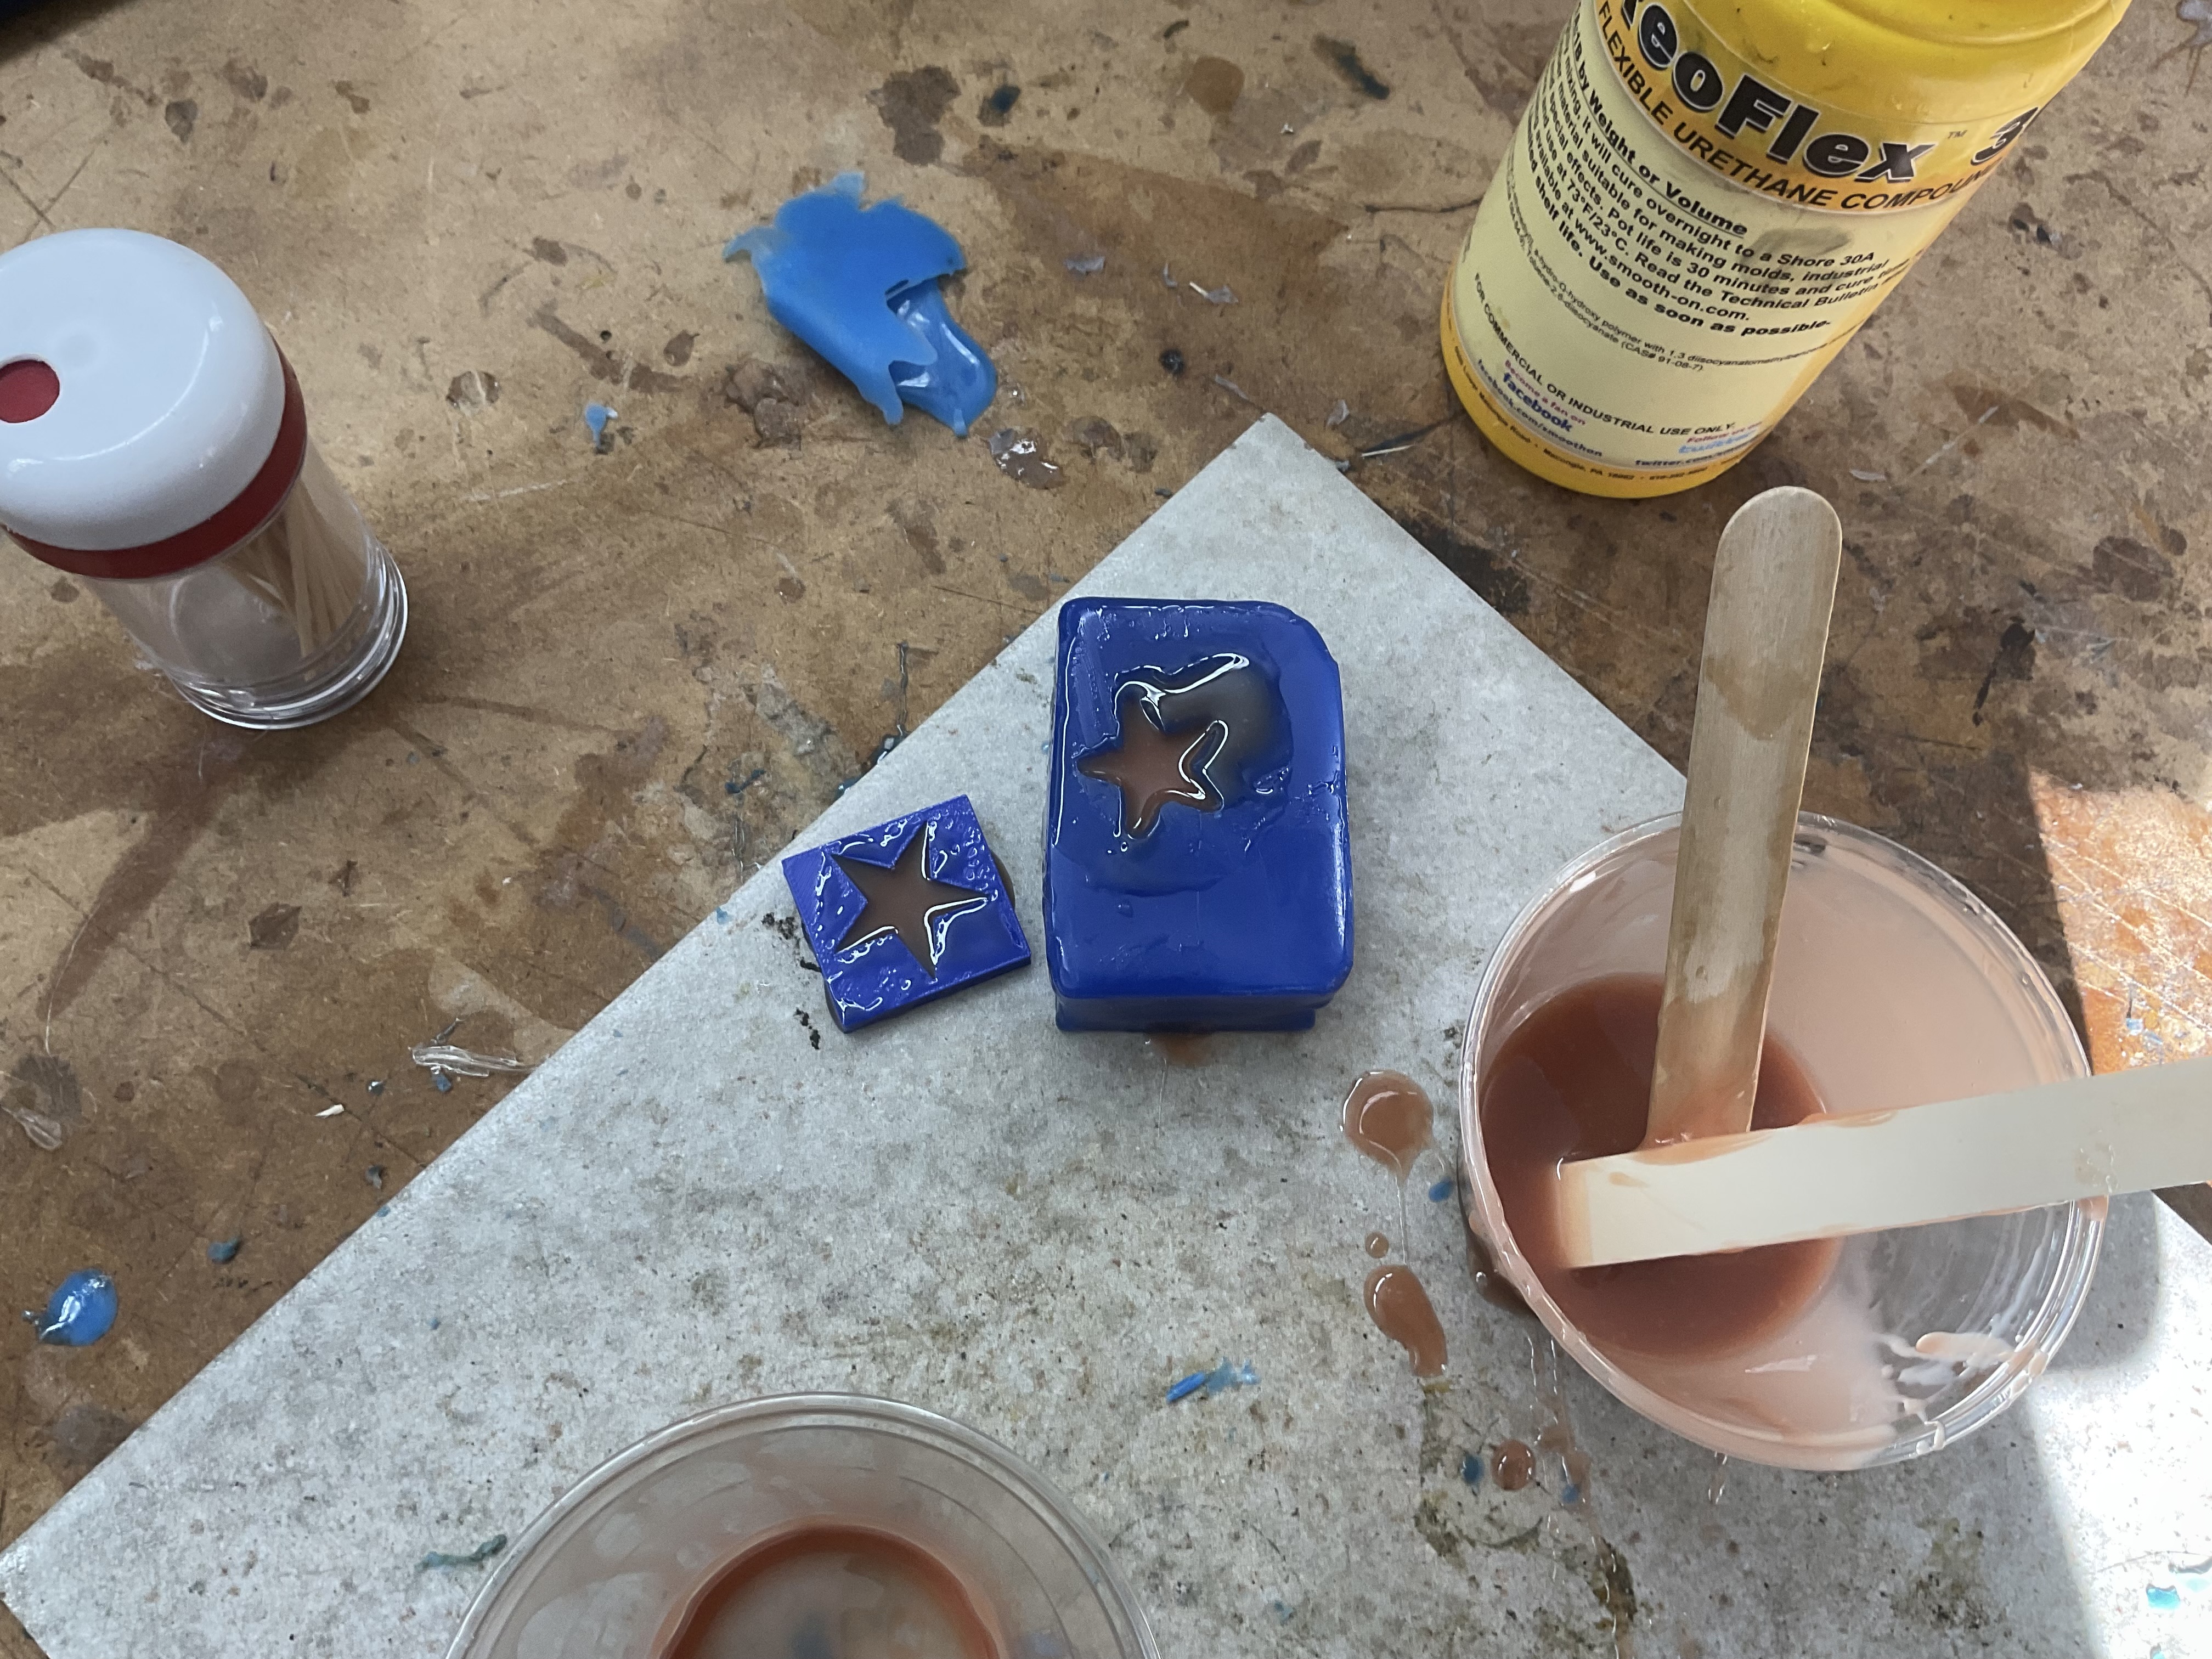
Then combined until the mixture reached a consistant color:
Then poured the material into our molds, reused from the previous project.
Then we let them sit for around 8 hours, returning that evening to release them from their molds. After a little prying, they came out great:
The urethane rubber, to the extent I tested it, behaved very similar to the silicone rubber- same A and B ratios, both similar consistancies, the only difference was the color. I am sure they have different operational strengths, but we were not able to assess them this week.
Data Sheets - McKinnon Collins
Milling Wax Data Sheet
Click Here to Access the Data Sheet.
Machinable wax is generally very safe to handle and machine, producing no harmful dust or fumes under normal CNC conditions. The main risks come from overheating or burning, which can release irritating fumes and create fire or slip hazards if the wax melts. Basic ventilation and avoiding excessive heat are usually enough to keep it safe in typical use.
Bambu PLA Data Sheet
Click Here to Access the Data Sheet.
Bambu PLA Basic is an easy-to-print, stiff thermoplastic designed for high-speed printing, with typical nozzle temps of 190–230 °C and good layer strength for general prototyping. It has low heat resistance, with a glass transition around ~60 °C and heat deflection ~54–57 °C, meaning parts can soften fairly easily under heat.
MoldStar Silicone Rubber Data Sheet
Click Here to Access the Data Sheet.
Mold Star silicones are easy-to-use platinum-cure rubbers mixed 1:1 by volume, producing strong, flexible, tear-resistant molds with extremely low shrinkage and no need for vacuum degassing. They cure at room temperature (as fast as ~30 minutes depending on type) and remain stable across a wide temperature range, up to about 450 °F (232 °C).
XTC-3D Data Sheet
Click Here to Access the Data Sheet.
XTC-3D is a two-part epoxy coating that is brushed onto 3D prints, self-leveling to create a smooth, hard, high-gloss surface that can be sanded and painted. It has a short working time (~10 minutes) and cures at room temperature in about 4 hours, forming an impact-resistant protective layer.
In practice, it’s an easy way to eliminate print lines and strengthen surface finish, but requires proper mixing, ventilation, and skin/eye protection during use.
(Note: I used ChatGPT to help me with the Data Sheet descriptions.)
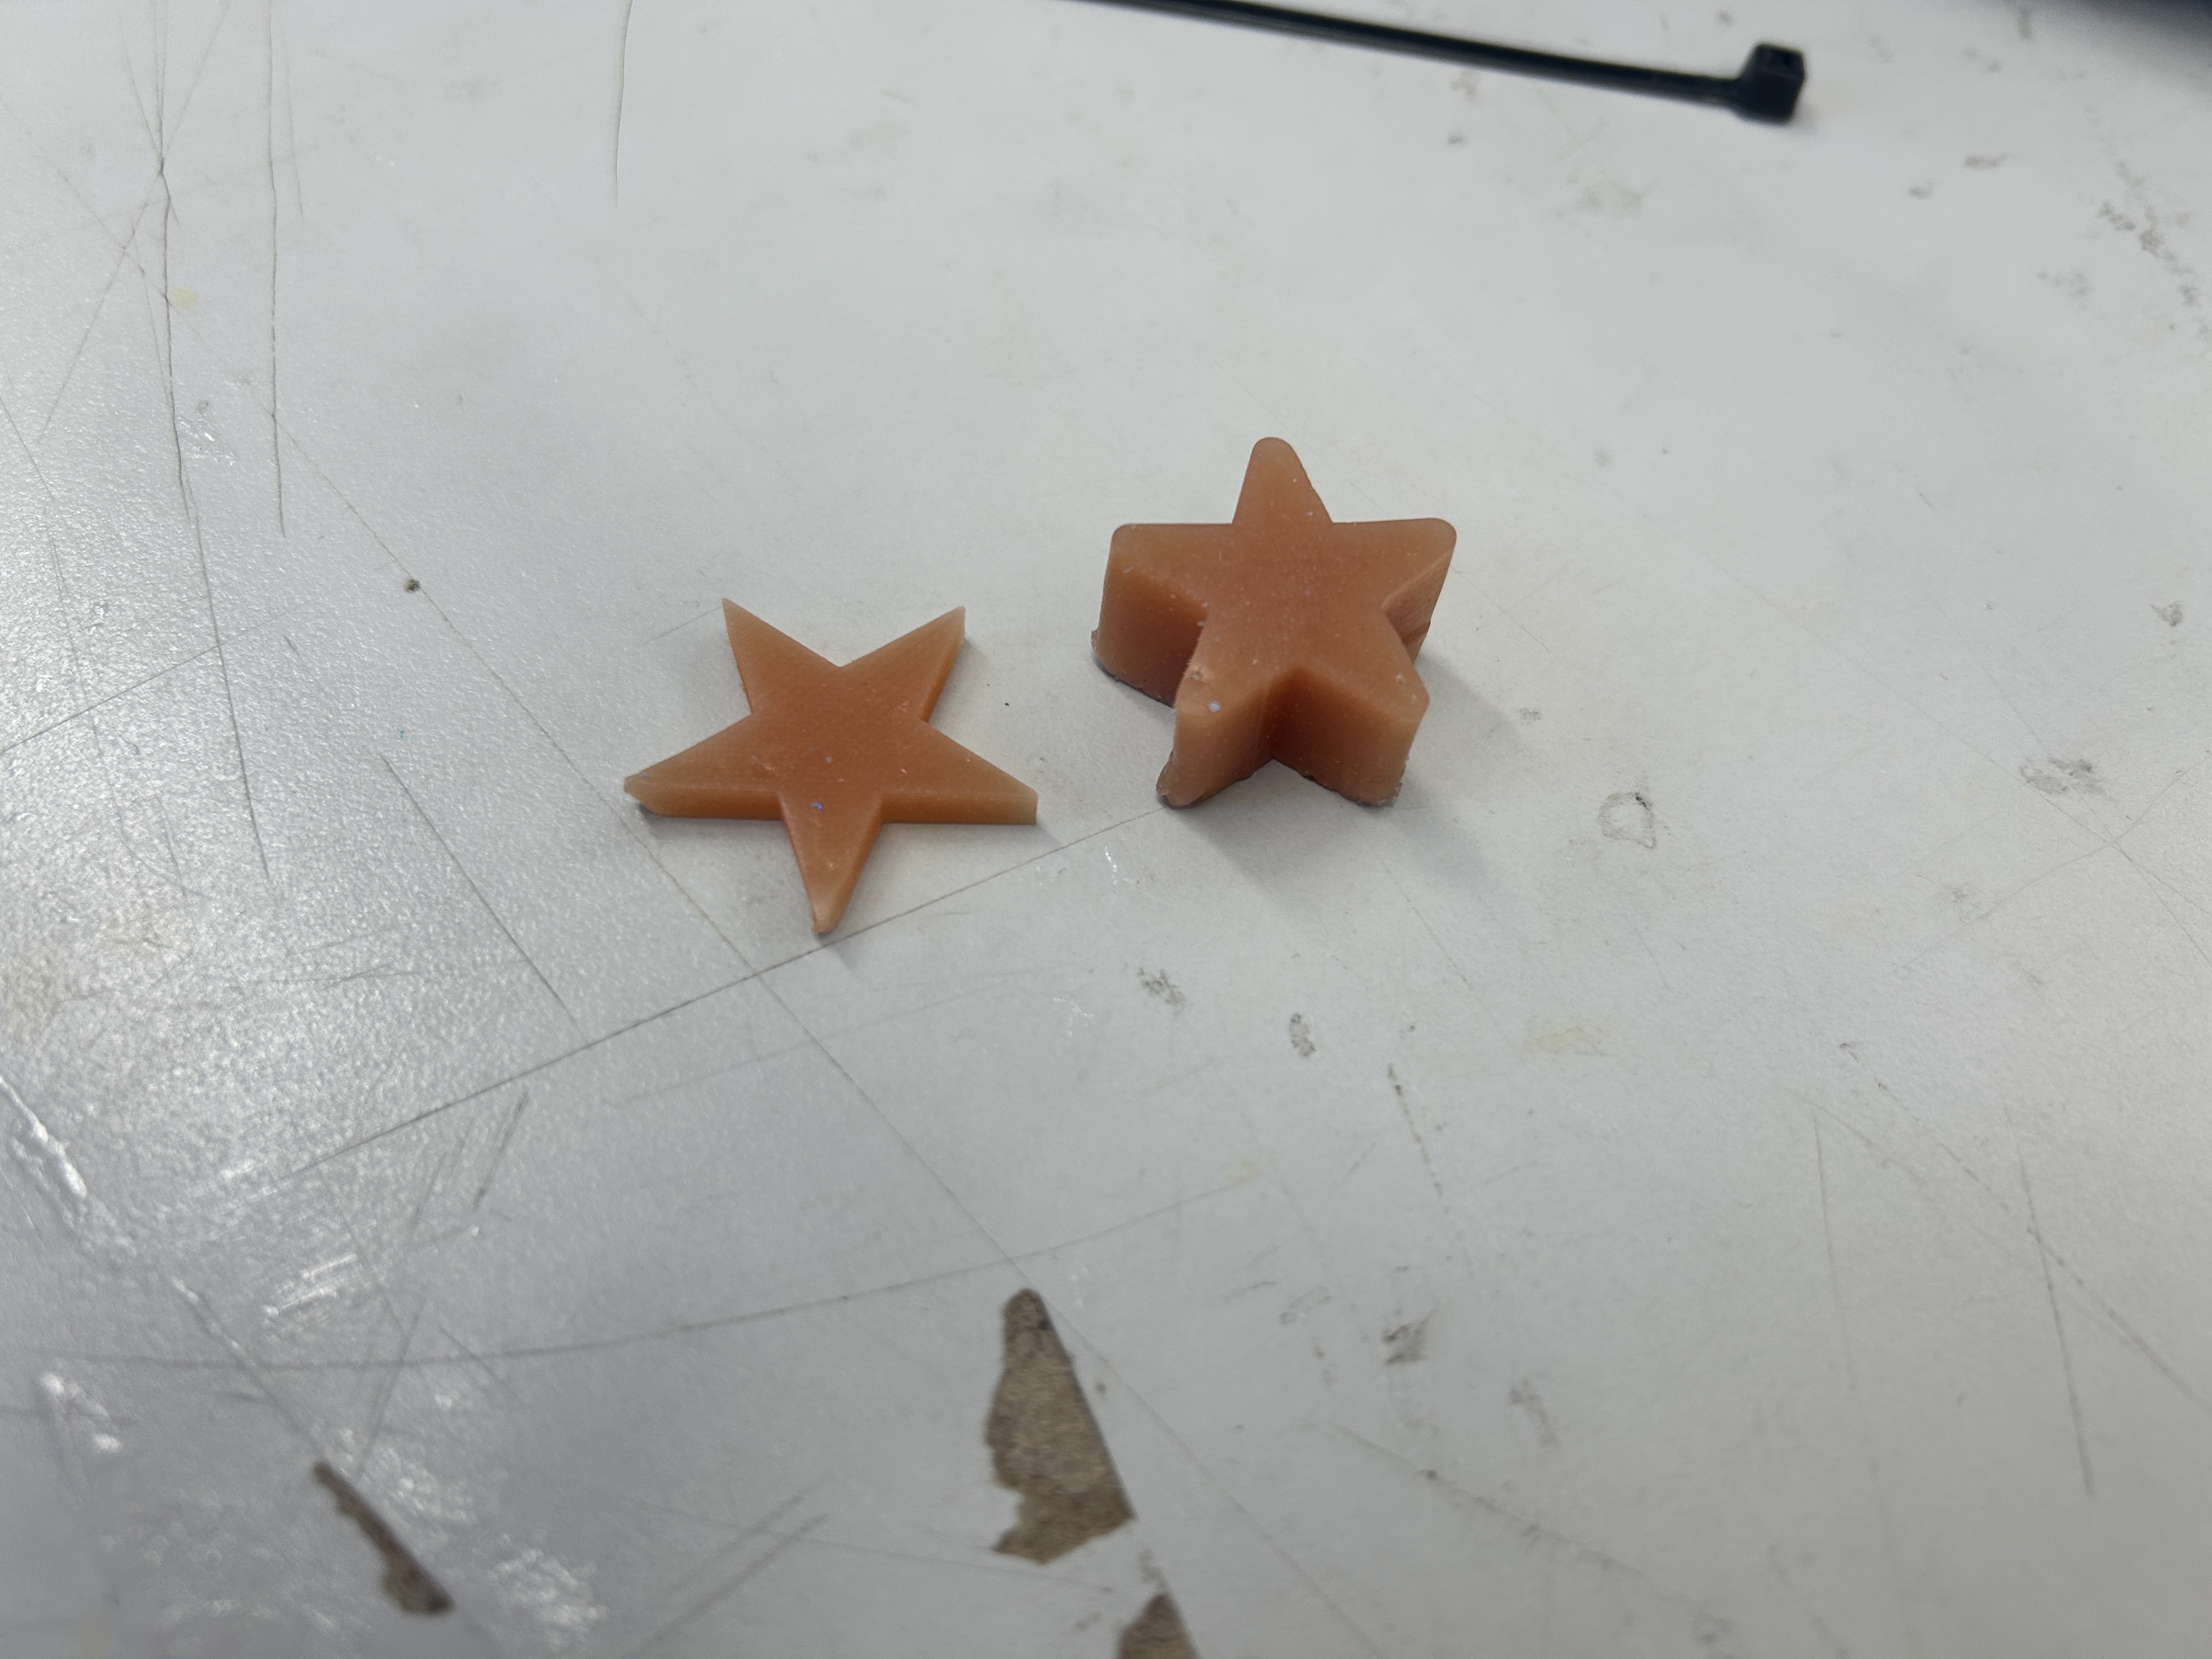
Comparison Between milling and 3D printing - McKinnon Collins
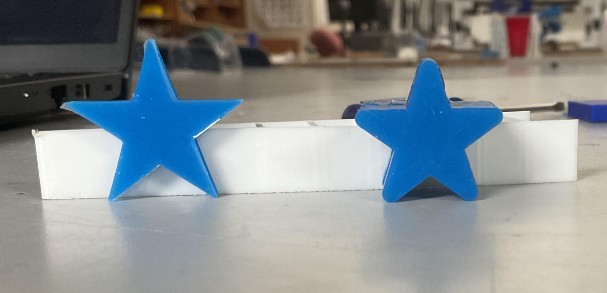
The star on the left is from the 3D printed mold, and the star on the left is from the wax mold. The 3D printed star has much sharper angles, however layer lines are still a bit visible. Both milling and 3D printing have their pros and cons, but overall, the group prefers 3D printing.
Beeswax Candle Molds — Two-Stage Silicone Molding Process — Oliver Abbott
Full documentation on Oliver’s personal site — Week 13: Molding and Casting
Project Overview
I keep bees and harvest honey from my hives, which leaves me with excess beeswax. Making candles is a great way to use it — beeswax candles burn clean, smell great, and are sustainable. The challenge is that you can’t pour hot beeswax directly into a 3D printed PLA mold. Beeswax melts at around 145°F (63°C), and PLA softens at 140–150°F (60–65°C). Even if the PLA doesn’t fully melt, the wax sticks to the layer lines and won’t release cleanly.
The solution is a two-stage molding process:
- Stage 1 — 3D Print a Master Mold (positive) with a smooth surface finish
- Stage 2 — Cast a Silicone Mold (negative) from the 3D printed master
- Stage 3 — Cast Beeswax Candles using the silicone mold
Silicone rubber is heat-resistant (up to 400°F / 200°C), flexible for easy part removal, and produces a smooth surface — ideal for a reusable candle mold.
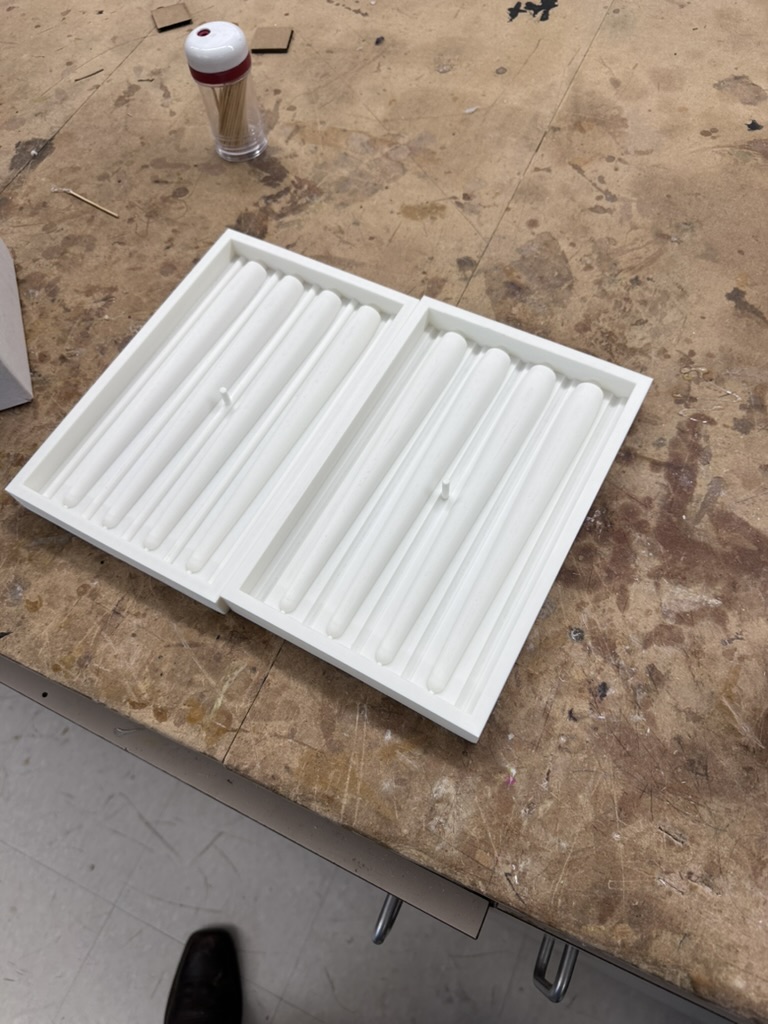
Stage 1: Designing & 3D Printing the Master Mold
I designed a two-part mold in Fusion 360. The design started with the candle shapes I wanted — four candles in a row — then I created a negative by cutting those shapes out of a solid block.
Two-Part Mold with Alignment Features:
- Alignment Arches: One side has long arches that protrude, the other has matching grooves. They interlock to ensure perfect alignment between the two halves.
- Center Clamping Hole: A cylindrical hole through the center of both halves allows clamping during the silicone pour.
- Precision Fit: Critical for creating a clean silicone mold without seams or misalignment.
3D Printing Settings:
- Printer: Bambu A1
- Quality: High Precision mode — finer layer heights for smoother surfaces
- Wall Thickness: Increased for structural rigidity
- Print Time: ~20 hours per half
Every layer line on the 3D print transfers to the silicone mold, and then to every candle. The finer the print, the less post-processing needed.
Stage 1.5: Sanding for a Smooth Finish
Even with high-precision printing, I still needed to sand the molds by hand to eliminate layer lines. I worked through progressively finer grits:
- 220 grit — Knock down visible layer lines and rough texture
- 330 grit — Smooth out scratches left by the 220
- 440 grit — Final pass for a very smooth finish ready for silicone
This is time-consuming but critical — every imperfection transfers to the silicone mold and then to every candle cast from it.
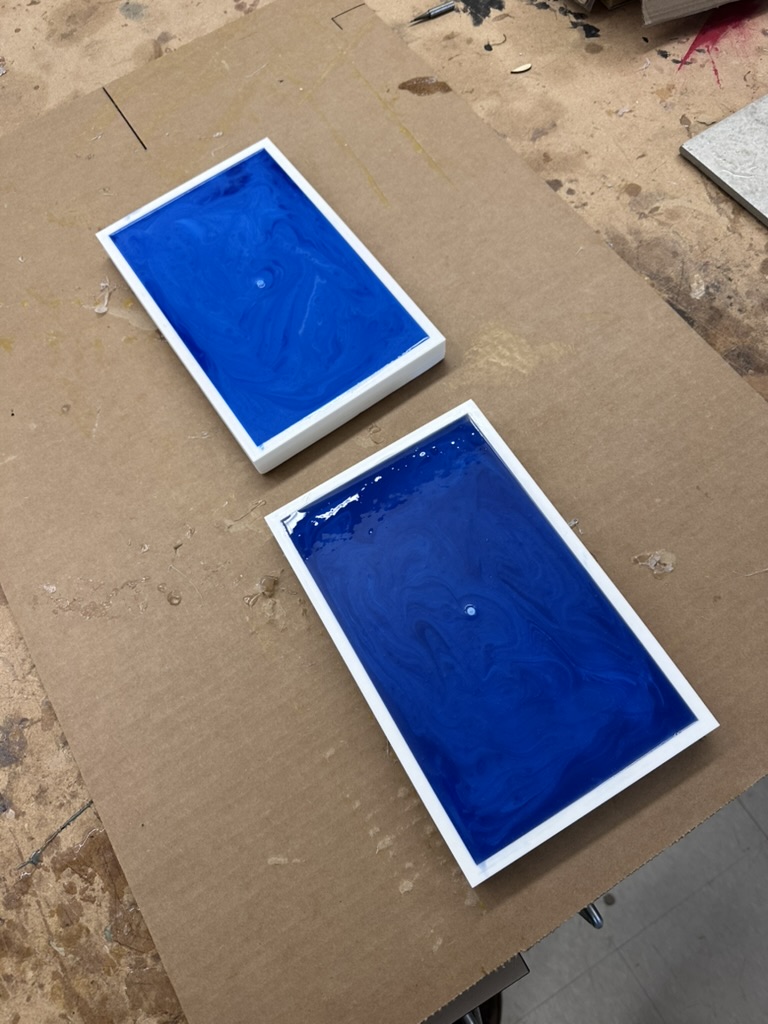
Stage 2: Casting the Silicone Mold
With the master mold printed and sanded smooth, I poured the silicone.
Silicone Casting Process:
- Prepare the Master: Applied mold release to the sanded 3D printed master to prevent the silicone from bonding to it
- Mix & Pour: Mixed the two-part silicone and poured it into the mold cavities
- Cure: Left it to cure overnight
- Demold: Removed the cured silicone molds from the 3D printed masters the next day
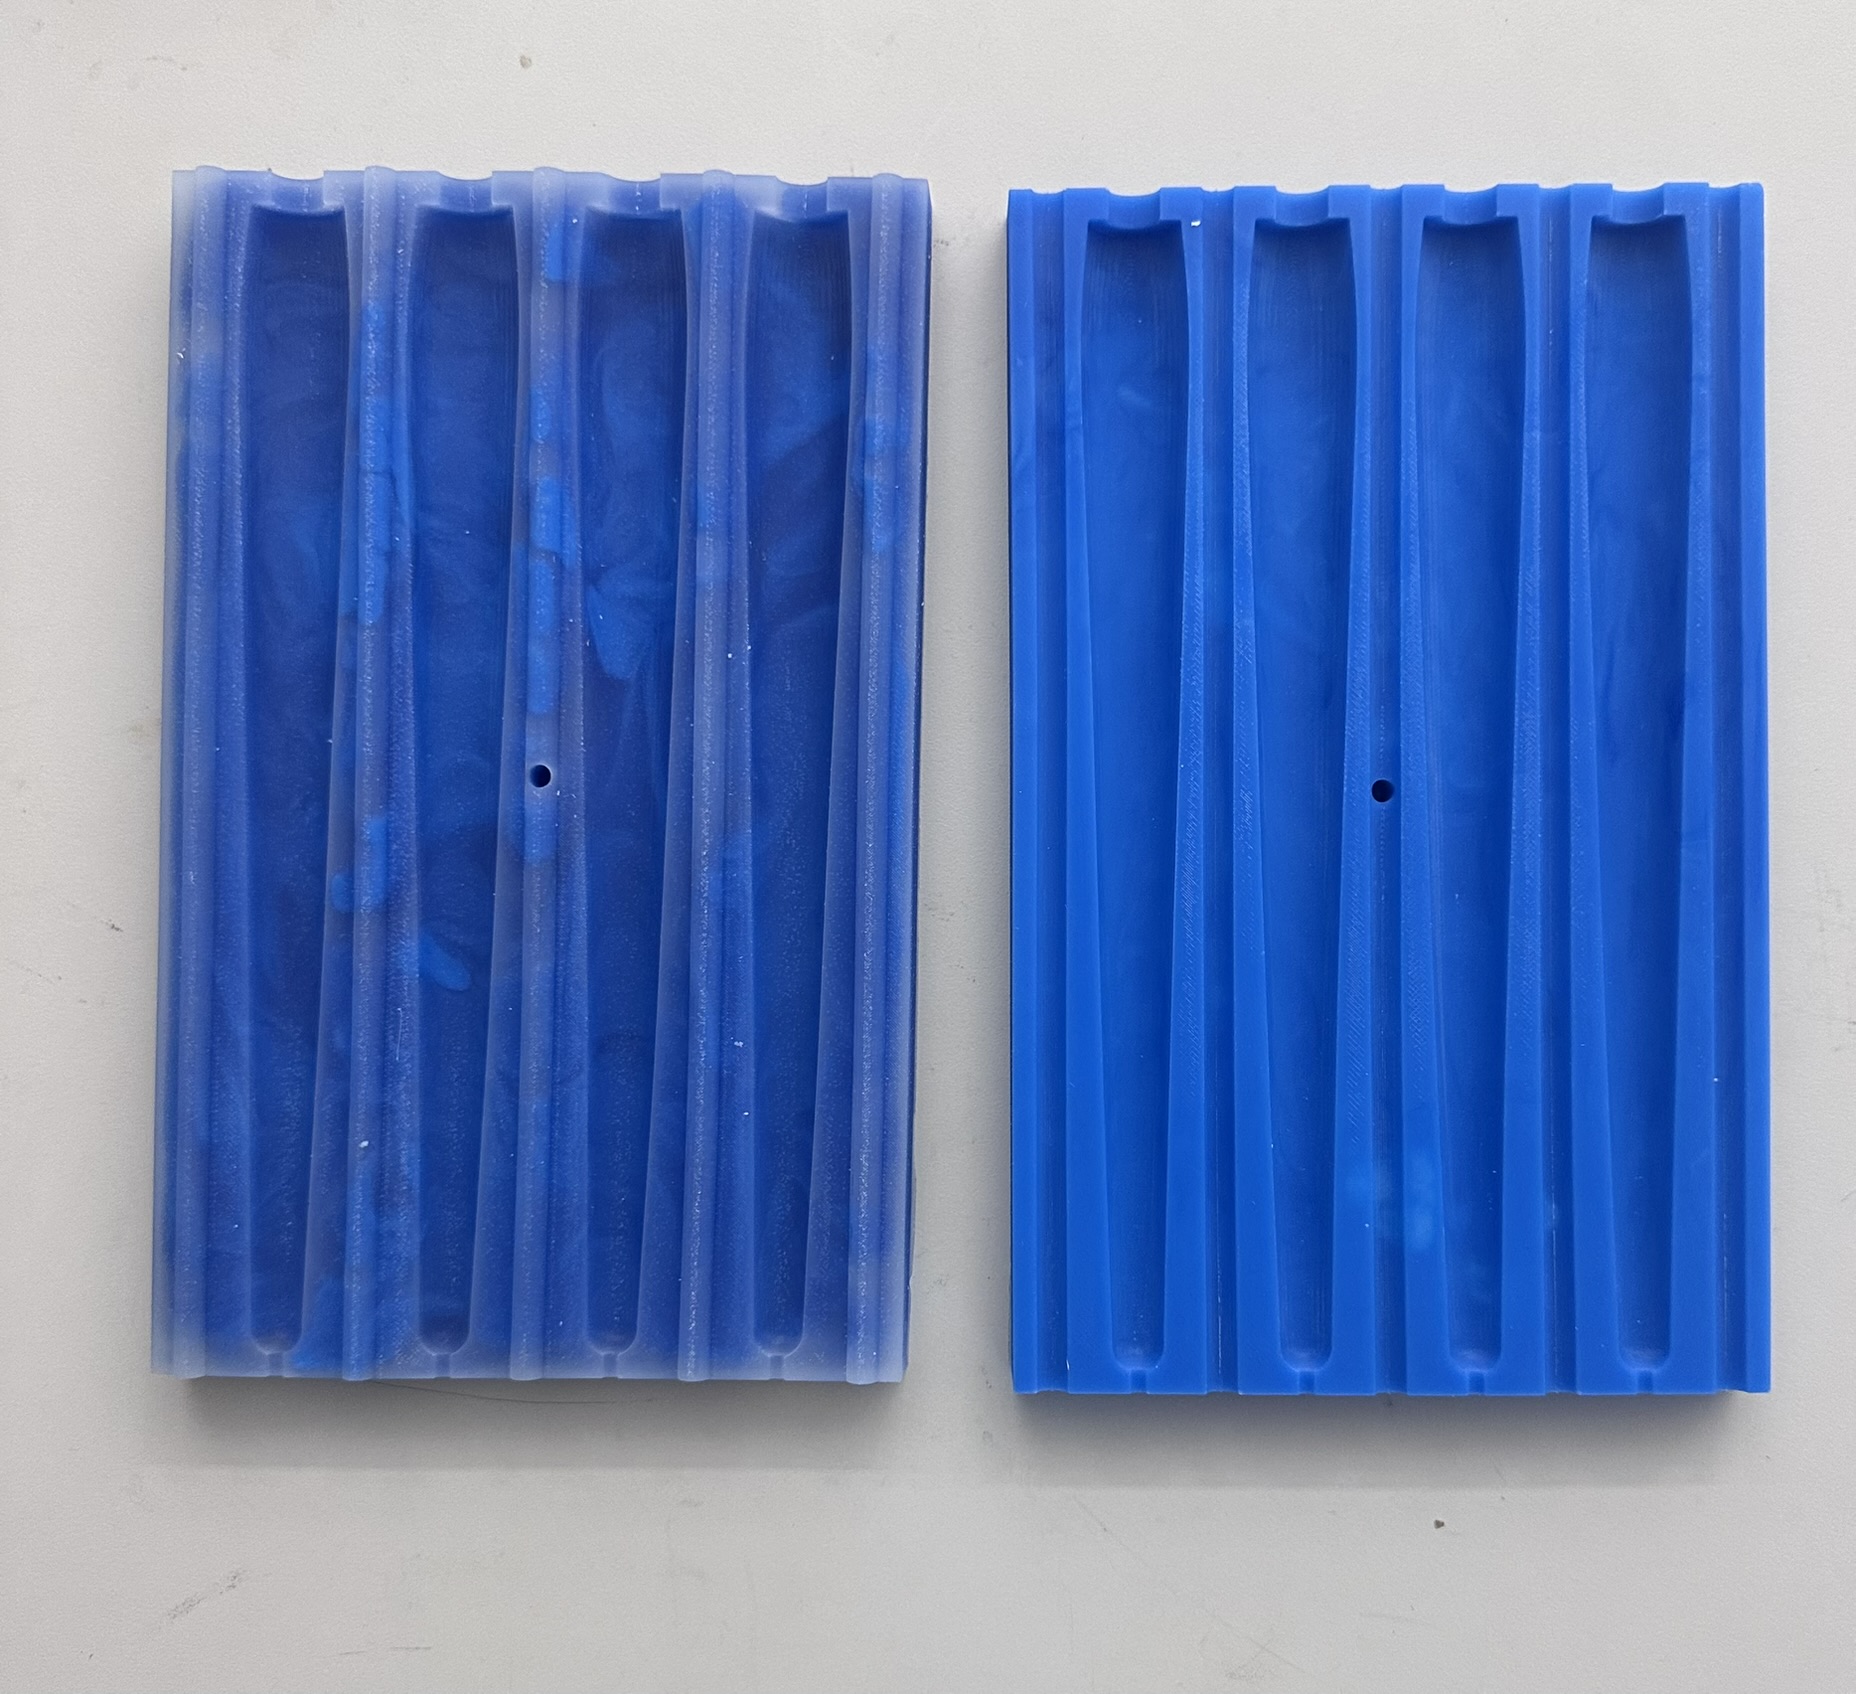
Lessons Learned — Two Different Silicone Batches:
I used a different container of silicone for each half, and the results were noticeably different:
- Hazy/Clear Mold: Much softer and more flexible — not ideal for candle making
- Solid Blue Mold: Firmer, more rigid, holds its shape better when clamped — preferred for repeated use with hot beeswax
Second Attempt — Remaking the Failed Mold:
The softer mold wasn’t going to work, so I remade it. The second pour had issues too:
- Patchy, uneven surface texture in some sections
- Shape didn’t capture the master perfectly in all areas
- One alignment groove was twisted — likely because someone tried to remove the mold before the silicone was fully cured
Rather than remaking it a third time, I went with what I had. Patience is key with silicone — pulling it out early saves a few hours but ruins the whole cast.
Safety Notes:
- Work in a well-ventilated area
- Wear gloves and safety glasses
- Review the Safety Data Sheet (SDS) for your specific silicone product
- Some silicones are inhibited by sulfur, latex, or certain 3D printing resins — check compatibility
Stage 3: Rendering Beeswax & Casting Candles
Rendering the Beeswax:
Raw beeswax from hives contains debris, propolis, and impurities that need to be filtered out. I used an Instant Pot as a double boiler:
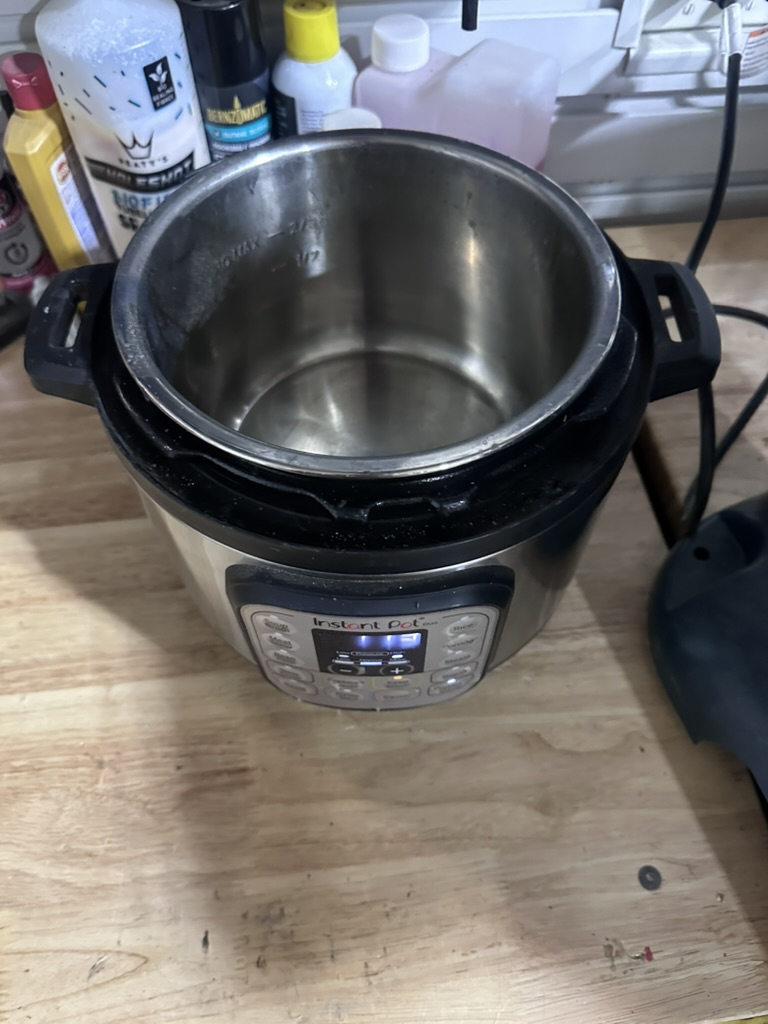
- Water Bath: Fill the Instant Pot with 2–3 inches of water
- Glass Jar: Place a heat-safe jar filled with raw beeswax in the water
- Rag Filter: Clean rag or cheesecloth on top to filter debris as the wax melts
- Low Heat: “Keep Warm” or low heat — never melt wax over direct high heat (flammable above 400°F / 200°C)

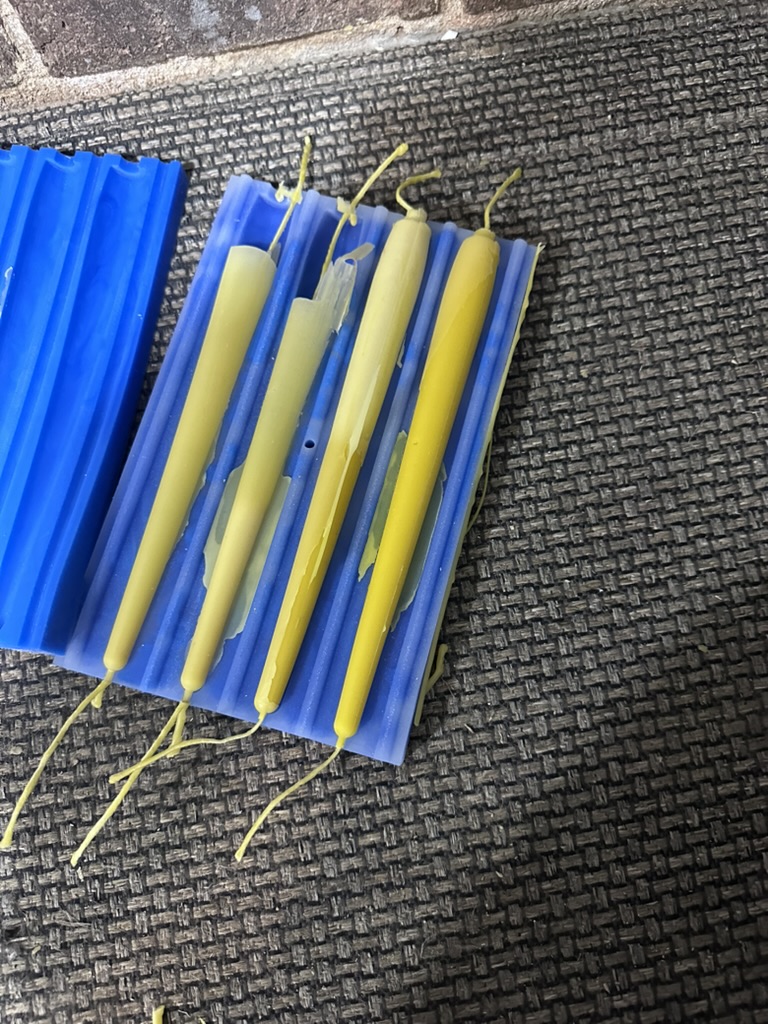
Casting the Candles:
I clamped the two silicone mold halves between wood boards (a 3D printed clamp wouldn’t fit on my printer bed). Before threading the wicks, I pre-waxed them in melted beeswax — this primes the cotton fibers so the candle lights easily and burns with a steady flame.

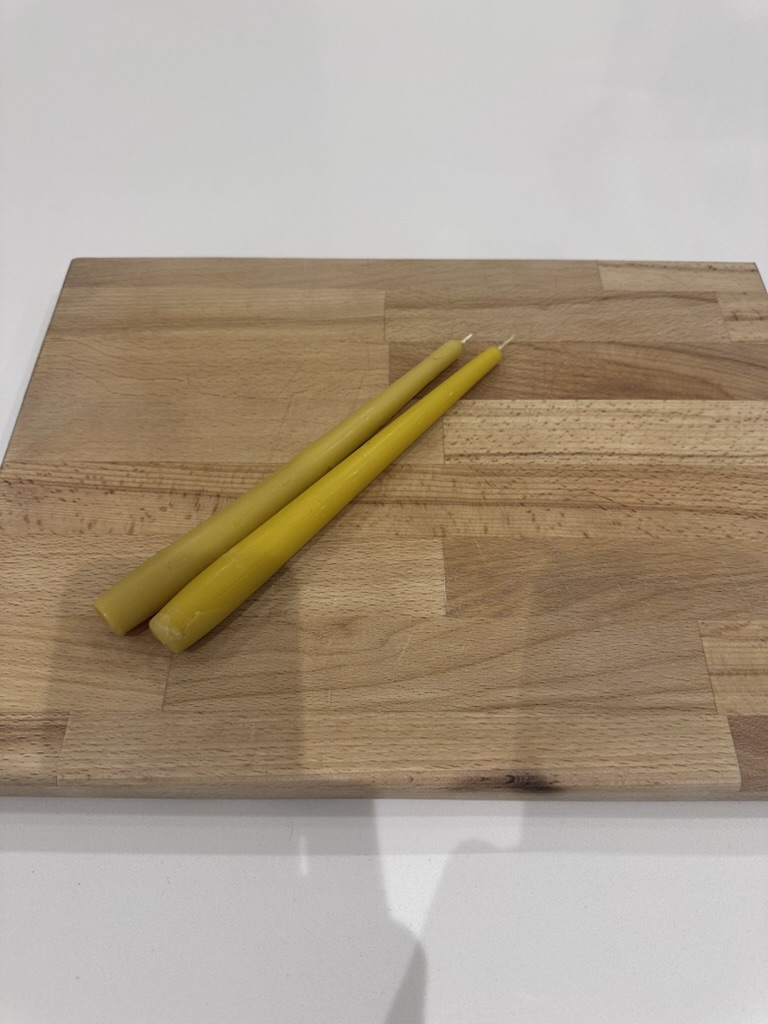
Results — Three Candles, Three Lessons:
- First candle: Came out pretty good, but the wax shrank as it cooled (thermal contraction) — had to top off with more wax
- Second candle: Ran out of wax mid-pour, creating a visible color line where the second batch met the first
- Third candle: Wax spilled out the bottom — the wood board clamp didn’t seal tightly enough
Burn Test: Tested one candle and it burned perfectly — steady flame, clean burn, great natural beeswax smell.

Potential Improvements
- 3D printed clamping mechanism — Would seal the mold halves more tightly and prevent leaking (biggest improvement)
- Taller pouring section — Extra height acts as a reservoir to account for thermal shrinkage
- Pour temperature control — Monitoring temperature more carefully could improve surface finish and reduce defects
- Single continuous pour — Having enough wax melted upfront avoids visible color differences from separate batches
Why Mold Casting Instead of Dipping?
Traditional pillar candles are made by repeatedly dipping the wick into melted wax, building up layers over many dips. Mold casting is faster and produces consistent shapes — plus the silicone molds are reusable for many future candles. It’s a great way to use up extra beeswax from beekeeping.