16. Wildcard Week
For this assignment, the objective is to conceive and manufacture an item using a digital process not addressed in previous assignments. The task involves thoroughly documenting the requirements fulfilled by the assignment and providing all necessary details to replicate it. Examples of potential approaches include wildcard week projects, though the scope extends beyond these.
Assigmnent checklist
| Item | Activity | Status |
|---|---|---|
| 1 | Linked to the group assignment pageDocumented the workflow(s) and process(es) you used. | Done |
| 2 | Described problems encountered (if any) and how you fixed them. | Done |
| 3 | Included original design files and source code. | Done |
| 4 | Included ‘hero shot’ of the result. | Done |
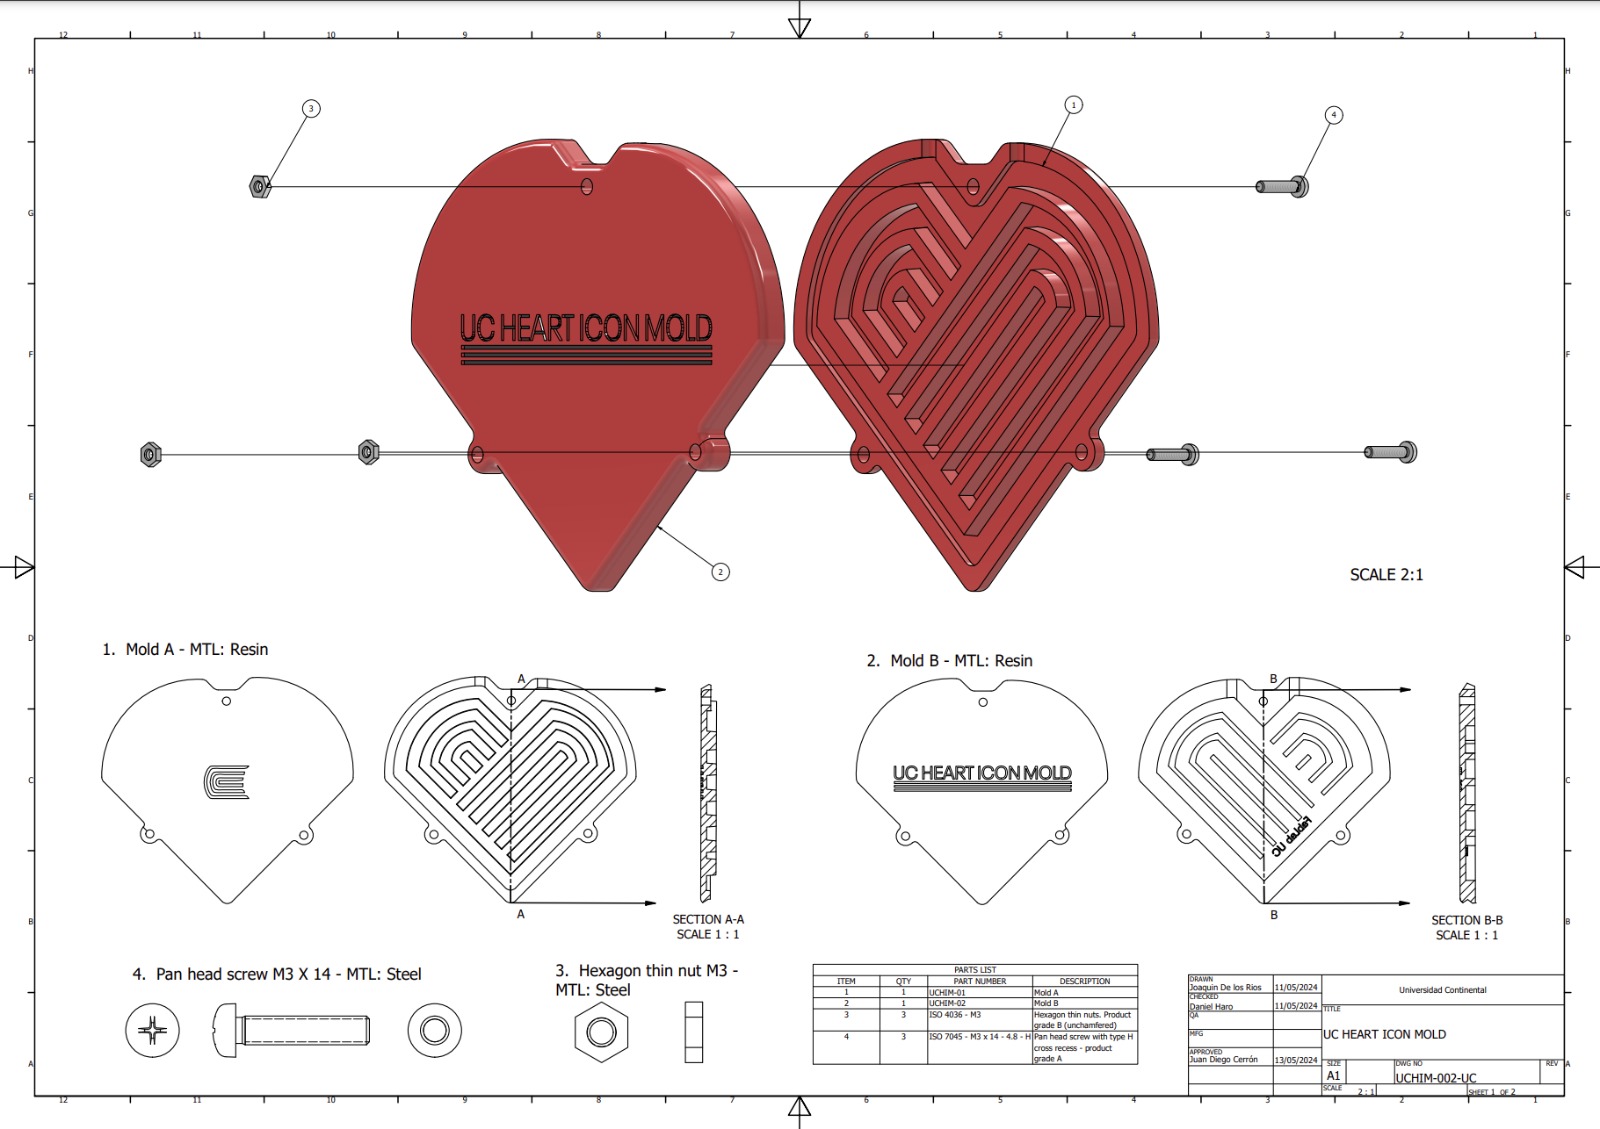
UC HEART ICON MOLD
For this assignment inspired in a Gift for my mom Maguelly Dorina Rosado Falconi, who is living in Spain actually and it’s dedicated to all mothers of continental university at the date that i am starting to write the assignment is May 8 and the Sunday 12 of May is the Mothers´s Day and i will gift chocolates.

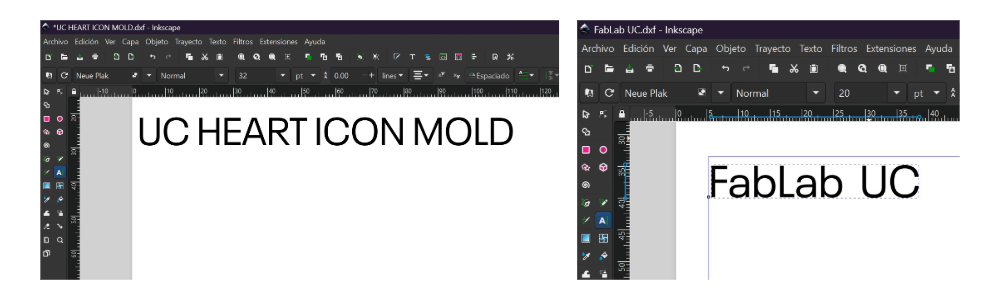
This detail in the design part is considered the official typeface of the university “Neue Plak” for all letters.
- To properly manage the digital assets of this project we first start by creating a folder starting with the acronym of the project name and the project name. Then we classify the files into 4 major categories.
- CAD Design files
- Project documentation such as dimensional drawings, assembly drawings, technical specifications of materials, etc.

-
UCIHM-01-Mold A UC Heart Icon Mold This mold was designed in Autodesk Inventor 2024, for this we must first create the lines and curves of the heart in a sketch. We create a 2D sketch selecting the XY plane.
-
In this sketch we import an image by clicking on the “Insert Image” tool. Then we must restrict the movement of the image with the “Fix” tool.
-
On this image we can trace the perimeter lines with the 2D design tools “Line” and “Arc” together with the perpendicular and parallel constraints that will help our design to be more symmetrical.
- Then with the “Offset” tool we create the other lines that will help us to shape the mold, with the “Circle” tool we create the holes for M3 bolts that will be mounted in the mold, with the “Fillet” tool we add the rounded edges, as a result we get this 2D design.

- In the first extrusion we generate the positive shape of the chocolate, which as a final result will be the piece of chocolate itself and as chocolate is a delicate material with a tendency to break or crack, even more so due to the shape of the isotype and the thinness of the 5mm thick chocolate walls, it is necessary to add a demolding angle, in this case using the “Tapper” tool indicating -3 deg.
- This angle will facilitate the demolding as shown in the figures about demolding angles.
- And -3 degrees is indicated because this will be the demolding angle of the chocolate part, which actually hinders the demolding of the silicone part, but is not relevant because of the flexible nature of silicone.

- I then extrude the base of the mold.
- The third extrusion will be used to give height to the silicone mold edge apron.
- With the “Offset from Plane” tool we create a plane at 6.5mm from the base of the mold, placing it right in the middle of the mold, assuming that when the 2 pieces of this mold fit together the thickness will be 13mm. This will be useful for the timing of the hole, because the inlet and vent hole is shared in both pieces.
- With this plan we will design the inlet hole and the vents.
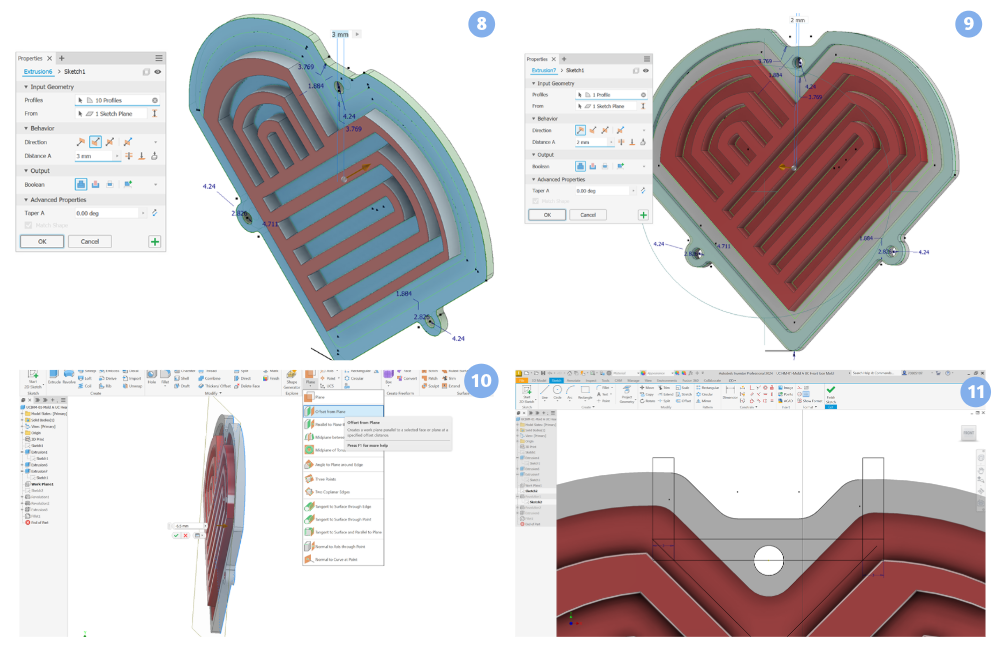
- With this sketch we will make the holes with the tool, “Revolve”.
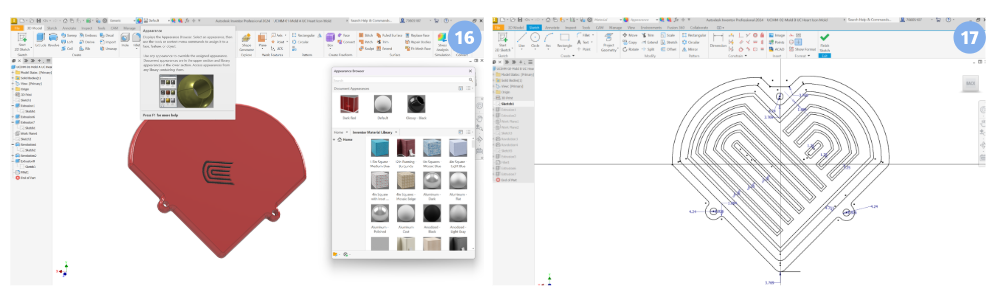
- We create a sketch on the base to add the logo of the university, importing in .dxf the logo.
- We extrude the logo in 1mm
- And add rounded edges to the design with the “Fillet” tool.

- With the “Appearance” tool we add the colors of the design. UCIHM-01-Mold A UC Heart Icon Mold
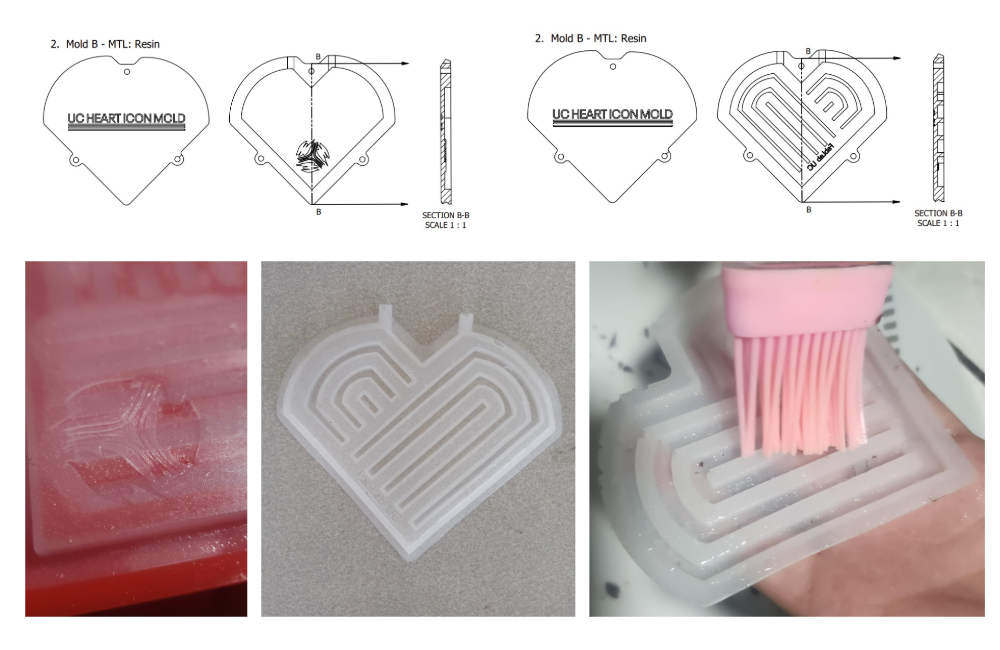
- In this piece we copy and paste the initial sketch and modify it slightly with the tool .
Now we have our design ready to be printed in resin.
With our design completed, we configure it in CHITUBOX PRO to proceed with resin printing.
 After the resin printing is finished, we proceed to cure the pieces.
Preparation of Food Grade Silicone F.10
- We start by opening our 2 bottles of silicone and catalyst.
- On a scale, we weigh the container into which we’ll pour and press TARE.
- We pour our Bottle A, which is the silicone, up to 40 grams.
- We pour our Bottle B, which is the catalyst, up to 40 grams and mix for 2 to 3 minutes.
- We pour the already mixed solution into our mold and wait for 6 hours for it to dry.

- We demold our silicone from the resin mold.
- We apply mold release to the entire mold for easy removal later.
- With our chocolate already melted, we pour it into our mold and wait for it to set in the refrigerator for half an hour.
- Carefully, we demold our chocolate, and it’s ready!
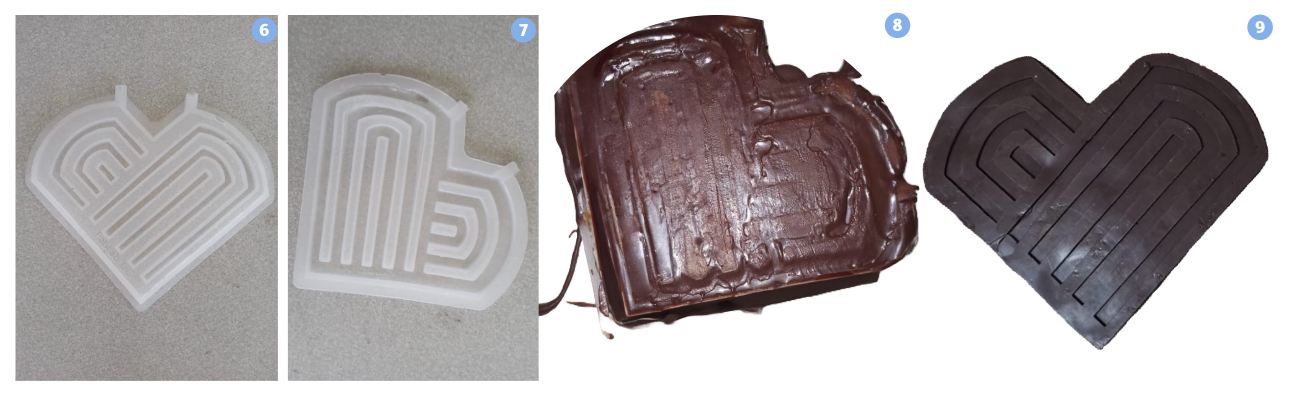
Issues, musings, and learnings.
The inner walls of the silicone inside the mold are very thick, and the chocolate, having walls of 5mm wide and thick, tends to break and/or crack when demolding the chocolate piece. Therefore, notches will be added to mold B to reduce the silicone walls, and a demolding angle will also be added to the chocolate figure to create a conical chocolate piece that is much easier to remove than the initially proposed one. Additionally, more efficient demolding techniques were researched and tested.