5. 3D Scanning and printing
For the group assignment, individuals are required to assess the design rules applicable to their 3D printer(s), documenting their findings on the group work page, and sharing personal reflections regarding the characteristics of their printer(s) on their individual pages. As for the individual task, participants must design and 3D print a small object (a few cubic centimeters in size, limited by printer time) that cannot be easily fabricated through subtractive methods. Additionally, they are encouraged to 3D scan an object and optionally print it.
Assigmnent checklist
| Item | Activity | Status |
|---|---|---|
| 1 | Linked to the group assignment page. | Done |
| 2 | Explained what you learned from testing the 3D printers. | Done |
| 3 | Documented how you designed and 3D printed your object and explained why it could not be easily made subtractively. | Done |
| 4 | Documented how you scanned an object. | Done |
| 5 | Included your original design files for 3D printing. | Done |
| 6 | Included your hero shots. | Done |
Group Assigmnents
In this assignment, we will address the following tasks:
- Test the design rules for your 3D printer(s)
- Document your work on the group work page and reflect on your individual page what you learned about characteristics of your printer(s)
Machines
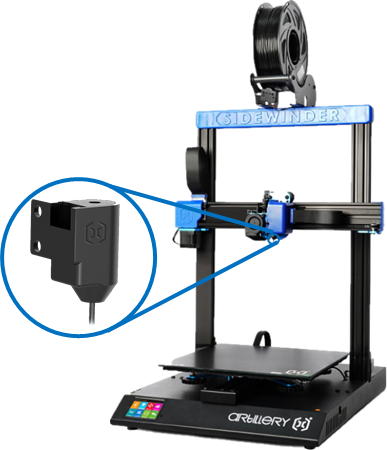
3D Printer: Artillery Sidewinder x2
| NAME | SPECIFICATIONS |
|---|---|
| 3D printing technology | FDM (Fused Deposition Molding) Direct Extrusion |
| Print dimensions | Base: 30 x 30 cm / height 40 cm |
| Print speed | 150 mm/s maximum |
| Printing precision | 0.1 – 0.35 mm |
| Extruder type | Direct (Titan type) |
| Nozzle type | Volcano |
| Nozzle diameter | · Standard: 0.4mm · Interchangeable: 0.2, 0.3, 0.6, 0.8, 1.0, 1.2 mm |
| Nozzle temperature | ≤ 240º C |
| Nozzle warm-up time | < 3 minutes |
| Print platform | Tempered glass with coating |
| Hot bed temperature | ≤ 130º C / reaches 110º C in less than 2 minutes |
| Bed leveling | Automatic |
| Connectivity | USB / TF Card / USB Flash Drive |
| File formats | STL / OBJ / AMF |
| Cutting software (SLICER) | Cura / Repetier-Host / Simplify3D |
| Operating system | MAC, Windows |
| Electric current parameters | 110 – 220 V AC |
| Electrical energy consumption | 700 W max (with heated bed on) |
| Printing materials | PLA, ABS, PETG, wood, nylon, carbon fiber, bronze, copper, etc. · Ideal for printing flexible filaments such as TPU, TPE, TPC, SOFT PLA, etc. |
| Filament diameter | 1.75 mm |
| Noise level | < 70 dBA |
3D Scanning: Academia 20TM
Technical Characteristics

Scanner parts and accessories

To avoid printing problems, it is important to ensure that any 3D printed part is supported if its angle is equal to or greater than 60°. Detailed lettering must be at least 4 mm in height to be recognized correctly in the print. When designing parts with specific measurements, keep in mind that the tolerance when printing for the internal dimensions to match exactly is 0.8 millimeters.
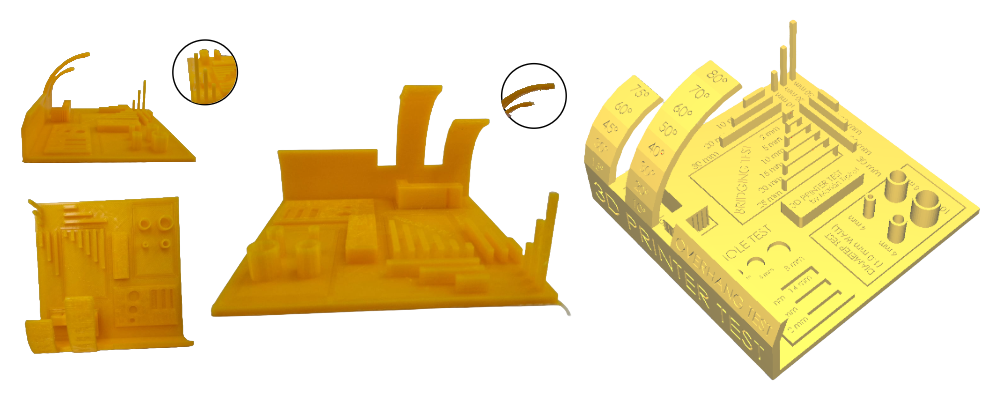
The infills used in 3D printing play a crucial role in the design process. When creating, it is essential to carefully consider which type of infill is most suitable for the project at hand. This is because different types of infill can significantly affect both the strength and the final appearance of the printed object. In addition, printing time is also an important factor to consider when choosing the type of infill. Some infills can print faster than others, which can be crucial in projects with tight deadlines. On the other hand, in projects where durability is paramount, it may be preferable to opt for a filler that takes longer to print but provides greater strength and structural stability.

Individual Assigmnents
In this assignment, we will address the following tasks:
Design and 3D print an object (small, few cm3, limited by printer time) that could not be easily made subtractively 3D scan an object (and optionally print it)
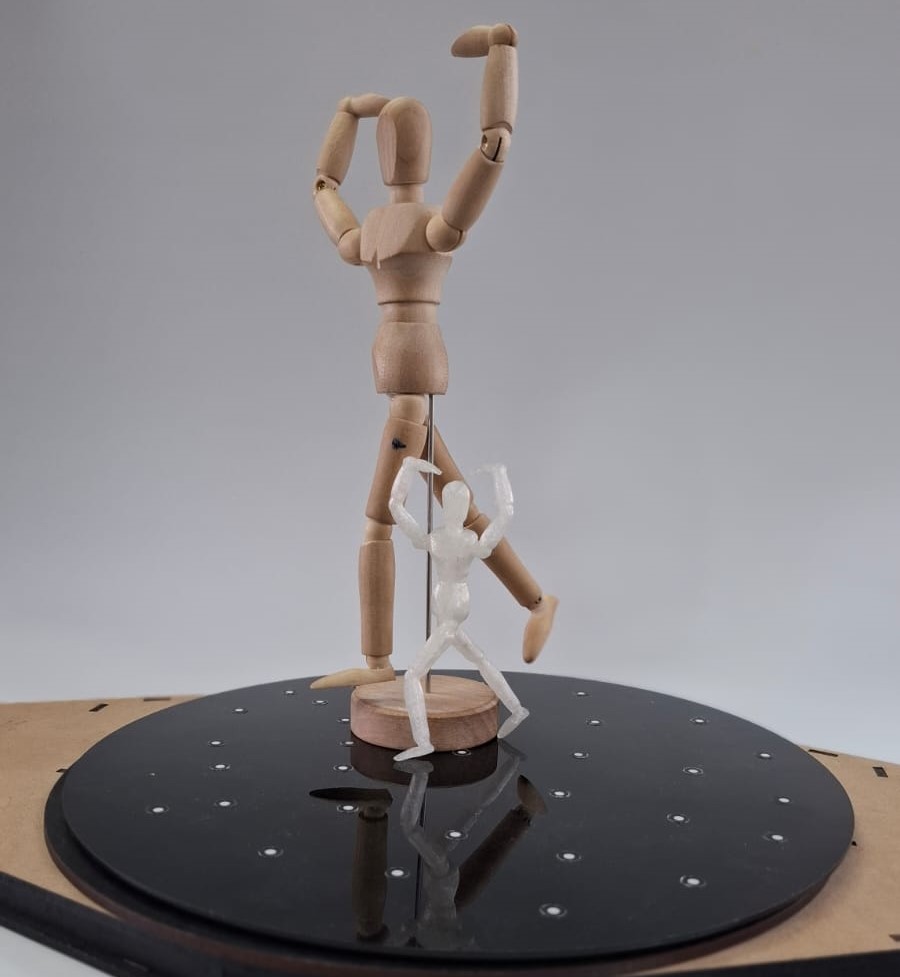
3D Scanning Monicker
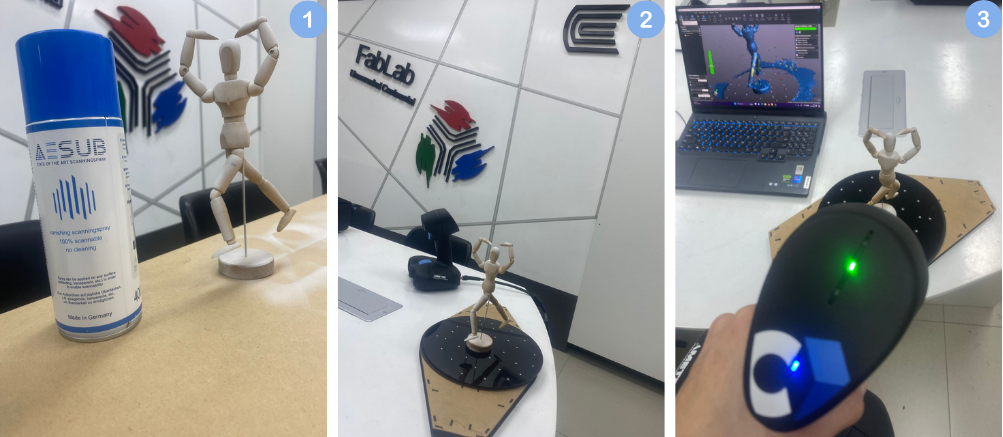
Preparation of the piece
- We spray the object we want to scan.
- We place our object on a base.
- We start scanning, making sure of the distance.
Calibration of the 3D printer
- Click on “Tools”.
- Click on “Level”.
- The four corners and the center of our platform will appear for us to begin calibration and Click on each option.
- Insert a bond paper and level the platform.
- Ensure that the paper slides but is also slightly snug.

Preparation of the 3D printer
- Clean our platform with isopropyl alcohol.
- Place masking tape on our platform so that the piece does not move during printing.
- Place the PLA filament, in this case, natural color.
- Insert it into the nozzle of our 3D printer.

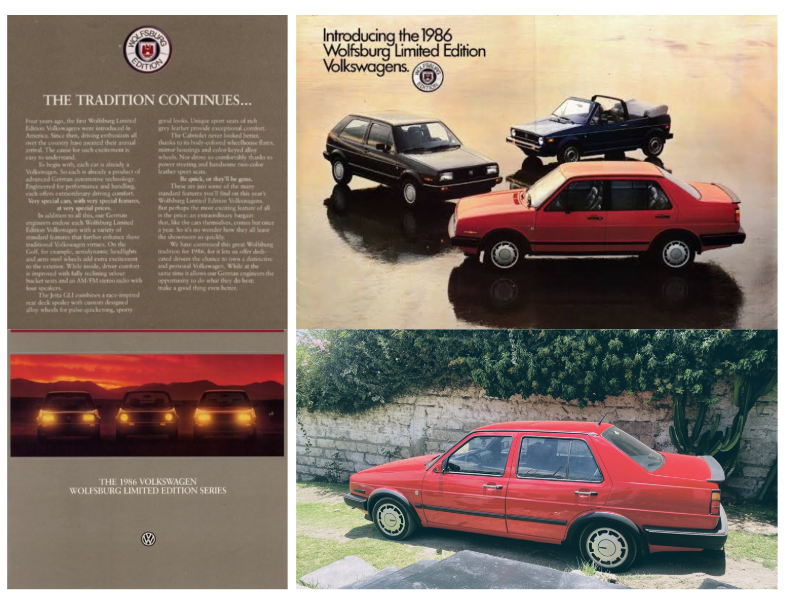
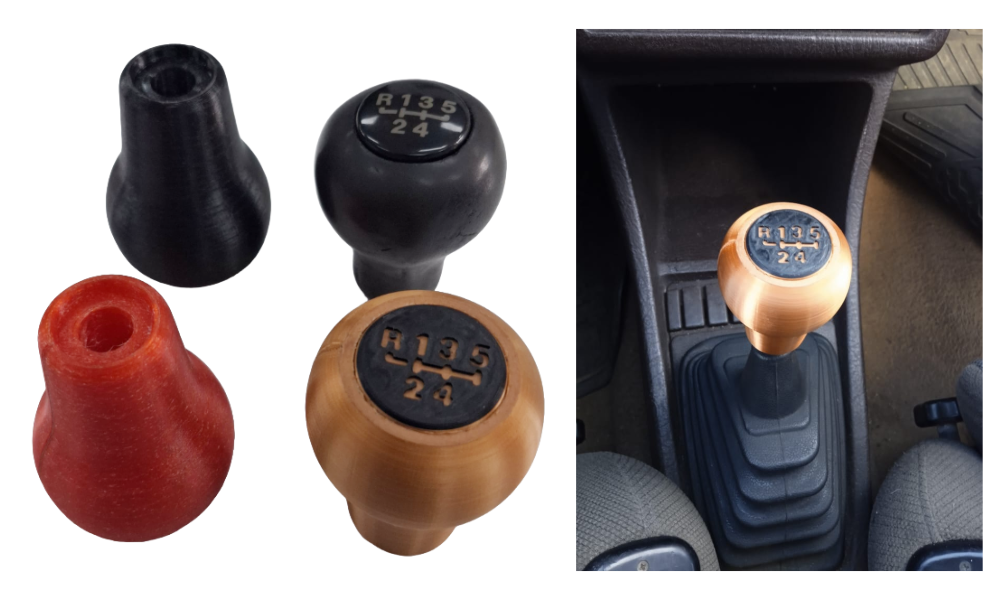
3D Priting VW 90’s personalized Shiftknob
I designed a personalized shift knob for my 1986 Jetta Mk2 Wolfsburg Edition inspired in the original gear level for the dimensions in the threded shaft and other rare gear level knob 000 064 225 041 VW MOTORSPORT for the concept for this redesign trying to reach the “OEM look” (Original Equipment Manufacturer) but with the special details of the version of my car. This features makes this shift knob unique and personalized. Finally i added a integrated to the shift knob support who mantein the dust cover near the shift knob for the optimization.
Based on the VW MOTORSPORT GEAR LEVEL KNOB 000 064 225 041 and my original shift knob for the proportions for the redesign
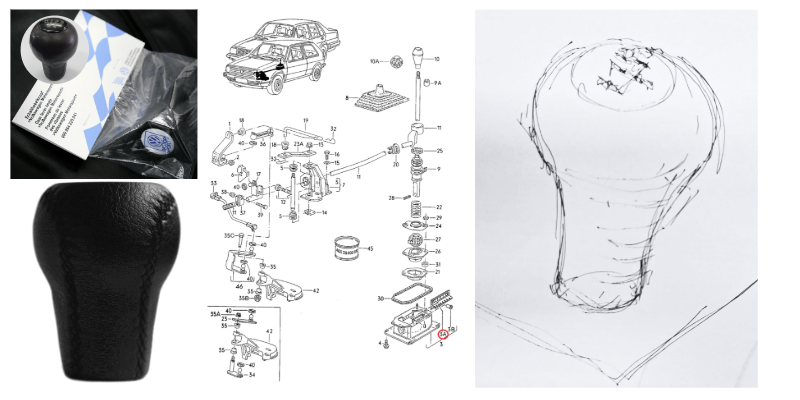
- First, we apply constraints to the image to prevent it from moving out of position, and then we begin modeling the outer profile.
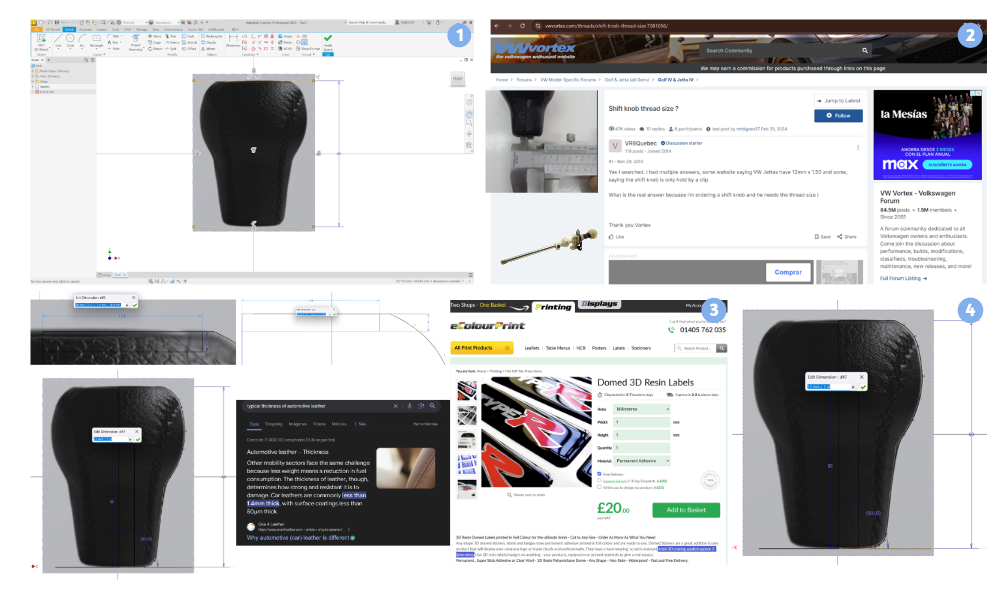
- For the assembly with the shaft i used the diameter and the hole dept from the original shift knob and for the size of the thread i search on enthusiast forums
- The measurements in this section are obtained from the commercial thickness of the automotive leather, the average height of the resinated stickers, the tolerances and the diameter of the original knob emblem.
- And with the measurements and the silhouette of the image we create the profile of the solid of revolution.
- M12 thread profile with 1.5mm pitch
- The thread is made with the COIL tool, selecting the thread profile and the shaft, indicating the thread pitch and the height.
-
This hole hides the edges of the leather.

-
Select the aspect of the piece to be covered with leather.
- Select the position in which it will be manufactured in the 3D printer.
- We open an assembly. And that’s it, our knob is finished.
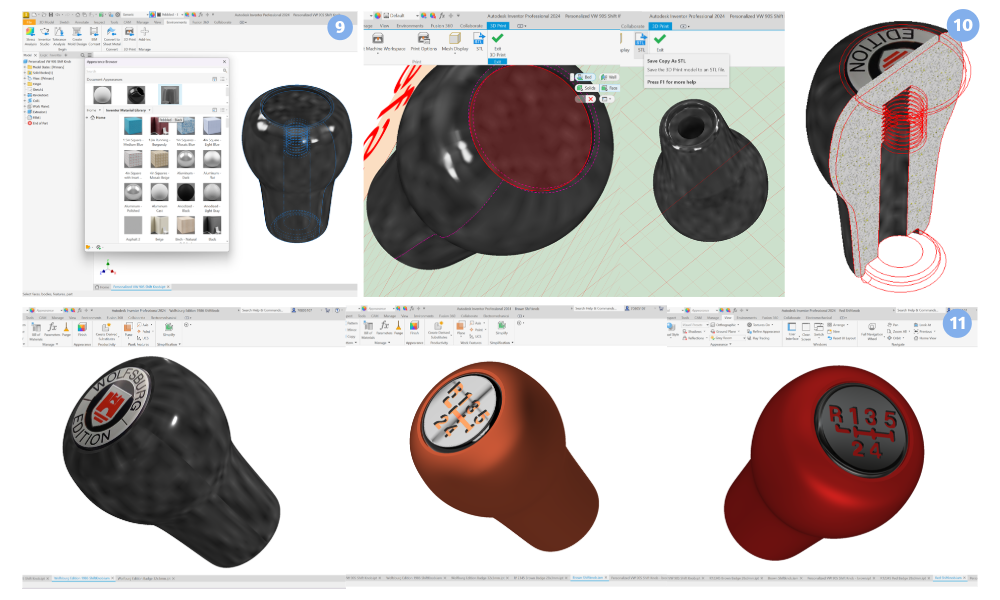

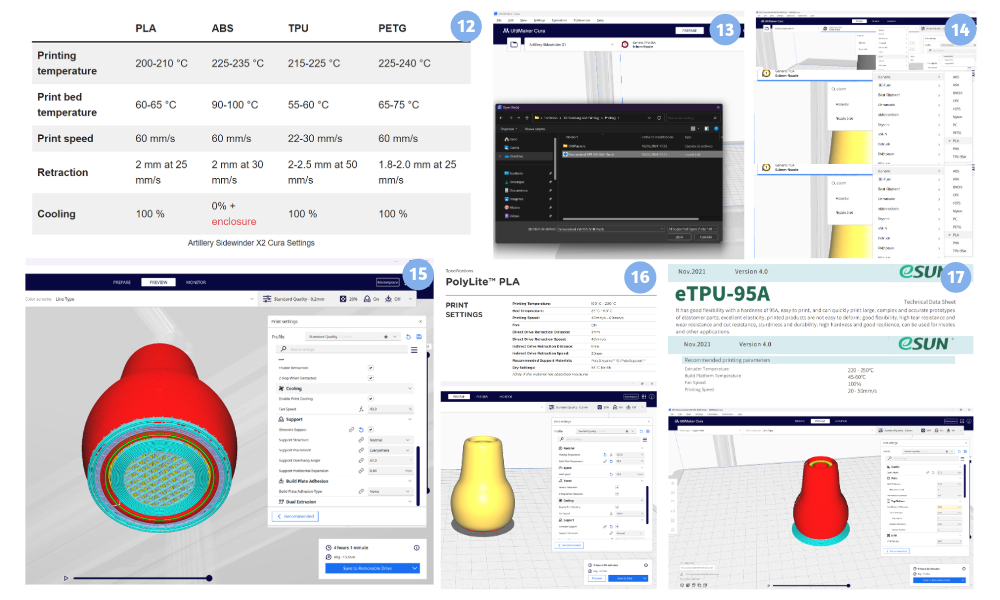
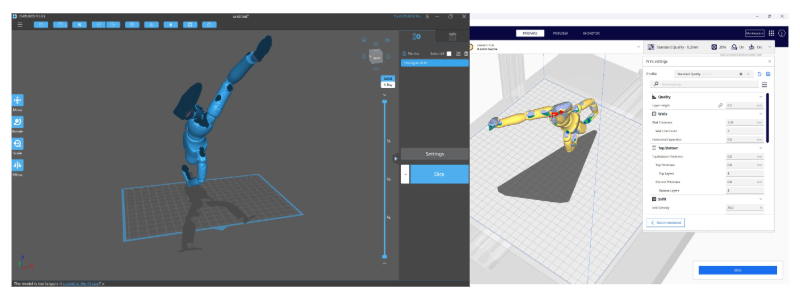
- We observe the parameters for our machine Artillery Sidewinder x2 Cura.
- We import the knob design into the ultimaker cura software.
- Select the material
- We do not have to configure more in the case of PETG due to the imported material profile. Then we click on save to removable drive and save the file.
- In the case of PolyMaker PolyLite PLA SIlk, we did not find the profile so we will use the values indicated by the manufacturer.
- In the case of PolyMaker PolyLite PLA SIlk, I did not find the profile so we will use the values indicated by the manufacturer
Results
Issues, musings, and learnings.
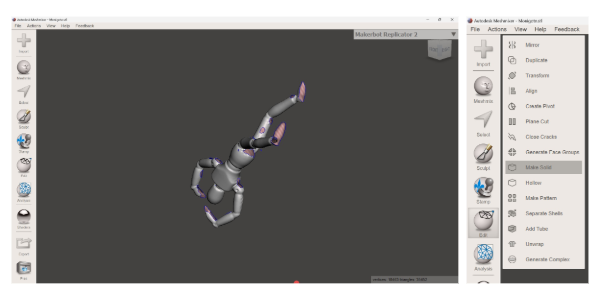
During the scanning process, it is common to observe holes and imperfections in the mesh due to part geometry. To address this problem, Autodesk Meshmixer software was employed, specifically using the “Make Solid” function.
In addition, using the available sculpting tools, further refinement of the details was achieved.
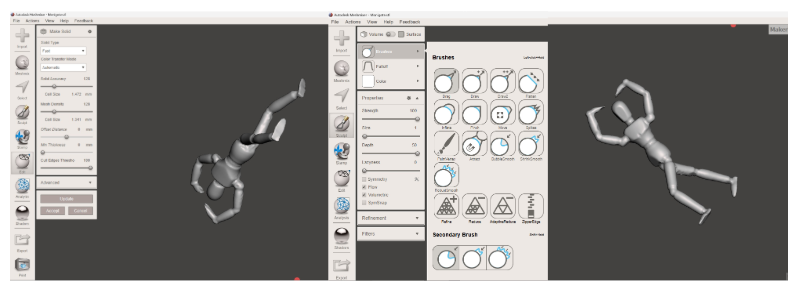
As a result of this process, an STL file optimized for 3D printing is obtained. This is crucial, as the final quality of the printed part would be directly affected by the lack of optimization in the original file.
ARCHIVES
VW 90’s personalized Shiftknob