7. Computer controlled machining
Group Assignment: Ensure you’ve finished safety training for your lab. Conduct tests on runout, alignment, fixturing, speeds, feeds, materials, and toolpaths for your machine. Document your progress on the group work page and share reflections on your individual page about what you’ve learned.
Individual Project: Create something substantial by designing, milling, and assembling it.
Assigmnent checklist
| Item | Activity | Status |
|---|---|---|
| 1 | Linked to the group assignment page. | Done |
| 2 | Documented how you designed your object (something big). | Done |
| 3 | Documented how you made your CAM-toolpath. | Done |
| 4 | Documented how you made something BIG (setting up the machine, using fixings, testing joints, adjusting feeds and speeds, depth of cut etc.). | Done |
| 5 | Described problems and how you fixed them. | Done |
| 6 | Included your design files and ‘hero shot’ of your final product. | Done |
Group Assigmnents
In this assignment, we will address the following tasks:
- Complete your lab’s safety training
- Test runout, alignment, fixturing, speeds, feeds, materials and toolpaths for your machine
- Document your work to the group work page and reflect on your individual page what you learned
CNC Machining
CNC (Computer Numerical Control) machining is a manufacturing process in which the cutting tools of machines such as milling machines, lathes, and drills are operated by computer software that has been pre-programmed to control the movements of the tools. This process makes it possible to manufacture parts with high precision and geometric complexity that would be difficult or impossible to achieve with manual machining methods.
CNC Router – Yinghe X1325 It is a computer numerical control machine designed to cut and engrave various materials such as wood, plastic, and light metals. With a working area of 1300 mm x 2500 mm, this CNC Router is ideal for medium to large projects. Equipped with a user-friendly interface and software compatible with various types of CAD and CAM files, it enables high precision and efficiency in manufacturing and production.
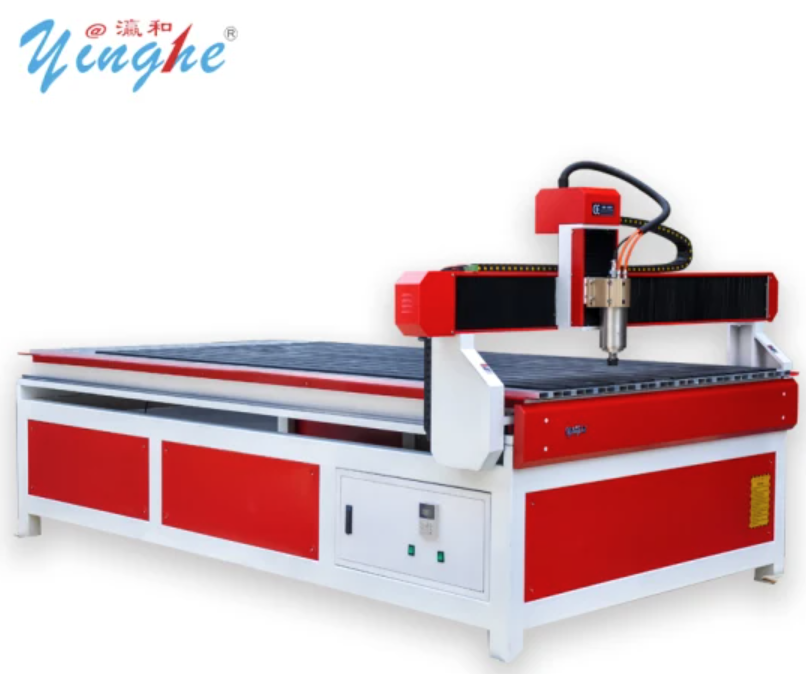
| Technical Specifications | Details |
|---|---|
| Brand | Yinghe |
| Model | X1325 |
| Working Area | 1300 x 2500 mm |
| Positioning Accuracy in X, Y, Z Travel | ±0.03/300 mm |
| Repositioning Accuracy in X, Y, Z | ±0.01 mm |
| Lathe Structure | Cast Iron |
| Y Structure | Square Orbit, Ball Screw |
| X, Z Structure | Square Orbit, Ball Screw |
| Maximum Power Consumption | 3.2 KW |
| Maximum Speed | 0-4000 mm/min |
| Maximum Working Speed | 0-3000 mm/min |
| Spindle Motor Power | 3.2 KW |
| Spindle Speed | 24000 rpm |
| Working Mode | Step |
| Working Voltage | AC 220 V/50 Hz |
| Domain | G Code, uoo, mmg |
| Operating System | Rich Auto |
| Flash Memory | 32M |
| Blade Diameter | Φ3.175, Φ4, Φ6 |
| X, Y Working Precision | <0.02 mm |
| Software | Software, Type 3, Artcam |
| Packaging | 12CBM |
| Gross Weight | 780 kg |
Machining Tools
| TOOL | USES | IMAGE |
|---|---|---|
| HELICAL 1 FLUTE | Very good performance on all materials. Especially recommended for wood, plastics, and aluminum. | 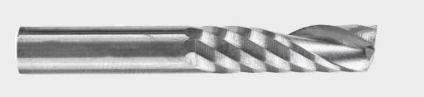 |
| HELICAL 2 FLUTES | The standard work tool due to its low cost and performance on all types of materials except aluminum and ferrous metals. |  |
| HELICAL 3 FLUTES | Ideal for aluminum. Leaves smoother edges than 1 flute cutters. | 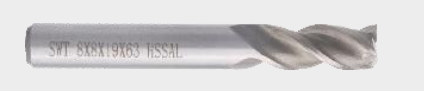 |
| BALL NOSE | Used for 3D work. Its ovoid tip allows smooth finishes on curved surfaces. |  |
| V-BIT | This type of bit is used for superficial engraving. Available in various angles. The maximum cutting thickness is estimated at 0.1 - 0.2 mm as the tips are fragile. Ideal for engraving on plastic and metal surfaces. |  |
| COMPRESSION UP&DOWN | Ideal for use on thin plates, recommended for wood and laminates, not for metals. The compression force keeps the material on the sacrificial table and prevents vibrations. Excellent finish. |  |
| COUNTERCLOCKWISE | Ideal for use on MDF and soft or hard woods. Does not leave burrs on the upper edges of the material. |  |
| STRAIGHT | Ideal for edge smoothing on wood. Not recommended for cutting due to its geometry and low discharge capacity. |  |
| CHIP BREAKER | Used for wood and composite materials. Ideal for smoothing already machined edges as it does not have much discharge capacity. |  |
| PROFILING | A group of various tools used for profiling processes on wood. Particularly useful in carpentry and construction of doors, furniture, and handicrafts. | 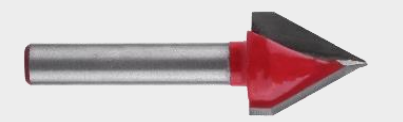 |
| ROUGHING | Tool necessary for the rectification of sacrificial tables on soft materials. They usually have a high chip removal rate, so it is necessary to use them in passes of no more than 0.5 mm. | 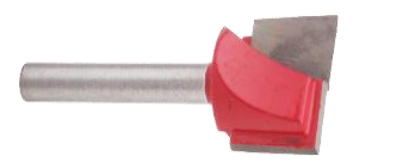 |
Materials of Construction
| MATERIAL | USES | IMAGE |
|---|---|---|
| Medium Density Fiberboard (MDF) | Furniture manufacturing: It is ideal for interior furniture, such as cabinets and shelving, due to its smooth surface that facilitates the application of paints and other finishes. Door components: Often used for the manufacture of interior doors due to its uniformity and ability to be cut into detailed shapes. Decoration and moldings: It is used for decorative panels and moldings, as it is easy to carve and shape. | 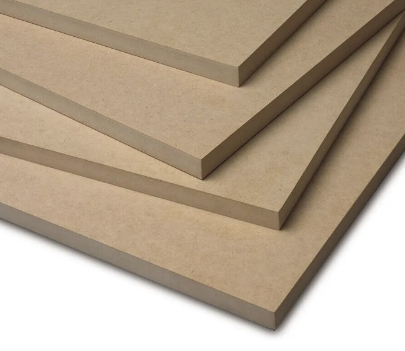 |
| Plywood | Furniture construction: Plywood is very popular in furniture manufacturing due to its smooth surface and dimensional stability. Shipbuilding: It is commonly used in the construction of small boats and boat components because of its water resistance and flexibility. Home construction: It is used in walls, floors and ceilings, especially in areas that require a stronger or more aesthetic material. | 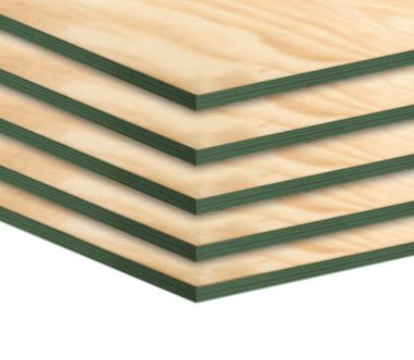 |
| Oriented Strand Board(OSB) | Building construction: It is commonly used as a cladding material for walls, ceilings and floors because of its strength and durability.Industrial packaging: It is often used for the manufacture of boxes and pallets because it can support heavy loads and is relatively inexpensive. Concrete formwork: Its moisture resistance and stiffness make it suitable for temporary formwork in construction. | 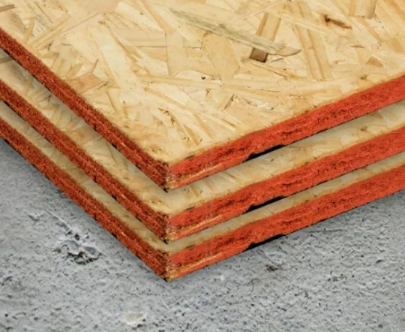 |
Knowing and following safety and biosafety protocol is essential when using a CNC router. It is also important to follow biosafety guidelines to minimize exposure to hazardous substances.
It also involves wearing personal protective equipment, knowing the emergency procedures and performing regular maintenance on the machine.

CNC ROUTER Techniques
- Pocketing: On the left, a triangular part is shown with a circular cavity in the center and some additional holes. This technique is used to create cavities or recesses in a part by removing material from the inside without affecting the outside edges.
- Pressfit : In the center, two rectangular pieces with slots and protrusions are shown, designed to fit together without the need for adhesives or fasteners. The middle image shows these pieces assembled. This technique is useful for temporary or permanent assemblies without the use of screws or glue.
- 3 Axis:
On the right, two examples of 3-axis milling with complex corrugated surfaces are shown. This technique allows the creation of detailed, three-dimensional shapes in a piece of material by moving the cutting tool along three axes (X, Y and Z).
These techniques demonstrate the versatility and accuracy of using a CNC router in the fabrication and design of parts of different shapes and assemblies.

Individual Assigmnents
In this assignment, we will address the following tasks:
- Make (design+mill+assemble) something big.
Mission Our mission at the “Monti Kids” project is to promote the educational and social inclusion of children with special needs in the city of Arequipa, Peru. We achieve this by implementing innovative Montessori furniture adapted to their specific needs. Our goal is to provide tools and resources that foster the holistic development of these children, promoting their autonomy, creativity, and emotional well-being. Ultimately, we aim to build a more inclusive and equitable society.
Vision We envision ourselves as leaders in promoting inclusive education for children with special needs, being recognized nationally and internationally for our innovation in designing and manufacturing adapted Montessori furniture. Our aspiration is to create a lasting impact in the lives of these children by providing them with meaningful learning opportunities and contributing to the transformation of educational systems towards more inclusive and child-centered models.
Impact
The “Montessori for All” project has the potential to generate significant impact across multiple levels:
Social Impact:
- Foster the inclusion and acceptance of children with special needs in society.
- Reduce the stigma and discrimination associated with differences in abilities.
- Promote awareness and empathy towards the needs of this group of children.
Educational Impact:
- Enhance the quality of education offered to children with special needs.
- Provide tools and resources that stimulate cognitive, emotional, and social development. Facilitate active participation and meaningful learning in inclusive educational environments.
Individual Impact:
- Empower the holistic development of each child, respecting their rhythms and learning styles. Improve children’s self-esteem, confidence, and autonomy by providing tools tailored to their needs.
- Facilitate social and emotional integration by offering inclusive and supportive spaces.
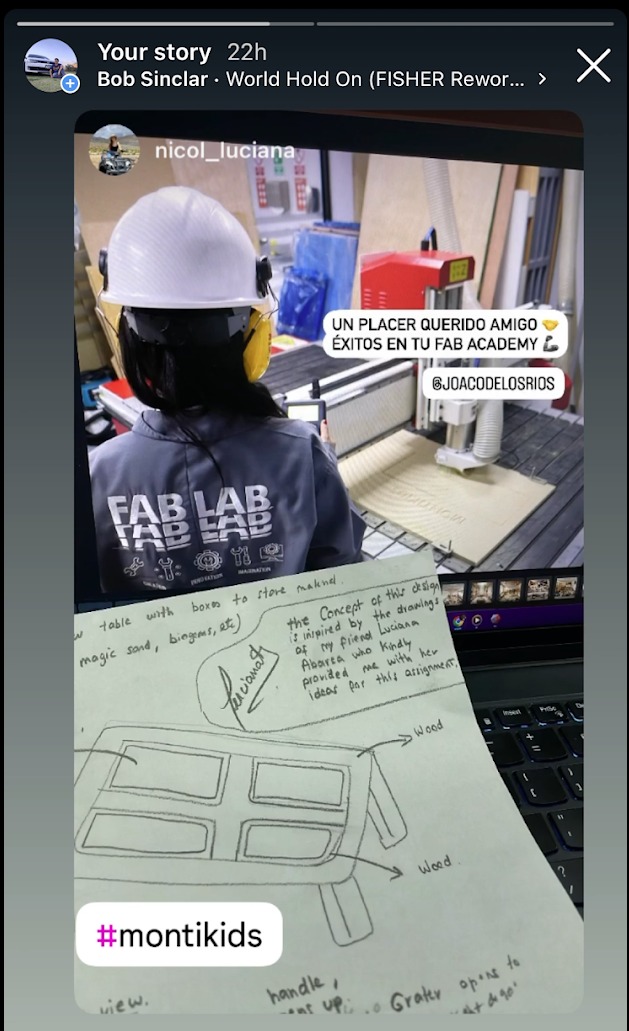
Concept: The concept of this design is inspired by the drawings of my friend Luciana, who kindly gave me her ideas for this assignment. Which gives the context from the point of view of psychology, which is very important as it gives the functionality and impact to this project.


Rhinoceros configuration
-
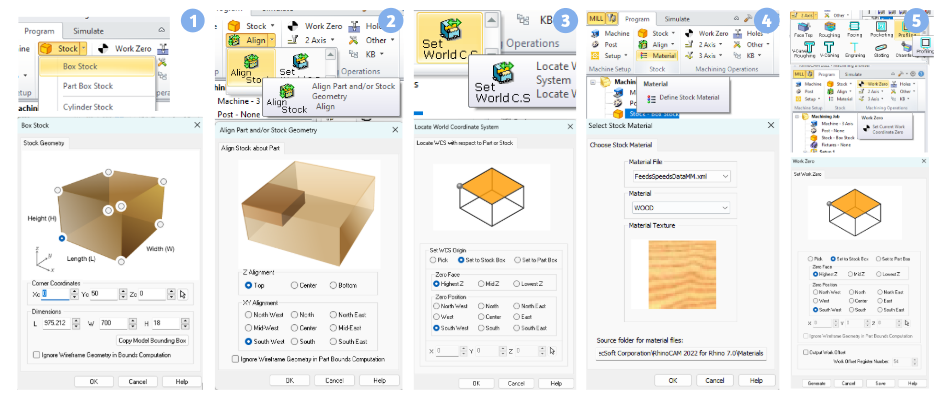
We click on ‘Copy Model Bounding Box’ to copy the measurements of the maximum design boundaries, and then manually adjust the ‘H,’ the height, to match the chosen material thickness in the design. As a result, we see the stock box overlaid on the design.
-
We click on ‘Align Stock’. Afterwards, we select “Top” for Z alignment and “South West” for XY alignment. In summary, we align the stock to the top southwest position. Then, we click on “OK”.
-
We click on “Set World CS”. Afterwards, we select “Set to stock Box”, “Highest Z” for Zero Face, and “South West” for Zero Position. In summary, we position the world coordinate system at the top southwest part. Then, we click on “OK”.
-
We’re going to define the material. Then, we select “WOOD” as the material to use, the one most similar to the MDF being used. After that, we click on “OK”.
-
We select the operation to perform, in this case, it’s a 2 ½ axis operation. We generate the work zero point, which should be aligned with the world coordinate system and the stock box.
-
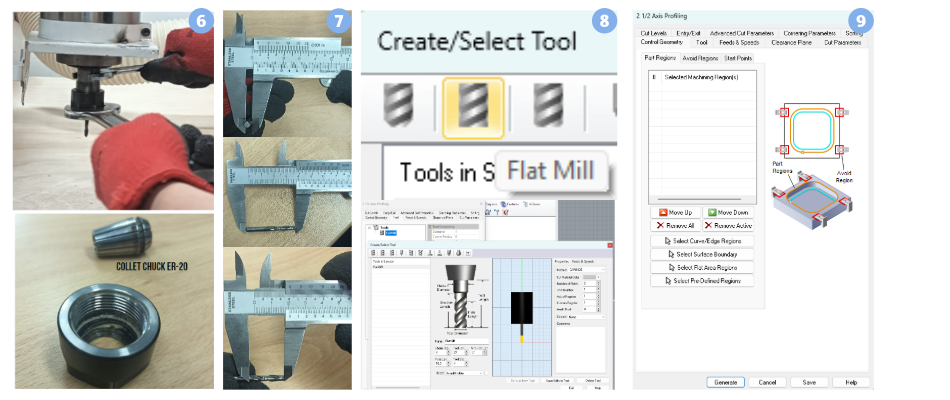
First, we select the tool, measuring its dimensions with a vernier caliper. We subtract 1/3 of the total length of the end mill from the total length because 1/3 of the length will be inside the collet chuck. To obtain the dimensions of the end mill, we need to remove it from the CNC router. To do this, we must first remove the locking nut, then remove the collet chuck and the end mill. Next, we measure the dimensions of the end mill with the vernier caliper and inspect the type of end mill.Tool Diameter.
-
We measure the total length of the tool, which in this case is 41mm, and subtract 1/3 of the total length, resulting in 13.6666, rounded to 14mm. We subtract 14 from 41, resulting in 27mm, which is the value that should be entered into the software as “Tool Length” or “Shoulder Length”. In this case, the length is 21mm.Flute Length - Length of the flute. Refers to the helical or spiral groove that runs the length of the cutting tool.Upon inspecting the end mill, we notice it has two flutes.
-
As the shoulder length of the end mill is 21mm, we divide this number by 2. This will be inputted in the software as Flute Length = 10.5.End Mill TypeUpon inspecting the shape of the end mill, we find that it is a flat end mill, selecting this option in the software.
-
We click on GENERATE.
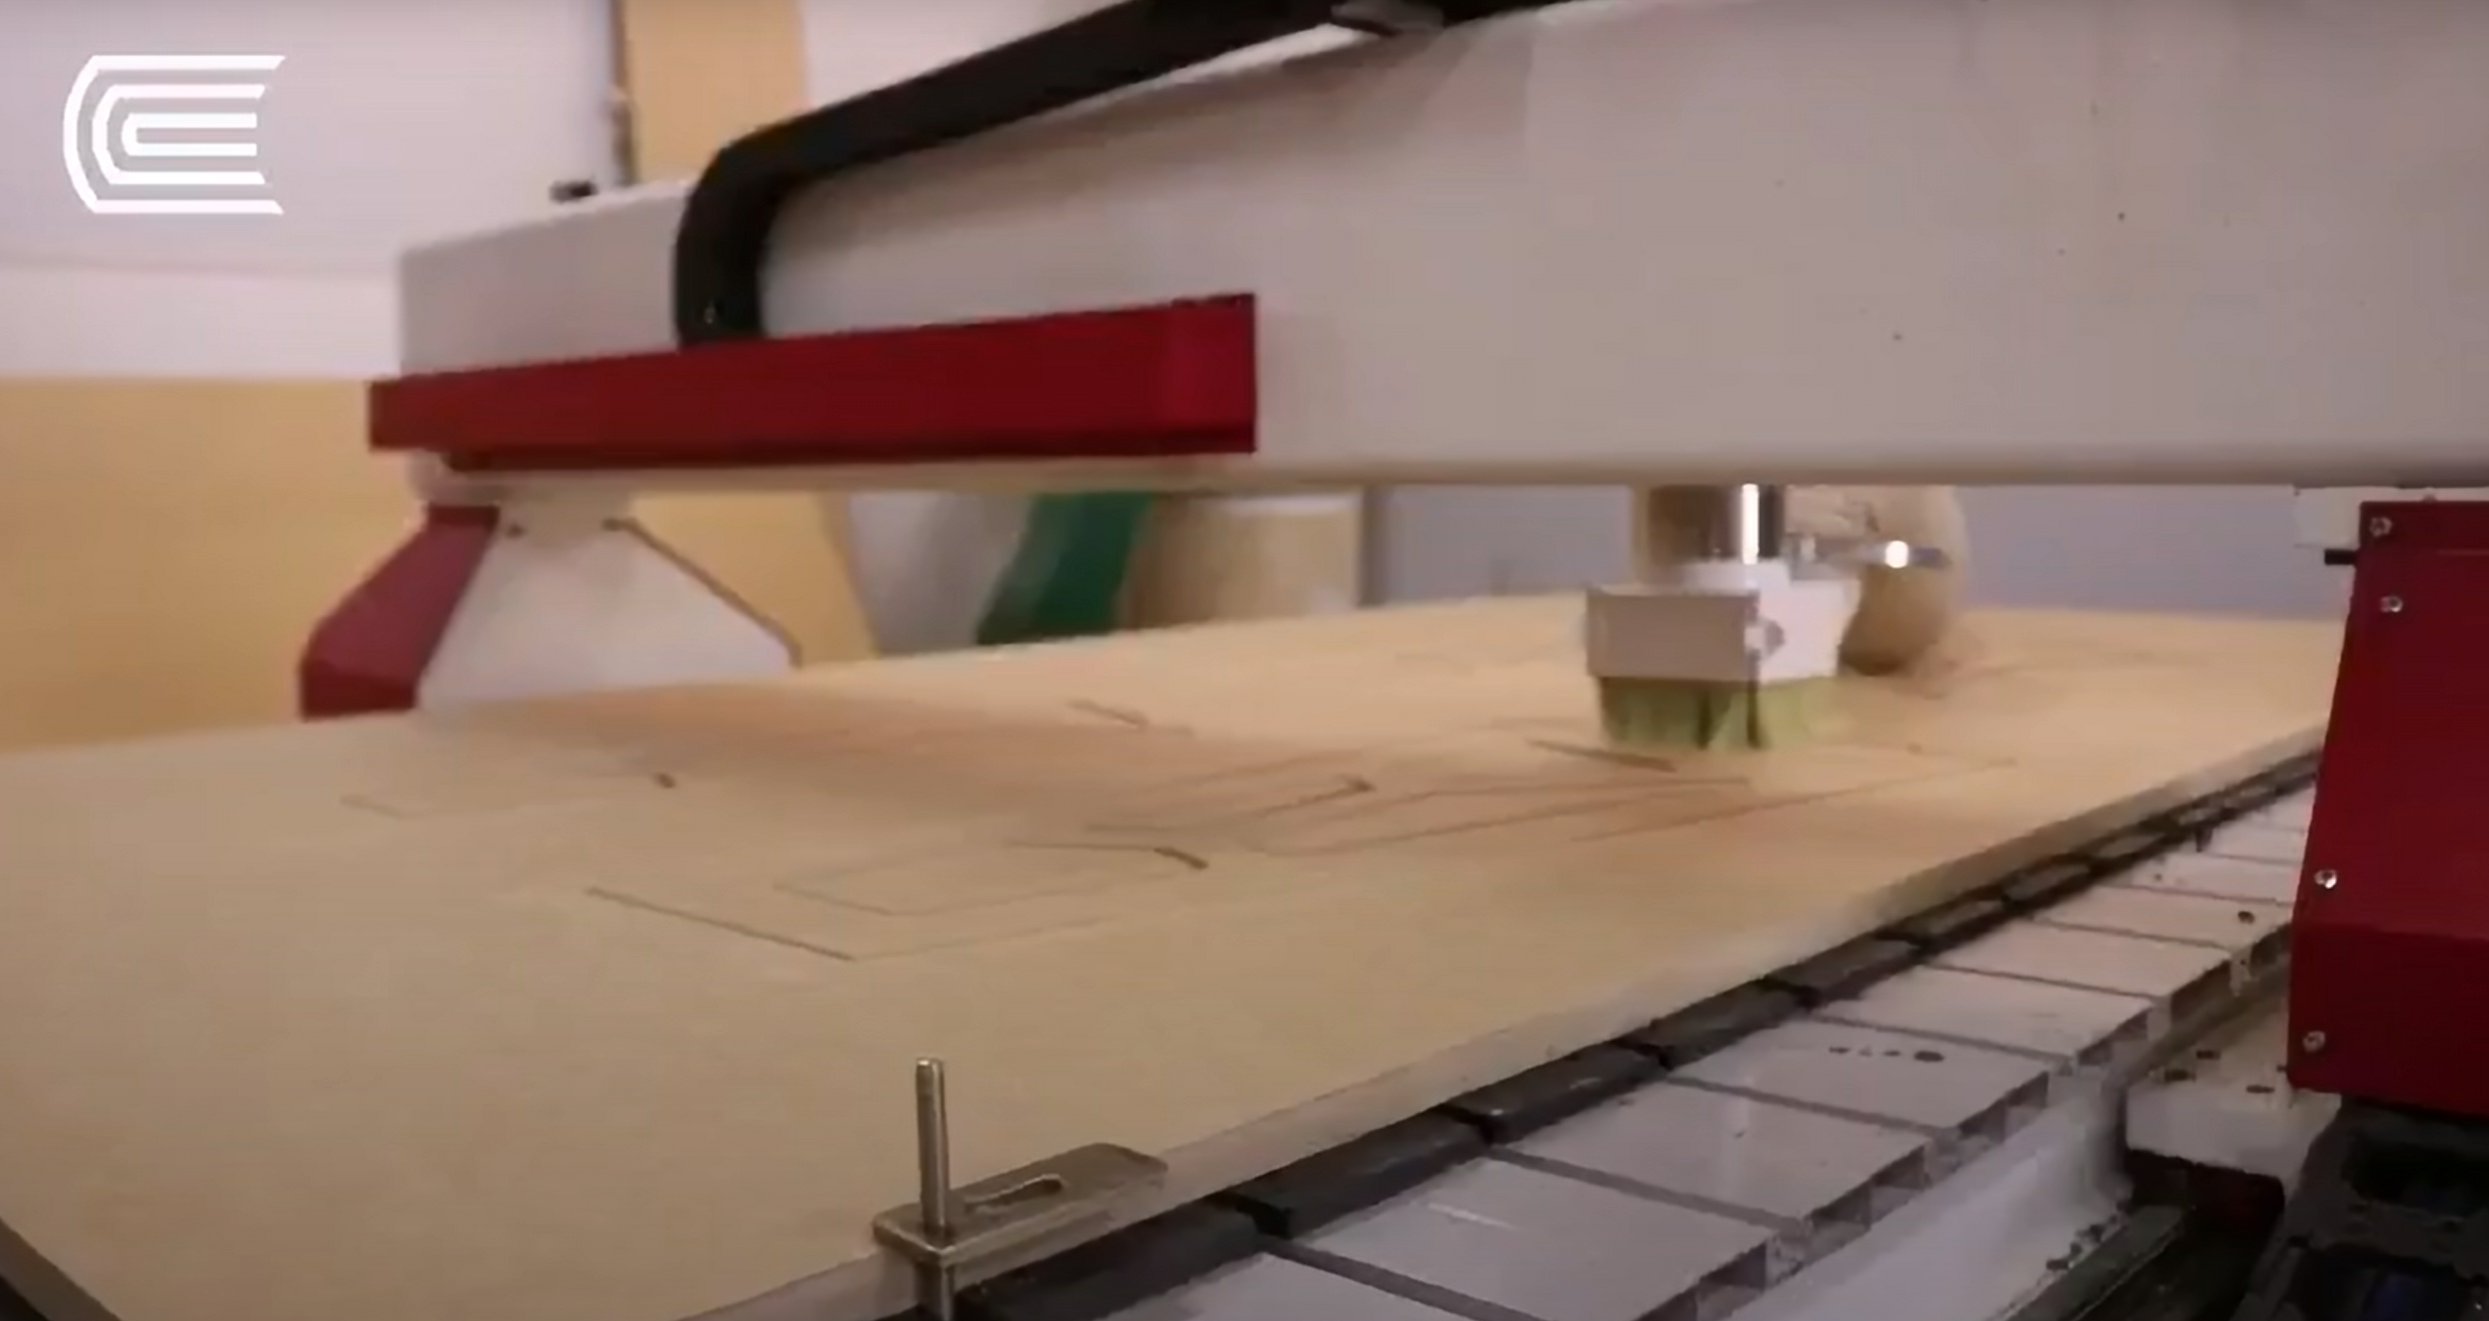
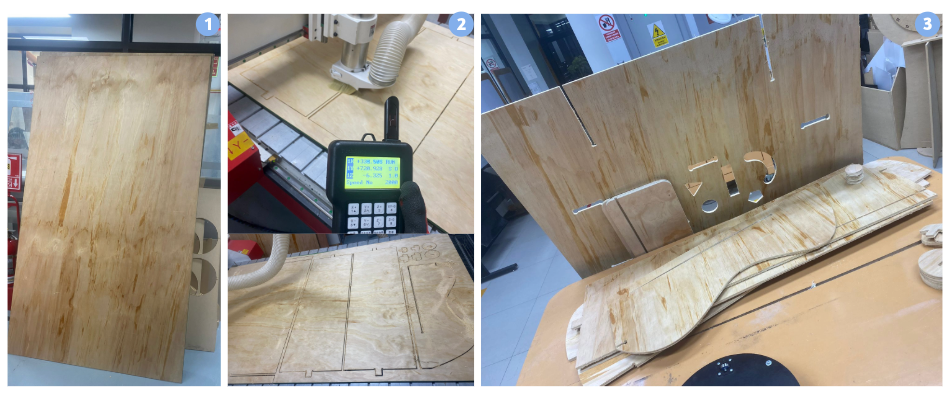
We place the MDF sheet on the CNC router.
We click on ‘Start’ to proceed with cutting our project on the machine. The pieces are ready to start assembling the sensory table.
MACHINE CNC
- We take out our MDF board.
- We place it in our machine
- The pieces are ready to be assembled
The video below is more explanatory of the process to cut our MontiKIDS design.
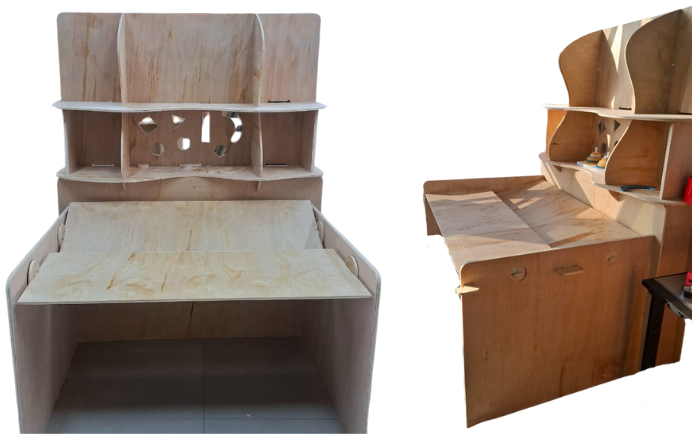
We assemble and insure our furniture

Our MontiKIDS sensory furniture is ready!
Issues, musings, and learnings.
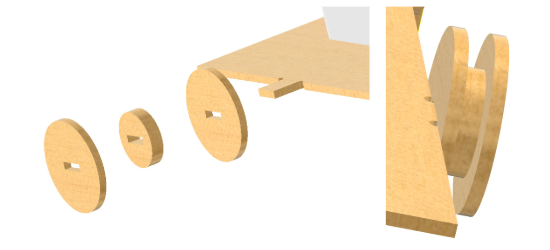
Learnings: It is possible to make a functional shaft in parts with a CNC Router, made in parts with Pressfit assembly.