Computer-controlled machining
7.1 Group assignment | Complete your lab's safety training
Until now, we had been making small-scale prototypes, working with "small" machinery in the FabLab's Querétaro Laboratory, such as 3D printing and medium (due to its work area) such as laser cutting. Now, we will work on a larger scale, in a completely different area, with very specific conditions. The CNC router is a machine that, due to its characteristics and the materials it works with, requires more care, from file design to machining.
In this case, this machine is located within the IDEA Workshop at Anáhuac University, this place has different work areas for different academic programs such as engineering, architecture and design. This is where students make prototipes.
To put the topic into context, in the IDEA there are Chemistry workshops where different dangerous solvents are handled, there is also the area of robotics, welding, ceramics, jewelry, plastics, wood, etc., and because to the danger and number of students that work there daily, it is very important to have security protocols and the CNC machine area is no exception. To begin with, we must wear our complete safety equipment to be able to get in and work: safety footwear with toe cap, cotton work coat or overalls and safety glasses.
To see the group assignment page, click here, you can also find a VCarve Tutorial
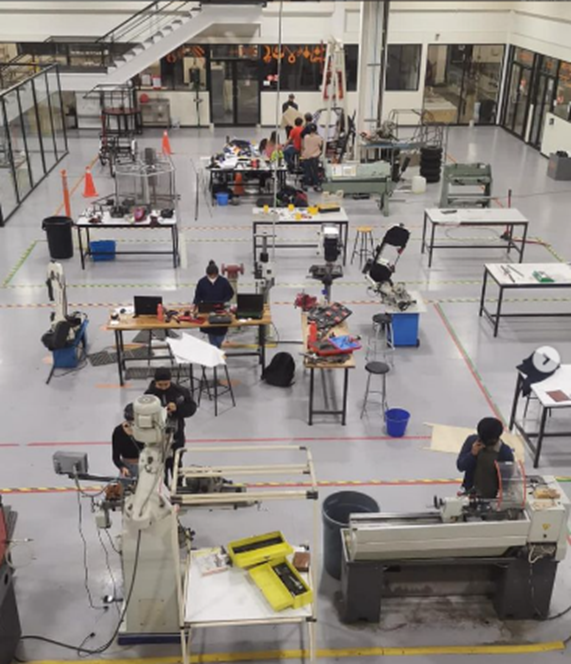
The workshop
In the image above you can see the central work area and around it are all the engineering, architecture and design laboratories and around it are the accesses to each of the laboratories.
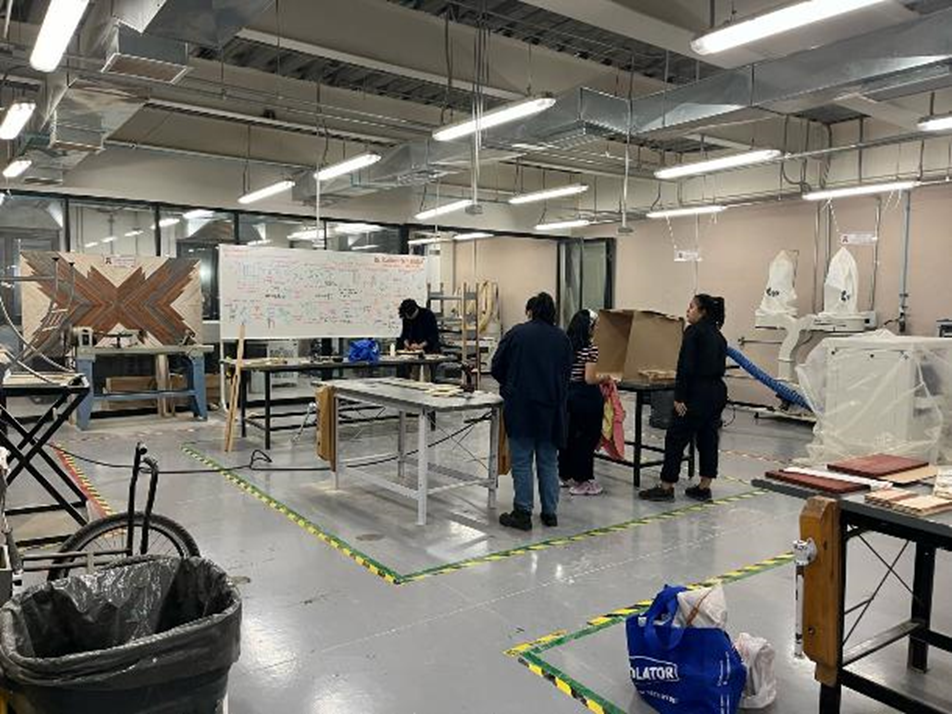
Wood workshop
The wood workshop, due to the risk that its machines and tools imply, is one of those that requires the most attention and supervision, it is also one of the ones that generates the most dust and particles, so keeping it clean becomes part of the safety measures. . Here is the CNC Router in a contained space

The CNC router area
Finally, inside the wood workshop, the CNC machine is protected. In addition to the safety equipment mentioned, in this area we must use safety earmuffs. The working area of this machine is 122x244 cm, so it is possible to work with complete sheets
7.2 Personal conclusions
This machine definitely impose compared to the others that we have used in the FabAcademy course, not because the others are simpler or less powerful, but the router comes with several components that constantly move in different directions and speeds that could cause an accident. The material is generally even thicker and if it is not secured correctly it could be thrown towards any of us, here the importance of using all the safety equipment.
The noise generated is considerably loud and although you can stay without the earmuffs for a while, it is not recommendable to do so, we know that many damages like this have consequences in the long run and these can be irreversible.
= USE YOUR SAFETY EQUIPMENT, BETTER SAVE THAN SORRY =
7.3 Individual project | Design something big.
I just moved house and these days I have been reorganizing all the furniture, and one of the things I need urgently to keep it clean and organized is an specific space for my dogs to sleep because although I always put mats for them, as soon as I leave the house I can see in the cameras that they climb on the couches, and even though i have put protections, I have to clean them more frequently.
So I decided to make a bed for each one, both are medium size, Boston Terrier breed and the idea is that their bed can be stored under my bed.
So, first thing i did, was to measured the plastic shoe container where they are suppose to sleep, then I checked the height between the the legs at the box of the my bed and according to that I began to design.
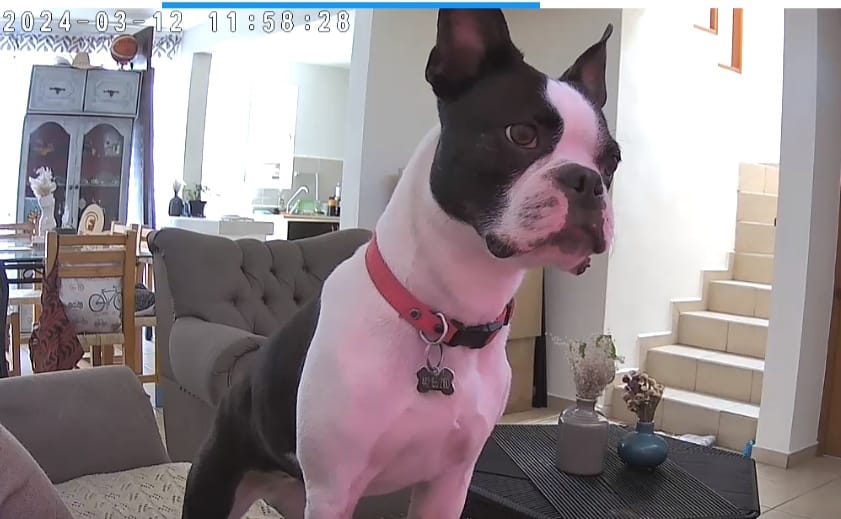
The evidence of my disobedient dog
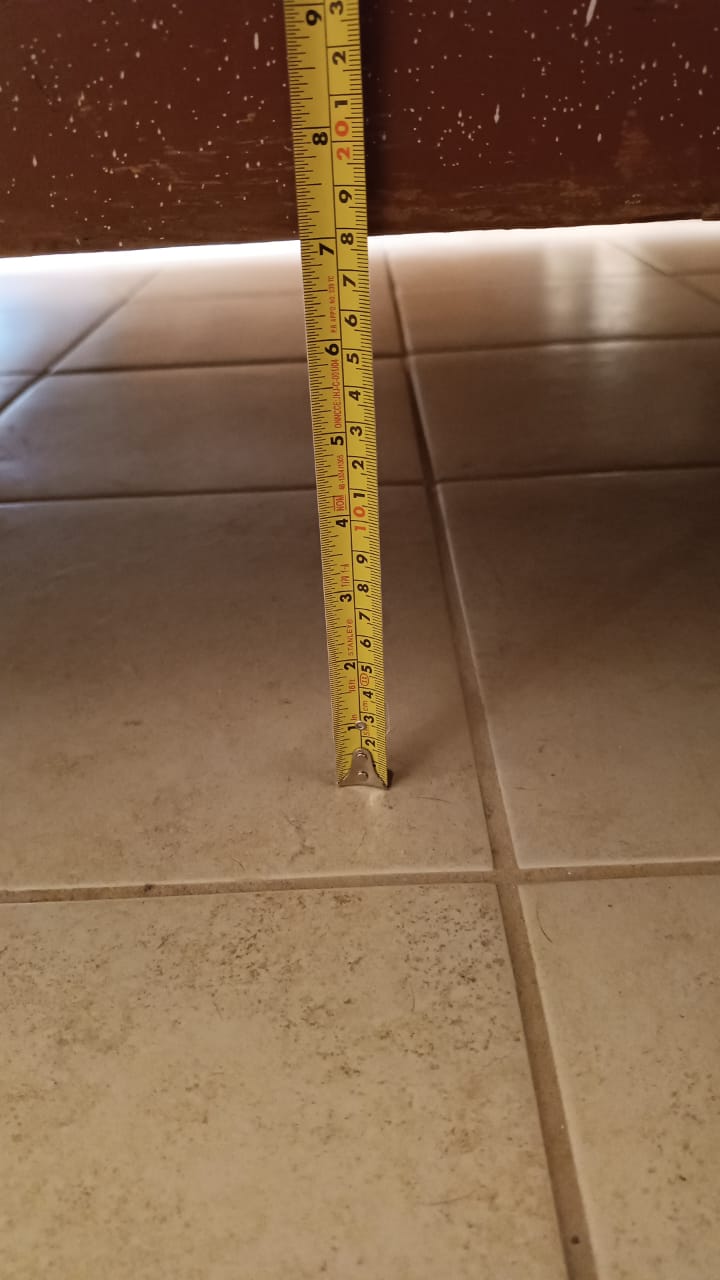
Heigh under bed
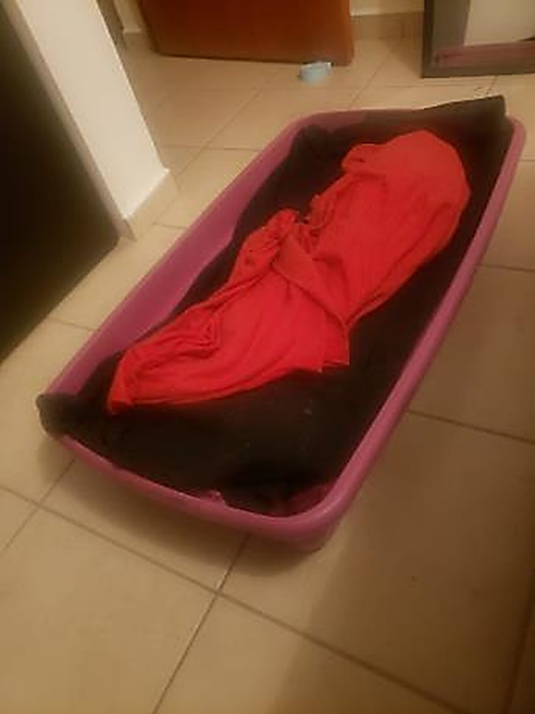
The improvised bed where they currently sleep
7.4 Design process | Using Rhino.
I started by making a quick drawing by hand and from there I started working in Rhino in 2 dimensions. I started this way to keep the measurements of the assemblies more in mind and once verified I continued with the three-dimensional model.
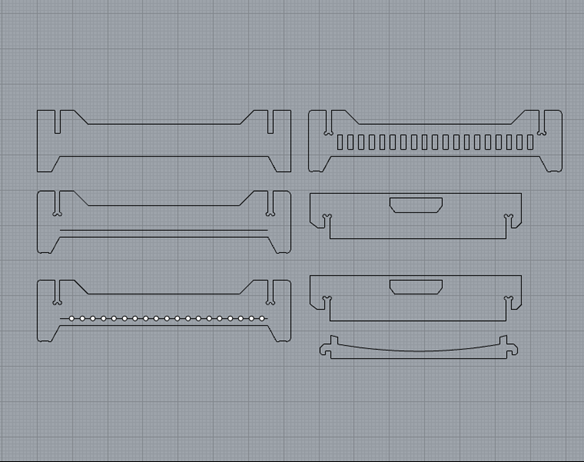
Firts steps in Rhino
In the image you can see the main steps followed in Rhino to generate all the 2d pieces.
Finally I have 2 long side pieces with trades, 2 short side pieces and 19 support ribs. Giving a total of 23 pieces.
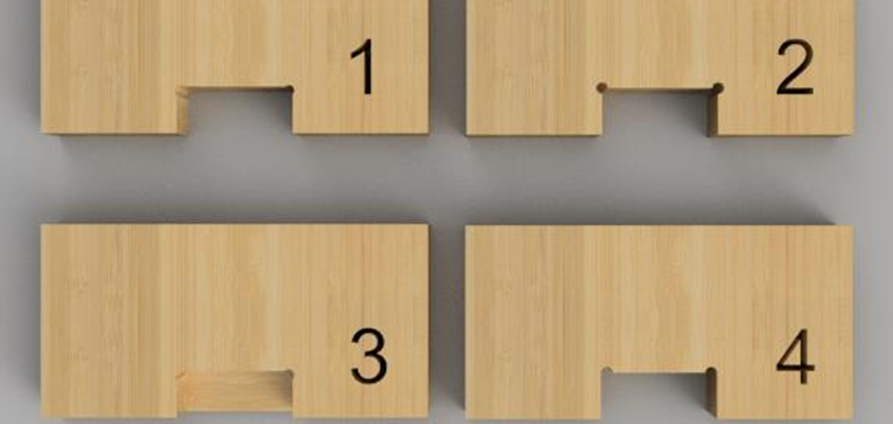
I add this image from https://fablab.ruc.dk/more-elegant-cnc-dogbones/ to show you different solutions to have perfect right corners and fit in all the joints. I want to keep them visible, so i'm using #2 dogbones.

3D model
And as I'm a person who needs to prototype to make sure everything is fine, I decided to make the 3D model, simulating the material we are going to work with: 15 mm plywood.
It looks good, apparently the measurements are correct, and the joints work perfectly.
The internal size of the bed is 550 x 850 mm and it has an internal curve to make it confortable but also to increase the internal height where the mat and the dog are going to be.
The whole bed size is about 700 x 1000 x 17 mm.
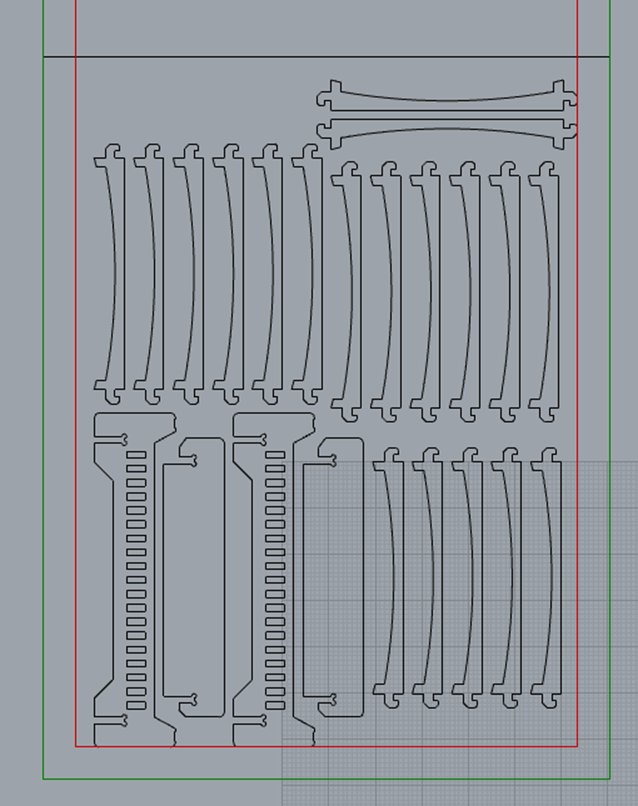
File to import
This image shows the cut file with its different layers.
Green: Represents the wood material 244 x 122 cm.
Red: margins to hold the material.
Black: roughing/cutting, the drill bit will pass through here and the separation between figures is designed so that the pieces do not come off, potentially causing an accident.
Update: It was necessary to rotate it horizontally
7.5 Design justifications
I decided to make something compact because my house is not very big nor are my dogs, something that would be easy to transport since I travel a lot to my parents' house and I often have to improvise something for my dogs.
I preferred the design to be orthogonal to take advantage of the corners of the house to accommodate the bed. The height, as I mentioned before, is to store it under my bed.
You may be wondering why I put 19 ribs and not a solid base. I did it this way so that dust and hair do not accumulate on the base or in the corners, so it will stay cleaner.
The dog will not sleep directly on the ribs because I'm going put a mat on it.

IT WILL NOT BE POSSIBLE TO CUT THE BED BEFORE WEDNESDAY BECAUSE THE ROUTER CNC IS VERY BUSY WITH STUDENT APPOINTMENTS SINCE WE ARE IN EXAMS WEEK.
I WILL DO IT AS SOON I CAN.
= U P D A T E =
THE ROUTER BREAKDOWN, WE STILL DO NOT KNOW HOW LONG IT WILL TAKE, BUT TECHNICAL HELP WAS ALREADY REQUESTED. AS SOON AS IT'S READY I'LL CUT ALL MY PIECES.
THE GOOD NEWS IS THAT I ALREADY HAVE ALL THE FILES NEEDED FOR ITS MANUFACTURE
Download Vcarve files