3D Scanning & printing
5.1 Group assignment | Test the design rules for your 3D printer(s).
For this assignment, we will be using the software CURA and a Creality FDM (Fused Deposition Material) 3D printer, specifically the Ender 3 S1 Pro model. In our lab, PLA filament is predominantly used, so we will also be working with it.
To access more detailed information about the various printing technologies and all the files we used for this assignment, click here.
Below, I will provide a brief summary of the progress we have made, complementary to what you can see on our group assignment page.
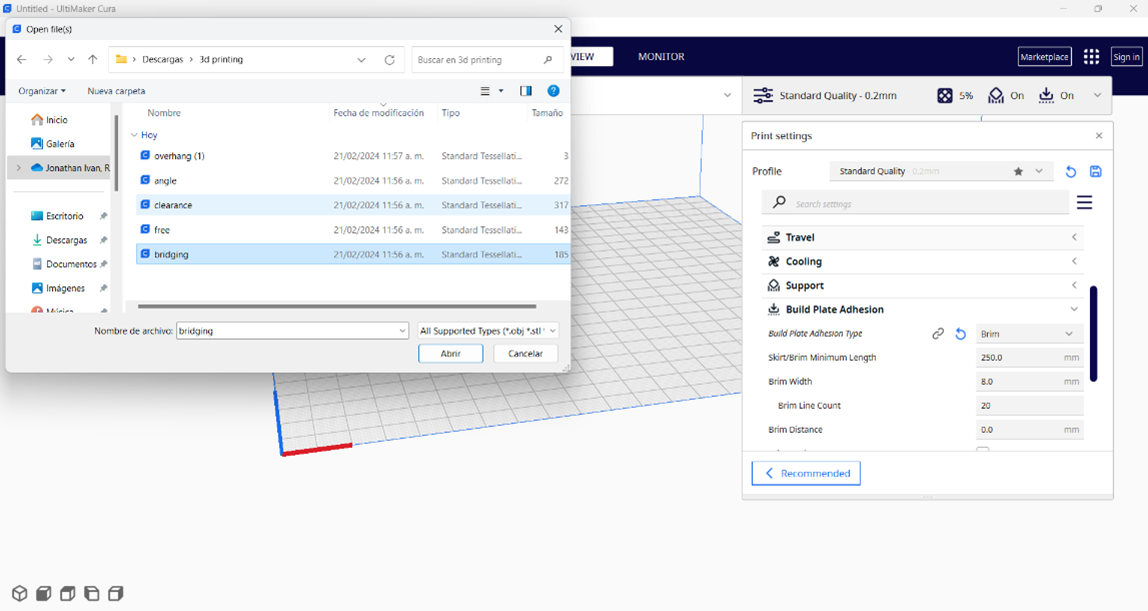
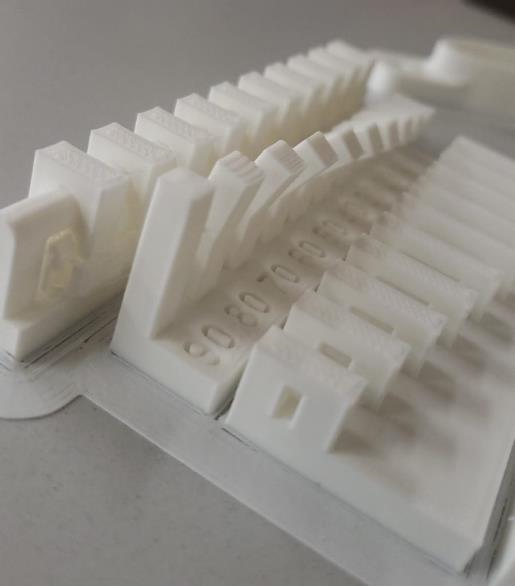
First, we will open all files in CURA. We can do it one by one, but since they are very small and fit together in the printing area, we decided to open them all at once to save time on settings and printing. This way, we can print them continuously without pauses. The other advantage is that in this way we can compare results and identify differences between one and the other.
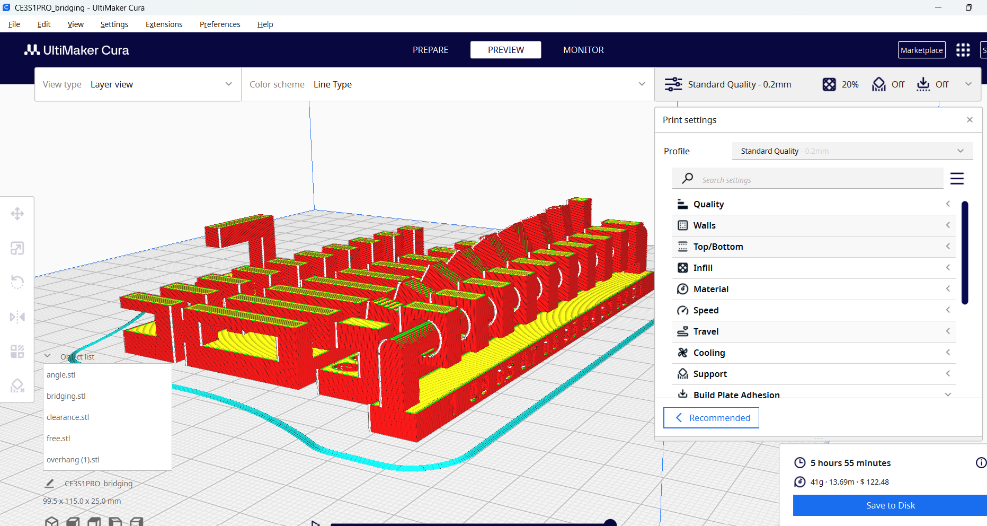
In this image, you can see the 4 pieces together. Now is time see he print settings. The program comes with this default plate adhesion: skirt, which doesn't really works to hold the piece, but it's very useful when we have changed color or pigment type to clean the nozzle of any residue.
One of the best plates adhesion is the brim: it's a single layer with several offsets around the object, uses little material and takes up little time. I personally recommend it although I have also used the raft type when my build plate is dirty, old or damaged. This plate adhesion makes a kind of mesh that interlocks through different layers (3 or 4), it is definitely slower and it uses more material but It is also very resistant, great for complex or very large shapes.
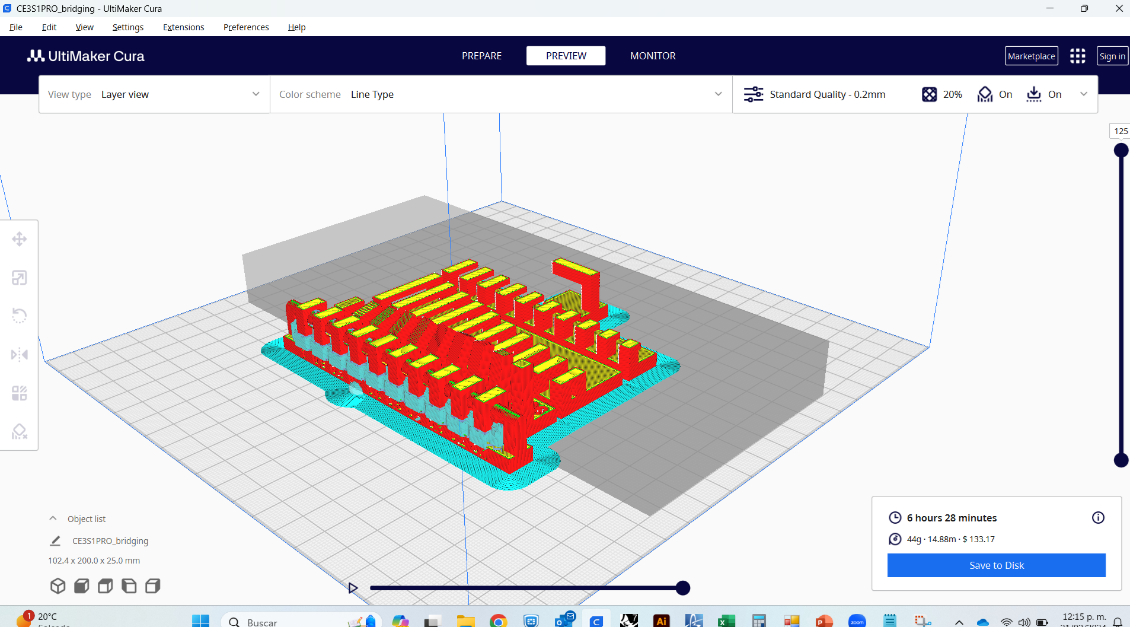
BRIM plate adhesion and printing time
5.2 Personal results analysis.
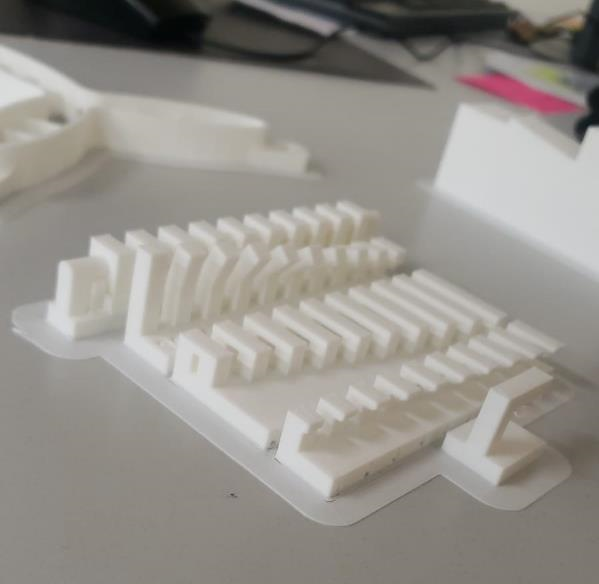
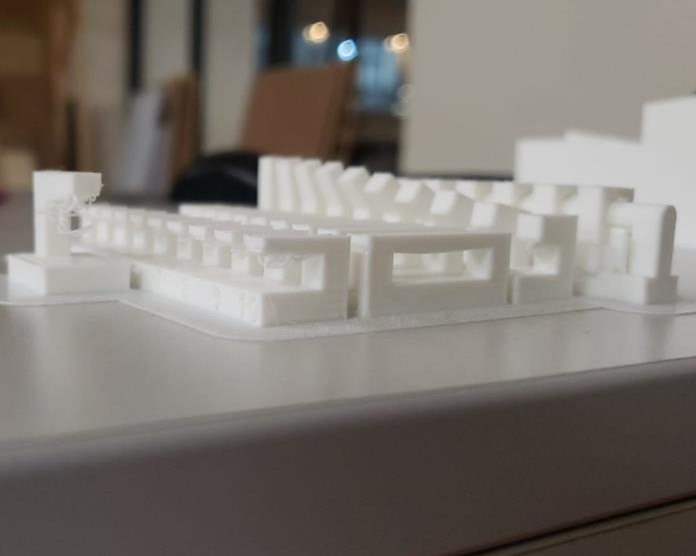
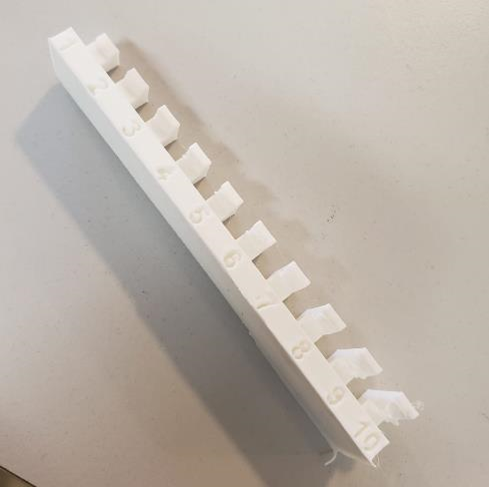
Cantilever angles at 180° collapse no matter of the length of the span, supports must always be used. The 180° angles with supports do not collapse in the same way as the previous ones, these only buckle and in some cases this cannot be perceived by the eye, and as for the tolerances for parts that must be assembled, we could use 0.0mm to 0.2mm for all those assemblies that must remain fixed and from +0.3 mm for all those assemblies that are designed to move.

5.3 Personal conclusions & interpretation of group assignment.
This exercise was very useful to understand the limitations of our 3D printing machine. Even thought the result was satisfactory, we realized that some pieces have poor quality In the bottom because of their inclination angle and distance from the overhang without supports.
As I mentioned before, the CURA software already has some default settings, but often, we need to modify them and this understanding comes from experiments like this and the analysis of results from different printed pieces. I am not saying that the default settings are bad, on the contrary, they are the safest way to print, but we can optimize them with the experience acquired through practice.
The values I adjust regularly are the angles for adding supports and the infill percentage depending on the piece I am going to print. For example, in pieces that won't undergo significant stress or temperature changes, I use lower infill percentage. For less complex pieces or those I can reposition to have fewer risky angles, I use fewer supports.
Assuming these pieces were requested by a client or a student, we wouldn't have been able to deliver them like this because they wouldn't meet minimum quality standards. To achieve that, we would have had to use supports to ensure the filament doesn't collapse.
In the standard quality values, "normal" supports come by default from 45 degrees, but we can also see in the tests we printed that it is not until the 30-20 angle on the diagonal that the filament layers begin to deform, so we could increase the default value to 60 degrees (or more depending on the model) and it will work well. Regarding the type of support, I prefer the "tree" support, it is easier to remove and in general terms less material is wasted.
3D printing is a vast field, and there is a lot of information on the internet, including tutorials, guides, live channels, etc. However, I have learned much more from hands-on experience and advices from my colleagues than from digital platforms.
5.4 Individual assignment | 3D scan a small object.
Skanect is a 3D scanning program used to create 3D models from real-world objects. The main purpose of Skanect is to convert information captured by sensors, such as RGB-D cameras (cameras that can capture depth information along with color information), into digital 3D models.
The Xbox Kinect is a motion-sensing input device developed by Microsoft for its video game consoles, particularly the Xbox 360 and Xbox One. Kinet ceased production in 2017 and is no longer bundled with the console. However, many of its concepts and technologies have influenced the development of other user interfaces and motion-sensing devices.
The following is the evidence of the procedure I followed to perform the scanning:
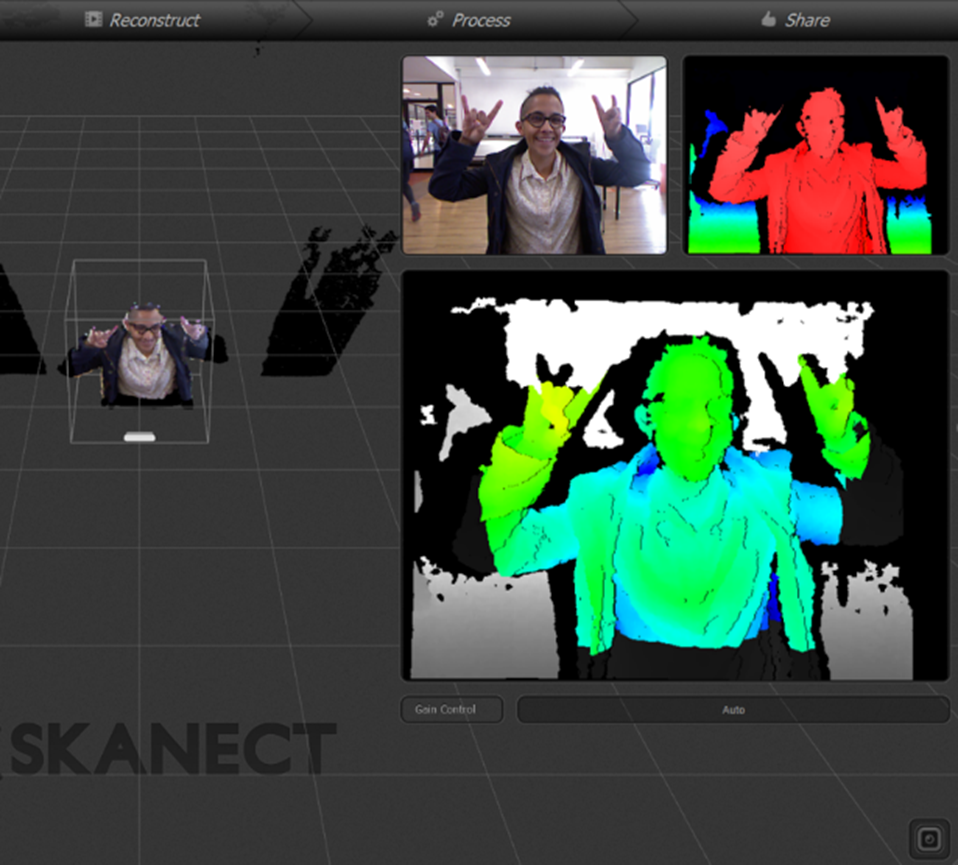
The first thing to do is position ourselves in front of the device's camera, making sure to stand in the green and blue zones. All areas marked in red won't to be scanned.
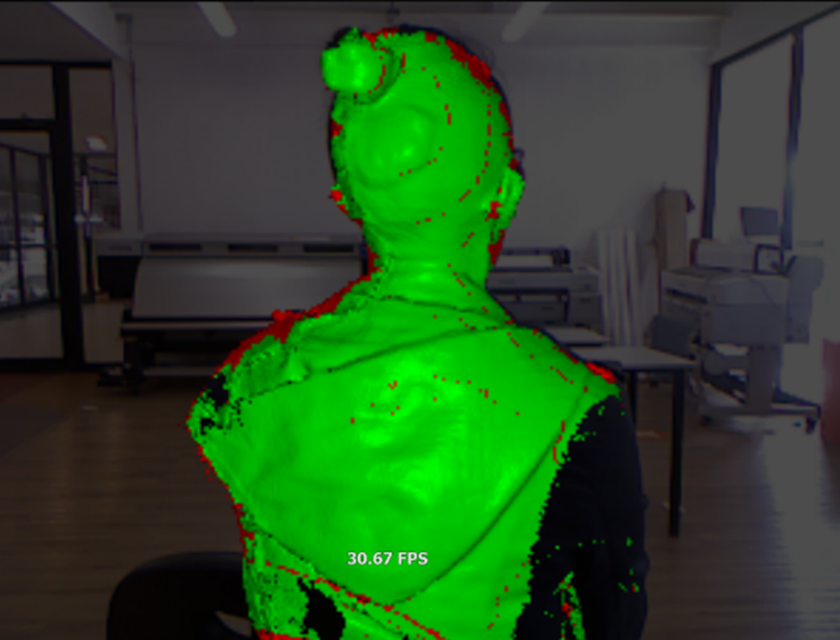
The next step is to slowly rotate 360° for the scanning process. In this case, I sat on a swivel chair to facilitate this process.
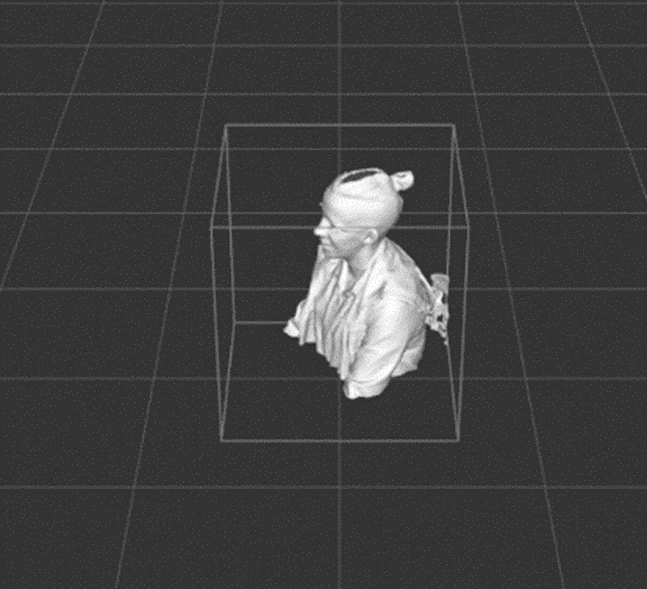
In the above image, you can see the completed scan, but with a large hole at the top of my head. This is not an issue as the program has an option called 'Watertight' to close all those open meshes
5.5 Optional assignment | Print the 3D scan.
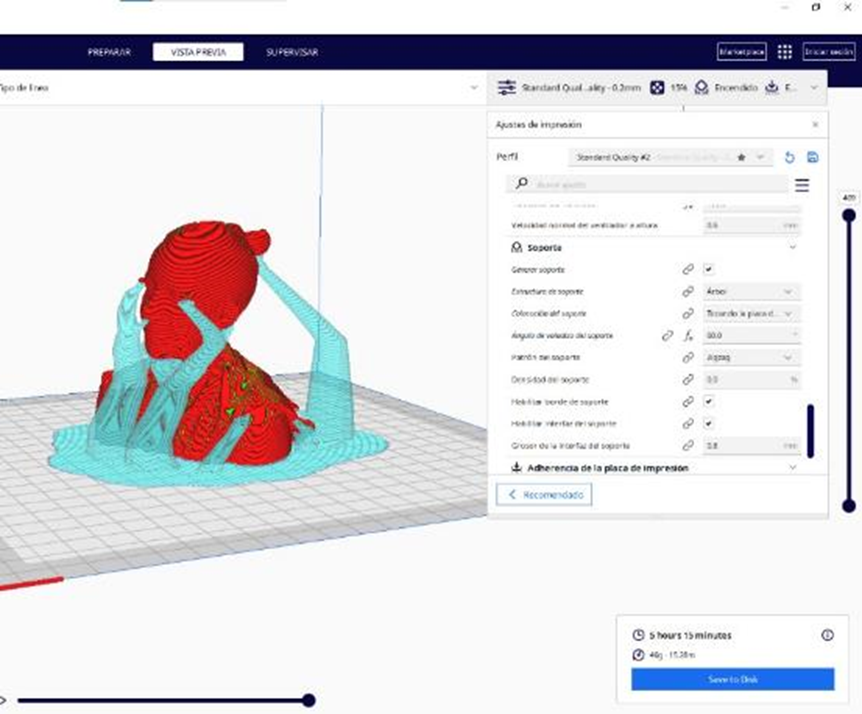
Once all the meshes are closed, the file is saved in .obj format and in millimeters. Then, it can be manipulated in our preferred software; in this case, I used CURA as it is the one used for Creality 3D printers.
I used standard quality parameters. I only modified the angle and type of supports, using tree type supports starting from 60°. I also adjusted the size for a small printing, using less material and optimizing the time. The estimated time will be 5 hours and 15 minutes.
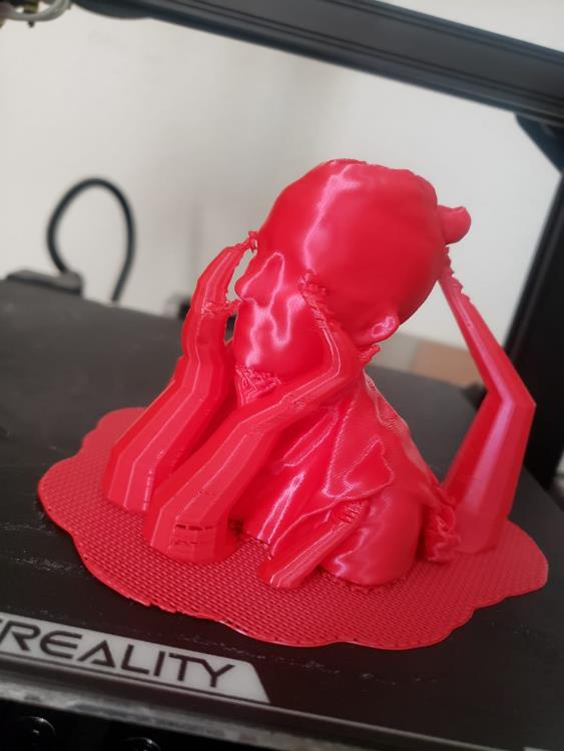
Next, I show you the final result.
5.6 Personal conclusions & interpretations of individual assignment.
I must confess that at first, I was a bit hesitant because I imagined that scanning and working with a 3D model filled with meshes created through scanning would be much more complicated. However, the process was not complex, although it requires to follow a methodology.
In the end, I decided to print the scanning model because I really wanted to see the print quality compared to the digital file. The result had its differences; there is much more fidelity in the digital file than in the print. The meshes were smoothed, and some flat parts did not appear in CURA or in the model, I suppose it was because of their small size.
5.7 Individual assignment | Design and 3D print a small object.
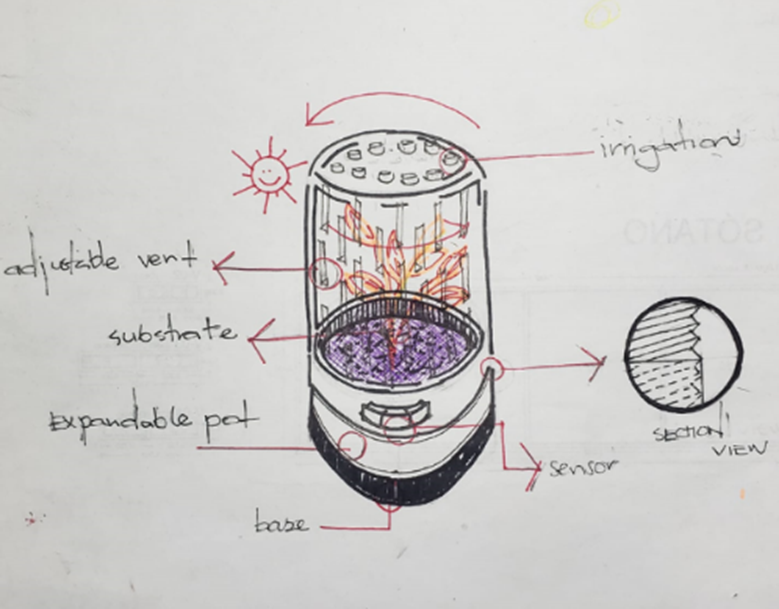
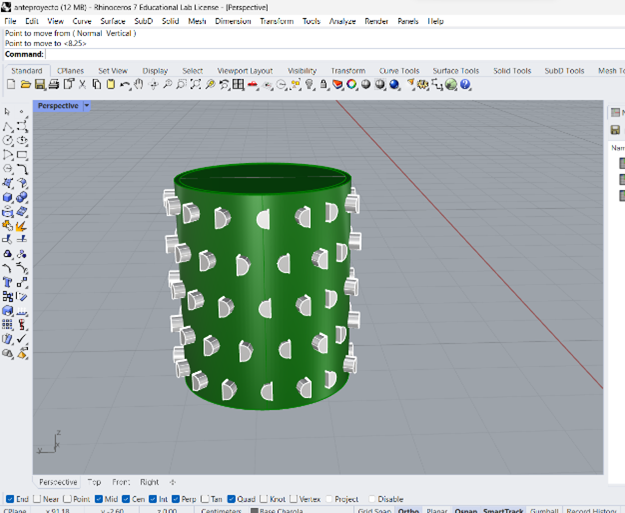
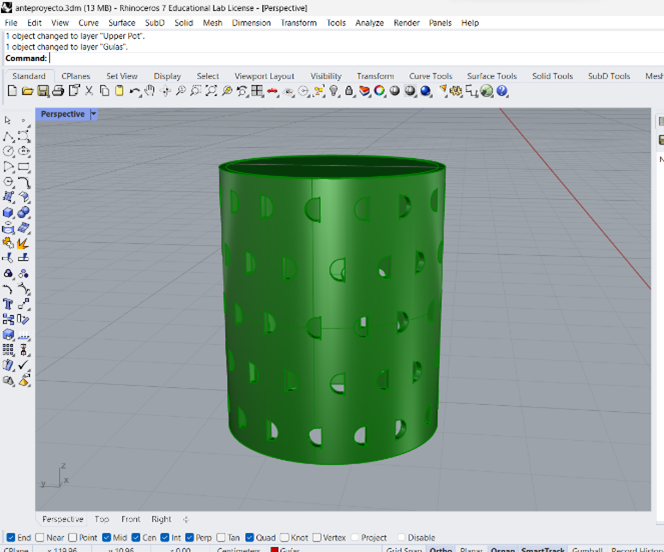
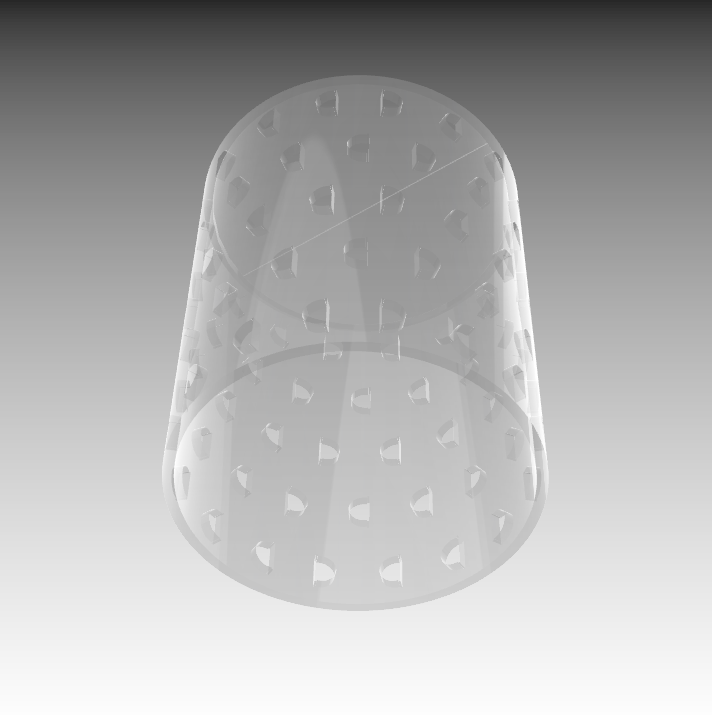
The piece I want to print is the top dome of my final project. Considering that is a deep hollow cylindrical piece with holes around the body and tabs on its external faces, it would be impossible to make it subtractively.
I know that this piece couldn't be the definitive one even if I printed it in real scale because I require something lighter but most important, transparent.
In the images below I will document my process:
Dome subtraction
Dome with holes
Dome material simulation
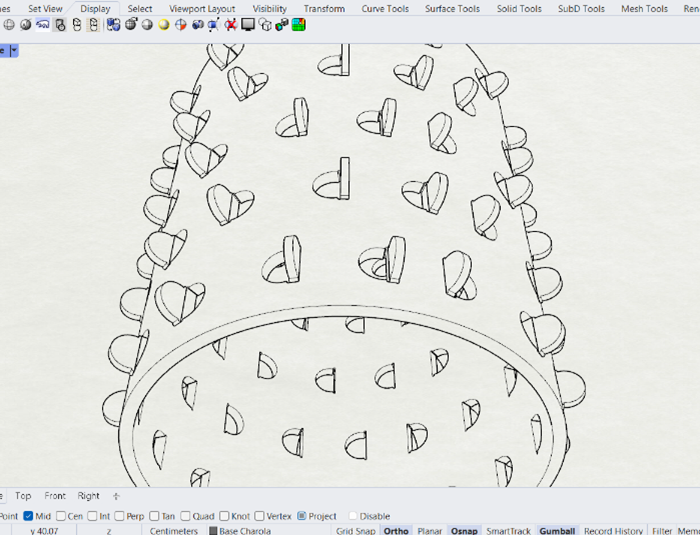
Final model
This perspective helped me to reflect if all the lashes should be facing outwards. I am thinking about the possibility of having some facing inwards to connect supports for the plant since in their growth phase they tend to be very sensitive and weaken easily. They could also help me to hold some devices that I am not yet what they will be, such as LEDs, humidity sensors, etc.
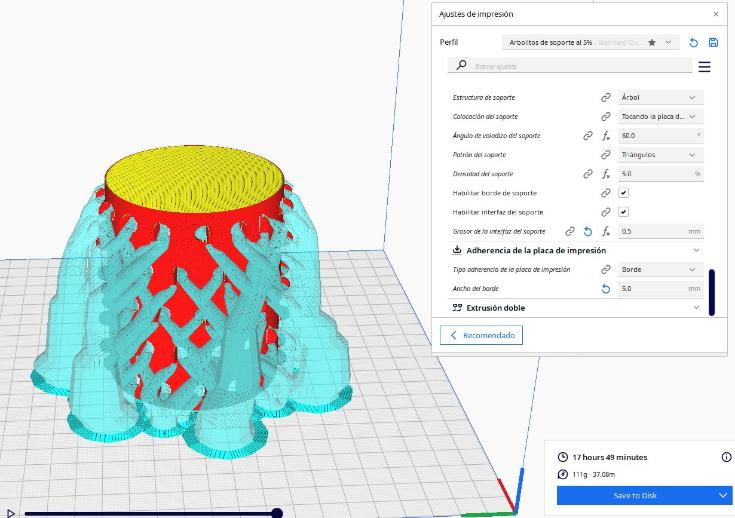
Tree supports
Now in CURA I am using standard quality parameters, but because the first preview showed me 17 hours to print it, I decided to make some changes such as: modify the angle of the supports to 60°, reduce the lower layers from 4 to 3 and the padding from 25% to 10%. In this model there are no risk angles, I think that with these values it will turn out very well and will reduce the time.
Normal supports
Using normal supports and making all the changes I mentioned before the time was reduced by 8 hours, now it will take around 9 hours. Obviously the amount of material is also less.
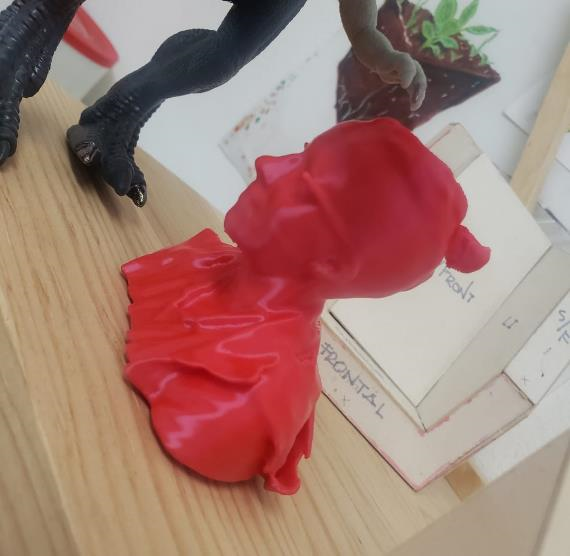
In this test I can confirm that 3D printing this part for my final project is not an option, this prototype is a third of the original. The original would take 27 hours! It takes too long and in the end it does not have the finish or the properties that I am expecting.
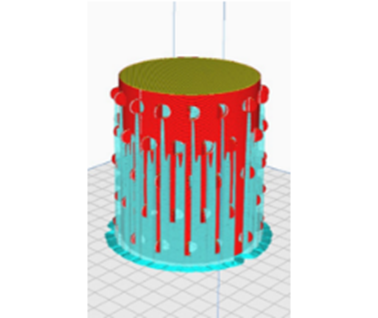
Surprice !!!
There is something I didn't change and I just realized it while the machine was already working. First I let the supports be generated from the base and not from anywhere (the base and the body of the figure), it is generating more supports around the cylinder. Second, since I let the filling parameter activated, the printer is going to make a second skin inside de dome, now I understand why it is taking so long.
I'm going to leave it that way because I prefer to finish it and see how complicated it takes remove all those supports. I'm seriously thinking about weighing the residue :/
Hero Shots
In the video I show the printing process, in fact everything went well, only the details with the supports that if i had changed it, it would have reduced the time even more since the print is only 8 cm high.
5.8 Conclusions.
The drawing process in Rhino was challenging, the intention of putting non-circular holes was that they could not be made subtractively with a drill bit, strategically they also have a flat side so the tabs can hold tightly to the body of the dome. The lashes have a negative angle that could hardly be made with a CNC or lathe.
Thinking about the prototype of my final project, I think that I will not be able to make this particular piece in 3D printing since transparency is important, in addition to the fact that the measurements are too large to consider making it with this technique, I need something lighter, that It does not retain so much heat and resists inclement weather outdoor.
I think i'm not going to use just one technique for this piece of my final project, I think that it might require laser cutting for the lashes, a mold to thermoform the dome, and some other thermoforming technique to pull the tabs outward.
The 3D printing left me with a lot of learning, I realized the importance of analyzing each model with its particularities, since although CURA has a good parameterization, the human eye will always be necessary to make the best decision and modify them correctly. If I had made all the pertinent changes I would have saved xx minutes and xx grams of material.