Group Assignment
Networking and communication.
The group assignment includes communication as everything in this week.
Send a message between two projects
Document your work to the group work page and reflect on your individual page what you learned.
This week we have to communicate between two projects. This communication can either be wired or wireless😁.
Work Plan!
For us to proceed with this assignment, we need to have a plan! So lets get right into it and start with our group assignment.
Since we have to communicate between two projects, we must have to wether set up a wired communication that is using one of the wired communication protocols. If not that, we can also do wireless communication through either wifi or bluetooth. There was a long discussion between the five of on whether to wired communication or wireless communication. After the discussion was over, we ultimately decided to use the wireless communication protocol for our group assignment.
Since we decided on using the wireless communication protocol to communicate between our two projects, we also had to chose a board that already had wireless communication protocol or use a wireless communication module.
Getting the materials😤.
Since we decided on using wireless communication as our protocol of communication. we also have to get the materials according to our plan on how to do this assignment
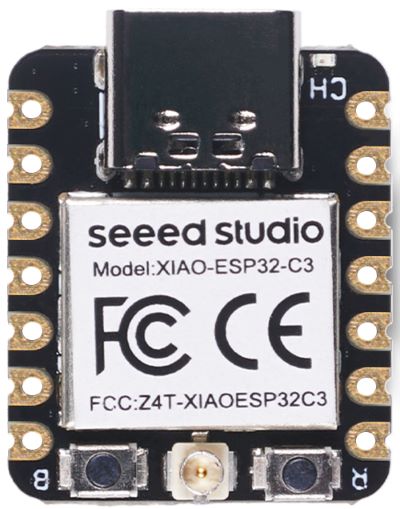
ESP 32 C3 XIAO - The esp 32 c3 xiao board is a powerful and compact board that has the capabilities of doing wireless communication through wifi.
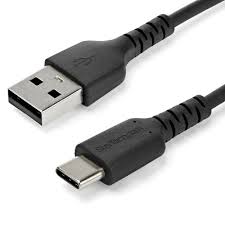
USB Cable type C - The USB type C also are needed as the esp 32 c3 xiao boards have to be programmed through the very cable.
Those are the only materials that we need to be able to do our group assignment.
TCP - Transmission Control Protocol
After we got the materials, we have to get to a bit more about how we are actually going to communicate wirelessly. The esp 32 c3 xiao has a built in wifi module so we went with a form of communication that uses wifi to communicate between the two boards.
Transmission Control Protocol (TCP) is a core protocol of the Internet Protocol Suite (TCP/IP) that enables reliable communication between devices over a network. TCP ensures that data sent from one device arrives intact and in the correct order at the destination device. Let's explore how TCP works to establish a connection between two devices.
Establishing a TCP Connection
Three-Way Handshake:
Sequence and Acknowledgment Numbers:
overall, TCP, or Transmission Control Protocol, is a set of rules that allows devices to talk to each other over the internet. It works by establishing a connection between two devices, ensuring messages are sent and received in the right order, and making sure nothing gets lost along the way. It's like having a reliable and organized conversation so that devices can communicate effectively.

With all of that, we were equipped with all the knowledge we needed to start up with our group assignments. We now know that we need 2 boards then after that we have to make one of these boards as a TCP host and a TCP client.
Setting up😀!
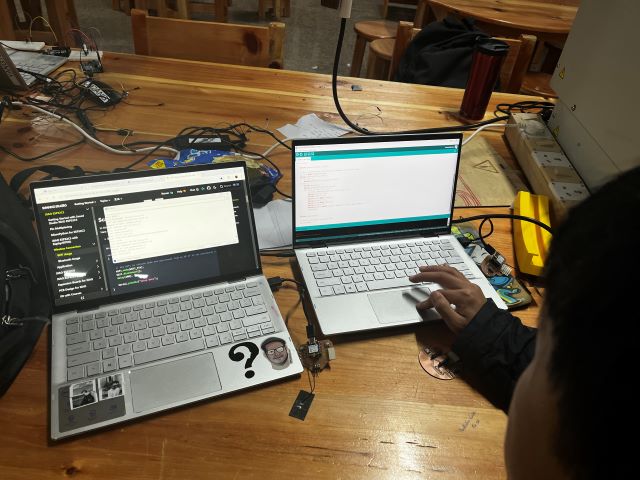
Now lets finally start with our group assignment! Now after we are done with all the theoretical processes of the project, we can now finally start up with practical bits of the assignments.
firstly lets start with setting up 2 laptops to program our xiao boards. We would also need two xiao boards so that we start with wifi communication. Before doing this we also referred to the documentation that was in the seed studio wiki page. right here
Now lets get done will all the steps that are needed to complete our group assignment.
Setting up the boards
Coding
Uploading
We first have to get two xiao boards ready. We used Thinley and Damzangs board for this assignments as not only were they were only ones the that were using the esp32 c3 xiao micro controller and had made boards for them.
Then after that we have to insert the antenna that comes with the micro controller and then insert it the slot that is supposed for the antenna.

picture courtesy - Seed Studio WIKI
Now after inserting the antennas onto the boards we can start programming our boards and then start with this weeks assignments
After we set up our boards, we have to write our code. we first wanted to create only a simple code that would be print "button pressed" from one of the xiao boards(Thinleys board) when a button on another board(Damzangs board) is pressed. In addition we also made it so that pressing a button on Damzang's Board would make a LED light up on Thinley's board.
this is our code.
Thinley's board(client board)
                    #include <WiFi.h>
                    #include <WiFiClient.h>

                    const char* ssid = "ESP_AP";
                    const char* password = "123456789";
                    const char* host = "192.168.4.1"; // IP address of the server

                    WiFiClient client;

                    void setup() {
                      Serial.begin(115200);
                      pinMode(5, OUTPUT);

                      Serial.println();
                      Serial.println("Connecting to WiFi");
                      WiFi.begin(ssid, password);

                      while (WiFi.status() != WL_CONNECTED) {
                        delay(500);
                        Serial.print(".");
                      }

                      Serial.println("");
                      Serial.println("WiFi connected");
                      Serial.println("IP address: ");
                      Serial.println(WiFi.localIP());
                    }

                    void loop() {
                      if (!client.connected()) {
                        Serial.println("Connecting to server...");
                        if (client.connect(host, 80)) {
                          Serial.println("Connected to server");
                        } else {
                          Serial.println("Connection failed");
                          delay(5000);
                          return;
                        }
                      }

                      if (client.available()) {
                        String message = client.readStringUntil('\n');
                        Serial.println("Message received from server: " + message);
                        if (message.equals("ButtonPressed")) {
                          digitalWrite(5, HIGH);  // Turn on the LED
                          delay(1000);  // Keep the LED on for 1 second
                          digitalWrite(5, LOW);  // Turn off the LED
                        }
                      }
                    }
Damzang's board(host board)
                        #include <WiFi.h>
                        #include <WiFiClient.h>

                        const char* ssid = "ESP_AP";
                        const char* password = "123456789";

                        WiFiServer server(80);
                        WiFiClient client;

                        const int buttonPin = 3;  // Define the pin connected to the button
                        bool buttonState = false;

                        void setup() {
                          Serial.begin(115200);
                          pinMode(buttonPin, INPUT);
                          WiFi.softAP(ssid, password);
                          server.begin();

                          // Print the IP address of the access point (server)
                          Serial.print("Server IP address: ");
                          Serial.println(WiFi.softAPIP());
                        }

                        void loop() {
                          if (!client.connected()) {
                            client = server.available();
                            if (client) {
                              Serial.println("Client connected");
                            }
                          }

                          if (client.connected()) {
                            if (client.available()) {
                              String message = client.readStringUntil('\n');
                              Serial.println("Message received: " + message);
                              if (message.equals("ButtonPressed")) {
                                buttonState = !buttonState;  // Toggle LED state
                                digitalWrite(buttonPin, buttonState ? HIGH : LOW);  // Control the LED
                                Serial.println("LED state changed");
                              }
                            }
                          }

                          if (digitalRead(buttonPin) == HIGH) {
                            client.println("ButtonPressed");
                            delay(1000);  // Debouncing delay
                          }

                          printWiFiInfo(); // Print host WiFi information
                        }

                        void printWiFiInfo() {
                          Serial.print("Host Name:");
                          Serial.println(WiFi.softAPgetHostname());
                          Serial.print("Host IP:");
                          Serial.println(WiFi.softAPIP());
                          Serial.print("Host IPV6:");
                          Serial.println(WiFi.softAPIPv6());
                          Serial.print("Host SSID:");
                          Serial.println(WiFi.SSID());
                          Serial.print("Host Broadcast IP:");
                          Serial.println(WiFi.softAPBroadcastIP());
                          Serial.print("Host mac Address:");
                          Serial.println(WiFi.softAPmacAddress());
                          Serial.print("Number of Host Connections:");
                          Serial.println(WiFi.softAPgetStationNum());
                          Serial.print("Host Network ID:");
                          Serial.println(WiFi.softAPNetworkID());
                          Serial.print("Host Status:");
                          Serial.println(WiFi.status());
                          Serial.print("Server IP address: ");
                          Serial.println(WiFi.softAPIP());
                          delay(1000);
                        }
After we went through the tedious process of writing our code, we came to the real moment of truth
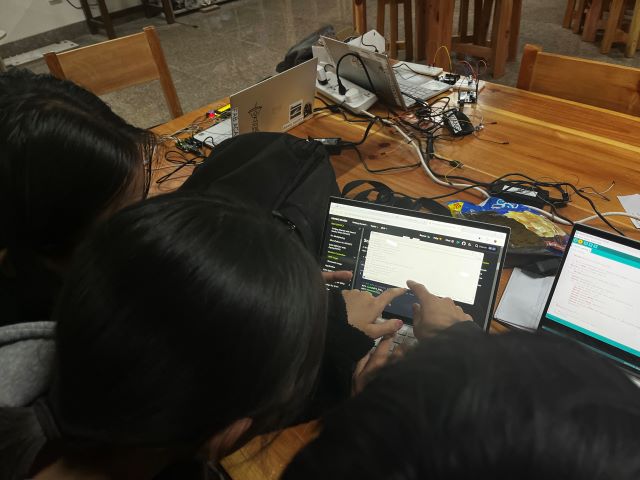
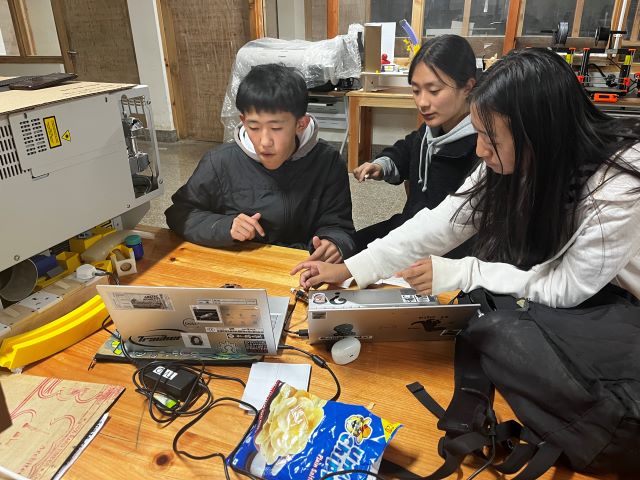
Hero shot!!!
We now have have the final reveal of whether our codes worked or not.
After a while we tested it and then surprising it worked!
Conclusion
With that we are finally done with this weeks group assignment. we learned a lot with this weeks assignment. Planning, integration and then finally testing of our codes. How if planned properly, each and everything can go smoothly and as you want. But it is also important to consider how crucial making mistakes are. Though for this week this is it.