3-D Printing and Scanning-Group Work
Group Assignment for Week 5
Group Assignment:
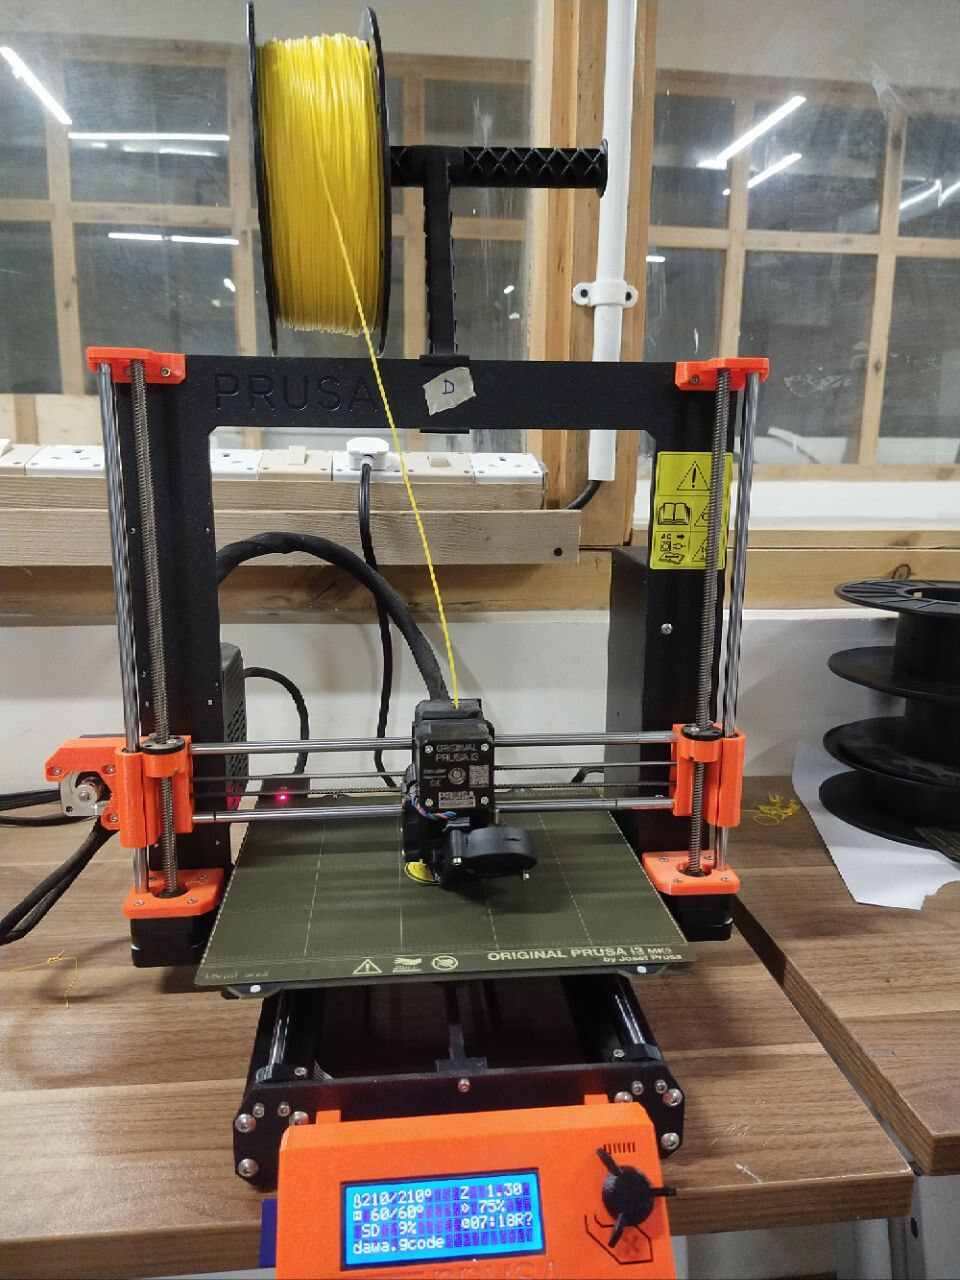
The 3-D printer we have at the DGI Aesthetic Centre is
Original Prusa i3 MK3S+
The Original Prusa i3 MK3S+ is a highly reliable and versatile desktop 3D printer known for its quality prints and advanced features. It includes automatic bed leveling, filament sensor, and power recovery, making it user-friendly and efficient. With its open-source design and strong community support, it's a popular choice among 3D printing enthusiasts.
Click here to learn more about the machine
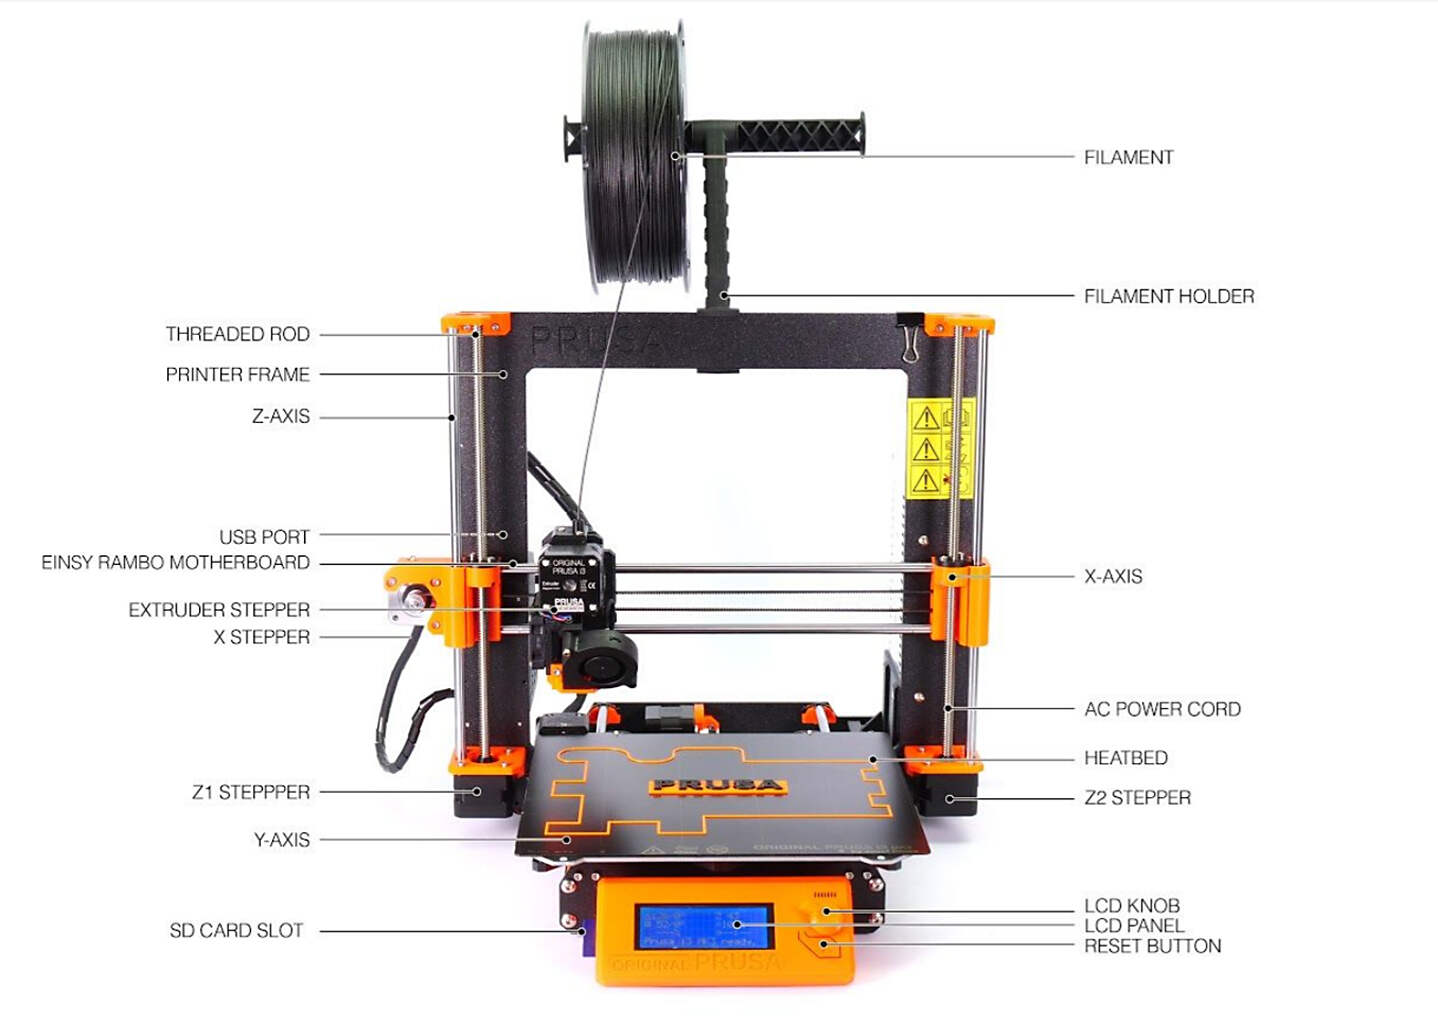
This is a labelled diagram of the 3D printer
Machine and Specifications
Build volume : 250 x 210 x 210 mm | 9.84 x 8.3 x 8.3 in
Layer height : 0.05 – 0.35 mm
Max travel speed : 200+ mm/s
Max hotend/heatbed temp : 290 °C / 120 °C (572 °F / 248 °F)
Mainboard : Einsy RAMBo 8-bit board
MMU2S/3 support : Yes
Nozzle diameter : 0.4mm (default) / other nozzle diameters supported
LCD screen : Monochromatic LCD
Print surface : Magnetic heatbed with removable PEI spring steel sheets
Cutting Tool Chuck : Collet method
Filament diameter: 1.75mm
A detailed specification is given here
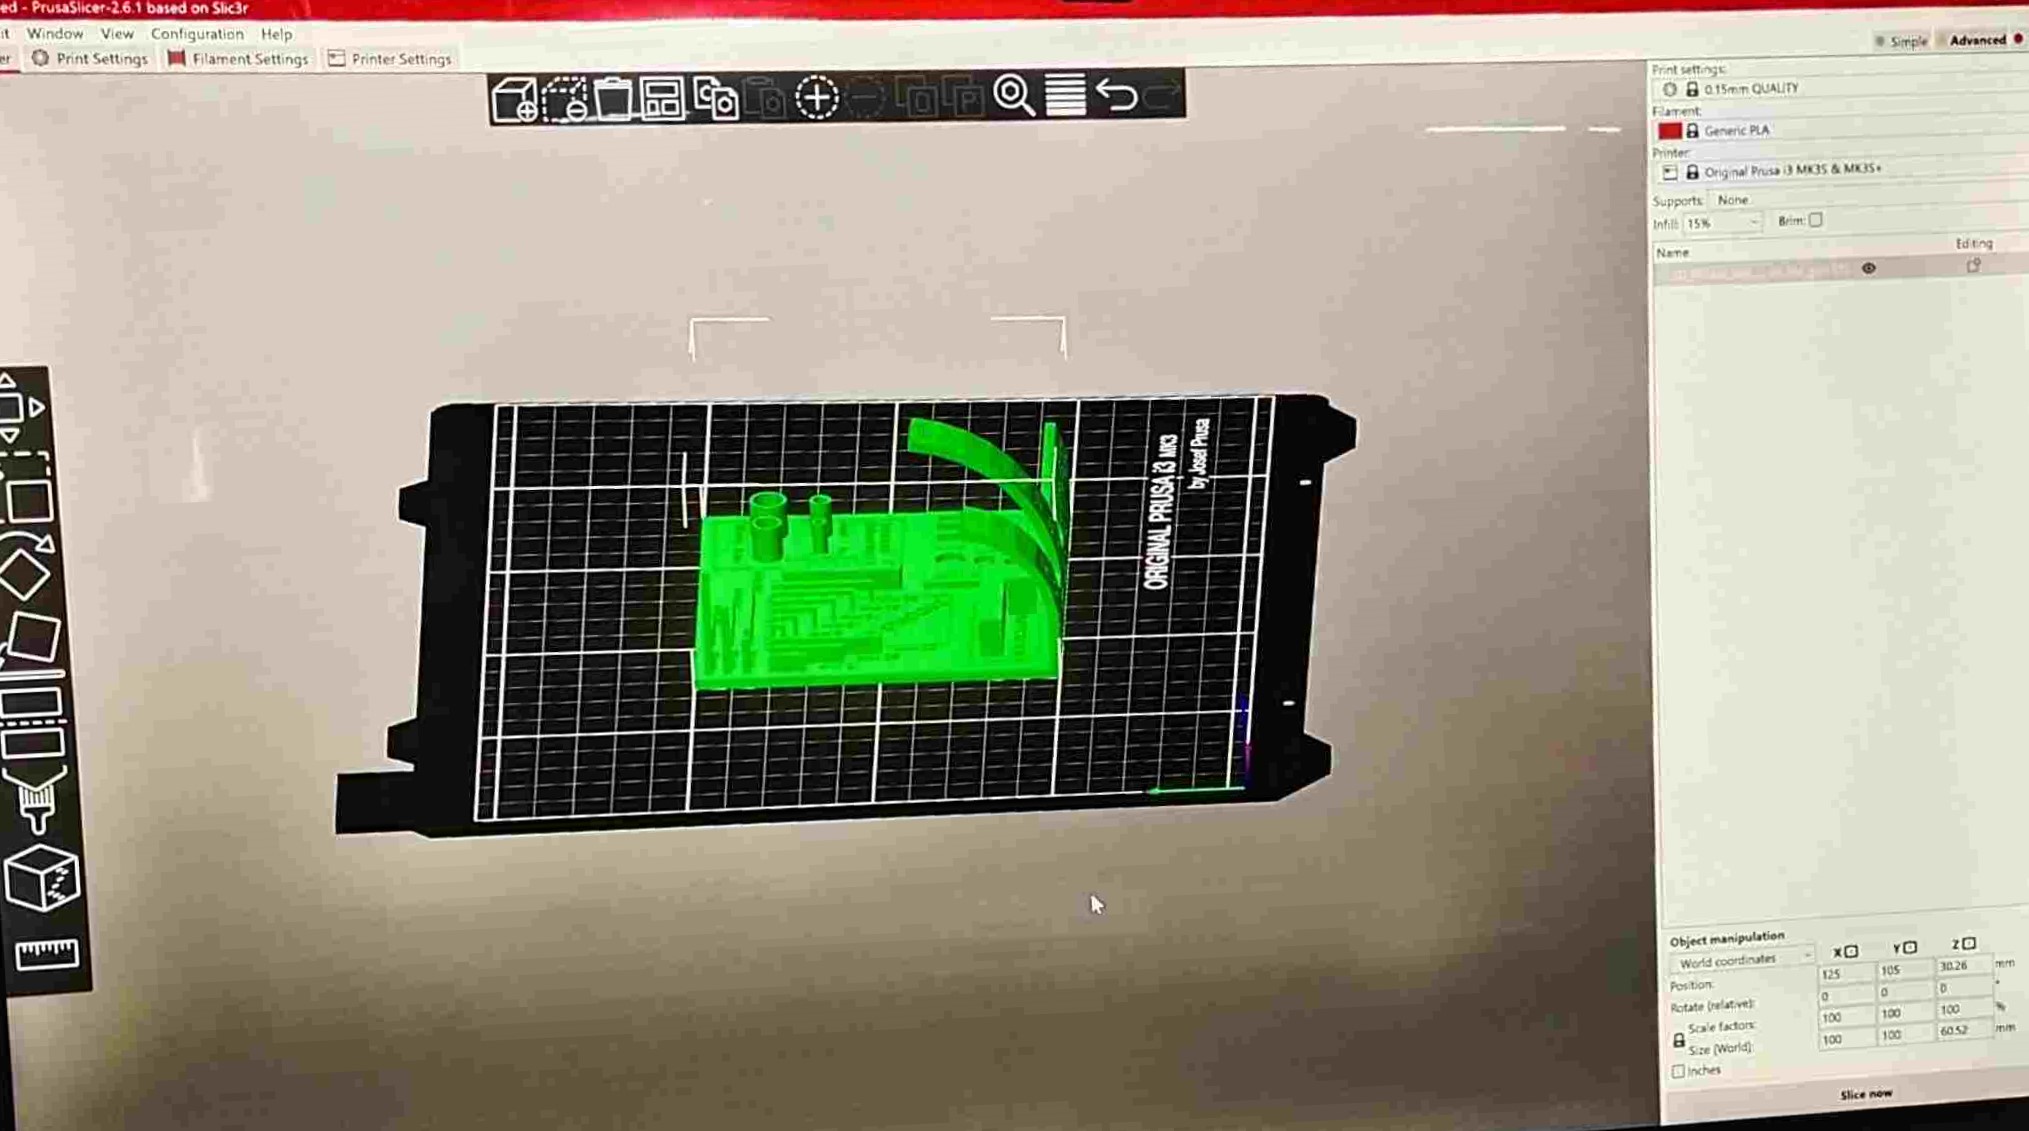
The design
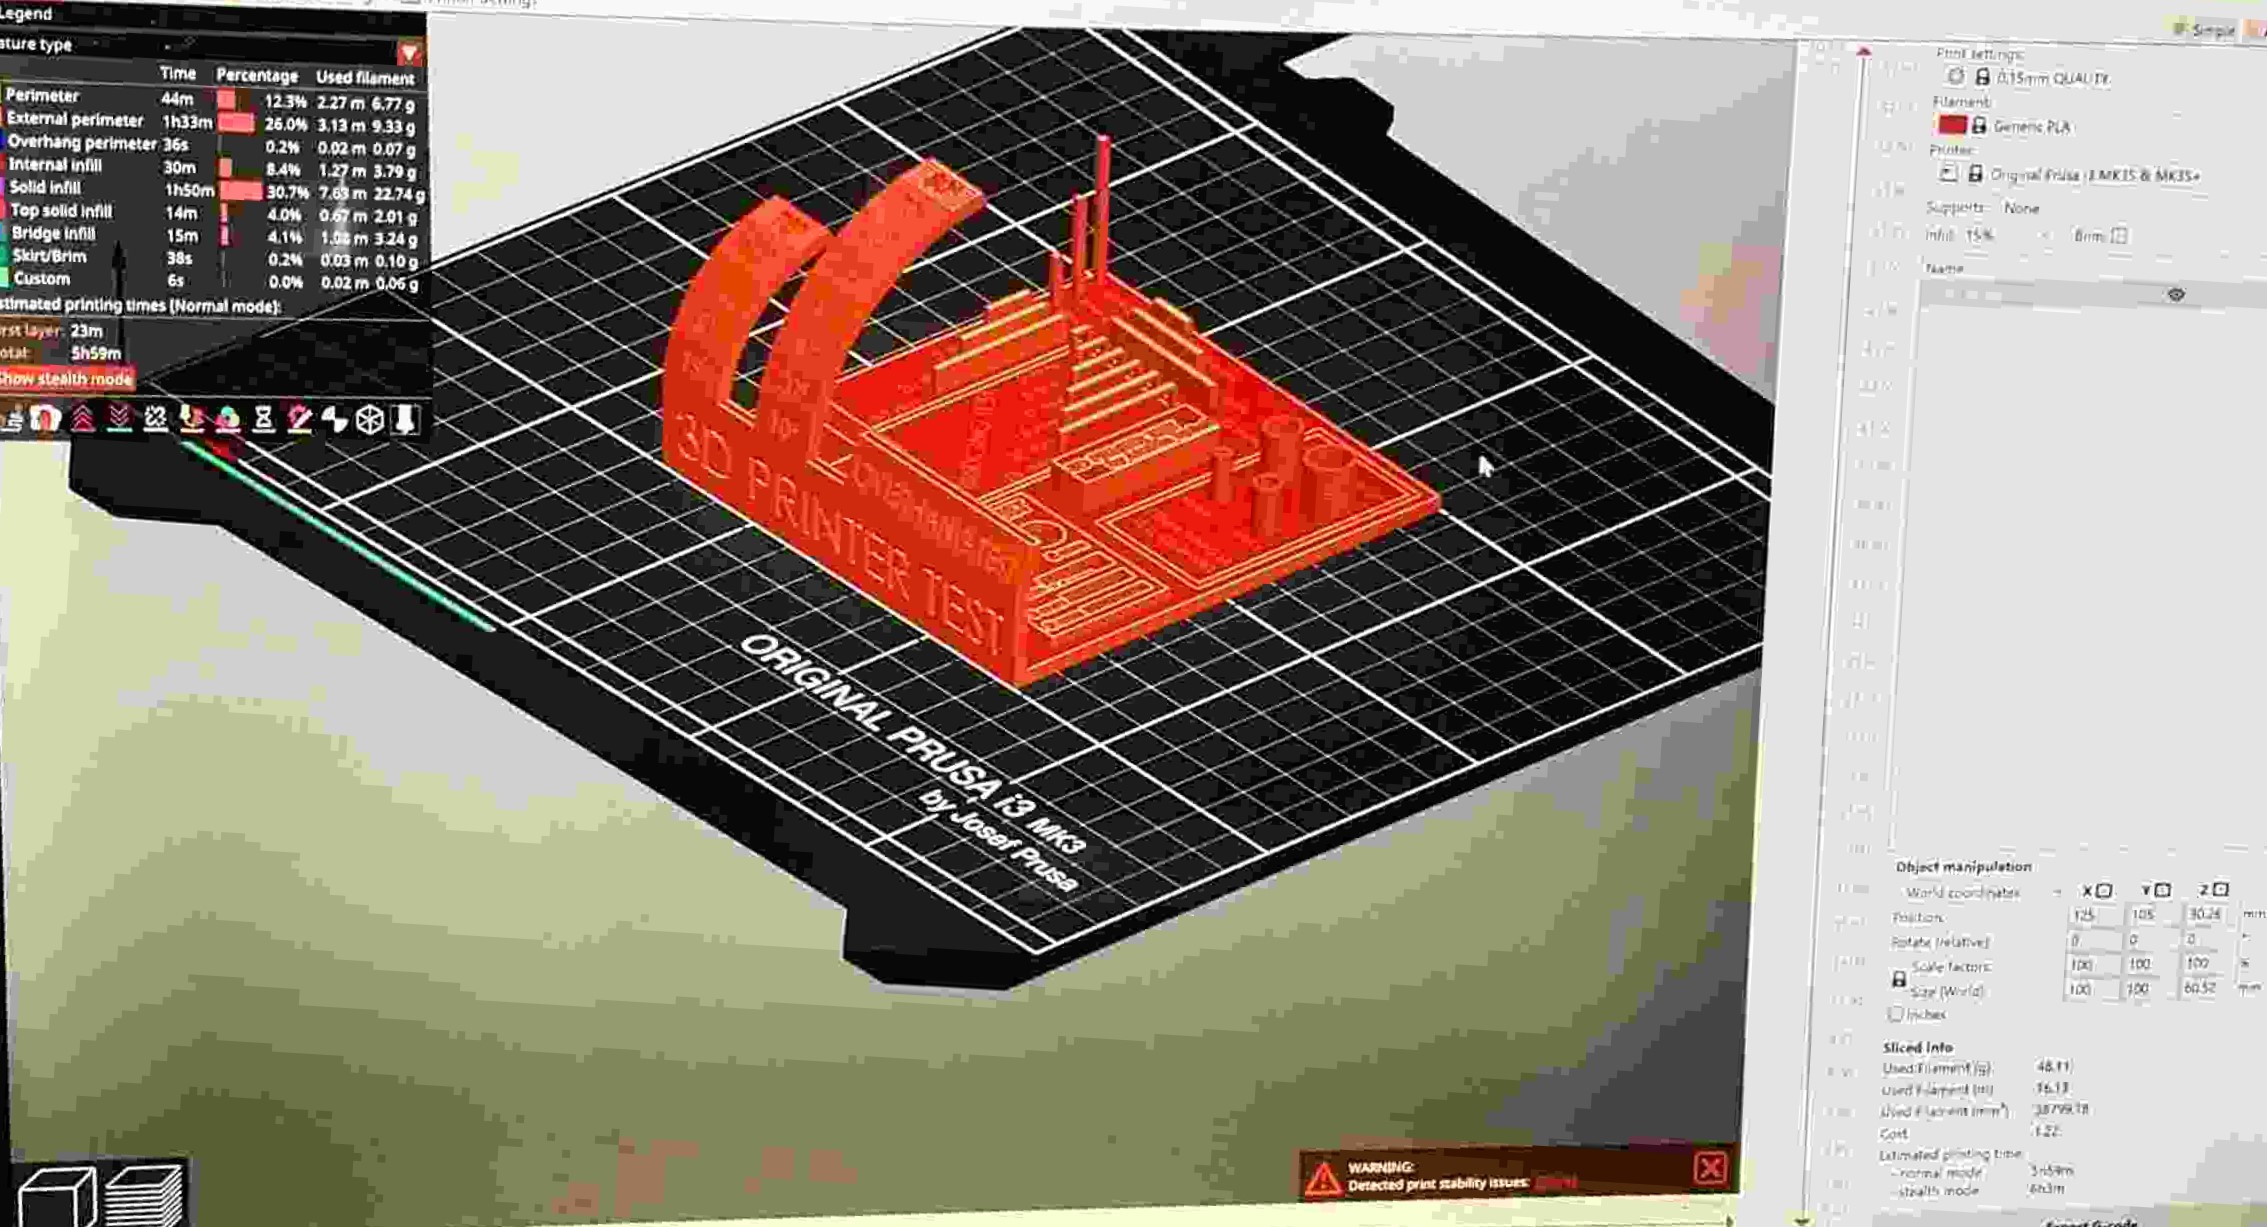
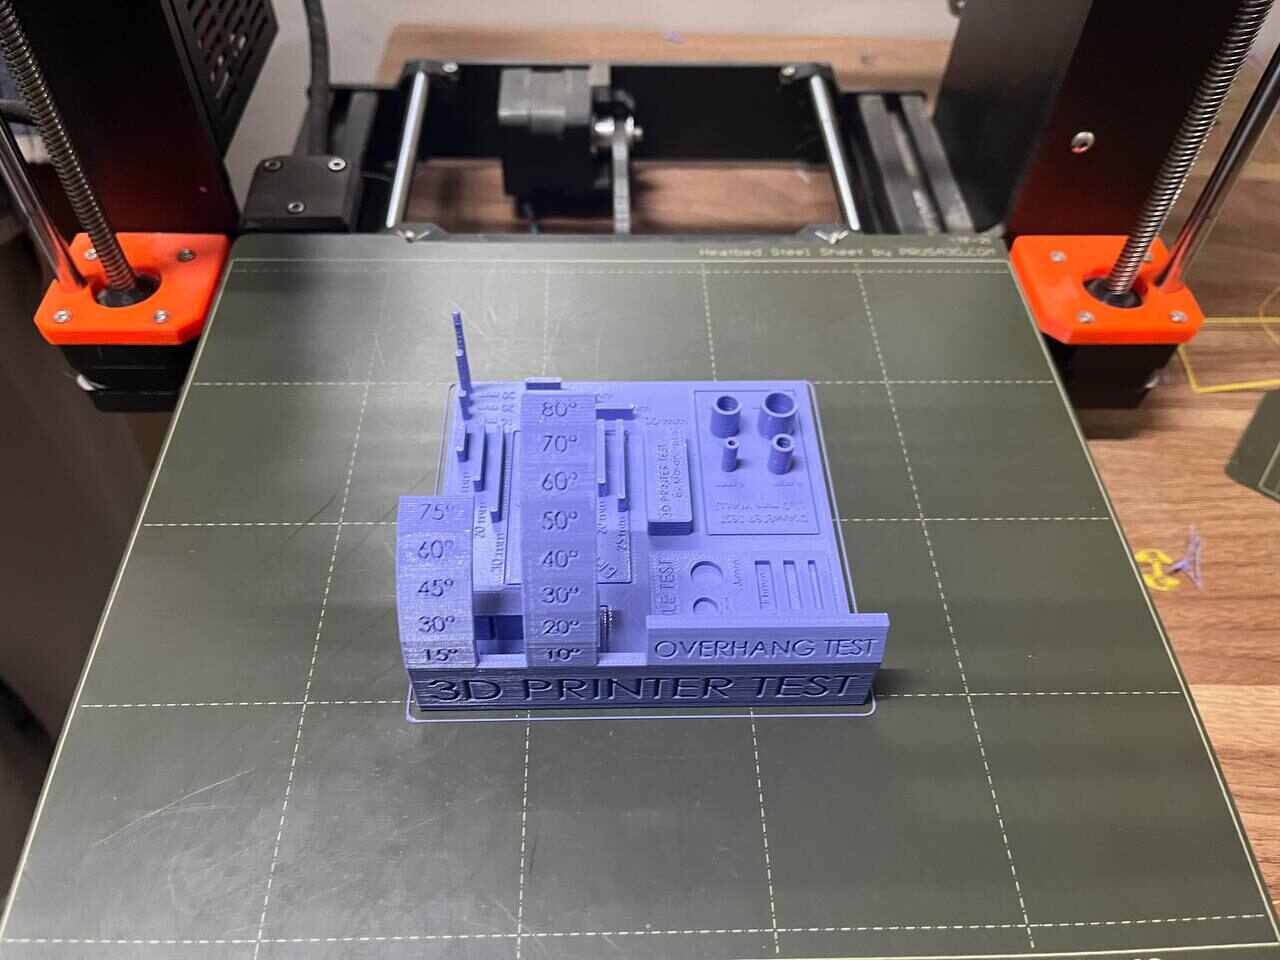
We used the All in one Printer Test to test the design rules

This is us with the design rule model


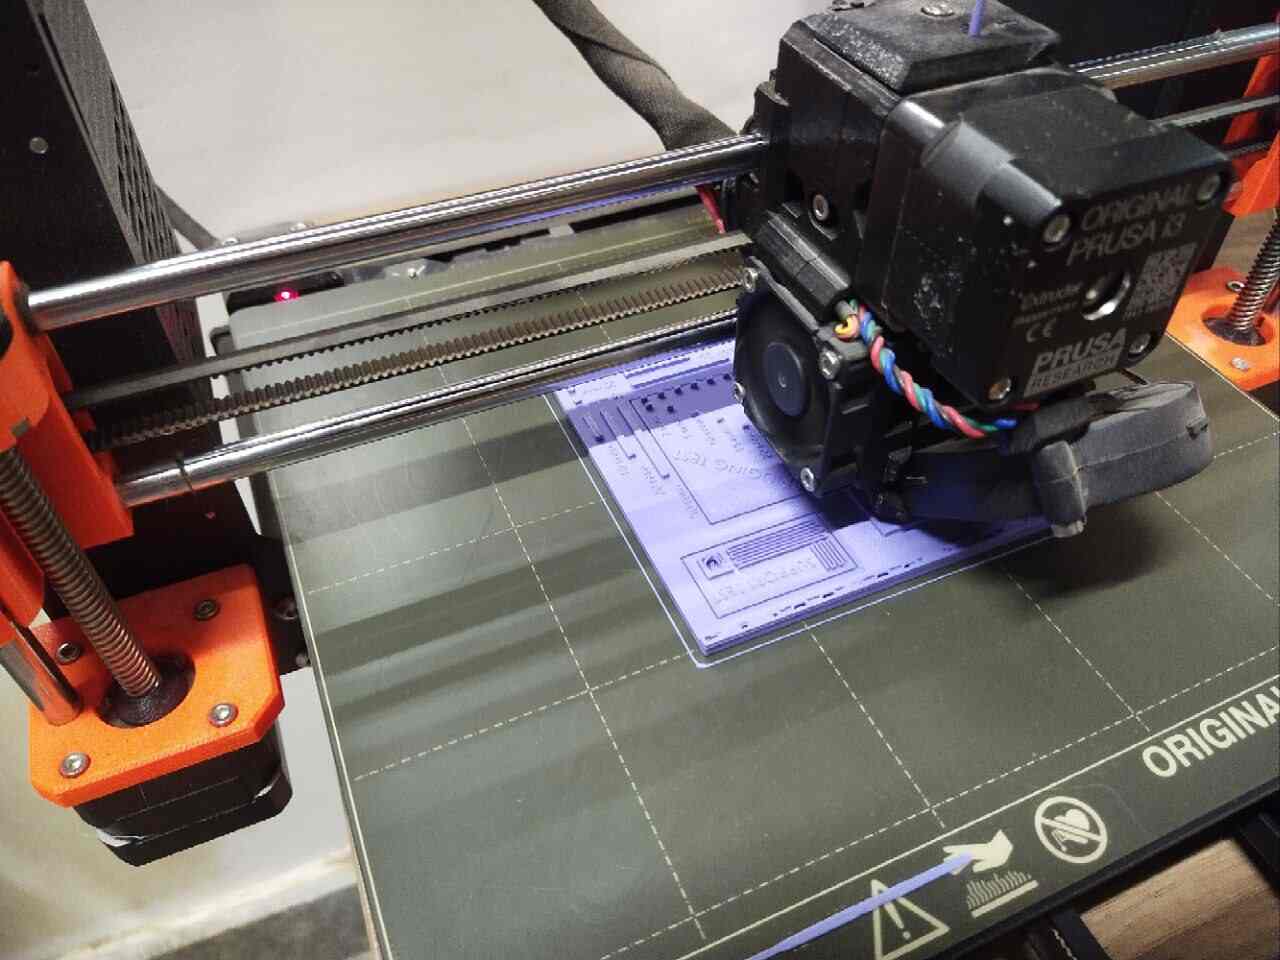
The process of printing

Understanding and Conclusion
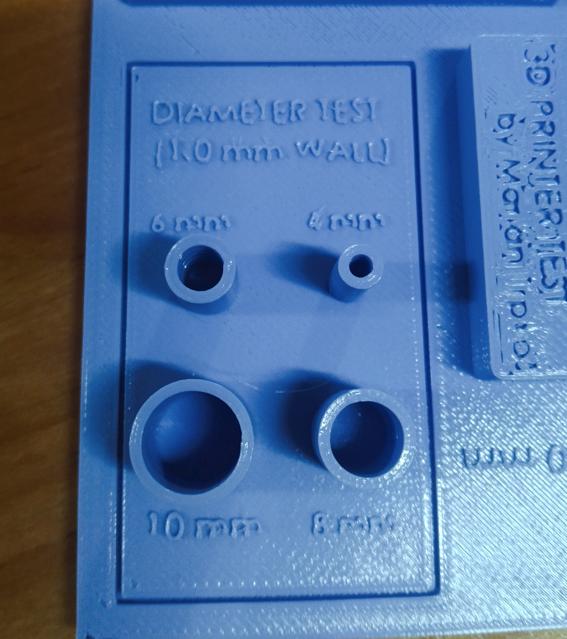
1. This is the Hole and Diameter test, The test evaluates the printer's tolerance and precision in producing small features. A printer with high accuracy and precision will be able to print cylinders and holes that closely match the intended sizes with minimal deviation. We undertsood that in the hole test because the text had limited gap in between except for 8mm (which is also not that clear), the text is not visible. For the Diameter test, the circles have turned out nice without shaky or excess filament.

From the diameter and hole test, we can conclude that, spaces like gaps between the text affects how clear they turn out and that our machine works veyry well on printing diameters and hole.The circles in the Diameter test turning out nicely without shakiness or excess filament suggests that the printer is capable of producing smooth and accurate circular shapes.

2.This is the Briding test,The test assesses the printer's ability to bridge gaps between two points without the need for support structures. If the bridging is successful, it indicates that the printer can accurately deposit filament in mid-air. But in our case the filament deposited in mid-air is not stable. We understood that height and gap is a important aspect while 3D printing. For this bridging test, though the filament was deposited quite stable it wasn't that accurate. There are excess filament below the printed design and there are spaces between the filament deposited in mid-air.

We can conclude that the filament deposition in mid-air not being stable suggests that the printer may struggle with maintaining consistent filament flow during bridging. Inconsistent filament deposition can lead to issues such as sagging, drooping, or even filament breaks, compromising the stability of the bridged sections.To address the issues observed in the Bridging test, adjustments to printer settings and parameters are necessary. Experimenting with different bridging settings and optimizing cooling methods can help improve filament stability and reduce defects such as excess filament and gaps.
3. This is the Overhang test,The Overhang Test evaluates a 3D printer's capability to produce overhanging structures without the need for additional support material. We understood that the printer struggled to print the overhang that crosses 60 degrees and the filament deposited after that are all saggy and droopy especially for 80 degree in the 10 degree increment overhang. Till 60 degrees the filament that was deposited went smoothly without any errors. For the 15 degree increment overhang, the filament was deposited without any defects till 45 degree. After that, the filament deposited is saggy and there are excess lines of filament.

We can conclude that the printer performed well for overhang angles up to approximately 60 degrees (10-degree increment test) and 45 degrees (15-degree increment test) but struggled beyond these angles. Sagging, drooping, and excess filament deposition were observed for overhangs beyond these thresholds. Optimization of printer settings and design considerations is necessary to improve overhang printing quality.
4. This is the vertical pillar testThe Vertical Pillar Test assesses a 3D printer's ability to accurately reproduce vertical features and evaluate dimensional accuracy and stability. We understood that the Vertical Pillar Test revealed that the printer struggled to maintain consistency and smoothness as the height of the pillar increased. The filament deposition became shaky and irregular towards the top of the pillar, indicating potential issues with layer adhesion, printer calibration, or cooling.
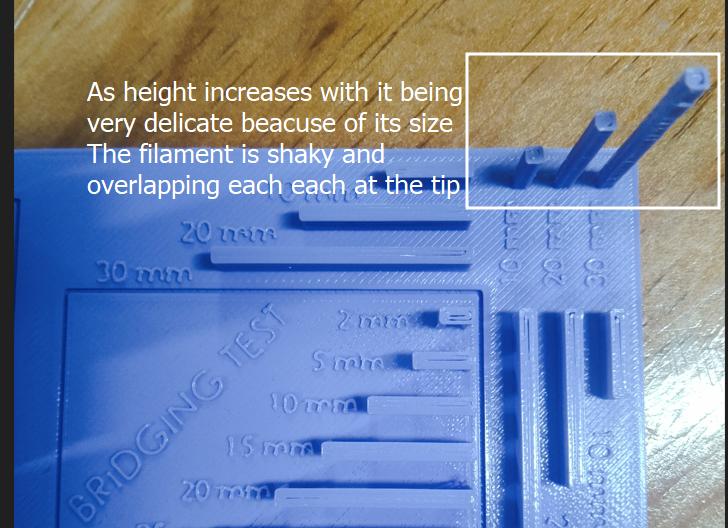
We can conclude that the Vertical Pillar Test indicated that the printer faced challenges in maintaining consistency and smoothness as the pillar height increased. This suggests potential issues with layer adhesion, printer calibration, or cooling. Further optimization of settings and calibration adjustments may be needed to improve dimensional accuracy and stability in vertical printing.