Computer-Controlled Machining - ShopBot PRS Standard CNC
Week 7:Fab Academy
1. Introduction🤩
In this assignment, we aim to explore the capabilities of the ShopBot PRS standard CNC machine, a powerful and versatile platform for computer-controlled machining. We will learn about the machine's specifications, understand its safety rules, and then model and cut a simple object.
2. ShopBot PRS Standard CNC - Specifications
The ShopBot PRS Standard CNC is a high-quality, precision CNC machine. Some of its primary specifications include:

- Workspace: 2400mm x 1220mm
- Speed: We used the speed of 10000 RPM to cut our design
- Software: The ShopBot PRS Standard CNC machine uses the ShopBot Control Software for operation
- Fixture: In our lab the main we for us to attach our cutting material to our shopbot machine is by using clamps.
- Setting origins: In our lab we set the origins for the x and y axis by the use of shopbot3 software. The shop bot has proximity sensors that detect the extreme points of the material that you intend to cut. For the z axis you have to manually set the origins through the use of zeroing. The zeroing process for the shop bot is a bit different compared to that of the srm-milling machine. To do zeroing on the shopbot you have to place the metel plate that is usually located on the top of the drill and then place it on top of the material that you intent to cut. Then you attach the clip that is on the end of the plate to the shopbot.
emergency stop button
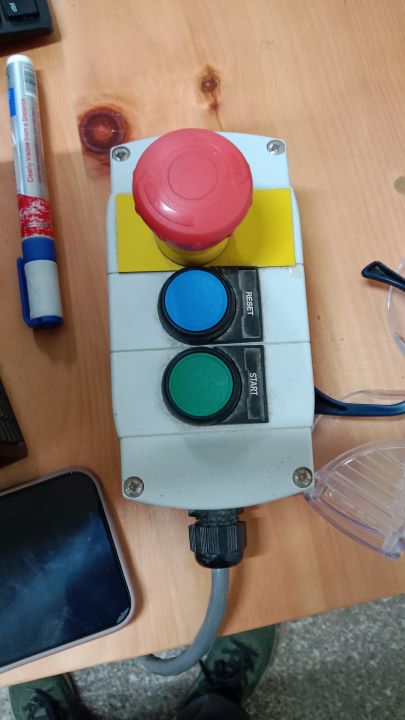
- Red button: This is the emergency stop button that will immediately stop the CNC. This is mainly used to stop the machine if any problems occur.
- Blue button:This is the reset button. This button is used to reset the CNC machine. This is mainly used after turning on the machine as you have to reset the machine before any cutting can be done.
- Green button: The green button is the start button. This button, when pressed makes the endmill start rotating. Remember to always press it before any cutting, other wise the machine will cut without the endmill spinning. This may ultimately lead to the endmill breaking
Main control box
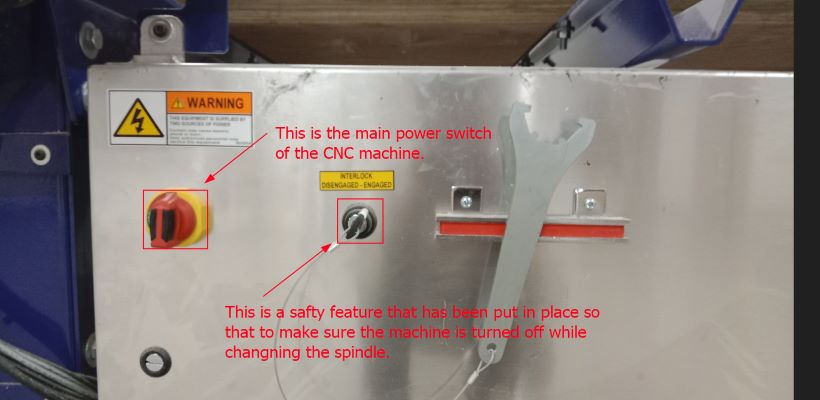
this is the main control box. This is the place where you can turn on your CNC machine. It is also the place where the wrench ment to open the spindle is kept. It have two inputs. The on/off switch, and also a engaged/disengaged key slot. the on and off switches are pretty self explanatory. the key is to either keep the machine engaged or disengaged. Mainly so that the person isn't harmed while opening the spindle
3. Safety Rules
Operating a CNC machine like the ShopBot PRS Standard requires adhering to several safety rules:
- Always wear safety glasses and hearing protection when the machine is in operation.
- Never leave the machine unattended while it's running.
- Keep hands, hair, and clothing away from moving parts.
- Always use the appropriate feed rates and spindle speeds for the material being cut.
- Ensure the workpiece is securely clamped or drilled before starting the machine.
- Regularly check and maintain the machine for loose components and wear.
- Never wear loss cloths that might get caught while you are cutting. Also if you have lond hair always remember to tie it up!
- Remember always to have the emergency stop button right beside you so that if anything happens... You can immediately stop it.
- If any debris and dust is left over, always ensure that you have cleaned it before using it.(If you have a dustcollector, you dont need to clean but still check if any dust is being leftover!)
4. Modeling and Cutting
For our cutting project, we chose to create a simple design. We used fusion 360 to create the skecth with which we exported the dxf file and then further improved on it with the help of inkscape.
Our steps were as follows:
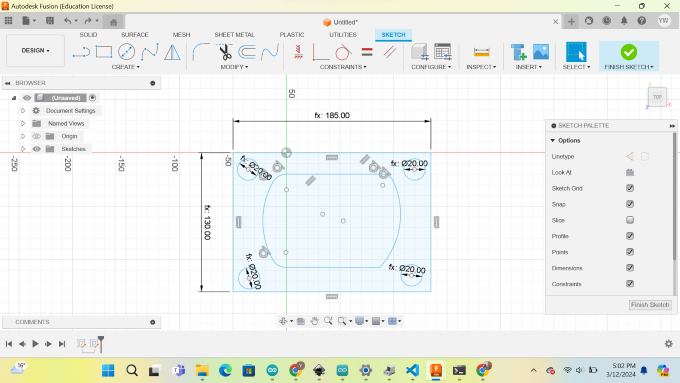
- Model Design: We created the design with the use of Fusion 360. The parameter adding feature made it very easy to do parameteric desinging and also gave accurate measurement of the dimensions that were there in our design.
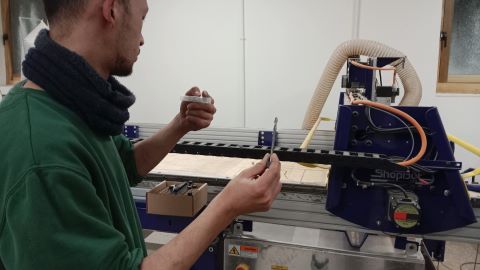
- Material preperation: For the group assignment we dicided to use a ply board with a thickness of 15mm. We clamped the wooden peice on top of the shopbot workspace. We will be using the 6mm endmill with 2 flutes.
- Tool path creation: To create the tool path for the cnc to cut design, we used the software Vcarve. Through the use of vcarve we were able to not only create the tool path but also get a visual representation of how the toolpath was going to look like. After setting up all the correct settings for our design, we laoded it in our 3D veiwer mode
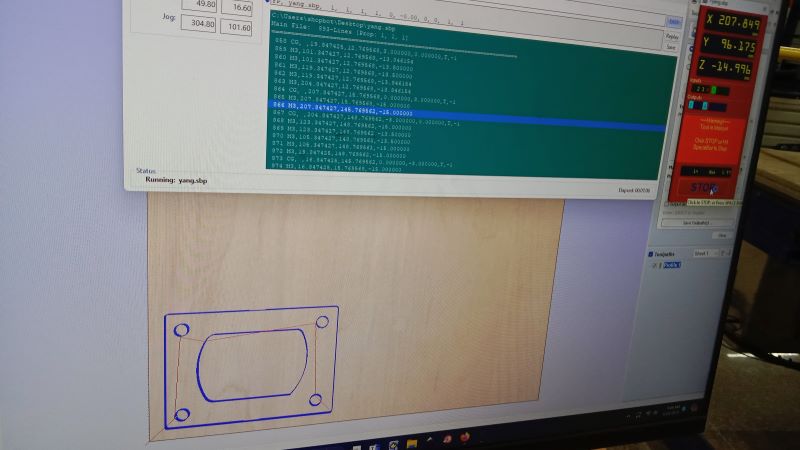
Cutting setting
This is the cutitng settings we used to cut our group assignment design.
- RPM:10000
- endmill:6mm, 2 flutes.
- Material thickness:15mm
- Tabs:2
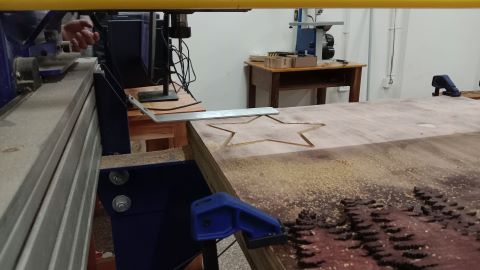
First cutting attempt
This is the very first attempt trying to cut our design. Though for some reason our cnc work properly. It suddenly started to go down right after we started the cutting 😰 . But thanks to the reaction of our instructor, Anith Sir and his insanely fast reaction speed, we got off with out have much issues.🫡
I think that incident was caused due to us not properly setting the origins of the x and y axis🤕
After that incident we learned our lesson and then we started with our second attempt at cutting our design.
Second attempt.
This time it worked!! horay!!!!!
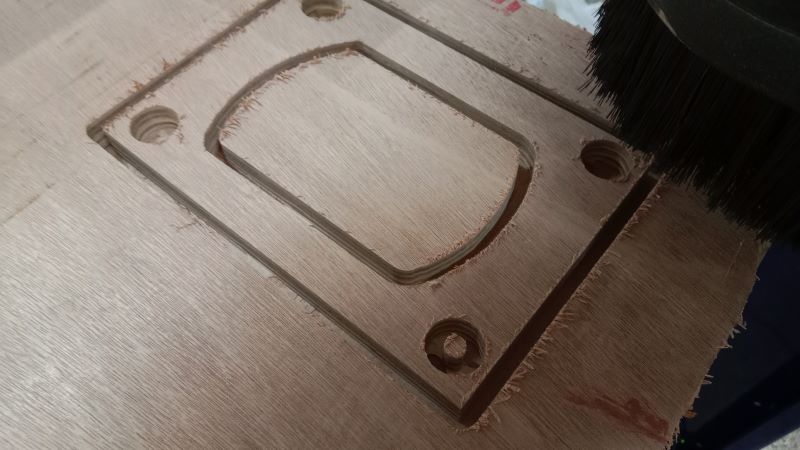
Print to design comparasion
design
- Length:185mm
- width: 130mm
- dimeter:20mm
Cut
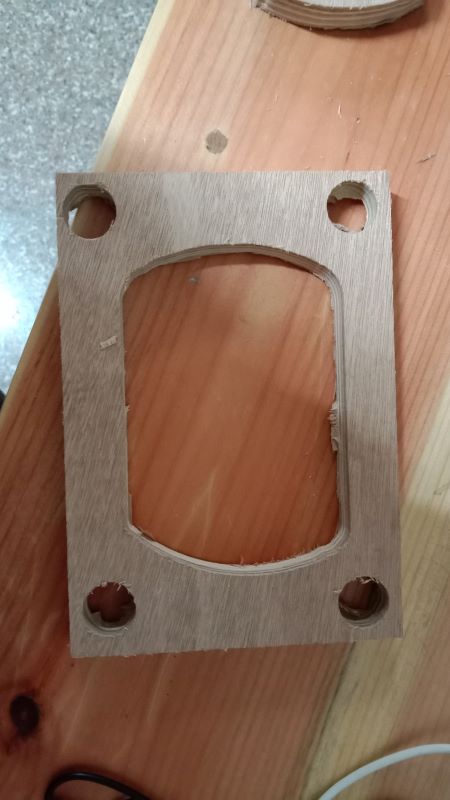
- Length:185mm
- width: 130mm
- dimeter:27mm
5. Conclusion
This assignment provided us with valuable hands-on experience with the ShopBot PRS Standard CNC. We learned about its capabilities, understood the importance of safety rules, and successfully cut a simple object. We look forward to applying these skills in future projects.