Embedded Programming Week
Group Assignment:
Datasheet

Since all of the students were introduced to the Xiao RP2040 board hence it would better for all the browse through the RP2040 Datasheet
We refered the Datasheets to understand about the RP2040, the Datasheet have 646 pages and it covers very detail and technical aspect of the Controllor. But also you can refer this link to get started with the Seeds Studio RP2040 devices
The first part of the Datasheet shared "Why the Chip is Called RP2040"
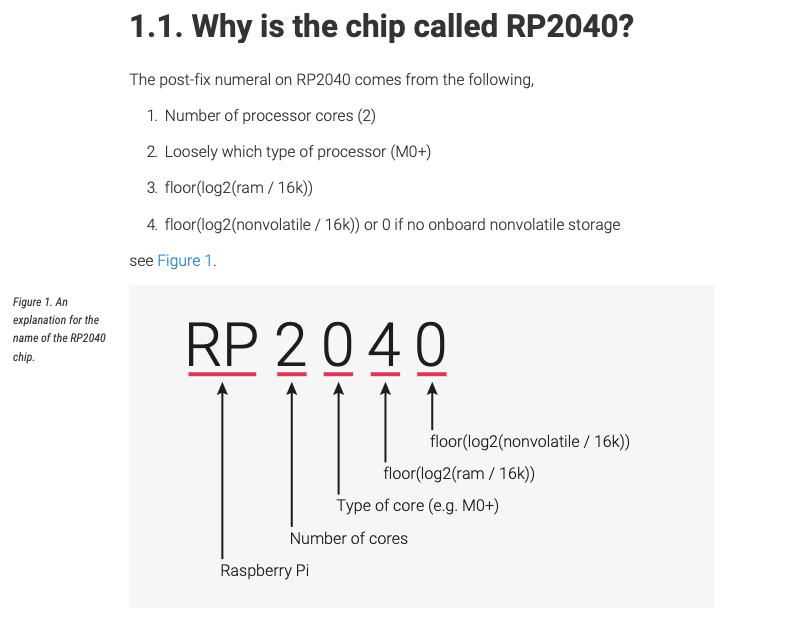
some of the important points that we extracted from the Data sheets are:
Features of RP2040
- Powerful MCU: Dual-core ARM Cortex M0+ processor, flexible clock running up to 133 MHz
- Rich on-chip resources: 264KB of SRAM, and 2MB of on-board Flash memory
- Flexible compatibility: Support Micropython/Arduino/CircuitPython
- Easy project operation: Breadboard-friendly & SMD design, no components on the back
- Small size: As small as a thumb(20x17.5mm) for wearable devices and small projects.
- Multiple interfaces: 11 digital pins, 4 analog pins, 11 PWM Pins,1 I2C interface, 1 UART interface, 1 SPI interface, 1 SWD Bonding pad interface.
- CPU Dual-core ARM Cortex M0+ processor up to 133MHz
- Flash Memory: 2MB
- SRAM: 264KB
- Digital I/O Pins: 11
- Analog I/O Pins: 4
- PWM Pins: 11
- I2C interface: 1
- SPI interface: 1
- UART interface: 1
- Power supply and downloading interface: Type-C
- Power: 3.3V/5V DC
- Dimensions: 20×17.5×3.5mm
Comparing Different board
For all the Programming Task, we are using the Arduino IDE application.

And basically we will be using the example blink code from Arduino IDE to program our boards.
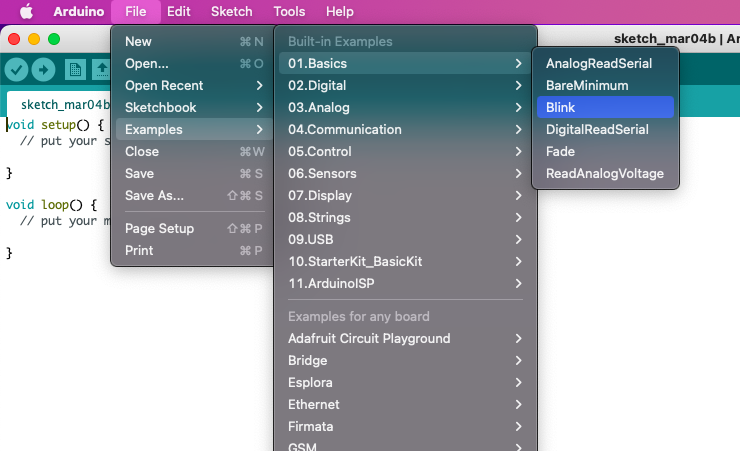
you can also find the code here, just change the pin number as per your Board
                void setup() {
                // initialize digital pin LED_BUILTIN as an output.
                pinMode(LED_BUILTIN, OUTPUT);
                }

                // the loop function runs over and over again forever
                void loop() {
                digitalWrite(LED_BUILTIN, HIGH);   // turn the LED on (HIGH is the voltage level)
                delay(1000);                       // wait for a second
                digitalWrite(LED_BUILTIN, LOW);    // turn the LED off by making the voltage LOW
                delay(1000);                       // wait for a second
                }
Arduino Uno
Arduino UNO is a microcontroller board based on the ATmega328P. It has 14 digital input/output pins (of which 6 can be used as PWM outputs), 6 analog inputs, a 16 MHz ceramic resonator, a USB connection, a power jack, an ICSP header and a reset button. It contains everything needed to support the microcontroller. Know more Here

the blink code was uploaded and here is the video of the LED_BUILTIN blinking.
ESP8266 board
ESP8266EX is capable of functioning consistently in industrial environments, due to its wide operating temperature range. With highly-integrated on-chip features and minimal external discrete component count, the chip offers reliability, compactness and robustness.
For this task, we are using the model ESP8266MOD

To program the ESP8266MOD board, the first thing is to make sure the required board installed in the Board Manager. By refering to this link, a .json link is shared which will enable us to install the required esp board.

The link used above is shared below
https://raw.githubusercontent.com/espressif/arduino-esp32/gh-pages/package_esp32_index.json
the blink code was uploaded and here is the video of the LED_BUILTIN blinking.
The controllor used above explains that different controllors can vary and can also be similar to program using Arduino IDE. It is always important to make sure that the required Board, Libraries, drivers and programmer is researched and installed in the IDE